Rack depowering
#1
Thread Starter
Senior Member
iTrader: (9)
Joined: Sep 2009
Posts: 691
Total Cats: 26
From: Yamato Japan
Ok I have a confession to make. This is not a miata rack. It's for an old VW rabbit. However, this is the best technical forum I know, and the only one (besides rx7 club) that covers this process well.
So anyway, I'm following the miata instructions for depowering a rack, and it's actually almost exactly the same. I'm about done, but now I want some advice from you experts.
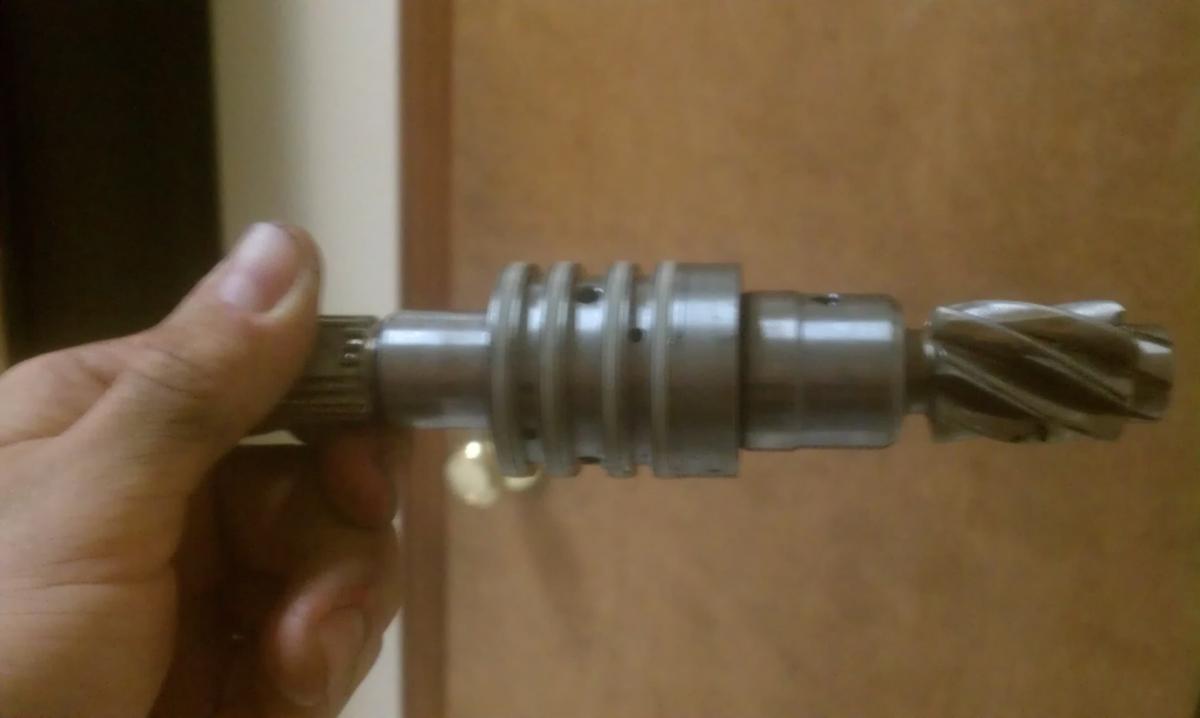
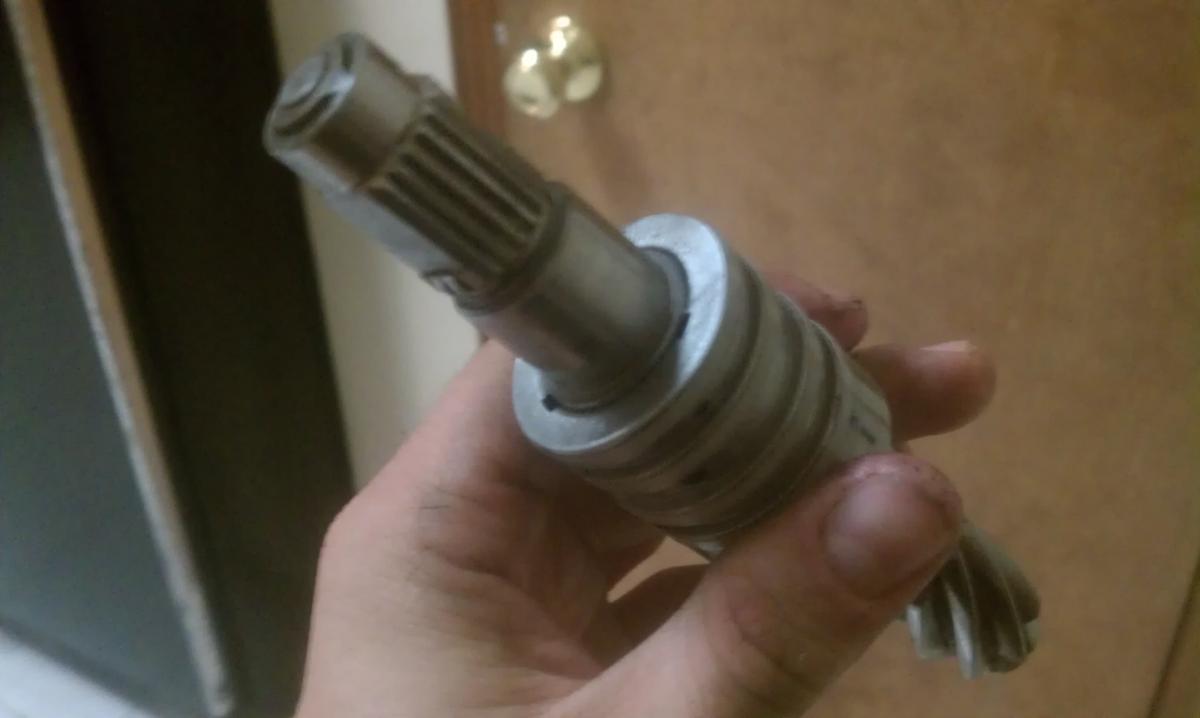
On the pinion shaft is a seal assembly. there is a very slight amount of play between the shaft and this seal barrel.
I don't see a separation between the pinion and the quill shaft, and this rack either does not have one, or it's underneath the seal.
I think I'd like to remove the seals similar to the way you do it on the main shaft of the rack, but I wanted some more experienced eyes to take a look at the shaft before I do anything stupid. I appreciate your expertise.
Take a grinder to it? leave it alone? There is a metal cover and o-ring seal that slides above this one to keep crud out of the rack, I believe this seal assembly is simply for power operation.


Last edited by tasty danish; 09-18-2011 at 10:31 PM.
#7
Thread Starter
Senior Member
iTrader: (9)
Joined: Sep 2009
Posts: 691
Total Cats: 26
From: Yamato Japan
Isn't that the pinion shaft in the picture? Or did you mean the seal on the main shaft? (I already grinded/chiseled that one off)
So on the miata, there is nothing holding that seal assembly solid on the shaft?
So on the miata, there is nothing holding that seal assembly solid on the shaft?
#10
Thread Starter
Senior Member
iTrader: (9)
Joined: Sep 2009
Posts: 691
Total Cats: 26
From: Yamato Japan
operation was a success. I ground off the seal assembly exactly like on the main shaft, fell off, and underneath saw the joint as in the miata pinion shaft. Had it tigged.
New question Mr. hustler: was setting the pre-load pretty trial and error for you? I've read how you tightened to 45 inlbs and then half of 45* back for ideal pre-load.
Problem is, with this rack I have no literature to guide me. It's VERY similar to the miata rack so I thought I've follow its procedures, though I found if I went to 45inlbs, I could no longer cycle the rack by hand on the bench. It stops around 30inlbs.
Doing some reading on other car forums, so Nissan drifter types that did this simply tightened the preload screw till it barely contacted the shim and called it good.
Thread
Thread Starter
Forum
Replies
Last Post
itsMikey
Insert BS here
0
09-05-2015 03:56 PM


