Brake Booster Delete
#1
I hate the brake booster. Because of the cams in my car, I get really inconsistent braking when blipping down through the gears... I can actually feel the assist coming and going, and beside that, the pedal feels numb.
So I ran the last few events to test the brakes with the booster line removed and whilst the brake pedal requires lots more force, the brake pedal is far more linear and I can feel the brakes working through the pedal. Once used to the additional pressure required, brake modulation is far better. I immediately found that I could brake later and deeper into the corners and my times dropped a bit.
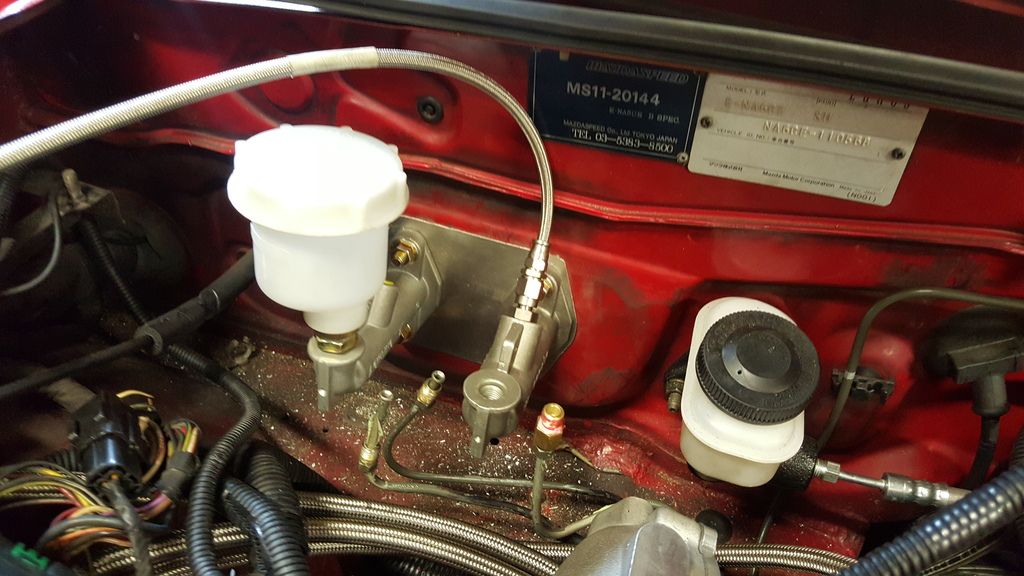
I've pulled out the pedal box and removed the booster entirely. As part of doing this I figured I may as well go for an adjustable bias and dual masters. Here are some pics of my pedal box mod:
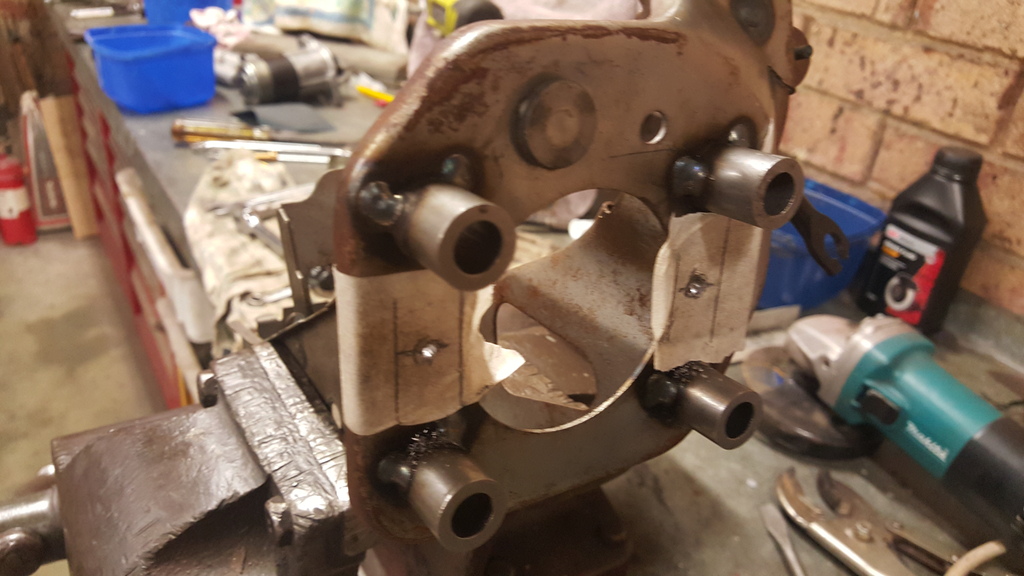
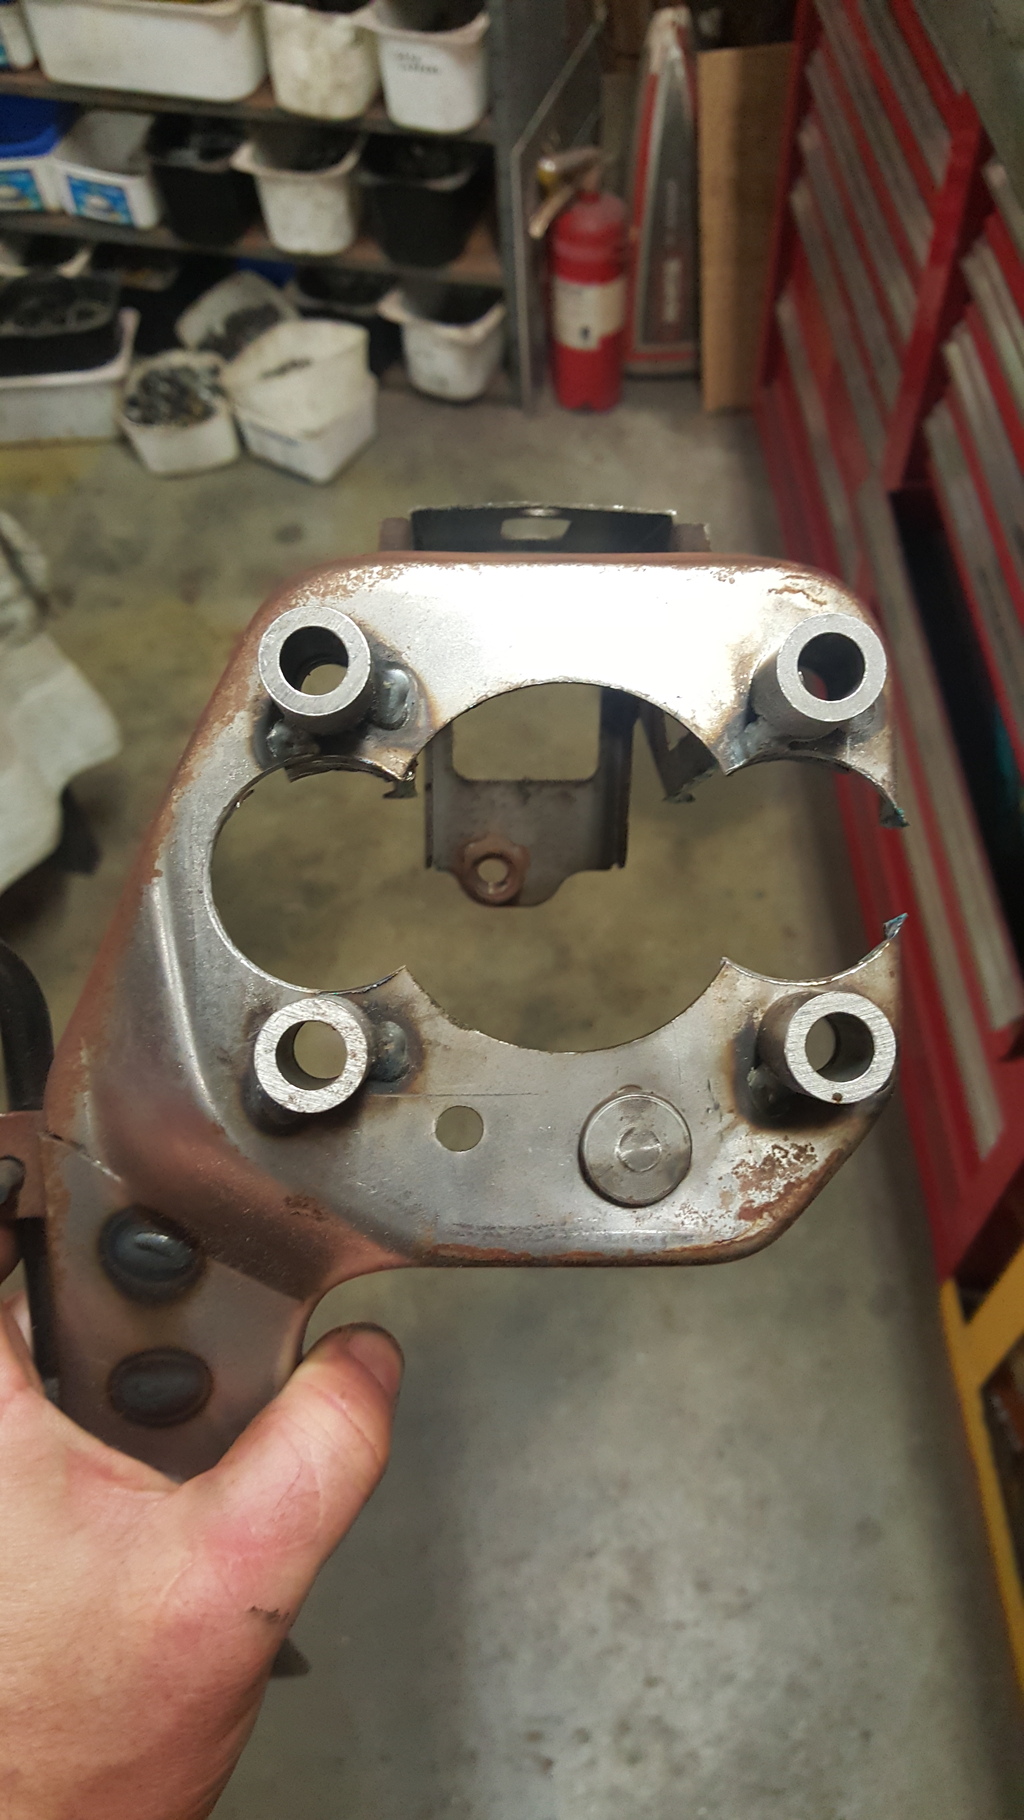
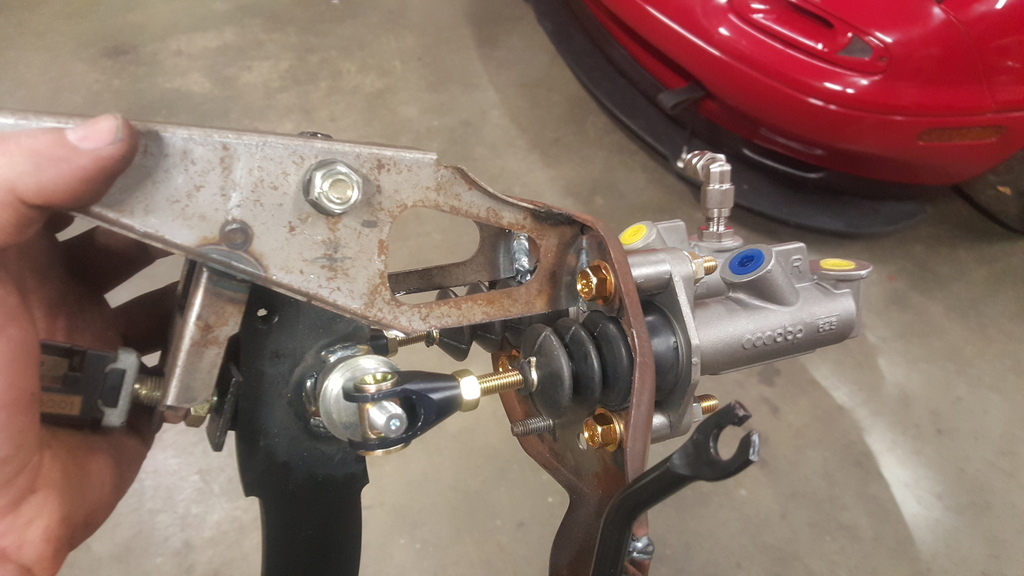
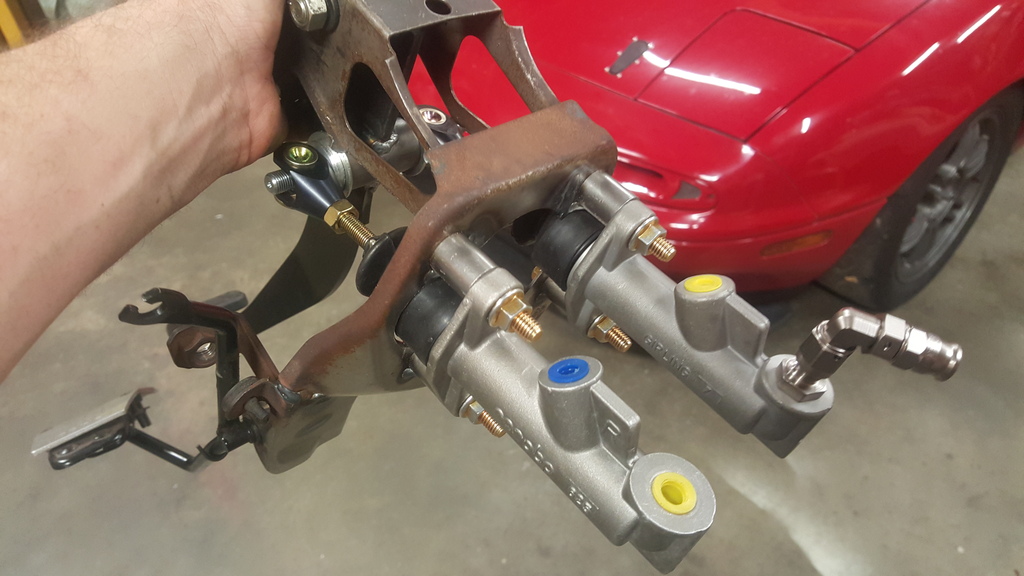
Some additional bracing is required on the pedal box to strengthen it after being modified. I've sized the master cylinders at 5/8" for the front, 0.7" for the rear so they are slightly smaller than the stock dual master from my car which was 7/8" will give me some extra brake ratio. Initially I'm keeping the stock pedal ratio of 4:1 but will probably need to increase this to 5:1 - 6:1 by dropping the top pivot a little. We'll see how it feels once it's in the car. With the booster still present but the vacuum line remove, there is a lot of resistance the pedal box adds, so maybe with it gone it might be fine.
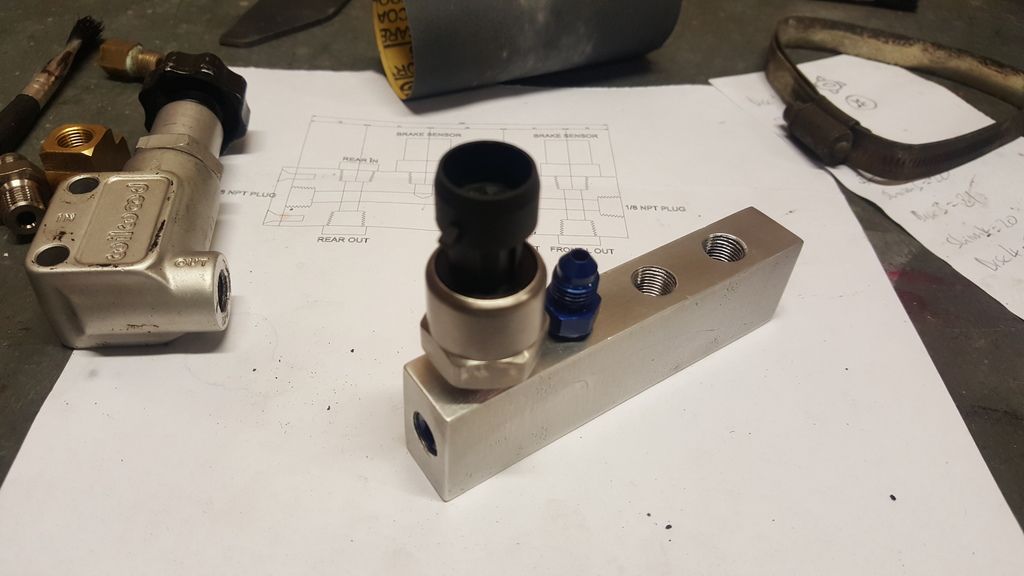
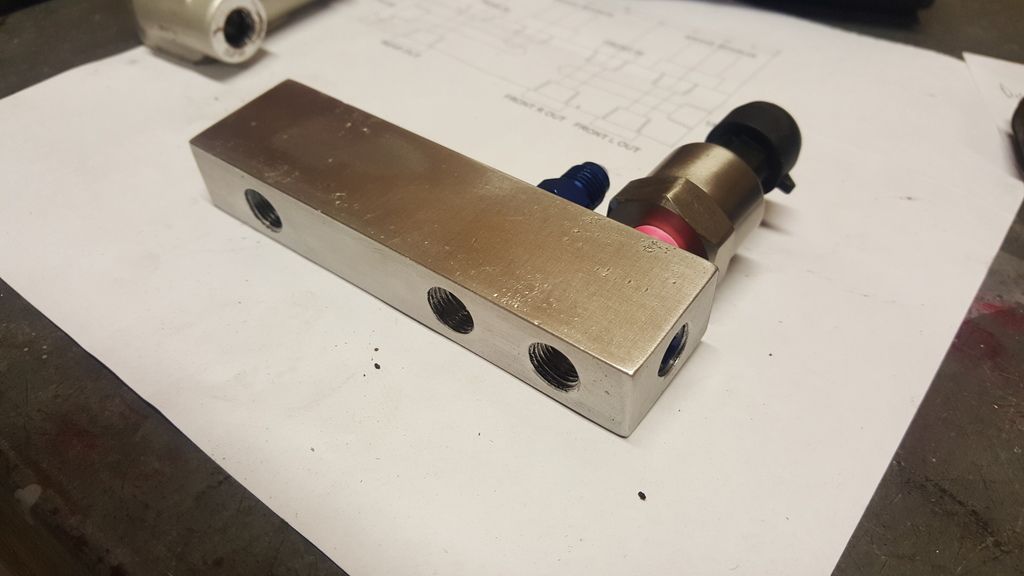
So far the mods have been extremely simple, retaining the original mounting points on the pedal box. The biggest hassle is getting all the brake lines connected which I'm going to do via a single custom distribution box that will have 1/8" ports in, 1/8" ports for brake sensors and 1/8" ports out for the various lines.
I'll report back in a few weeks when I've raced with this setup.
So I ran the last few events to test the brakes with the booster line removed and whilst the brake pedal requires lots more force, the brake pedal is far more linear and I can feel the brakes working through the pedal. Once used to the additional pressure required, brake modulation is far better. I immediately found that I could brake later and deeper into the corners and my times dropped a bit.
I've pulled out the pedal box and removed the booster entirely. As part of doing this I figured I may as well go for an adjustable bias and dual masters. Here are some pics of my pedal box mod:


Some additional bracing is required on the pedal box to strengthen it after being modified. I've sized the master cylinders at 5/8" for the front, 0.7" for the rear so they are slightly smaller than the stock dual master from my car which was 7/8" will give me some extra brake ratio. Initially I'm keeping the stock pedal ratio of 4:1 but will probably need to increase this to 5:1 - 6:1 by dropping the top pivot a little. We'll see how it feels once it's in the car. With the booster still present but the vacuum line remove, there is a lot of resistance the pedal box adds, so maybe with it gone it might be fine.
So far the mods have been extremely simple, retaining the original mounting points on the pedal box. The biggest hassle is getting all the brake lines connected which I'm going to do via a single custom distribution box that will have 1/8" ports in, 1/8" ports for brake sensors and 1/8" ports out for the various lines.
I'll report back in a few weeks when I've raced with this setup.
#7
I picked up these 1000psi pressure sensors for $30 each from ebay and installed them in the existing lines a few months ago to log the fluctuating pressure with the booster. I logged the pressures by trying to keep the pedal pressure even as I blipped the throttle whilst I was dropping down gears. There wasn't a lot of point though because I could feel the pedal moving under my foot anyway so I'm not sure how even the pressure was... Still you can see in the logs a high initial brake pressure, followed by dips and spikes as I blipped the throttle. Regardless the booster wasn't helping and had to go...
I wouldn't rely that the readings are calibrated, but it's great for logging and comparing setups. It will be good to check them when the dual masters are in to make sure I'm hitting the same pressure points as I was prior to removing the booster. It will also be good to log the brake bias I'm running at future events.
The car is a 1989 Eunos Roadster B-spec imported from Japan... All the B-spec stuff has been replaced over time with only the badges left on the car. I ended up moving all the running gear into a new chassis and selling it off.
Last edited by Madjak; 11-22-2015 at 10:51 PM. Reason: grammar
#9
I checked my oil and fuel pressure ones against an accurate gauge and they did read about 5-8 psi higher throughout the pressure range, so be a little careful using them. I use mine for logging so I'm more interested in changes rather than actual values.
The 1000 PSI ones are a little tricky to find... Search for "1000 PSI pressure transducer" on ebay
The 1000 PSI ones are a little tricky to find... Search for "1000 PSI pressure transducer" on ebay
#11
I use them for the engine protection in the ECU and data logging. I have a separate standalone Longacre gauge for oil pressure which includes a 3 stage warning light. It's against this gauge that I can see the difference in pressure but it's also the same difference against a mechanical fuel pressure gauge to these cheaper sensors so I figure they all read a little high.
#12
Joined: Apr 2014
Posts: 18,642
Total Cats: 1,866
From: Beaverton, USA
That's my plan, logging and warning lights. I have a mechanical fuel gauge I'll compare it to, but I guess I could also adjust the readings in the ECU.
Maybe they just need to be calibrated differently in the ecu? What values are you using.
Maybe they just need to be calibrated differently in the ecu? What values are you using.
#13
I just use the listed 0.5v for 0 PSI and 4.5v for highest PSI rating (100 or 1000PSI) and linear in between. It would be easy to re-calibrate in the ECU but I'd need a better master gauge to base it from. I haven't been bothered to mess with them as I'm not relying on accurate values but maybe it's worth doing just to know which gauge / sensor is right. I trust the Longacre gauge more but it reads lower than both the ebay sensor and an Autometer electronic gauge. Maybe it's the one that is low, I doubt it though.
It's a bit like tire pressure gauges. Mine reads different to others, but I know what pressures work for me and as long as I use my gauge it's all good.
If you do check them, please report back what you found as I'd be interested how accurate they are.
It's a bit like tire pressure gauges. Mine reads different to others, but I know what pressures work for me and as long as I use my gauge it's all good.
If you do check them, please report back what you found as I'd be interested how accurate they are.
#15


__________________
OG Racing
Your Source For Motorsports Safety Equipment
WWW.OGRACING.COM
800.934.9112
703.430.3303
info@ogracing.com
OG Racing
Your Source For Motorsports Safety Equipment
WWW.OGRACING.COM
800.934.9112
703.430.3303
info@ogracing.com
#16
It would have been nice to remote mount the reservoirs up in the cowl area at the base of the windscreen but they are too tall to fit. I might look around for a 3-way reservoir that will fit up top.
I used flexible lines to connect the masters to my distribution block, its just easier to get everything to fit right. I don't have enough 1/8" NPT to 10mm fittings to hook up all three lines and I can't find anything locally to join metric and imperial brake fittings so I'll get the lines modified at a brake place. In the longer term I would like to run flexible lines so I can route the LHD brake line away from the headers. For now some heat wrap will do it.
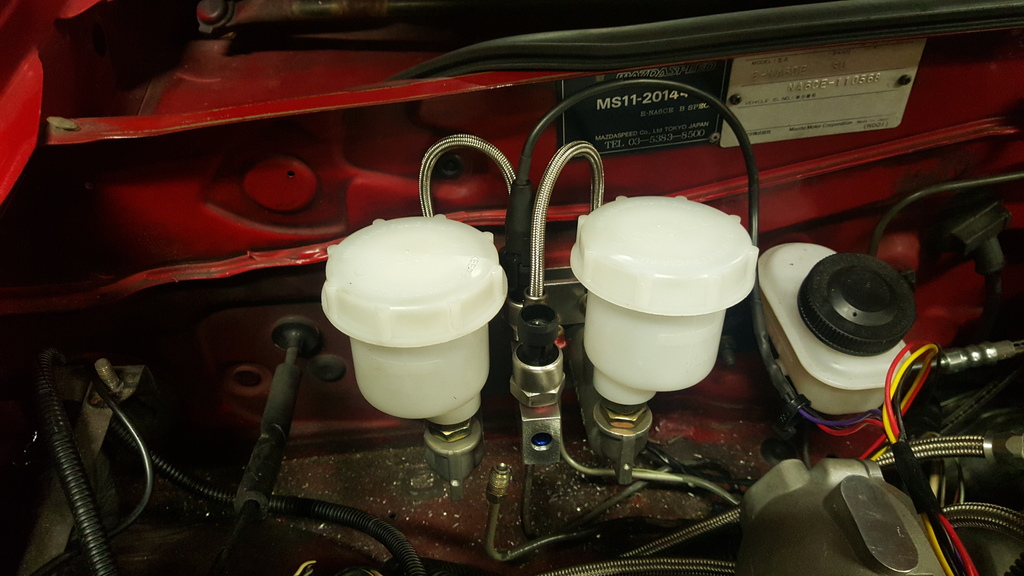
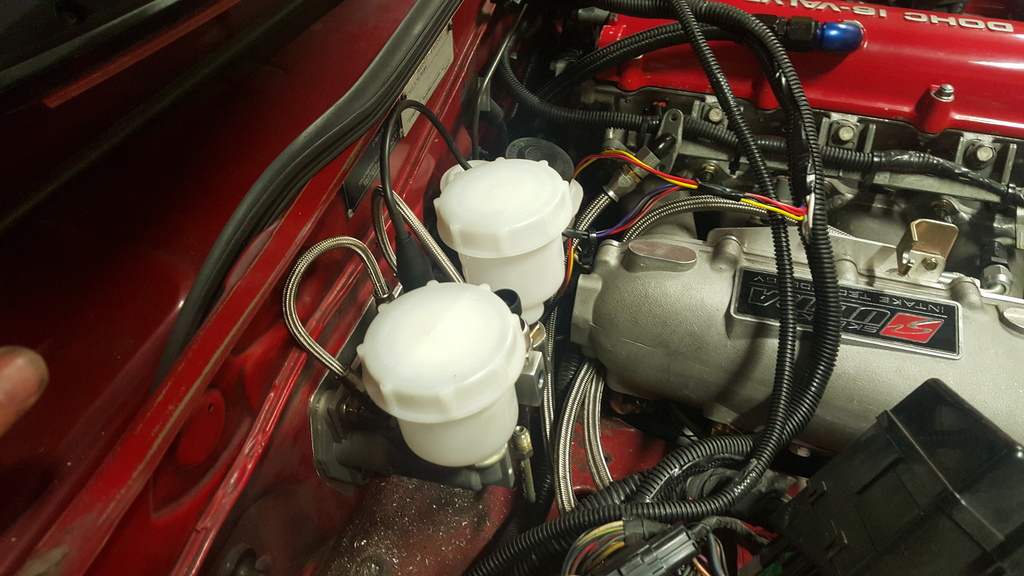
I used flexible lines to connect the masters to my distribution block, its just easier to get everything to fit right. I don't have enough 1/8" NPT to 10mm fittings to hook up all three lines and I can't find anything locally to join metric and imperial brake fittings so I'll get the lines modified at a brake place. In the longer term I would like to run flexible lines so I can route the LHD brake line away from the headers. For now some heat wrap will do it.


#17
Update:
I've finished the installation with everything hooked up and working. I had some major dramas bleeding the system. To bleed a balance bar setup you really need 3 people or a pressure bleeder. Even still a bubble of air must have been trapped in one of the front calipers and it took several goes and lots of mess to get it bleed properly.
I've taken the car for a drive and the pedal feel is awesome. Very firm pedal, not much movement but a nice linear feel to the brakes. I can actually feel the feedback through the pedal for the first time. With the bias bar wound full lock in either direction I can easily lock the front or rear brakes. The bias bar I've used is designed to allow only a certain amount of angle so that if I loose a circuit the other circuit is still effective. This is what made the bleeding difficult.
I'm running the car this weekend at the local race track so I'll report back on how I found the brakes at race pace.
Total materials required:
5/8" (0.625") master for front
0.7" master for rear - may be different based on caliper and rotor size
Balance bar (2.5 - 3")
Balance bar remote adjuster
Ally block off plate (make it yourself from offcuts)
28mm hole saw for drilling into firewall and pedal box
Welding some bracing on the pedal box
Modify the existing lines to fit to the new masters.
Approx costs: $300-450 USD depending on masters and fittings etc.
There is also an option for doing just a booster delete. This would involve moving the master upwards 30mm to mount to the existing holes and drilling a new hole 25mm higher in the pedal for the clevis. The hole in the firewall would need to be raised with a block off plate covering the rest, and the pedal box would require some minor mods to fit. It would certainly be cheaper however I'm unsure how much it would increase the pedal travel due to the higher pedal ratio. That would depend on how effectively you can bleed your brakes and the pads you run.
Last edited by Madjak; 11-30-2015 at 11:00 PM. Reason: minor spelling
#18
and then....
__________________
OG Racing
Your Source For Motorsports Safety Equipment
WWW.OGRACING.COM
800.934.9112
703.430.3303
info@ogracing.com
OG Racing
Your Source For Motorsports Safety Equipment
WWW.OGRACING.COM
800.934.9112
703.430.3303
info@ogracing.com
#19
The brakes work great on track. Nice even and progressive feel. It took me a while to get used to the extra pedal force required on the initial application but after a few laps I was used to it.
I think I would prefer slightly more pedal ratio as the force to stop on race rubber is fairly high. I'll try it at a few more events first but maybe I'll move the pivot to 5:1 instead of 4:1.
I think I would prefer slightly more pedal ratio as the force to stop on race rubber is fairly high. I'll try it at a few more events first but maybe I'll move the pivot to 5:1 instead of 4:1.
#20
We see 5.75:1 as a common pedal ratio. You'll notice that immediately.
__________________
OG Racing
Your Source For Motorsports Safety Equipment
WWW.OGRACING.COM
800.934.9112
703.430.3303
info@ogracing.com
OG Racing
Your Source For Motorsports Safety Equipment
WWW.OGRACING.COM
800.934.9112
703.430.3303
info@ogracing.com


