When you click on links to various merchants on this site and make a purchase, this can result in this site earning a commission. Affiliate programs and affiliations include, but are not limited to, the eBay Partner Network.
One thing I've learned from Emachineshop is the finishing processes are ridiculously priced. The finish is baked into the total cost, so you don't actually know how much it costs. I've found it to be 30-50% of the total cost for anodizing or powdercoating.
I had them waterjet and cnc bend my seat mounts and it was $180 for one seat (two brackets) unfinished OR about $350 with black powdercoat. No thanks, I can drop those off locally for easily <$40. $180 is quite reasonable for custom mounts, when off the shelf stuff is easily $100.
Anodizing is a huge process. So it makes sense for it to be expensive for one part. Especially If it requires custom racking .
For example our process tank time is about $600 an hour. Parts generally run for 45 - 60 minutes. Pair this with a ton of other factors that easily drive the cost up and you have your answer.
We are a high volume automated facility though. I'm unsure what our smaller devisions with hand run lines would charge. (We're doing $5k+ loads at a time)
Had to build an alternate set of downpipes and exhaust for Hyper to pass Laguna Seca's sound limits. 100% stainless nose to tail, great opportunity for a lot of practice on the TIG. Mostly made up of 304 welded with 308L, muffler is 400 series and welded with 309L filler, ran a backpurge on everything. There were just a few details that threw me some curve ***** - a couple spots welding hanger rod to the muffler case that just refused to weld right, had to experiment a ton with cleaning, filler, tungsten tip shape, etc. to struggle through there, but overall really pleased with how it all turned out. Going to experiment with some titanium soon (they say Ti is like SS but everything has to be perfect, particularly shielding gas and purge).
I made dis! Land Rovers wooden box that someone made for the back looked really neat, but design wise it had less than 3" of space in the middle... new one has about triple that depth wise and is stout.
Square steel tubing, galvanized trim panel (matches galvanized all over truck), mahogany wood table top that is on its own hinge to keep the front/back locked door separate and a top door for access if back bed is fully loaded.
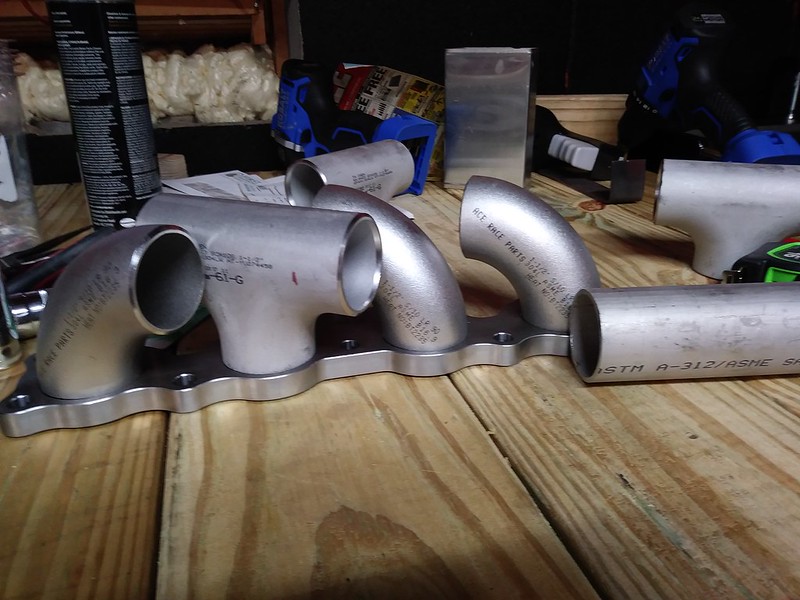
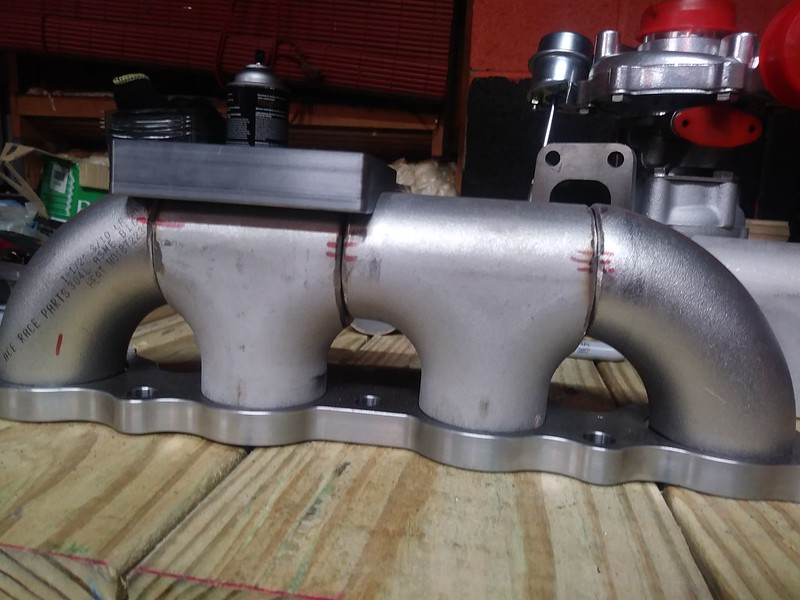
So I am building a manifold right now and expect to mount the turbine inlet right over cylinder two. How would the brain trust build this manifold given the option?
really tho I'm not sure what you're asking? cut a hole in it and weld the flange on, or add a short piece of pipe if you want it to stick out. Flange right on the els is usually best. The even sell them with the backside radiused for this.
Yes the t2 flange i have is radiused to the pipe. The question was weather it would be a better idea, flow wise, to use two tees or three 90's, and if the effort would be worth it.
I bought an off the shelf seat mount from Planted for $140 in the expectation that it would be a bolt in affair, with all of the engineering already done .
It was not. The planted bottom mount is off center in the car by about 2.5" and sits about as high as stock.
Time to go to Home Depot racing supply .Bought some 1.125" by 3/16 steel .Bent the rails to match my kirkey and mount the seat as far back and low as possible without removing the rear mounts .
Used my $300 Amazon welder, a cheap replacement for my Everlast that failed out of warranty and they said they didn't have replacement parts or schematics for repair. Don't buy an Everlast!
No completed pictures yet as I'm waiting on bolts for the bottom of the seat .
What welder was ok with leaving those giant voids in a manifold?
Could you point out what ones you are seeing? I believe I can spot some, but it could also be lighting in the pictures in some of the spots. Looking at the pics on my phone so using a potato screen.


 08-04-2018 | 02:49 PM


 0
0