When you click on links to various merchants on this site and make a purchase, this can result in this site earning a commission. Affiliate programs and affiliations include, but are not limited to, the eBay Partner Network.
Facebook doesn't need any of my real info. **** them.
Basically how I feel about it, every time I go on I post a picture of a flower or something. You know instead of cool Miata ****, it's part of my fake book campaign. I should point out that I go on like once a month. Spend way more time here.
Got the head back, added the +1 Inconel on the exhaust side. Unshrouded the valves, Lightly ported both sides, just removed the flashing really along with some very minor bowl blending. The exhaust side seats fit much better when opened up for the larger valve. Used to be an undercut below the seat. Now it just blends right into the port.
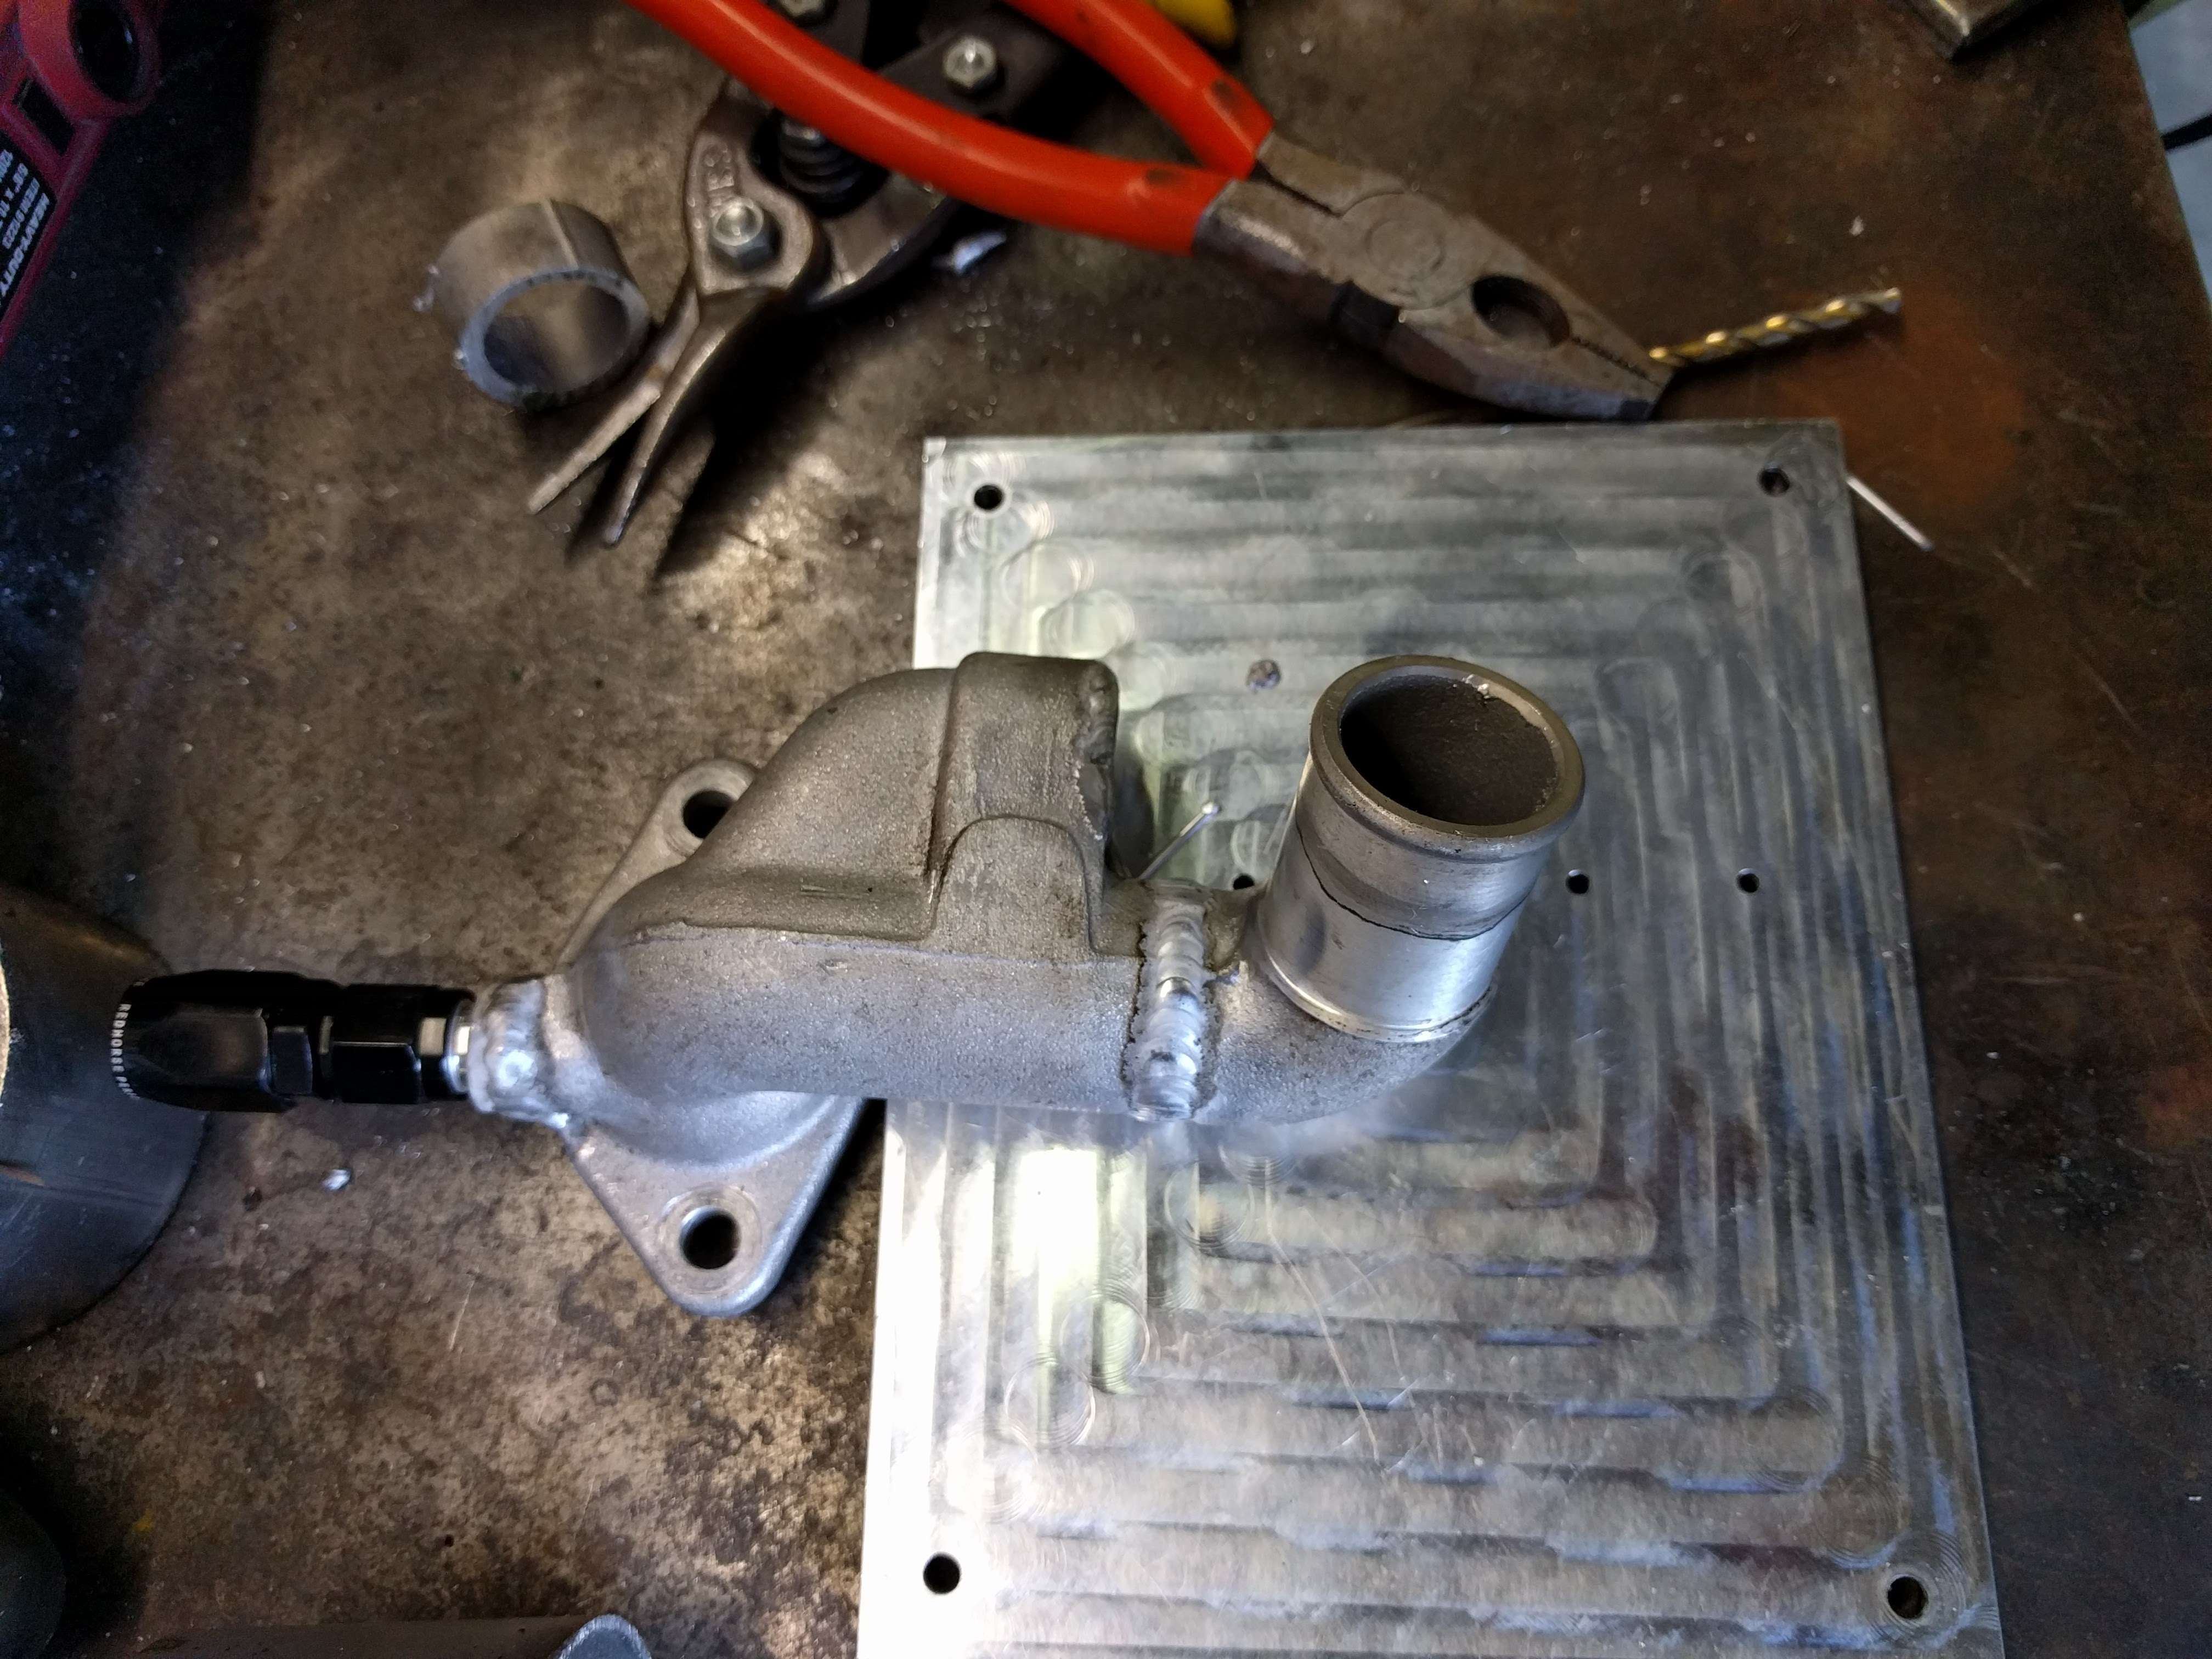
Recent progress. ..Got the radiator plenum roughed out.
.060" Aluminum is no joke to weld. Can't screw around.
Proper size tungsten is really important with aluminum, to achieve a steady arc. I used 1/16" lanthiated.
Also messing with composite layup. My splitter is going to have a Lowes-green-foam core, wrapped in some kevlar around the edges, uni directional carbon and capped off with a heavy fiberglass. West systems epoxy.
Not knowing much, I made a random shape with various corners, edges and a wood plug (later used for mounting), a trash bag, some paper towels (for breather) and a poor shop vac. Here is that first attempt.
Not pretty, but it sure is/was strong. Had to break it to see what it would do. Held 220 lbs point load with an 18" span. It was still pretty green when I decided to test it, had only been curing for about 12 hours. That was all just single layer on the layup. I'm good with that.
Last edited by ryansmoneypit; 05-11-2017 at 05:33 PM.
I got my turbo back! For those out of the loop, I had damaged the turbine wheel while trying to separate the housing from the CHARA. Although it was an expensive mistake, it may have been for the better. the wheel had damage from the PO around the tips of a few of the blades. My EFR had been on a Polaris Razor previously that had been running leaded race fuel. My guess is that clumps of leaded carbon caused the damage. Here is the carnage that I caused -
With much gratitude I was pointed towards Southeast Power Systems, in Florida. The ONLY authorized EFR repair facility on Mother Earth. Mike Franke is the man! Completely rebuilt, new seals, balanced to 50K rpm. Look at this beauty now!
You can fit a 1/4" NPT fitting into the water return neck, like this. Its pretty clean I think. I love how it sits behind my now janky looking brass fitting. that thing has to go.
an Ebay find here, some very cool banjo fittings to -AN size fittings. Another clean look I think.
No real reason I guess... The NPT tap and fitting were already in my possession, so I went with it. come to think of it....I have a few -6 An bungs laying around. poop.
Some new air dam/ radiator intake pics. I won't lie, it's a pain in the *** to install. That's why a lot of the fasteners are missing for the first install.
those are some legit looking brackets. very nice work
Thanks man. They bolt right to some existing threaded holes on the body. Made it pretty straight forward. Now I need to dig up some pics for ideas on mounting the splitter. I'm going to follow ThePass and make mounts that can survive off roading.
Got the engine together when I decided to do a leak-down test. This thing is dead. 5, 20, 30, 20 % leak- down. Brand new head, so all rings and bore. I was the manifold that was media blasted improperly, so.it preceded to sand blast the interior of the engine. Whatever, it's going in.
Second thoughts now.... should I pull this thing back out and JUST put new rings in, maybe bring leakdown to 15% ish, pull it completely apart, hone cylinders, new rings and basically shitcan all hopes of driving it again this summer, or do nothing and run it for the year?
Depends on if the scoring is bad enough to need to be bored out. If you can just hit it with a bottle hone and new rings without boring it then that might be the way to go. You are a fast worker.


 04-08-2017 | 09:27 AM


 0
0