When you click on links to various merchants on this site and make a purchase, this can result in this site earning a commission. Affiliate programs and affiliations include, but are not limited to, the eBay Partner Network.
Lol
I am glad you don't mind me defacing your logo a bit. I actually couldn't get the pupil to stick because that is a silicone nub so I colored it with a sharpie.
After reading some of soviet's thread I decided to step up my game on heat shield design.
Managed to save some of the latest CAD stuff from the recycle bin before it got deleted.
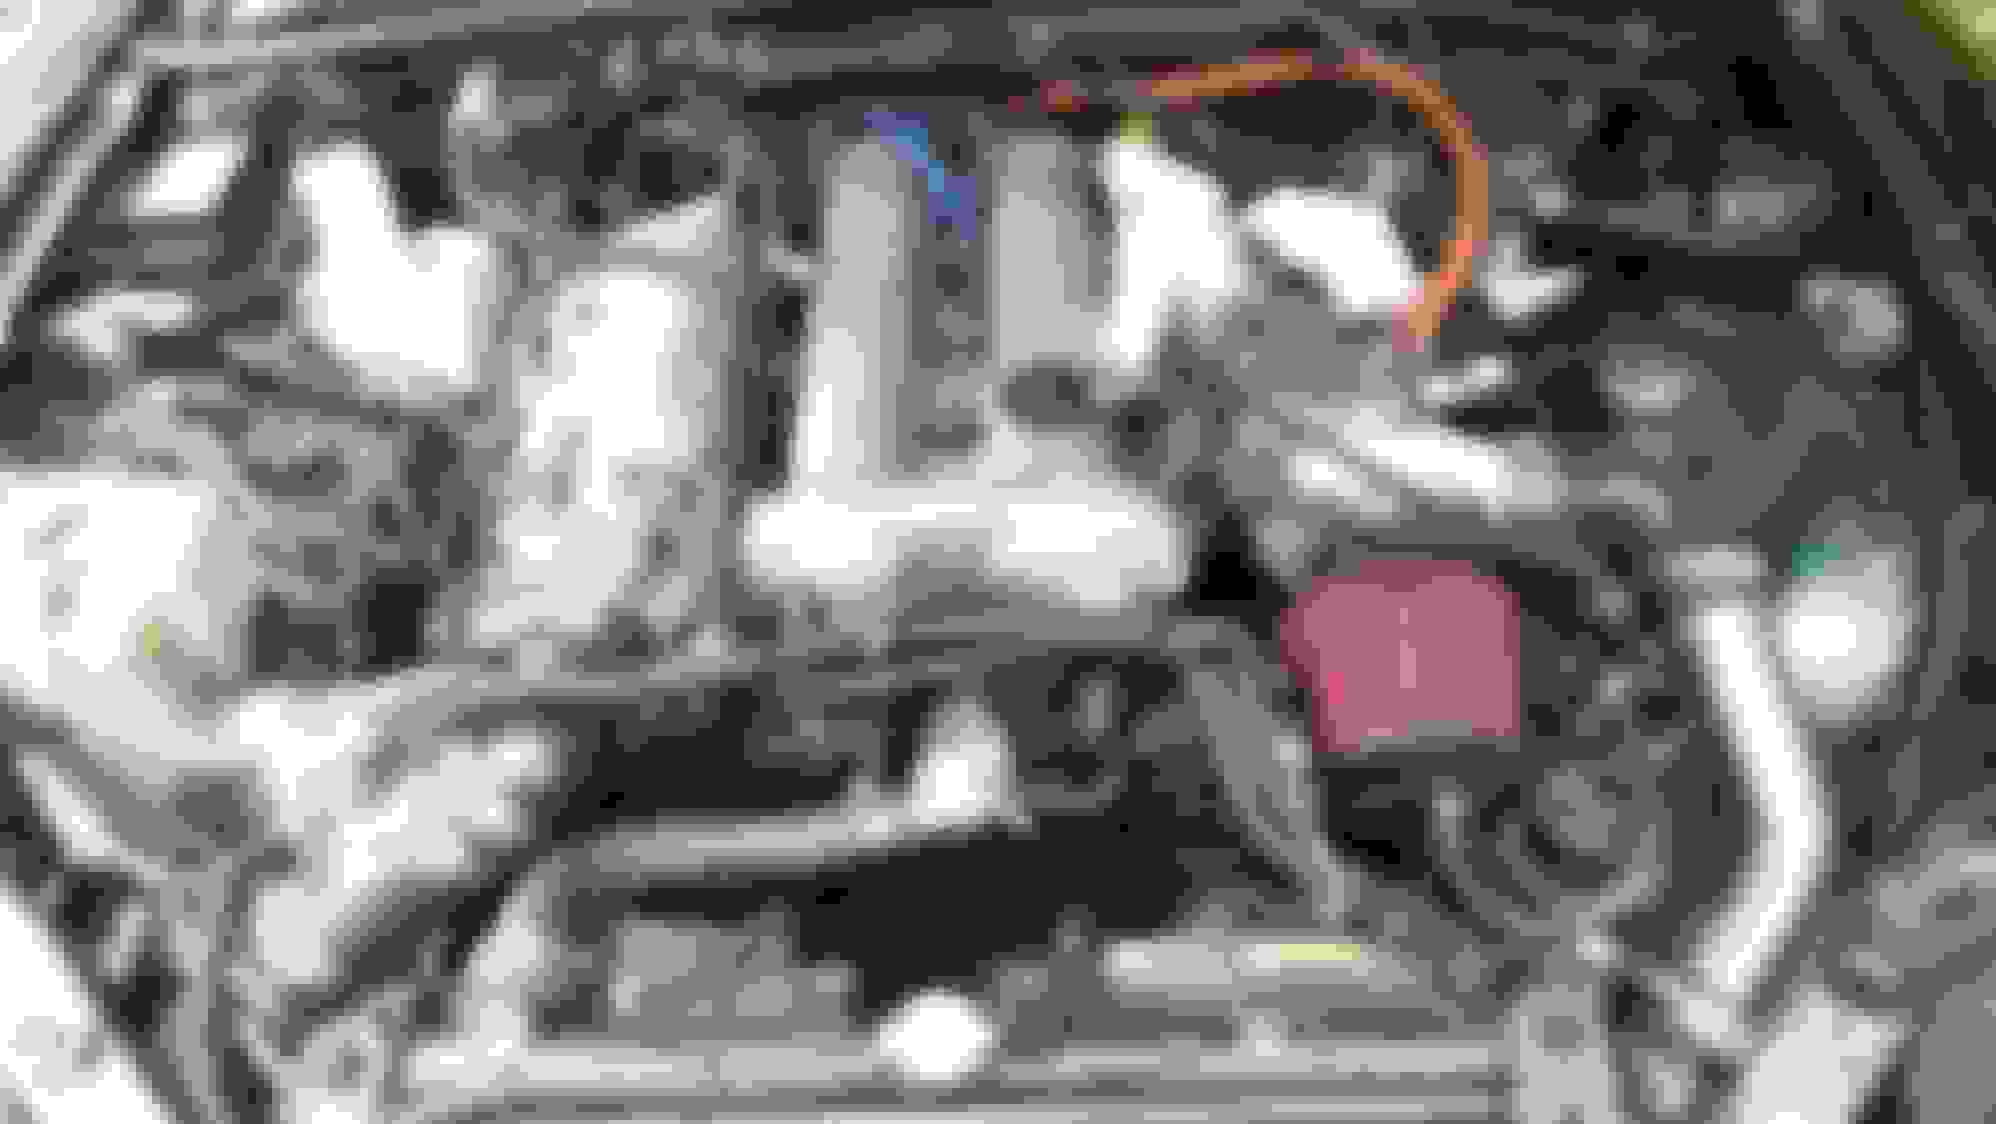
Made some crappy ducting last night and figured I would post a couple pics after seeing that Lars had solved the upper design for me
I worked on the lower side and used election sign plastic, got the idea from Lars suggesting it in someone else's thread.
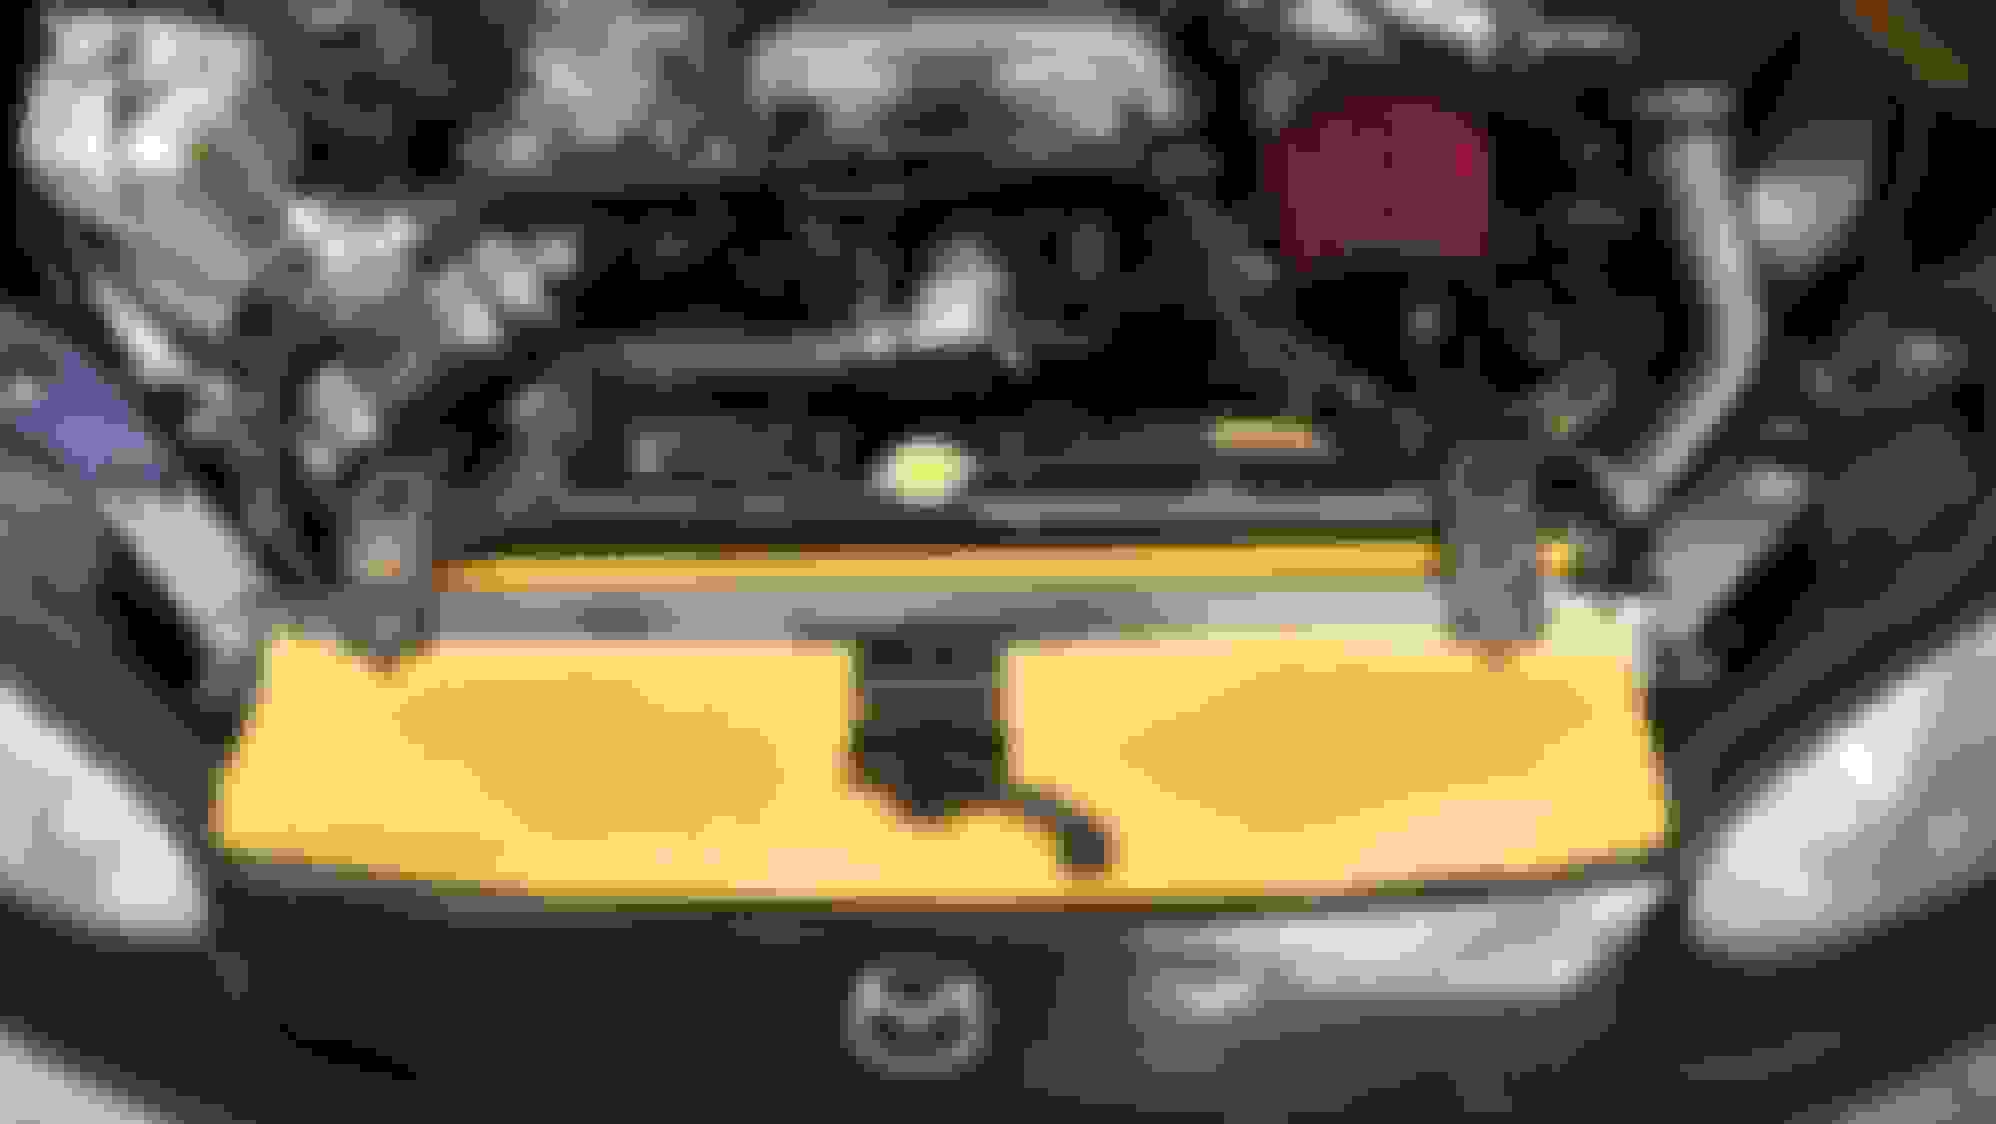
It is yellow and sort of looks like the mucous membrane inside the mouth of my green colored pal
That ducting looks pretty good. You are lucky the inlet and outlet of your IC go up. I got to figure out how to cut holes there for those pipes on the side. Makes it a bit more challenging to do.
Good point. I am going to copy your top cover it is almost exactly what I have been trying to envision. I am hoping these free mods will keep my IAT's a tad lower in 4th and 5th at the 1/4 mile.
Ok, you guys ready to laugh your asses off.
In light of the discussion on Lars' thread, I have decided to change my idea a bit. I still need a big zip tie and another small top piece to finish it off.
Originally Posted by NBoost
Ducting is sweet, material used is even more genius. What IC is that? Piping outlets are much more duct friendly.
Thanks!
This is the intercooler
http://www.cxracing.com/mm5/merchant.mvc?Screen=PROD&Store_Code=CXR&Product_Co de=IC0003-25&Category_Code=INCO
Hmmmm...
The link didn't seem to work it is 18x12x3 over all with a 12" long core, bar and plate. $95 I think. Turbulators on the outside, perforated fins on the inside.
Works ok for street.
That ducting looks pretty good. You are lucky the inlet and outlet of your IC go up. I got to figure out how to cut holes there for those pipes on the side. Makes it a bit more challenging to do.
I use flexible pvc. For the intercooler holes you just need to cut an x in the material and push the tube through. If you are using rigid material I would make a single cut from the top to a hole. Like a line going down into the top of a circle. That way you can kind of open the ducting a bit making it easy to slide of and off.
Started the first piece of my new heat shield (I know, jagged cuts.)
At least it hides the most hideous part of my old heat shield and rattles a ton less.
Here is the latest version of my top radiator shroud.
I have some black sign plastic that I plan to use for the final versions.
If you are willing to sacrifice one of the soft play mats that I use, you can cut nice holes in the plastic with a piece of tubing, a block of wood and a hammer. The 2 holes in this picture were not cut that way.
The final design, I still might do one in black. Figured I could advertise a bit for Lars at the drag strip tomorrow.
The hammer, tube and play mat solution only works well for small holes. For the larger holes I used a box knife on a piece of wood and carefully pulled the plastic from perpendicular to the lines to parallel for each 1/4 of the circle.
I am thinking before the end of drag racing season. We'll see.
The lower ducting works a little too well without any vents in the hood. Actually started pushing the corners of the hood up around 100mph causing me to slow down before the end of the 1/4 mile. So I pulled it after my second run, the top one seems fine.


 08-27-2016 | 03:39 PM

 0
0