
91 BRG 1.8BP MK turbo build
 03-06-2016, 01:48 PM
#1
Senior Member

Thread Starter
iTrader: (2)
Join Date: Nov 2015
Location: Seattle
Posts: 1,426
Total Cats: 266
Parts are starting to pile up, so I guess I'd better start a build thread...
The car is a 91, and I'm swapping in a 1.8 engine for a turbo build. My power goals are ~225WHP/200WTQ. The suspension & brakes are resonably sorted out already. The car is one of two DD vehicles, and I don't have plans to use it for anything else at this time. Below is a summary of the intended build. I already have all parts, with the exception of the kit Lars is building. I've put an asterisk next to things that are already installed.
Mechanical:
1.8 swap into 91
Mk turbo kit + oil lines + cat
4.1 torsen
*5sp
ACT ZM1-HDSS 1.6 clutch
*F1 10 lb 1.6 flywheel
*Poly bushings
*FM VMAXX coilovers
*OEM front sway/no rear sway (60.5% FRC)
*Depowered rack
*Momo steering wheel
*Frame rails
Competition motor mounts
*Stock brakes (carbotech rotors/hawk hps pads)
*15x7 Advanti storms
*Nitto NT450’s
*PS/AC/charcoal/cruise delete
Electrical:
*DIYPNP
EBCS
Sequential injection
*GM IAT
*1.8 TB w/VTPS (currently running modified 1.6 VTPS)
*Innovate WB O2
Flowforce 610 injectors
Mechanical boost gauge
*Odyssey PC680 battery
Plumbing:
Coolant reroute
2.5” IC piping
28”x7”x2.5”CX IC
Type S BOV plumbed as BPV
3” to 2.25” inlet
AEM dryflow filter 3”X5”
Dezums style air/oil separator
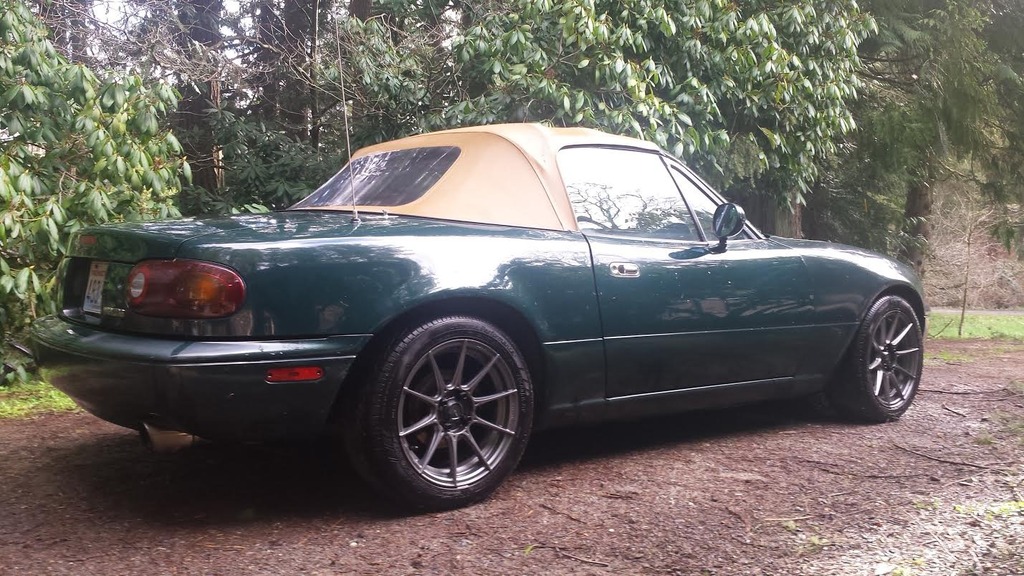
this is what the car looks like now
this is what the engine bay looks like now- wait- WTF?
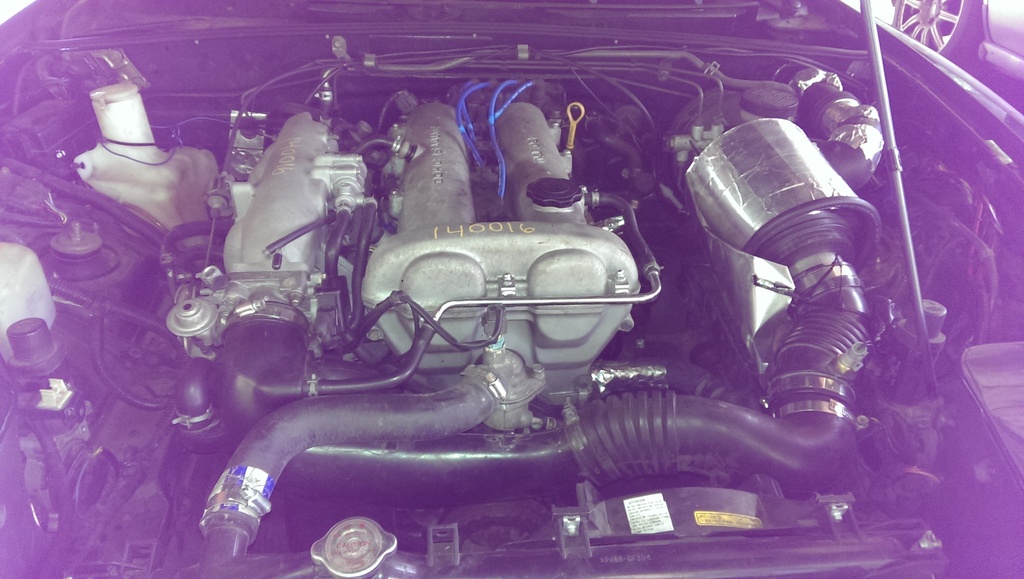
This is a $4 hot air intake rescue. The car had the classic "CAI" sitting on top of the exhaust header when I bought it. The free.99 cowl induction beauty you see here is made from: old subie intake bits, a PP one gallon paint can wrapped in heat wrap, and a $4 piece of dryer exhaust.
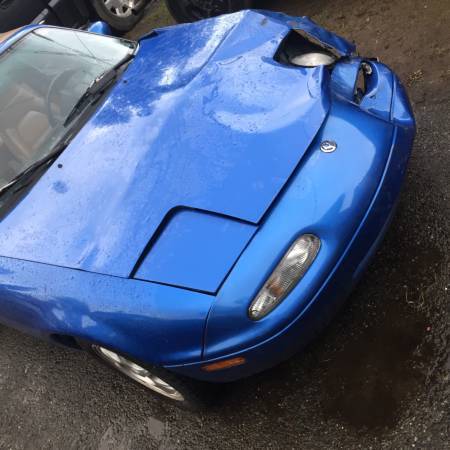
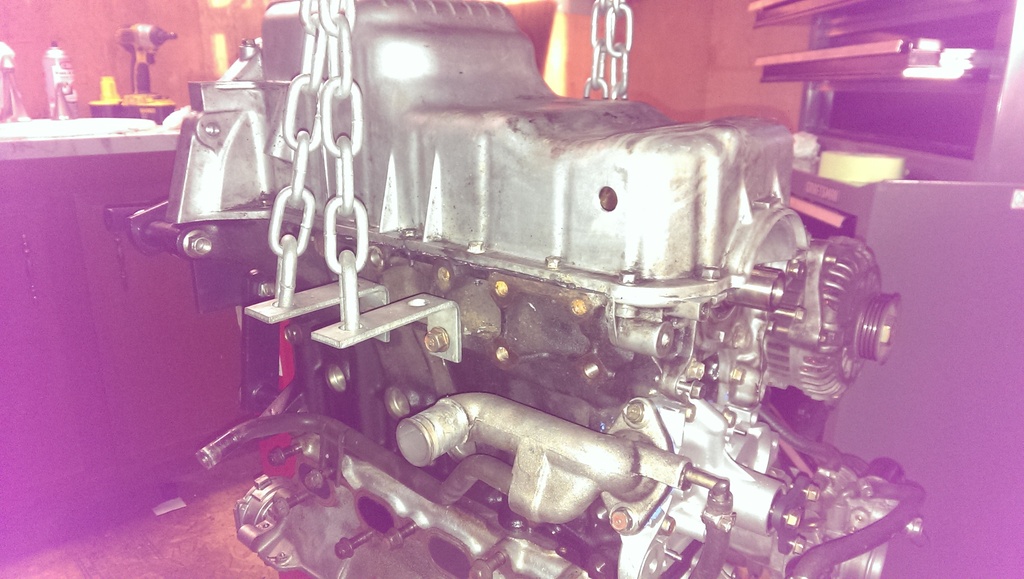
This is the laguna blue & tan that died to make this swap possible. I scored the engine & torsen dif from this car. 102k miles.
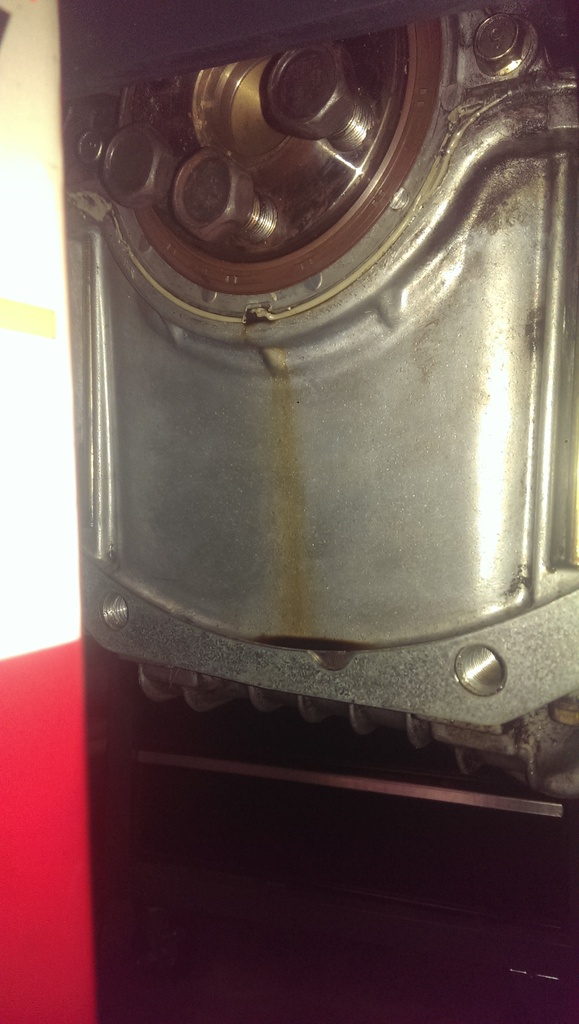
After getting it home & degreasing it, I discovered that the rear 1/2 moon oil pan gasket was leaking. 1st time I've ever seen the pan gaskets go bad on a miata. So the pan came off, which at least means the oil return project will be pretty clean.
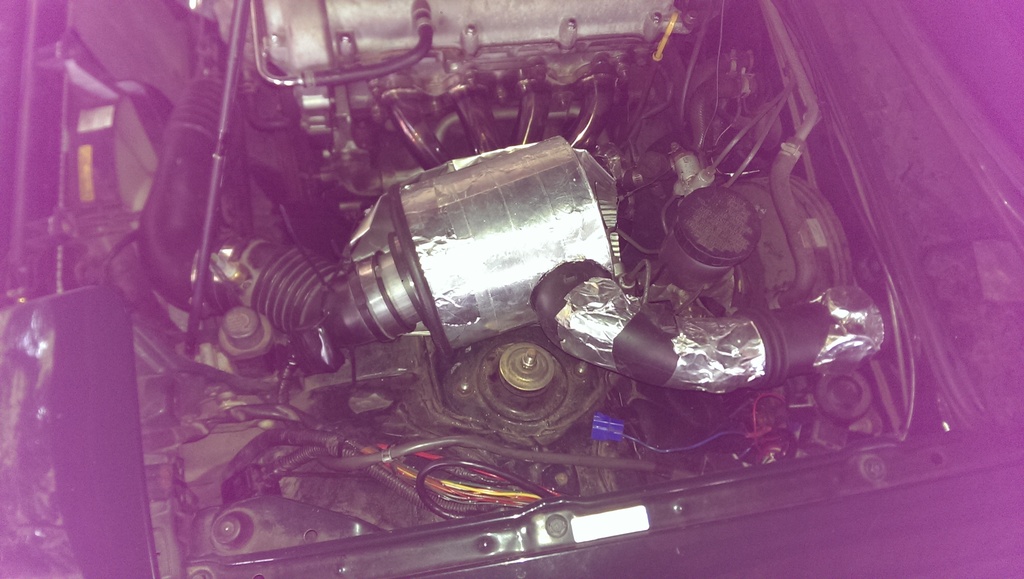
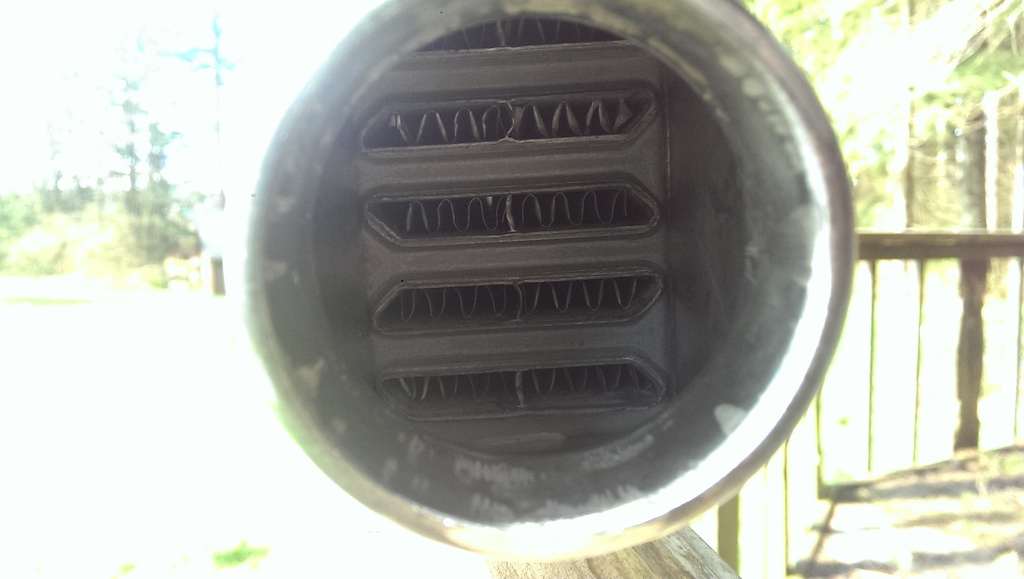
The CXracing IC. It has turbulators all the way through, but not super dense. Get what you pay for I guess.
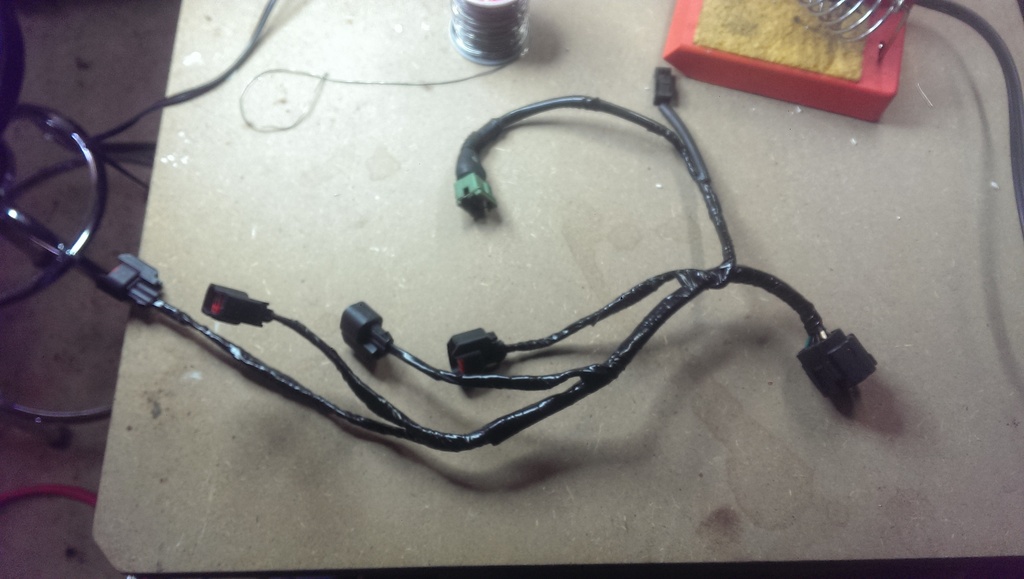
I had an injector harness from a cali 93 with sequential injection. I hacked it up to build a EV14 PNP harness for the FF610's, as I'm converting my MS 9093 to support sequential injection when I do the swap. I soldered, heat shrunk, & wrapped the harness in super 33. If anyone thinks soldering these connections is a terrible idea, please advise.
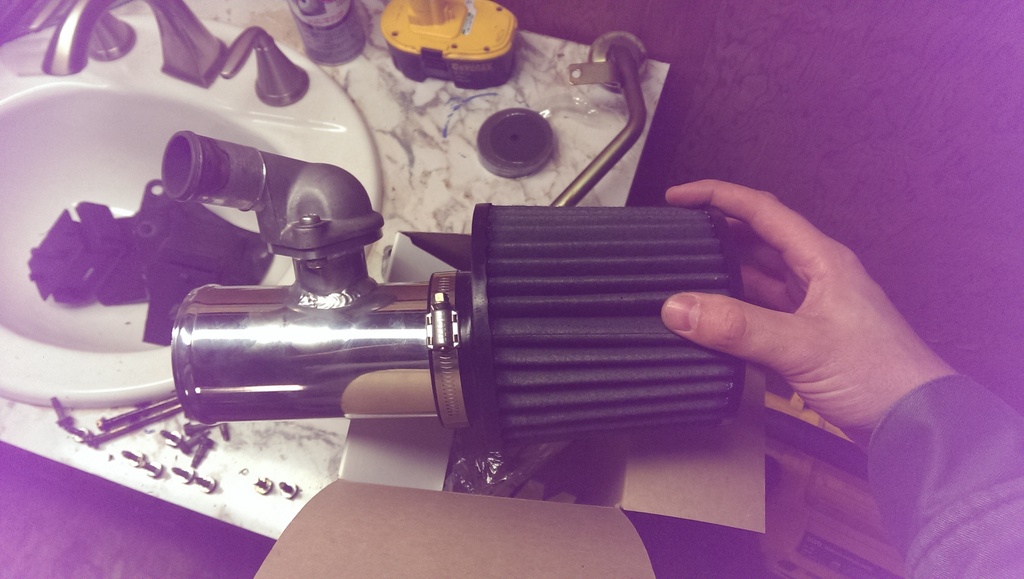
I'm using a type S knockoff as a BPV. In trying to cut costs, I noticed that I could get a 3" pipe with a greddy flange for $17, while the same pipe with a simple hose barb was $34. Since I'm doing a coolant reroute, I recycled my thermostat housing & bolted it straight up to the greddy flange. Total cost for a recirculating BPV (minus some rad hose) $55.
more to come!
The car is a 91, and I'm swapping in a 1.8 engine for a turbo build. My power goals are ~225WHP/200WTQ. The suspension & brakes are resonably sorted out already. The car is one of two DD vehicles, and I don't have plans to use it for anything else at this time. Below is a summary of the intended build. I already have all parts, with the exception of the kit Lars is building. I've put an asterisk next to things that are already installed.
Mechanical:
1.8 swap into 91
Mk turbo kit + oil lines + cat
4.1 torsen
*5sp
ACT ZM1-HDSS 1.6 clutch
*F1 10 lb 1.6 flywheel
*Poly bushings
*FM VMAXX coilovers
*OEM front sway/no rear sway (60.5% FRC)
*Depowered rack
*Momo steering wheel
*Frame rails
Competition motor mounts
*Stock brakes (carbotech rotors/hawk hps pads)
*15x7 Advanti storms
*Nitto NT450’s
*PS/AC/charcoal/cruise delete
Electrical:
*DIYPNP
EBCS
Sequential injection
*GM IAT
*1.8 TB w/VTPS (currently running modified 1.6 VTPS)
*Innovate WB O2
Flowforce 610 injectors
Mechanical boost gauge
*Odyssey PC680 battery
Plumbing:
Coolant reroute
2.5” IC piping
28”x7”x2.5”CX IC
Type S BOV plumbed as BPV
3” to 2.25” inlet
AEM dryflow filter 3”X5”
Dezums style air/oil separator
this is what the car looks like now

this is what the engine bay looks like now- wait- WTF?

This is a $4 hot air intake rescue. The car had the classic "CAI" sitting on top of the exhaust header when I bought it. The free.99 cowl induction beauty you see here is made from: old subie intake bits, a PP one gallon paint can wrapped in heat wrap, and a $4 piece of dryer exhaust.

This is the laguna blue & tan that died to make this swap possible. I scored the engine & torsen dif from this car. 102k miles.

After getting it home & degreasing it, I discovered that the rear 1/2 moon oil pan gasket was leaking. 1st time I've ever seen the pan gaskets go bad on a miata. So the pan came off, which at least means the oil return project will be pretty clean.

The CXracing IC. It has turbulators all the way through, but not super dense. Get what you pay for I guess.

I had an injector harness from a cali 93 with sequential injection. I hacked it up to build a EV14 PNP harness for the FF610's, as I'm converting my MS 9093 to support sequential injection when I do the swap. I soldered, heat shrunk, & wrapped the harness in super 33. If anyone thinks soldering these connections is a terrible idea, please advise.

I'm using a type S knockoff as a BPV. In trying to cut costs, I noticed that I could get a 3" pipe with a greddy flange for $17, while the same pipe with a simple hose barb was $34. Since I'm doing a coolant reroute, I recycled my thermostat housing & bolted it straight up to the greddy flange. Total cost for a recirculating BPV (minus some rad hose) $55.

more to come!

Reply
 0
0

0
03-10-2016, 09:20 PM
#2
Senior Member
Thread Starter
iTrader: (2)
Join Date: Nov 2015
Location: Seattle
Posts: 1,426
Total Cats: 266
I finally drilled, tapped, & re sealed my pan. This was a first for me, so I hope it goes well. I replaced the pickup to oil pump gasket, front & rear half moon gaskets, & used "right stuff" black.

Reply
0
0
03-11-2016, 11:21 PM
#3
Senior Member
Thread Starter
iTrader: (2)
Join Date: Nov 2015
Location: Seattle
Posts: 1,426
Total Cats: 266
I was cleaning out my HLAs & shot one of those microscopic check valve springs out into the wild blue yonder. It took me about half an hour, but I found it. Thanks for the miracle mr jebus.
Reply
1
1
03-12-2016, 12:36 PM
#4
Senior Member
Thread Starter
iTrader: (2)
Join Date: Nov 2015
Location: Seattle
Posts: 1,426
Total Cats: 266
For those of you who have refurb'd HLAs, do you put them back in limp or hard? I've been filling the inner cylinder completely with oil, which makes the HLA go full staff. I feel like this will eliminate any clatter on first start, I just don't know what it will do to valve seating.
Reply
0
0
03-14-2016, 01:33 AM
#6
Senior Member
Thread Starter
iTrader: (2)
Join Date: Nov 2015
Location: Seattle
Posts: 1,426
Total Cats: 266
Pulled a bonehead move today. I threaded an oil feed adapter into the OEM oil feed port on the driver's side of my '94 block, not the oil pressure sensor port on the passenger side where it belongs. The adapter is threaded for 1/8" BSPT. It doesn't look anything like the thread on the OEM port on the driver's side, but I had pipe thread goo all over the threads so i just didn't notice. Fortunately, the adapter was considerably softer metal than the block, so all the tread damage was on the adapter.
Oh well, it's only $25 bucks for a nice replacement. I'm sure I'll brake more expensive bits before it's all over.
Here's where I picked up the replacement:
Trackspeed Oil Feed Adapter
Oh well, it's only $25 bucks for a nice replacement. I'm sure I'll brake more expensive bits before it's all over.
Here's where I picked up the replacement:
Trackspeed Oil Feed Adapter
Reply
0
0
 03-14-2016, 02:20 AM
#8
Senior Member
Thread Starter
iTrader: (2)
Join Date: Nov 2015
Location: Seattle
Posts: 1,426
Total Cats: 266
I got the oil lines from Lars for one of the MK turbo kits. It didn't occur to me that it would pull oil from the pressure sensor because I had the convenient hot side ports available. It makes sense for a kit though, as only a few years have the hot side oil port.
I saw a pic of a delta IC you posted a while back that looked pretty butt. Even so, the CX IC looks about half as dense as the turbulators on my OEM STI IC.
I saw a pic of a delta IC you posted a while back that looked pretty butt. Even so, the CX IC looks about half as dense as the turbulators on my OEM STI IC.
Reply
0
0
03-14-2016, 09:42 AM
#9
mkturbo.com

iTrader: (24)
Join Date: May 2006
Location: Charleston SC
Posts: 15,194
Total Cats: 1,687
Because I keep cost low by minimizing parts inventory. Also the port on the driver side is a weird *** thread pitch that my hydraulic shop does not carry a fitting for.
Reply
0
0
 03-15-2016, 09:02 PM
#11
Senior Member
Thread Starter
iTrader: (2)
Join Date: Nov 2015
Location: Seattle
Posts: 1,426
Total Cats: 266
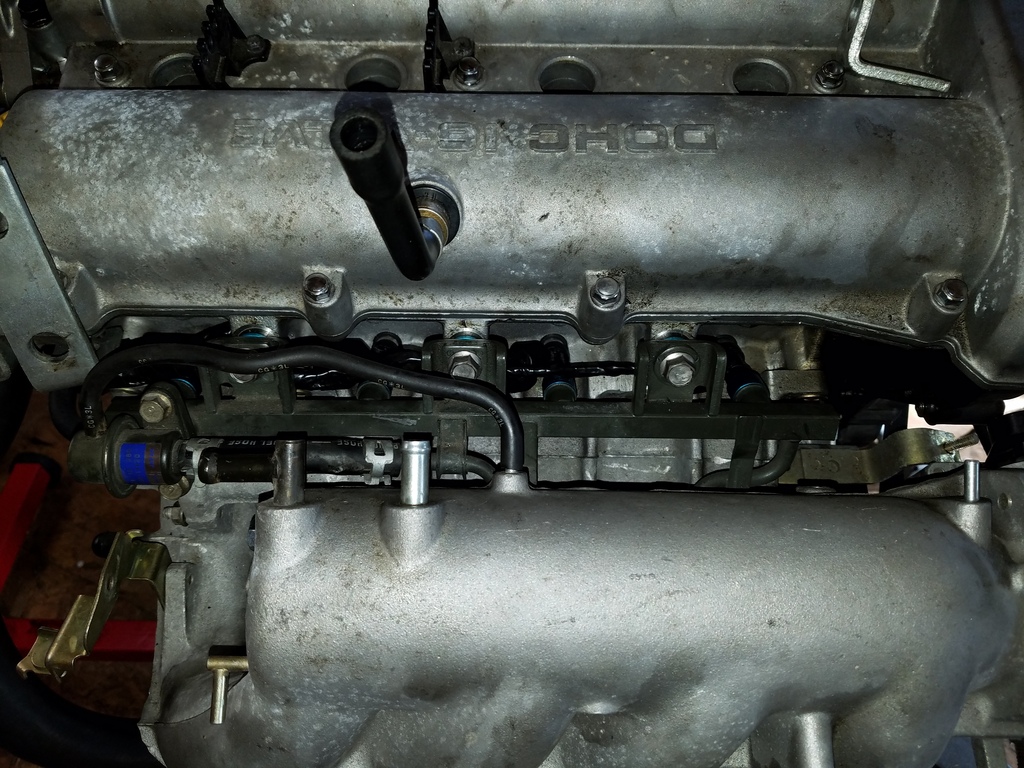
Kinda hard to see, but the FF injectors & rewired harness went in. I had to extend the lead for the single wire sensor in the head to accommodate the coolant reroute.

Reply
0
0
04-18-2016, 06:24 PM
#12
Senior Member
Thread Starter
iTrader: (2)
Join Date: Nov 2015
Location: Seattle
Posts: 1,426
Total Cats: 266
Started the swap, and started breaking things. I mashed my TPS, so I could use one if anyone has an extra lying around.
I also noticed that I busted a sway bar end link (which explains a lot), so I used it as an excuse to upgrade to RB 15/16” solid front/14mm rear & supermiata end links. Combined with the vmaxx coils, the new setup will give me a 59.2% FRC, & 2096 lb-ft/deg roll stiffness.
I also noticed that I busted a sway bar end link (which explains a lot), so I used it as an excuse to upgrade to RB 15/16” solid front/14mm rear & supermiata end links. Combined with the vmaxx coils, the new setup will give me a 59.2% FRC, & 2096 lb-ft/deg roll stiffness.
Reply
0
0
04-22-2016, 03:17 PM
#13
Senior Member
Thread Starter
iTrader: (2)
Join Date: Nov 2015
Location: Seattle
Posts: 1,426
Total Cats: 266
Engine & transmission are out. VLSD is swapped out for the torsen, & the diff/single piece CV's are installed. The driver's side rear axle nut was so seized that I ended up shearing something internally in the old CV after I gave it hell with a 6 ft breaker bar. I ended up pulling the whole CV, lag bolting the inner flange to a fence post, cutting about 3/4 of the way into the axle nut with a 4" angle grinder, then giving it hell with the 6" breaker bar. Luckily, the CV wasn't seized in the hub.
I've got to rewire my WBO2 to move the controller out of the engine bay so Brain doesn't berate me (also so I don't cook it when the turbo goes in), wire in EBCS, and wire up my MS & wire harness for sequential injection. I have a '93 Cali injector harness on the 1.8 now, and I will need to swap out connectors for the TPS, & the main input connector to the injector harness on the car side. I'm also putting in a refurb kit for the clutch hydraulics. I can't wait to eliminate the hard line to the slave cyl. The clutch hard line mounting bracket that's common to the bell housing & starter is one of my least favorite parts of the car to work on. That and the rear CV/hubs. Those really suck.
I've got to rewire my WBO2 to move the controller out of the engine bay so Brain doesn't berate me (also so I don't cook it when the turbo goes in), wire in EBCS, and wire up my MS & wire harness for sequential injection. I have a '93 Cali injector harness on the 1.8 now, and I will need to swap out connectors for the TPS, & the main input connector to the injector harness on the car side. I'm also putting in a refurb kit for the clutch hydraulics. I can't wait to eliminate the hard line to the slave cyl. The clutch hard line mounting bracket that's common to the bell housing & starter is one of my least favorite parts of the car to work on. That and the rear CV/hubs. Those really suck.
Reply
0
0
04-26-2016, 05:15 PM
#14
Senior Member
Thread Starter
iTrader: (2)
Join Date: Nov 2015
Location: Seattle
Posts: 1,426
Total Cats: 266
I'm wiring up the harness for sequential injection. My intent is to use 18 AWG TXL to run two extra wires for INJ3 & INJ4 from the DB15 on the MS, to the connector on the injector harness. Does anyone think this wire is too feeble to hold in the smoke for this application? I can't imagine the run will exceed 5 ft. 18 gauge TXL is what the EV14 pigtails use, but the OEM injector harness wires are all AVS-1.25: SWS Wires and Cables for Automobiles
Reply
0
0
04-30-2016, 10:30 AM
#17
mkturbo.com
iTrader: (24)
Join Date: May 2006
Location: Charleston SC
Posts: 15,194
Total Cats: 1,687
Change your required fuel to go from the 1.6 engine to 1.8 and then everything else should be pretty close. There is nothing else major that you should really need to change. This is assuming you already had the EV14 injectors running on the 1.6 engine.
Reply
0
0
04-30-2016, 11:11 AM
#19
Senior Member
Thread Starter
iTrader: (2)
Join Date: Nov 2015
Location: Seattle
Posts: 1,426
Total Cats: 266
Thanks- I found the shards of mine & humpdy-dumpdied it back together. We'll see how it holds.
By the way, I grew up in Aurora. Probably caused trouble in Oregon City once or twice...
By the way, I grew up in Aurora. Probably caused trouble in Oregon City once or twice...
Reply
0
0
05-01-2016, 02:15 AM
#20
Senior Member
Thread Starter
iTrader: (2)
Join Date: Nov 2015
Location: Seattle
Posts: 1,426
Total Cats: 266
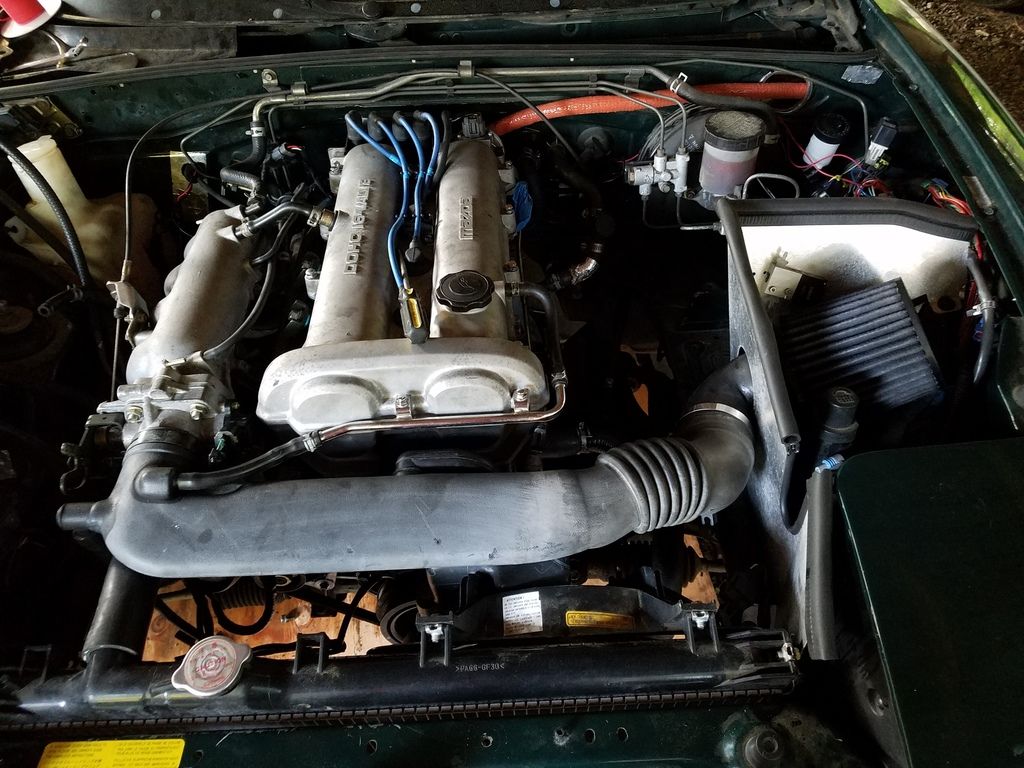
here's the engine in. This is how I'll run it NA at first. That's a FM CAI box. I mounted my ECBS into the inside of the box for future tubros. The oil line is only poking through the cowl to keep it out of the way while I wrench.
Reply
0
0


