
Scaxx builds an E46
 03-29-2016, 12:27 PM
#201
Elite Member

Thread Starter
Join Date: Sep 2015
Location: Seattle, WA
Posts: 1,651
Total Cats: 885
I haven't been able to put the driveshaft in yet since it won't fit, no way of knowing if the bolt holes line up unless I took the rear subframe out. However I have no doubt that the bolt holes would line up. I'll shoot Shandelle an email and see if he has anything to say about it.

Reply
 0
0

0
03-29-2016, 12:44 PM
#202
Elite Member
Thread Starter
Join Date: Sep 2015
Location: Seattle, WA
Posts: 1,651
Total Cats: 885
Pretty sure someone got confused on pricing over at online metals, 5 feet of 4" was $90, 6 was $93, went ahead and bought the extra foot, can always use extra for practice. Now I just have the muffler, y pipe, and slips to buy and all the exhaust material should be done. I think just my exhaust for Audrey is gonna end up costing more than I have into Brad including his cost of purchase, kinda ridiculous.
Reply
1
1
 03-29-2016, 01:01 PM
#204
Elite Member
Thread Starter
Join Date: Sep 2015
Location: Seattle, WA
Posts: 1,651
Total Cats: 885
Probably something like that, although they have 8 foot sticks of it so it wouldn't make sense that they only got 6 foot sticks. Maybe they just had a bunch lying around and knocked the price down some, they've been known to do clearance prices once in a while.
Reply
0
0
03-30-2016, 10:20 PM
#205
Elite Member
Thread Starter
Join Date: Sep 2015
Location: Seattle, WA
Posts: 1,651
Total Cats: 885
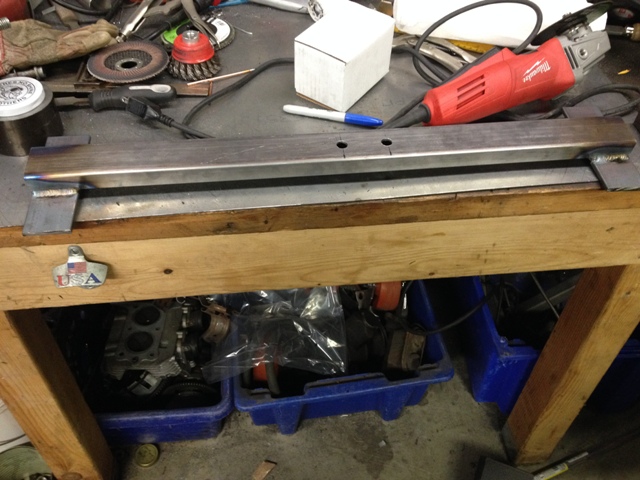
Stopped by online metals today to grab my metal, 4" is pretty decent size. Went home and finished up the trans mount, cut the locator pin on my diff and then looked a little more at exhaust options. I'm about ready to pull the engine back out again which is kinda disappointing but whatever, I think I'll need to pull it twice more. My extended lower balljoints, arp wheel studs, and alignment bolts should get here tomorrow, not sure when my r package tie rod ends are getting here. Not sure at all when my burns order is going through, not too worried about it since I have to pull the engine back out to put the headers on. Oh and I made a nice little shifter in solidworks, gonna make an aluminum extender to put it nice and close to the steering wheel and then try to get some time away from our rover project at the machine shop.
Edit: The exhaust should fit fine, gonna try to tilt the muffler a little bit since the frame rail is in the way but it looks like it'll only exit and inch or two higher than originally planned which is still in a good spot. Pretty excited to see how much it weighs, the burns "muffler" is only 3 lbs. I'm hoping for only a few lb heavier than the stock exhaust set up but we'll see. Speaking of, anyone know the stock weight of the exhaust? I have a stock cat-back sitting in my scrap pile but I don't really feel like pulling the other half off my car just to stroke my dick about how much weight I was able to save.
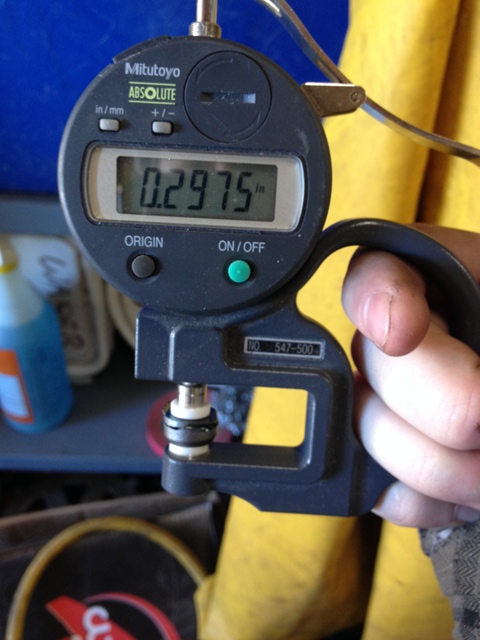
How much I cut off the locator pin to make it fit, well I guess that and the thickness of the cut off blade but you get the idea.
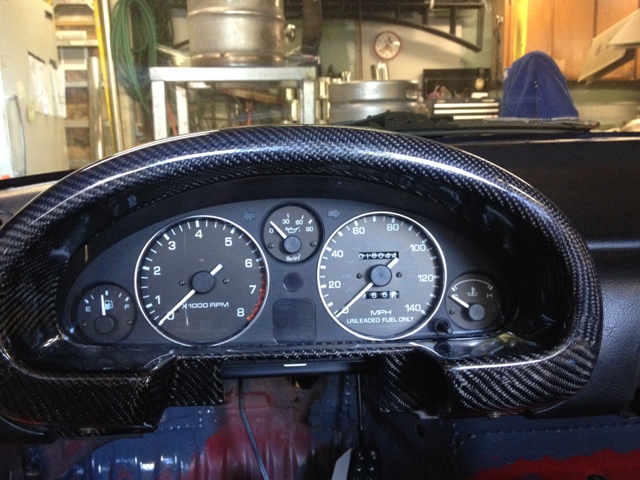
Threw my gauge cover on with the gauges to see how it fits, needs a touch of trimming on the top of the gauges but other than that it fits well.
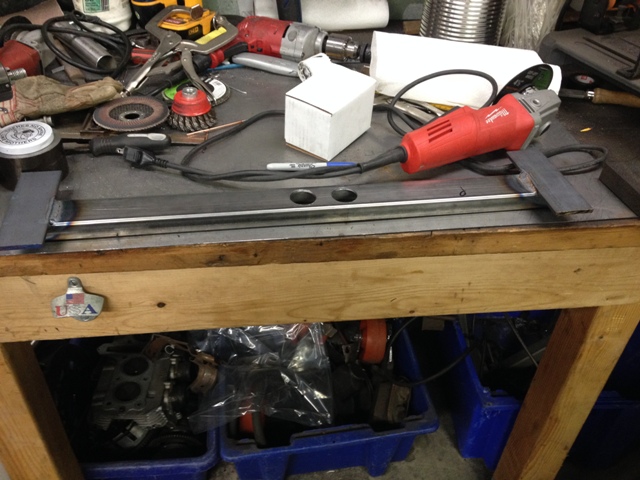
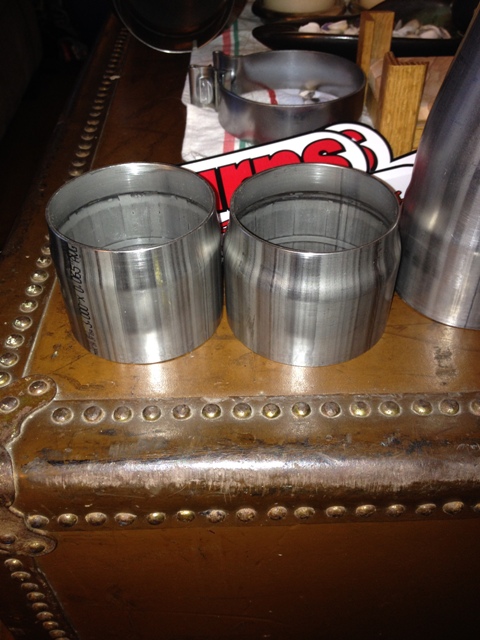
Cut about 4-5" off the end of the tube so I had a feeler that I could use to see what would fit where
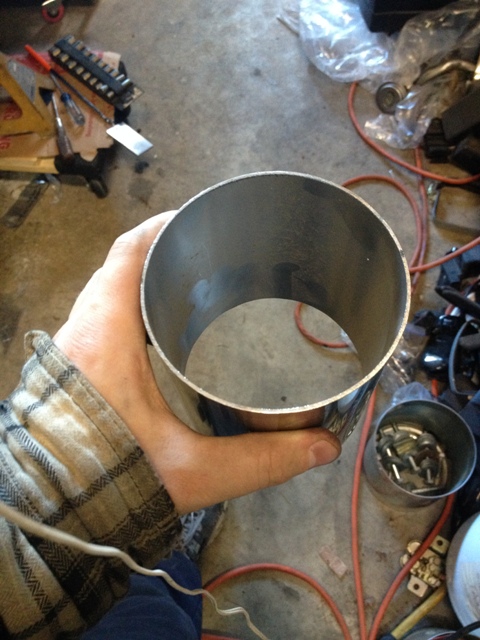
This is the size of the 4" vs the 3"
Top of the trans mount
Bottom of the trans mount
Edit: The exhaust should fit fine, gonna try to tilt the muffler a little bit since the frame rail is in the way but it looks like it'll only exit and inch or two higher than originally planned which is still in a good spot. Pretty excited to see how much it weighs, the burns "muffler" is only 3 lbs. I'm hoping for only a few lb heavier than the stock exhaust set up but we'll see. Speaking of, anyone know the stock weight of the exhaust? I have a stock cat-back sitting in my scrap pile but I don't really feel like pulling the other half off my car just to stroke my dick about how much weight I was able to save.
How much I cut off the locator pin to make it fit, well I guess that and the thickness of the cut off blade but you get the idea.

Threw my gauge cover on with the gauges to see how it fits, needs a touch of trimming on the top of the gauges but other than that it fits well.

Cut about 4-5" off the end of the tube so I had a feeler that I could use to see what would fit where

This is the size of the 4" vs the 3"

Top of the trans mount

Bottom of the trans mount

Reply
5
5
 04-01-2016, 12:01 AM
#207
Elite Member
Thread Starter
Join Date: Sep 2015
Location: Seattle, WA
Posts: 1,651
Total Cats: 885
I can never say no to cats!
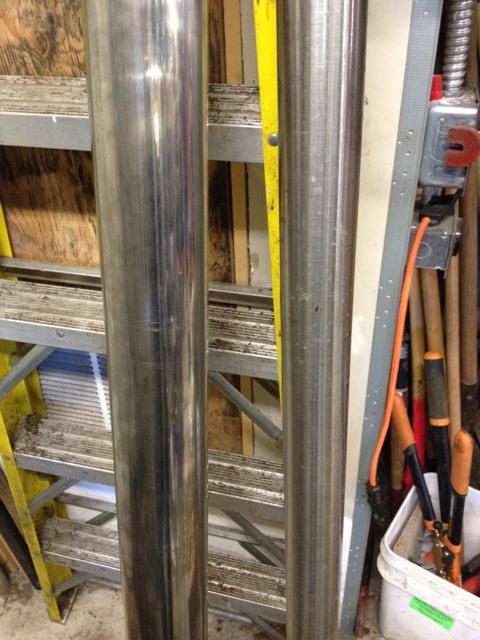
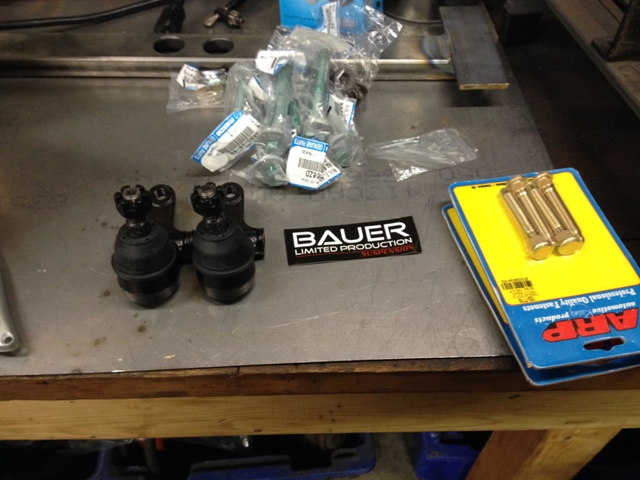
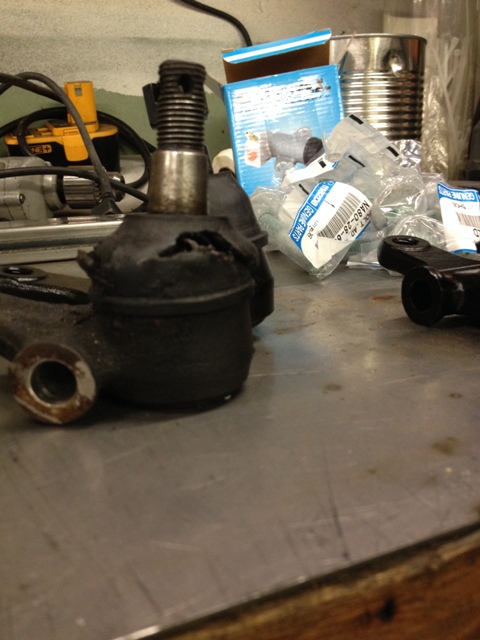
Got some more stuff today. Alignment bolts, bauer ltd extended balljoints, and some arp studs for the front. The balljoints are pretty cool, I did a quick measure with the magnetic angle finder thing and it looked like about an extra degree, but that's also at full droop, not sure if it'll make more as it compresses, seems like it would? Either way, a free (well not really free) degree is nice. They are definitely a touch longer though, I lined them up on the bench took a picture.
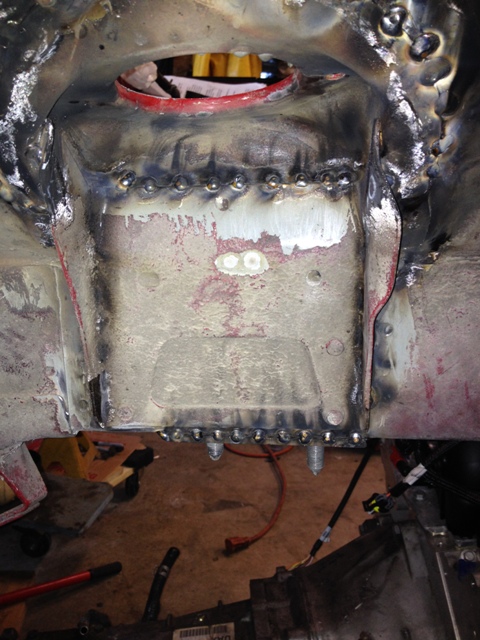
I then proceeded to pull the engine out of the car again. There's a lot of stuff that I need to do that involves the engine not being in the engine bay. In fact the headers don't really go in without the engine being out of the subframe or the whole assembly out of the car so just to start fabbing the exhaust I needed to pull it anyway. But that leads me to my next point. I had skipped/said **** it on the seam welding on the underside of the passenger shock tower back when I was doing all the seam welding. I was pretty tired of that **** at the time and just decided I was done and I was gonna move on. But the fact that I didn't fully finish when I was so close has bugged me for some time now. So today after pulling the engine I decided to fix that and finally finish the seam welding. Makes me feel a lot better that I didn't let that little detail go. I absolutely positive I wouldn't have felt it, especially at my experience level (or rather inexperience level) but nonetheless, it's done now. After I finish a little more grind and probably some other small welds I'll be covering the whole engine bay in por15 and then getting it ready for real paint. I'll be painting it myself since I'm running out of money real quick and I don't have the cash to pay someone to do it. Hoping to get the por15 on by the weekend since my other classes will start ramping up soon.
Oh and I just got a shipping notification from burns! Lightweight stainless steel sexiness should be here soon!
Got some more stuff today. Alignment bolts, bauer ltd extended balljoints, and some arp studs for the front. The balljoints are pretty cool, I did a quick measure with the magnetic angle finder thing and it looked like about an extra degree, but that's also at full droop, not sure if it'll make more as it compresses, seems like it would? Either way, a free (well not really free) degree is nice. They are definitely a touch longer though, I lined them up on the bench took a picture.


I then proceeded to pull the engine out of the car again. There's a lot of stuff that I need to do that involves the engine not being in the engine bay. In fact the headers don't really go in without the engine being out of the subframe or the whole assembly out of the car so just to start fabbing the exhaust I needed to pull it anyway. But that leads me to my next point. I had skipped/said **** it on the seam welding on the underside of the passenger shock tower back when I was doing all the seam welding. I was pretty tired of that **** at the time and just decided I was done and I was gonna move on. But the fact that I didn't fully finish when I was so close has bugged me for some time now. So today after pulling the engine I decided to fix that and finally finish the seam welding. Makes me feel a lot better that I didn't let that little detail go. I absolutely positive I wouldn't have felt it, especially at my experience level (or rather inexperience level) but nonetheless, it's done now. After I finish a little more grind and probably some other small welds I'll be covering the whole engine bay in por15 and then getting it ready for real paint. I'll be painting it myself since I'm running out of money real quick and I don't have the cash to pay someone to do it. Hoping to get the por15 on by the weekend since my other classes will start ramping up soon.
Oh and I just got a shipping notification from burns! Lightweight stainless steel sexiness should be here soon!


Reply
1
1
04-01-2016, 01:18 AM
#208
Elite Member
Thread Starter
Join Date: Sep 2015
Location: Seattle, WA
Posts: 1,651
Total Cats: 885
Kinda miata related, solidworks is working well on my home computer! (So far at least) Pretty excited since I was real worried that it wouldn't be strong enough for it, we'll see how it does with some bigger simulations but for now it's chugging right along. I have a feeling I'm gonna be losing some sleep now though haha
Reply
0
0
04-01-2016, 11:11 AM
#209
Elite Member
Thread Starter
Join Date: Sep 2015
Location: Seattle, WA
Posts: 1,651
Total Cats: 885
Full stock exhaust with headers and everything looks to be 52 lb after a quick search, that's my number to aim for then. Hoping I can be right around there or even under, one of the big weight gains in the swap is from the exhaust and if I could cut that weight gain down I'd be happy.
Reply
0
0
04-02-2016, 05:14 PM
#210
Elite Member
Thread Starter
Join Date: Sep 2015
Location: Seattle, WA
Posts: 1,651
Total Cats: 885
Currently eating some lunch and then I'm off to put the first coat of paint on the engine bay. My original coat of por15 was came out a little weird in some places so I took it back off and I'm going to do it again. Also going to do the transmission tunnel and trans mount. Then I can do a primer and some actual paint down the road but this gets it started. I can also do a small amount of seam sealer in areas after the first coat is on. I think I may only have to pull the engine one more time after this and then hopefully it'll go in for quite a while. Even though por won't do very much when coated over normal paint I'm just gonna go ahead and do the whole thing so it's a smooth layer, I sanded the whole engine bay down so it should stick well.

Reply
0
0
04-03-2016, 12:09 AM
#211
Elite Member
Thread Starter
Join Date: Sep 2015
Location: Seattle, WA
Posts: 1,651
Total Cats: 885
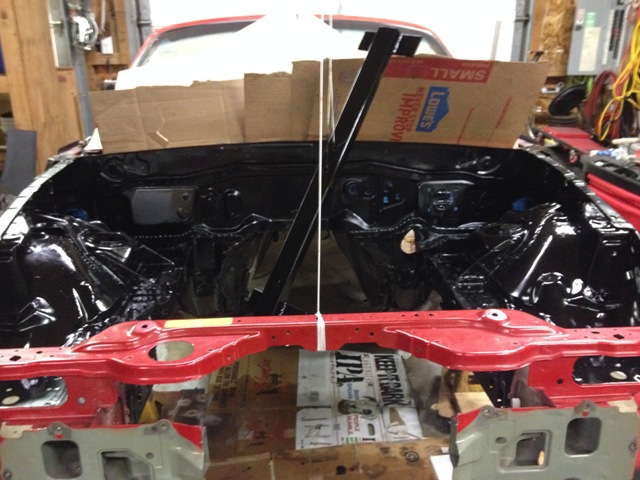
Engine bay is painted, means I can start doing seam sealer soon which is nice. Don't mind the trans mount hanging in the middle, it was the only place I could hang it. Should be a more matte black since the paint is still mostly wet but the finish is decent. Probably wait until spring to finish it, but at least I got the initial layer out of the way.

Reply
0
0
04-03-2016, 08:14 PM
#212
Elite Member
Thread Starter
Join Date: Sep 2015
Location: Seattle, WA
Posts: 1,651
Total Cats: 885
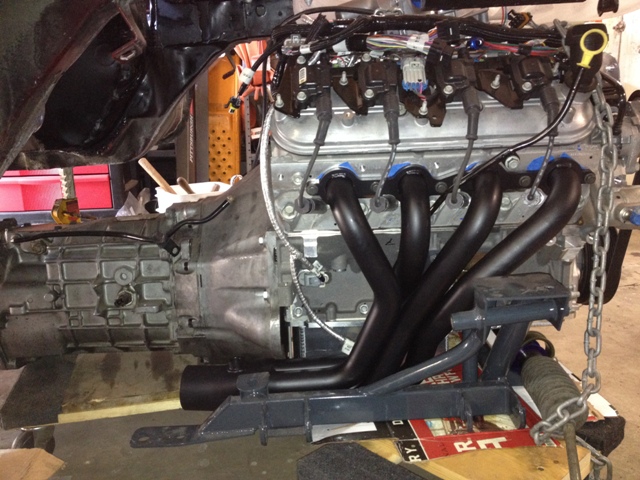
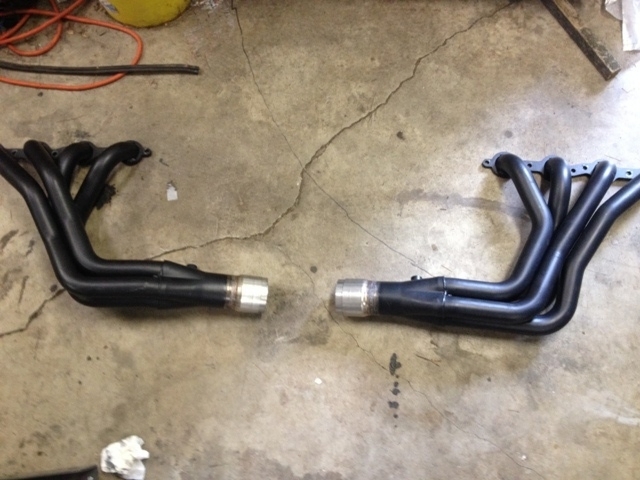
Threw the headers on since I still had never even test fit the passenger side. Pretty sure there's no way to put them in with the engine still in the car, it was tight just slipping in around the subframe. That said they fit well, still need to pick up a starter at some point and make some heat shields. not a big fan of how close the knock sensor on the passenger side is to the headers, need to extend the wiring on both knock sensors I guess, good thing I have an entire box of extra wires!
Also put seam sealer on the welds in the engine bay. My welds weren't symmetrical because I switched techniques half way through and it would drive me nuts looking at them. It's a little bit of weight that I don't like adding but if it'll keep me sane then so be it. Probably gonna sand them a little bit after they dry but probably not a whole ton, mostly just to get the extra off. Overall happy with how it turned out.
Burns order should be here in the next two days and once my systems midterm is over I can throw the engine back in and start fabbing the exhaust. Getting pretty excited about this car, feel like I'm getting closer finally.


Reply
1
1
04-04-2016, 09:42 AM
#213
everyone has had a real issue with the headers cooking the factory starters. if you find yourself replacing batteries, stop yourself because the starter is going out.
i wound up ordering a power master mini starter. it relocates the starter much higher as it uses a gear reduction for high compression motors. this moves the electric motor up and out of the way. after i switched my starting issues where gone.
i wound up ordering a power master mini starter. it relocates the starter much higher as it uses a gear reduction for high compression motors. this moves the electric motor up and out of the way. after i switched my starting issues where gone.
__________________
OG Racing
Your Source For Motorsports Safety Equipment
WWW.OGRACING.COM
800.934.9112
703.430.3303
info@ogracing.com
OG Racing
Your Source For Motorsports Safety Equipment
WWW.OGRACING.COM
800.934.9112
703.430.3303
info@ogracing.com
Reply
1
1
04-04-2016, 01:09 PM
#214
Elite Member
Thread Starter
Join Date: Sep 2015
Location: Seattle, WA
Posts: 1,651
Total Cats: 885
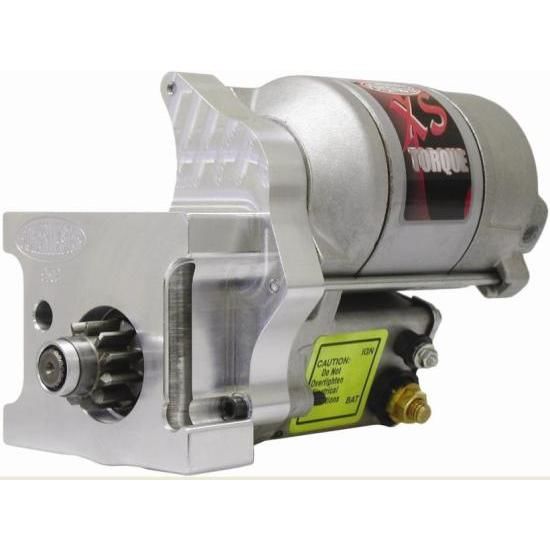
Powermaster XS Torque Starters 9509 - Free Shipping on Orders Over $99 at Summit Racing
This guy then? Looks like a bad *** little starter, that's a lot of torque.
Cool, I had originally set my price for a starter at $250 even though I knew they were much cheaper, happy to see it still falls under that. Still gonna make a heat shield for the starter, sure as hell can't hurt.
This guy then? Looks like a bad *** little starter, that's a lot of torque.
Cool, I had originally set my price for a starter at $250 even though I knew they were much cheaper, happy to see it still falls under that. Still gonna make a heat shield for the starter, sure as hell can't hurt.
Reply
0
0
04-04-2016, 04:33 PM
#215
yep that's it
__________________
OG Racing
Your Source For Motorsports Safety Equipment
WWW.OGRACING.COM
800.934.9112
703.430.3303
info@ogracing.com
OG Racing
Your Source For Motorsports Safety Equipment
WWW.OGRACING.COM
800.934.9112
703.430.3303
info@ogracing.com
Reply
0
0
04-05-2016, 11:04 PM
#216
Elite Member
Thread Starter
Join Date: Sep 2015
Location: Seattle, WA
Posts: 1,651
Total Cats: 885
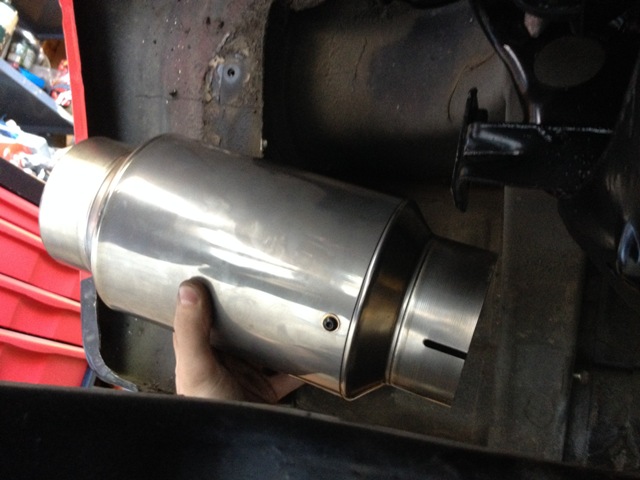
Exhaust stuff came in! I'll let the pictures do most the talking. Really high quality stuff from burns, very happy with it. Looking at it now I may have been able to fit the 17" muffler in but that's alright, it would have been a bit more of a stretch to fit. Should fit just fine and look decent doing it. Not sure if the neighbors will enjoy it, and if it's still too loud then I'll just throw some resonators in but for now this will be the only muffler.
If I bought another $25 worth of stuff it put me in the 5% off and that would more cancel a bit more than the $25 extra I spent, I think it actually covered shipping too. That's the reason for the shirt and the polish (just realized polish isn't in the picture), but here's what I got.
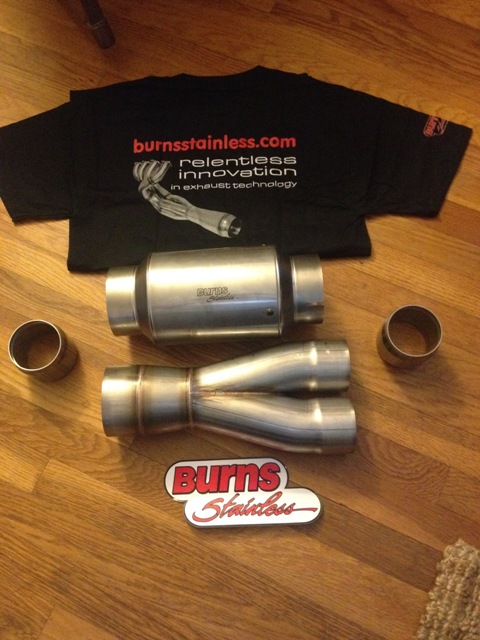
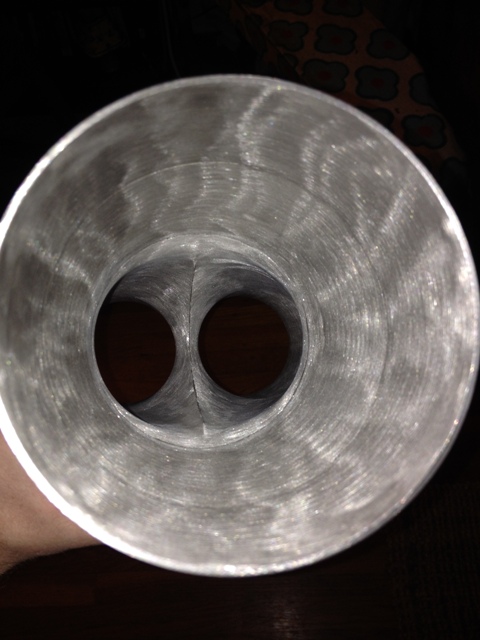
Inside view of the y pipe
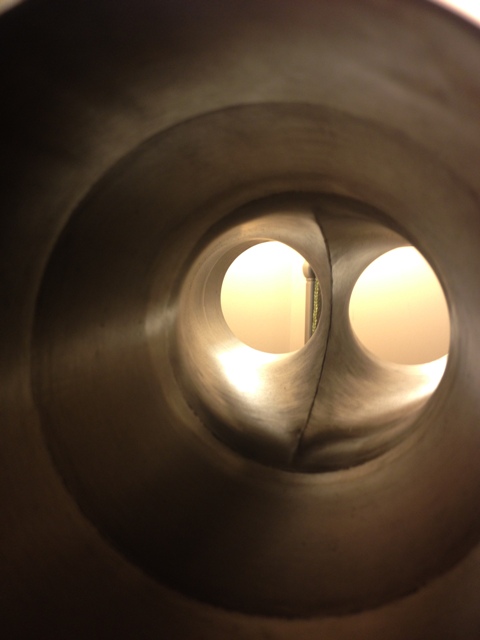
Better inside view (this is why you buy quality ****)
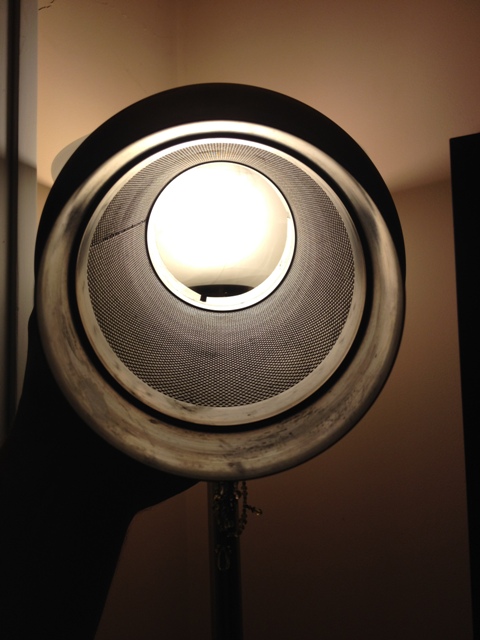
Inside view of muffler
This is one of the double slips
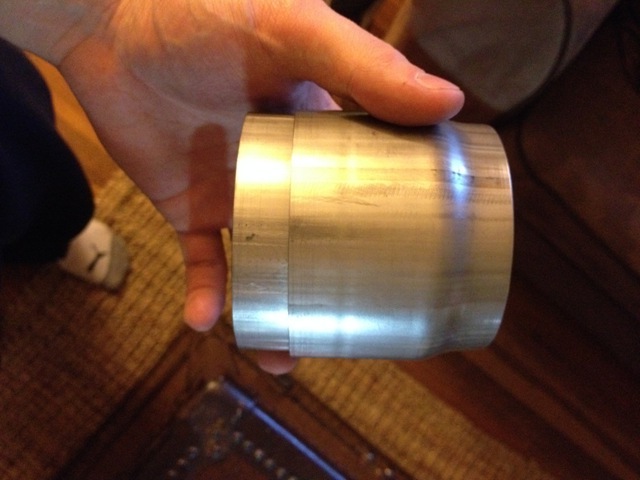
This is the double slip taken apart
Oh and how much this baby weighs:

If I bought another $25 worth of stuff it put me in the 5% off and that would more cancel a bit more than the $25 extra I spent, I think it actually covered shipping too. That's the reason for the shirt and the polish (just realized polish isn't in the picture), but here's what I got.

Inside view of the y pipe

Better inside view (this is why you buy quality ****)

Inside view of muffler

This is one of the double slips

This is the double slip taken apart

Oh and how much this baby weighs:

Reply
1
1
04-06-2016, 04:17 PM
#217
Elite Member
Thread Starter
Join Date: Sep 2015
Location: Seattle, WA
Posts: 1,651
Total Cats: 885
Holy **** my system dynamics teacher's tests are hard (also had him for fluids), ******* brutal. Gonna go work in the garage for a while, goal is to have the engine back in the car today to fab the exhaust, we'll see how it goes.
Reply
1
1
04-07-2016, 10:17 PM
#218
Elite Member
Thread Starter
Join Date: Sep 2015
Location: Seattle, WA
Posts: 1,651
Total Cats: 885
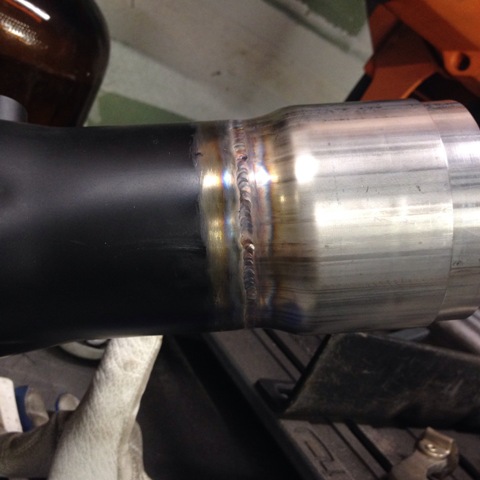
Well my goals were a little too big yesterday, also had to go to a meeting that took up some time, but I got the engine back in today. Got the double slips welded on yesterday, welds came out decent, still need more practice but I prepped them a lot better this time. I also tried out my solar flux, real cool stuff and it protected the back of the weld like a champ, I'll have to try out purging soon.
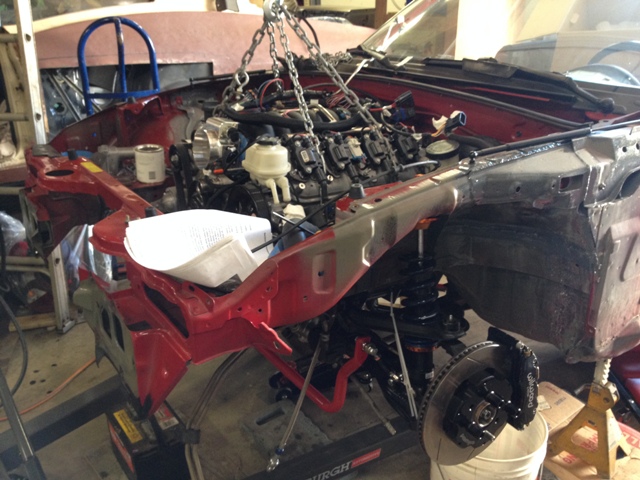
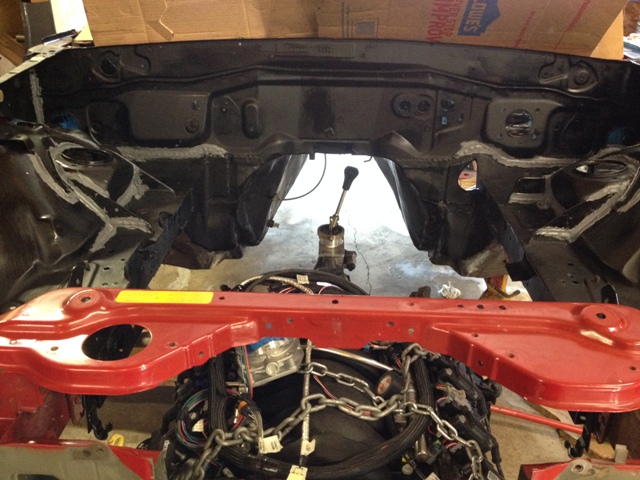
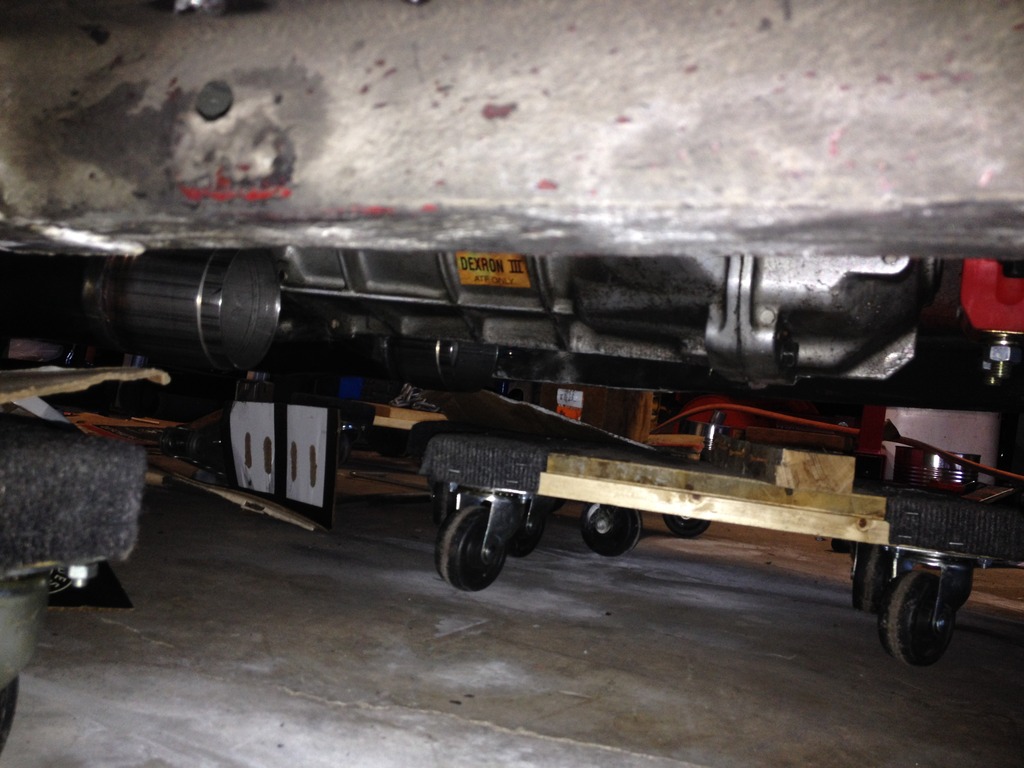
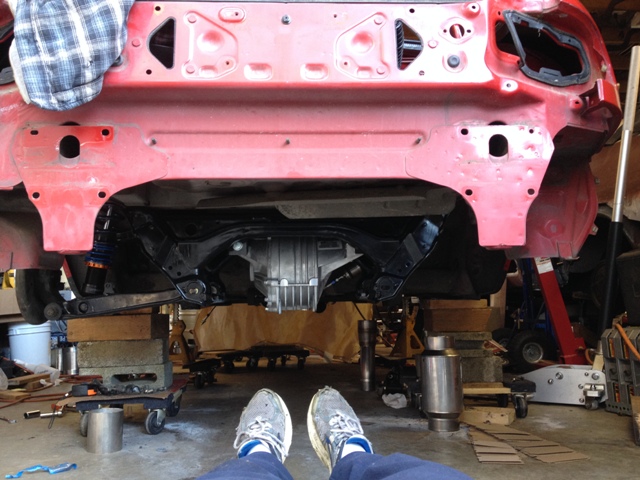
Like I said the engine is back in, looks a lot better sitting in there with the bay partially painted.
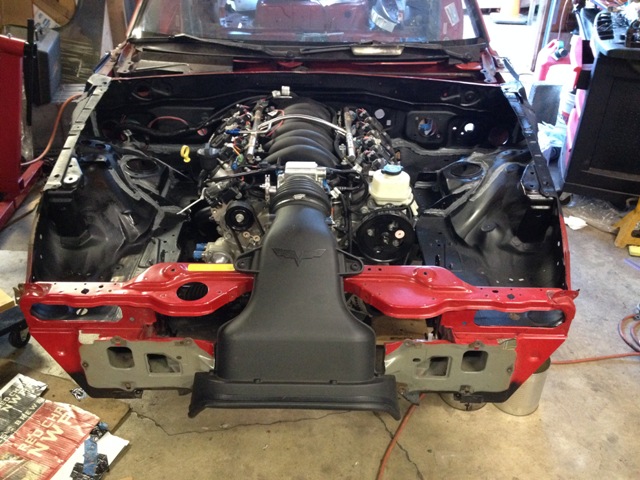
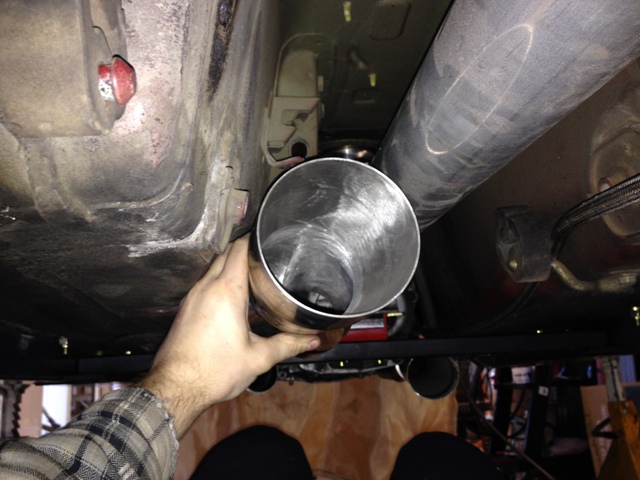
This is how low the exhaust is underneath, the picture make it seem lower than it is but it's probably a solid 3/4"-1" under the frame rails. Not a big fan of it that low but there's not really anything I can do about it. I'll just make sure that the rest of it bends up and is tucked into the trans tunnel better.
Okay question time, Johnny I'm really hoping you have FM's power steering kit, so where does this thing connect to, I've got the other side connected to the rack but I have no idea where this plugs in or if there's another hose that goes to it or what's going on. Really shouldn't be that complicated, it's just a few lines but I cant seem to figure it out. And the second picture is the output of the power steering pump right? Maybe I'm just losing my mind haha

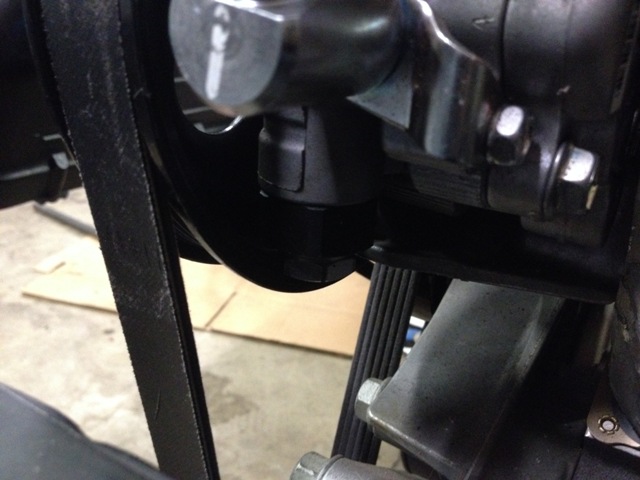
If I can't get it figured out I'll just have to give fm a call one of these days.


Like I said the engine is back in, looks a lot better sitting in there with the bay partially painted.

This is how low the exhaust is underneath, the picture make it seem lower than it is but it's probably a solid 3/4"-1" under the frame rails. Not a big fan of it that low but there's not really anything I can do about it. I'll just make sure that the rest of it bends up and is tucked into the trans tunnel better.

Okay question time, Johnny I'm really hoping you have FM's power steering kit, so where does this thing connect to, I've got the other side connected to the rack but I have no idea where this plugs in or if there's another hose that goes to it or what's going on. Really shouldn't be that complicated, it's just a few lines but I cant seem to figure it out. And the second picture is the output of the power steering pump right? Maybe I'm just losing my mind haha


If I can't get it figured out I'll just have to give fm a call one of these days.
Reply
0
0
04-09-2016, 11:23 AM
#219
Elite Member
Thread Starter
Join Date: Sep 2015
Location: Seattle, WA
Posts: 1,651
Total Cats: 885
Figured out the power steering situation, my initial thought was correct that I have to pull that big *** nut off to put the restrictor in, that thing's on there ******* tight though, tried a bit the other day and when it didn't want to come off I figured maybe I was ******* with the wrong thing so I decided to stop and see if anyone knew.
I need one 90* at the back of my exhaust, I have an overabundance of 4" at this point and a mandrel bend is $110 so I guess I'll make a pie. Kinda ******* sucks with the 4" but I ain't about to drop over $100 on a single bend. Also really wish I had a horizontal band saw for pie cuts but whatever.
I need one 90* at the back of my exhaust, I have an overabundance of 4" at this point and a mandrel bend is $110 so I guess I'll make a pie. Kinda ******* sucks with the 4" but I ain't about to drop over $100 on a single bend. Also really wish I had a horizontal band saw for pie cuts but whatever.
Reply
0
0
04-10-2016, 08:08 PM
#220
Elite Member
Thread Starter
Join Date: Sep 2015
Location: Seattle, WA
Posts: 1,651
Total Cats: 885
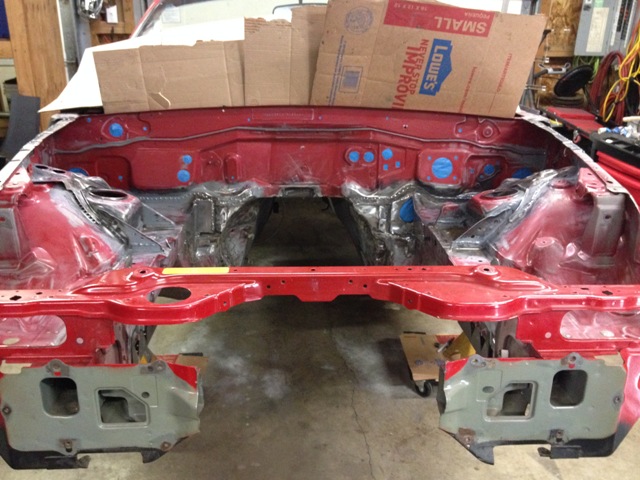
Speak now or forever hold your silence, any other reasons other than the obvious "you're a ******* idiot and are going to absolutely destroy the structure of your car" that I shouldn't cut this? I realize it is a part of the unibody that adds rigidity but it ain't gonna suddenly fall apart if I cut it. That said, does anyone have any major objections?
Edit: I'm gonna cut this within the next day unless someone has something to say, preferably I'd like to cut it by tonight.
Driver side quarter panel where I wanna cut:
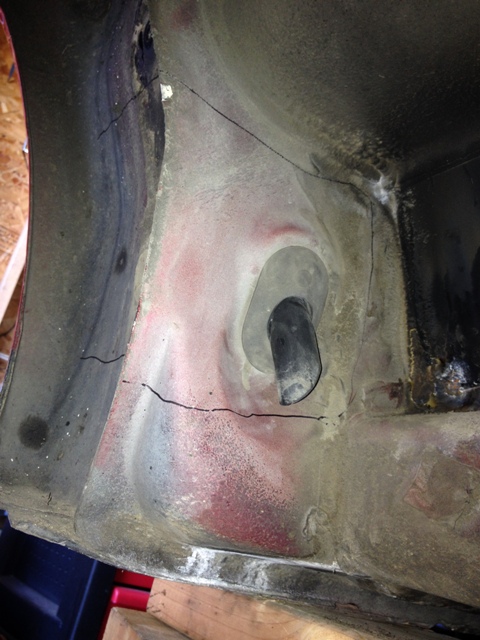
It'll tuck between the frame rail and body once the structure is cut.
Where the y pipe is gonna go, ignore the tube on the pass side, it's just sitting there, that's not actually how it's gonna sit
So much room!
Edit: I'm gonna cut this within the next day unless someone has something to say, preferably I'd like to cut it by tonight.
Driver side quarter panel where I wanna cut:

It'll tuck between the frame rail and body once the structure is cut.

Where the y pipe is gonna go, ignore the tube on the pass side, it's just sitting there, that's not actually how it's gonna sit

So much room!

Reply
0
0


