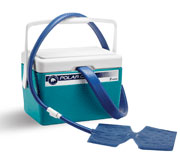
DIY Cool Shirt System
#1
Thread Starter
Joined: Nov 2008
Posts: 21,117
Total Cats: 3,142
From: Tampa, Florida
I was cooking at the last track day at Miami in my multilayer firesuit. Even though it was incredibly uncomfortable, I couldn't see spending $400-600 on a store-bought system. After some research on some DIY suit systems I decided to make my own. I used this article as a model.
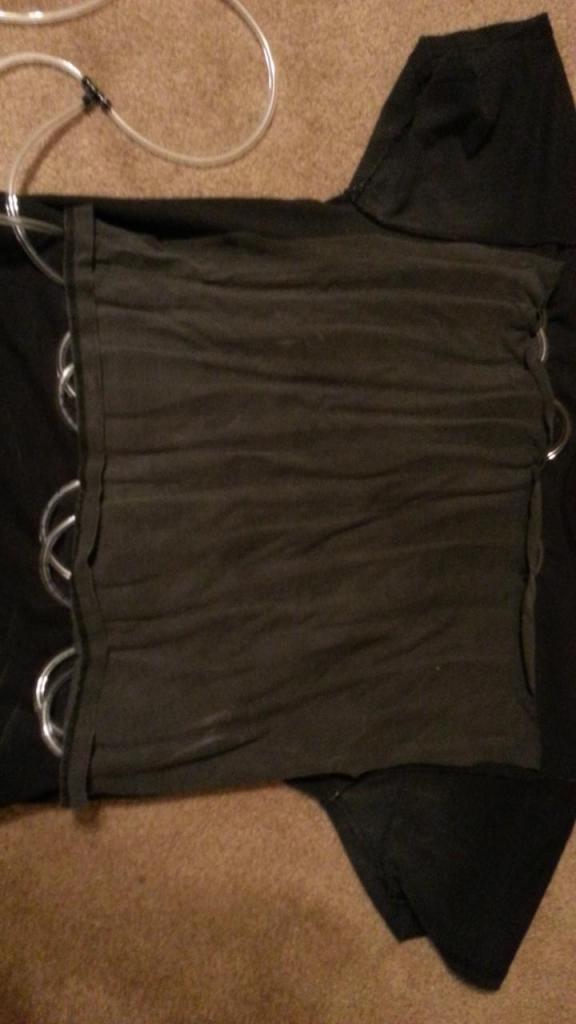
I took a tight fitting t-shirt and cut another shirt up to have panels to sew into it. I used the basic vertical lines stitching pattern shown below on the front and back panels. Then I wove the 1/4 OD vinyl tubing through the shirt panels.
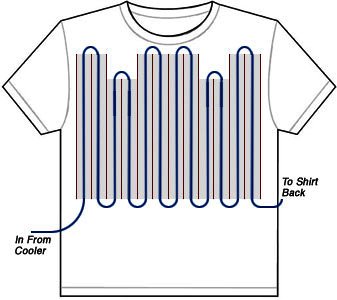
I solved the slow flow problem the other guy was having by using a couple of tees to cut the distance the water had to flow and lowering the resistance.
My shirt:
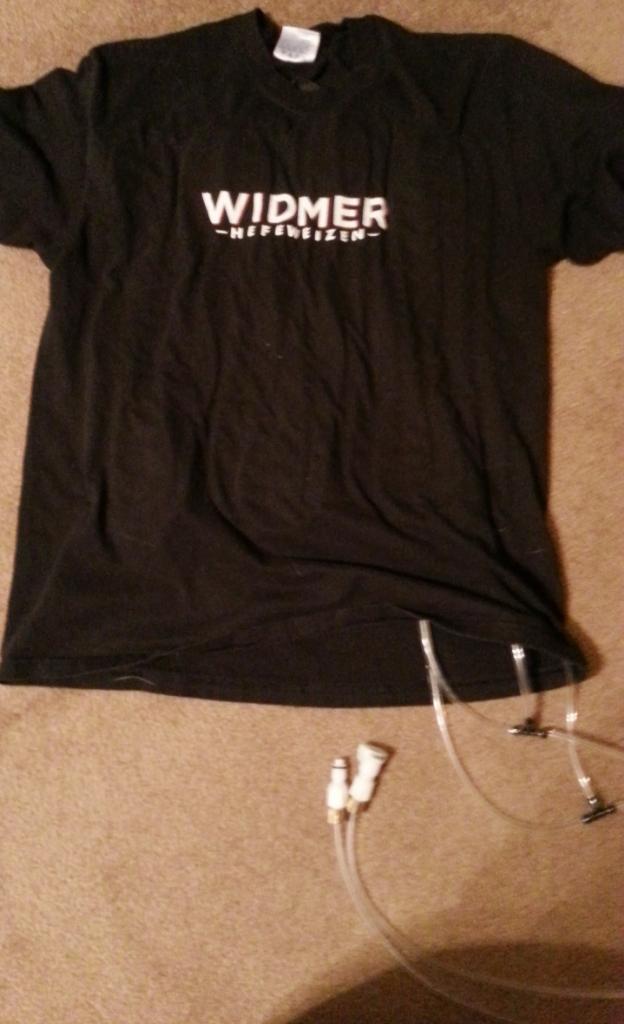
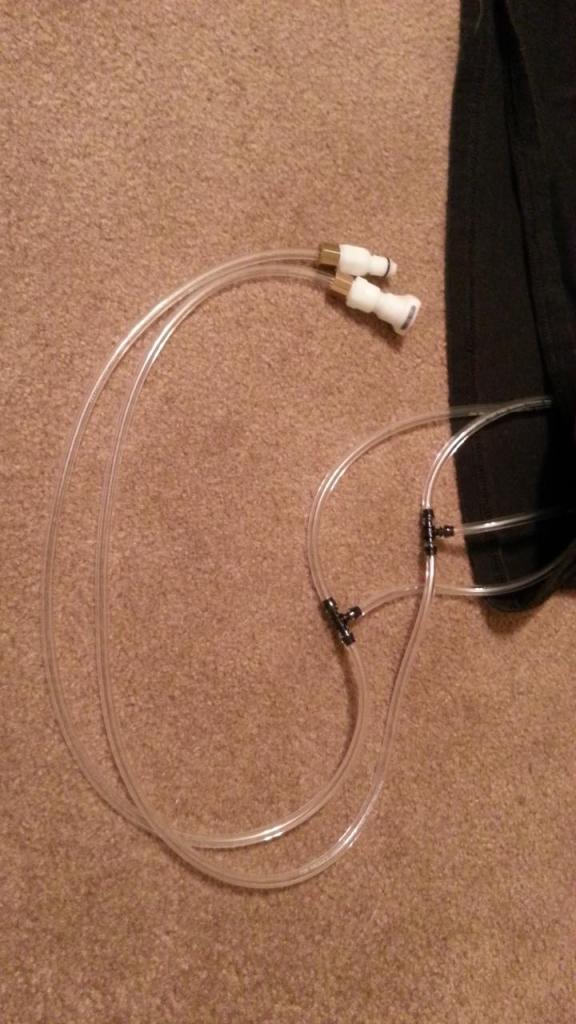
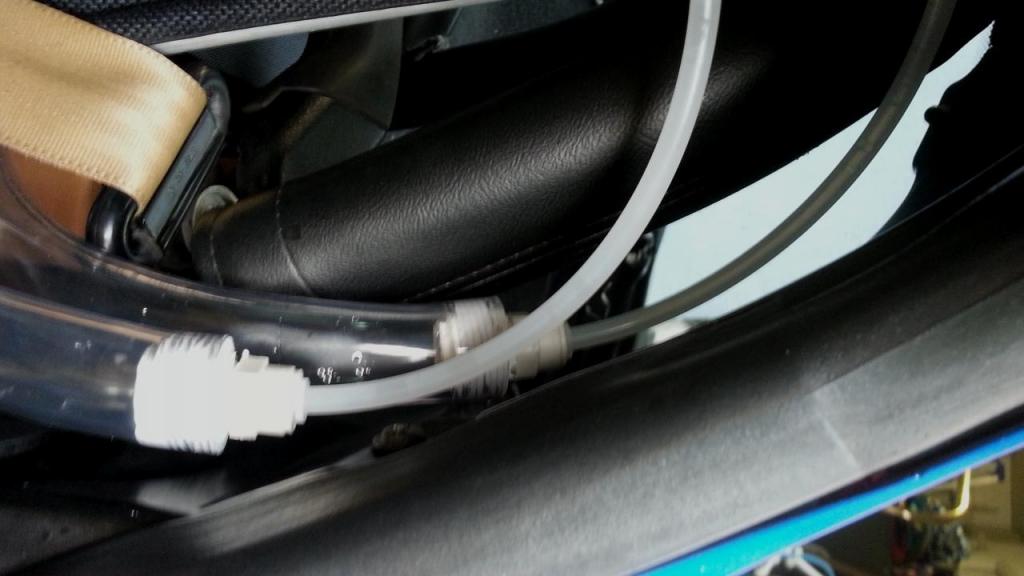
I also used a larger diameter tubing from the pump up to the driver's seat and back to reduce resistance to flow. Then I used a short section of the smaller "ice-maker" 1/4 OD polyethylene tubing where it was to be connected to the shirt. I used push lock fittings from Lowe's to connect the big tubes to the little ones.
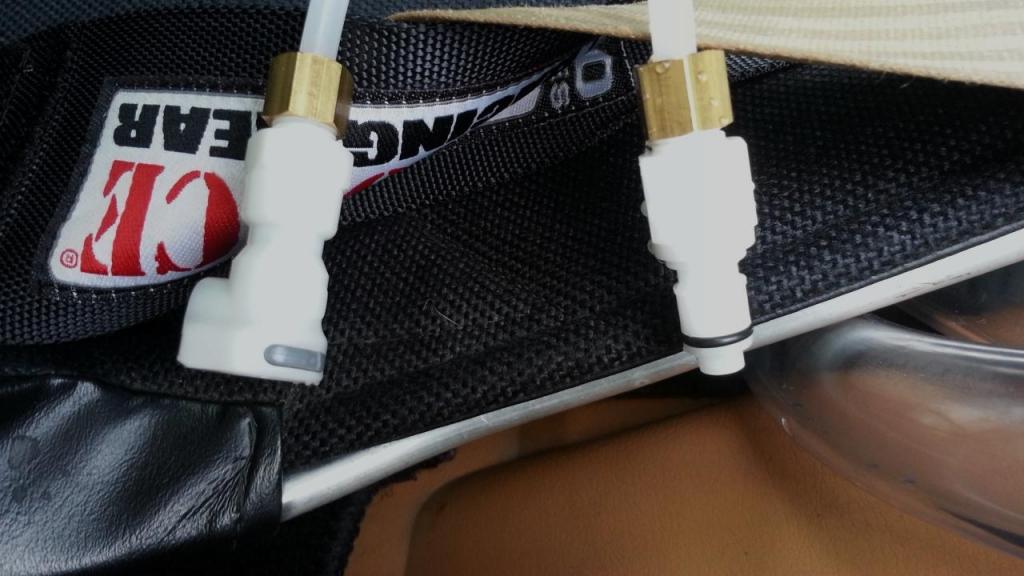
I like the dry break quick couplers from McMaster Carr. Be sure to use one male and one female on the car side and on the shirt side so you can circulate the water without the shirt connected to get the air out of the system.
I bought a $12 Igloo cooler from Dollar General, a $23 800GPM boat bilge pump, some 3/4in ID vinyl tubing, a toggle switch, and some marine sealant to keep the cooler from leaking. I stole power from the fused power location for the rear window defroster (the fuse for it and the power antenna circuit are mounted right next to the power antenna).
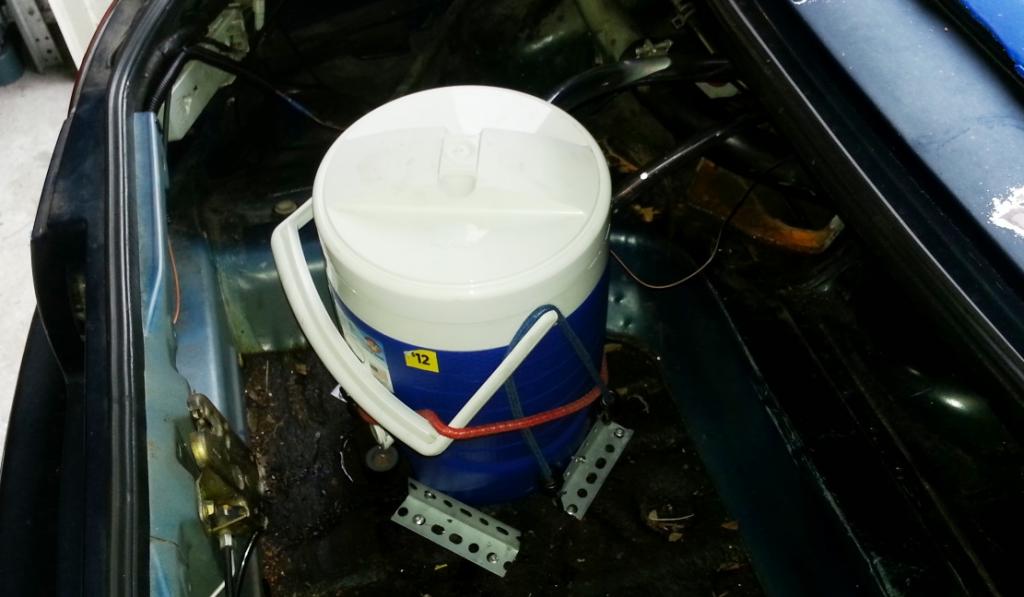
The other guy was complaining about his cooler leaking out of the top during hard cornering and braking, so I purposefully chose one that seals when the lid screws on.
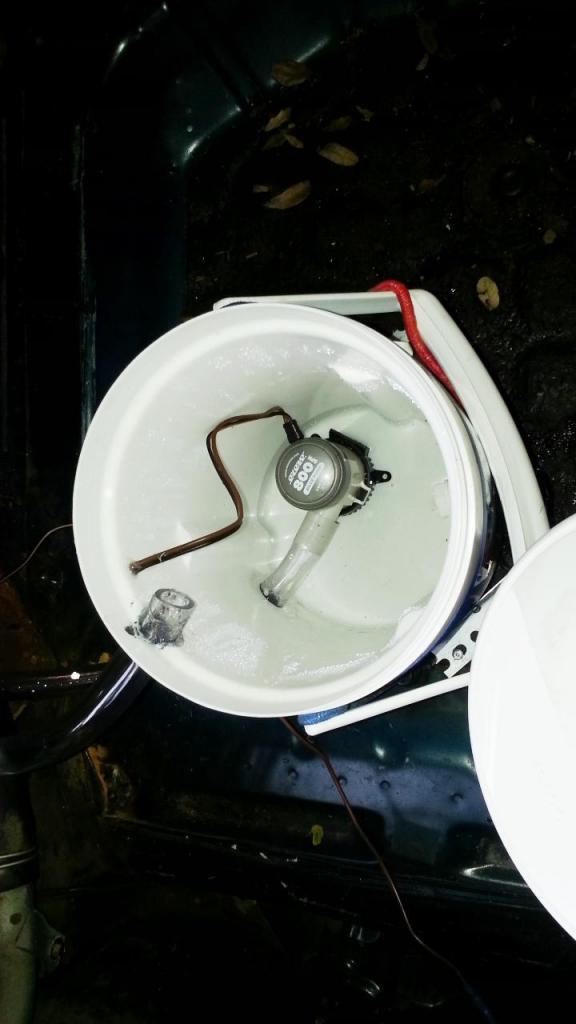
I oriented the "drinking outlet" of the cooler where it would drain out of one of the drain plugs in the trunk floor when it needed to be emptied.
I took a tight fitting t-shirt and cut another shirt up to have panels to sew into it. I used the basic vertical lines stitching pattern shown below on the front and back panels. Then I wove the 1/4 OD vinyl tubing through the shirt panels.

I solved the slow flow problem the other guy was having by using a couple of tees to cut the distance the water had to flow and lowering the resistance.
My shirt:


I also used a larger diameter tubing from the pump up to the driver's seat and back to reduce resistance to flow. Then I used a short section of the smaller "ice-maker" 1/4 OD polyethylene tubing where it was to be connected to the shirt. I used push lock fittings from Lowe's to connect the big tubes to the little ones.

I like the dry break quick couplers from McMaster Carr. Be sure to use one male and one female on the car side and on the shirt side so you can circulate the water without the shirt connected to get the air out of the system.

I bought a $12 Igloo cooler from Dollar General, a $23 800GPM boat bilge pump, some 3/4in ID vinyl tubing, a toggle switch, and some marine sealant to keep the cooler from leaking. I stole power from the fused power location for the rear window defroster (the fuse for it and the power antenna circuit are mounted right next to the power antenna).

The other guy was complaining about his cooler leaking out of the top during hard cornering and braking, so I purposefully chose one that seals when the lid screws on.

I oriented the "drinking outlet" of the cooler where it would drain out of one of the drain plugs in the trunk floor when it needed to be emptied.
#3
Thread Starter
Joined: Nov 2008
Posts: 21,117
Total Cats: 3,142
From: Tampa, Florida
It flows water. I'll be taking it to Sebring this coming weekend. I damn sure hope it works. I almost got heat stroke last Saturday cutting the grass in the middle of the afternoon. Seriously, it took a few days before I was feeling right again.
#5
Thread Starter
Joined: Nov 2008
Posts: 21,117
Total Cats: 3,142
From: Tampa, Florida
I'll get a few of bags of ice in the morning and keep them in a separate cooler. I'll add ice as needed throughout the day. It won't be cold water. It will start off being some water and mostly ice. I've got the toggle switch in the center console until I work out a permanent location for it, so I'll be able to turn the water off and on as necessary to moderate it if it is too cold. Imagine that, too cold. That is such a welcome thought. Wait! The Chateau Elan has ice machines in the hallways of the hotel, right? lol.
#8
Very nice work. One of the MSM guys did a similar project last summer but he decided to use an off the shelf cool shirt and just fabricate up the tank/pump and lines. In Seattle I can't pretend to need one of these like you guys that live where it is actually hot but an 80* ambient can still leave you dripping in sweat after a session and there is no harm in being a little more comfortable, right? 
Cool Shirt DIY

Cool Shirt DIY
#9
very cool, I love the idea of building it into the seat. for de or time trial it would be awesome. Ive not felt the need for something like this but alot of friends run them and swear by them.
the other thing I would say is that I would make something out of aluminum to mount around the sides, like a massive exhaust pipe clamp.
what the heck happened to the bottom of your trunk? looks like a swamp
the other thing I would say is that I would make something out of aluminum to mount around the sides, like a massive exhaust pipe clamp.
what the heck happened to the bottom of your trunk? looks like a swamp
#10
Not as neat as DIY, but as I started to look into this last night, I checked ebay and found a 2 Cool next gen cool shirt display for $60 OBO. I offered $40 (shipped) and won the damn thing. If I paid myself $3/hr, I couldn't make one for that.  Now I guess I need to build the DIY cooler box and pump.
 Now I guess I need to build the DIY cooler box and pump.
#12
Thread Starter
Joined: Nov 2008
Posts: 21,117
Total Cats: 3,142
From: Tampa, Florida
Not as neat as DIY, but as I started to look into this last night, I checked ebay and found a 2 Cool next gen cool shirt display for $60 OBO. I offered $40 (shipped) and won the damn thing. If I paid myself $3/hr, I couldn't make one for that.  Now I guess I need to build the DIY cooler box and pump.
 Now I guess I need to build the DIY cooler box and pump.
Now, I'm no seven year old Malaysian boy but I did make pretty quick work of sewing up the shirt and routing the hose. It wasn't exactly difficult.
Ah, yes! the threaded fittings stuffed into the pipe with sealant. Not the best solution at all. That will likely be reworked but it was late on Sunday and I had few remaining options. I'll be hunting better fitting options for the transition.
#13
I like it  - wouldn't an old fuel pump work, or is it not enough flow? What's amp draw on that bilge pump?
I toyed with making one with an external pump using a proportioning/mixing valve controlled by a PID temp controller to recycle some of the incoming coolant so as not to freeze your *** off - of course that was using dry ice and a glycol coolant.
 - wouldn't an old fuel pump work, or is it not enough flow? What's amp draw on that bilge pump?
I toyed with making one with an external pump using a proportioning/mixing valve controlled by a PID temp controller to recycle some of the incoming coolant so as not to freeze your *** off - of course that was using dry ice and a glycol coolant.
#19
Thread Starter
Joined: Nov 2008
Posts: 21,117
Total Cats: 3,142
From: Tampa, Florida
This was a consideration for me so I used some precautions. I left plenty of slack between the big hoses and the shirt so that I could climb out of the window of the car with a couple of feet to spare if the car was upside down. Additionally, where the big hoses meet the little polyethylene hoses those are push lock fittings with plastic retaining clips. I think a good forceful tug would separate them without much issue. They are far from burly.


