Digital Do it Yourself Camber tools...
#1
Has anyone tried these out?
Camber Caster Wheel Alignment Tool Digital Gauge Accurate to Within 0 1 Degrees | eBay
Seems for the price of a couple/few wheel alignments the price of this tool would be covered...
Anyway, I like the concept just wonder if they work as well as described on our cars.
Camber Caster Wheel Alignment Tool Digital Gauge Accurate to Within 0 1 Degrees | eBay
Seems for the price of a couple/few wheel alignments the price of this tool would be covered...
Anyway, I like the concept just wonder if they work as well as described on our cars.
#3
When I looked in to the phone apps a couple of years ago they had terrible reviews as being inaccurate, hard to use, unrepeatable etc.
That's why this appealed, the reviews on Amazon of the same device were mostly very positive.
While I dont know how exactly, I do know you CAN **** around with string and camber plates etc...this seemed more like something I would do.
String and camber plates, flat floor etc.....seems easier to pay someone.
That and my next mx5 project isn't going to be street legal making getting an alignment more of a hassle than it currently is.
#5
You can build one for far less. Digital levels can be had at any hardware store.
You set toe quickly with toe plates, but setting rear toe requires string (google "string alignment")
Doing any of this requires a completely level surface, which is something that virtually no home garage has and only some commercial spaces have.
You set toe quickly with toe plates, but setting rear toe requires string (google "string alignment")
Doing any of this requires a completely level surface, which is something that virtually no home garage has and only some commercial spaces have.
#6
I jack the car up and place all four wheels on 100mm blocks of wood that sit on the garage floor. The floor slopes in one direction so if I was keen I could make the blocks slightly smaller at one end to compensate... I think it's a fall of only a few mm over the length of the car so I doubt it would have much impact. The main thing is that each end of the car is flat and I tend to check the floor to sill measurement to double check.
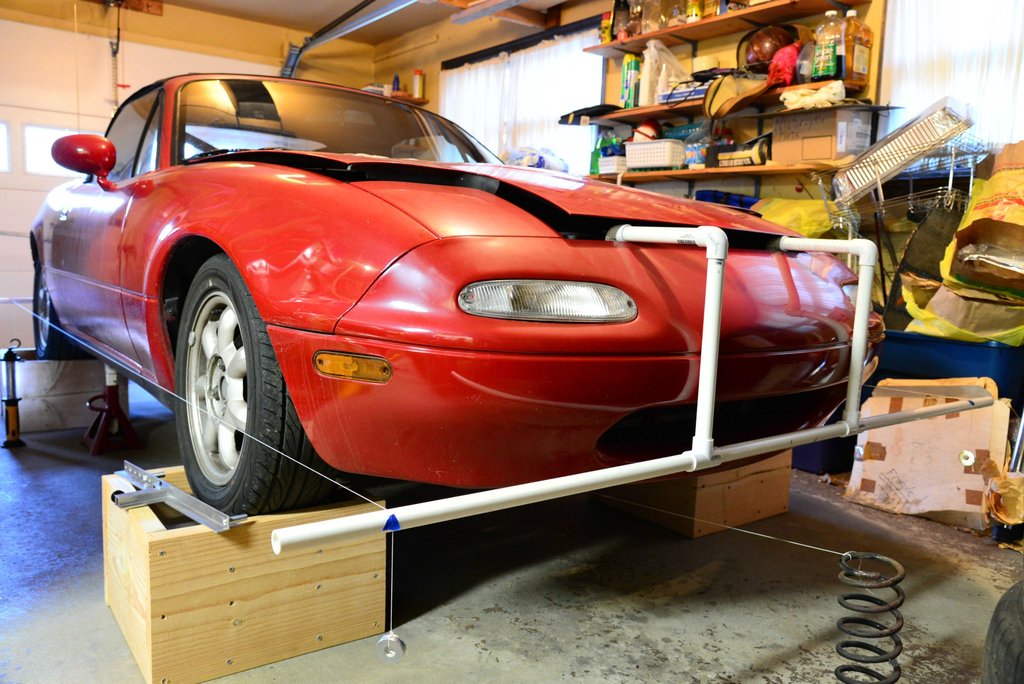
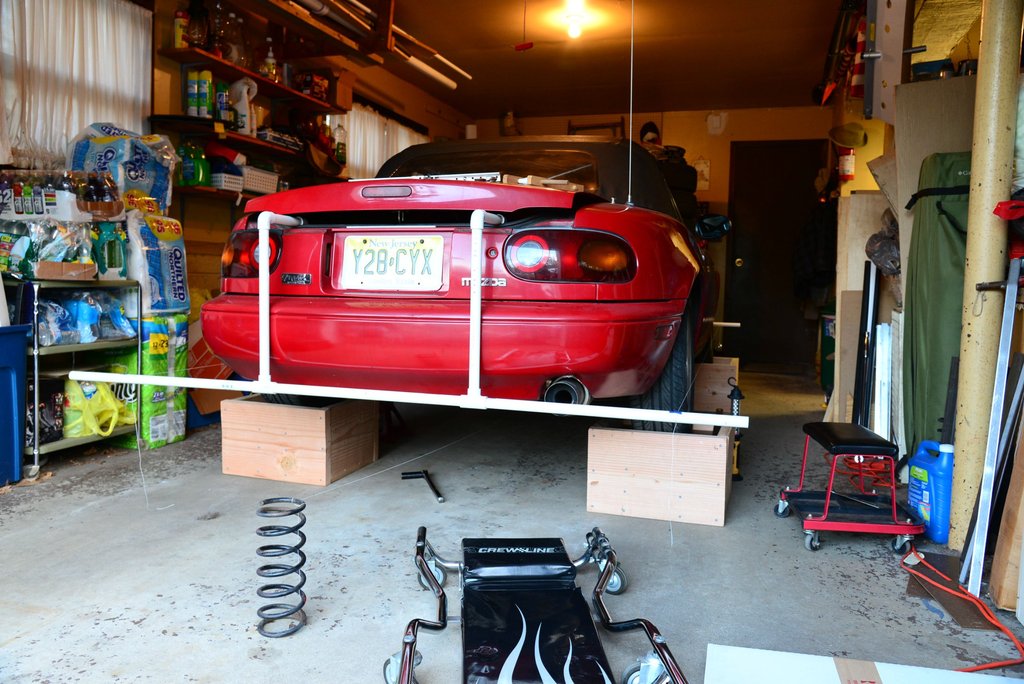
I have two x 2m wide poles that I hang from the front and rear via some straps so that I can run a string line down either side. Total set up time is around 5 mins to get everything parallel and in line. With the car on the blocks, I can just squeeze under the car and adjust the suspension bolts without knocking the stringline. Generally, if I remember, I loosen them whist the car is high in the air before dropping it on to the blocks as I tend to do them up very tight. Once the alignment is right, I then jack the car and tighten everything up tight.
Setting tow is straight forward... just measuring from the rim to the string line. It helps if you have a metal ruler rather than a tape measure.
For camber I use a tall woodworking square standing vertically on the floor between a couple of bricks. The difference at the top and bottom of a 15" rim is about 6.5mm per degree, so 1 degree is 6.5mm, 2 is 13mm, 3 degrees 20mm difference, 3.5 degrees is 24mm. I think that's the dimensions anyway, I'd have to check my book.
As for caster, that I don't check. I'm sure you can do it but with my current setup I'm trying to maximize camber and then I get whatever is left for caster. I did get my car aligned at a shop and both toe and camber were dead on to what I had already set so I know the setup is fairly accurate.
#9
Side to side must be flat but front to back doesn't matter too much as long as it's pretty close.
I just use a spirit level on the floor and check the fall before rolling the car into position. My garage is flat enough not to worry though.
I have to do an alignment soon, maybe tonight if I get time. I'll take some pics so you can see the setup. It's very easy and cheap to make the parts I have. If you have to do lots of alignment its worth setting up something at home to make it easier.
One thing I forgot to mention is after jacking the car I jump up and down on the side steps to settle the shocks. I don't know if actually helps but it can't hurt and its good fun anyway.
#11
I find when the car is on timber blocks the wheels can rotate easy enough for toe adjustments... If you are making massive camber changes then you might need to resettle the car once you make a big change. I'm normally doing minor tweaks with tyres that are around 24psi so there is enough movement in the tyre wall for most adjustments.
I've found it's near on impossible to get to the adjustment bolts without getting the car a bit higher on blocks. I should point out that you can't do alignments on stands as the wheels droop on the suspension and you'll get useless measurements.
I've found it's near on impossible to get to the adjustment bolts without getting the car a bit higher on blocks. I should point out that you can't do alignments on stands as the wheels droop on the suspension and you'll get useless measurements.
#14
You can build one for far less. Digital levels can be had at any hardware store.
You set toe quickly with toe plates, but setting rear toe requires string (google "string alignment")
Doing any of this requires a completely level surface, which is something that virtually no home garage has and only some commercial spaces have.
You set toe quickly with toe plates, but setting rear toe requires string (google "string alignment")
Doing any of this requires a completely level surface, which is something that virtually no home garage has and only some commercial spaces have.
*I align my cars with a husky digital level that sticks by magnet to a wheel adapter I made.
#15
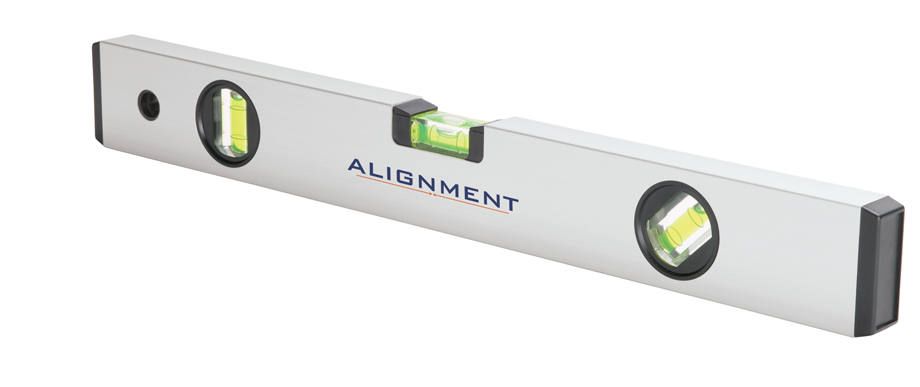
I use this guage and then some wood blocks with slip plates (greased hardboard/garbage bags), some PVC and some string. Total cost was $120 (mostly for lumber and screws).


Thread
Thread Starter
Forum
Replies
Last Post
johnp2
Miata parts for sale/trade
10
01-18-2016 11:09 PM
jcrane82
Miata parts for sale/trade
4
01-08-2016 10:23 PM


 is this from the cia's own handbook on how to interrogate, oops I mean level a floor!


