
Singular Motorsports NA & NB Hood Louvers GROUP BUY
 10-03-2014, 02:13 PM
#181
Senior Member

Join Date: Sep 2011
Location: Sierra Vista, AZ
Posts: 1,303
Total Cats: 330
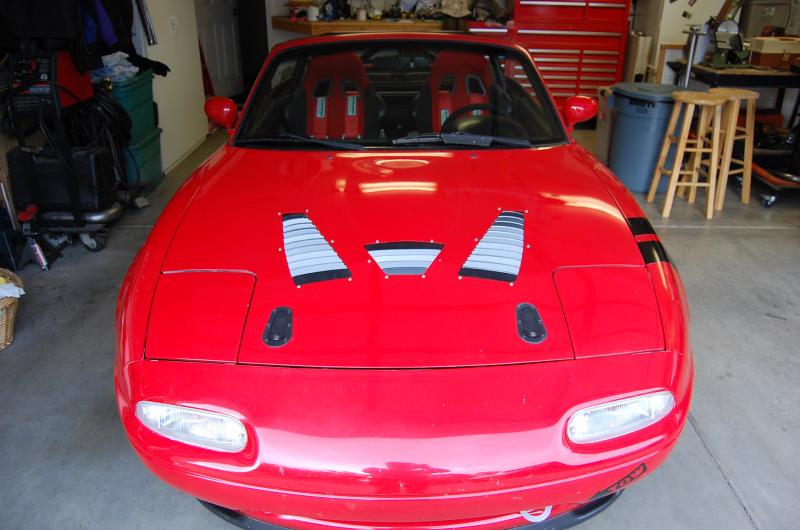
Making progress... wish I had more than just a couple hours each morning to work on this. The multiple layers on the underside of the hood are a PITA. Hope to finish tomorrow, maybe...
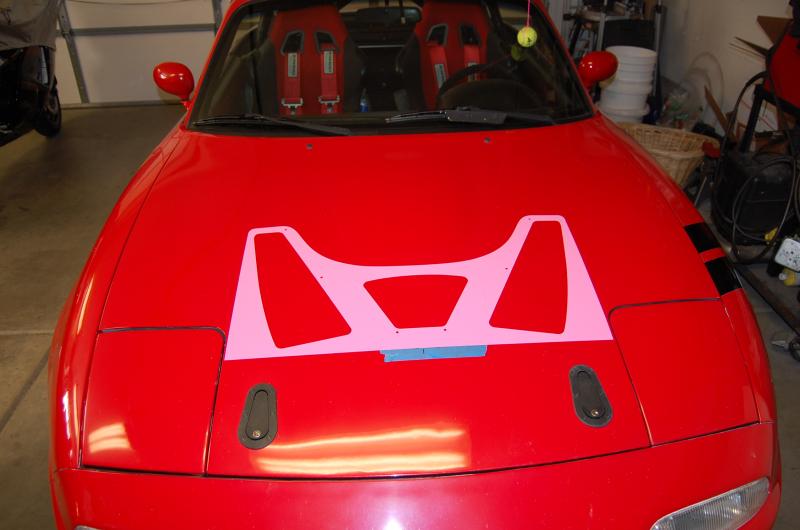
Even though the install is a PITA, this is one of the best products I've worked with. The template is perfect, and the instructions well thought out and properly detailed. Looking forward to more unique and innovative products!


Even though the install is a PITA, this is one of the best products I've worked with. The template is perfect, and the instructions well thought out and properly detailed. Looking forward to more unique and innovative products!

Reply
 0
0

0
10-06-2014, 10:11 AM
#182
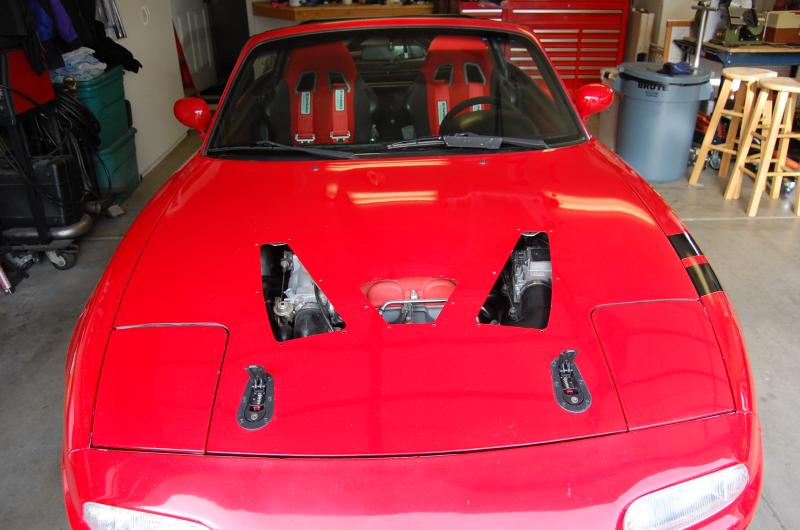
Due to the LS engine i couldn't run the middle vent. after receiving the "side" vents i noticed they looked a little small. so i'm going another direction with the hood. after fiddling with the singular vents i noticed they would fit perfect on the fenders.


__________________
OG Racing
Your Source For Motorsports Safety Equipment
WWW.OGRACING.COM
800.934.9112
703.430.3303
info@ogracing.com
OG Racing
Your Source For Motorsports Safety Equipment
WWW.OGRACING.COM
800.934.9112
703.430.3303
info@ogracing.com
Reply
0
0
10-06-2014, 10:52 PM
#183
Senior Member
Join Date: Sep 2011
Location: Sierra Vista, AZ
Posts: 1,303
Total Cats: 330
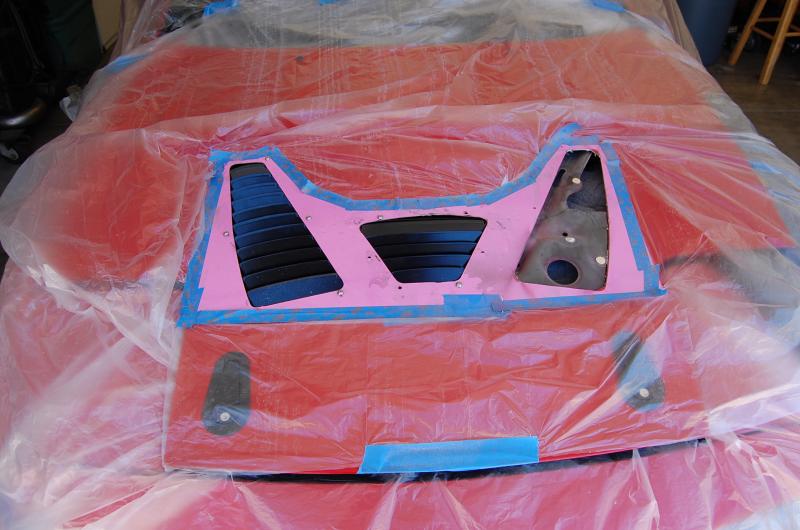
Finished up today.
Used a combination of 4 1/2" angle grinder w/cutoff wheel, dremel, and air grinder w/drums. Left the gurney flaps off for now.
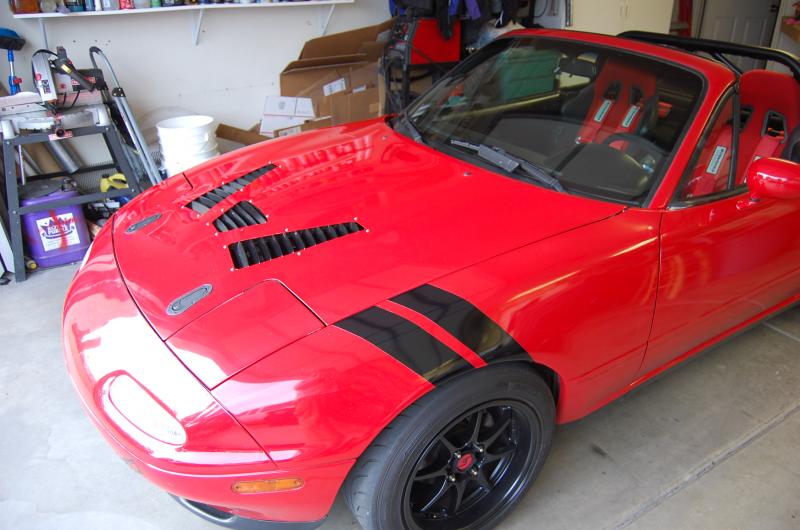
This is a great product, as I said before, well developed, great instructions. That said, it's not a project for the faint of heart. If you're not comfortable cutting sheet metal, or don't have a complete set of tools at hand, this probably isn't for you! The multiple layers of the NA hood are also a PITA, and required some contortions to cut enough to clear the louvers. On the NA, it also pretty much eliminates the stock hood prop location, though that's not a big deal.
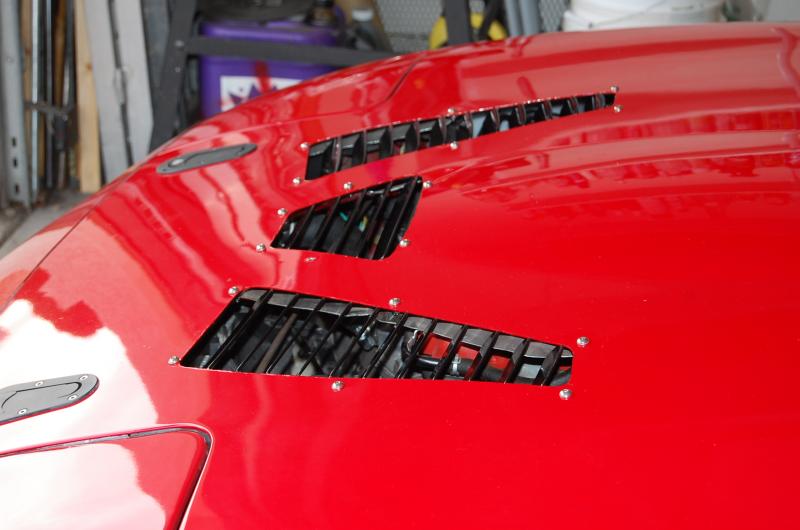
And, you will get aluminum dust all over anything within 50ft, regardless of the precautions you take...
One recommendation for the instructions, and one problem: when drilling the holes, I followed the instructions, and drilled the marked holes from the top, and started drilling the others from the bottom. I found that drilling from the bottom with the 7/32" drill was causing the paint to lift and chip on top. This may just be the cheap repaint my car had at some point in it's life, but my suggestion is to use the 7/32" from the bottom with the louver as a guide to start a small divot centered on the hole. Then, drill through from the bottom with a small bit. Finish the hole from the top with the 7/32" drill. After the first couple of holes, I did this and had no more issues with paint lifting/chipping.
The problem I had was two of the 5mm nuts got stuck on the bolts, like they were cross threaded. Now, I know for sure they were not cross threaded, because they were spun on by hand and went about halfway up the bolt before binding. I don't know if it was a galling issue between the stainless parts, or what, but I had to cut them off with a dremel. Need to go to the local hardware to get some replacements. Never had that issue before...
Again, awesome product. Can't wait to see what you come up with in the future.
Used a combination of 4 1/2" angle grinder w/cutoff wheel, dremel, and air grinder w/drums. Left the gurney flaps off for now.


This is a great product, as I said before, well developed, great instructions. That said, it's not a project for the faint of heart. If you're not comfortable cutting sheet metal, or don't have a complete set of tools at hand, this probably isn't for you! The multiple layers of the NA hood are also a PITA, and required some contortions to cut enough to clear the louvers. On the NA, it also pretty much eliminates the stock hood prop location, though that's not a big deal.
And, you will get aluminum dust all over anything within 50ft, regardless of the precautions you take...
One recommendation for the instructions, and one problem: when drilling the holes, I followed the instructions, and drilled the marked holes from the top, and started drilling the others from the bottom. I found that drilling from the bottom with the 7/32" drill was causing the paint to lift and chip on top. This may just be the cheap repaint my car had at some point in it's life, but my suggestion is to use the 7/32" from the bottom with the louver as a guide to start a small divot centered on the hole. Then, drill through from the bottom with a small bit. Finish the hole from the top with the 7/32" drill. After the first couple of holes, I did this and had no more issues with paint lifting/chipping.
The problem I had was two of the 5mm nuts got stuck on the bolts, like they were cross threaded. Now, I know for sure they were not cross threaded, because they were spun on by hand and went about halfway up the bolt before binding. I don't know if it was a galling issue between the stainless parts, or what, but I had to cut them off with a dremel. Need to go to the local hardware to get some replacements. Never had that issue before...
Again, awesome product. Can't wait to see what you come up with in the future.
Reply
1
1
10-06-2014, 11:00 PM
#184
Supporting Vendor

Thread Starter
iTrader: (3)

Join Date: Jul 2006
Location: San Diego
Posts: 3,304
Total Cats: 1,222
Roda - looks great! Thanks for the feedback as well. The bolts/nuts are regular M5 stuff so shouldn't be too hard to find replacements, but if you have any trouble finding them in stainless locally, we're happy to send you a few extras.
-Ryan
-Ryan

Reply
0
0
 10-07-2014, 09:44 PM
#186
Supporting Vendor
Thread Starter
iTrader: (3)
Join Date: Jul 2006
Location: San Diego
Posts: 3,304
Total Cats: 1,222
Our hood louver kits are now in stock at Good-Win Racing, ready to ship!
NA: Singular Motorsports NA Miata Hood Louvers for Miata 90-97
NB: Singular Motorsports NB Miata Hood Louvers for Miata 99-05
NA: Singular Motorsports NA Miata Hood Louvers for Miata 90-97
NB: Singular Motorsports NB Miata Hood Louvers for Miata 99-05
Reply
1
1

 10-08-2014, 12:49 AM
#189

The problem I had was two of the 5mm nuts got stuck on the bolts, like they were cross threaded. Now, I know for sure they were not cross threaded, because they were spun on by hand and went about halfway up the bolt before binding. I don't know if it was a galling issue between the stainless parts, or what, but I had to cut them off with a dremel. Need to go to the local hardware to get some replacements. Never had that issue before...
Again, awesome product. Can't wait to see what you come up with in the future.
Again, awesome product. Can't wait to see what you come up with in the future.
Reply
0
0
 10-08-2014, 06:07 AM
#192
Elite Member

Join Date: Oct 2013
Location: Cedar City, UT
Posts: 2,764
Total Cats: 951
Oh I know I would haha, I just want to replace them with black zinc bolt heads to blend in with the rest of the car. Just an OCD thing, but stainless will look a little out of place on my car.
(This is in no way a derogatory remark about your choice of bolts)
(This is in no way a derogatory remark about your choice of bolts)
Reply
0
0
10-08-2014, 07:22 AM
#193

Reply
0
0
 10-09-2014, 02:05 PM
#196
Senior Member
Join Date: Sep 2011
Location: Sierra Vista, AZ
Posts: 1,303
Total Cats: 330
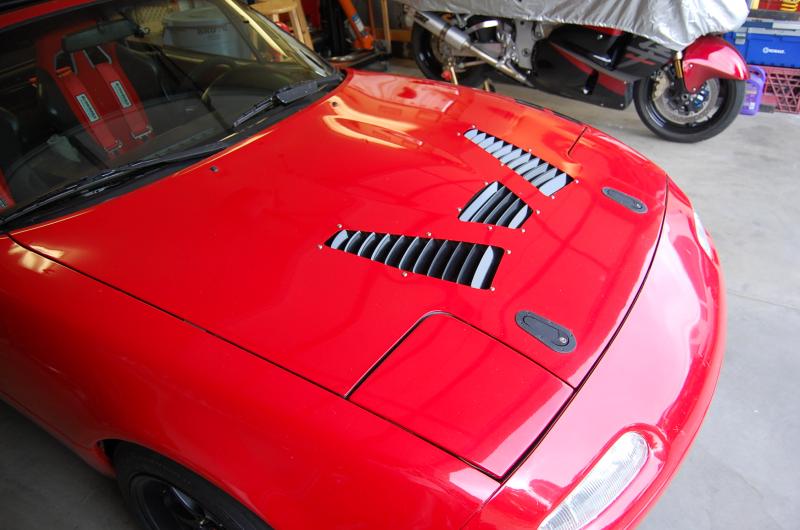
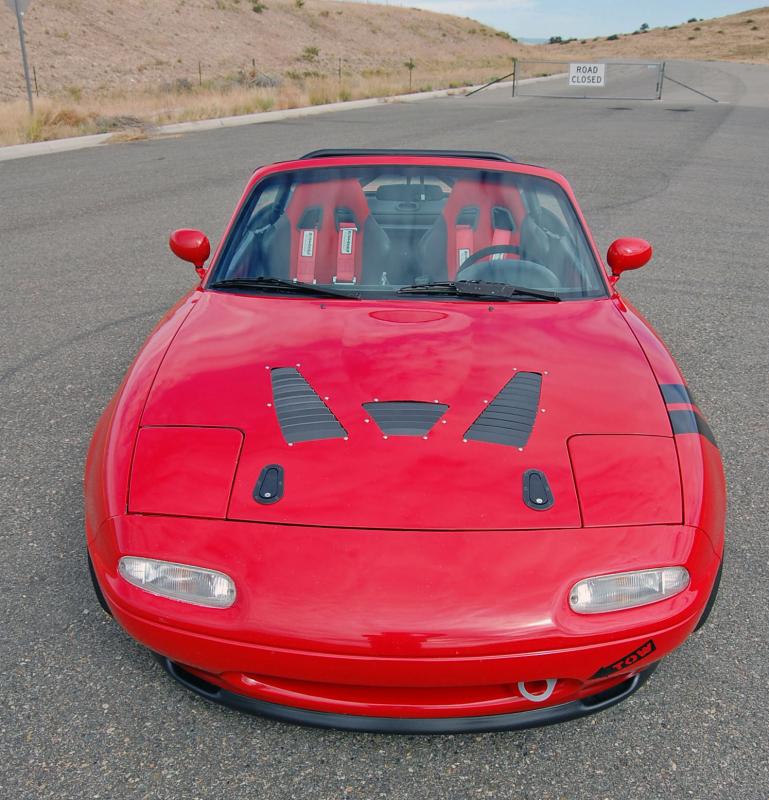
Finally got all the hardware sorted. Another one galled on me when I tried to remove it and I had to cut it off. I would definitely add using anti-seize to the instructions...
Also went out this morning and took some better pics.


Also went out this morning and took some better pics.


Reply
0
0
10-09-2014, 02:51 PM
#197
Supporting Vendor
Thread Starter
iTrader: (3)
Join Date: Jul 2006
Location: San Diego
Posts: 3,304
Total Cats: 1,222
Great pics Roda, thanks. The nylock issue is a tad frustrating, they have an inherent flaw, but they do what they do so nicely when they don't have issues. I do anti-seize all my stainless hardware and have far less issues, I'll add that to the instructions.
-Ryan
-Ryan
Reply
0
0
10-09-2014, 06:47 PM
#199
Elite Member
Join Date: Oct 2013
Location: Cedar City, UT
Posts: 2,764
Total Cats: 951
That is so weird, I've never had issues with stainless binding. I had a friend give me a huge thing of silver Anti-sieze several years ago for my birthday and I love it. Never had problems with stuck bolts when used liberally. Just don't get it on any clothes/fabric...it stains BAD.

Reply
2
2
10-09-2014, 06:54 PM
#200

That is so weird, I've never had issues with stainless binding. I had a friend give me a huge thing of silver Anti-sieze several years ago for my birthday and I love it. Never had problems with stuck bolts when used liberally. Just don't get it on any clothes/fabric...it stains BAD.
I thought everyone had a tub of this stuff, the copper anti-seize, and the nickel anti-seize? Do I have issues?
Reply
0
0


