RotorNut's Build Thread
 03-09-2009, 11:15 AM
#101
Elite Member
Thread Starter
iTrader: (33)
Join Date: Jan 2007
Location: Newnan, GA
Posts: 2,518
Total Cats: 30
Well tell BEGi to hurry up and get the reroute parts done so I can install the motor! lol
On another note, you finished the bumper vent yet? I'm seriously curious, my exterior plans are interesting to say the least, and it's next on the list to get tackled. Bye bye RL flares.
On another note, you finished the bumper vent yet? I'm seriously curious, my exterior plans are interesting to say the least, and it's next on the list to get tackled. Bye bye RL flares.

Reply
 0
0

0
 03-09-2009, 02:05 PM
#103

Yup, I'm that guy. You took my 2nd place trophy. lol
You need to join over at MX5 Miata Atlanta Owners Club, even if you're not "metro" Atlanta.
You need to join over at MX5 Miata Atlanta Owners Club, even if you're not "metro" Atlanta.
Reply
0
0
03-09-2009, 02:12 PM
#104
Elite Member
Thread Starter
iTrader: (33)
Join Date: Jan 2007
Location: Newnan, GA
Posts: 2,518
Total Cats: 30

Reply
0
0
03-10-2009, 07:25 PM
#105
built in the way you have, you should definately be able to make a streetable 300+ and live with it. This thing is gonna be a beast. Im gonna be in a few road events with some of the SCCA guys. you should come when its running again. Im pretty sure you've heard of CCR and the guys. I know Doppleganger has since he used to drift with them.
Reply
0
0
03-19-2009, 11:08 PM
#106
Elite Member
Thread Starter
iTrader: (33)
Join Date: Jan 2007
Location: Newnan, GA
Posts: 2,518
Total Cats: 30
Yup, I know who they are. And I do plan on making more track/road events after everything is said and done.
So it's almost there. Just need to reassemble the VICS intake manifold, which I can do now since my plenum gasket arrived today, and get the coolant reroute parts. It'll be so nice to have a/c this time around. Although I accidentally broke the condenser I had. Anyway...
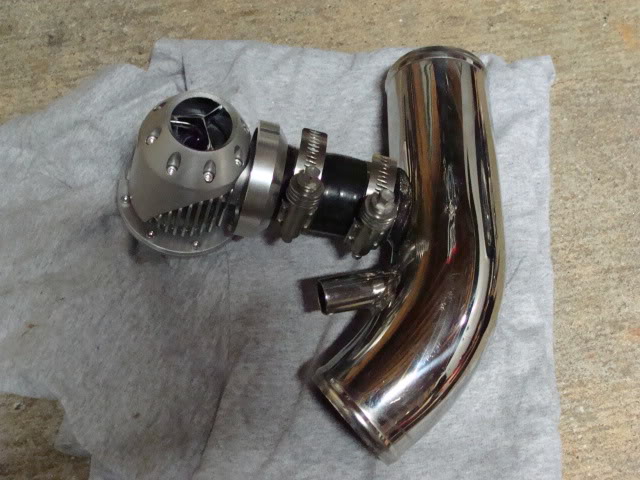
BOV mounted to the hard pipe. Did I ever mention I hate snap rings? lol
So it's almost there. Just need to reassemble the VICS intake manifold, which I can do now since my plenum gasket arrived today, and get the coolant reroute parts. It'll be so nice to have a/c this time around. Although I accidentally broke the condenser I had. Anyway...
BOV mounted to the hard pipe. Did I ever mention I hate snap rings? lol
Reply
0
0
 03-22-2009, 11:38 PM
#108
Elite Member
Thread Starter
iTrader: (33)
Join Date: Jan 2007
Location: Newnan, GA
Posts: 2,518
Total Cats: 30
You cannot has. lol
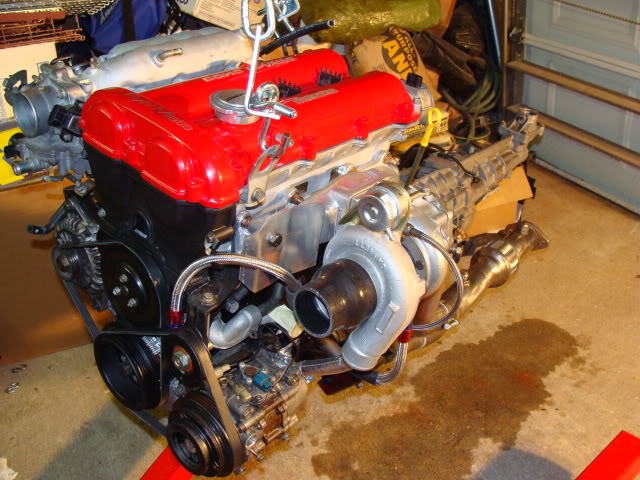
I got a decent amount of work done today.
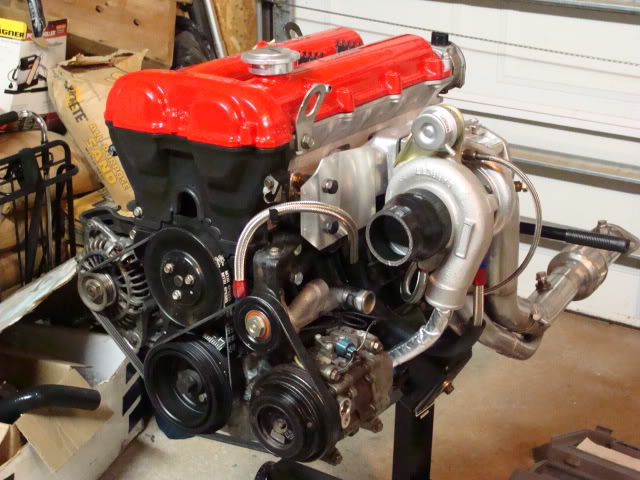
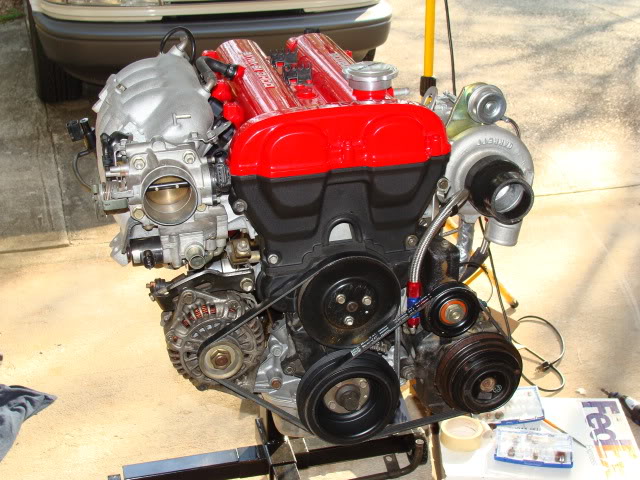
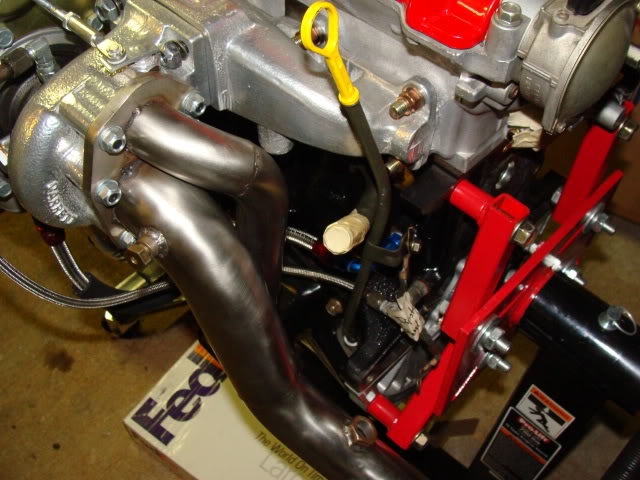
Got the lower intake manifold mounted and mocked up the rest of the assembly so that I could check the fitment of various hoses and the dual feed fuel rail (I'm glad I kept the '99 injectors, having them to space everything was great). Everything is a tight fit, but it should work out ok. You can also see where I took the FPR solenoid and turned it into my new VICS solenoid.
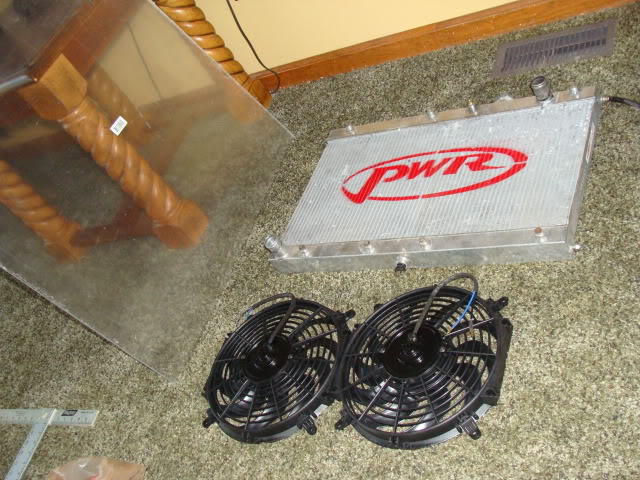
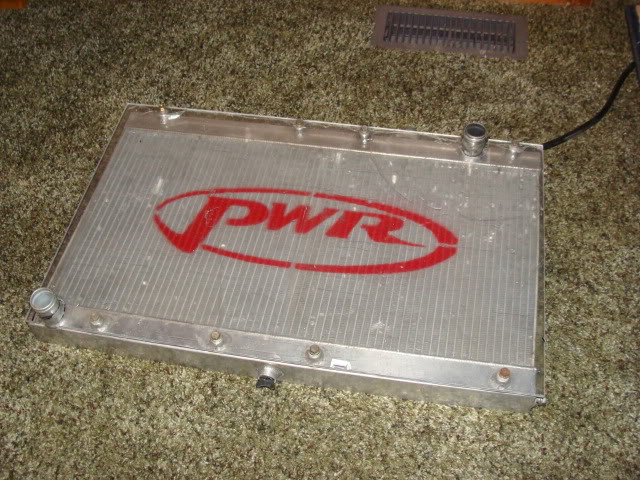
And then the radiator shroud. How I have put this project off for far too long.
So, when this is all done, all this will be one assembly, right?
Made some measurements, marked the plexi, pulled out the table saw, and:
Used a powered hand saw and made the cutouts for the inlet and outlet tubes (yeah, my cuts were just a tad rough, thought I had the right blade the first time. Oops):
Then drilled holes for the mounting bolts (I also cracked the plexi a little during this step, but it's ok, it's still structurally sound at the end of all this) :
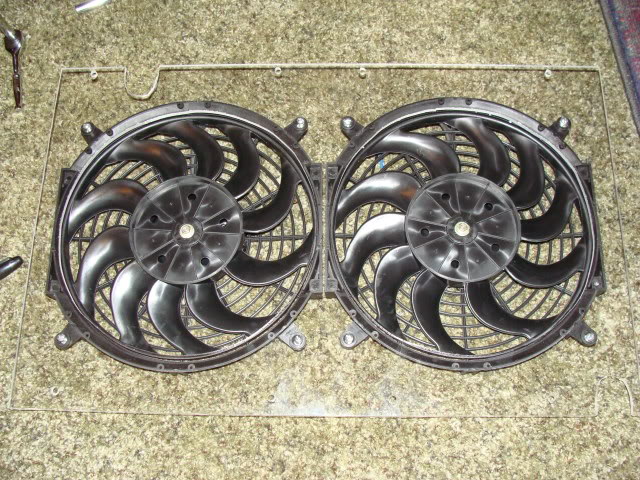
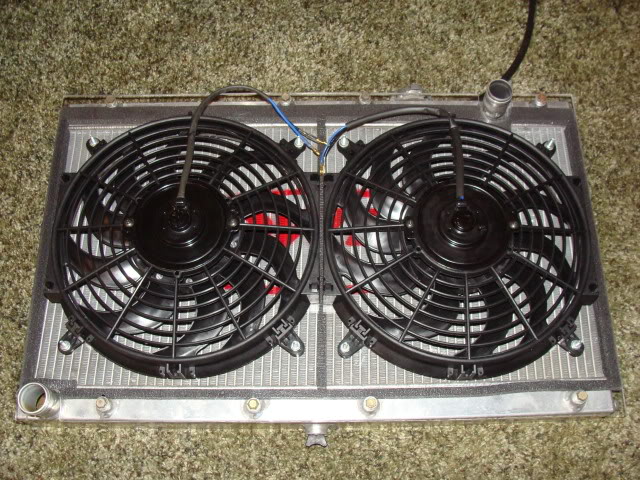
Then I drilled holes and mounted the fans:
Then I traced the outlines of the outer diameter of the fan blades:
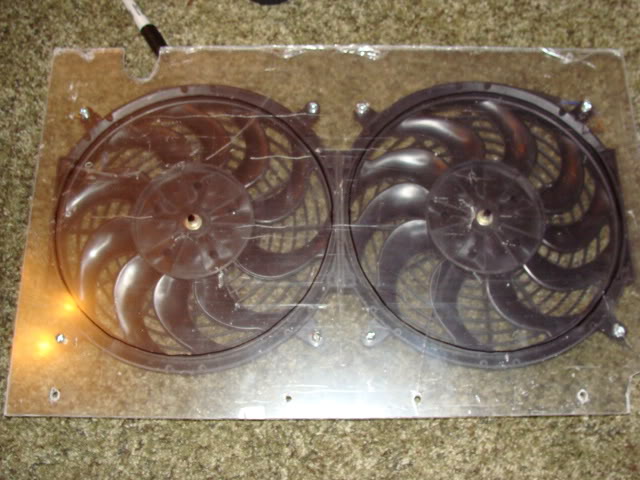
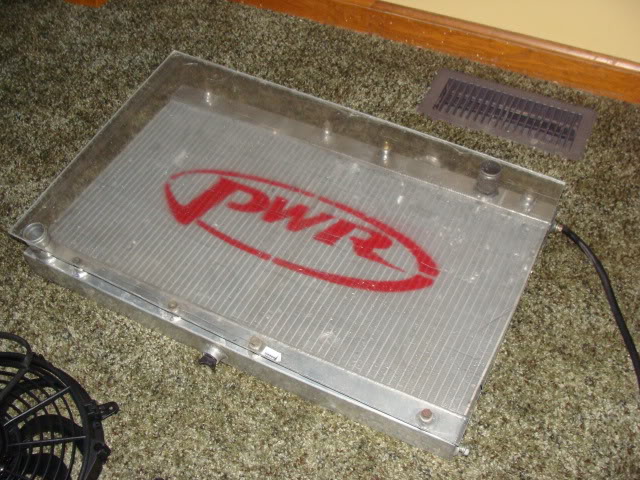
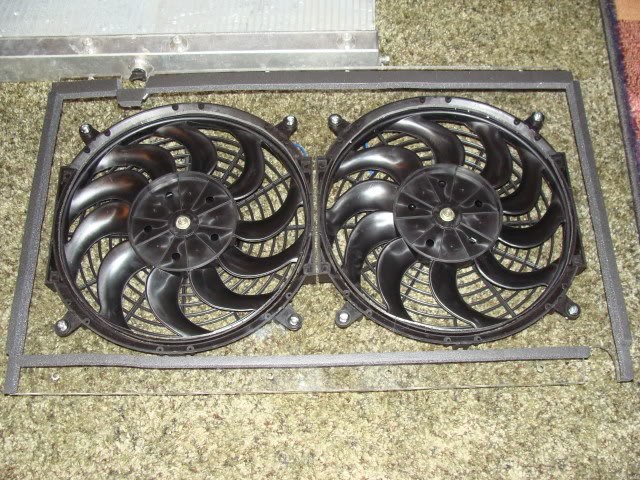
Hand saw again and removed all the clear protective plastic and:
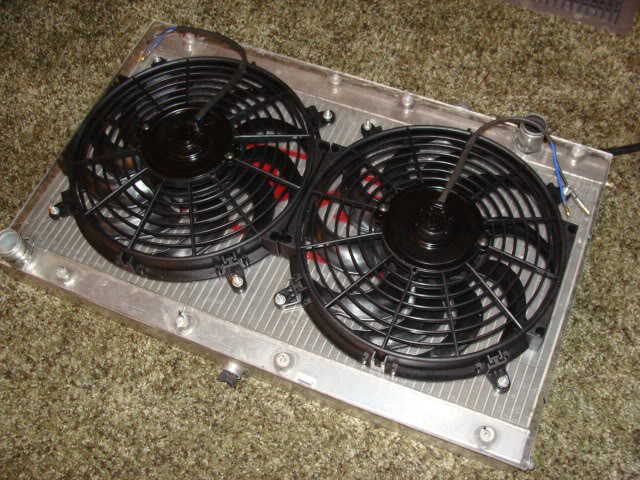
Remounted the fans:
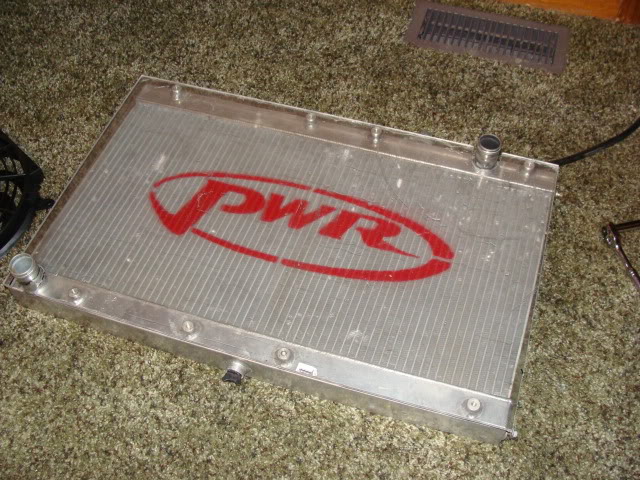
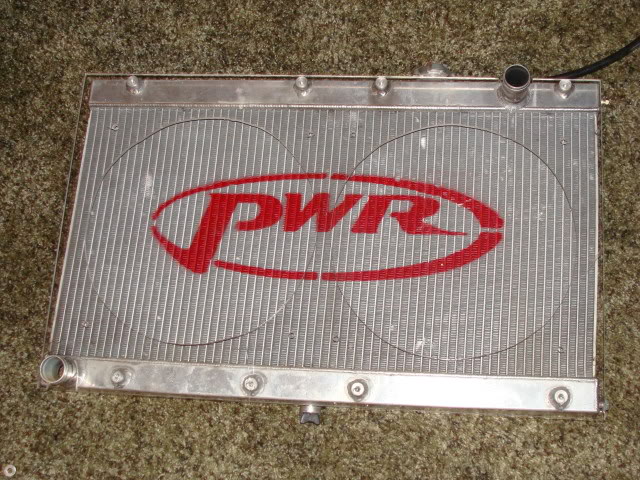
Applied weather stripping:
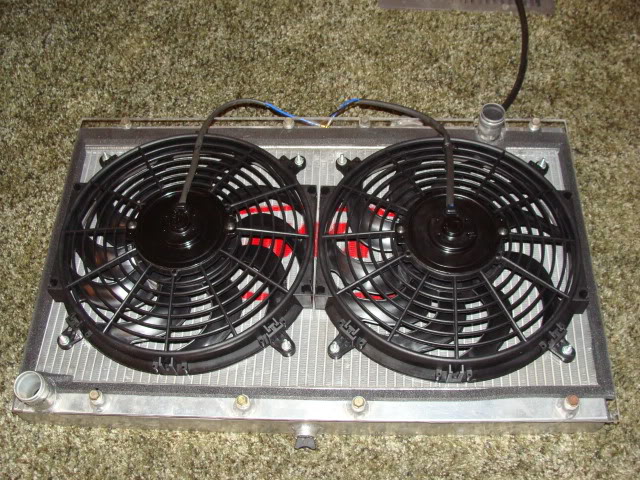
Finished. Sturdy as hell and all airflow through the fans.
I got a decent amount of work done today.
Got the lower intake manifold mounted and mocked up the rest of the assembly so that I could check the fitment of various hoses and the dual feed fuel rail (I'm glad I kept the '99 injectors, having them to space everything was great). Everything is a tight fit, but it should work out ok. You can also see where I took the FPR solenoid and turned it into my new VICS solenoid.
And then the radiator shroud. How I have put this project off for far too long.
So, when this is all done, all this will be one assembly, right?
Made some measurements, marked the plexi, pulled out the table saw, and:
Used a powered hand saw and made the cutouts for the inlet and outlet tubes (yeah, my cuts were just a tad rough, thought I had the right blade the first time. Oops):
Then drilled holes for the mounting bolts (I also cracked the plexi a little during this step, but it's ok, it's still structurally sound at the end of all this) :
Then I drilled holes and mounted the fans:
Then I traced the outlines of the outer diameter of the fan blades:
Hand saw again and removed all the clear protective plastic and:
Remounted the fans:
Applied weather stripping:
Finished. Sturdy as hell and all airflow through the fans.
Reply
0
0
03-25-2009, 12:09 AM
#109
Elite Member
Thread Starter
iTrader: (33)
Join Date: Jan 2007
Location: Newnan, GA
Posts: 2,518
Total Cats: 30
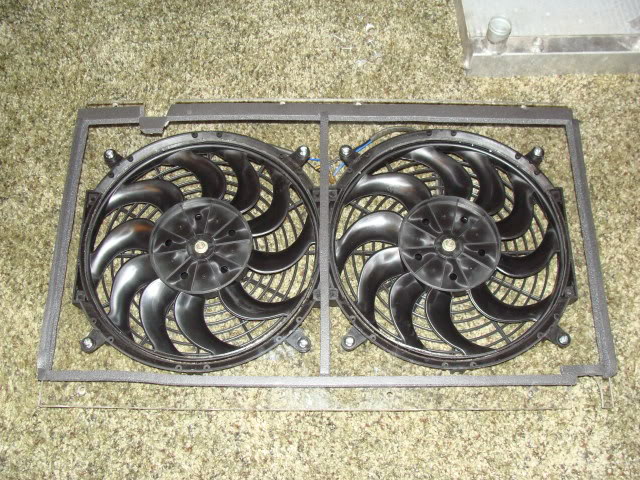
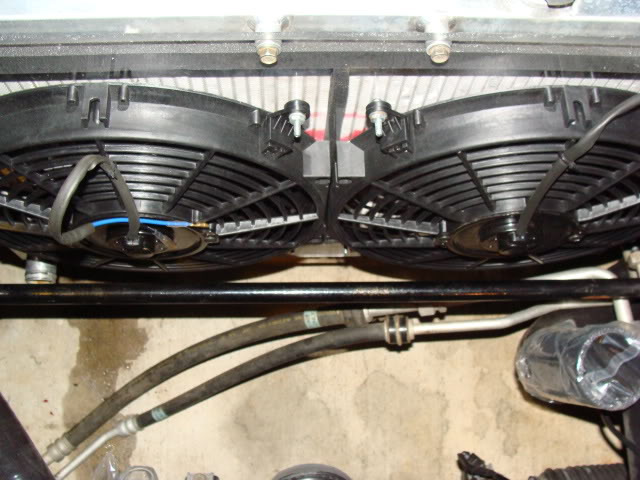
Ok, so I decided today that I wanted to run the OEM fan wiring on my new setup (where the a/c fan kicks on independently of the main fan, or unless I switch it on), so I had to take the shroud off and divide the "chambers" if you will with some weather stripping:
Did a test fit in the car too, just to make sure I had properly measured everything:
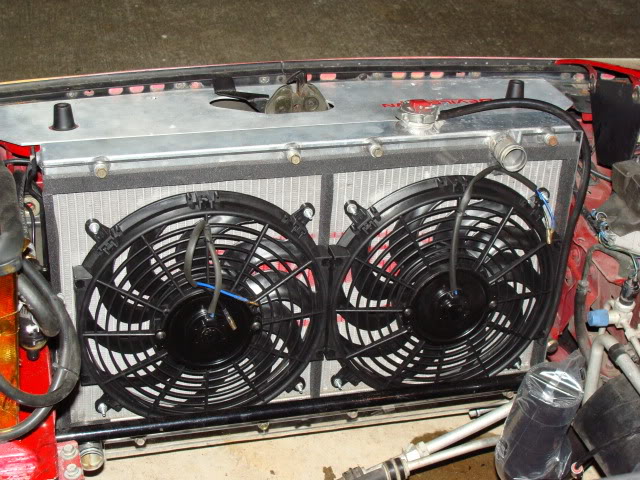
Can't really see the depth in this shot, but there's about 1/2" between the sway bar and the fans. Will be even less when I install the FM sway.
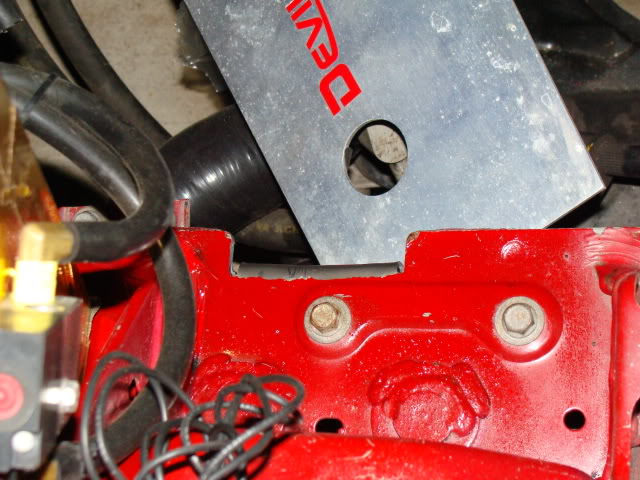
Then I took a die grinder and notched and rounded off the frame rail for the compressor housing (I clear-coated it for now, the engine bay will get repainted with the rest of the car later on, I could care less right now, lol).
Mounted the heater core return pipe after bending it up and away from the downpipe a little and mock installed the dipstick to make sure it would still fit.
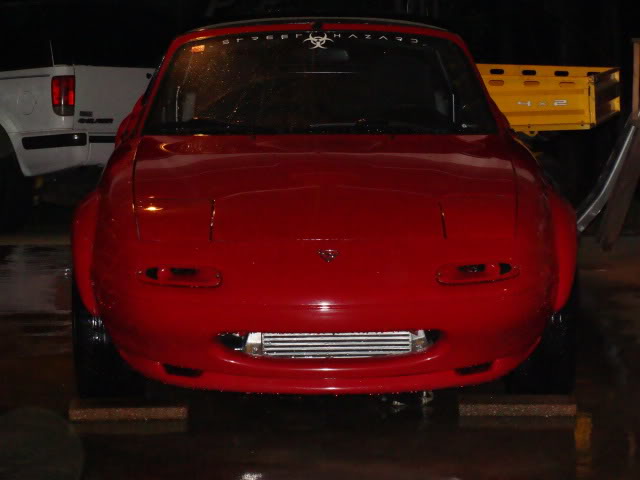
And just because she isn't running doesn't mean she doesn't get washed (she's also on jackstands in the rear, thus the funny looking angle):
Did a test fit in the car too, just to make sure I had properly measured everything:
Can't really see the depth in this shot, but there's about 1/2" between the sway bar and the fans. Will be even less when I install the FM sway.
Then I took a die grinder and notched and rounded off the frame rail for the compressor housing (I clear-coated it for now, the engine bay will get repainted with the rest of the car later on, I could care less right now, lol).
Mounted the heater core return pipe after bending it up and away from the downpipe a little and mock installed the dipstick to make sure it would still fit.
And just because she isn't running doesn't mean she doesn't get washed (she's also on jackstands in the rear, thus the funny looking angle):
Reply
0
0
04-04-2009, 02:50 PM
#111
Elite Member
Thread Starter
iTrader: (33)
Join Date: Jan 2007
Location: Newnan, GA
Posts: 2,518
Total Cats: 30
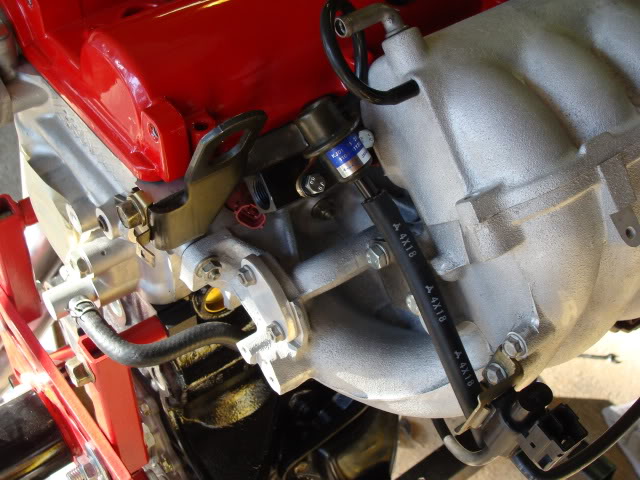
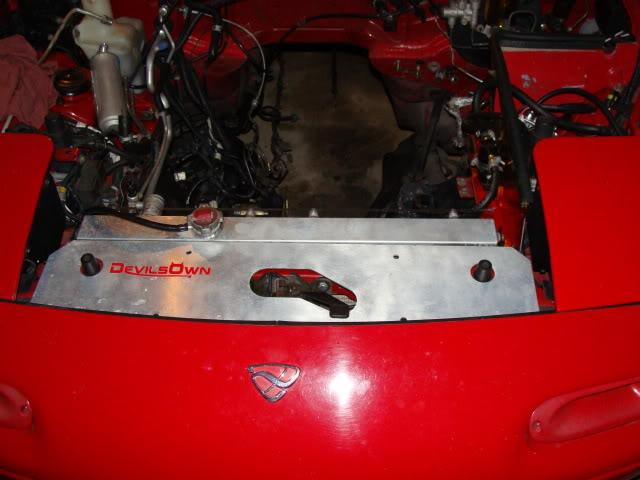
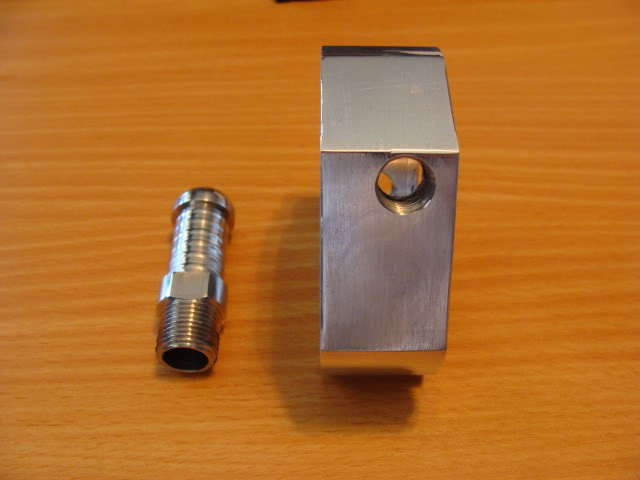
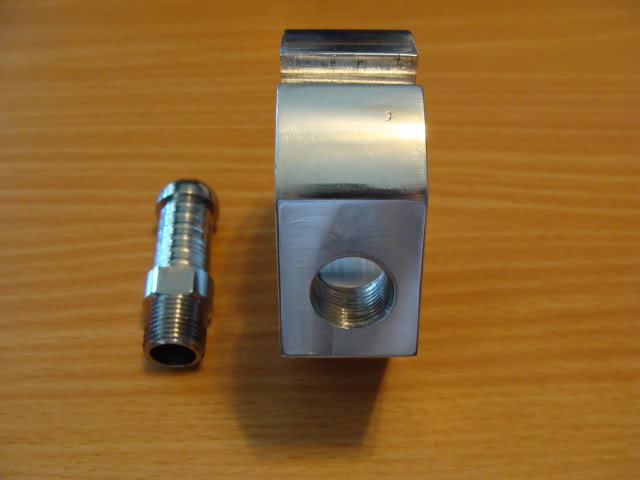
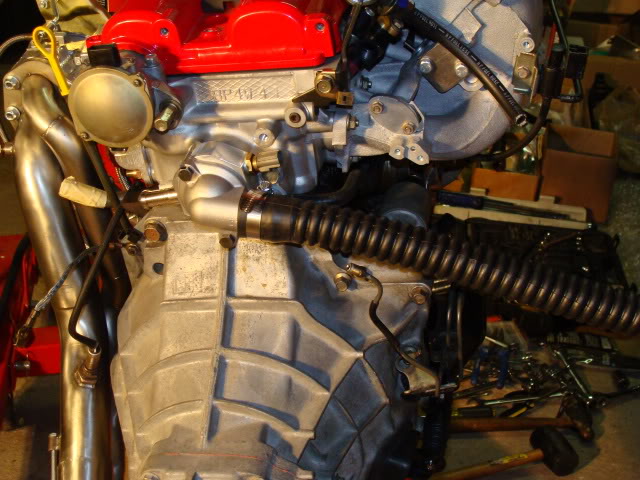
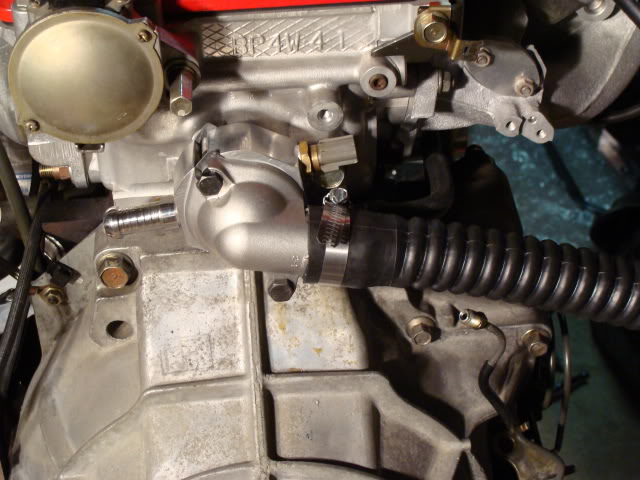
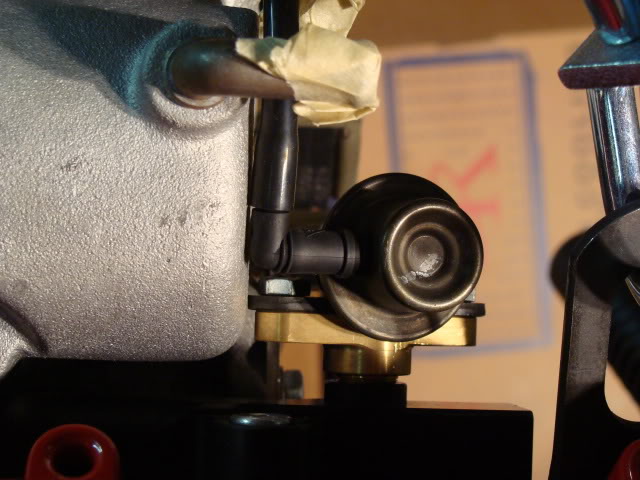
Got tired of waiting on BEGi or M-Tuned to come out with their reroute kits a while back, so a local forum member did a little work for all of us and here's spacer #1, which as of today, belongs to me. Spacer is aluminum and the heater hose fitting is stainless steel. He did both pieces.
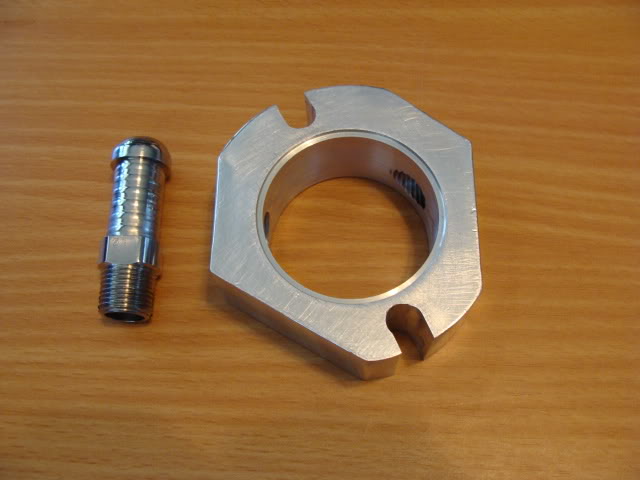
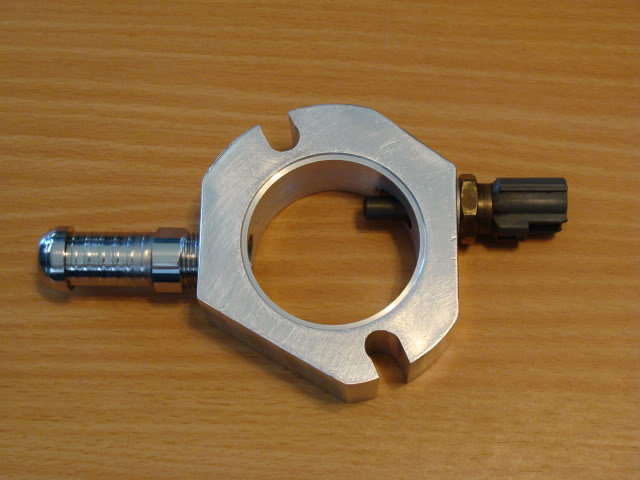
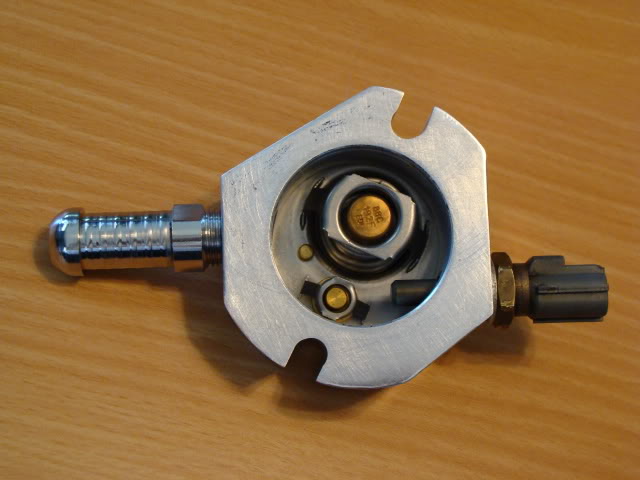
Mocked up on the head with a Kia water neck:
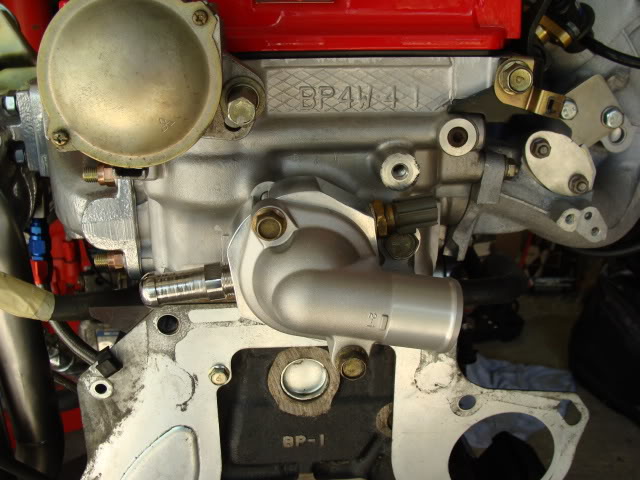
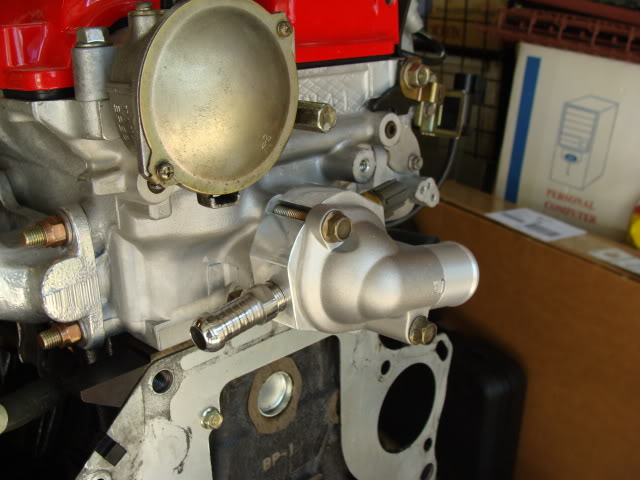
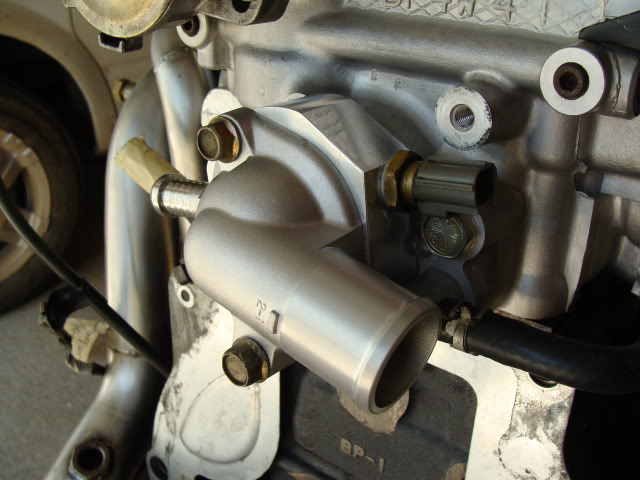
May not look like it, but the sensor does clear the port plug.
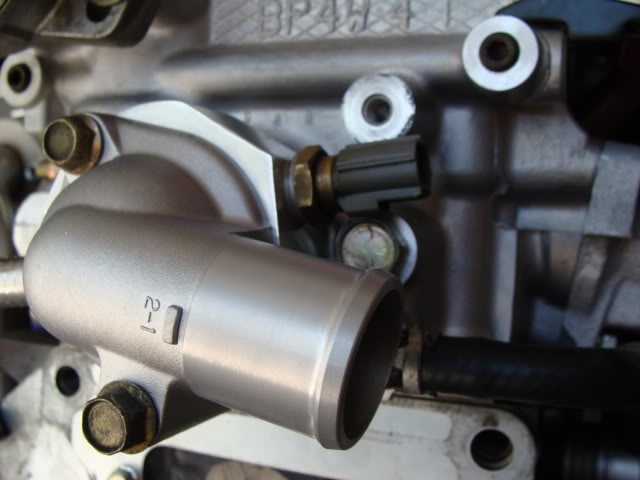
Now I just need to find some appropriate length bolts (the lower one is just in there for apperarance's sake and the top one is just barely threaded into the head) and a solution for the upper radiator hose.
Mocked up on the head with a Kia water neck:
May not look like it, but the sensor does clear the port plug.
Now I just need to find some appropriate length bolts (the lower one is just in there for apperarance's sake and the top one is just barely threaded into the head) and a solution for the upper radiator hose.
Reply
0
0
 04-05-2009, 02:51 AM
#114
Elite Member
Thread Starter
iTrader: (33)
Join Date: Jan 2007
Location: Newnan, GA
Posts: 2,518
Total Cats: 30
Hopefully everything will be all together within the next few weeks, definitely will be videos!
Thanks man! Table saw for the big cuts and a saber saw for the radiator holes.
Reply
0
0
04-06-2009, 12:07 AM
#115
Elite Member
Thread Starter
iTrader: (33)
Join Date: Jan 2007
Location: Newnan, GA
Posts: 2,518
Total Cats: 30
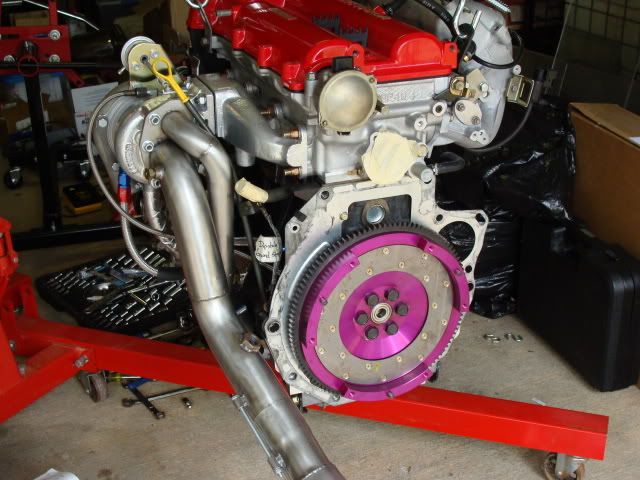
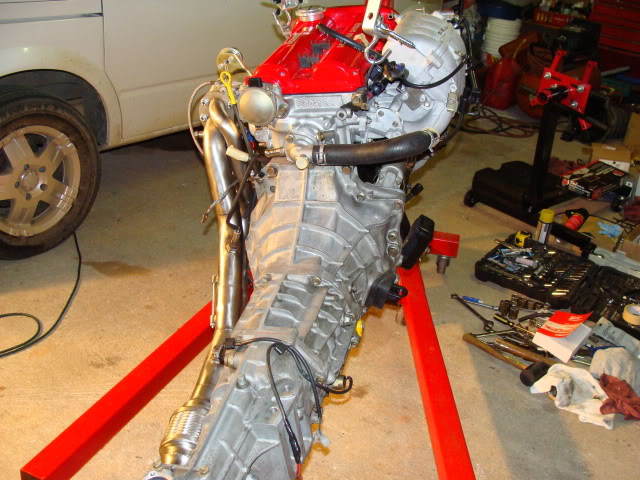
Flywheel mounted:
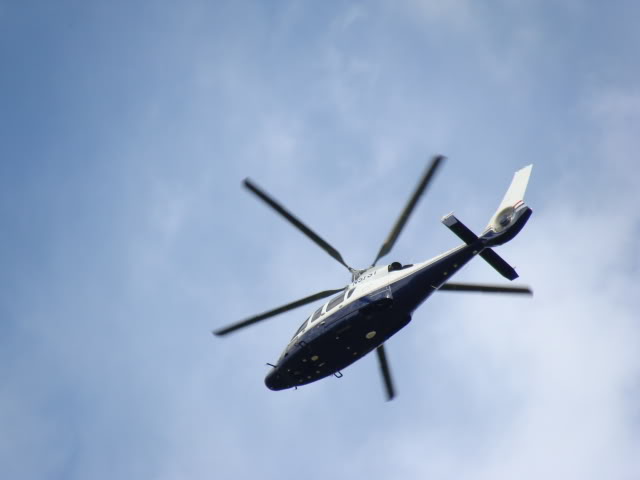
Quick break to watch the Dolphin HH-65 (same heli used by the Coast Guard) fly over my house at about 130 knots:
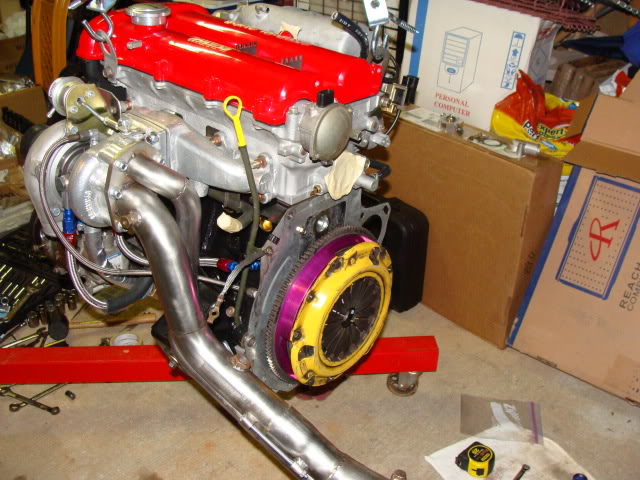
Back to work, clutch mounted:
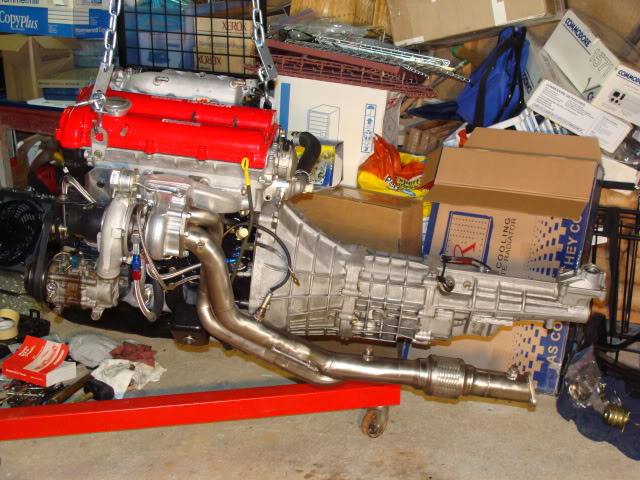
Transmission installed! (This was a feat, 2 of my friends and I could not get this thing together last night, the splines did not want to engage properly at all. I tried this morning alone and it slid together on the first try making use of the load leveler and a mechanic's creeper. lol) It's almost ready to go back in. Gotta finish up the reroute details and that's it.

Quick break to watch the Dolphin HH-65 (same heli used by the Coast Guard) fly over my house at about 130 knots:
Back to work, clutch mounted:
Transmission installed! (This was a feat, 2 of my friends and I could not get this thing together last night, the splines did not want to engage properly at all. I tried this morning alone and it slid together on the first try making use of the load leveler and a mechanic's creeper. lol) It's almost ready to go back in. Gotta finish up the reroute details and that's it.
Reply
0
0
04-06-2009, 08:36 AM
#116

Is that an MSM oil pan?
__________________
Best Car Insurance | Auto Protection Today | FREE Trade-In Quote
__________________
Best Car Insurance | Auto Protection Today | FREE Trade-In Quote
Reply
0
0
04-07-2009, 11:24 PM
#118
Elite Member
Thread Starter
iTrader: (33)
Join Date: Jan 2007
Location: Newnan, GA
Posts: 2,518
Total Cats: 30
As of tonight, the engine is ready to install into the engine bay! I still have to put fluid in the trans., but that's not hard. All bolts are tightened, all sensors are in place, I found a hose for the coolant reroute, it's all done. I'm really excited now! Friday should be the install day!
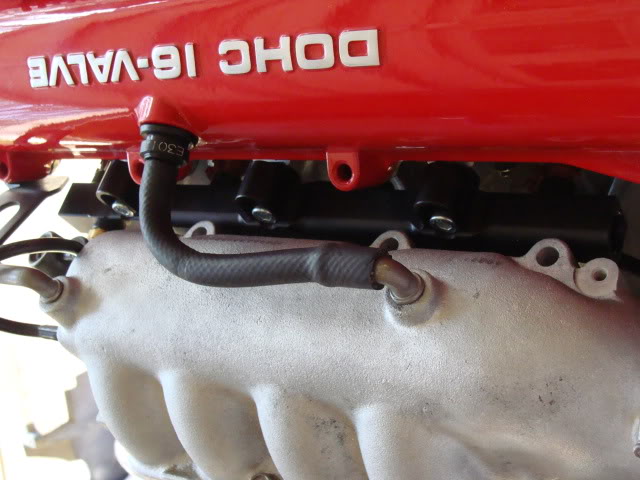
I even found a 90* vacuum piece that allowed me install the FPR correctly.
I even found a 90* vacuum piece that allowed me install the FPR correctly.
Reply
0
0


