Car aero development


 04-29-2009, 08:36 PM
#30
Senior Member
Thread Starter
iTrader: (13)

Join Date: Jul 2008
Location: Macon, Ga
Posts: 811
Total Cats: 0
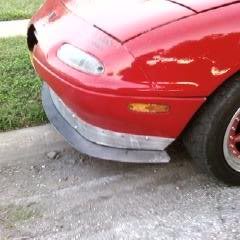
Guys the diffusers are mounted. Tomorrow i'll be heading down to the shop to hack up my bumper. I'll have pics of it mounted W/O bumper as well as with the bumper.
I'll post up more tomorrow.
Go to gomiata.com and look under exterior for the NA. For me it was $262 shipped.
Shipping was $60 from gomiata. Its a pretty big piece and extends further than that plastic stock one. It actually passes the engine
Yea to change oil, and the subframe isnt a proper jacking point dude. But anyways its really not a problem. Its simple to remove.
I'll post up more tomorrow.
Yea to change oil, and the subframe isnt a proper jacking point dude. But anyways its really not a problem. Its simple to remove.
Last edited by Sam Amporful; 04-29-2009 at 08:47 PM.

Reply
 0
0

0


 04-30-2009, 01:33 AM
#39

well, i can tell you for a fact, that stuff works. i made a splitter about 18mos. ago, and a diffuser 6 mos. after that and they totally changed the way the car handles at speed. even at 70mph on the highway, the difference is immediately noticeable. the car doesn't wander anymore, even in a big crosswind, the car will NOT even budge! you can feel the wind hitting the car but it just keeps going straight. the splitter made the biggest difference. at tws or a pca event in south tx. i would hit 130mph+ and the first time i went to both of those tracks the car felt really light up frt. i had to make little corrections the entire time over 105mph or so. my diffuser doesn't even extend back as far as yours, but it looks like it may stick out a little further, mine is just over 2.5 inches past the bumper. now when i go to those tracks the frt. end feels solid and planted. when i added the diffuser, i can't ''feel'' downforce, but it feels more stable and a few key high speed corners are taken around 5mph faster with no changes other than the aero done to the car. also i think the diffuser made it more stable in a straight line at high speed. kinda like the fins on the back of an arrow or dart. my diffuser looks exactly like yours, only i used 2 allthread rods to hold it to the car and the 2 rearmost bolts that hold the factory brace to the car.
your gonna love it. i also made my own home depot style lip, but out of this aluminum instead of the plactic lawn edging everybody seems to use. (my local home depot doesn't seem to carry the right edging?)
yeah, my car with the same tails, i blk. out those and now have oem. lol
heres a few pics:
lip and splitter
splitter only - oem attachment point
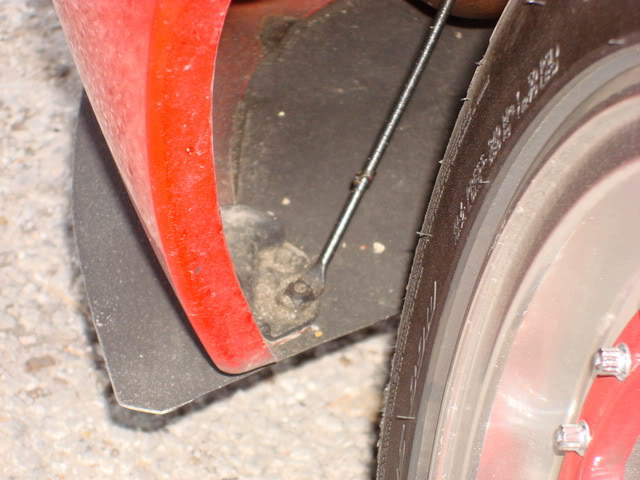
frt. attachment point - allthread and a L bracket i bent from aluminum strapping. easy, 4 bolts and the splitter comes off in 2 mins. if necessary.
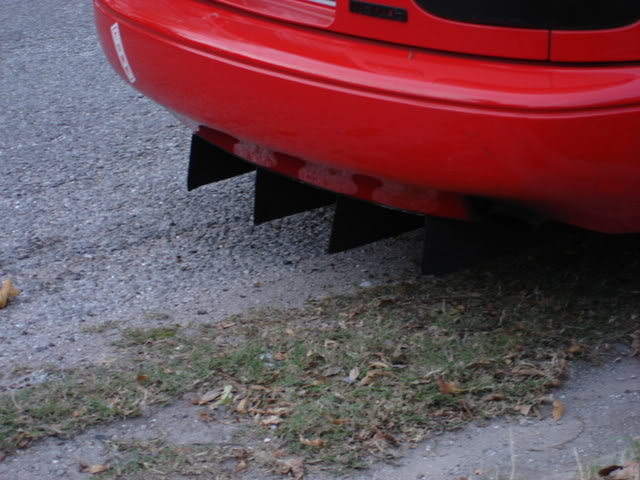
diffuser - i don't have pics with the little side plates yet.
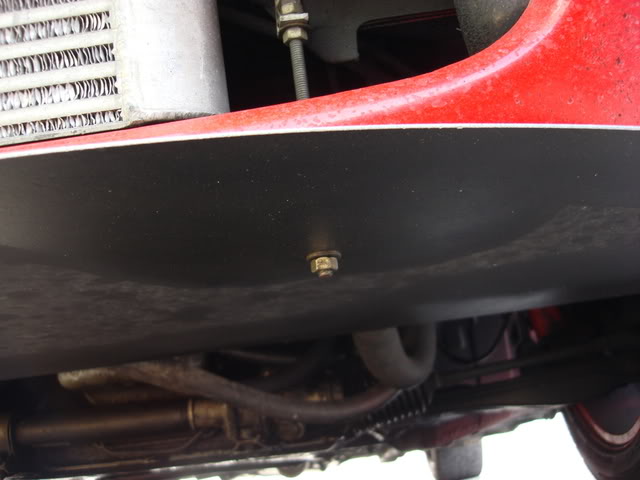
rear attachment point - again just an L shaped bracket hammered from an aluminum strap, allthread rod.
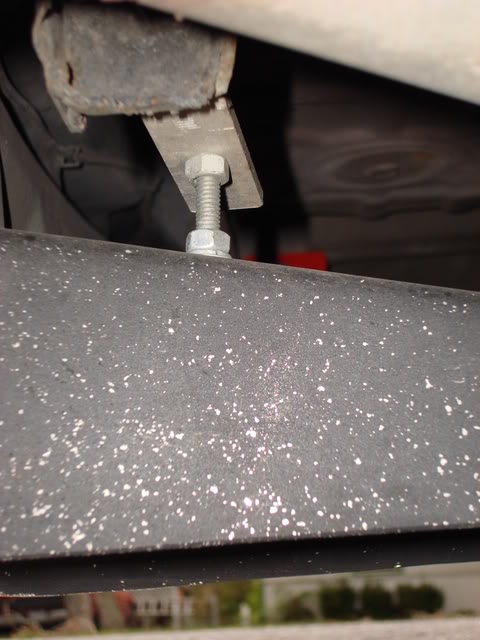
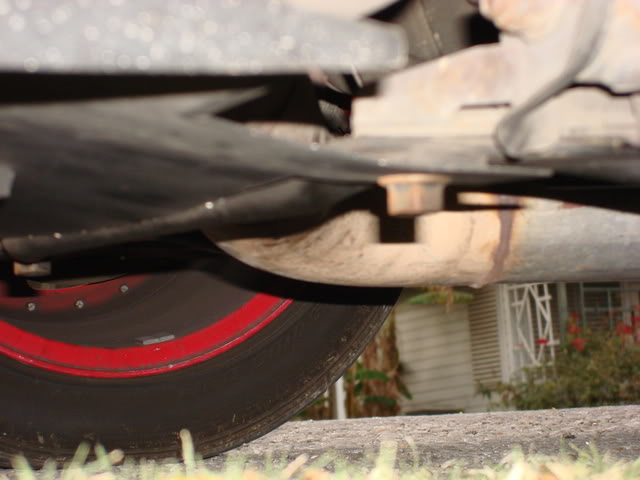
forward attachment points - oem 17mm bolts that hold the factory brace ('95 NA) 4 bolts and can be removed in 4 mins. no need to jack up the car.
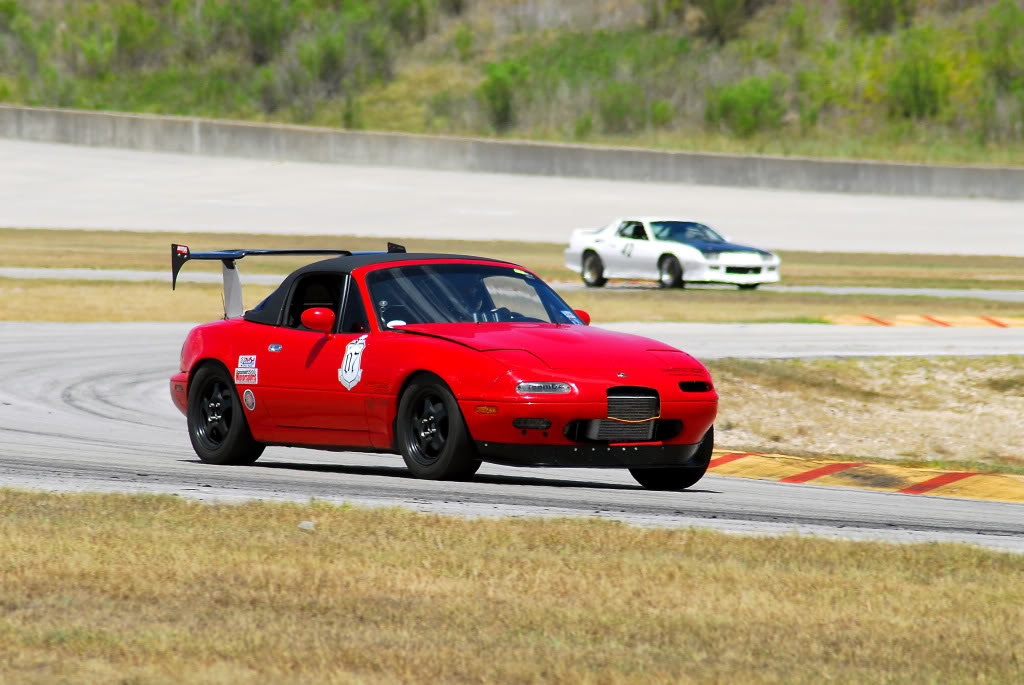
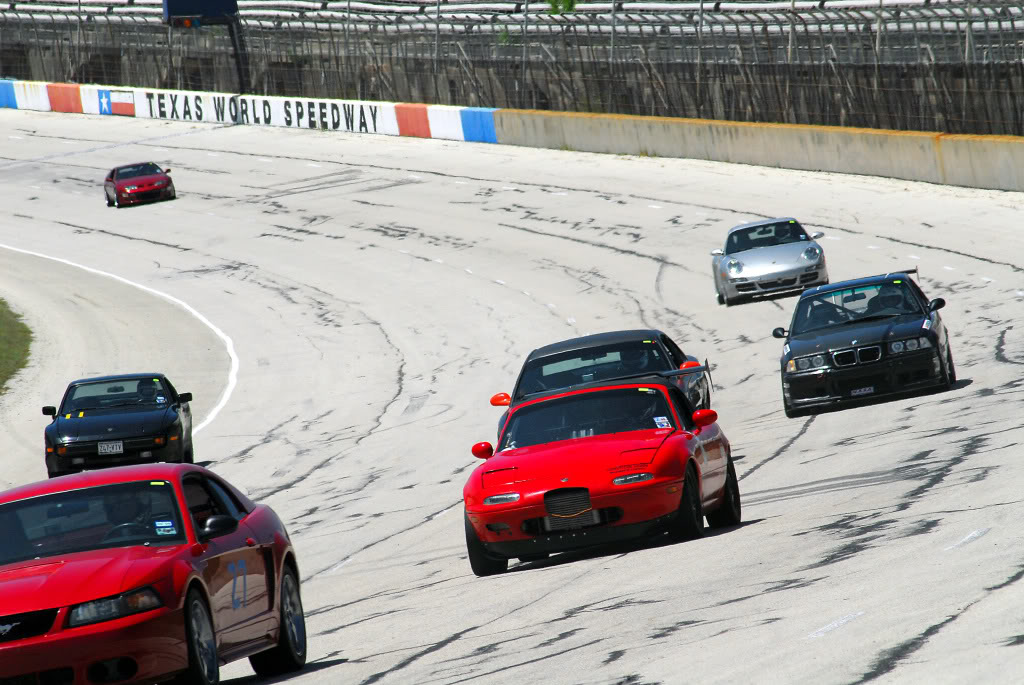
in action
your gonna love it. i also made my own home depot style lip, but out of this aluminum instead of the plactic lawn edging everybody seems to use. (my local home depot doesn't seem to carry the right edging?)
yeah, my car with the same tails, i blk. out those and now have oem. lol
heres a few pics:
lip and splitter
splitter only - oem attachment point
frt. attachment point - allthread and a L bracket i bent from aluminum strapping. easy, 4 bolts and the splitter comes off in 2 mins. if necessary.
diffuser - i don't have pics with the little side plates yet.
rear attachment point - again just an L shaped bracket hammered from an aluminum strap, allthread rod.
forward attachment points - oem 17mm bolts that hold the factory brace ('95 NA) 4 bolts and can be removed in 4 mins. no need to jack up the car.
in action
Reply
0
0
04-30-2009, 01:50 AM
#40
Senior Member
Thread Starter
iTrader: (13)
Join Date: Jul 2008
Location: Macon, Ga
Posts: 811
Total Cats: 0
Looks good man. Yeah my diffuser is kinda long but I intended for it to reach out. Our designs are very very similar. I think our differences are in a few mounting points since mine requires a cobalt subframe brace just to attach the front. I also have those wings on the side that sits right behind the tires. My bumper WILL be the hardest part. I like how you did your splitter. clean and functional. I was looking into APR making me a CF one. we'll see how that goes. I know they made Matt Andrews one for his time attack car. Im just ready to take it for a test drive and slice some wind while dodging roadkill  . Im actually worried about bottoming out on speedbumps lol. Its not a daily anyways so who cares haha
. Im actually worried about bottoming out on speedbumps lol. Its not a daily anyways so who cares haha
Reply
0
0


