? re: Milling the 01 VVT valve cover for COPs
#1
Thread Starter
Senior Member
iTrader: (4)
Joined: Jan 2008
Posts: 1,361
Total Cats: 17
From: Falls Church, VA
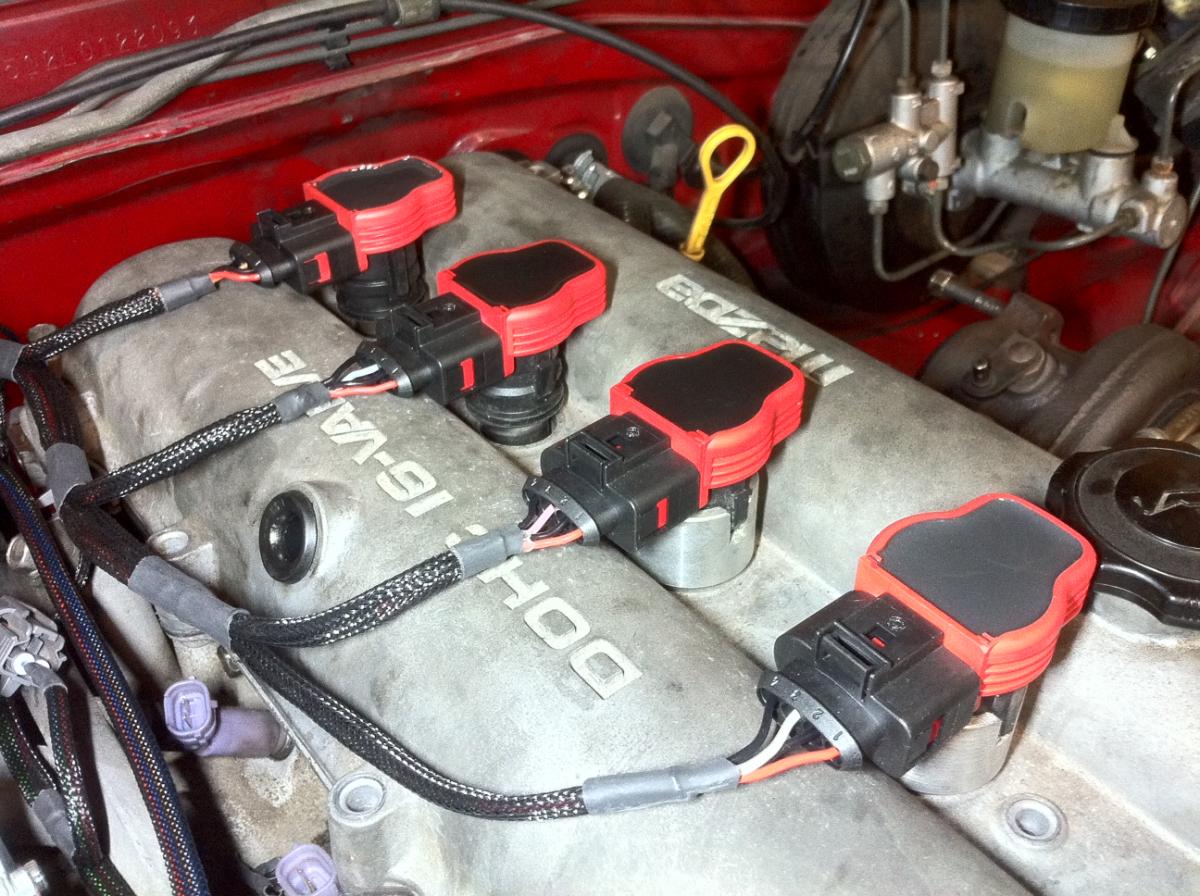
I have COPs on a nice booty-fabbed hold-down bracket in my 94, like so:

I would like to re-use the bracket on the 01 motor, because the bar-across-the-top method looks ghetto. It looks like the three holes that hold the bracket down onto the valve cover have the same spacing on the 94 and the 01, so it's just a matter of grinding away the crap in the valve cover valley that's in the way.
Looks like Emilio has done this for Crusher:
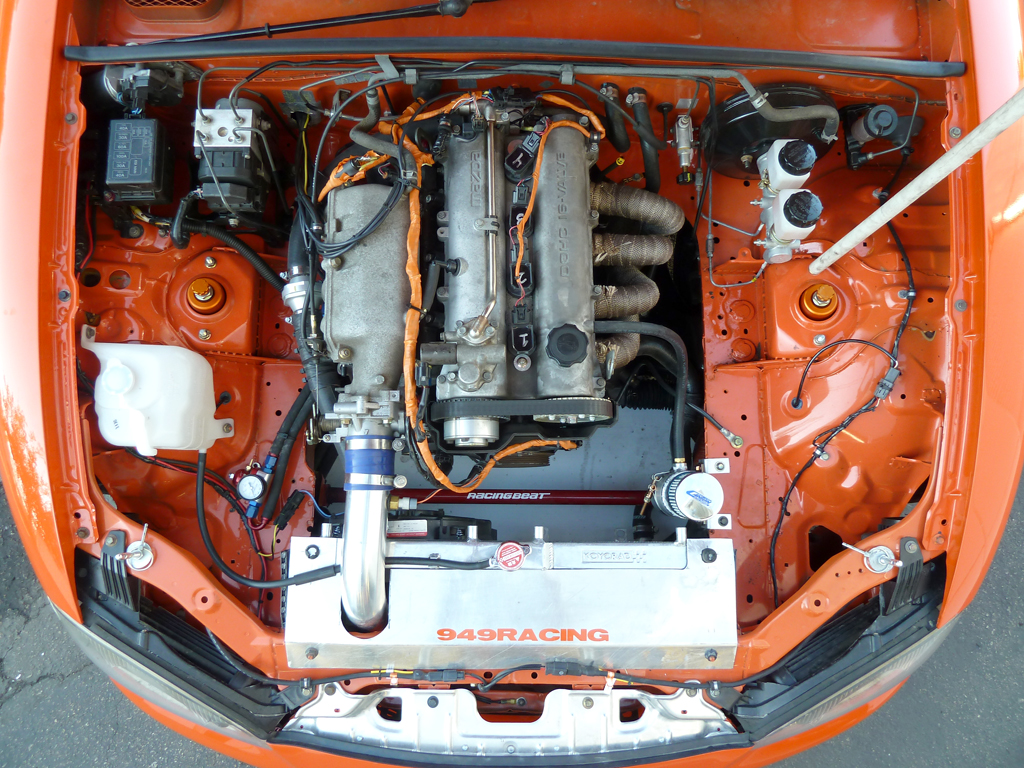
So it looks pretty clear that 100% of the stock 01 coil mounting bosses can be ground down so the valve cover has a smooth profile all the way back. What I can't see very clearly in the above pic is how much has been removed in the region of the valley between #1 and #2. How much of this stuff circled in red below can be ground down without creating a passage to daylight where I don't want one?
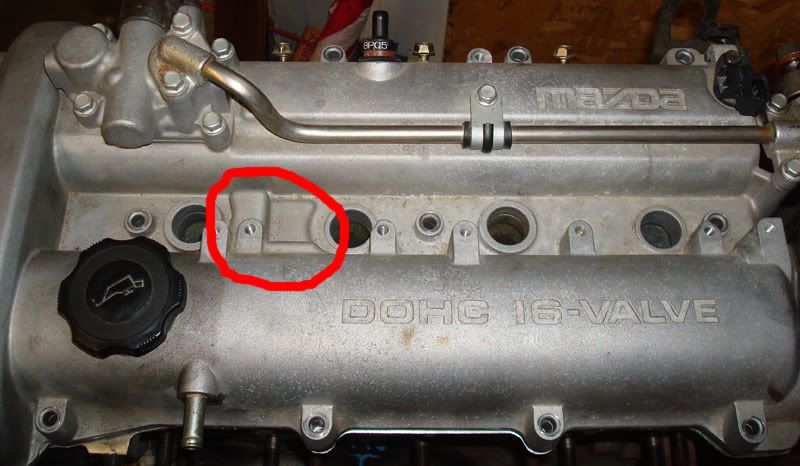
If the taller Louisiana-shaped (more or less) portion can't be shaved down to about the same height as the Minnesota-shaped area towards the top/right of the circle, then I don't think my existing hold-down bracket will work.
I would like to re-use the bracket on the 01 motor, because the bar-across-the-top method looks ghetto. It looks like the three holes that hold the bracket down onto the valve cover have the same spacing on the 94 and the 01, so it's just a matter of grinding away the crap in the valve cover valley that's in the way.
Looks like Emilio has done this for Crusher:

So it looks pretty clear that 100% of the stock 01 coil mounting bosses can be ground down so the valve cover has a smooth profile all the way back. What I can't see very clearly in the above pic is how much has been removed in the region of the valley between #1 and #2. How much of this stuff circled in red below can be ground down without creating a passage to daylight where I don't want one?

If the taller Louisiana-shaped (more or less) portion can't be shaved down to about the same height as the Minnesota-shaped area towards the top/right of the circle, then I don't think my existing hold-down bracket will work.
#5
Thread Starter
Senior Member
iTrader: (4)
Joined: Jan 2008
Posts: 1,361
Total Cats: 17
From: Falls Church, VA
One possibility is cutting my existing bracket and using it on cyls 2-4, and just use a bolt for the #1 COP like in Emilio's pic.
I've seen that pic but don't recall you mentioning how those adapter pieces are held to the valve cover, or how the coils are held to the adapters. Is any of that stuff welded/bolted or is it all friction fit?
#6
The bungs are a tight fit. You need to hamer them into the cover.
The coils hook into the sparkplug by design, they click on to it. Quite secure. I don't see them comming off besides pulling them with quite some force. The metal of the coil goes all the way down to the hex of the sparkplug. That's where it clamps.
I like the Denso COP's more but I think these will clear the VVT stuff.
#12
Thread Starter
Senior Member
iTrader: (4)
Joined: Jan 2008
Posts: 1,361
Total Cats: 17
From: Falls Church, VA
What's probably the cheapest is buying a quality $30 aluma-burr and going to town on the valve cover to fit what I already have. I just want to get a better look at the internals to see what all is required before I commit. But I guess it's not a really big commitment since I have no plans to ever need to mount the stock coils again.
#13
I have the stock 01 coils that came with the motor. They are in a box somewhere but my recollection is that it's a wasted configuration. Not a super critical issue, but I have COPs already and if I'm going to replace them with something else, that something else will also be configurable for sequential. I have MS3/X, no reason not to.
That's probably what I would go with if I replaced the COPs. I found your old thread and bookmarked it for mounting ideas if I end up going that route.
Especially if the cost was offset by selling my set of COPs complete with wiring harness & hold-down bracket.
What's probably the cheapest is buying a quality $30 aluma-burr and going to town on the valve cover to fit what I already have. I just want to get a better look at the internals to see what all is required before I commit. But I guess it's not a really big commitment since I have no plans to ever need to mount the stock coils again.
I will take a picture of my VC tonight if it is not to dark when I get home. So you can see what I cut down to make the cops work on my VC. Just remember that I used a janky bar across the top of them to hold them down, not some fancy good looking bracket.
#16
Thread Starter
Senior Member
iTrader: (4)
Joined: Jan 2008
Posts: 1,361
Total Cats: 17
From: Falls Church, VA
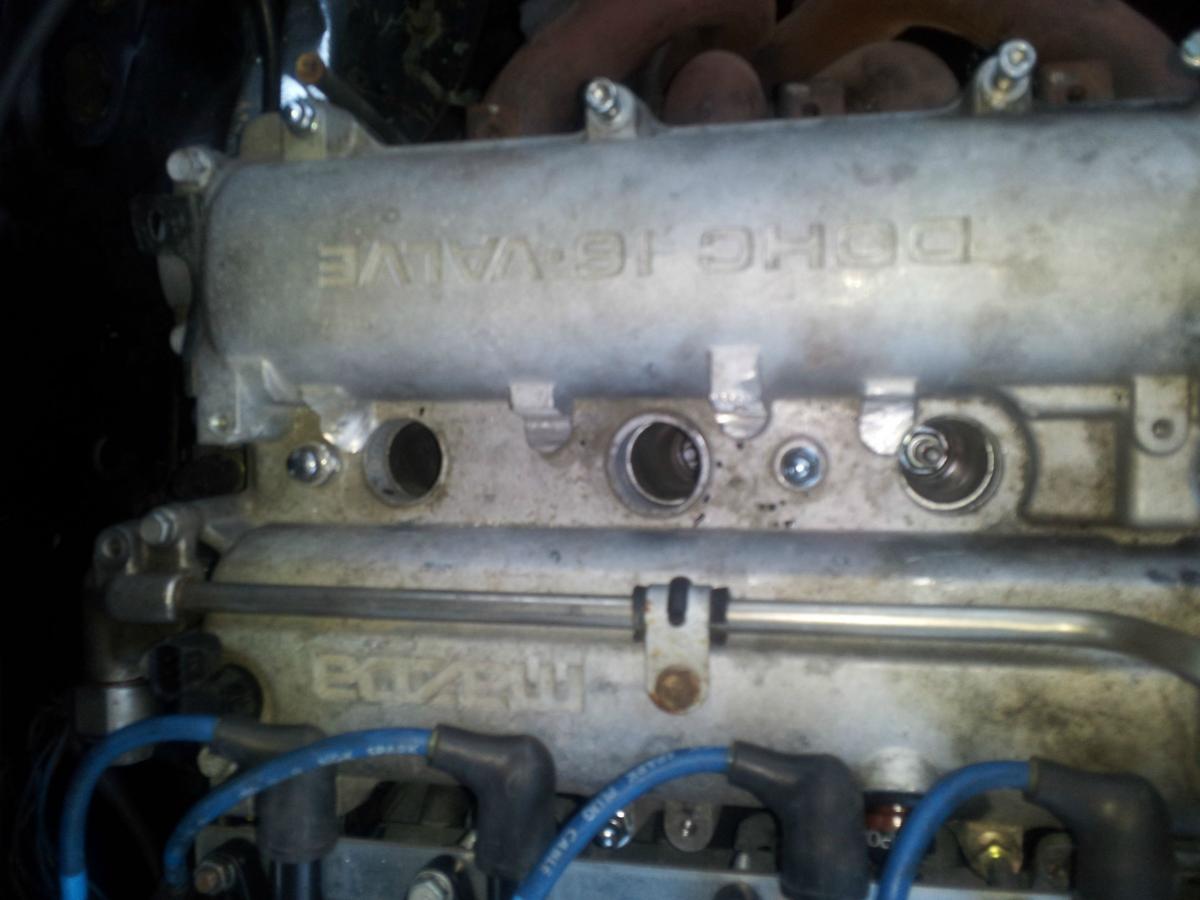
In case anyone else cares, here's a pic of the inside of the 01 valve cover with the center baffle plate removed. In the center of the pic is the underside of the Louisiana-Minnesota area circled in the earlier pic.
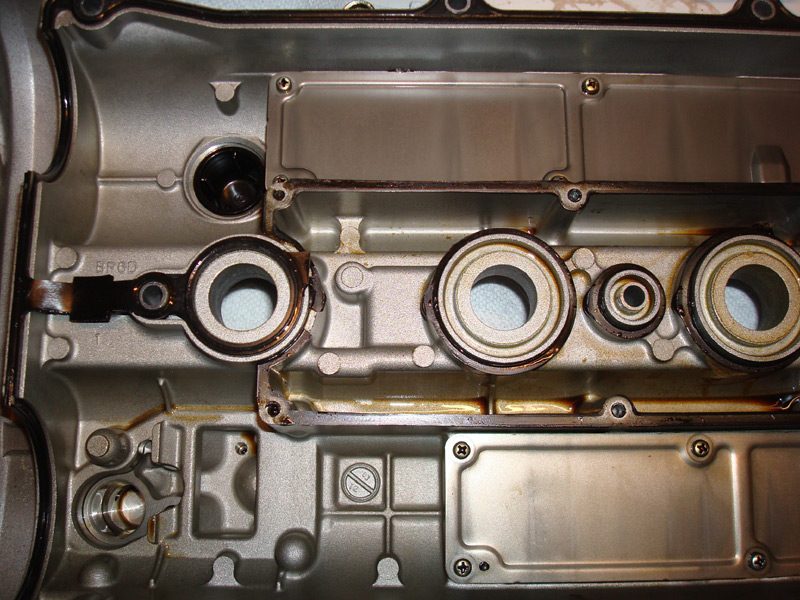
You can't do any significant grinding on that area without creating a big hole. I also don't see why that stuff has the profile it does in the first place. As far as I can tell, you could remove it all and then weld in a piece of aluminum to make the valve cover valley totally flat, without compromising the function of the baffling and valve cover breather to which it connects. I mean, presumably there is a legit reason for that stuff to have the shape it does, other than Mazda ******* with me.
I'm just going to grind off the stock coil posts to match the rest of the valve cover profile (where possible) and go from there. For cyls 2-4 I can probably use an underneath style bracket like I currently run. I can possibly make the #1 coil mounting eye work with the valve cover bolt right in front of it. The janky bar across the top is less preferable but I'll do it if I have to.
You want die grinder bits specifically made for aluminum, with a low flute count so the tool doesn't get loaded up. Like these:
http://www.carbidebur.com/nfburs/nfall.htm

You can't do any significant grinding on that area without creating a big hole. I also don't see why that stuff has the profile it does in the first place. As far as I can tell, you could remove it all and then weld in a piece of aluminum to make the valve cover valley totally flat, without compromising the function of the baffling and valve cover breather to which it connects. I mean, presumably there is a legit reason for that stuff to have the shape it does, other than Mazda ******* with me.
I'm just going to grind off the stock coil posts to match the rest of the valve cover profile (where possible) and go from there. For cyls 2-4 I can probably use an underneath style bracket like I currently run. I can possibly make the #1 coil mounting eye work with the valve cover bolt right in front of it. The janky bar across the top is less preferable but I'll do it if I have to.
http://www.carbidebur.com/nfburs/nfall.htm
#17
I opened the holes up on my valve cover using a step bit I got from Harbor Freight. After that I used the raised the areas that the factory '01+ coils mount to with a set of Home Depot sourced 2" steel straight bracket and a plastic spacer. Hard to explain, but pictures are worth a 1000 words, so here you go:

#18
You want die grinder bits specifically made for aluminum, with a low flute count so the tool doesn't get loaded up. Like these:
http://www.carbidebur.com/nfburs/nfall.htm
http://www.carbidebur.com/nfburs/nfall.htm
#19
You want die grinder bits specifically made for aluminum, with a low flute count so the tool doesn't get loaded up. Like these:
http://www.carbidebur.com/nfburs/nfall.htm
http://www.carbidebur.com/nfburs/nfall.htm


