

my first DIY resisted injector harness
 08-25-2010, 06:48 AM
#1
Elite Member
Thread Starter
iTrader: (4)
Join Date: Dec 2009
Location: Reno, NV
Posts: 3,686
Total Cats: 95
I decided to build my own resisted injector harness, with as little money possible, in hope to mass make if people like the product, and dont want to mess with wires (pussies). This is a prototype of course, it will be cleaned up.
my build list:
-RADIOSHACK PARTS-
-AUTO PARTS NEEDED-
-STUFF I HAD-
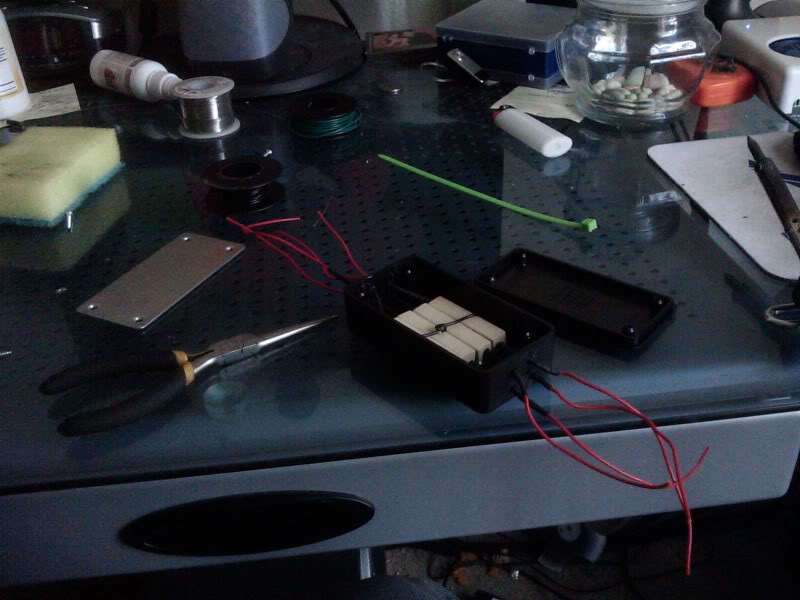
First, I started putting my injector box together. Nothing fancy or too crazy, 4 wires on each end of the box. I plan on cleaning this up with on one side will be a 6-pin connector, with only 5 pins being used. I also am thinking of installing aluminum heatsyncs on the resistors themselves.
I then took the paper clip and heated it up with the lighter, to poke holes through the plastic lid, to allow the box to breathe, I also dremmeled a open square in the aluminum plate to allow it to breathe through my fancy hole(s).
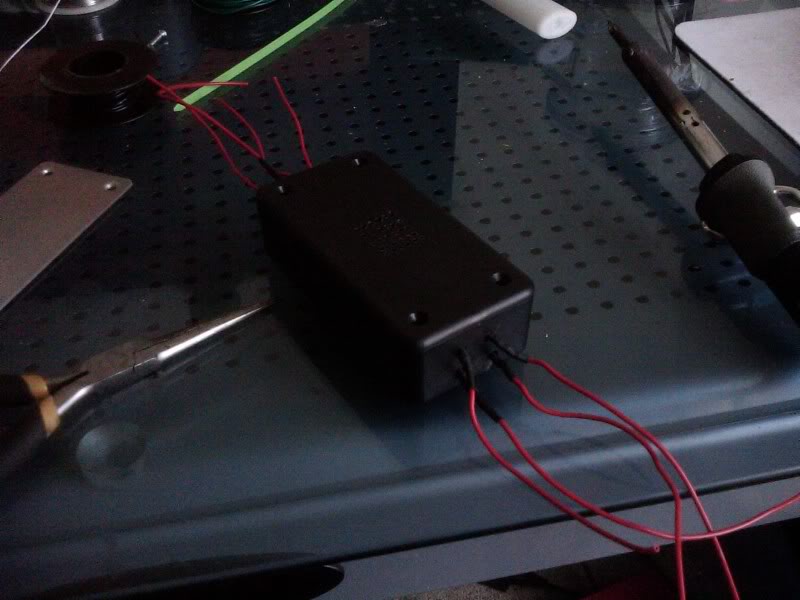
I then, gave little hope to retards like me by painting directional arrows on the lid. Amazing what 7 post-it notes can accomplish when masking tape is missing.
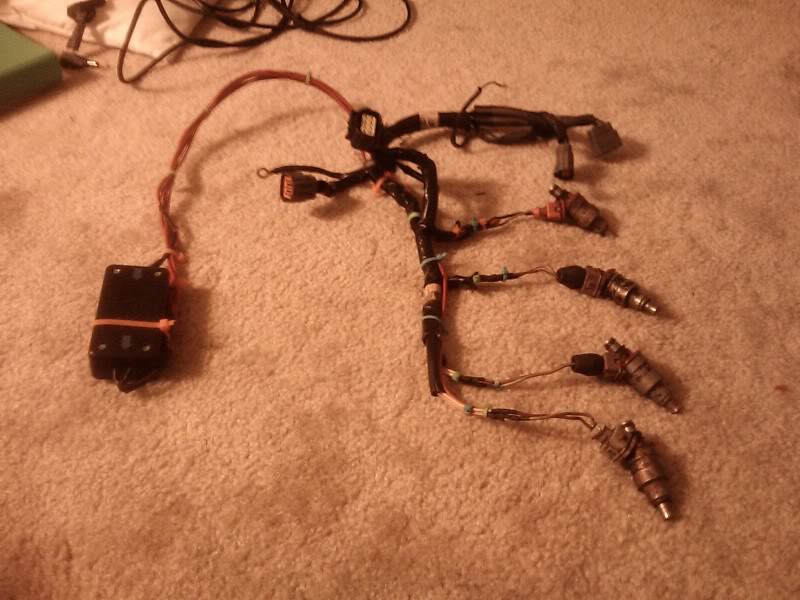
Then, it was simple soldering, shrinking and zip tying. I only used one power source wire, since its the same damn source in all 4 injectors, which allowed me to splice all 4 wires at the inbound side of the injector box into one nice gay wire. In this photo you can see injectors 1 & 2 with the 12v source heat shrinked and crimped.
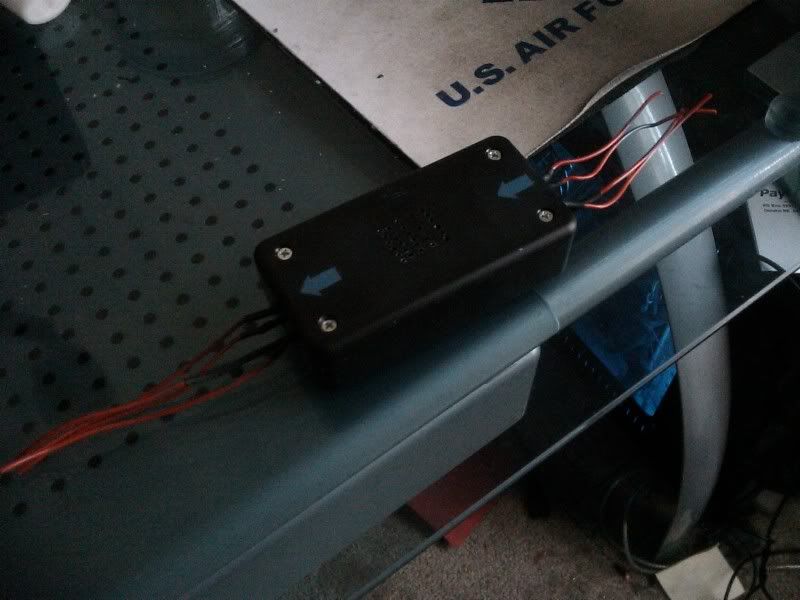
and presto! A resisted injector harness is born! The box can is estimated to reach 3 inches away from passenger front fender wall. About a little past the strut. Remember... estimated.
my build list:
-RADIOSHACK PARTS-
- 10ohm ceramic resistors- $5~
- small plastic "project box"- $6~
- Assorted shrink tubing (optional)- $4~
- 14 Guage wire (three color pack of 15ft.)-$6~
-AUTO PARTS NEEDED-
- Injector clips (in this case, RX-7 from fellow butt buddy on mt.net) -(price varies)
- of course, a injector harness. (mine is from a 94')
-STUFF I HAD-
- Soldering Iron
- Soldering Wire (.032 diameter, small yes. Rosin-core)
- Lighter
- plastic ties (very fruity assortment of colors... very mt.net)
- small paper clip
First, I started putting my injector box together. Nothing fancy or too crazy, 4 wires on each end of the box. I plan on cleaning this up with on one side will be a 6-pin connector, with only 5 pins being used. I also am thinking of installing aluminum heatsyncs on the resistors themselves.
I then took the paper clip and heated it up with the lighter, to poke holes through the plastic lid, to allow the box to breathe, I also dremmeled a open square in the aluminum plate to allow it to breathe through my fancy hole(s).
I then, gave little hope to retards like me by painting directional arrows on the lid. Amazing what 7 post-it notes can accomplish when masking tape is missing.
Then, it was simple soldering, shrinking and zip tying. I only used one power source wire, since its the same damn source in all 4 injectors, which allowed me to splice all 4 wires at the inbound side of the injector box into one nice gay wire. In this photo you can see injectors 1 & 2 with the 12v source heat shrinked and crimped.
and presto! A resisted injector harness is born! The box can is estimated to reach 3 inches away from passenger front fender wall. About a little past the strut. Remember... estimated.

Reply
 0
0

0


Thread
Thread Starter
Forum
Replies
Last Post
Zaphod
MEGAsquirt
47
10-26-2018 11:00 PM


