
College Student's First Engine Rebuild
 08-18-2013, 09:00 PM
#1
Newb
Thread Starter

Join Date: Mar 2013
Location: Lubbock, TX
Posts: 17
Total Cats: 2
WARNING!!! If you are an experienced builder some things you will see here may really upset your stomach.
OK guys, about one year and a half ago the oil pump on my car failed idling in my garage. The head was making sounds and sure enough the oil pressure gauge was down at zero. Because I was hearing noises I decided to get a new 70k miles JDM engine. I installed the engine in the car after replacing all gaskets and seals (not the head gasket) and it has been running perfectly all this time, about 10k miles. There was only a single thing I did wrong with my install aparently (torque the crank bolt properly). If you read my first post on this forum, some time ago there were some things I could not explain about my large timing numbers. Below is a link to the post:
https://www.miataturbo.net/megasquir...estions-71612/
One day I decided to inquire a little more about my unussualy high timing numbers and I took off the pulley and sparkplug #1. Even though I had checked the pulley a few times in the past I must have not indexed the cylinder at TDC correctly. I quickly noticed something, it was an instant "ohh crap" moment, It explained all the problems I was having before. See the picture below. Retarded timing, The hub was at a different angle than the gear was!. It turns out that the crank bolt had backed slightly. Just enough to get the threads inside FULL of dirt and key/keyway filings. This caused the bolt to seize into the crank. I tried to remove the bolt and I was using too much force, it felt really stuck. Then I chickened out and tried to tighten it instead of removing it and the damn thing just snapped.

There is no need to mention that the keyway was toast. Below is a picture of the key itself:

Seeing this mess I decided to take averything out and refresh my engine.

The damage pictured:

Then, I separated the engine and transmission to find my FM Stage 1 clutch kit looking beautiful. Not a drop of oil from the rear crank seal as expected. Anyways, This is how I loosen the bolts that hold the flywheel. Maybe not the best way but it works for sure. This rope is a little stretchy so there must be something better out there.

Once I got the flywheel off, I bolted on my engine stand to the block:

This looks ridiculous but at least I dont have to force my back. In case you can not tell from the picture, the engine stand is actually hanging from the engine pulled by the hoist. Once everything is bolted together I lower the hoist. Now the engine stand is supporting the engine not the hoist. At this point I started to take the intake manifold and the turbo off of the block. The hoist was kept on just in case I tipped over the stand.

Picture of the head's intake ports:
Cylinder 1
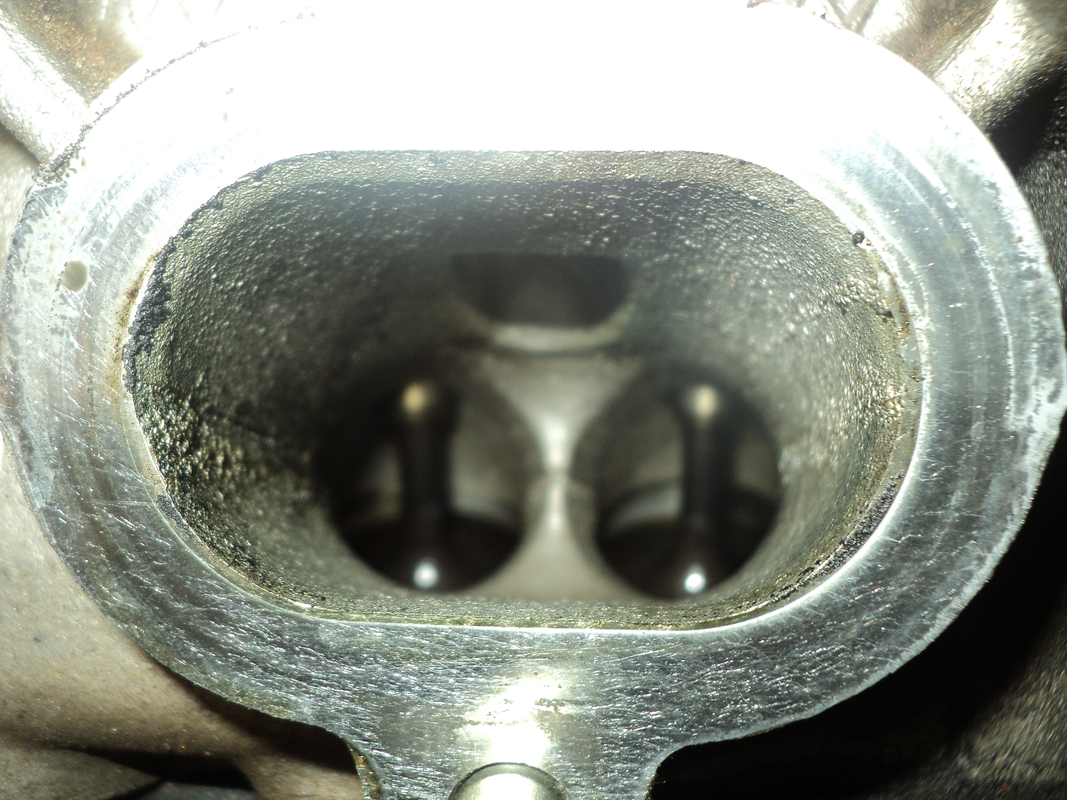
Cylinder 2

Cylinder 3

Cylinder 4
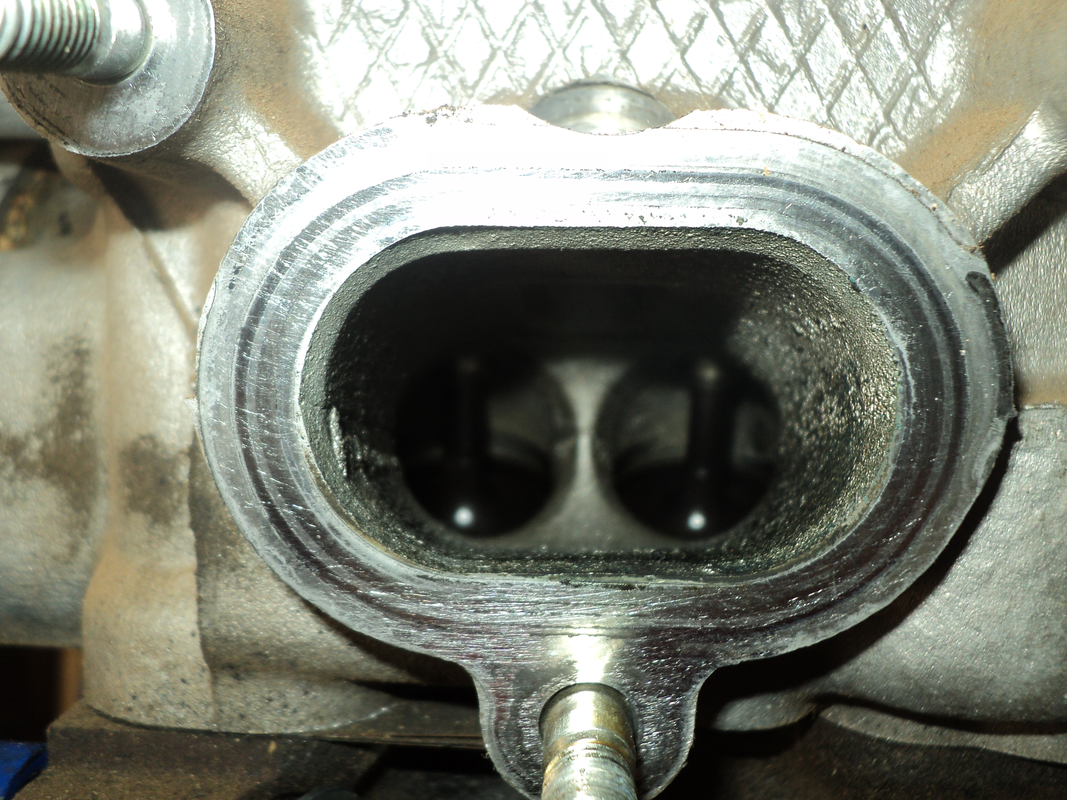
It looks like my water/methanol injection is keeping those ports/valves clean. Then, to remove the head without causing harm to it. I used the hoist to slightly "break the glue off". Notice the valve cover was on. I felt that not having it in would somehow hurt/bend the hollow head. Once it was loose I took off the hoist's attachments and gently lifted it up by hand and put it on top of an old towel on my workbench.
Picture of the gasket and block's deck:
Gasket:

Deck:

Looking at the piston tops and the head's combustion chamber was upsetting. Look at all that carbon! Because This crank is somewhat messed up I am going to use my old engine's crankshaft. Look at a picture of the worse looking journal:


Looks pretty darned good to me!. Those fine little cratches can not be felt using my finger nails. I guess that the fact that the pump failed while idling, using mobil 1 synthetic oil and I did not delayed much to turn the engine off kept everything looking great. Anyone thinks otherwise?
I have already purchased piston rings, micrometers, plastigauge, main and rod bearings, ring grinding tool, new head bolts and some cheap autozone oil for breakin. After assembly I will only run it for 50 miles or so before I change the oil so buying the good stuff does not seem like a good idea.
Please let me know what you think about this: since I am going to be using my old crank I think I should also be using the old pistons. This is because the rotating assembly of the old engine is matched to the old pistons. Good/bad idea?
Since I have everything appart I will either get my cylinder head serviced by a machine shop. Maybe change the stem seals, guides, retainers, cleaned and get the mating surface trued/cleaned. I do not think this head is warped or messed up in any way but I will have the shop check just in case. The car ran strong without heating issues. Essentially this would be a new engine. I will check to see what is more economical, to have my local machine shop service it or to simply buy a new remanufactured one online.
Do you guys know of a good place to get the remanufactured head from in case my local machine shop is excesively expensive?
Thank you
OK guys, about one year and a half ago the oil pump on my car failed idling in my garage. The head was making sounds and sure enough the oil pressure gauge was down at zero. Because I was hearing noises I decided to get a new 70k miles JDM engine. I installed the engine in the car after replacing all gaskets and seals (not the head gasket) and it has been running perfectly all this time, about 10k miles. There was only a single thing I did wrong with my install aparently (torque the crank bolt properly). If you read my first post on this forum, some time ago there were some things I could not explain about my large timing numbers. Below is a link to the post:
https://www.miataturbo.net/megasquir...estions-71612/
One day I decided to inquire a little more about my unussualy high timing numbers and I took off the pulley and sparkplug #1. Even though I had checked the pulley a few times in the past I must have not indexed the cylinder at TDC correctly. I quickly noticed something, it was an instant "ohh crap" moment, It explained all the problems I was having before. See the picture below. Retarded timing, The hub was at a different angle than the gear was!. It turns out that the crank bolt had backed slightly. Just enough to get the threads inside FULL of dirt and key/keyway filings. This caused the bolt to seize into the crank. I tried to remove the bolt and I was using too much force, it felt really stuck. Then I chickened out and tried to tighten it instead of removing it and the damn thing just snapped.
There is no need to mention that the keyway was toast. Below is a picture of the key itself:
Seeing this mess I decided to take averything out and refresh my engine.
The damage pictured:
Then, I separated the engine and transmission to find my FM Stage 1 clutch kit looking beautiful. Not a drop of oil from the rear crank seal as expected. Anyways, This is how I loosen the bolts that hold the flywheel. Maybe not the best way but it works for sure. This rope is a little stretchy so there must be something better out there.
Once I got the flywheel off, I bolted on my engine stand to the block:
This looks ridiculous but at least I dont have to force my back. In case you can not tell from the picture, the engine stand is actually hanging from the engine pulled by the hoist. Once everything is bolted together I lower the hoist. Now the engine stand is supporting the engine not the hoist. At this point I started to take the intake manifold and the turbo off of the block. The hoist was kept on just in case I tipped over the stand.
Picture of the head's intake ports:
Cylinder 1
Cylinder 2
Cylinder 3
Cylinder 4
It looks like my water/methanol injection is keeping those ports/valves clean. Then, to remove the head without causing harm to it. I used the hoist to slightly "break the glue off". Notice the valve cover was on. I felt that not having it in would somehow hurt/bend the hollow head. Once it was loose I took off the hoist's attachments and gently lifted it up by hand and put it on top of an old towel on my workbench.
Picture of the gasket and block's deck:
Gasket:
Deck:
Looking at the piston tops and the head's combustion chamber was upsetting. Look at all that carbon! Because This crank is somewhat messed up I am going to use my old engine's crankshaft. Look at a picture of the worse looking journal:
Looks pretty darned good to me!. Those fine little cratches can not be felt using my finger nails. I guess that the fact that the pump failed while idling, using mobil 1 synthetic oil and I did not delayed much to turn the engine off kept everything looking great. Anyone thinks otherwise?
I have already purchased piston rings, micrometers, plastigauge, main and rod bearings, ring grinding tool, new head bolts and some cheap autozone oil for breakin. After assembly I will only run it for 50 miles or so before I change the oil so buying the good stuff does not seem like a good idea.
Please let me know what you think about this: since I am going to be using my old crank I think I should also be using the old pistons. This is because the rotating assembly of the old engine is matched to the old pistons. Good/bad idea?
Since I have everything appart I will either get my cylinder head serviced by a machine shop. Maybe change the stem seals, guides, retainers, cleaned and get the mating surface trued/cleaned. I do not think this head is warped or messed up in any way but I will have the shop check just in case. The car ran strong without heating issues. Essentially this would be a new engine. I will check to see what is more economical, to have my local machine shop service it or to simply buy a new remanufactured one online.
Do you guys know of a good place to get the remanufactured head from in case my local machine shop is excesively expensive?
Thank you

Reply
 2
2

2
08-22-2013, 02:05 PM
#2
Newb
Thread Starter
Join Date: Mar 2013
Location: Lubbock, TX
Posts: 17
Total Cats: 2
Even though I knew it was going to be more expensive I decided to take my cylinder head to the local machine shop. Contrary to my belief the head was in fact minimally warped. The machinist said that is was only 0.003" warped. Also while I was there I got a complete service, got all 16 stem seals and a valve job.
Also, the machinist told me that instead of using new OEM head bolts that I should think about upgrading to ARP studs to be on the safe side. They do install turbos and superchargers with stock head fasteners but it is their preference to have customers upgrade. I purchased them online. BTW, they are a complete auto service shop. Link below:
Complete Auto Repair
I also decided to get the crankshaft miked and polished up. I guess that all the prepwork is almost done. All I have left if to get the bores dereamed and deglazed. I will do those in my garage as it does not seem to be that dificult at all. It will be done this weekend.
See pictures below:
This one is the machine where they slightly shaved and resurfaced the head.


Thanks
Also, the machinist told me that instead of using new OEM head bolts that I should think about upgrading to ARP studs to be on the safe side. They do install turbos and superchargers with stock head fasteners but it is their preference to have customers upgrade. I purchased them online. BTW, they are a complete auto service shop. Link below:
Complete Auto Repair
I also decided to get the crankshaft miked and polished up. I guess that all the prepwork is almost done. All I have left if to get the bores dereamed and deglazed. I will do those in my garage as it does not seem to be that dificult at all. It will be done this weekend.
See pictures below:
This one is the machine where they slightly shaved and resurfaced the head.
Thanks
Reply
0
0
08-24-2013, 05:53 PM
#3
Newb
Thread Starter
Join Date: Mar 2013
Location: Lubbock, TX
Posts: 17
Total Cats: 2
OK, I honed the cylinders, gapped the rings, installed them, mounted the pistons in their original place, installed the bearings and used assembly lube all over the place EXEPT for the piston rings.
Am I supposed to put assembly lube on the rings too? I just Oiled them really well. Regular motor oil that is.
Also check out how the deck turned out to look like.

How is that for a finish. I am having a hard time removing the rest of the backed black stuff. Would leaving that in cause much problems?
Also, the honing was done first with 220 grit stones and I finished it off with a little with 400 grit stones.
Is there anything I am obviously doing wrong?
I am about to silicone the pan in so any input would be apreciated.
Thank you
Am I supposed to put assembly lube on the rings too? I just Oiled them really well. Regular motor oil that is.
Also check out how the deck turned out to look like.
How is that for a finish. I am having a hard time removing the rest of the backed black stuff. Would leaving that in cause much problems?
Also, the honing was done first with 220 grit stones and I finished it off with a little with 400 grit stones.
Is there anything I am obviously doing wrong?
I am about to silicone the pan in so any input would be apreciated.
Thank you
Reply
0
0
09-01-2013, 12:19 AM
#4
Newb
Thread Starter
Join Date: Mar 2013
Location: Lubbock, TX
Posts: 17
Total Cats: 2
So far so good. After cleaning the block's deck a little more I ended up torquing the head to 55 ft-lb when using the ARP studs. I read many people were having crushed head problems by torquing them to the specified 80 ft-lb
Today I mated the engine and the transmission and installed the starter motor to do a coompression test. I know compression tests need to be done on a hot engine but the reason I wanted to do it anyways is because I wanted to see if putting the engine into the car was worth the trouble.
Before the compression test started I wanted to make sure that the oil pump was in fact working. Surely enough it was not pumping as it needed some oil to make the seal. I fixed that rather quickly by putting some oil in the passage covered by an allen plug in the pump and proceeded with the compression test.
The cylinders had a little oil in them for initial lubrication purposes. The numbers obtained are as follow:
Cyl #1: 180 psi
Cyl #2: 182 psi
Cyl #3: 175 psi
Cyl #4: 180 psi
Cylinder #3 is a little below all others but still within specs, maybe I screwed up the honing (I would not be amazed if this was case). At this point I knew that the engine, once in the car, would at least start.
I slaped the engine into the car and after hooking up everything it started without issues. LOTS of lifter chatter, like I have never had before. The chatter lasted for all 10 minutes the car idled, setting timing, cheking for leaks, etc.
I shutdown the car because I could not get a stuborn air bubble out, let it cool back down, topped it off and this time the heater started to feel hot after a reving the engine a few times. This second time I started the car there was no lifter chatter at all.
Now, because its 11pm here I am not going out to break in the rings until the morning. If the car breaks on me I prefer it does so in daylight. Tomorrow will be the day.
I am realy glad that the car is not smoking at all and that it is running with a smoothness that I never felt before from this car. If it does not blow up tomorrow during break-in it should last 200K miles, or at least I hope.
Reply
0
0
09-01-2013, 10:41 AM
#5
Moderator


iTrader: (12)
Join Date: Nov 2008
Location: Tampa, Florida
Posts: 20,884
Total Cats: 3,075
The ring break in should have happened within the first ten minutes. I hope you varied the RPMs and didn't just let it idle. It needed to have a load placed on it, too.

Reply
0
0
09-01-2013, 01:53 PM
#6
Newb
Thread Starter
Join Date: Mar 2013
Location: Lubbock, TX
Posts: 17
Total Cats: 2
Unfortunatelly I was not able to drive very far today. I tried going out but the car sometimes stall just by pressing the gas slightly. I got as far as a few blocks before heading back to my garage.
Any clues as to what could be causing this problem?
Reply
0
0
09-01-2013, 02:05 PM
#7
Junior Member

Join Date: Oct 2012
Posts: 138
Total Cats: 5
Yes, I did, I was reving it to try to get all air bubbles out but that was about it.
Unfortunatelly I was not able to drive very far today. I tried going out but the car sometimes stall just by pressing the gas slightly. I got as far as a few blocks before heading back to my garage.
Any clues as to what could be causing this problem?
Unfortunatelly I was not able to drive very far today. I tried going out but the car sometimes stall just by pressing the gas slightly. I got as far as a few blocks before heading back to my garage.
Any clues as to what could be causing this problem?
I would start by checking what the ECU is saying... if OEM, hook up an OBD reader and see if you have any codes stored. If MS, then need to log the behavior. Also, check all connections including both electrical and vacuum.
Did you check the base timing?
Reply
0
0
09-01-2013, 03:06 PM
#8
Newb
Thread Starter
Join Date: Mar 2013
Location: Lubbock, TX
Posts: 17
Total Cats: 2
The ECU is a megasquirt. What I notice is that the AFR goes very lean and then it quits. This is a bit interesting.
If I start the car with the throttle half way, the car runs with no problem at higher RPM but as soon as I try to increase the RPM from that point it dies.
The same happens when trying to accelerate from idle. This was not happening yesterday as I was reving it without issues. The only thing I noticed is that very sporadically there was a very small blip in smoothness.
Perfectly running the night before and funky next day? weird.
I took off the valve cover to recheck the timing, all OK, sparkplug gaps OK, fuel lines connected the right way. The line that is closest to the radiator goes to the FPR side.
Right now the only thing that I am unsure about is the quality of the fuel. During the rebuilt process I left the gas cap off to prevent any pressure buildup and leaks that come with it. I put caps on the lines after engine was out but but the tank cap remained off. You think thos could have damaged the gas?
Anyways the engine is running SMOOTH as long as I donr try to change its speed.
Thanks
Reply
0
0
09-01-2013, 03:44 PM
#9
Newb
Thread Starter
Join Date: Mar 2013
Location: Lubbock, TX
Posts: 17
Total Cats: 2
OK I found the culprit. It turns out that before the rebuild I had a little fitting to extend the vacuum hose that feeds the ECU I lost it during this time. Because I did not have another one handy I used the cruise control check valve to extend it.
Even though it was oriented properly I sensed a large resistance towards air flow. This was delaying the ECUs reaction time leading to lean conditions.
I decided to check this once I noticed that my vacuum gauge returned very slowly to the zero mark.
My bad!
Even though it was oriented properly I sensed a large resistance towards air flow. This was delaying the ECUs reaction time leading to lean conditions.
I decided to check this once I noticed that my vacuum gauge returned very slowly to the zero mark.
My bad!
Reply
0
0
09-03-2013, 11:43 PM
#10
Newb
Thread Starter
Join Date: Mar 2013
Location: Lubbock, TX
Posts: 17
Total Cats: 2
Ok, reporting on the status of my rebuild. I have 200 miles already where the last 75 the engine has seen boost levels up to 160 kPa. The engine runs well so I think I will be doing one more oil change with dino oil at 300 miles. After that (at about 500) I am switching to synthetic.
So far there has been only a single negative. Aparently the machine shop did not change my stem seals or they installed cheap chinese ones because sometimes when the car sits for a while a single puff of blue smoke comes out when its started. Restarting the engine immediatly after shuting down causes no puff. I could claim warranty but I don't feel like taking everything appart for something I can change easily with the rope method. Again no smoke at all during running, shifting, engine braking or anything, just a puff when staring after sitting for at least half an hour.
So far there has been only a single negative. Aparently the machine shop did not change my stem seals or they installed cheap chinese ones because sometimes when the car sits for a while a single puff of blue smoke comes out when its started. Restarting the engine immediatly after shuting down causes no puff. I could claim warranty but I don't feel like taking everything appart for something I can change easily with the rope method. Again no smoke at all during running, shifting, engine braking or anything, just a puff when staring after sitting for at least half an hour.
Reply
0
0
 09-07-2013, 01:07 PM
#12
Newb
Thread Starter
Join Date: Mar 2013
Location: Lubbock, TX
Posts: 17
Total Cats: 2
I had the crank key, crank, pistons and rods from my old engine lying around so I did not buy these. Here is the list of supplies with prices simply pulled from my credit card statement:
HARBOR FREIGHT TOOLS 7 $15.58
AUTOZONE #1411 $16.16
HARBOR FREIGHT TOOLS 7 $4.32
HARBOR FREIGHT TOOLS 7 $17.62
AUTOZONE #1411 $28.66
OREILLY AUTO 00010082 $8.11
AUTOZONE #1339 $23.98
OREILLY AUTO 00010082 $4.32
AUTOZONE #1339 $109.31
AUTOZONE #1339 $23.22
AUTOZONE #1339 $18.36
HARBOR FREIGHT TOOLS 7 $46.94
AUTOZONE 1339 LUBBOCK TX $10.81
AUTOZONE 1339 LUBBOCK TX $23.11
OREILLY AUTO 010082LUBBOCK TX $8.11
Mopar Combustion Chamber Cleaner $8.77
AUTOZONE 3072 LUBBOCK TX $25.09
AUTOZONE 1339 LUBBOCK TX $7.01
AUTOZONE 1339 LUBBOCK TX $80.55
AUTOZONE 1339 LUBBOCK TX $46.41
ARP (eBay) $113.32
Victor Reinz Head Bolts (eBay) $35.26
NPR/King Rings And Bearings (eBay) $84.95
Ring Gapper (eBay) $44.95
Felpro Head Gasket (eBay) $54.95
OEM Shifter Turret Bushing Kit (eBay) $47.00
Presure Test Head $36.50
VAT HEAD, DISSEMBLE, CLEN< CHECK FOR WARPAGE, AND VACUUM TEST $58.40
SURFACE HEAD $40.00
VALVE JOB $294.00
POLISH CRANK $45.00
Total $1,000.34
Notice that some things I did just in case or for my own pleasure. For example the head did not really NEED a valve job or seals but I went ahead and did it anyways. Since I only ran this engine only 10k miles I did not need ALL NEW seals but I did purchased them all new anyways. So, this job could be made much cheaper by someone that takes the time to source the supplies from cheaper/better places.
Also notice that I purchased Victor Reinz head bolts but then I diceded to go with ARP studs, this was an extra expense not really needed.
If anyone needs those head bolts I am willing to part with them, I did open the bock to check them out though but never installed or torqued.
Thank you
Reply
0
0
09-29-2013, 02:59 AM
#13
Newb
Thread Starter
Join Date: Mar 2013
Location: Lubbock, TX
Posts: 17
Total Cats: 2
I guess this will be the last status update of this engine rebuild. Tonight I went to the drag strip to put this engine through its paces. It feels much stronger than the last engine as expected. Below is a virtual dyno plot comparing the old engine and the rebuild.
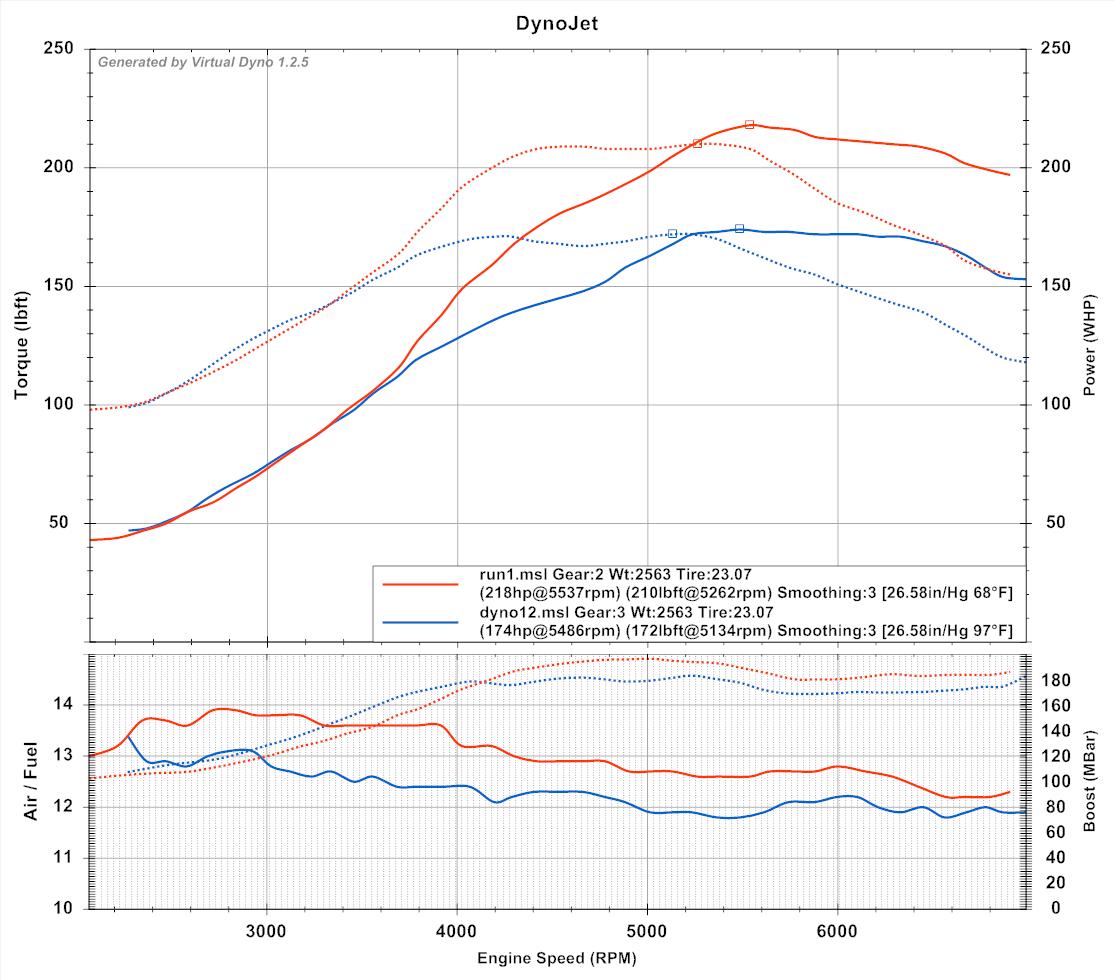
As y'all can probably tell, the blue one (old engine) was done in third gear while the red one (rebuild) was done in second gear and in a different day/ambient temperature. I just wanted a ball park measure anyways. The result is that I picked up 44 WHP. This improvement was not just from the engine alone I believe.
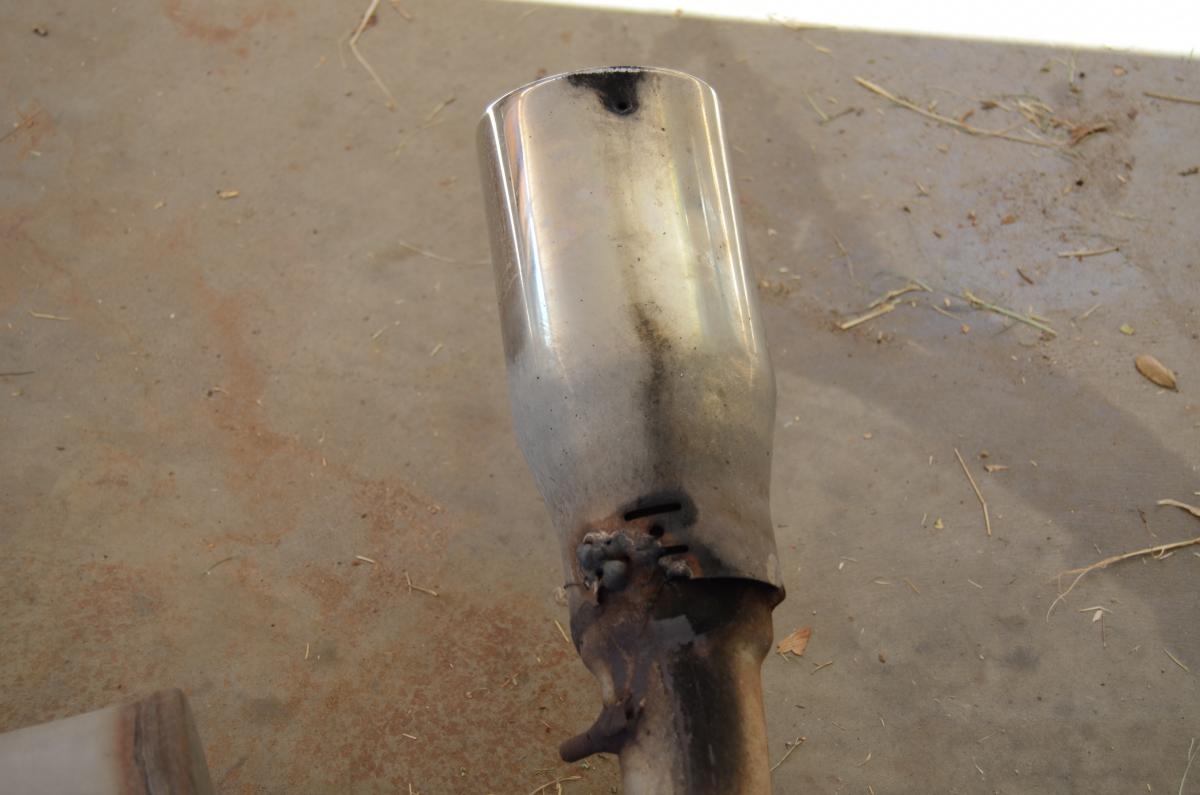
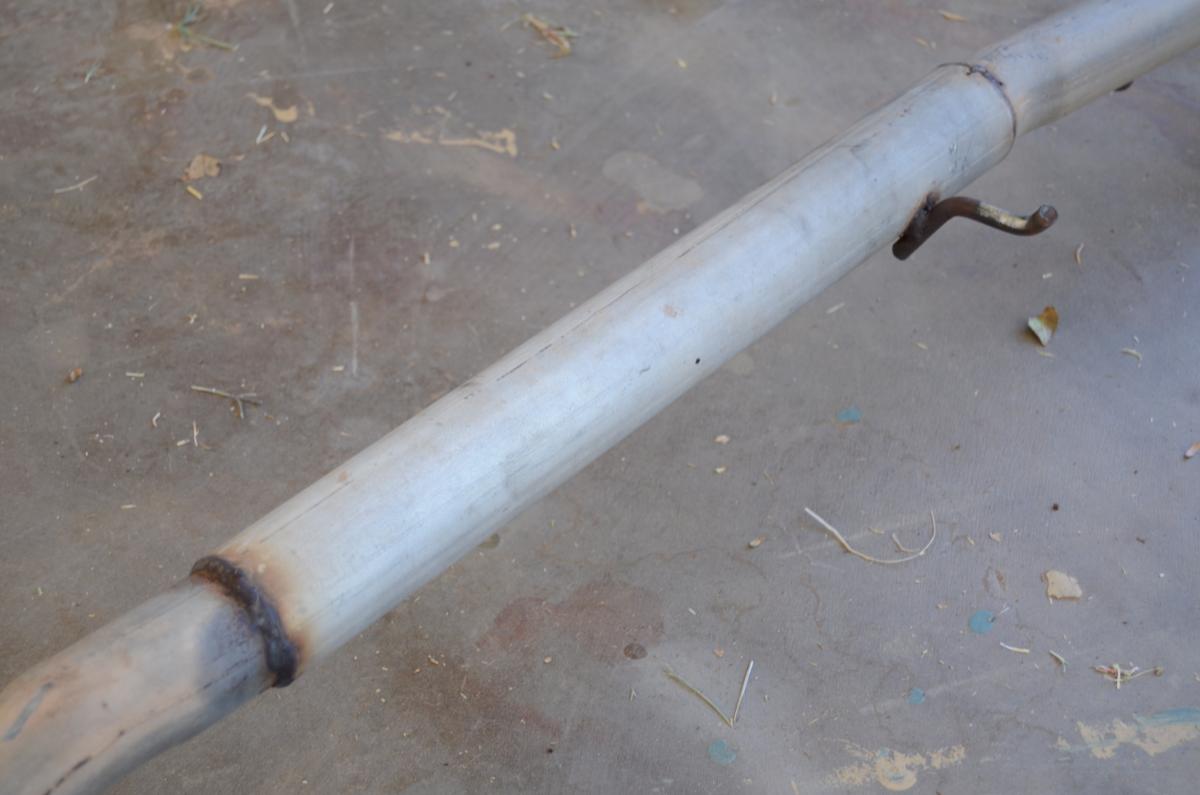
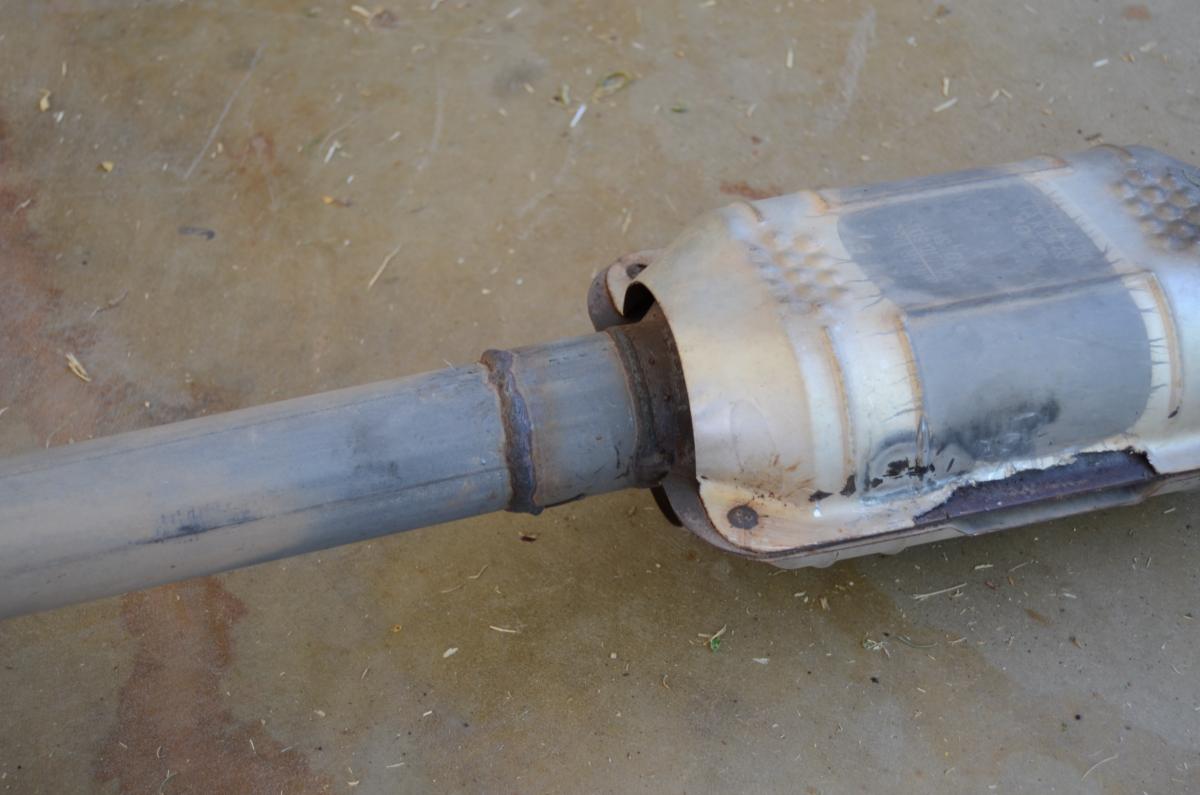
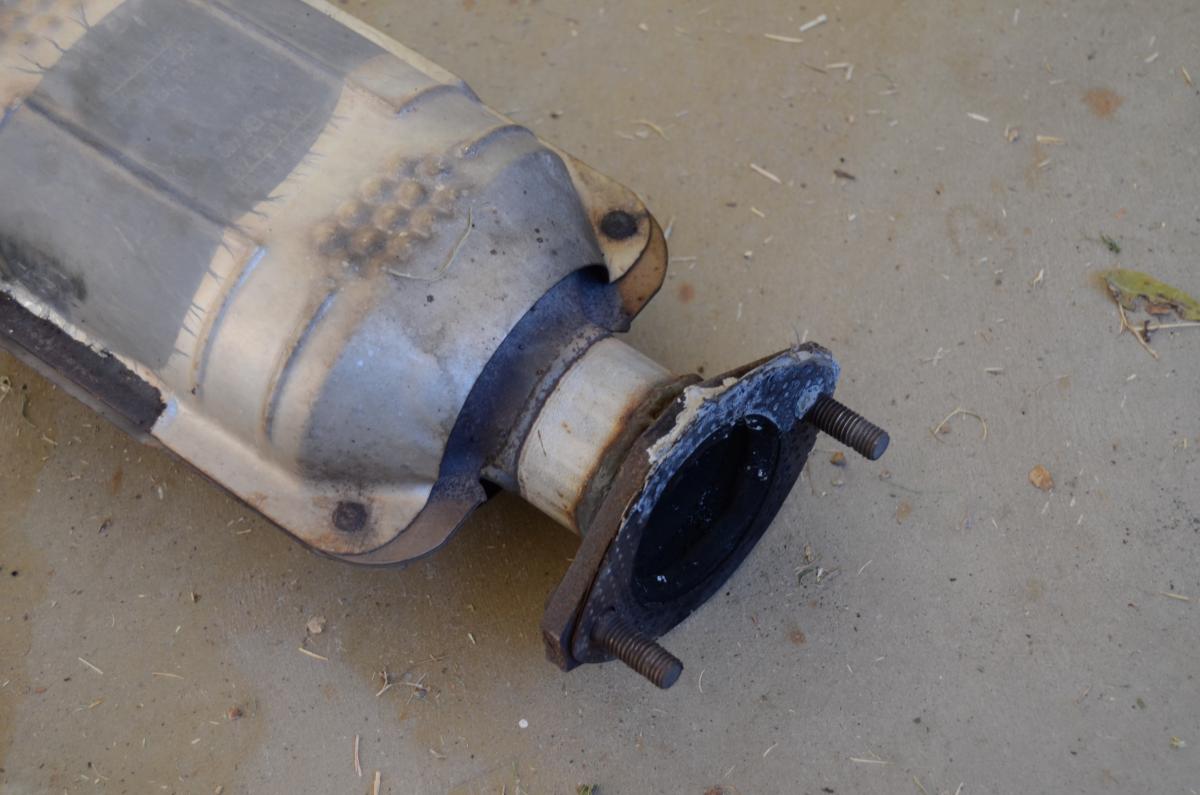
The old engine was running on a Frankenstained exhaust system. Stock cat connected to a section of 1.85" pipe, then to a section of 2.375" (resonator was deleted like this), then into the same 1.85" pipe (to recycle the pipe's bends) into a magnaflow muffler. The muffler is a 2.5". You get the idea... a really crappy exhaust system.
I recently installed a new exhaust system because my cat was rattling badly. Because the cat was welded to the "midpipe" and muffler, I decided to get a full replacement. Ive always read the reviews of eBay exhaust systems and what not but I decided to go ahead with one. They are cheap and hell, it could not possibly be worse than what I already had. I got a magnaflow direct fit catalytic converter together with the ebay exhaust and installed them. This system is an NA exhaust but Ive read reviews that say that they are extremely loud in NA cars. That was actually something I was looking forward to, it would be best for a turbo setup.
The resonator in the midpipe is a perforated wall type, the first muffler I have no idea about its construction and the third muffler is a perforated wall type. Unfortunately I did not measure the pipe's ID when I installed it but the OD measures almost 2.4". The ebay listing was for a 2.5" system but not even the pipe's OD was that much I am honestly not surprised. It is most likely somewhere in between a 2.25"-2.375".
The positive side is that it fit perfectly clearing the FM's butterfly brace and the rear sub brace. The tip was also right on center and hangers matched perfectly. The included silencer did make the car a lot quieter but it was so cheaply made that I simply dumped it into the trash after testing it. The sound level without the silencer is just perfect for me, not too loud and not exactly quiet. I could record a clip is anyone is interested. Anyways the rest of the exhaust system is beautiful, I really liked the welding and the looks of it. All mandrel bent. I paid $184.00 for it (including shipping)
Even though it is not a good system by any means, it was an upgrade to what I had on the car for sure. I may take pictures of the old one just for the giggles.
If you notice, the tune is running leaner on this engine than on the other engine, no changes made. Could this cleaned head be flowing better? This needs to be enriched a little more.
So a question... does this power level seem *right* for this 1.8L setup? too optimistic?
Let me know if more information is needed/required.
As y'all can probably tell, the blue one (old engine) was done in third gear while the red one (rebuild) was done in second gear and in a different day/ambient temperature. I just wanted a ball park measure anyways. The result is that I picked up 44 WHP. This improvement was not just from the engine alone I believe.
The old engine was running on a Frankenstained exhaust system. Stock cat connected to a section of 1.85" pipe, then to a section of 2.375" (resonator was deleted like this), then into the same 1.85" pipe (to recycle the pipe's bends) into a magnaflow muffler. The muffler is a 2.5". You get the idea... a really crappy exhaust system.
I recently installed a new exhaust system because my cat was rattling badly. Because the cat was welded to the "midpipe" and muffler, I decided to get a full replacement. Ive always read the reviews of eBay exhaust systems and what not but I decided to go ahead with one. They are cheap and hell, it could not possibly be worse than what I already had. I got a magnaflow direct fit catalytic converter together with the ebay exhaust and installed them. This system is an NA exhaust but Ive read reviews that say that they are extremely loud in NA cars. That was actually something I was looking forward to, it would be best for a turbo setup.
The resonator in the midpipe is a perforated wall type, the first muffler I have no idea about its construction and the third muffler is a perforated wall type. Unfortunately I did not measure the pipe's ID when I installed it but the OD measures almost 2.4". The ebay listing was for a 2.5" system but not even the pipe's OD was that much
I am honestly not surprised. It is most likely somewhere in between a 2.25"-2.375".The positive side is that it fit perfectly clearing the FM's butterfly brace and the rear sub brace. The tip was also right on center and hangers matched perfectly. The included silencer did make the car a lot quieter but it was so cheaply made that I simply dumped it into the trash after testing it. The sound level without the silencer is just perfect for me, not too loud and not exactly quiet. I could record a clip is anyone is interested. Anyways the rest of the exhaust system is beautiful, I really liked the welding and the looks of it. All mandrel bent. I paid $184.00 for it (including shipping)
Even though it is not a good system by any means, it was an upgrade to what I had on the car for sure. I may take pictures of the old one just for the giggles.
If you notice, the tune is running leaner on this engine than on the other engine, no changes made. Could this cleaned head be flowing better? This needs to be enriched a little more.
So a question... does this power level seem *right* for this 1.8L setup? too optimistic?
Let me know if more information is needed/required.
Reply
0
0


 06-26-2020, 06:52 AM
#15
Senior Member

Join Date: Mar 2017
Location: GER
Posts: 769
Total Cats: 113
edit:
I'm dumb, 2560, fm2, 14psi tapering down to ~12,5psi, 220whp seems fine. My 2560 holds 14,5 psi rock solid up to 7000rpm, i can even taper up a little bit (kraken manifold, 3" exhaust, pierburg boost solenoid on speeduino pnp)
Maybe try a third gear pull for better comparsion
Last edited by der_vierte; 06-26-2020 at 07:14 AM.
Reply
0
0

Thread
Thread Starter
Forum
Replies
Last Post


