
Wanker's Clever Build Thread Title...(56k come crash your computer)
 03-06-2009, 10:21 PM
#1
Elite Member
Thread Starter
iTrader: (8)

Join Date: Aug 2007
Location: Bellingham, Wa
Posts: 2,712
Total Cats: 4
So today on my way home from class I got hustled up a freeway on-ramp by something i'd rather not admit being hustled by.  This car is just too damn slow, especially with the map scaled for boost...i'm not running nearly enough timing up top for being N/A.
So I thought about it, thought some more. I'm only missing a few smallish pieces that I can run and get at the parts store down the street when the time comes. I've got til tuesday to get this thing back on the road or i'll be taking the bus to school
My setup is mostly in my sig, if you want to know anything more specific just ask.
So enough chit-chat, lets make with the pictures.
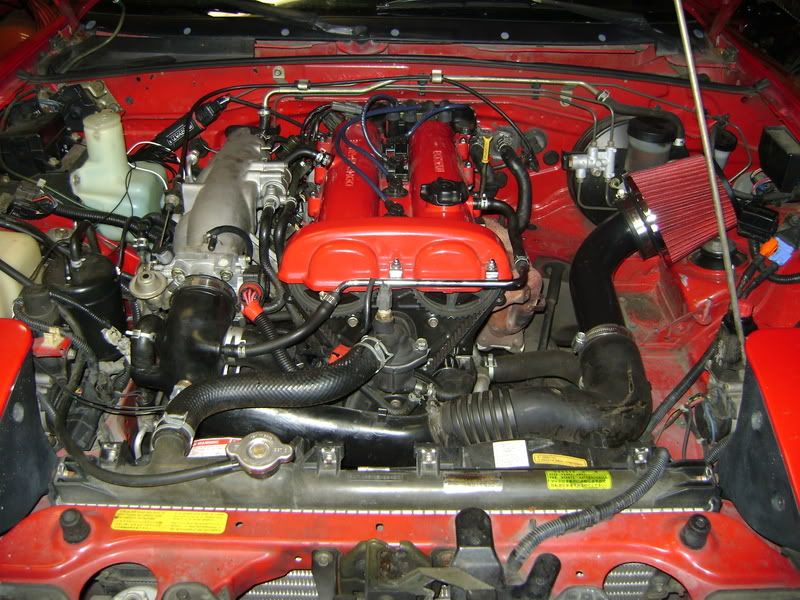
As it sat when I pulled it into the garage. Dont mind the ghettofied TPS hanging off the throttle body...will fix in due time.
First things first, get that old header off:
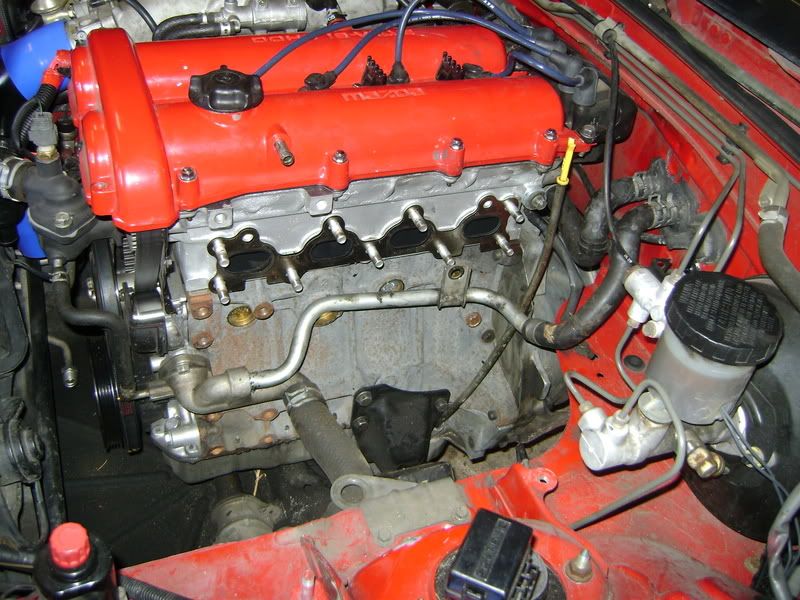
Took me awhile but I knew I remembered being able to get that bastard out in one piece.
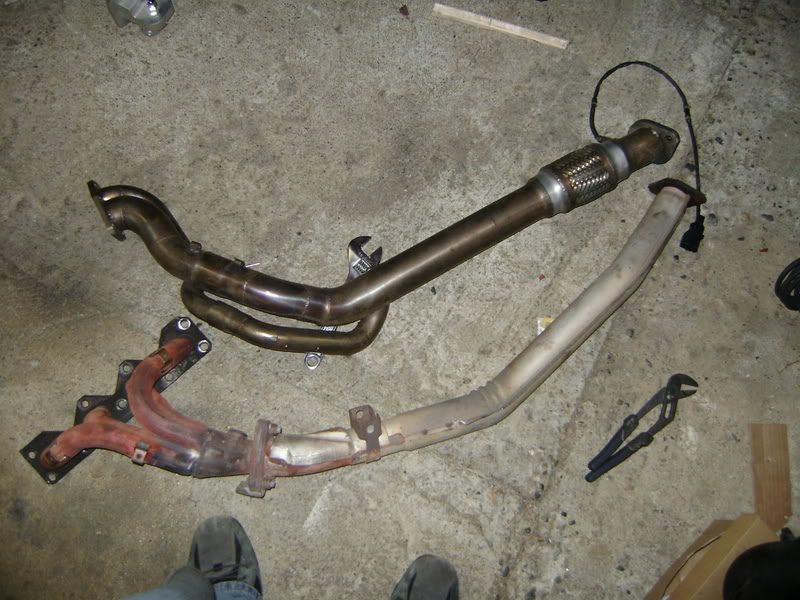
The old and the new (thesnowboarder misses his SSSGDP):
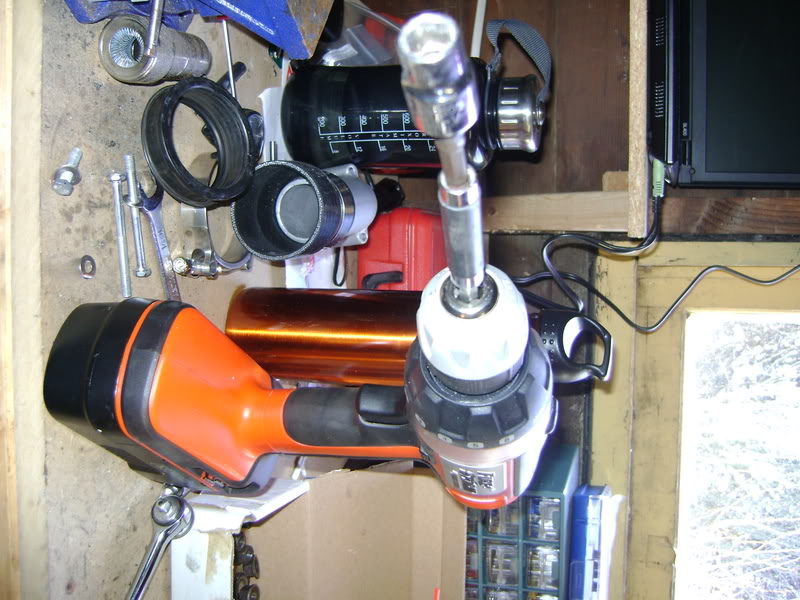
Best tool in the garage in my opinion. Makes quick work of twisting out mile long bolts without the obnoxiousness of the air ratchet:
Turbo not hit block?
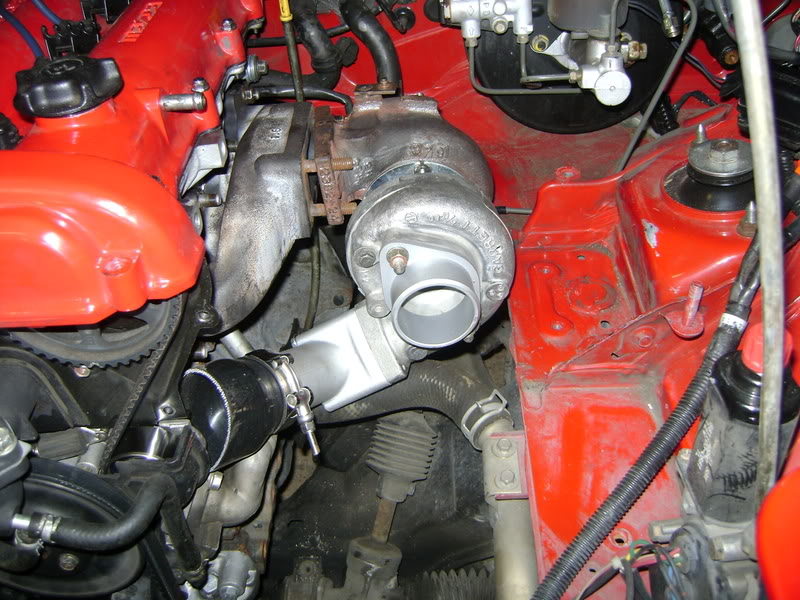
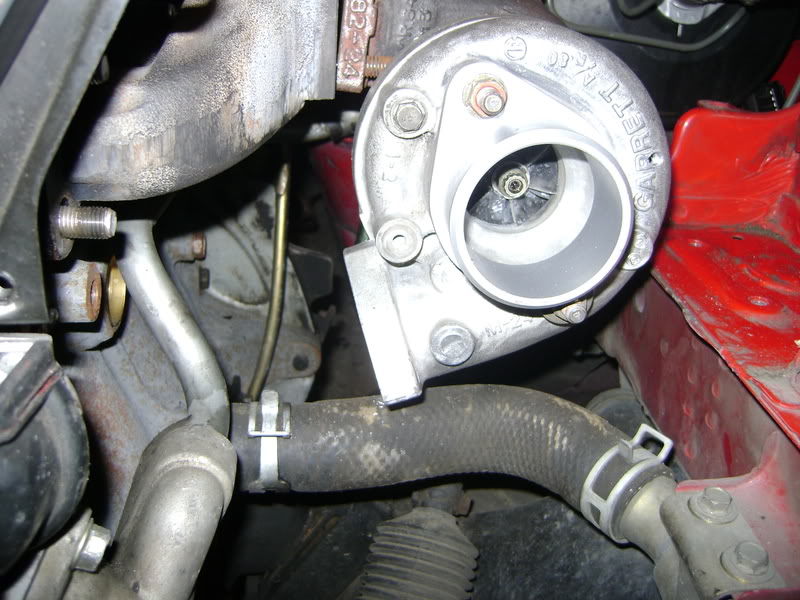
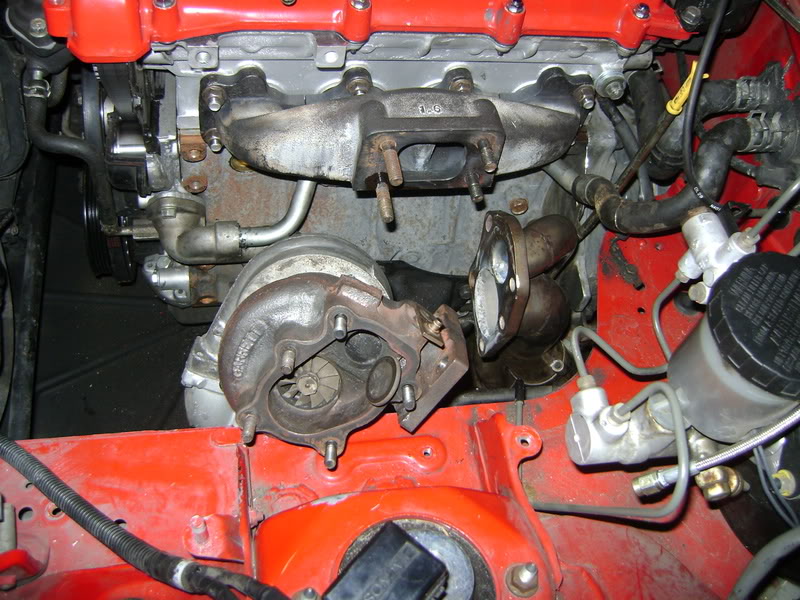
I'll tell you, i really hated this outlet adapter for this turbo. I knew i'd hate it but bought it anyway, I should have just gone with my gut and purchased the ATP adapter. After putting the turbo on, taking it off, clocking it, putting it back on, taking it back off, clocking it again, omg I thought it'd never end. Finally figured out a setup that will work alright, going to have to re-route that lower radiator hose somehow.
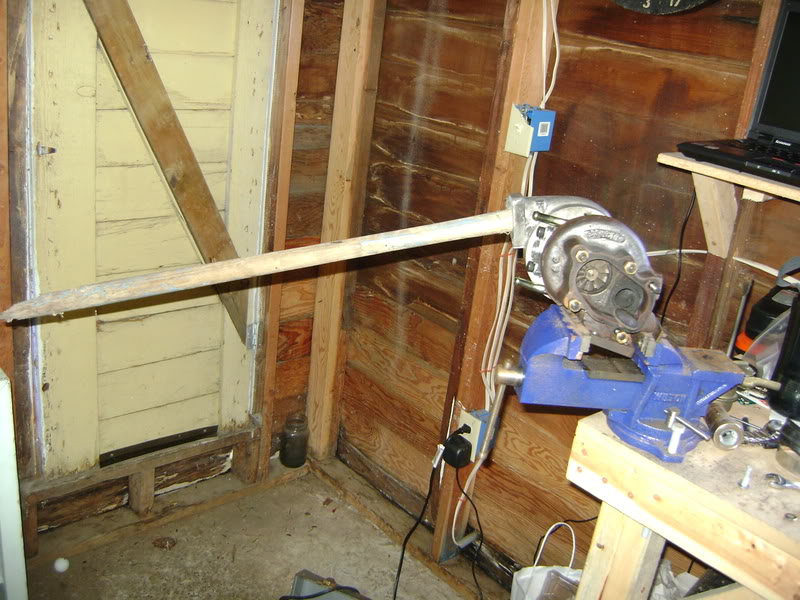
Here is my turbo clocker:
Here are a couple shots of what I think ended up being my final alignment:
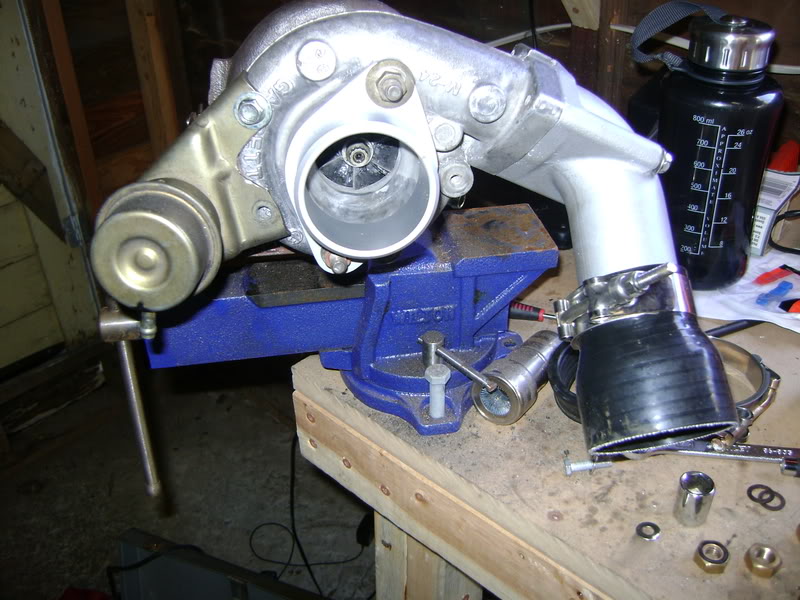
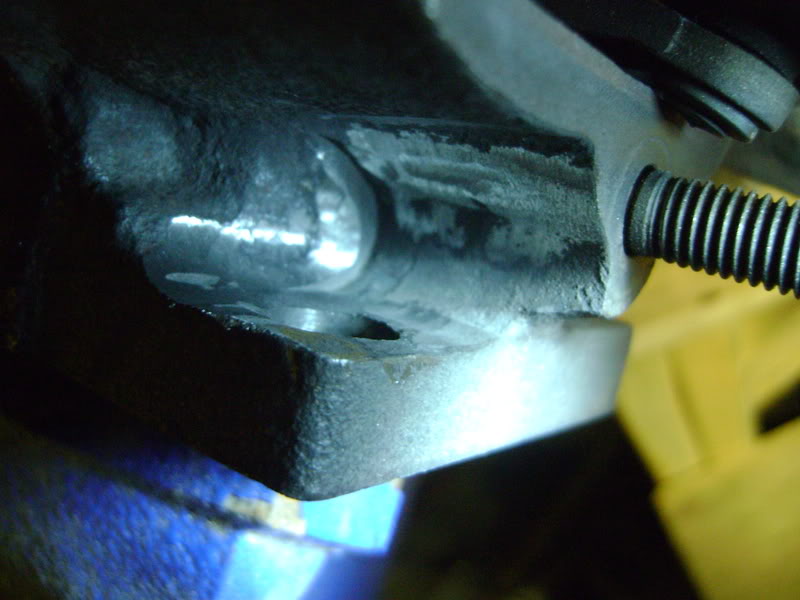
I learned while test fitting the turbo to the BEGI mani out of the car that I had to clearance the turbine housing a little bit to actually be able to twist the nut on. Went to town with the dremel:
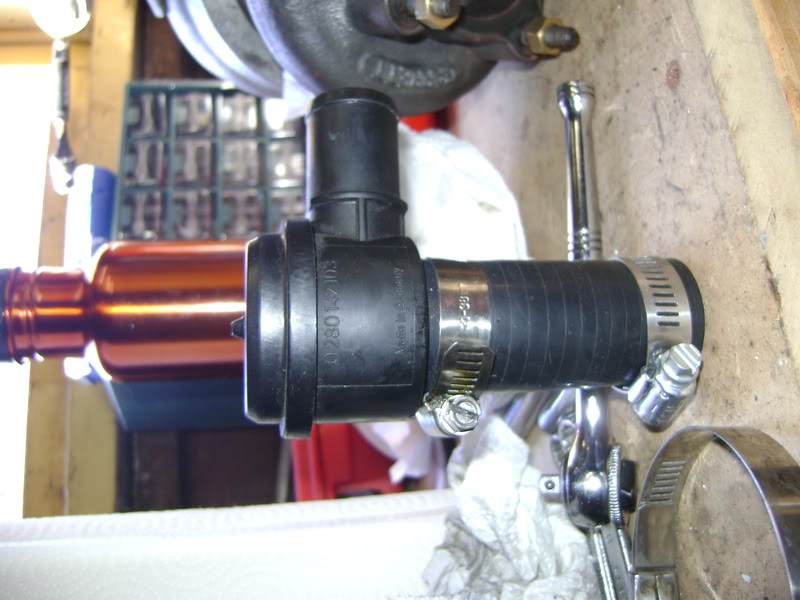
Here is a shot of my bosch bypass valve that will be VTA on my application. Not sure which end is in and which is out but here is how I have it for now:
After a long frustrating afternoon/evening I had to give up. While I was trying to fit the turbo to the mani/dp I realized that I needed to remove the lower front stud to get it to fit. While trying to get it out I stripped the two nuts I was double-nutting to get it out. That just seemed like as good of a time as any to hang it up for the night and have some beers.
Here is how she sits in the garage, cold and lonely:
So, the to-do for tomorrow, if possible (its a lot):
-Finish mounting turbo
-Get some missing hardware (long bolt for the DP, new turbo hardware etc)
-Mock up intercooler piping
-Mount intercooler
-Sort out the oil feed/drain
-Relocate the lower radiator hose out of the turbo's way
-Figure out where i'm going to run a vac line to the WGA
-Redo LC-1 wiring to work with the turbo
-Perhaps clean up my nasty rats nest megasquirt wiring under the passenger foot well
I'm sure there is plenty more that i'm not thinking about right now. Thanks for looking!
This car is just too damn slow, especially with the map scaled for boost...i'm not running nearly enough timing up top for being N/A.So I thought about it, thought some more. I'm only missing a few smallish pieces that I can run and get at the parts store down the street when the time comes. I've got til tuesday to get this thing back on the road or i'll be taking the bus to school
My setup is mostly in my sig, if you want to know anything more specific just ask.
So enough chit-chat, lets make with the pictures.
As it sat when I pulled it into the garage. Dont mind the ghettofied TPS hanging off the throttle body...will fix in due time.
First things first, get that old header off:
Took me awhile but I knew I remembered being able to get that bastard out in one piece.
The old and the new (thesnowboarder misses his SSSGDP):
Best tool in the garage in my opinion. Makes quick work of twisting out mile long bolts without the obnoxiousness of the air ratchet:
Turbo not hit block?
I'll tell you, i really hated this outlet adapter for this turbo. I knew i'd hate it but bought it anyway, I should have just gone with my gut and purchased the ATP adapter. After putting the turbo on, taking it off, clocking it, putting it back on, taking it back off, clocking it again, omg I thought it'd never end. Finally figured out a setup that will work alright, going to have to re-route that lower radiator hose somehow.
Here is my turbo clocker:
Here are a couple shots of what I think ended up being my final alignment:
I learned while test fitting the turbo to the BEGI mani out of the car that I had to clearance the turbine housing a little bit to actually be able to twist the nut on. Went to town with the dremel:
Here is a shot of my bosch bypass valve that will be VTA on my application. Not sure which end is in and which is out but here is how I have it for now:
After a long frustrating afternoon/evening I had to give up. While I was trying to fit the turbo to the mani/dp I realized that I needed to remove the lower front stud to get it to fit. While trying to get it out I stripped the two nuts I was double-nutting to get it out. That just seemed like as good of a time as any to hang it up for the night and have some beers.
Here is how she sits in the garage, cold and lonely:
So, the to-do for tomorrow, if possible (its a lot):
-Finish mounting turbo
-Get some missing hardware (long bolt for the DP, new turbo hardware etc)
-Mock up intercooler piping
-Mount intercooler
-Sort out the oil feed/drain
-Relocate the lower radiator hose out of the turbo's way
-Figure out where i'm going to run a vac line to the WGA
-Redo LC-1 wiring to work with the turbo
-Perhaps clean up my nasty rats nest megasquirt wiring under the passenger foot well
I'm sure there is plenty more that i'm not thinking about right now. Thanks for looking!

Reply
 0
0

0


 03-07-2009, 02:16 PM
#9
Elite Member
Thread Starter
iTrader: (8)
Join Date: Aug 2007
Location: Bellingham, Wa
Posts: 2,712
Total Cats: 4
And John, I hope you're right about it all being downhill once the turbo is mounted =P
Reply
0
0
 03-08-2009, 05:32 AM
#11
Elite Member
Thread Starter
iTrader: (8)
Join Date: Aug 2007
Location: Bellingham, Wa
Posts: 2,712
Total Cats: 4
I've got a few updates guys. Here they are...I'm drunk so go **** yourself if my grammar sucks:
I had a friend come help me tonight. He pulled the bumper off to mount the intercooler while I finished mounting up the manifold/turbo/downpipe. I still didn't figure that **** out. What special tool do you need to get to the bottom right nut? What a pain in the ***...
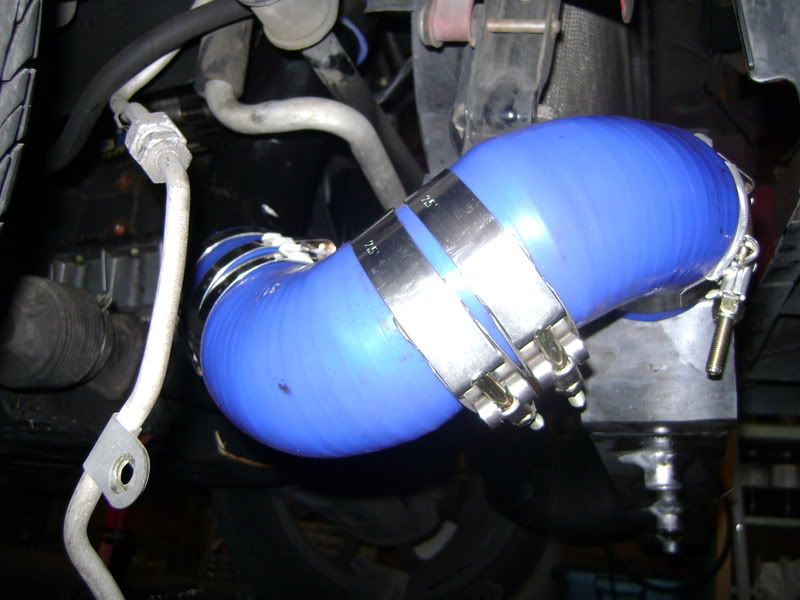
Fabbing up the intercooler piping has been daunting. I was really expecting more of a pain in the ***. Its difficult to explain while drunk, but we only connected one pipe to the throttle body inlet pipe and 2 90 degree couplers to make it to intercooler. Here is a couple of pictures to help with the explanation:
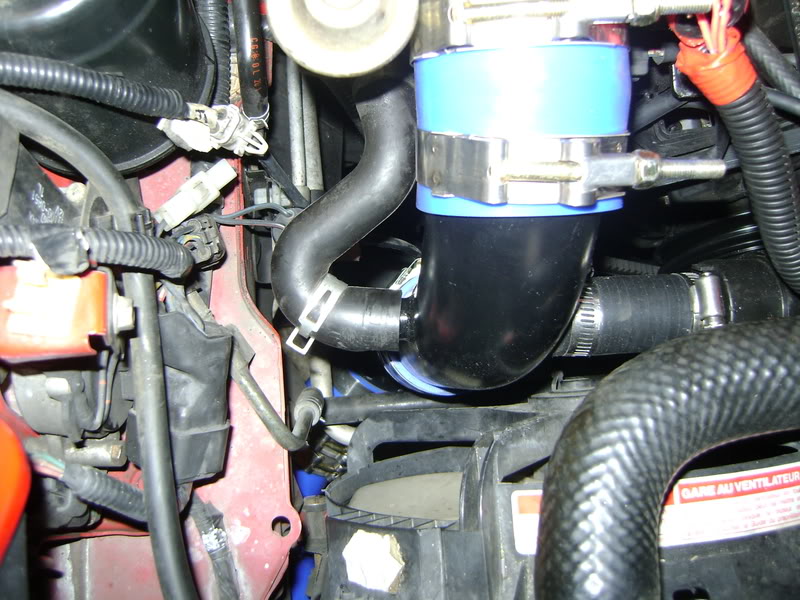
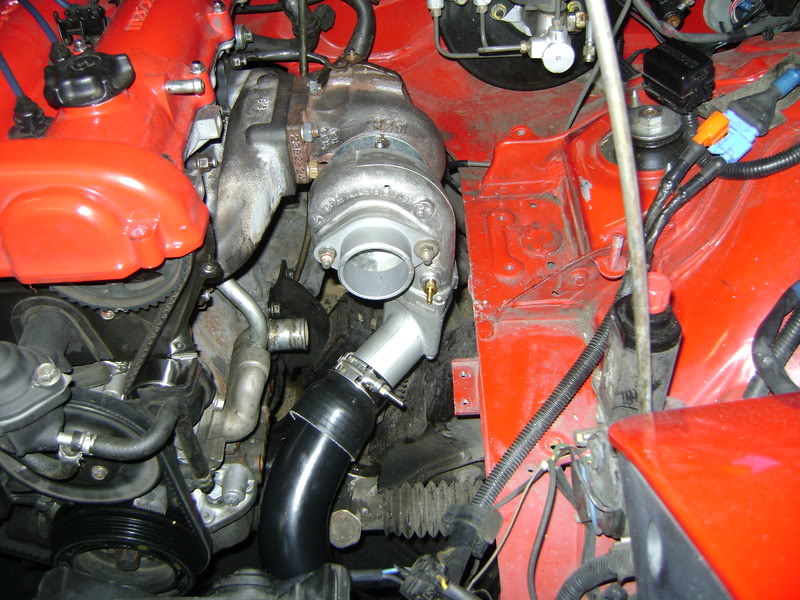
For the hot side, we used one 90* pipe with part of the stock intake piping to get it to the intercooler. Here are some pictures of what we did here:

So i've never taken the bumper off. My buddy helped me with that cause he dealt with front end damage not too long ago (by the sound of it). I didnt pay much attention to what he was doing so now I have a bag full of parts and a bumper that is chillin in the corner of my garage. He doesn't have time to come help me put it back on tomorrow so this will be interesting.
I still havent bought what I need to do the lower radiator hose stuff. Will do that tomorrow for sure. I'm pretty sure a flex hose will do just fine there.
Here is how it sits tonight:
Will have more tomorrow, i'm too drunk to add anymore tonight...
I had a friend come help me tonight. He pulled the bumper off to mount the intercooler while I finished mounting up the manifold/turbo/downpipe. I still didn't figure that **** out. What special tool do you need to get to the bottom right nut? What a pain in the ***...
Fabbing up the intercooler piping has been daunting. I was really expecting more of a pain in the ***. Its difficult to explain while drunk, but we only connected one pipe to the throttle body inlet pipe and 2 90 degree couplers to make it to intercooler. Here is a couple of pictures to help with the explanation:
For the hot side, we used one 90* pipe with part of the stock intake piping to get it to the intercooler. Here are some pictures of what we did here:
So i've never taken the bumper off. My buddy helped me with that cause he dealt with front end damage not too long ago (by the sound of it). I didnt pay much attention to what he was doing so now I have a bag full of parts and a bumper that is chillin in the corner of my garage. He doesn't have time to come help me put it back on tomorrow so this will be interesting.
I still havent bought what I need to do the lower radiator hose stuff. Will do that tomorrow for sure. I'm pretty sure a flex hose will do just fine there.
Here is how it sits tonight:
Will have more tomorrow, i'm too drunk to add anymore tonight...
Reply
0
0
 03-08-2009, 02:15 PM
#15
Elite Member
Thread Starter
iTrader: (8)
Join Date: Aug 2007
Location: Bellingham, Wa
Posts: 2,712
Total Cats: 4

Si and si. The intercooler isn't attached right now, was just hanging by the piping in that picture. I'm lacking 2 90* couplers so in lieu of that I recycled that piece of intake.
I actually do not have that much to get done today. I still need to figure out how i'm going to tighten the rear lower mani-turbo stud. Go to lowes to find something to mount that IC with. JB weld my IAT sensor bung somewhere. Drill/tap the pan. I bought a tap set with the wrong sized tap for my drain fitting. Also need to finish up the oil feed. Will be moving the LC-1 around today. A couple of other things. Uninteresting info, sorry guys, it helps to type it out though so I know what to remember

I got myself really drunk last night and as a result i'm very hungover this morning. This is not how I want to be when finishing up my car...ugh. Also i'm noticing on my computer clock that we lost an hour last night
I'm going to drink some water, smoke a bowl (#1 hangover remedy) and go sleep this off.
Reply
0
0
03-08-2009, 04:25 PM
#16
Newb

Join Date: Mar 2008
Posts: 1
Total Cats: 0
Alright for pics!
I am pretty sure I can find some time monday night to come over and help reinstall the bumper. It may not be until 7-8 if it works, but bumper really isn't that hard if you feel ambitious. Shoot me a text and let me know
I am pretty sure I can find some time monday night to come over and help reinstall the bumper. It may not be until 7-8 if it works, but bumper really isn't that hard if you feel ambitious. Shoot me a text and let me know
Reply
0
0
03-08-2009, 05:11 PM
#17
Cpt. Slow

iTrader: (25)
Join Date: Oct 2005
Location: Oregon City, OR
Posts: 14,429
Total Cats: 1,207
If you use that accordion piece from the stock intake, it will expand in boost. I good temporary and cheap remedy is to put some zip ties around the root of the accordion piece so it won't expand as much.
The bumper's not terrible, 6-8 bolts along the top (you'll need the lights up for the outside ones) two inside the fender on each side, and then the support bars on the inside of the fender as well. Then it connects to the bottom through the radiator shroud (I think) and uses a bunch of cheezy plastic connectors. I replaced some of them with a metal nut and bolt and some washers. Its much stronger and I don't have to be so damned worried about breaking the cheap plastic bits.
Edit: just noticed you're in Bellingham. Another NW turbo miata! Go us.
Reply
0
0
03-08-2009, 09:19 PM
#18
Junior Member

Join Date: Sep 2007
Location: Brisbane, Australia
Posts: 109
Total Cats: 0
This is how I moved the bottom hose, I plugged the heater return with a welch plug, cut off the throttle body return and replaced it with a brass tail for the water through the turbo, and turned it upside-down. The hose is then just a single 90* and further forward. The heater now returns into the top of the na6 thermostat housing via a banjo to 5/8 hose tail as the thermofan switch is redundant because the MS controls the fan.


Reply
0
0
03-09-2009, 10:45 PM
#19
Elite Member
Thread Starter
iTrader: (8)
Join Date: Aug 2007
Location: Bellingham, Wa
Posts: 2,712
Total Cats: 4
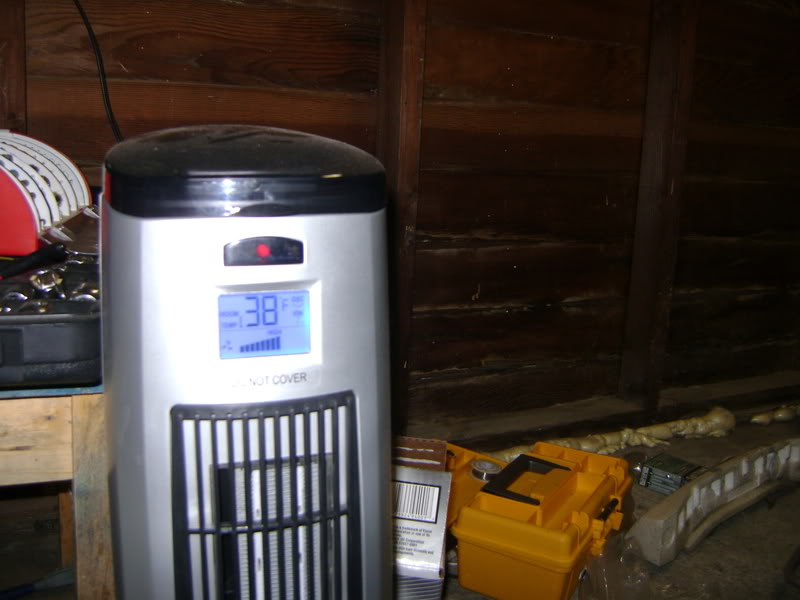
Here is another update for everyone. Its not a significant update but its something. It is pretty cold out today and the little space heater I have in my garage just cant keep up. Its only 8 degrees warmer in the garage than it is outside.
I lost the whole day yesterday due to an epic hangover. Dont you love hearing about all the things you did/said the night before that you dont remember at all? Eat before you drink kids...drinking on an empty stomach is a mistake that i never seem to learn from. I didn't even realize I made my last update saturday night. Yesterday I went to type it up and saw that it was already there. Its like time travel lol.
So today I got back to the build. I have to come to realize that my initial goal of getting done by today was completely realistic even if I had worked on it all day yesterday.
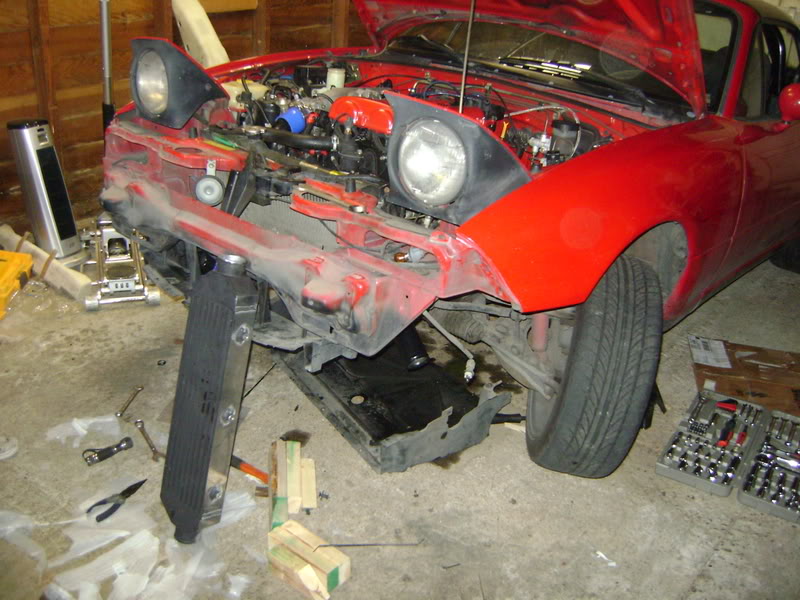
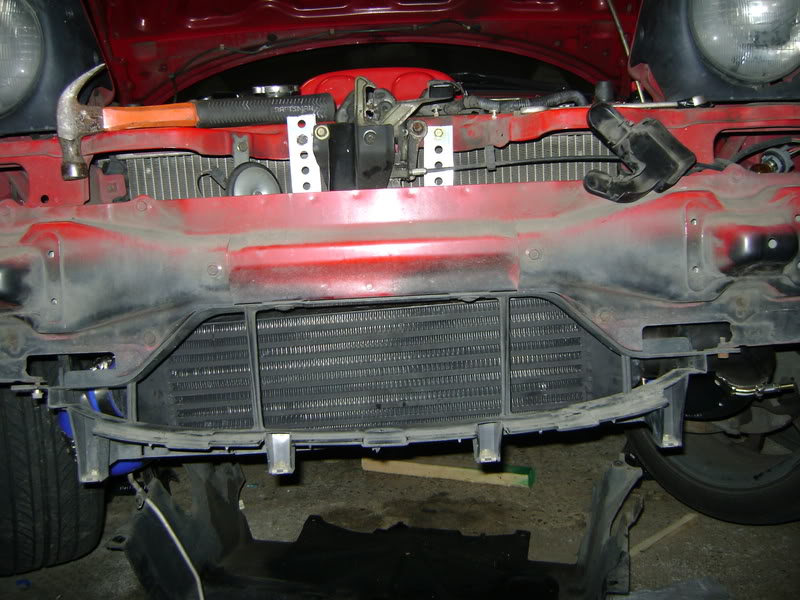
Today I mounted up the intercooler to make sure my initial IC pipe routing would work. Well, it didn't. I finagled the cold side into place pretty much how it was, the the hot side was way off. I'm wishing I had some of those couplers with the hump in them. Here is a shot from the front:
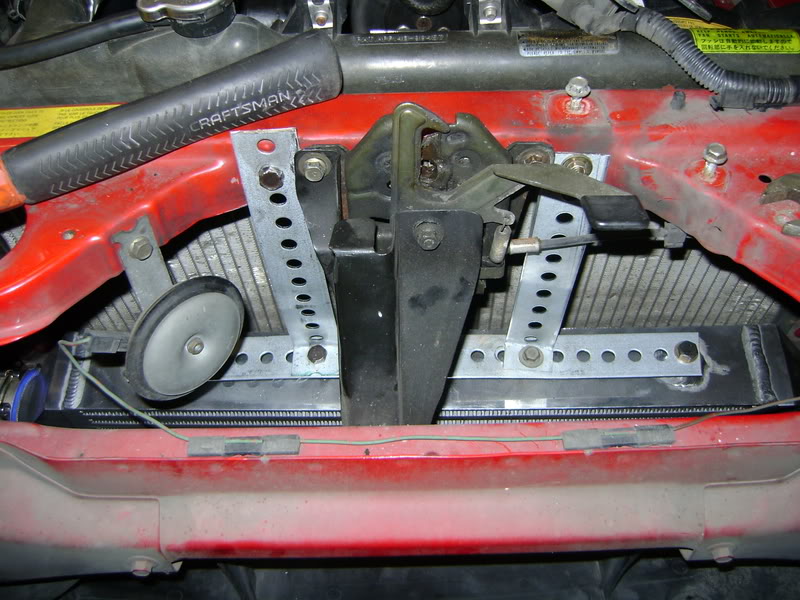
The brackets I made (they suck, go easy on me):
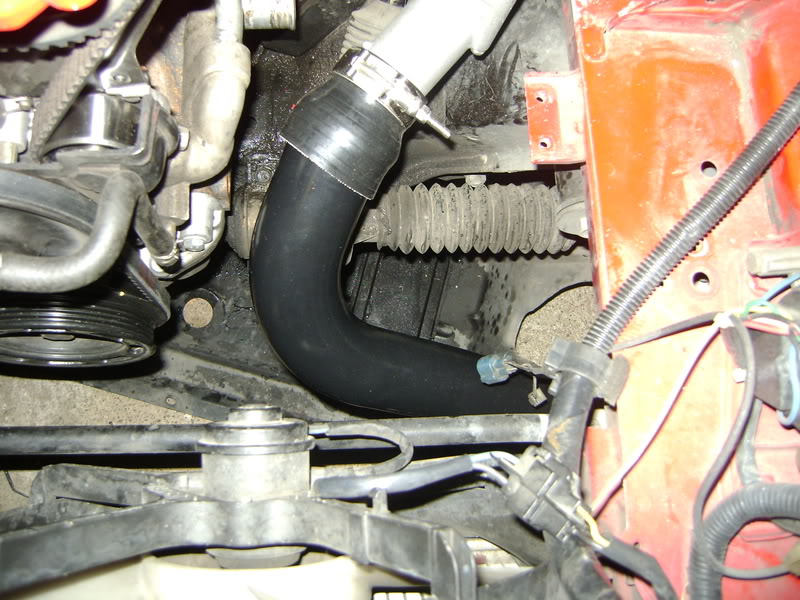
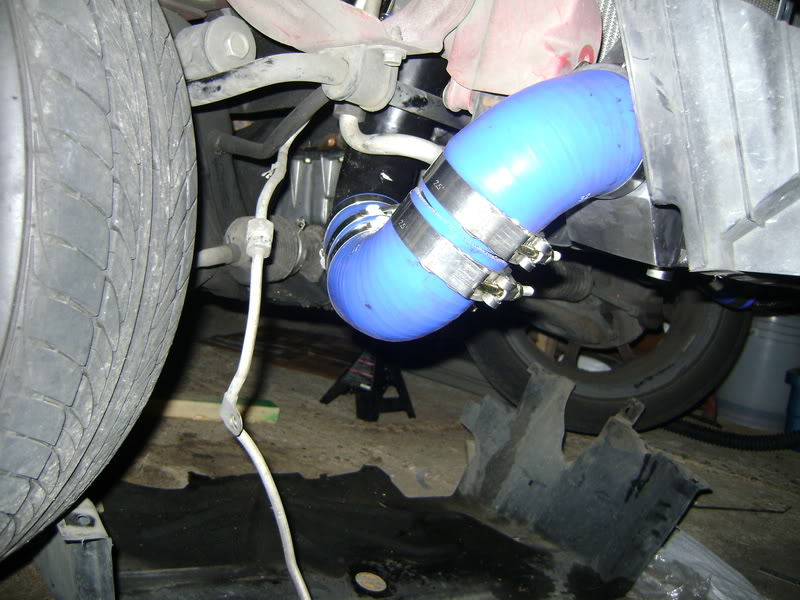
Here is the revised hot side piping. Notice the lack of the accordian piece. I cut it off of the stock intake piece...still used the other half of the stock intake as a 90* coupler:
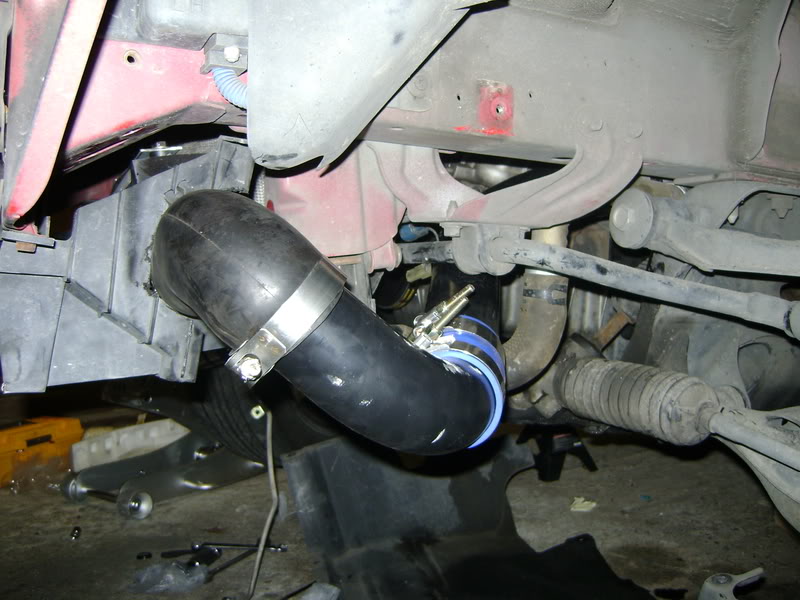
Here is the cold side piping again. Can you guys tell if my piping is hanging too low? I'm worried about ground clearance but i'm not sure how I could make them hang any higher at all.
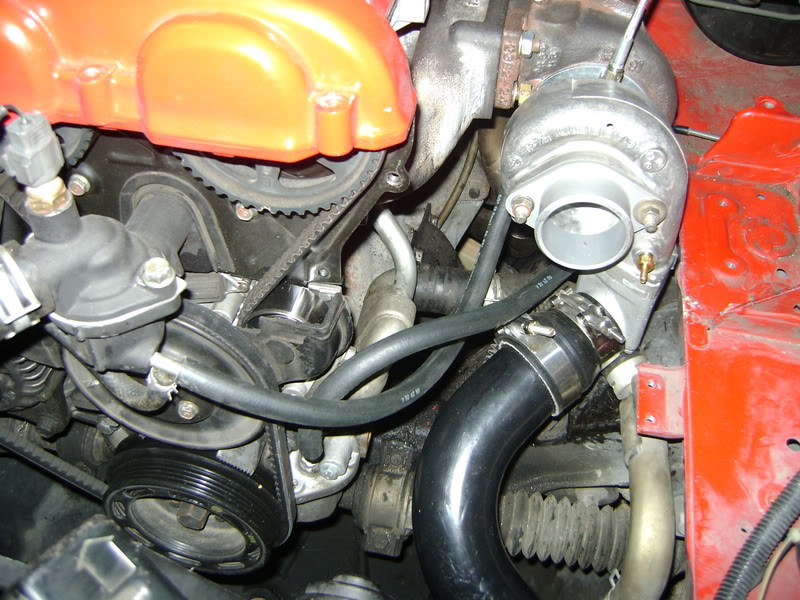
Turbo water lines in place:
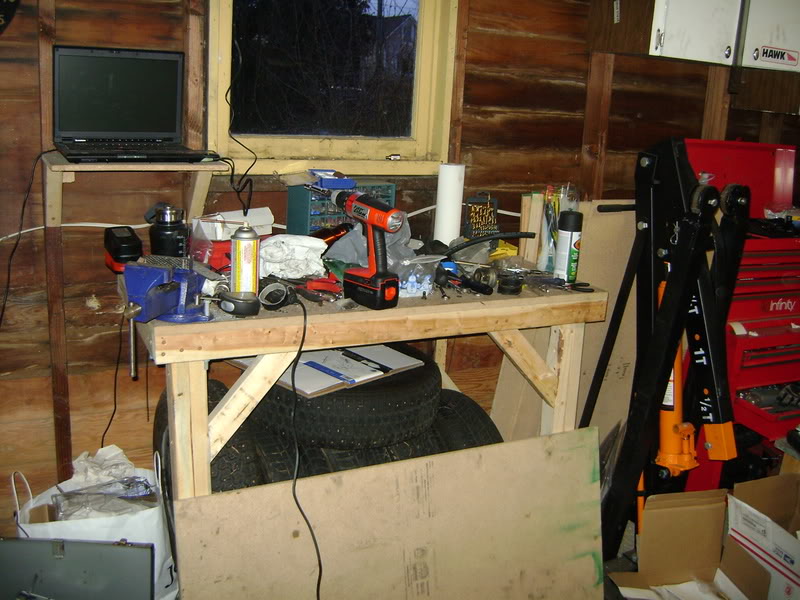
My messy *** work bench:
I managed to get a ride to class tomorrow from a friend, so no bus for me
So lets try that setting goals thing for tomorrow. I have a long day tomorrow so I wont have time to get a whole lot done but I figure I can:
-Finish all the cuts for all the plastic in the way of the IC (under tray etc)
-Replace a stripped turbo-manifold nut so I can finally tighten it down for good and leave it
-Finish removing A/C lines
If I have time to do more maybe I will...we'll see.
I lost the whole day yesterday due to an epic hangover. Dont you love hearing about all the things you did/said the night before that you dont remember at all? Eat before you drink kids...drinking on an empty stomach is a mistake that i never seem to learn from. I didn't even realize I made my last update saturday night. Yesterday I went to type it up and saw that it was already there. Its like time travel lol.
So today I got back to the build. I have to come to realize that my initial goal of getting done by today was completely realistic even if I had worked on it all day yesterday.
Today I mounted up the intercooler to make sure my initial IC pipe routing would work. Well, it didn't. I finagled the cold side into place pretty much how it was, the the hot side was way off. I'm wishing I had some of those couplers with the hump in them. Here is a shot from the front:
The brackets I made (they suck, go easy on me):
Here is the revised hot side piping. Notice the lack of the accordian piece. I cut it off of the stock intake piece...still used the other half of the stock intake as a 90* coupler:
Here is the cold side piping again. Can you guys tell if my piping is hanging too low? I'm worried about ground clearance but i'm not sure how I could make them hang any higher at all.
Turbo water lines in place:
My messy *** work bench:
I managed to get a ride to class tomorrow from a friend, so no bus for me
So lets try that setting goals thing for tomorrow. I have a long day tomorrow so I wont have time to get a whole lot done but I figure I can:
-Finish all the cuts for all the plastic in the way of the IC (under tray etc)
-Replace a stripped turbo-manifold nut so I can finally tighten it down for good and leave it
-Finish removing A/C lines
If I have time to do more maybe I will...we'll see.
Reply
0
0


