LSx coil thread
 01-20-2015, 01:12 AM
#1
Senior Member
Thread Starter

Join Date: Dec 2004
Location: Brisbane, Australia
Posts: 1,278
Total Cats: 37
OK ladies,
It's time for a thread consolidating all this stuff.
There are a few variants of LSx coils, bbundy has posted pics and part numbers here.
GM#12573190 ACDelco D514A LS2/LS7 Corvette:
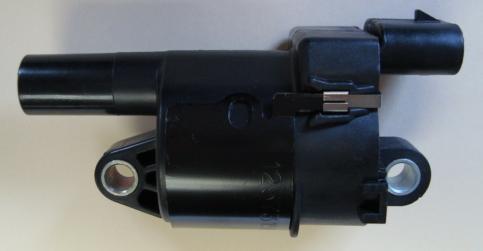
GM#10457730 ACDelco D585 LS2 Truck:
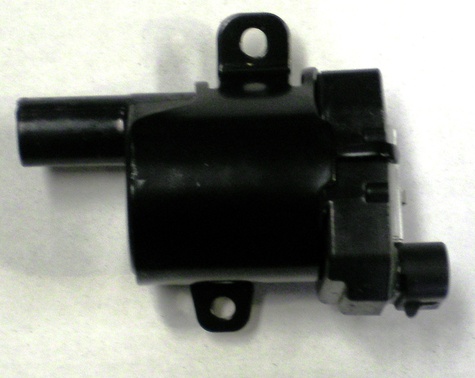
GM#12611424 ACDelco D510C LS?:
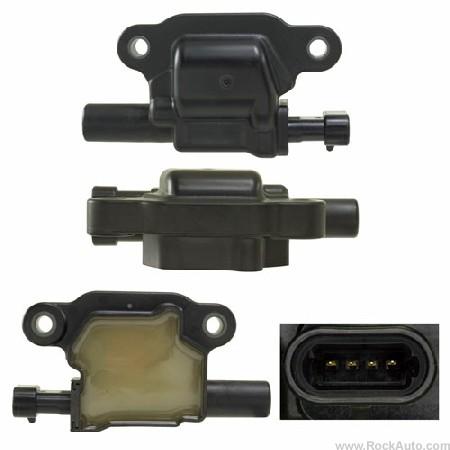
GM#12558948 ACDelco D580 LS1/LS6:
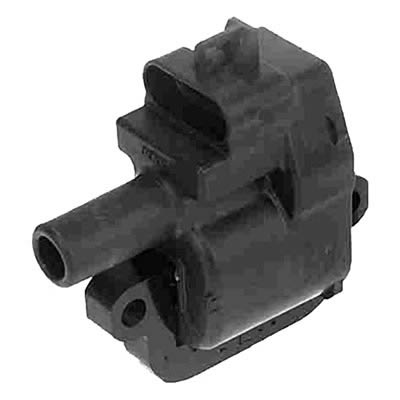
The general consensus says the LSx truck coil (D585) is the best, followed by the non-truck LS2/LS3 coil (D510C, D514A), then the LS1 coil (D580). I'm sure this isn't an exhaustive list of all LSx coils but these are the common ones people are running.
If you want to use the FM bracket, you'll probably want the D510C.
They are all much beefier than our OE coils or the Toyota coils.
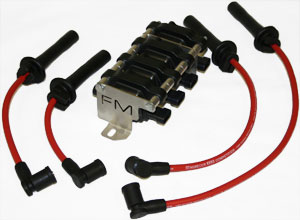
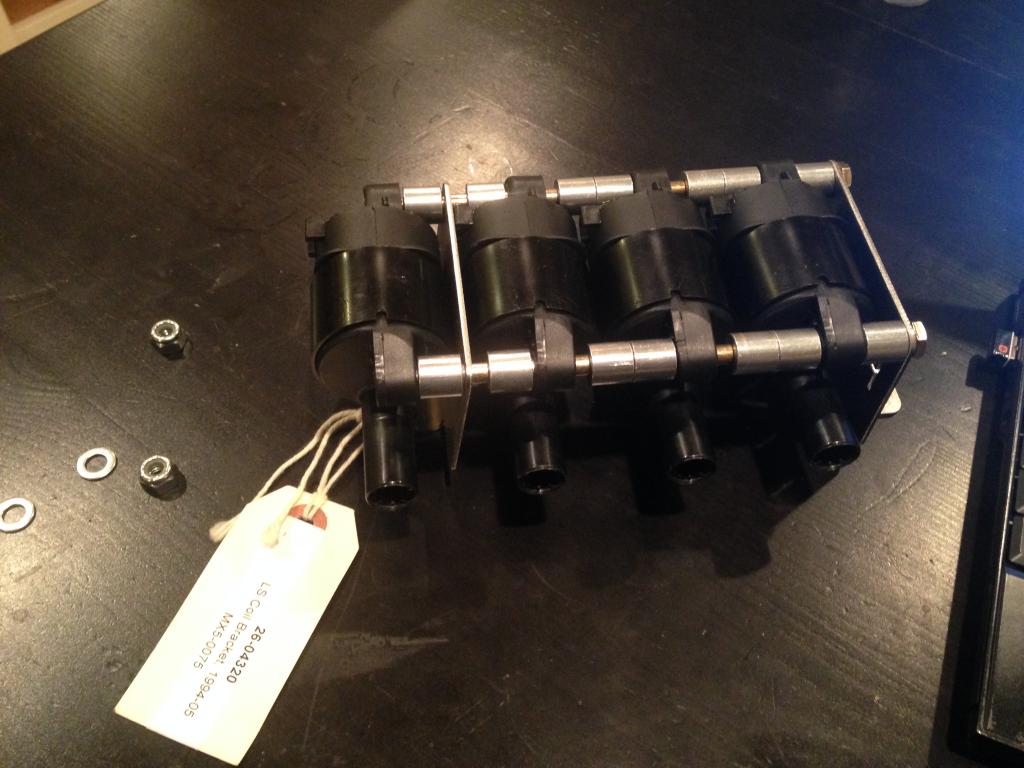
Mounting
You can buy the D510C LS2 mounting bracket from Flyin' Miata for $44.95, part # 26-04320. The part # for the Magnecor 5mm leads is 26-04075. These parts suit 1994-2000 cars (non-VVT). You can buy additional parts from Flyin' Miata to replace the VVT hard line to let you run this bracket on a VVT engine.
The instructions for their full kit can be found here:
http://www.flyinmiata.com/support/in...ra%20coils.pdf
Keep in mind that the FM mounting bracket won't work with the EGR pipe in place, and may get in the way of coolant reroutes.
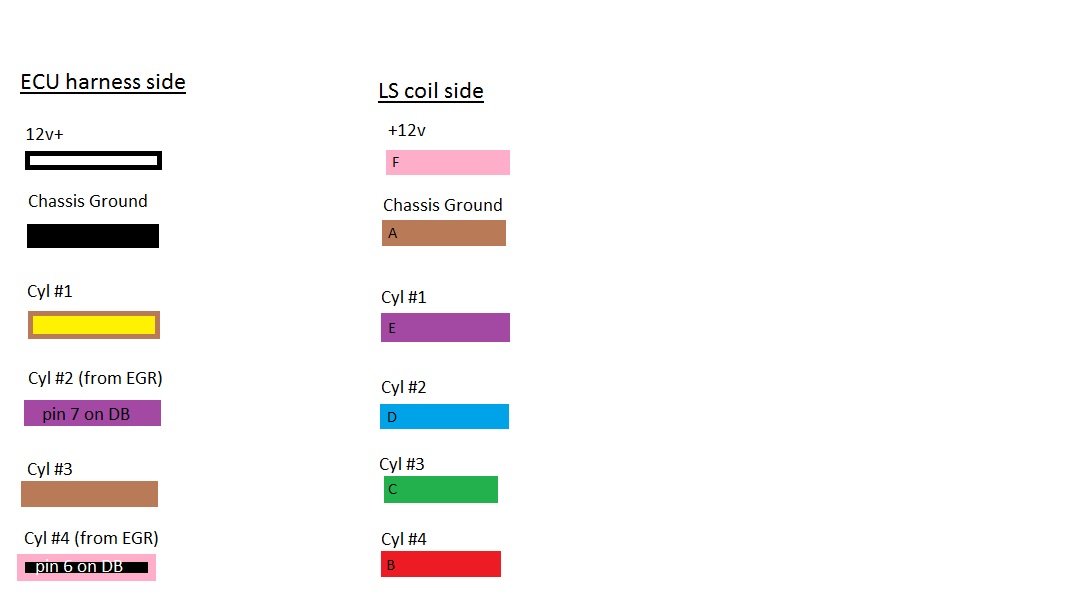
Wiring
If you are retaining all the factory wiring you will need to wire these as wasted spark:
A - grounded on engine
B - existing ground wire on coil connector loom
C - existing trigger wire on coil connector loom (trigger wire on coil connector 1 goes to both 1/4 GM coils, trigger wire on coil connector 2 goes to both 2/3 GM coils)
D - existing +12v wire on coil connector loom
These coils don't provide a tach output.
Here is a wiring diagram from swimming108:

Here is a schematic from Megasquirt Sequencer Coils:
Dwell settings and optional capacitors
Taken from Megasquirt Sequencer Coils:
Disclaimer
None of this is my work, I've just brought together useful things found on this site. I haven't tested anything above first hand but have tried to verify everything from at least two sources.
Please post the type of coil you are running and how you have things mounted and wired!
Cheers
It's time for a thread consolidating all this stuff.
There are a few variants of LSx coils, bbundy has posted pics and part numbers here.
GM#12573190 ACDelco D514A LS2/LS7 Corvette:
GM#10457730 ACDelco D585 LS2 Truck:
GM#12611424 ACDelco D510C LS?:
GM#12558948 ACDelco D580 LS1/LS6:
The general consensus says the LSx truck coil (D585) is the best, followed by the non-truck LS2/LS3 coil (D510C, D514A), then the LS1 coil (D580). I'm sure this isn't an exhaustive list of all LSx coils but these are the common ones people are running.
If you want to use the FM bracket, you'll probably want the D510C.
They are all much beefier than our OE coils or the Toyota coils.
Mounting
You can buy the D510C LS2 mounting bracket from Flyin' Miata for $44.95, part # 26-04320. The part # for the Magnecor 5mm leads is 26-04075. These parts suit 1994-2000 cars (non-VVT). You can buy additional parts from Flyin' Miata to replace the VVT hard line to let you run this bracket on a VVT engine.
The instructions for their full kit can be found here:
http://www.flyinmiata.com/support/in...ra%20coils.pdf
Keep in mind that the FM mounting bracket won't work with the EGR pipe in place, and may get in the way of coolant reroutes.
Wiring
If you are retaining all the factory wiring you will need to wire these as wasted spark:
A - grounded on engine
B - existing ground wire on coil connector loom
C - existing trigger wire on coil connector loom (trigger wire on coil connector 1 goes to both 1/4 GM coils, trigger wire on coil connector 2 goes to both 2/3 GM coils)
D - existing +12v wire on coil connector loom
These coils don't provide a tach output.
Here is a wiring diagram from swimming108:
Here is a schematic from Megasquirt Sequencer Coils:
Dwell settings and optional capacitors
Taken from Megasquirt Sequencer Coils:
The maximum dwell should be set at 4.5 milliseconds - going longer does not generate any more spark energy.
The two capacitors are optional but recommended. The 1.0 �F capacitor on the +12V is helpful, it is similar to the one used on EDIS. What it does is provide brief energy storage for the discharge. The other capacitor will help eliminate back-fed noise to the MegaSquirt controller. Use a 100 pF to 0.001 �F cap on the TTL trigger input wire to ground. What this does is shunt extremely fast noise spikes to ground and not let them feed back to the MegaSquirt processor. The added capacitance is minimal - with the series resistance of 1,000 ohms (in the controller) and a 100 pF capacitor the RC 3dB time constant is 2πR � C = 0.6 microseconds.
None of this is my work, I've just brought together useful things found on this site. I haven't tested anything above first hand but have tried to verify everything from at least two sources.
Please post the type of coil you are running and how you have things mounted and wired!
Cheers

Reply
 12
12

12


 01-20-2015, 07:46 AM
#4
Former Vendor
iTrader: (8)

Join Date: Mar 2005
Location: Broken Arrow,Ok
Posts: 1,185
Total Cats: 57
Thanks for gathering this information into one thread.
Something to amend is that the FM bracket does not work with all the different coils shapes. They designed their bracket for the thin rectangular coil (looks to be the LS7 version). I had my suspicions and Curly now has his bracket for sale in the classifieds because his round truck coils don't fit.
Something to amend is that the FM bracket does not work with all the different coils shapes. They designed their bracket for the thin rectangular coil (looks to be the LS7 version). I had my suspicions and Curly now has his bracket for sale in the classifieds because his round truck coils don't fit.
Reply
0
0
 01-20-2015, 04:48 PM
#6
Cpt. Slow

iTrader: (25)
Join Date: Oct 2005
Location: Oregon City, OR
Posts: 14,360
Total Cats: 1,184
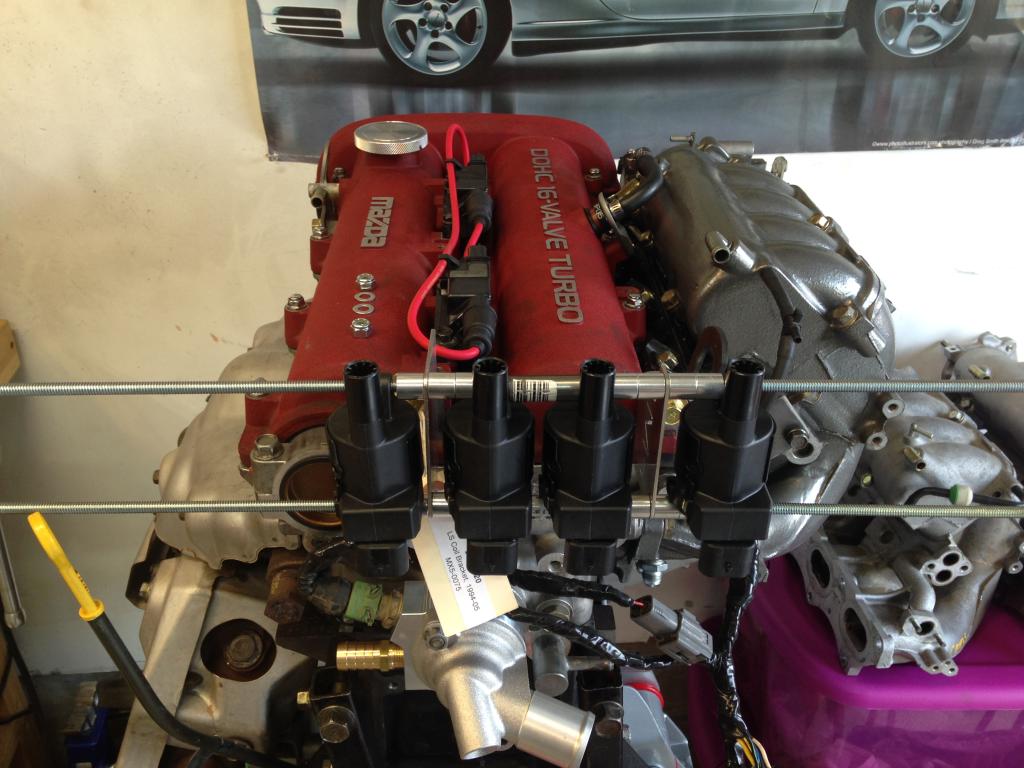
Yup, FM's bracket only works with the D510C coils. Seen here:
The issue with the D514A coils and FM's bracket can be seen here:
There's a chance it could fit with some longer spacers, and some clever custom work. I might dick around with the MSM engine sitting in my garage, but it's definitely not going to work off the (FM's) shelf.
I bought 8 D514A coils and 8 wiring pigtails all off ebay for a total of $136.93, or $68.47 per 4 cylinder engine. Previously on Blaen99's engine, I made temporary mounts seen here:
https://www.miataturbo.net/attachmen...ine=1417391883
This was using the popular $75 NGK spark plug wire kit for 90-97 miatas, not FMs. I'm mocking up the same setup on my own car with the bigger red Magnacores. I'll let you know how that works soon.
For brackets, I'll be using a custom Singular Motorsports bracket, kindly designed to my specifications by ThePass. I'll have a few sets soon, one for myself, one for Blaen99, and another for the other 4 coils/pigtails I have. They'll be for sale soon. And I think he plans on selling them through Goodwin after I get a few prototype sets. But the should be compatible with 1.6, NA1.8, NB1, NB2, and MSM valve covers.
The issue with the D514A coils and FM's bracket can be seen here:

There's a chance it could fit with some longer spacers, and some clever custom work. I might dick around with the MSM engine sitting in my garage, but it's definitely not going to work off the (FM's) shelf.
I bought 8 D514A coils and 8 wiring pigtails all off ebay for a total of $136.93, or $68.47 per 4 cylinder engine. Previously on Blaen99's engine, I made temporary mounts seen here:
https://www.miataturbo.net/attachmen...ine=1417391883
This was using the popular $75 NGK spark plug wire kit for 90-97 miatas, not FMs. I'm mocking up the same setup on my own car with the bigger red Magnacores. I'll let you know how that works soon.
For brackets, I'll be using a custom Singular Motorsports bracket, kindly designed to my specifications by ThePass. I'll have a few sets soon, one for myself, one for Blaen99, and another for the other 4 coils/pigtails I have. They'll be for sale soon. And I think he plans on selling them through Goodwin after I get a few prototype sets. But the should be compatible with 1.6, NA1.8, NB1, NB2, and MSM valve covers.
Reply
1
1
01-20-2015, 06:30 PM
#7
SADFab Destructive Testing Engineer

iTrader: (5)
Join Date: Apr 2014
Location: Beaverton, USA
Posts: 18,642
Total Cats: 1,866
What boost level are these necessary over Toyotas if at all? Curly did you have issues with the Toyota COPS you had or are you switching for the bling factor.
Reply
0
0
01-20-2015, 06:43 PM
#8
Senior Member
Thread Starter
Join Date: Dec 2004
Location: Brisbane, Australia
Posts: 1,278
Total Cats: 37
I can only assume that all the coils share the same connector?
Home � Shop � Connectors / Harnesses � Delphi / Packard � Pigtails � GM Delphi / Packard - 4 way GT 150 3.5mm Centerline male connector Pigtail for some GM truck ignition coils (index keyway)

I think the LS1 coil gets plugged in upside down compared the other coils, no difference in wiring just spin the plug 180 degrees.
Can anyone confirm?
Home � Shop � Connectors / Harnesses � Delphi / Packard � Pigtails � GM Delphi / Packard - 4 way GT 150 3.5mm Centerline male connector Pigtail for some GM truck ignition coils (index keyway)
I think the LS1 coil gets plugged in upside down compared the other coils, no difference in wiring just spin the plug 180 degrees.
Can anyone confirm?
Reply
0
0
01-20-2015, 10:04 PM
#10
Former Vendor
iTrader: (8)
Join Date: Mar 2005
Location: Broken Arrow,Ok
Posts: 1,185
Total Cats: 57
Curly,
Would you mind sharing your design idea?
I'm working with VVT and have no plans to castrate the oil lines. I'm currently eyeing the driver side of the back of the head.
Would you mind sharing your design idea?
I'm working with VVT and have no plans to castrate the oil lines. I'm currently eyeing the driver side of the back of the head.
Reply
0
0
01-20-2015, 10:21 PM
#11
All-round "Good Guy"
Join Date: Dec 2009
Location: Brisbane, AUSTRALIA
Posts: 1,009
Total Cats: 252
:
The issue with the D514A coils and FM's bracket can be seen here:
There's a chance it could fit with some longer spacers, and some clever custom work. I might dick around with the MSM engine sitting in my garage, but it's definitely not going to work off the (FM's) shelf.
:
The issue with the D514A coils and FM's bracket can be seen here:
There's a chance it could fit with some longer spacers, and some clever custom work. I might dick around with the MSM engine sitting in my garage, but it's definitely not going to work off the (FM's) shelf.
:
Reply
0
0
01-20-2015, 10:34 PM
#12
Cpt. Slow
iTrader: (25)
Join Date: Oct 2005
Location: Oregon City, OR
Posts: 14,360
Total Cats: 1,184
Tried that today. You can't run them with the wire plug and harness plug on the inside, they'd have to be waaaay over towards the intake side. In order for it to work, it'll look like this:
And sticks this far out from the head:
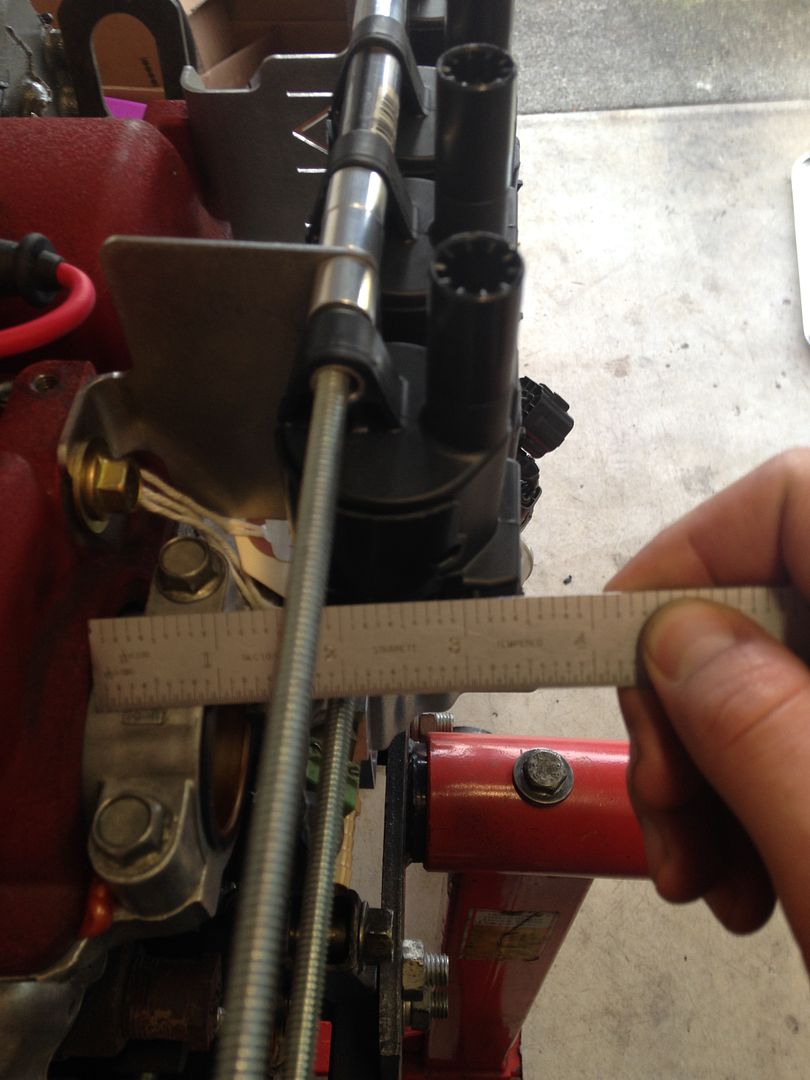
Don't think we have that kinda room before the firewall.

And sticks this far out from the head:

Don't think we have that kinda room before the firewall.
Reply
1
1
01-20-2015, 10:46 PM
#14
Cpt. Slow
iTrader: (25)
Join Date: Oct 2005
Location: Oregon City, OR
Posts: 14,360
Total Cats: 1,184
Man, why didn't I think of that?!?
https://www.miataturbo.net/diy-turbo...ing-vvt-82085/
It might be the basis of the Singular Motorsport kit.
https://www.miataturbo.net/diy-turbo...ing-vvt-82085/
It might be the basis of the Singular Motorsport kit.
Reply
0
0
 01-21-2015, 07:11 AM
#19
Moderator
iTrader: (12)
Join Date: Nov 2008
Location: Tampa, Florida
Posts: 20,884
Total Cats: 3,075
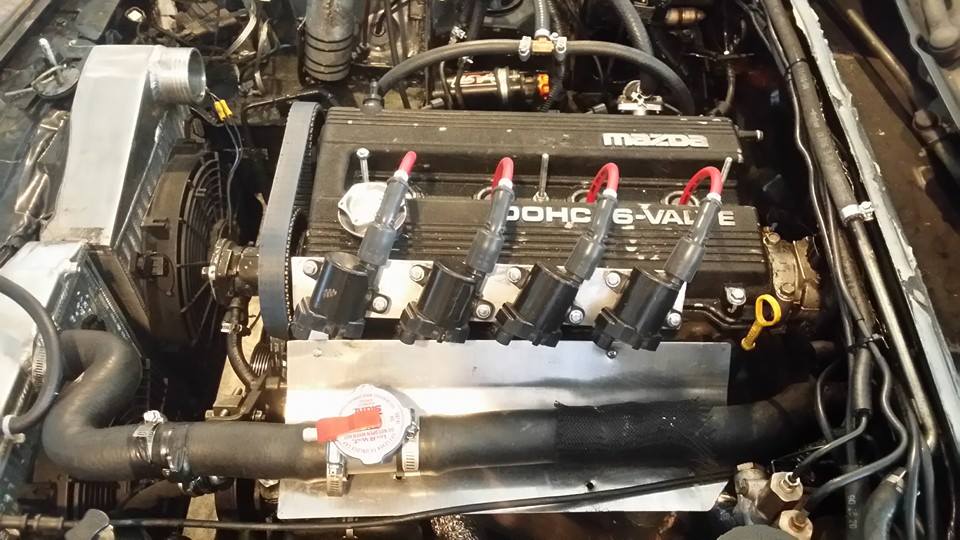
This is mine before re-doing the plug wires:
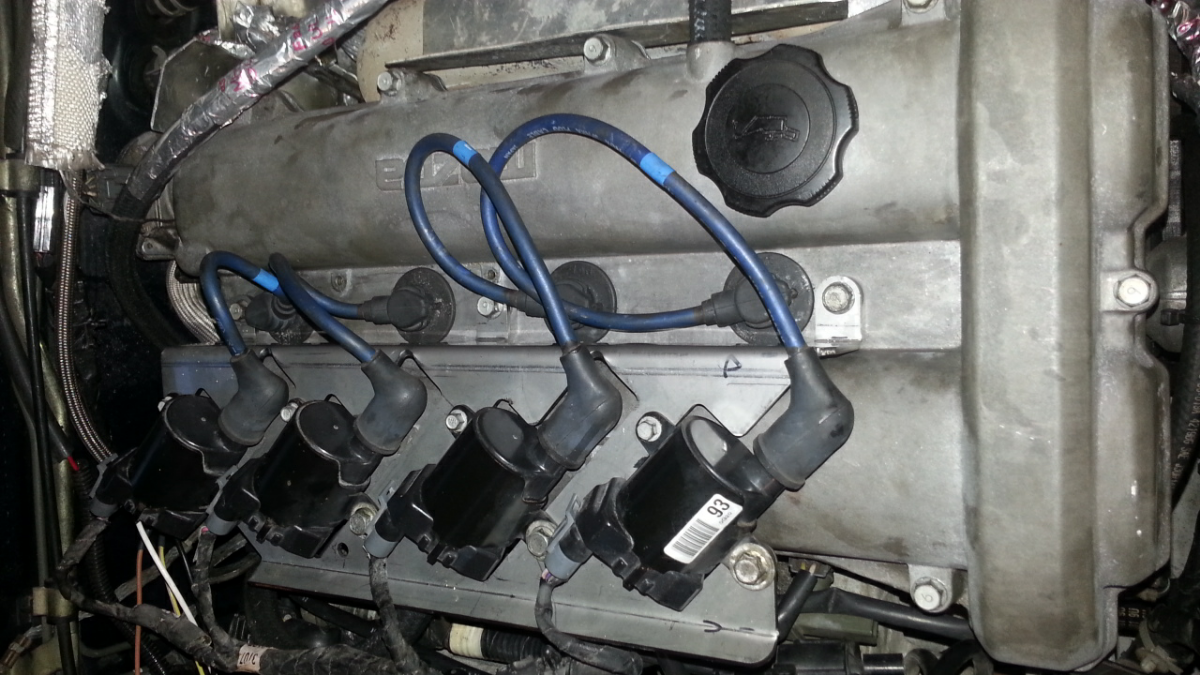
Bracket courtesy of HHammerly. Coils are the Delco units from the "flex fuel" trucks. Mitsubishi coils were much easier to find but don't supposedly make as much power and bolt up differently.
Bracket courtesy of HHammerly. Coils are the Delco units from the "flex fuel" trucks. Mitsubishi coils were much easier to find but don't supposedly make as much power and bolt up differently.

Reply
0
0
01-21-2015, 01:47 PM
#20
Junior Member

Join Date: Dec 2013
Location: Little Rock, Ar
Posts: 107
Total Cats: 24
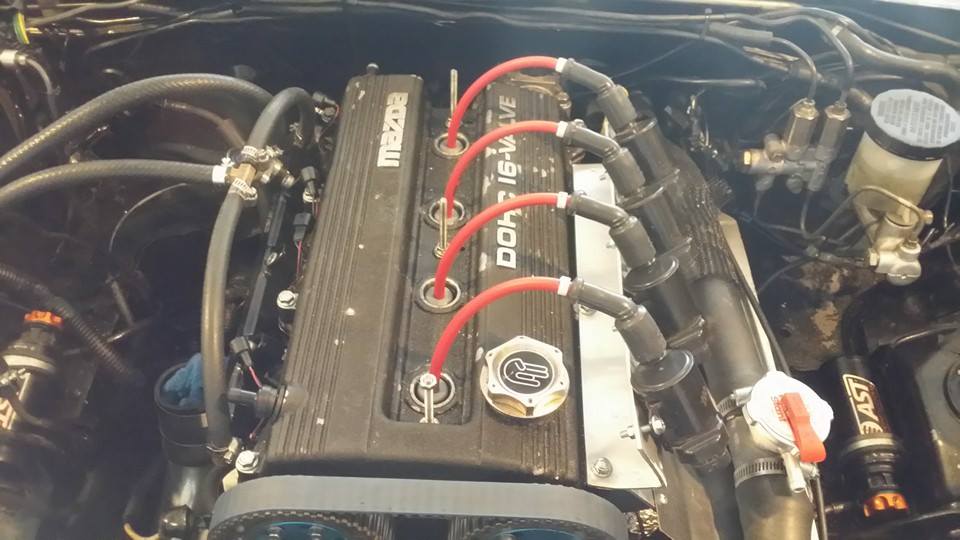
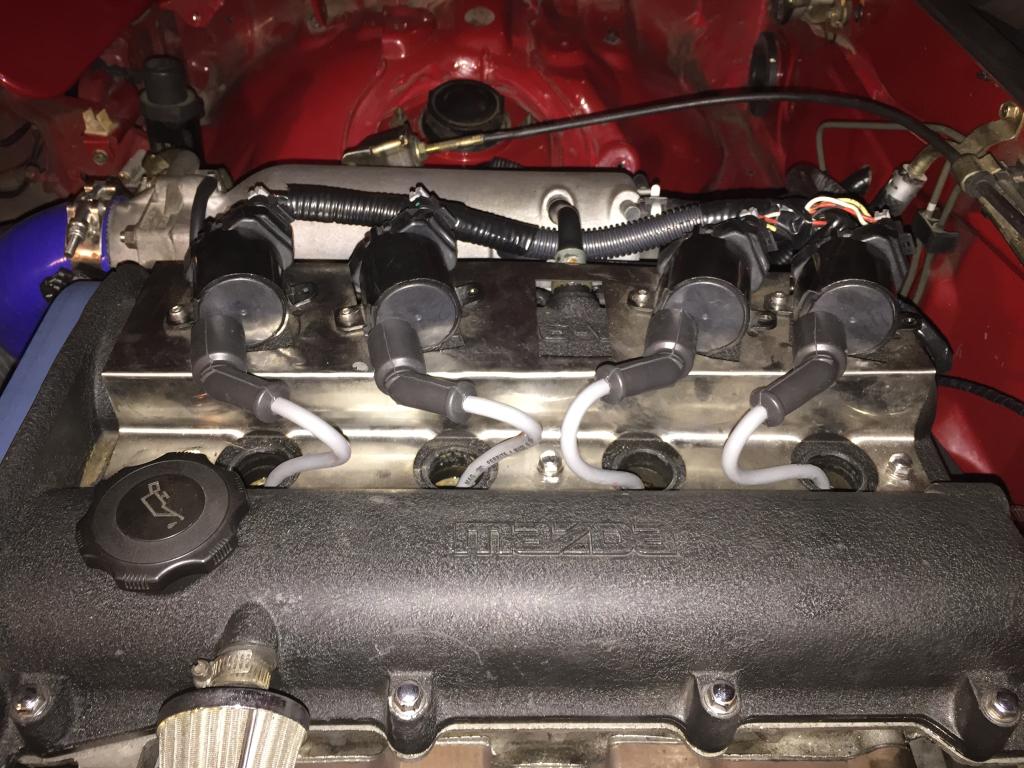
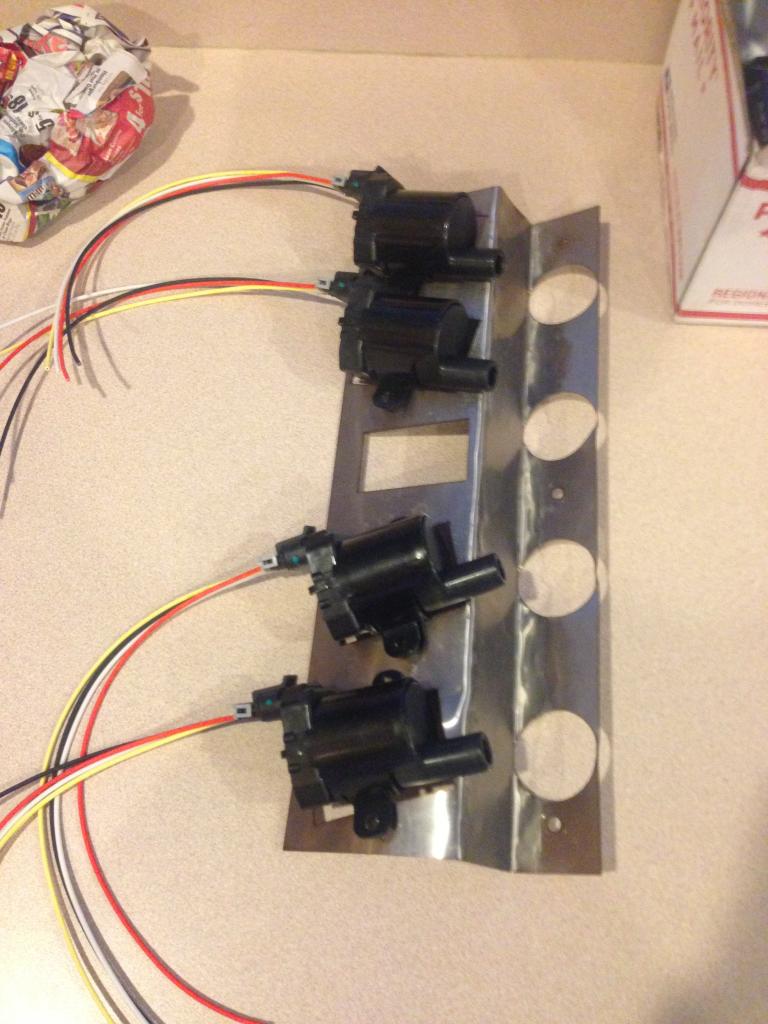
Here is how I mounted mine. D585 LS2 truck coils wired in sequential and being run by a DIYPnP. The wires are from a 2004 corvette and work great. I designed the bracket in SketchUp and cut it out on a laser cutter at work out of stainless steel. I may redo it in the future but for now it works great. It is held on by the 3 middle bolts of the valve cover.


Reply
0
0


