Fab 9 Stage 2 Intercooler install - the right way ;)
 06-15-2018, 03:45 PM
#1
Junior Member

Thread Starter

Join Date: Mar 2014
Location: Central Mass
Posts: 122
Total Cats: -22
So I picked up one of Fab9 stage 2 intercoolers for NA/NB. Given that Bryan uses a Vibrant cooler that he just welds tabs onto i was happy with it since i've always had good luck with their stuff.
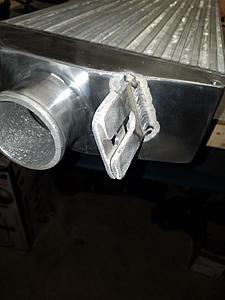
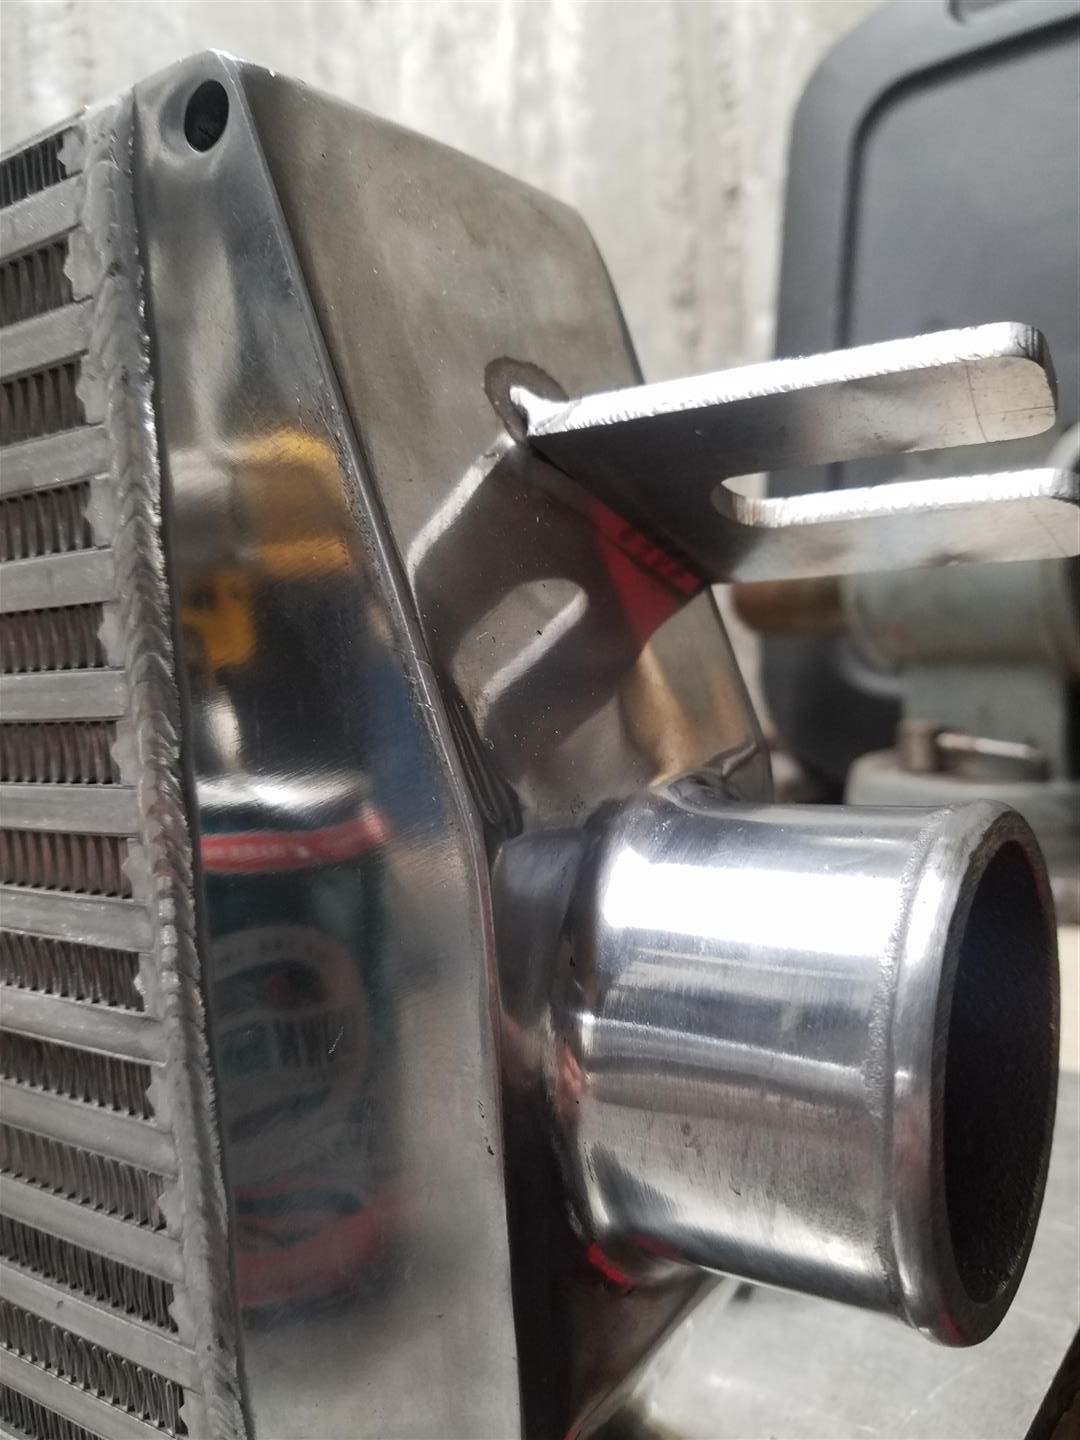
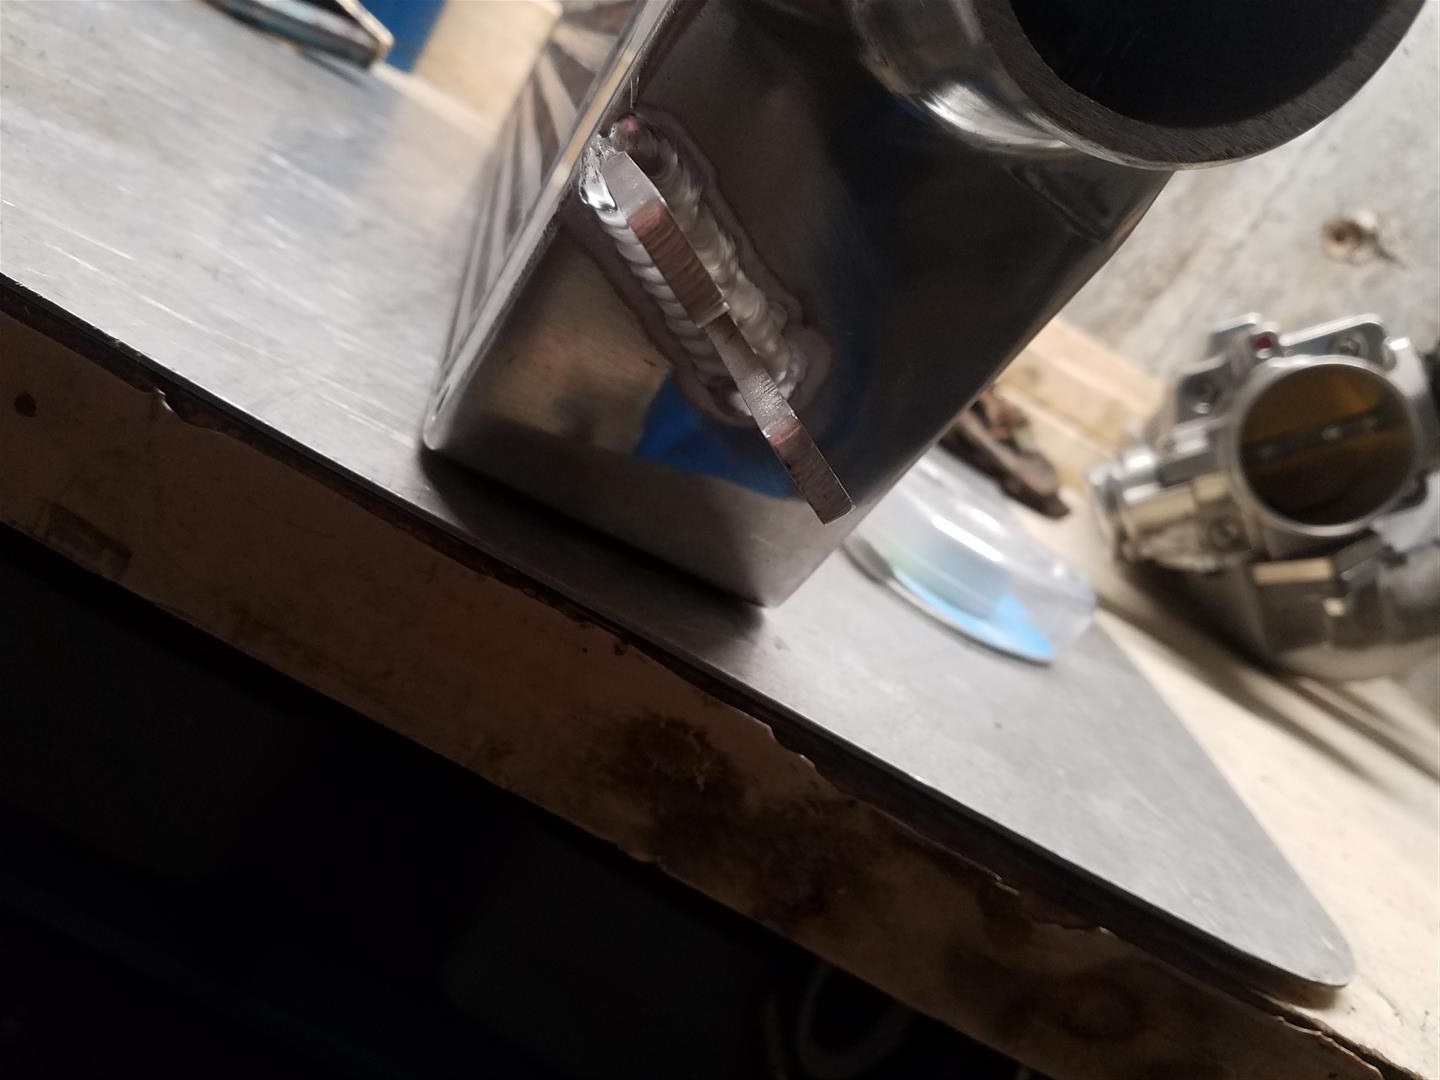
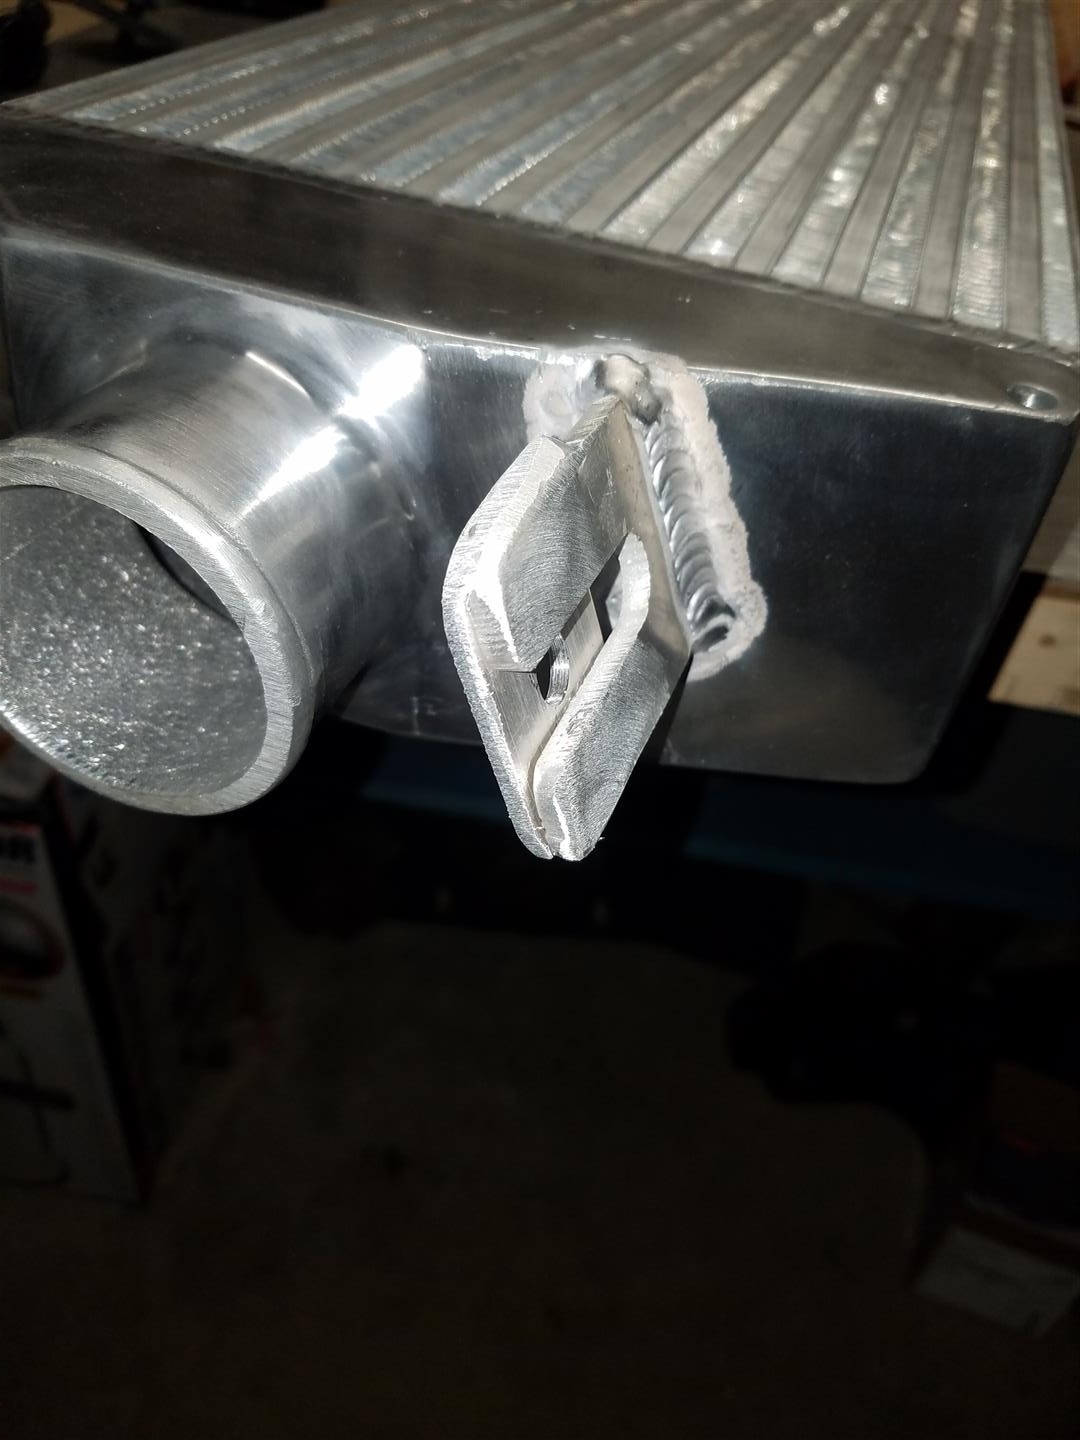
And now its were i deviate from the normal install. For one i wasnt excited amount the one sided weld on the tabs, especially in the direction of the normally experiences forces look like they'd snap the tabs right off.
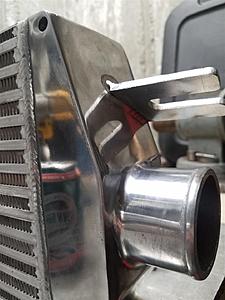
So I welded both sides.
Bryan's welds are better than mine, oh well.

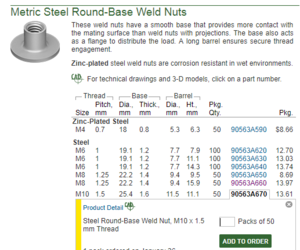
So getting to mounting it, I wanted to retain all the OEM weldnuts for the front teeth tow hooks. I picked up a set of these M10x1.5 weld in nuts from McMaster P/N 90563A670
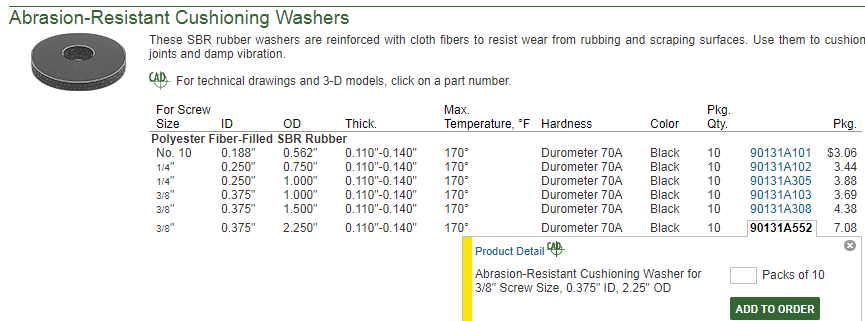
I also picked up a set of these vibration resistant rubber washers to put between the intercooler and the chassis, they didnt have M10 but 3/8 was close enough. P/N 90131A552

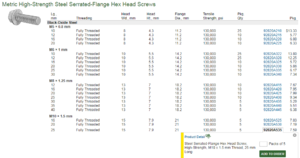
And finally i got a set of M10x1.5 serrated flange bolts, i really didnt want these coming loose during a track day, the flange serations bite nicely into the aluminum. P/N 92890A535
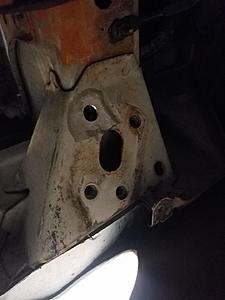
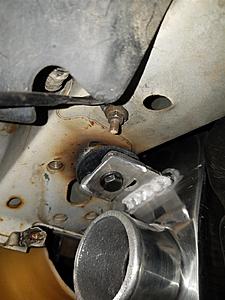
Now, if you get under the car, remove the OEM tow hooks or whatever you have or dont have, I should point out I dont have A/C and this wont work with A/C. You'll see 3 threaded holes and one not threaded hole. Take a 15/32" drill bit and open that hole up so the weldnut fits in nicely. and grind the paint off so you dont catch your car on fire and such. showing the passenger side here:
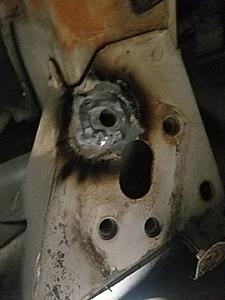
Now stick the weldnut in, while being upside down hold it with one hand and tack it in place. this can be a bitch so idk take your time or something. I was tig welding so it was an extra bitch. BTW i cant weld upside down, but whatever it was on there. a grinder is tough to get in there but i have a small air one i got in there to clean it up.
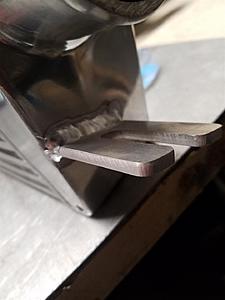
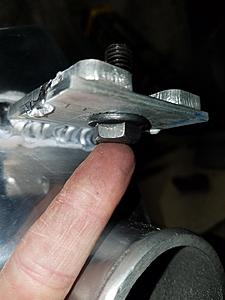
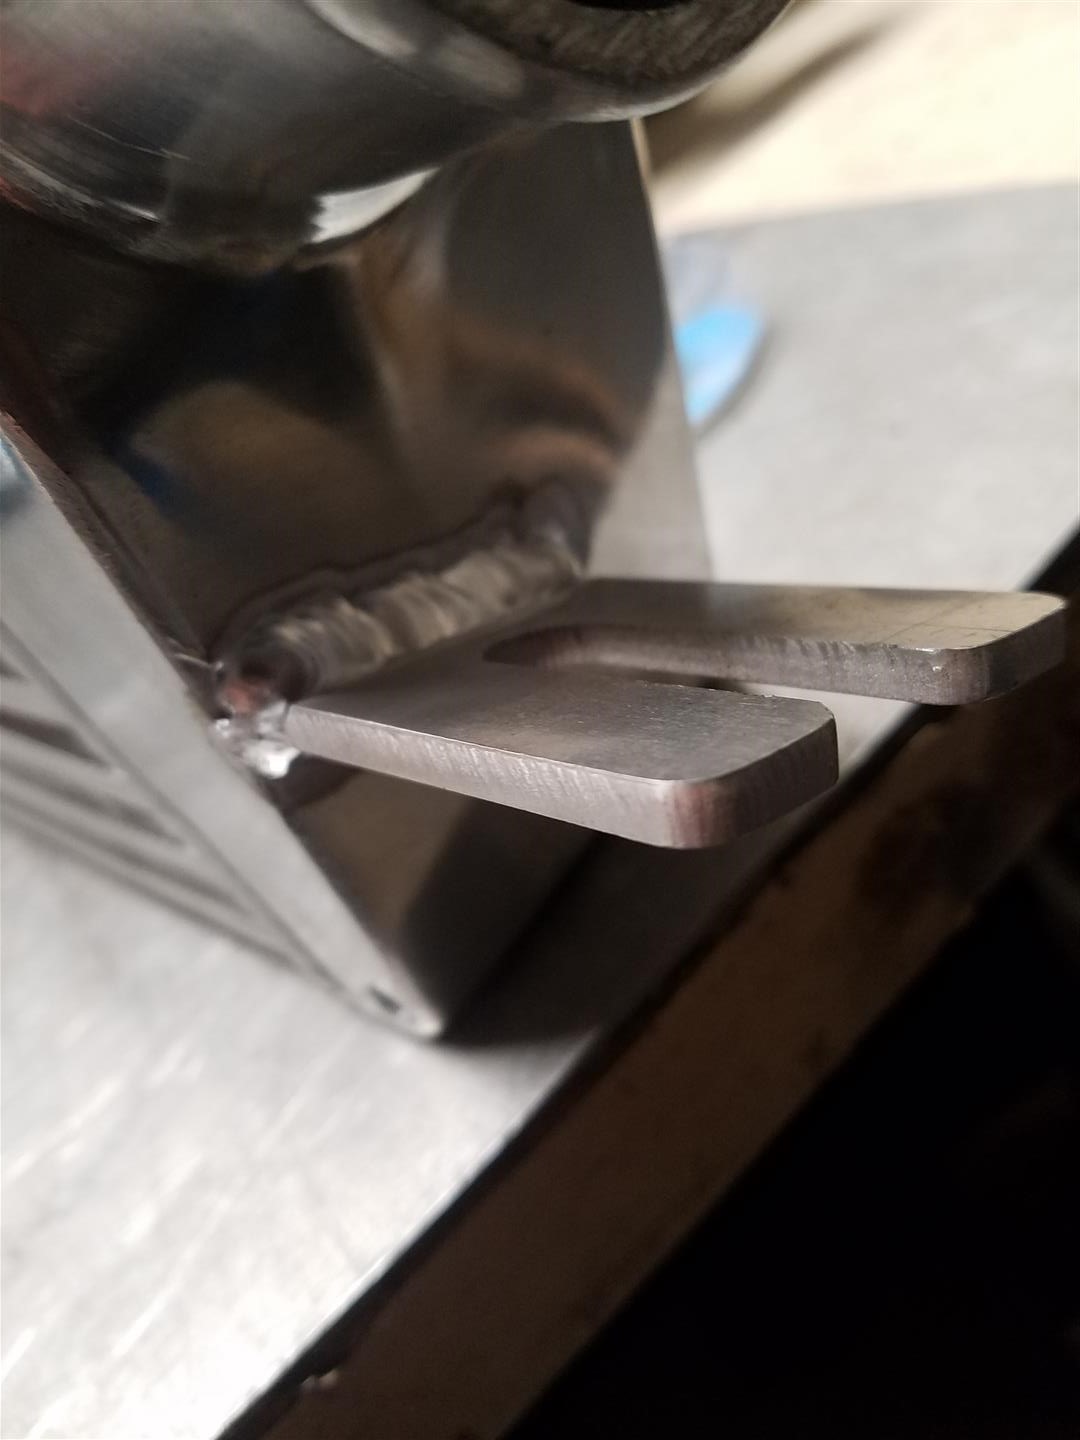
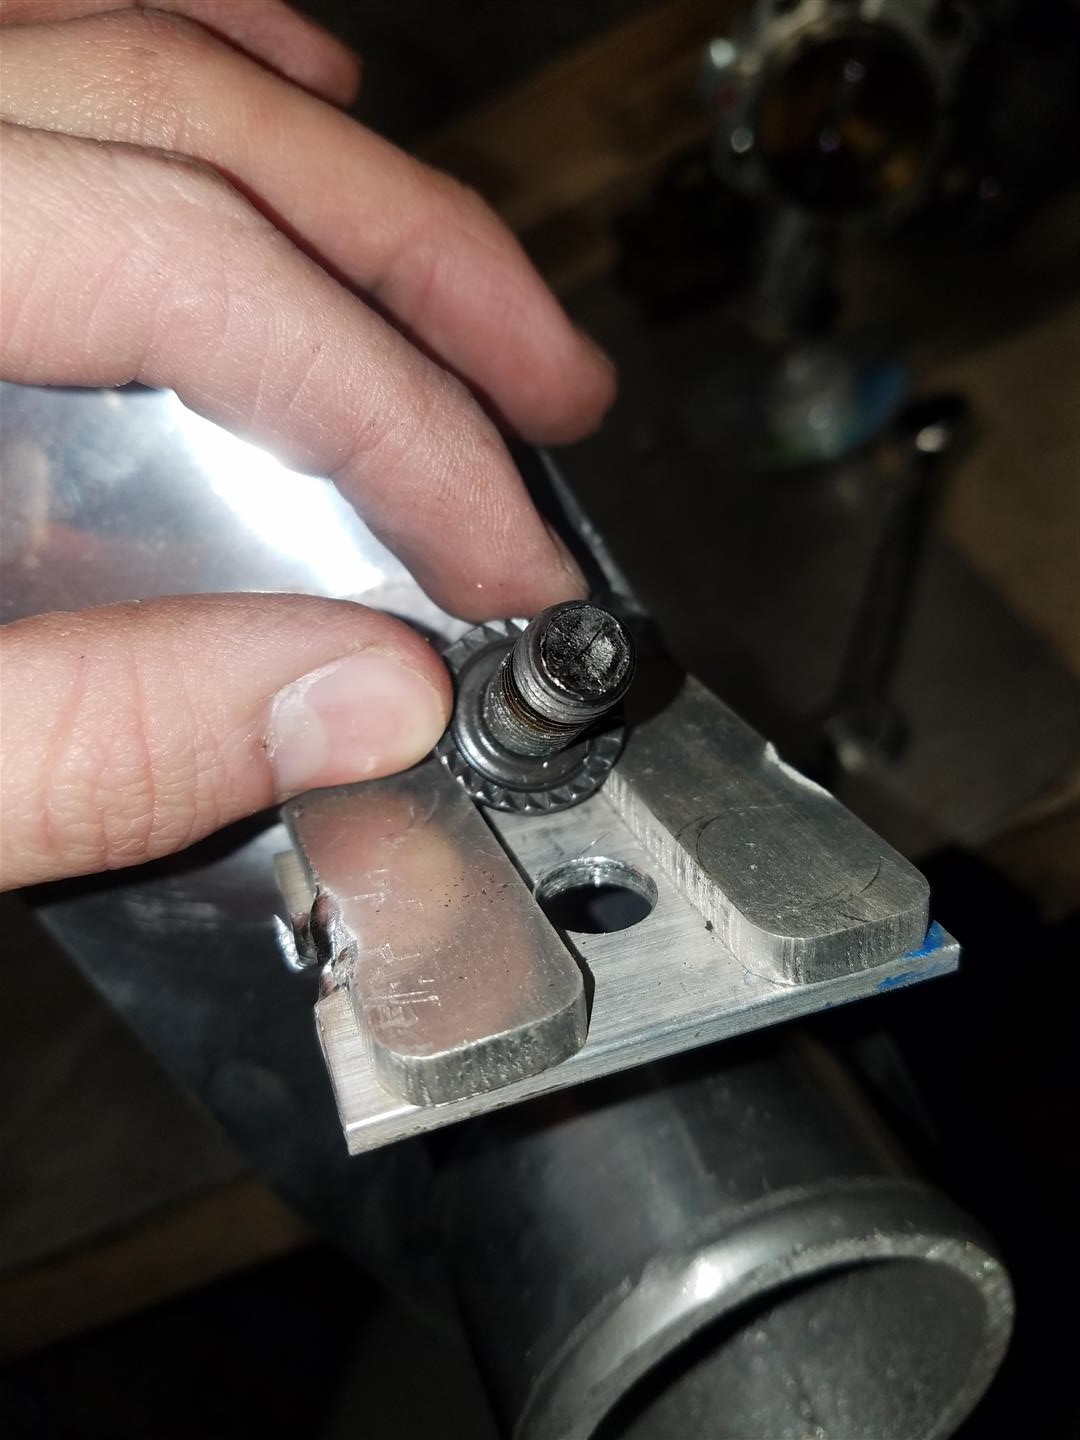
Ok, back to the I/C tabs, i didnt like how the slot was way to wide for my bolt and i needed to use a washer so the head had a good surface to mount to, and using washers with flange serrated bolts is just stupid and defeats the purpose, so cut up some aluminum "washers" and welded those onto the tabs.

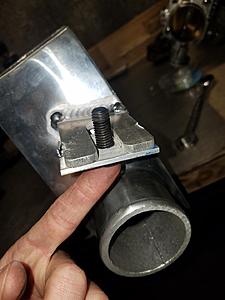
Fully welded and cleaned up:
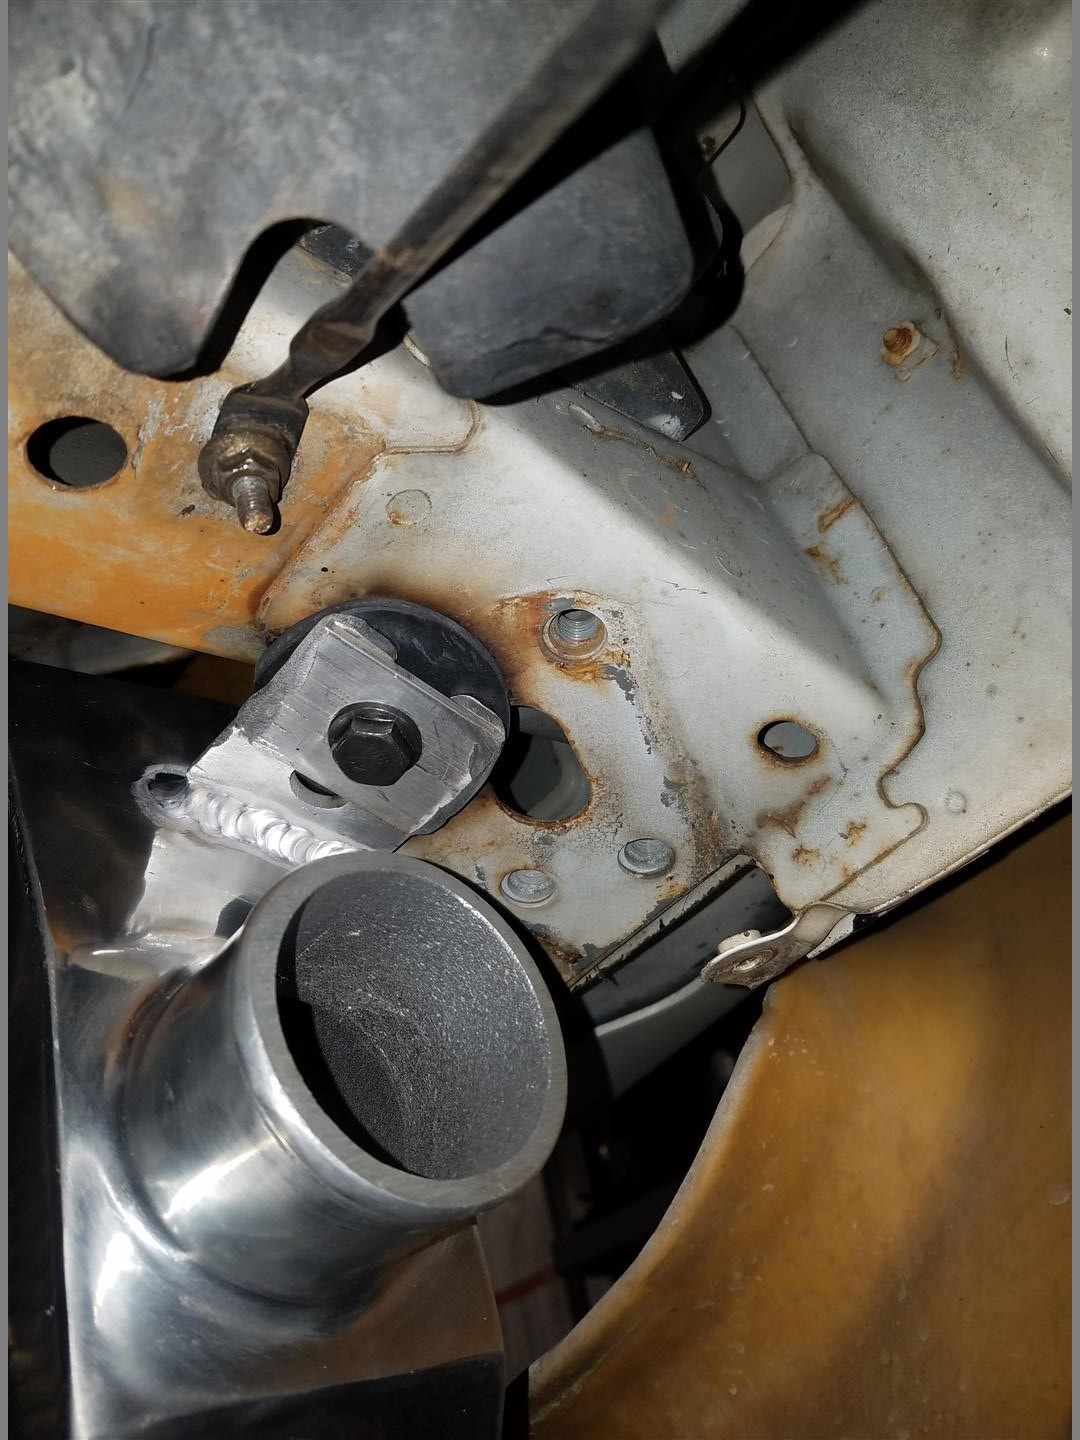
Passenger side installed

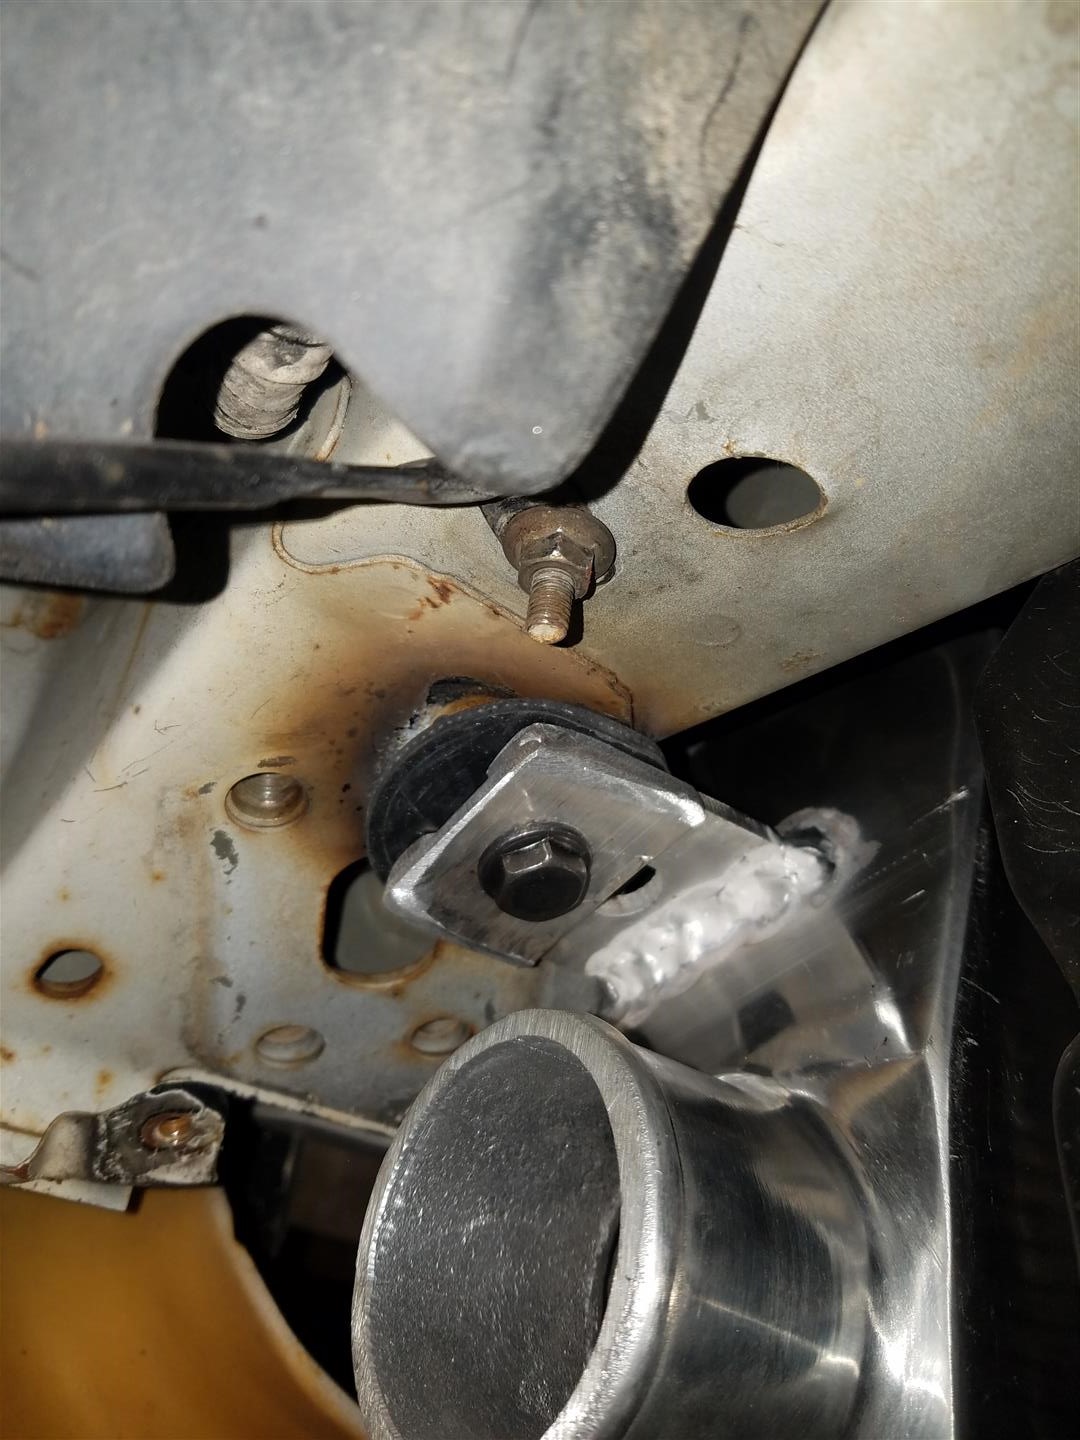
Drivers side installed
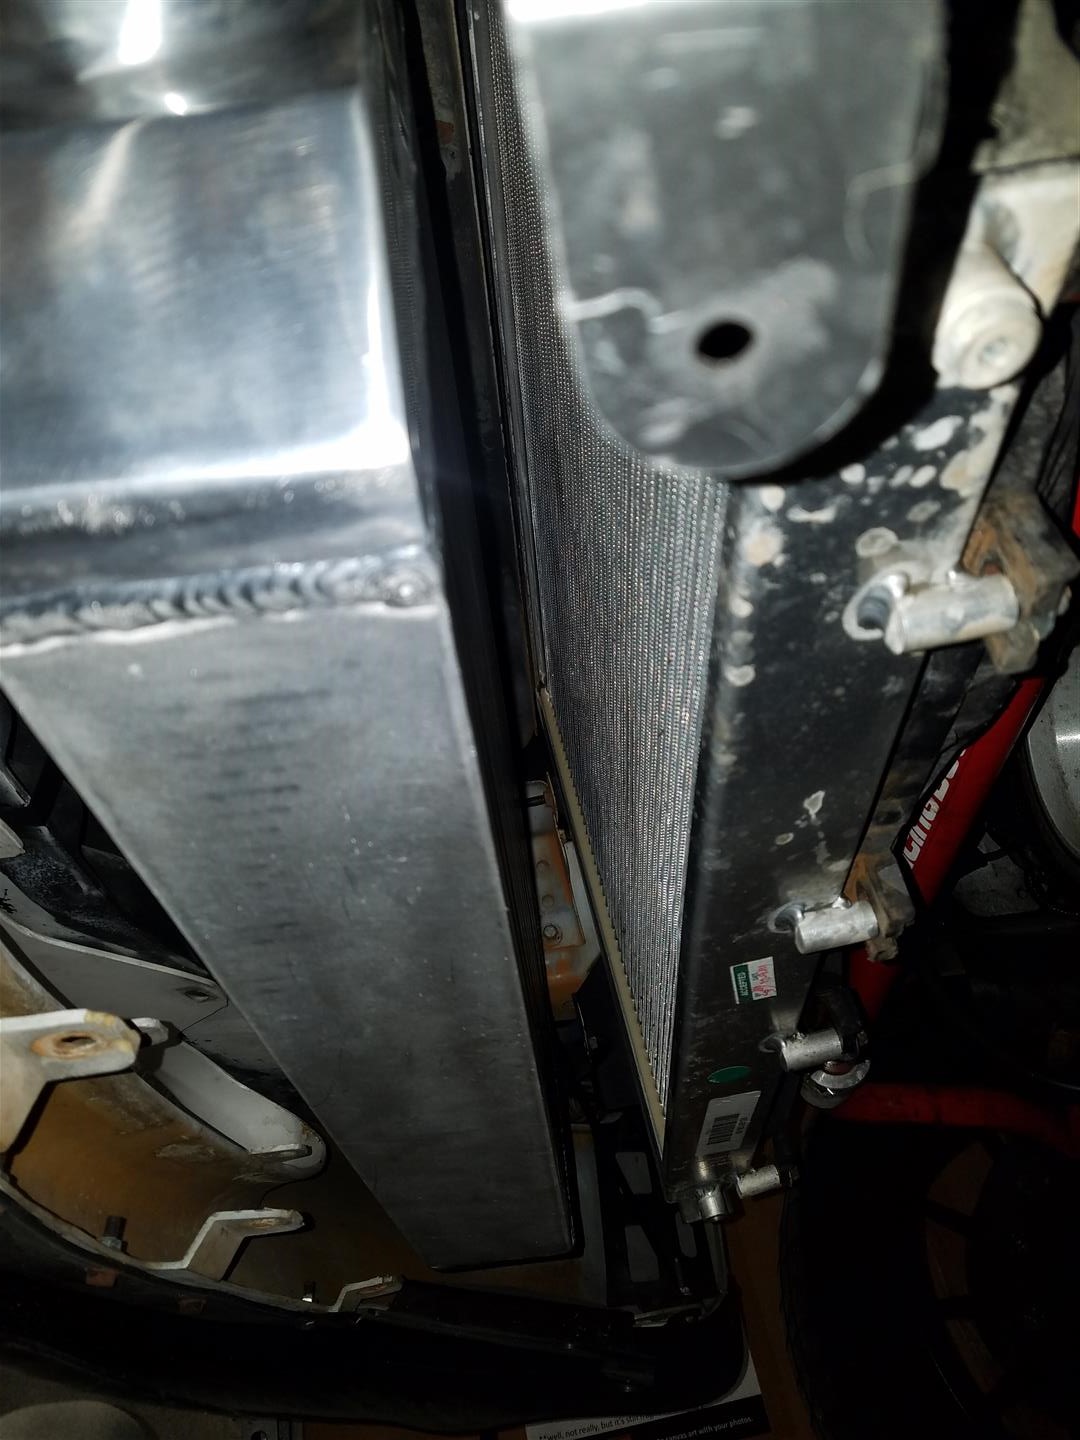
There was actually a decent amount of space left between the rad and the I/C. I was able to mount my oil cooler in there, which i actually attached to my I/C with a bracket. It does have a slight angle so it gets tighter towards the top. I have an FM crossflow rad so its kinda big. not sure on the spacing on any other rads.

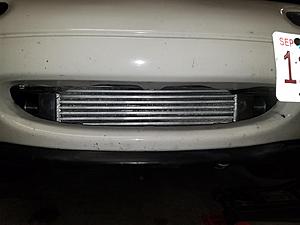
and a front shot
I didnt take any pictures of the OEM tow hook install, but i just cut a notch out of each one to fit around the new I/C mounts. Still using all 3 OEM bolts and mounts, just with a bit cut off to clear. If i get a chance I'll add some of what it looks like with them installed.
And now its were i deviate from the normal install. For one i wasnt excited amount the one sided weld on the tabs, especially in the direction of the normally experiences forces look like they'd snap the tabs right off.
So I welded both sides.
Bryan's welds are better than mine, oh well.
So getting to mounting it, I wanted to retain all the OEM weldnuts for the front teeth tow hooks. I picked up a set of these M10x1.5 weld in nuts from McMaster P/N 90563A670

I also picked up a set of these vibration resistant rubber washers to put between the intercooler and the chassis, they didnt have M10 but 3/8 was close enough. P/N 90131A552
And finally i got a set of M10x1.5 serrated flange bolts, i really didnt want these coming loose during a track day, the flange serations bite nicely into the aluminum. P/N 92890A535

Now, if you get under the car, remove the OEM tow hooks or whatever you have or dont have, I should point out I dont have A/C and this wont work with A/C. You'll see 3 threaded holes and one not threaded hole. Take a 15/32" drill bit and open that hole up so the weldnut fits in nicely. and grind the paint off so you dont catch your car on fire and such. showing the passenger side here:
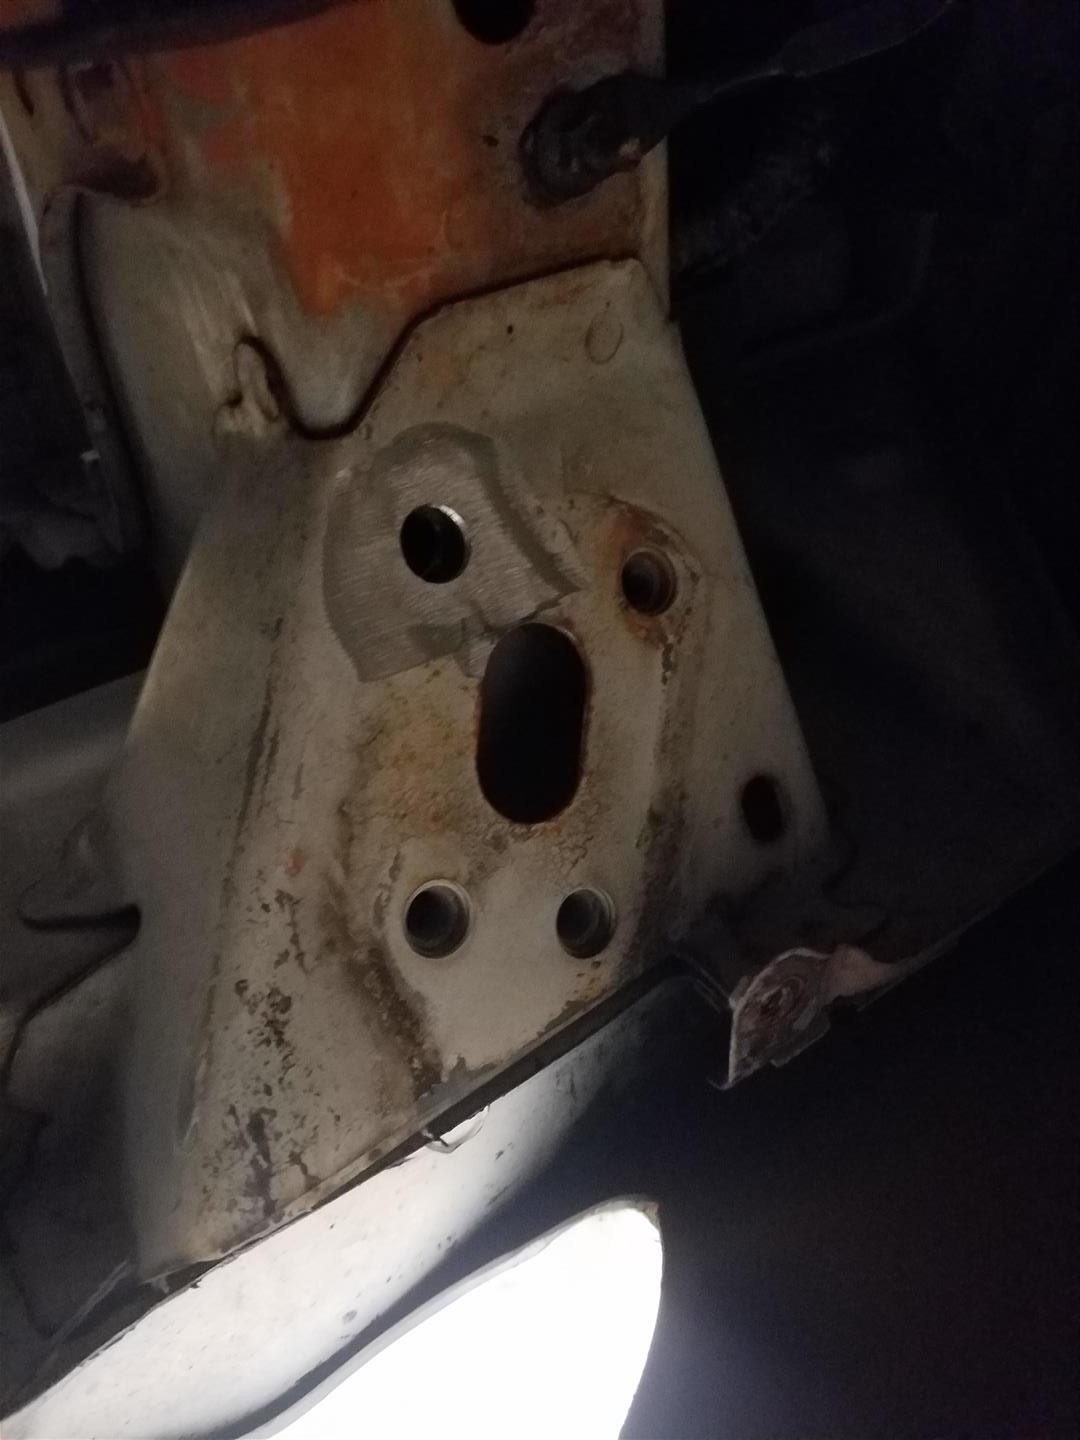
Now stick the weldnut in, while being upside down hold it with one hand and tack it in place. this can be a bitch so idk take your time or something. I was tig welding so it was an extra bitch. BTW i cant weld upside down, but whatever it was on there. a grinder is tough to get in there but i have a small air one i got in there to clean it up.

Ok, back to the I/C tabs, i didnt like how the slot was way to wide for my bolt and i needed to use a washer so the head had a good surface to mount to, and using washers with flange serrated bolts is just stupid and defeats the purpose, so cut up some aluminum "washers" and welded those onto the tabs.


Fully welded and cleaned up:
Passenger side installed
Drivers side installed
There was actually a decent amount of space left between the rad and the I/C. I was able to mount my oil cooler in there, which i actually attached to my I/C with a bracket. It does have a slight angle so it gets tighter towards the top. I have an FM crossflow rad so its kinda big. not sure on the spacing on any other rads.
and a front shot

I didnt take any pictures of the OEM tow hook install, but i just cut a notch out of each one to fit around the new I/C mounts. Still using all 3 OEM bolts and mounts, just with a bit cut off to clear. If i get a chance I'll add some of what it looks like with them installed.

Reply
 2
2

2

Thread
Thread Starter
Forum
Replies
Last Post
triple88a
DIY Turbo Discussion
20
07-05-2010 10:39 AM


