DIY SS Bottom Mount Manifold


 12-13-2009, 11:55 PM
#163
Elite Member
Thread Starter
iTrader: (8)

Join Date: Aug 2007
Location: Bellingham, Wa
Posts: 2,712
Total Cats: 4
Tomorrow and tuesday are my days off and I really HAVE to get it done by work wednesday cause i'm sick to death of driving my friends gutted/exhaustless M3.
So to answer your question more clearly...tomorrow or tuesday it'll be done for sure.
So to answer your question more clearly...tomorrow or tuesday it'll be done for sure.

Reply
 0
0

0

 12-14-2009, 12:10 AM
#166
Elite Member
Thread Starter
iTrader: (8)
Join Date: Aug 2007
Location: Bellingham, Wa
Posts: 2,712
Total Cats: 4
The Integra handled the ~1" of snow on the way home tonight fancifully. Even got me up a really steep hill (with a running start) and dorifted around some corners.
Reply
0
0
12-16-2009, 04:18 PM
#167
Elite Member
Thread Starter
iTrader: (8)
Join Date: Aug 2007
Location: Bellingham, Wa
Posts: 2,712
Total Cats: 4
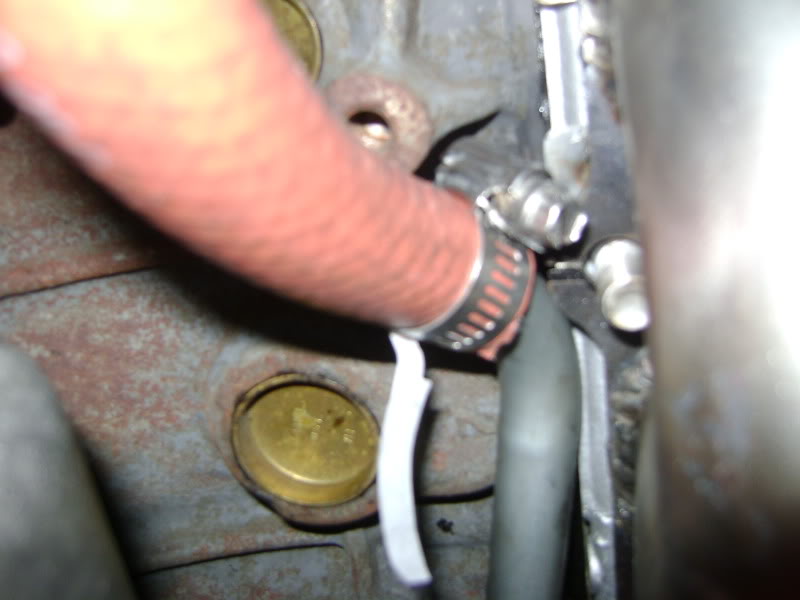
Ok, more pictures. Here is how I re-routed my heater line a'la neogenesis2004.
Cut the hardline and flipped it around and welded a bracket on it.
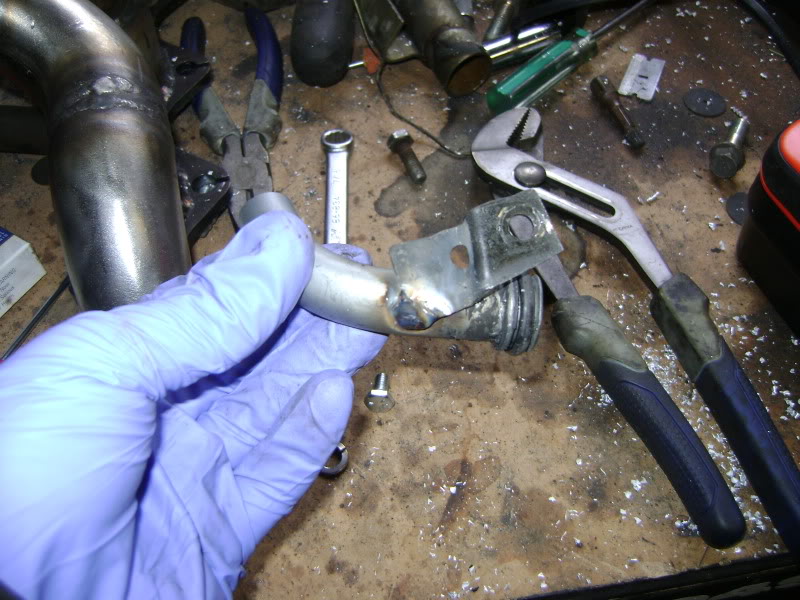
Drilled and tapped a hole in the mixing manifold to bolt the bracket down to so it wont come out under pressure.

Ran an ugly red hose between the hardlines.
Cut the hardline and flipped it around and welded a bracket on it.
Drilled and tapped a hole in the mixing manifold to bolt the bracket down to so it wont come out under pressure.
Ran an ugly red hose between the hardlines.
Reply
0
0

 .
12-16-2009, 09:43 PM
.
12-16-2009, 09:43 PM
#171
Elite Member
Thread Starter
iTrader: (8)
Join Date: Aug 2007
Location: Bellingham, Wa
Posts: 2,712
Total Cats: 4

Reply
0
0
 12-28-2009, 06:10 PM
#173
Elite Member
Thread Starter
iTrader: (8)
Join Date: Aug 2007
Location: Bellingham, Wa
Posts: 2,712
Total Cats: 4
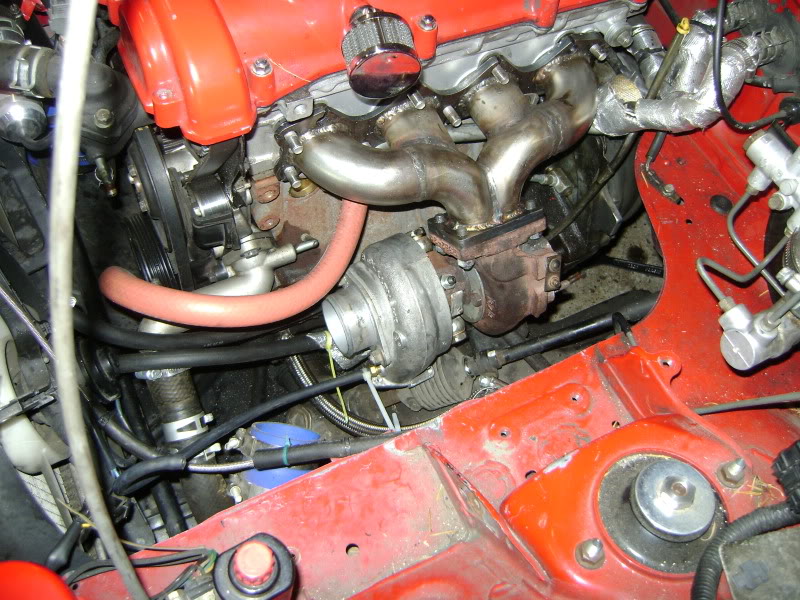
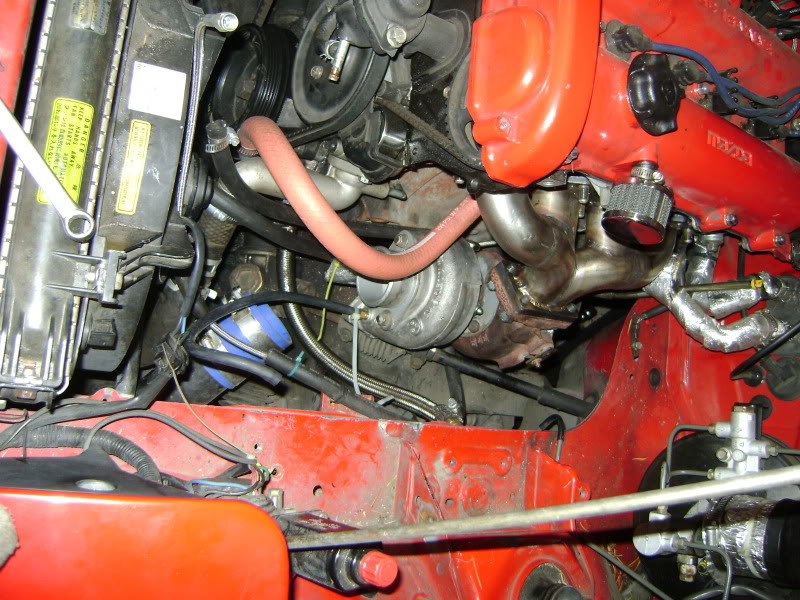
I'll take more pictures later but its in and driving. The manifold is starting to change colors and look all cool now that its been heat cycled. I've got a small exhaust leak between the turbo and the outlet flange. Cant hear it, only smell it and saw it when it first started.
Otherwise I can TOTALLY tell the difference in a 3" downpipe versus the BEGi piece that was on before.
Not to mention I have a torsen now which just makes everything that much better!
Otherwise I can TOTALLY tell the difference in a 3" downpipe versus the BEGi piece that was on before.
Not to mention I have a torsen now which just makes everything that much better!
Reply
0
0
 12-28-2009, 11:01 PM
#176
Elite Member
Thread Starter
iTrader: (8)
Join Date: Aug 2007
Location: Bellingham, Wa
Posts: 2,712
Total Cats: 4
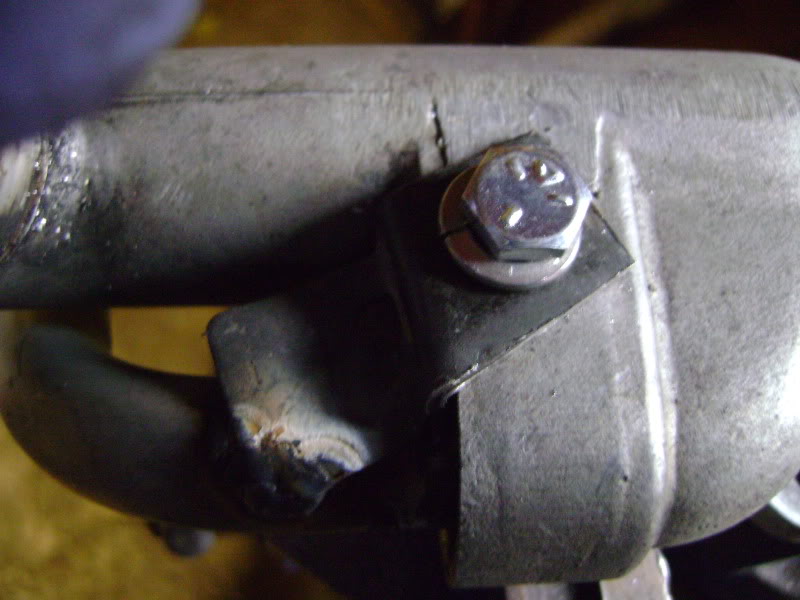
Not planning on keeping that hose there at all and its not close enough to melt. That picture was taken without the bracked bolted down to the manifold that is on the hardline so it was a bit out of place. Eventually i'll be modifying the mixing manifold more permanently when i can afford to pay someone to weld it.
Reply
0
0


