
ABSURDflow Turbo KLDE Mazda V6 Thread
 07-02-2012, 04:45 PM
#341
Elite Member

Thread Starter
iTrader: (9)
Join Date: Jun 2006
Location: Chesterfield, NJ
Posts: 6,930
Total Cats: 404
OK, I have all the components, supposedly, to do this Arduino circuit, Amazon tracking says my LCD display was delivered today, great.
At lunch I started going thru my AEM EMS map and changing things for my new setup, injector offsets, crank/cam trigger settings, etc. Even though I looked before, today I found that there is an independent user definable pulse width output (pulls to ground, so I just connect the signal on the pump to 12v and PWM the ground via AEM EMS). It's mentioned only once in passing in the entire user manual. Soooo basically this entire Arduino circuit/gizmo isn't needed. hahaha. I'm sure I may use it in the future for something, unless someone wants it.
-Tim

Reply
 0
0

0


 07-09-2012, 11:33 PM
#347
Elite Member
Thread Starter
iTrader: (9)
Join Date: Jun 2006
Location: Chesterfield, NJ
Posts: 6,930
Total Cats: 404
I uploaded more pics tonight. Sorry for the fuzzy pictures, I dropped my ancient pointNshoot one too many times I guess. It's also been thru the washer machine twice and the toaster oven once.
Huster likes braces.
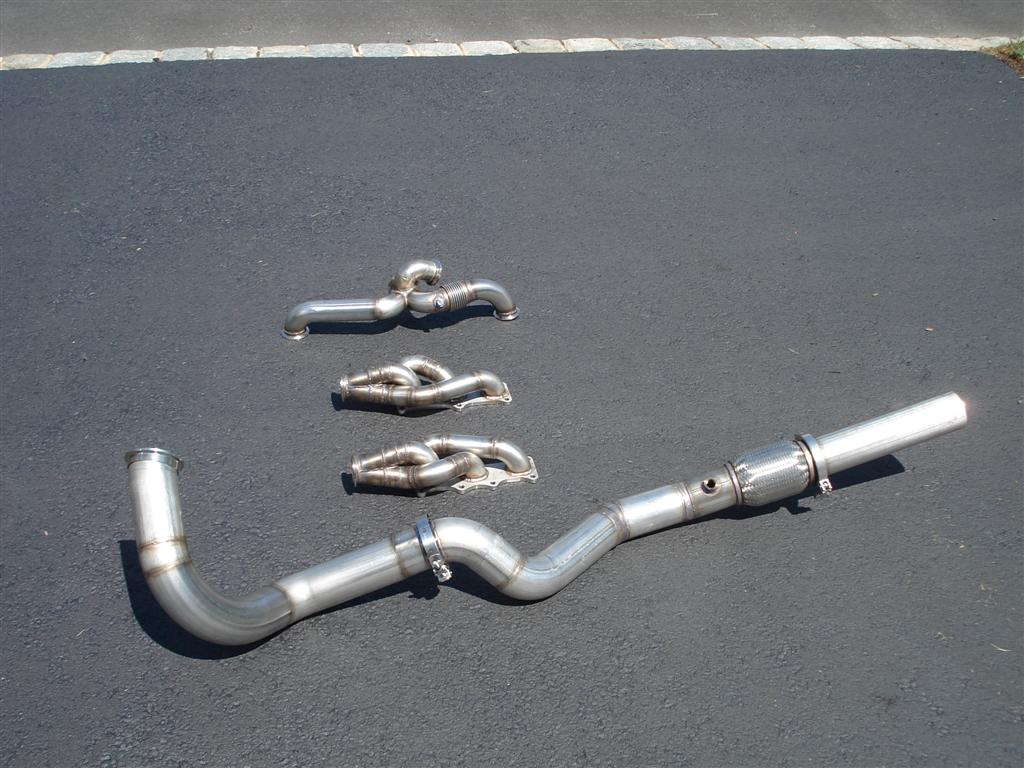
All stainless except for the rearmost Vband clamp which is aluminum clamshell piece, a-la ARTech.
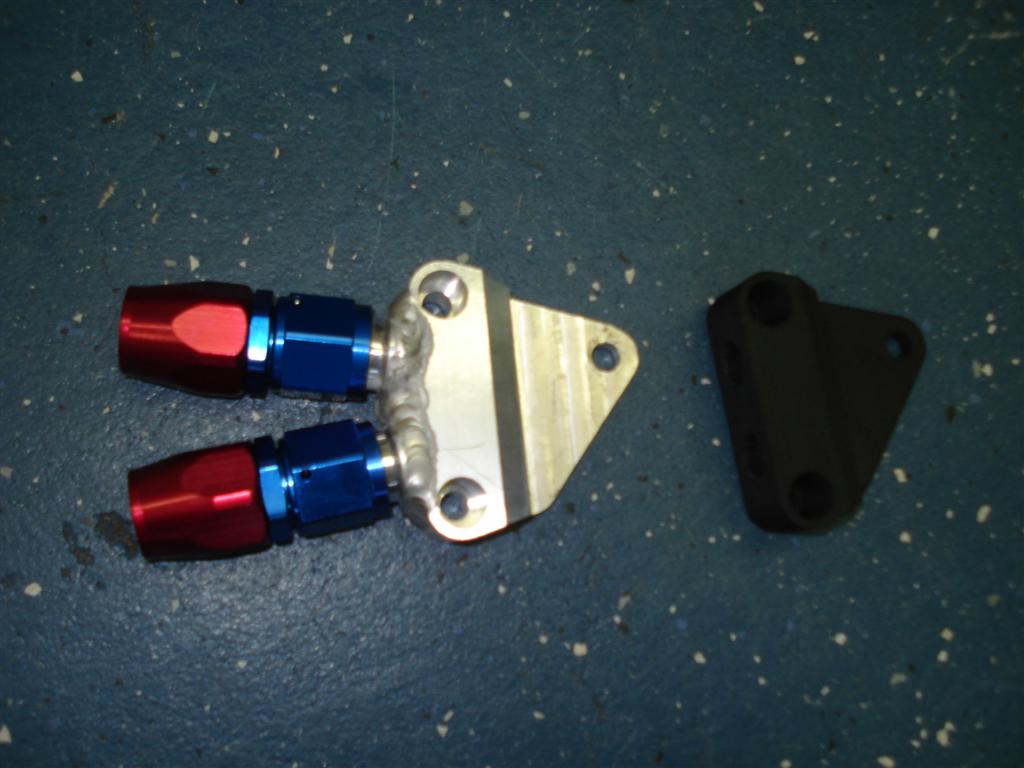
Oil supply boss. I had to build up weld in order to angle the fittings away from one another...oops.
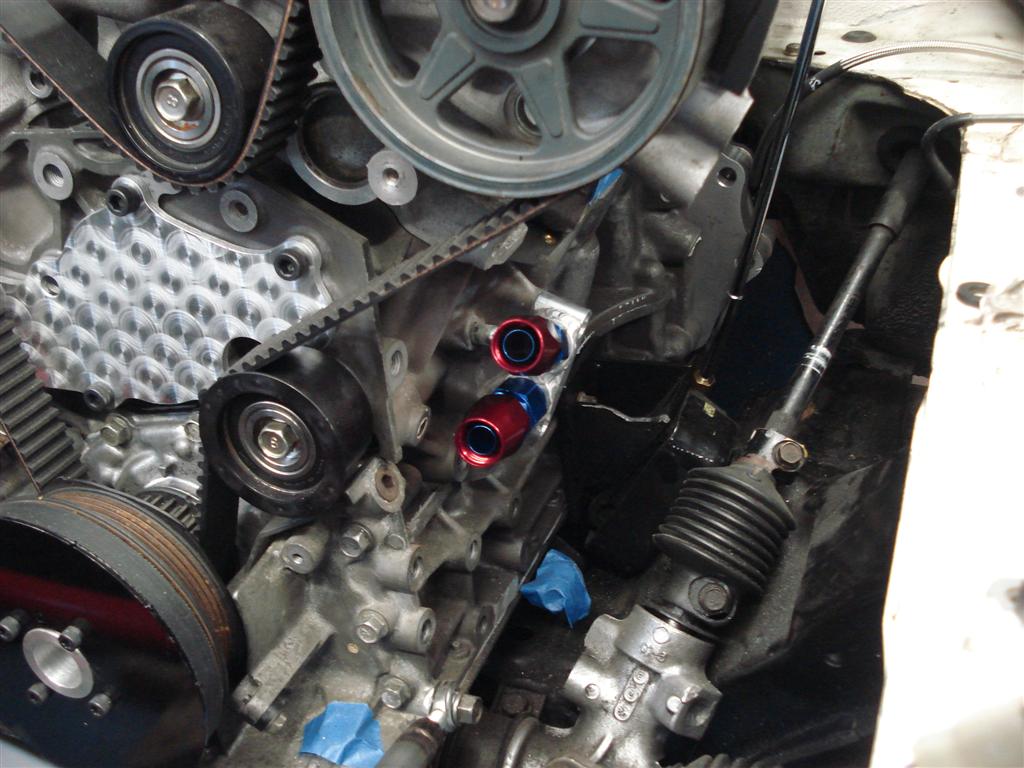
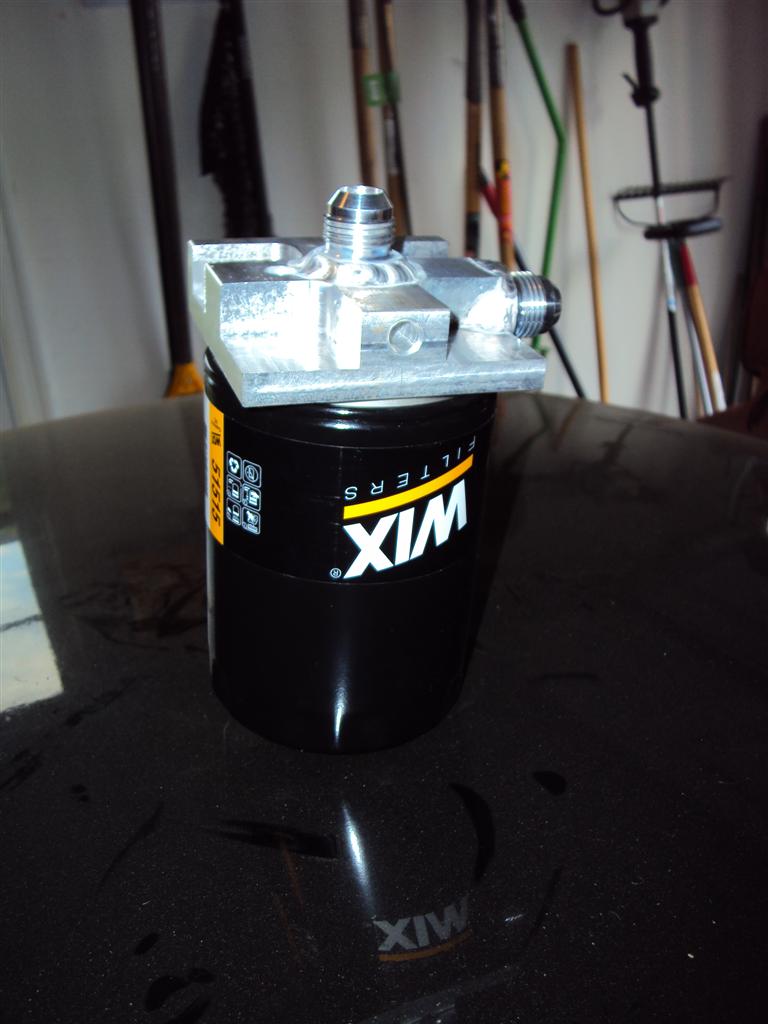
Remote mount. I still have to pipe-tap for turbo supply, oil temp & pressure sensors. And find a place for it. I need oil capacity so I went with one of those huge racing filters. Length AND girth.
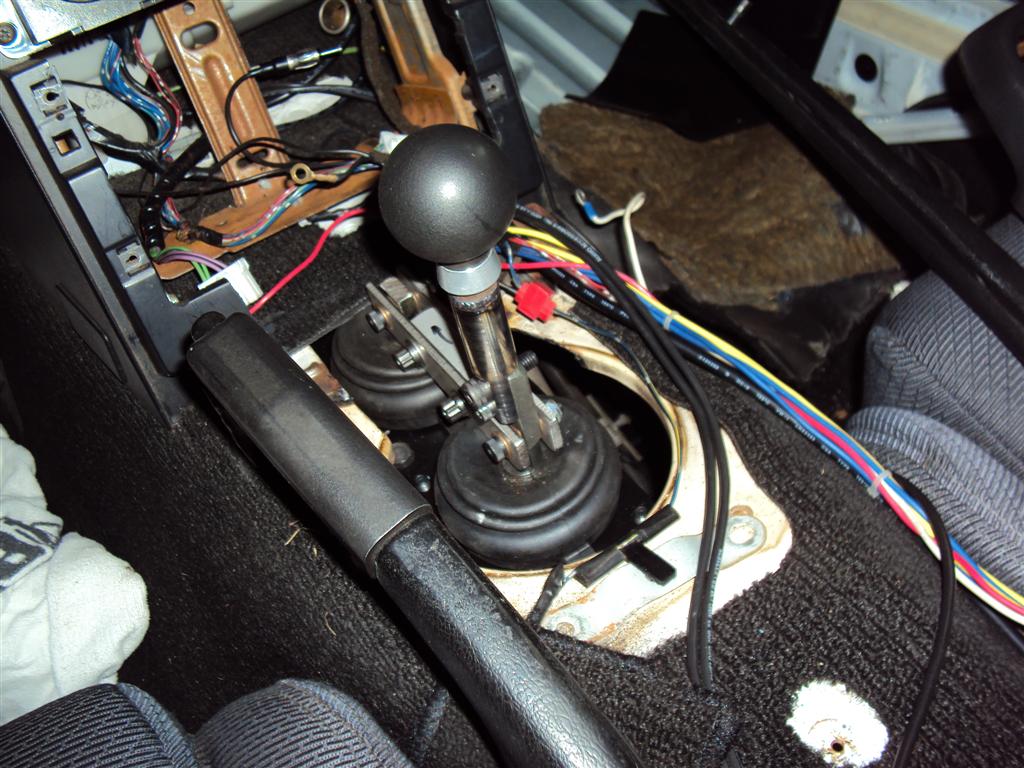
Shifter handle finally done. I hacked off the top portion of the OEM shifter. Niice. Shift throws are so slick about as short as the short-throw shifter I ran on the 5speed. I may measure both.
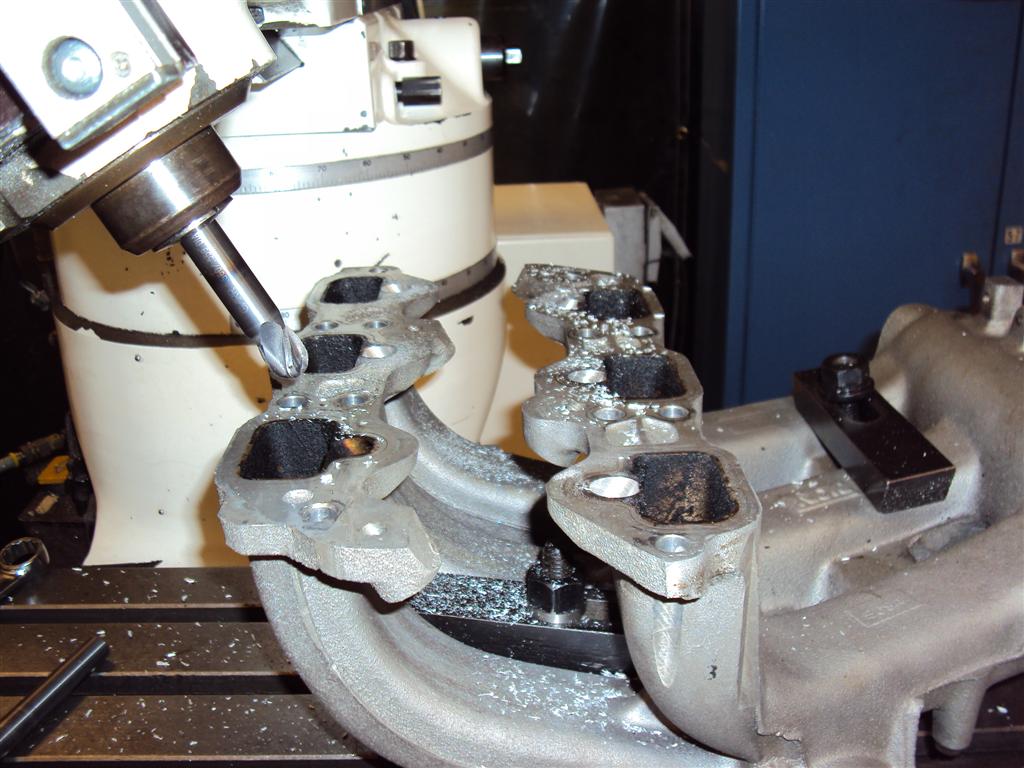
OK so summer is almost over and I still have this thing on jack stands. I figure making the original cast manifold work will take less time than finishing the sheetmetal (aluminum) intake I started. I bandsawed the throttle body off last week and milled out the injector holes 9/16" for standard injector o-rings after work today. I should just have to weld up the holes, cut/put the throttle body flange pointing off the side, and go. Oh, make fuel rails too. Maybe tomorrow at lunch.
Reply
0
0
 07-10-2012, 09:56 AM
#349
Boost Czar

iTrader: (62)
Join Date: May 2005
Location: Chantilly, VA
Posts: 79,729
Total Cats: 4,126
if you speak of mine... mine was loaded and fighting the expansion. The exhaust shop that put it on used the mount to pull the exhaust off the k-member because it was rubbing. It was under a lot of tension and hard mounted to the trans. It broke off during a track day, as well as warped and cracked the manifold.
Last edited by Braineack; 07-10-2012 at 10:11 AM.
Reply
0
0
07-10-2012, 10:08 AM
#350
Elite Member
Thread Starter
iTrader: (9)
Join Date: Jun 2006
Location: Chesterfield, NJ
Posts: 6,930
Total Cats: 404
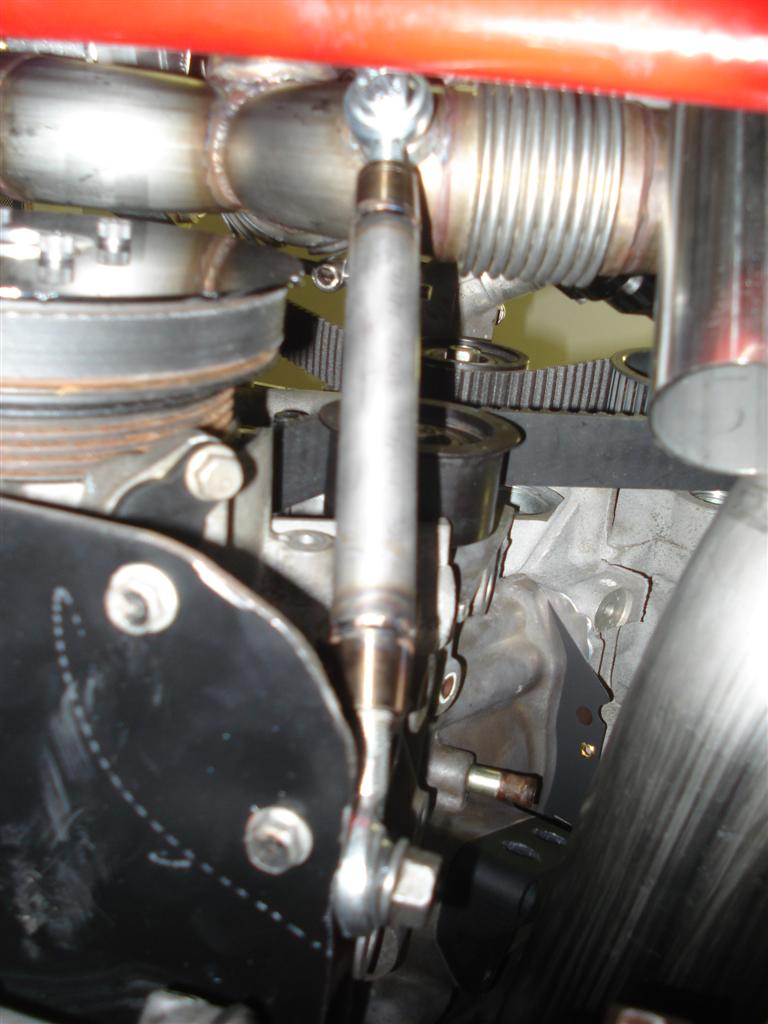
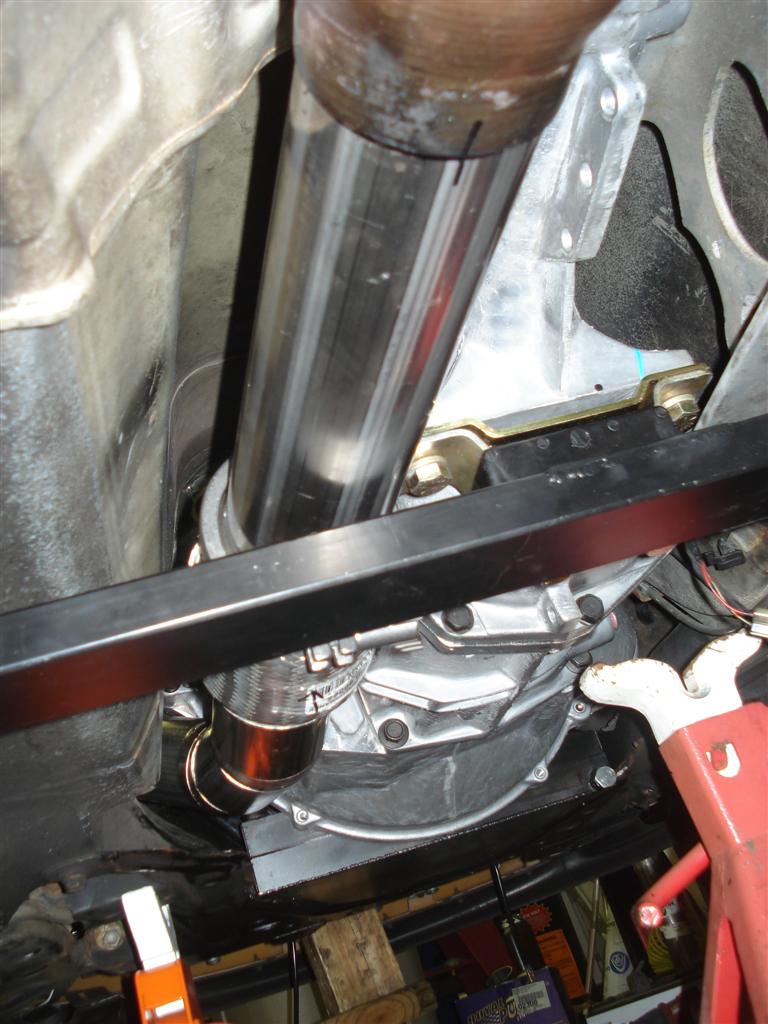
I bought these stainless threaded weld standoff pieces which are thin like the pipe (.065"). The pipe is not reinforced. Good call on the warning though Matt, if I had thought about it I would have considered a reinforcing wrap thing. I am using this style turnbuckle support on another part of the exhaust too. To lift the downpipe up and over the trans cross member. It clears without a brace but only by a finger's width and I'm sure it would hit and rattle once hot and driving.
I think this will work because the exhaust has room to grow and move around unlike the stiff trans bracket and bolt to the pipe style. The turnbuckle just supports the weight. In this picture, it's there mainly because I have to take off the driver's side manifold to install the downpipe and holding up that side of the Y pipe with the turbo attached while also attaching the downpipe vband clamp was impossible with one person. I think once both manifold vbands are tight then this support will be somewhat along for the ride. I will preload it anyway to take some load off the vband clamps.
I think this will work because the exhaust has room to grow and move around unlike the stiff trans bracket and bolt to the pipe style. The turnbuckle just supports the weight. In this picture, it's there mainly because I have to take off the driver's side manifold to install the downpipe and holding up that side of the Y pipe with the turbo attached while also attaching the downpipe vband clamp was impossible with one person. I think once both manifold vbands are tight then this support will be somewhat along for the ride. I will preload it anyway to take some load off the vband clamps.
Reply
0
0
 07-13-2012, 01:31 AM
#353
Junior Member

Join Date: Mar 2010
Location: onion city,ca
Posts: 413
Total Cats: 2
may I enquire about that bushing you are using? I have a gm style now (approx 2" tall) and I need a shorter one. yours looks just about right i think.
gorjus from underneath. everything is shiny
gorjus from underneath. everything is shiny
Reply
0
0
07-18-2012, 12:44 PM
#357
Junior Member
Join Date: Mar 2010
Location: onion city,ca
Posts: 413
Total Cats: 2
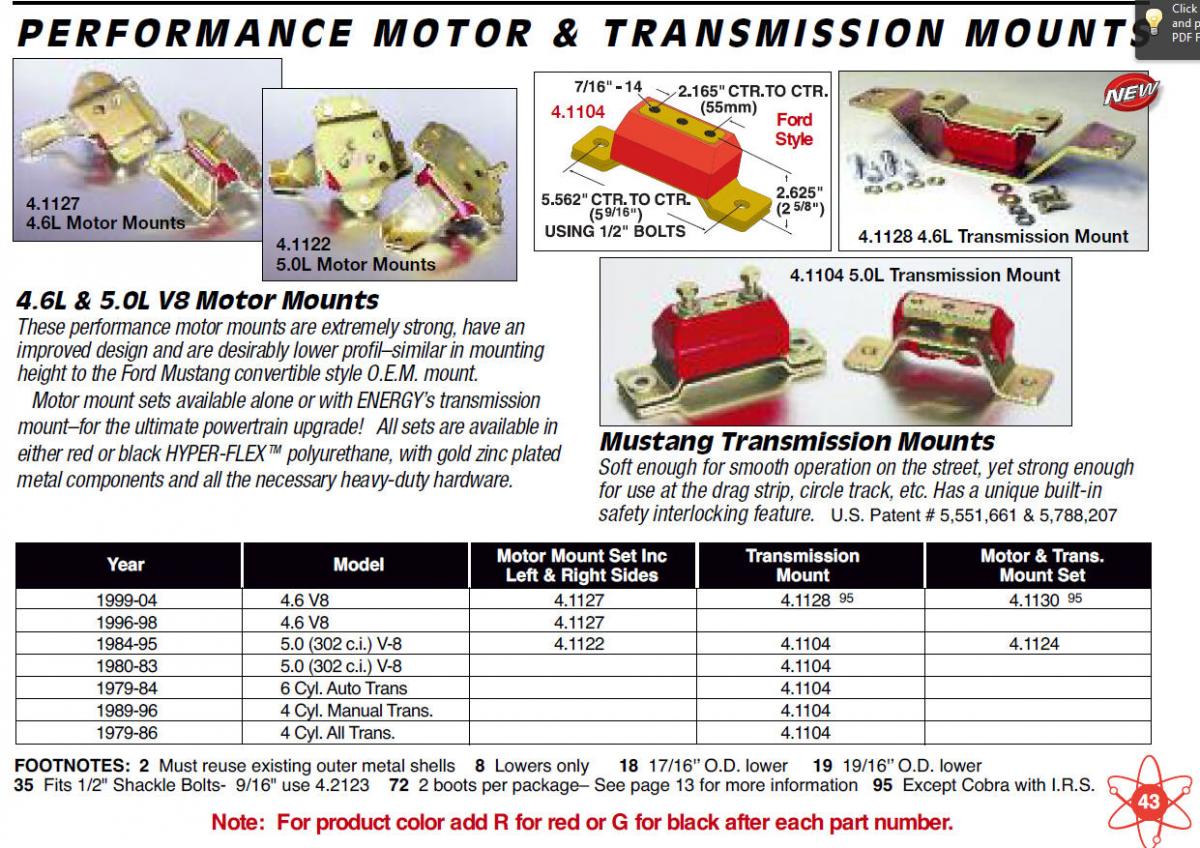
thank you sir. is this the one?
1979-1986 Mercury Capri Energy Suspension Transmission Mount Red|Mercury Capri|Mercury|Energy Suspension Bushing
i went to parts yard and crawled under '80's mustangs but didn't find anything that looked suitable - they were all huge.
1979-1986 Mercury Capri Energy Suspension Transmission Mount Red|Mercury Capri|Mercury|Energy Suspension Bushing
i went to parts yard and crawled under '80's mustangs but didn't find anything that looked suitable - they were all huge.
Reply
0
0
07-18-2012, 12:55 PM
#358
Elite Member
Thread Starter
iTrader: (9)
Join Date: Jun 2006
Location: Chesterfield, NJ
Posts: 6,930
Total Cats: 404
OOps. Yes, that's the correct part number. I fixed the above post. Screenshot of Energy suspension 2010 page 43 attached showing year range mustang. It shows it's 2.625 tall though.
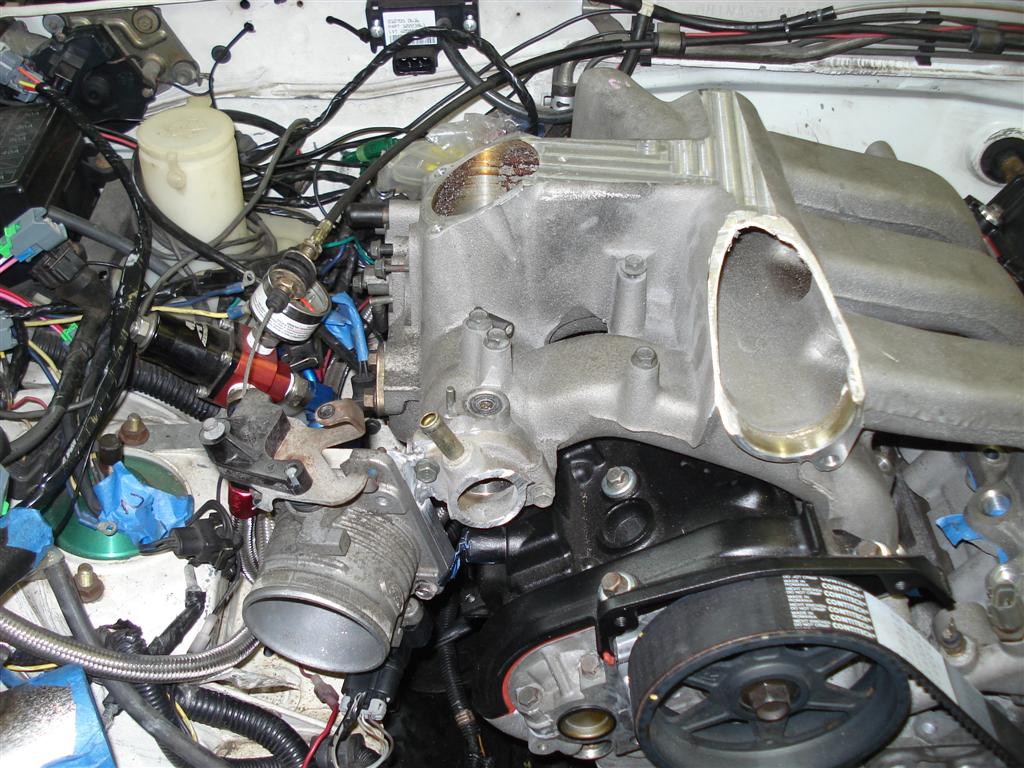
I started welding my mini-plenum onto the factory intake during lunch today. Welding onto old cast aluminum is not fun. Boo hoo. I hope to finish it after work tonight then tomorrow work on making plates to plug off where I cut off the original throttle body and weld those on, then the intake should be done, minus bracket to hold the throttle cable.
I started welding my mini-plenum onto the factory intake during lunch today. Welding onto old cast aluminum is not fun. Boo hoo. I hope to finish it after work tonight then tomorrow work on making plates to plug off where I cut off the original throttle body and weld those on, then the intake should be done, minus bracket to hold the throttle cable.
Reply
0
0
07-20-2012, 11:18 PM
#359
Elite Member
Thread Starter
iTrader: (9)
Join Date: Jun 2006
Location: Chesterfield, NJ
Posts: 6,930
Total Cats: 404
I spend the past week working on modifying the factory intake manifold to work until I make my sheet metal/aluminum intake, which would have taken me much longer than a week to do.
Throttle body test fit. 65mm Crown Vic, $40 off ebay with the TPS.
New plenum FAILfloral cuts. XOXO BEAU.
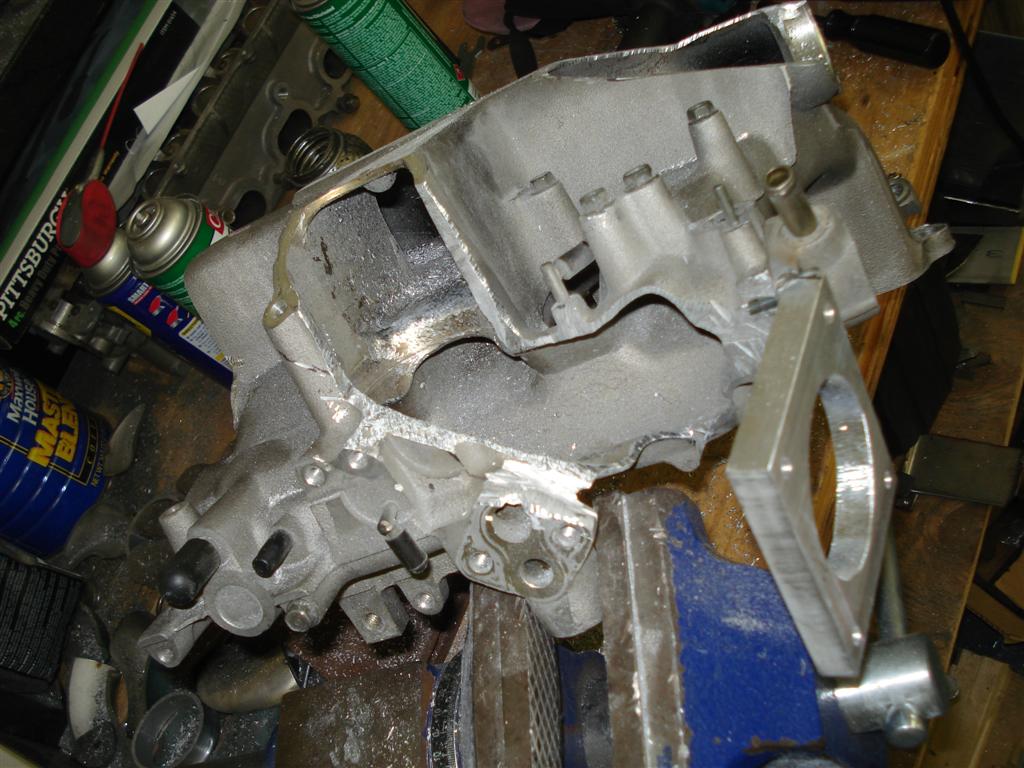
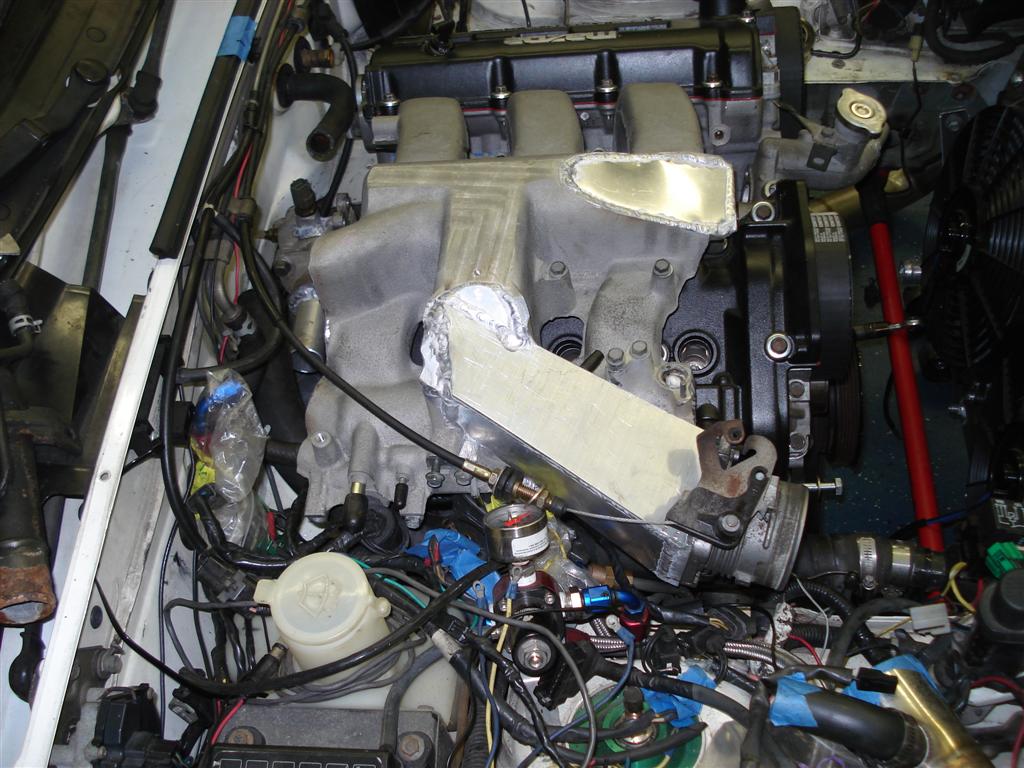
Holes all patched up. I SUCK at aluminum welding thank you very much. I think I figured out what I was doing wrong right there at the end sorta. Still a royal PITA. But as long as it doesn't leak I don't really care at this point :(
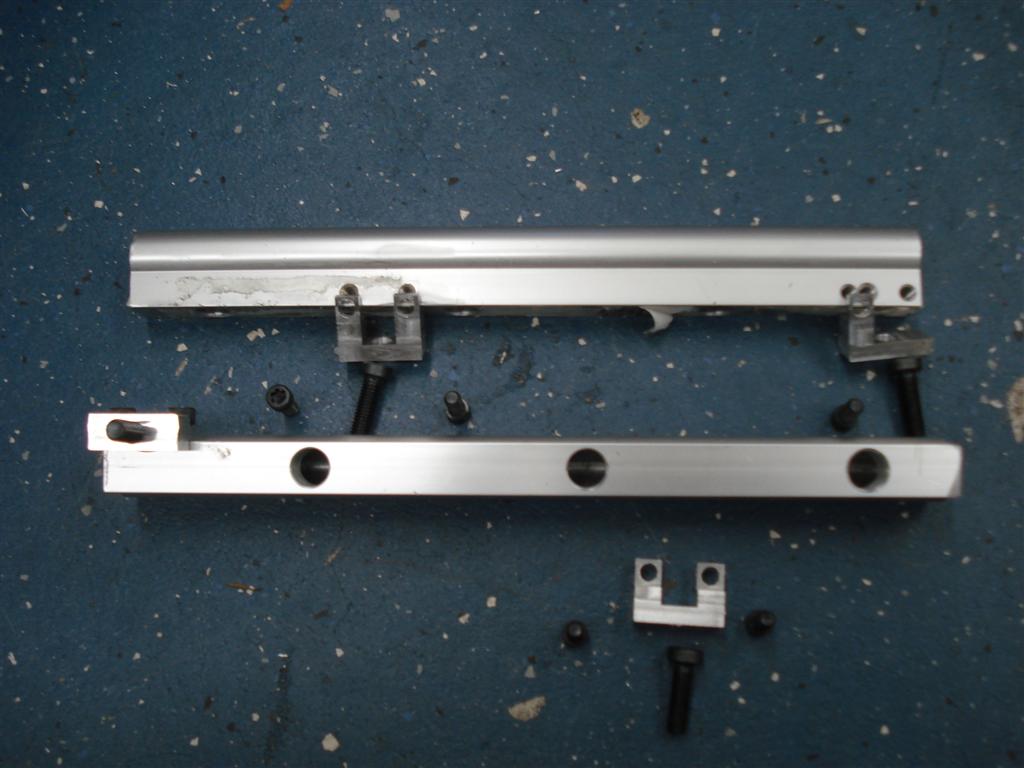
Picture above in post 347 shows me milling 9/16" holes for the fuel injectors. I use -203 o-rings, not the ones supplied by Deautschwerks (LS3/LS7 shorty injectors). The fuel rail is drilled .531 hole. The supplied 'red' o-rings worked well. I have no idea what size they are though, doesn't seem to match anything I have. Maybe some funky metric oring. Whatever.
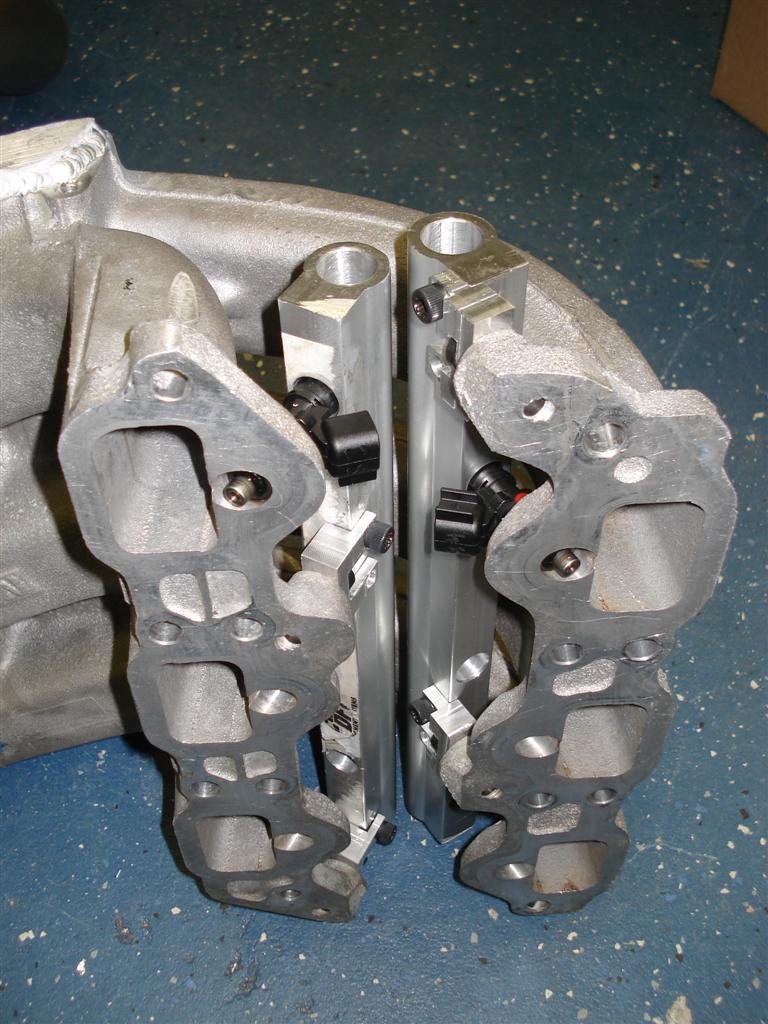
Mazda was nice enough to have different standoff/mount spacings and heights from one fuel rail to the next. I was rushing and assumed they were the same from bank to bank. Fortunately I was able to salvage the second fuel rail and the standoffs.
680cc Deatschwerks Bosch shortys (LS3/LS7). I still have to weld on my 6AN male fittings. Car is already plumed for 6AN, and that's what the factory supply line is, so anything larger wouldn't make sense unless I redo the entire fuel system. T.B.D.
Intake is 'square' KLZE port, heads are 'oval' KLDE. I will add epoxy and smooth out next week.
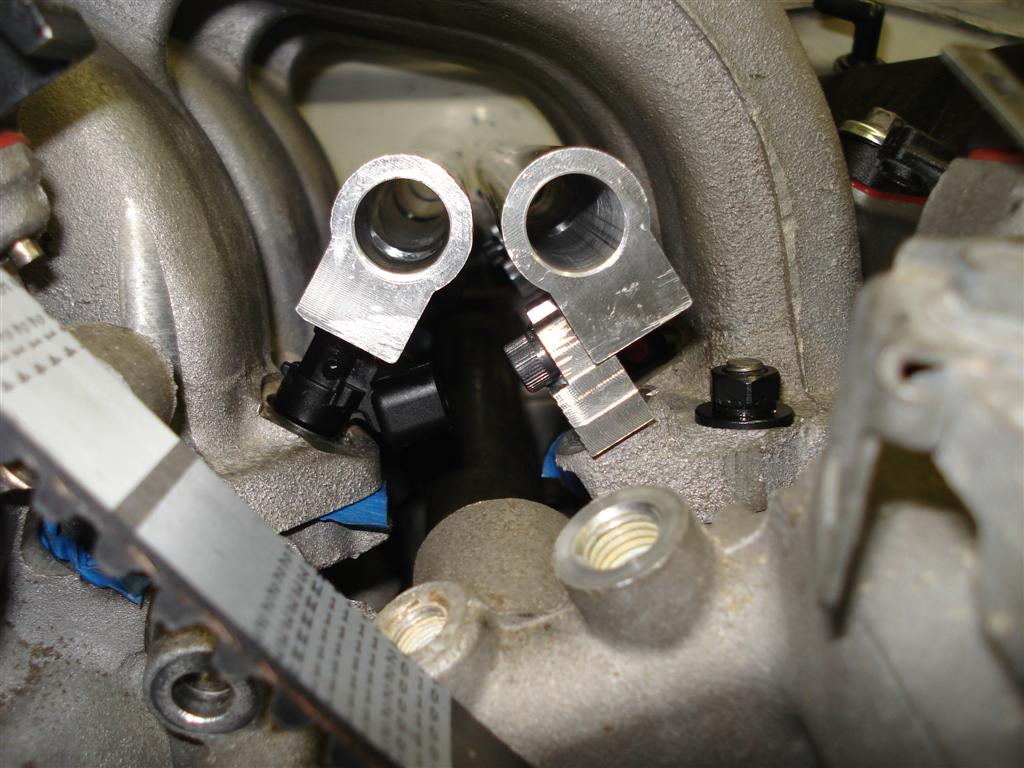
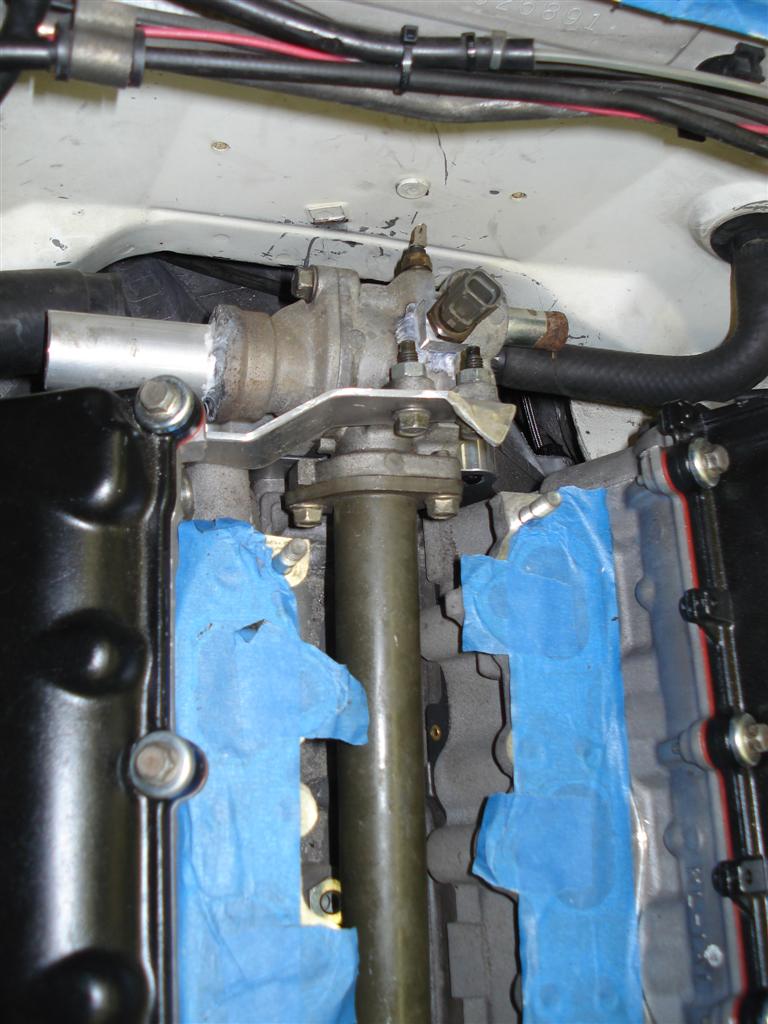
Factory coolant pipe flipped over and Miata coolant sensors added. Typical reroute pipes/hoses would fit perfectly but I will redo mine in aluminum hardline. Probably.
Throttle body test fit. 65mm Crown Vic, $40 off ebay with the TPS.
New plenum FAILfloral cuts. XOXO BEAU.
Holes all patched up. I SUCK at aluminum welding thank you very much. I think I figured out what I was doing wrong right there at the end sorta. Still a royal PITA. But as long as it doesn't leak I don't really care at this point :(
Picture above in post 347 shows me milling 9/16" holes for the fuel injectors. I use -203 o-rings, not the ones supplied by Deautschwerks (LS3/LS7 shorty injectors). The fuel rail is drilled .531 hole. The supplied 'red' o-rings worked well. I have no idea what size they are though, doesn't seem to match anything I have. Maybe some funky metric oring. Whatever.
Mazda was nice enough to have different standoff/mount spacings and heights from one fuel rail to the next. I was rushing and assumed they were the same from bank to bank. Fortunately I was able to salvage the second fuel rail and the standoffs.
680cc Deatschwerks Bosch shortys (LS3/LS7). I still have to weld on my 6AN male fittings. Car is already plumed for 6AN, and that's what the factory supply line is, so anything larger wouldn't make sense unless I redo the entire fuel system. T.B.D.
Intake is 'square' KLZE port, heads are 'oval' KLDE. I will add epoxy and smooth out next week.
Factory coolant pipe flipped over and Miata coolant sensors added. Typical reroute pipes/hoses would fit perfectly but I will redo mine in aluminum hardline. Probably.
Reply
0
0


