
ABSURDflow Turbo KLDE Mazda V6 Thread
 04-11-2012, 07:58 AM
#261
Elite Member

Thread Starter
iTrader: (9)
Join Date: Jun 2006
Location: Chesterfield, NJ
Posts: 6,930
Total Cats: 404
Not much clearance between the pickup tube and the crossmember when in place - and those don't look like solid mounts... thoughts? I caught the 'plenty of room remark' above the pic... I can just see the pipe/weld cracking at the pan after bouncing off the member several hard times - that'll be a mess!
The clearance you see in these pics is with the engine resting with the oil pan against the subframe; no transmission attached. The engine rocks back quite a bit before the oilpan hits the subframe thanks to my use of my Big ------- Hammer. This would be the worse case scenario and it still clears the subframe. When the trans is in & the back of the engine rotates back up (so that the bottom of the oil pan is level, not like in the recent pics) there is even more clearance. Yeah, the engine will rock somewhat but it's very close to the mount so the sideways distance should be minimal. That side has a new mazdacomp mount, the driver's side is a mazdacomp mount with about 25000miles on it and looked good.
Don't be so hard on yourself Failfloral. We :heart: you.
Thanks but I think it could be cleaner. I when this all comes out maybe next winter for a rebuild I may have Stef's do a completely new pan. That's where I got the oil pickup screen and baffling.
The hydraulic valve buckets are in the ultrasonic cleaner. I may take a day off next week to assemble the engine stuffs at my dad's shop. Fabbing the rest of the stuff, exhaust, intake, alternator bracket, radiator, would be better if the accessories/cam belts/etc are there.

Reply
 0
0

0
 05-10-2012, 10:19 AM
#263
Elite Member
Thread Starter
iTrader: (9)
Join Date: Jun 2006
Location: Chesterfield, NJ
Posts: 6,930
Total Cats: 404
Thanks, I am getting more happy with it. Nothing is as pretty in person as it is in my head before it's made. haha.
I have lots of pics to upload but for now here's two. Started on the header shapes. Equal length will be too time consuming to do. I have a few different routing and this seems the cleanest. I still have to verify location once the engine is reinstalled.
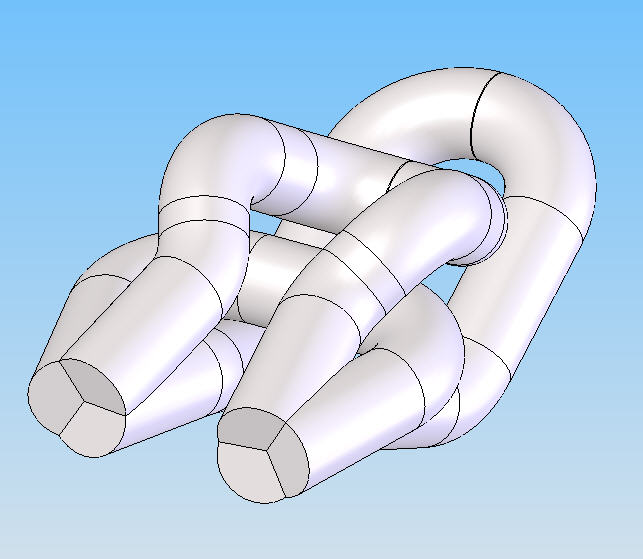
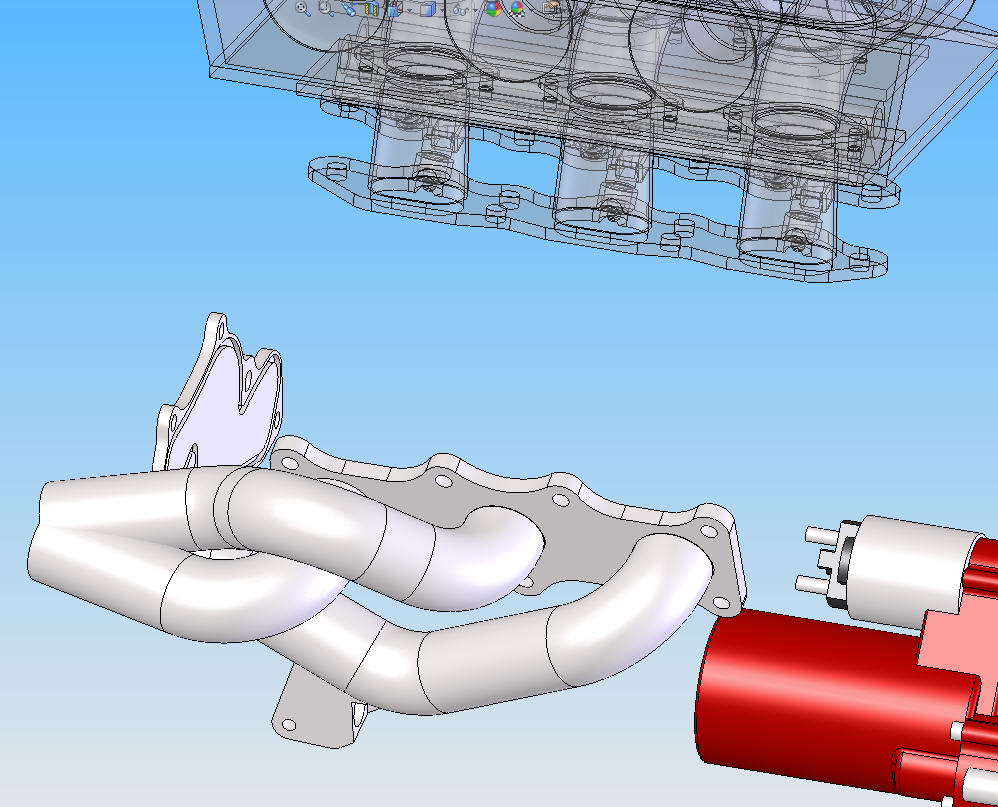
I have lots of pics to upload but for now here's two. Started on the header shapes. Equal length will be too time consuming to do. I have a few different routing and this seems the cleanest. I still have to verify location once the engine is reinstalled.
Reply
0
0
 05-10-2012, 12:32 PM
#267
Elite Member
Thread Starter
iTrader: (9)
Join Date: Jun 2006
Location: Chesterfield, NJ
Posts: 6,930
Total Cats: 404

Good to know. It's probably just above that in spots. Fortunately that area is cutoff wheel accessable post install.
Reply
0
0
 Oh and congrats!
 05-11-2012, 11:42 PM
#271
Elite Member
Thread Starter
iTrader: (9)
Join Date: Jun 2006
Location: Chesterfield, NJ
Posts: 6,930
Total Cats: 404
Found out it's a boy today. I also found out the T30 torx bits don't like torquing 5/16-24 ARP bolts to the proper torque. Craftsman bits tend to explode around 20ftlbs. Massive fail today. SO there's 14 bolts partly tightened and loctited. I may have to figure something else out on my flywheel adapter. ----. I planned on the final engine/trans install this weekend.
Reply
0
0
 05-12-2012, 12:36 PM
#273
Elite Member
Thread Starter
iTrader: (9)
Join Date: Jun 2006
Location: Chesterfield, NJ
Posts: 6,930
Total Cats: 404
If I could get to 20ftlbs without breakign a bit I would be happy. I replaced the 2 craftsman bits this morning and stopped at harbor freight for their impact driver torx.
All 3 lasted about 2 minutes and removed all but 1 bolt. Now I have to drill the bolt head off and attempt to remove the threads. Then either find a good bit or grind some custom 12 point bolts, but those would not be until mid week. Hard to believe all this fail comes from not being able to tighten a simple fine pitch 5/16 bolt.
I could also go with regular ol' allen head socket head cap screws, but I thought torx bits were stronger?!!?
Reply
0
0
05-12-2012, 09:12 PM
#275
Elite Member
Thread Starter
iTrader: (9)
Join Date: Jun 2006
Location: Chesterfield, NJ
Posts: 6,930
Total Cats: 404
Thinking about it for the first time instead of taking things for granted, the standard fine pitch .3125 bolt uses a .250 allen bit. These T30's are tiny. No where near the shear strength in the bit. I'll have to find out WTF is going on with that size when I get back to work...perhaps cause they are low head and are used like a stud, screwed from behind for the Jesel upper pulleys. But regardless the standard head torx in this size at mcmaster are T45's, much bigger.
I'll get a 25 count box of regular ol' grade 8 allen head bolts from mcmaster for $5 monday morning. ---- it. 12 point bolts would be trick and the right thing to do but I must make progress on my upcoming week off.
I got the last bolt out today by drilling the head off and welding a bolt to the remaining threads. All in the back of the subaru in my driveway
Reply
0
0
 05-17-2012, 10:52 PM
#277
Elite Member
Thread Starter
iTrader: (9)
Join Date: Jun 2006
Location: Chesterfield, NJ
Posts: 6,930
Total Cats: 404
Thanks Luke.
Here's where I am. More pics here towards the bottom:
http://www.absurdflow.com/klde.html
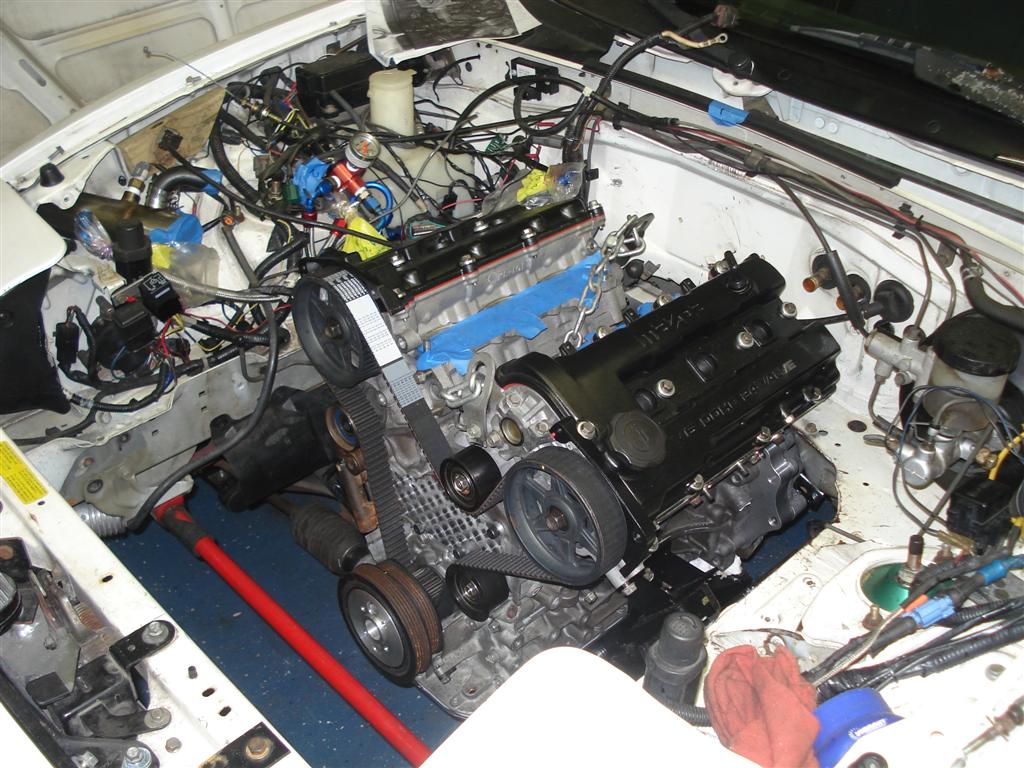
I have to paint that idler & tensioner...oops. Trackspeed Engineering 12tooth crank trigger wheel, 100amp single wire alternator mounted on the opposite side to give me more room for a downpipe on the driver's side. I made a nice bracket for the alternator earlier this week but it crashes into the header. Dammmit.
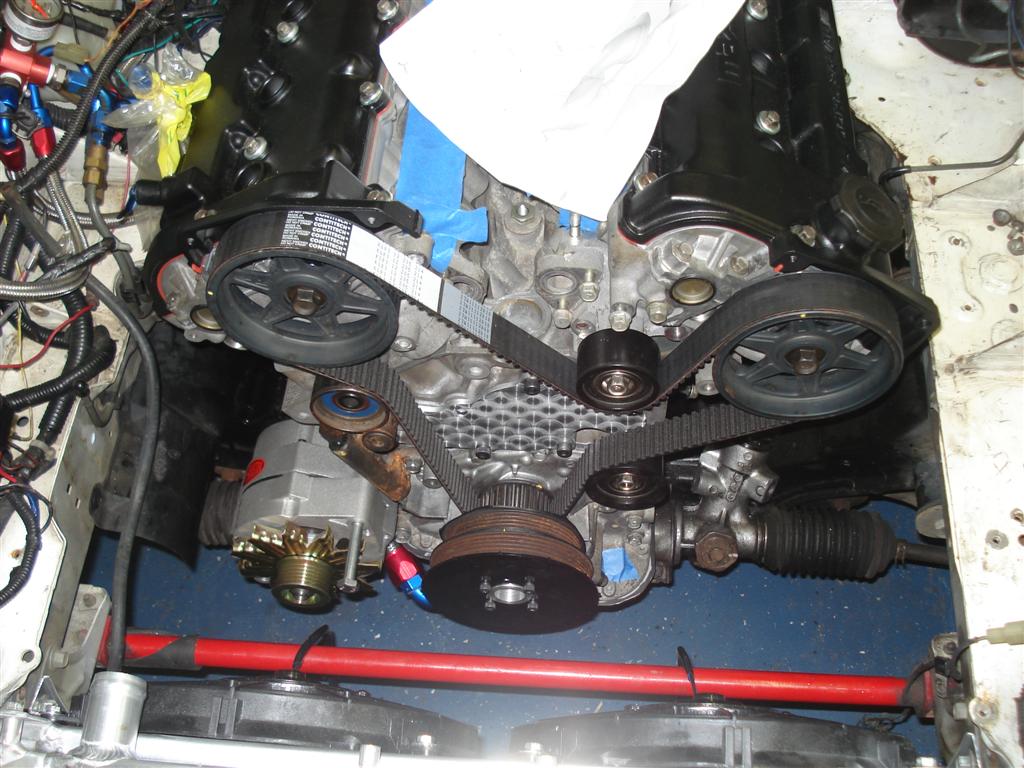
Alum. radiator sunk into the radiator support and slim fans to give me as much room as possible between the fans and the engine for the turbo.
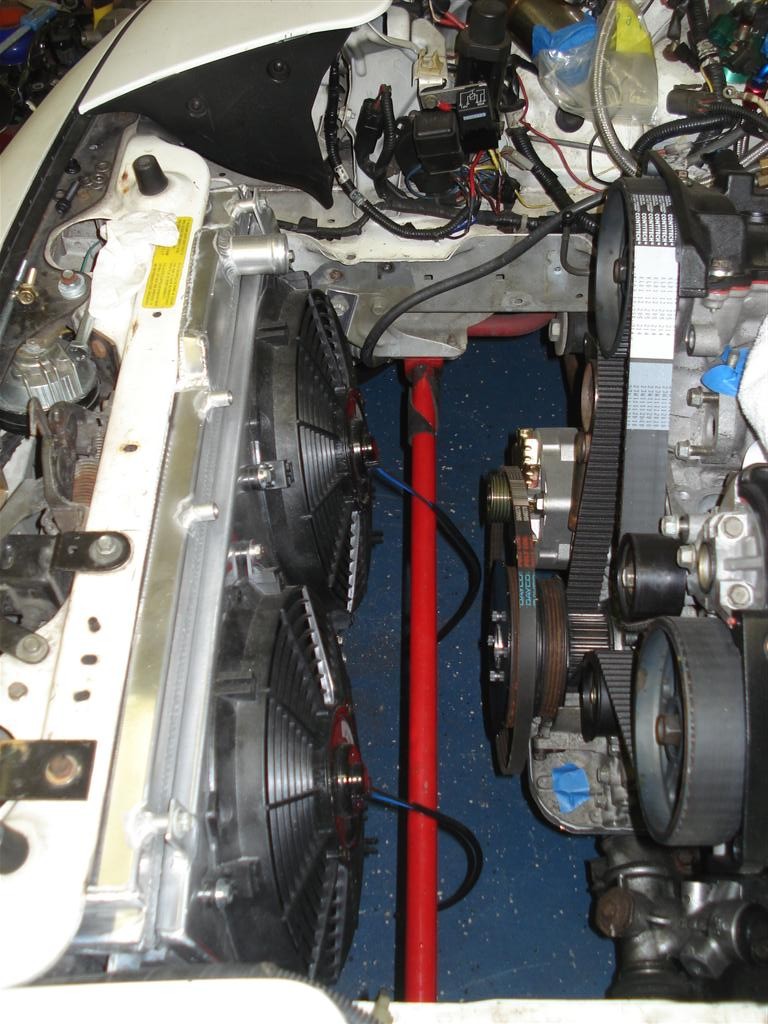
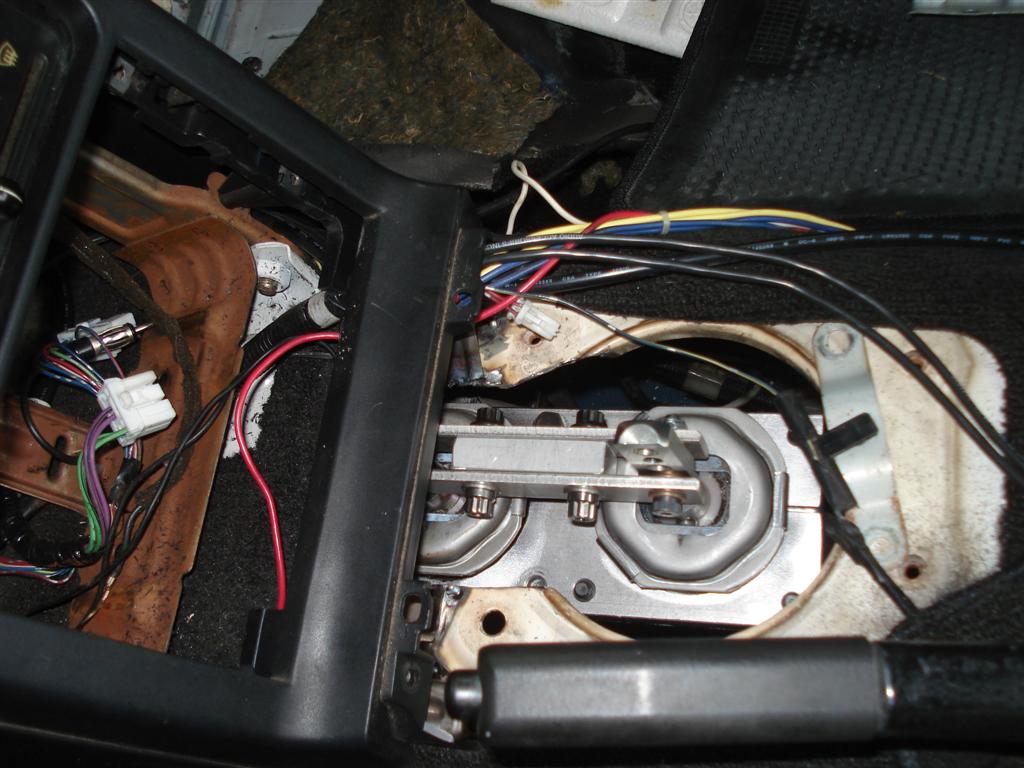
Shifter do-hickey
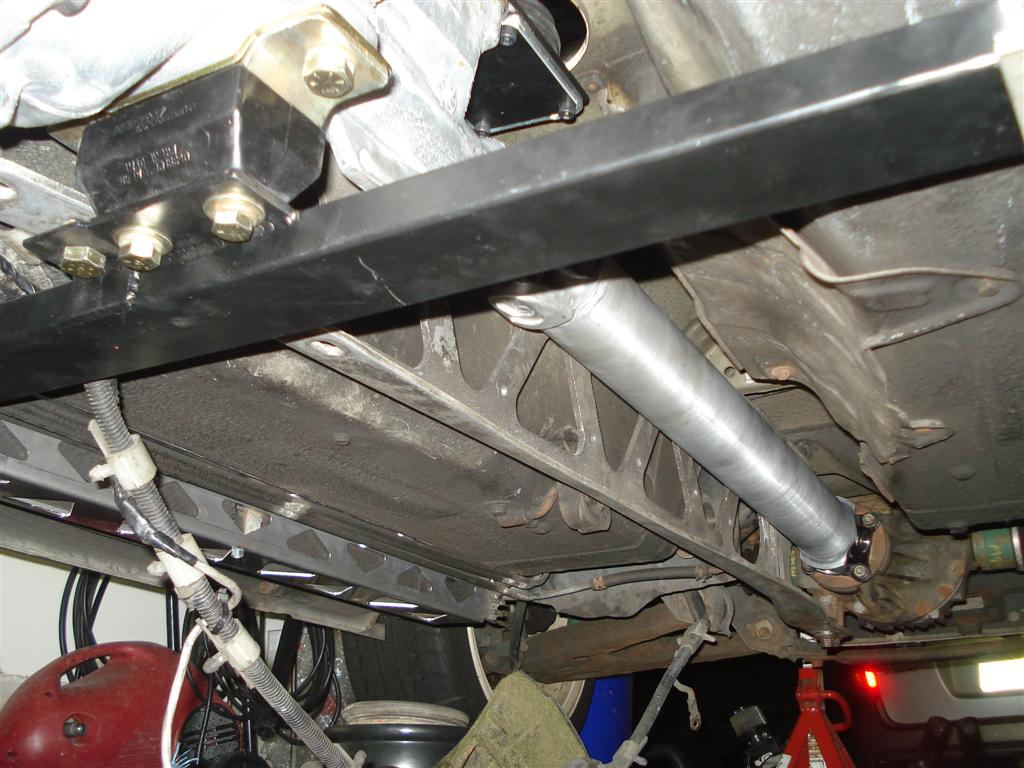
Original PPF bolted to the crossmember for the T5 trans. Alum. driveshaft from V8roadsters.
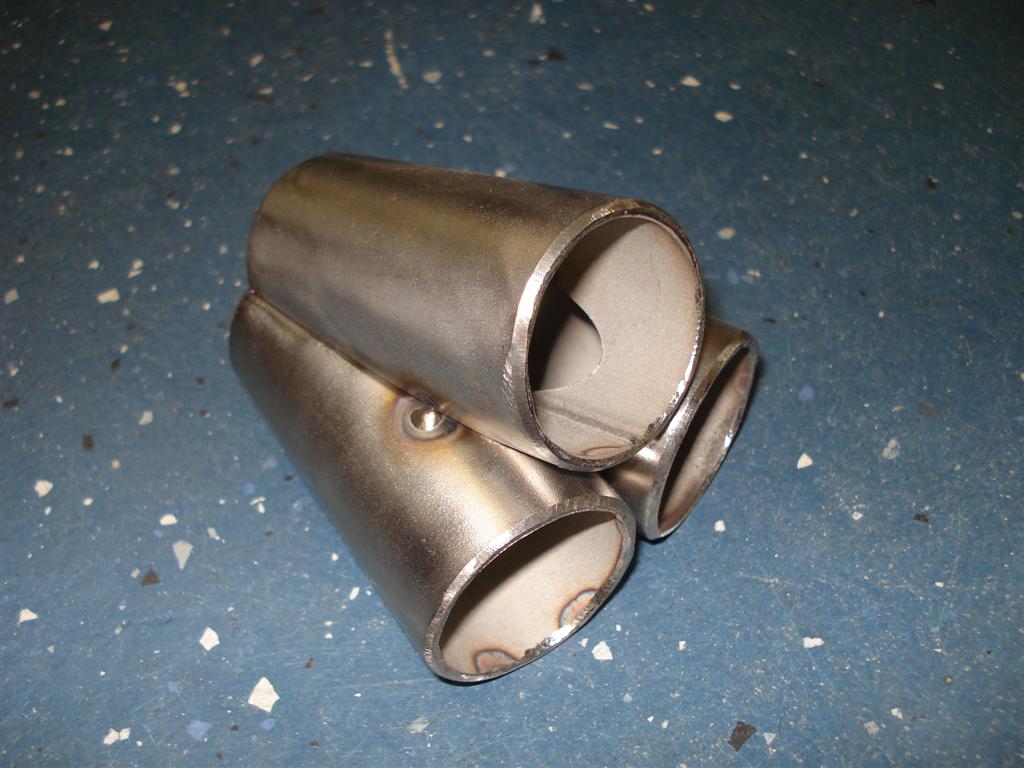
This is as far as I got on my headers today. I ran out of Argon, filler wire, and my bandsaw blade broke. Tomorrow's another day.
Here's where I am. More pics here towards the bottom:
http://www.absurdflow.com/klde.html
I have to paint that idler & tensioner...oops. Trackspeed Engineering 12tooth crank trigger wheel, 100amp single wire alternator mounted on the opposite side to give me more room for a downpipe on the driver's side. I made a nice bracket for the alternator earlier this week but it crashes into the header. Dammmit.
Alum. radiator sunk into the radiator support and slim fans to give me as much room as possible between the fans and the engine for the turbo.
Shifter do-hickey
Original PPF bolted to the crossmember for the T5 trans. Alum. driveshaft from V8roadsters.
This is as far as I got on my headers today. I ran out of Argon, filler wire, and my bandsaw blade broke. Tomorrow's another day.
Reply
0
0
05-17-2012, 11:07 PM
#278

Nice pics! You have SO much room up front compared to my FE. ~3/16" from front sway to crank pulley. I considered doing this swap before i got started on the FE project. Its good to see someone with the proper knowledge and equipment to do the job right! Keep up the good work and get as much done before the baby comes. Congrats!
Congrats!
Reply
0
0
05-18-2012, 10:10 AM
#279
Junior Member

Join Date: Aug 2008
Location: Toronto, Canada
Posts: 127
Total Cats: -1
^^^ All depends how much liberty you take with the motor and the firewall. I've clearanced my firewall quite a bit, and my FE3 sits further back than a stock BP setup.
Tranny mount looks good, how will 3" exhaust clearance look?
Are you deleting the rad cap from the radiator and mounting a swirl pot/surge tank to the cooling system somewhere up high?
Tranny mount looks good, how will 3" exhaust clearance look?
Are you deleting the rad cap from the radiator and mounting a swirl pot/surge tank to the cooling system somewhere up high?
Reply
0
0


