Wingman's "Low Power Time Attack" Build
#321
I donít have the answer to this haha, was just curious if it was something you had thought about.
The nature of my question came from my presupposition of K-swaps being very NVH-heavy even without solid motor and diff mounts. I was curious if, at some point, additional NVH/lack of damping could cross the line into danger territory for something in the driveline.
Again, more of a speculative question than anything, as there are very few similar setups out in the world currently. Didnít mean to arouse excessive concern lol.
#322
I think it is a valid concern, to be considered, monitored, etc. Vibration and the stresses involved in transmitting gobs of power, not to mention the power reversals, are fatigue/damage inducing. Time will tell whether your installation exceeds the capability of the materials, and it is worth monitoring for any signs of cracking etc.
I can only add that when I saw your solid mounting of the diff, my kneejerk reaction was 'if it was me, I'd have put some bushings in there'.
I can only add that when I saw your solid mounting of the diff, my kneejerk reaction was 'if it was me, I'd have put some bushings in there'.
#323
Thatís all you can do really with a ďnewĒ swap combination like this, huh? I suppose consistent bolt checking and visual inspections should be a given anyways, although Iím sure thereís plenty of parts than can fail without prior visual cues.
As an aside, I just watched the second YouTube episode that dropped today. Well done, and props for the pertinent meme-age scattered throughout lol.
As an aside, I just watched the second YouTube episode that dropped today. Well done, and props for the pertinent meme-age scattered throughout lol.
#326
Hey Wingman! I just got here from your vids. I commented there too... Ive been planning my NB time attack build and hopefully will get started super soon, and low and behold your videos popped up. I have also settled on a CD009. Thank you for pioneering this! I hope to add to the scene and do some things differently, not just copy you. I wanted to share my appreciation for you existing. I will be doing this all the way in Aus, so also RHD which may throw several differences, but I am excited to start. Thank you again and best of luck with everything. I will go through this thread in detail too!
#328
Ep 4(prepping for the cage) drops this Saturday and Ep 5(building the engine) two weeks after. They are, IMHO, the best of the 7 finished and uploaded(so far) videos.
When I did my first testfit of the CD009, I was thrilled that the shifter hole in the tunnel lined up almost perfectly with the shifter input of the CD009. I had hoped that I wouldn't have to trim the tunnel at all. This unfortunately wasn't the case, I did have to trim the tunnel hole slightly with the shifter I chose. Other shifters that have a larger range of for/aft adjustment may not need any trimming.
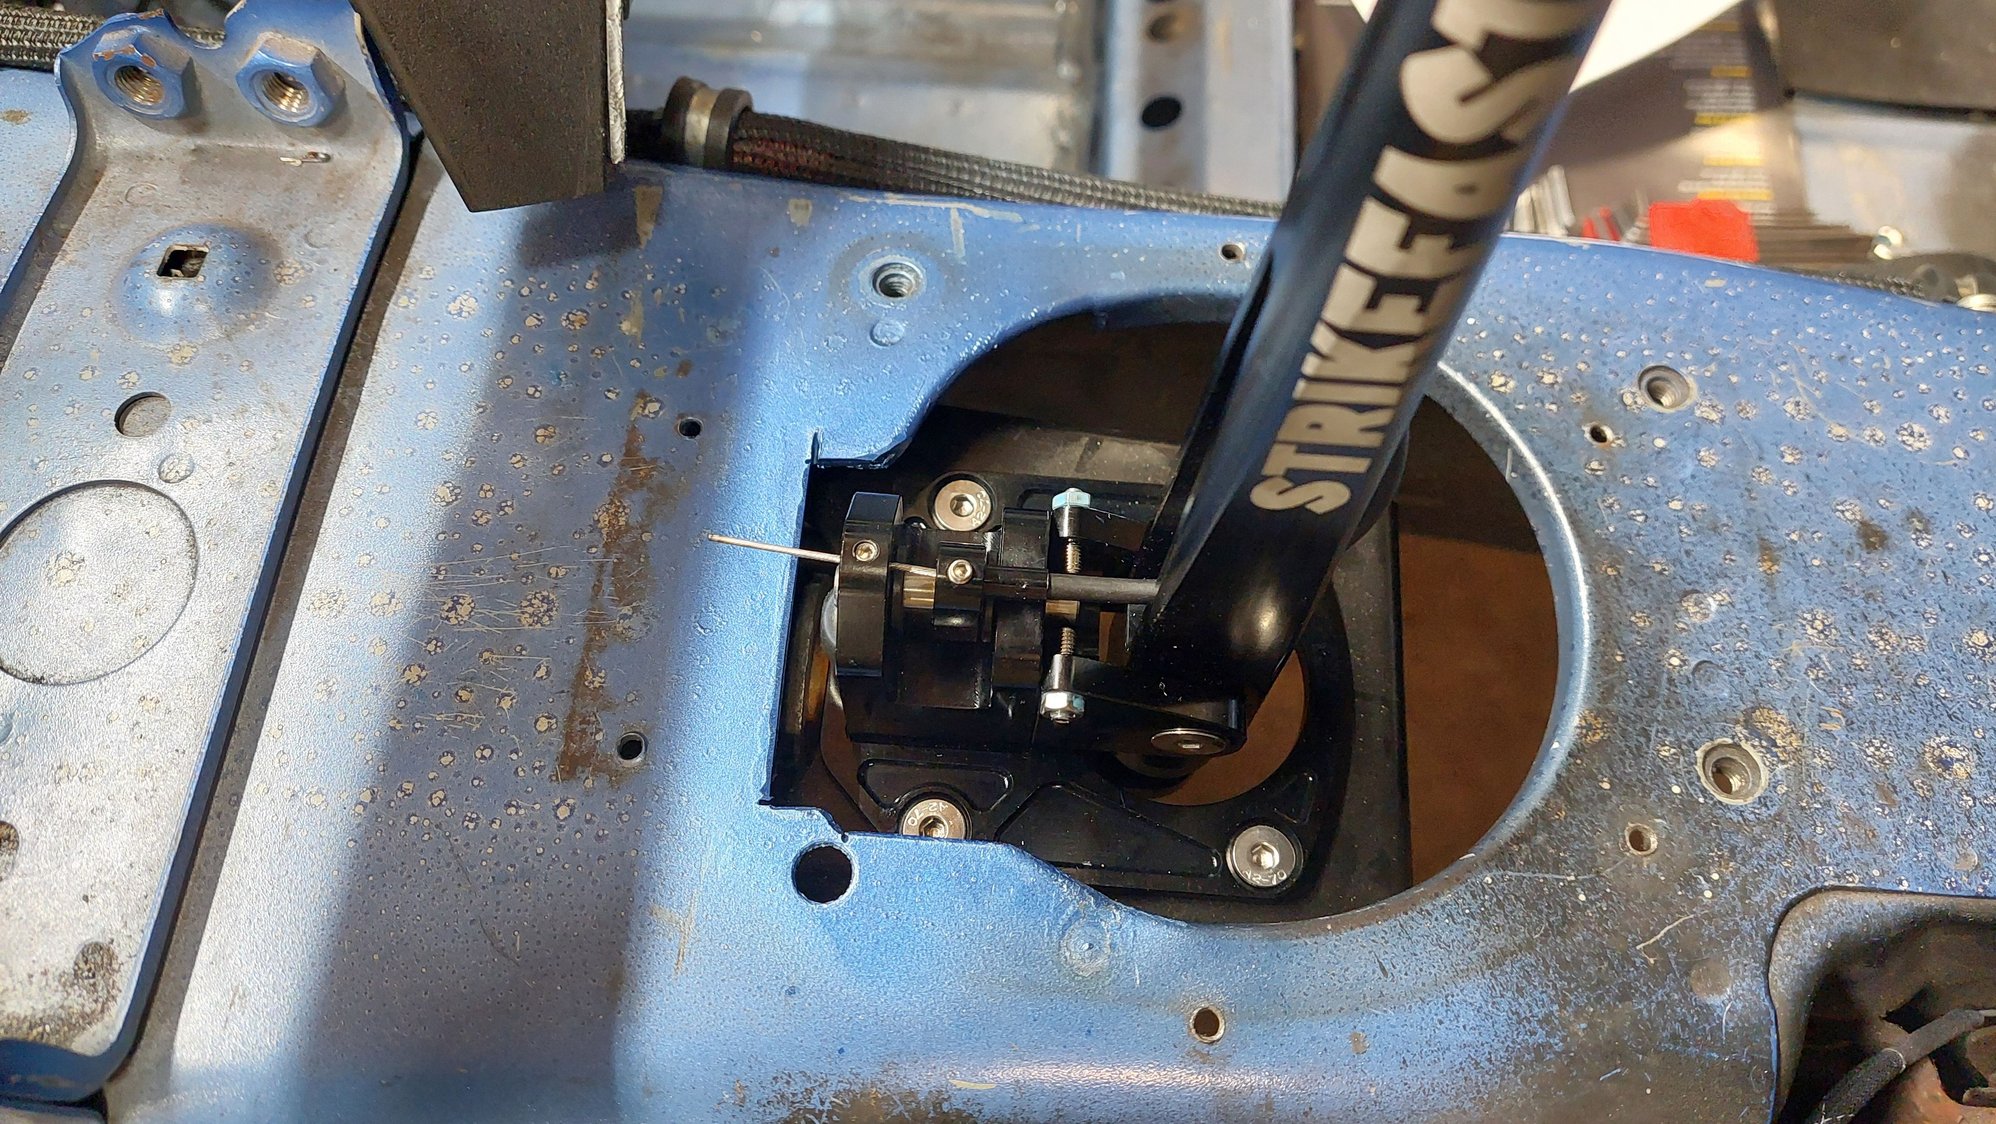
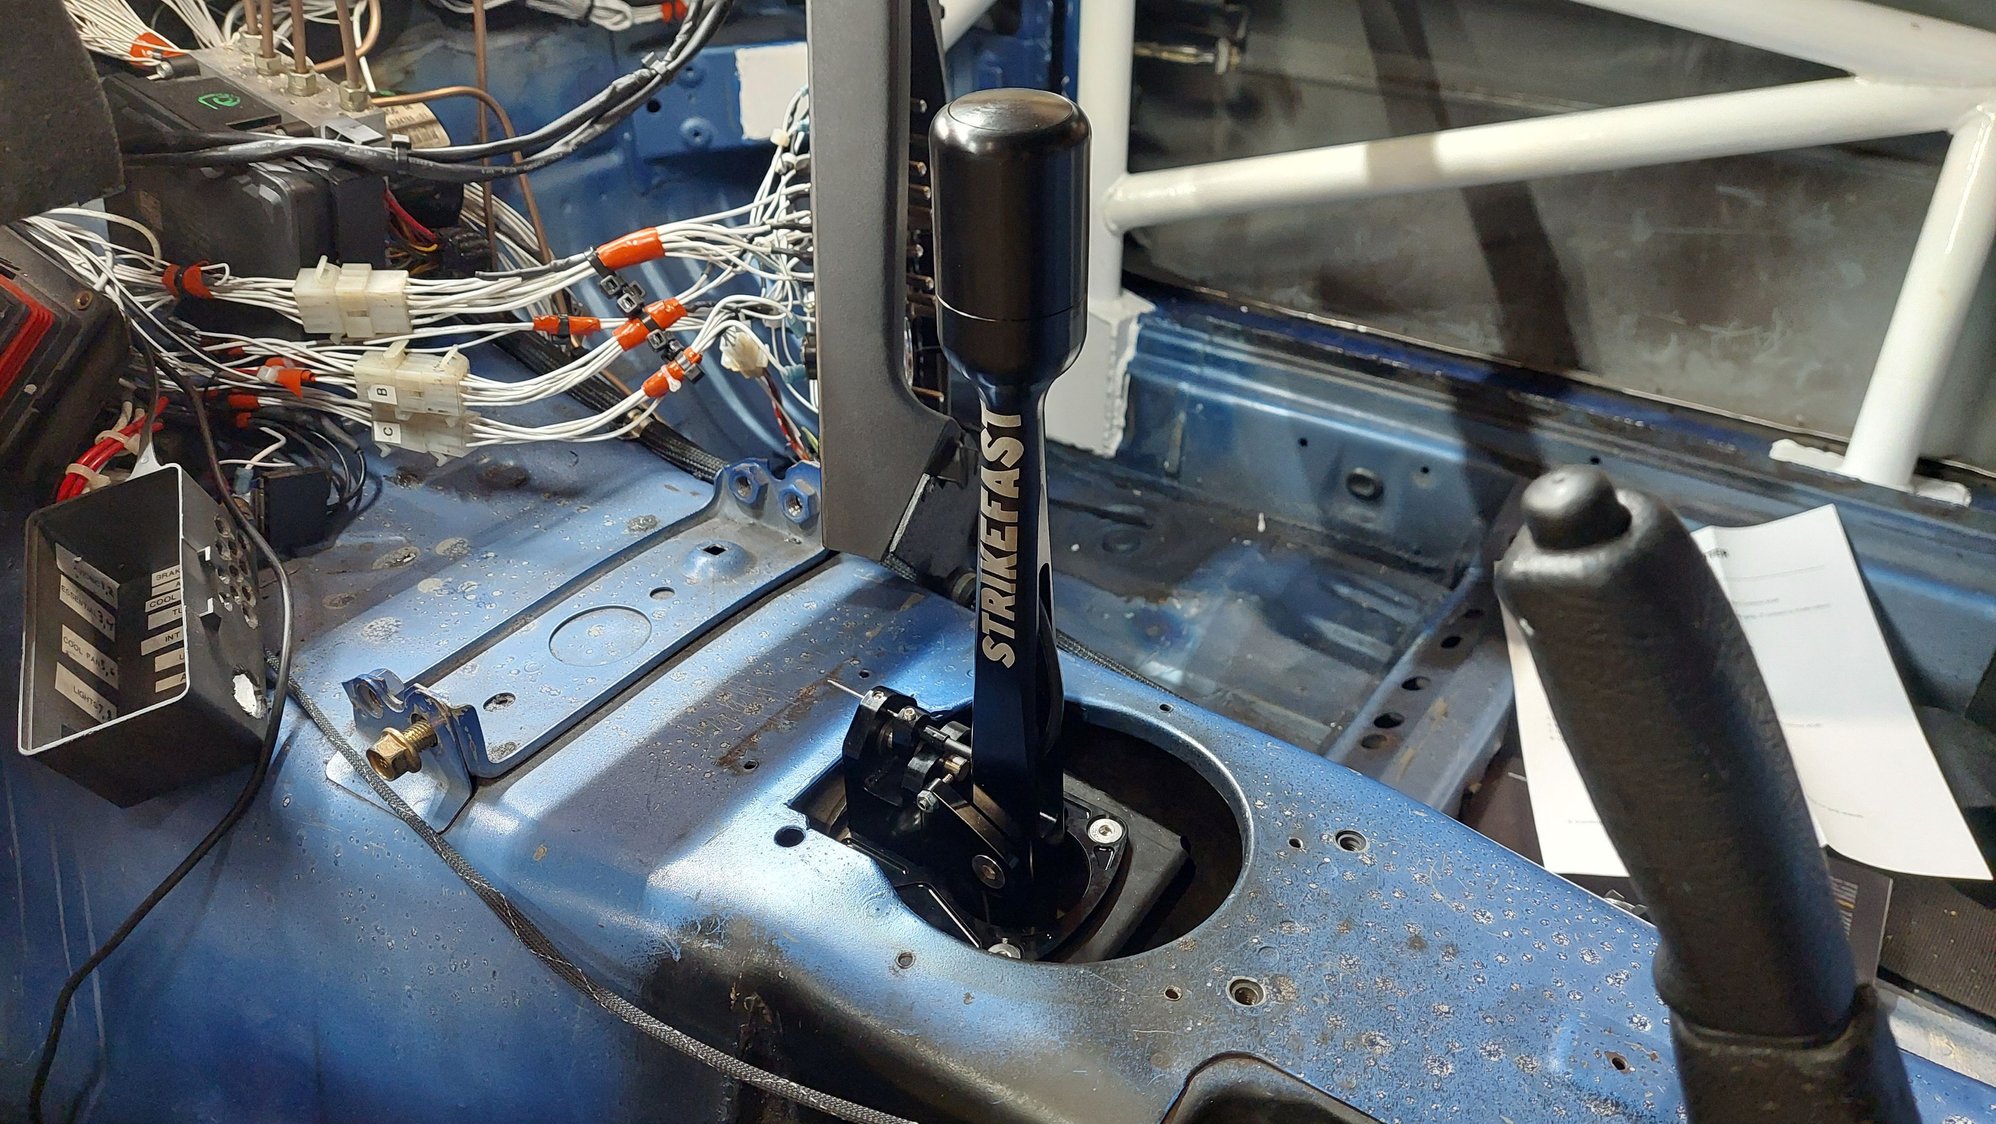
Before someone mentions it, I loctite-ed all the small setscrews this GKTech Strikefast shortshifter uses to set lateral movement and reverse lockout. I'm not thrilled with them considering the buzzy nature of this car, but I wanted a shifter that replicated the short, snappy nature of my old Gracing shortshifter and this was the closest I could find, judging from YT videos.
I later built an ABS cover cover to hide the tunnel trimmings and help seal up the tunnel, as shown here:
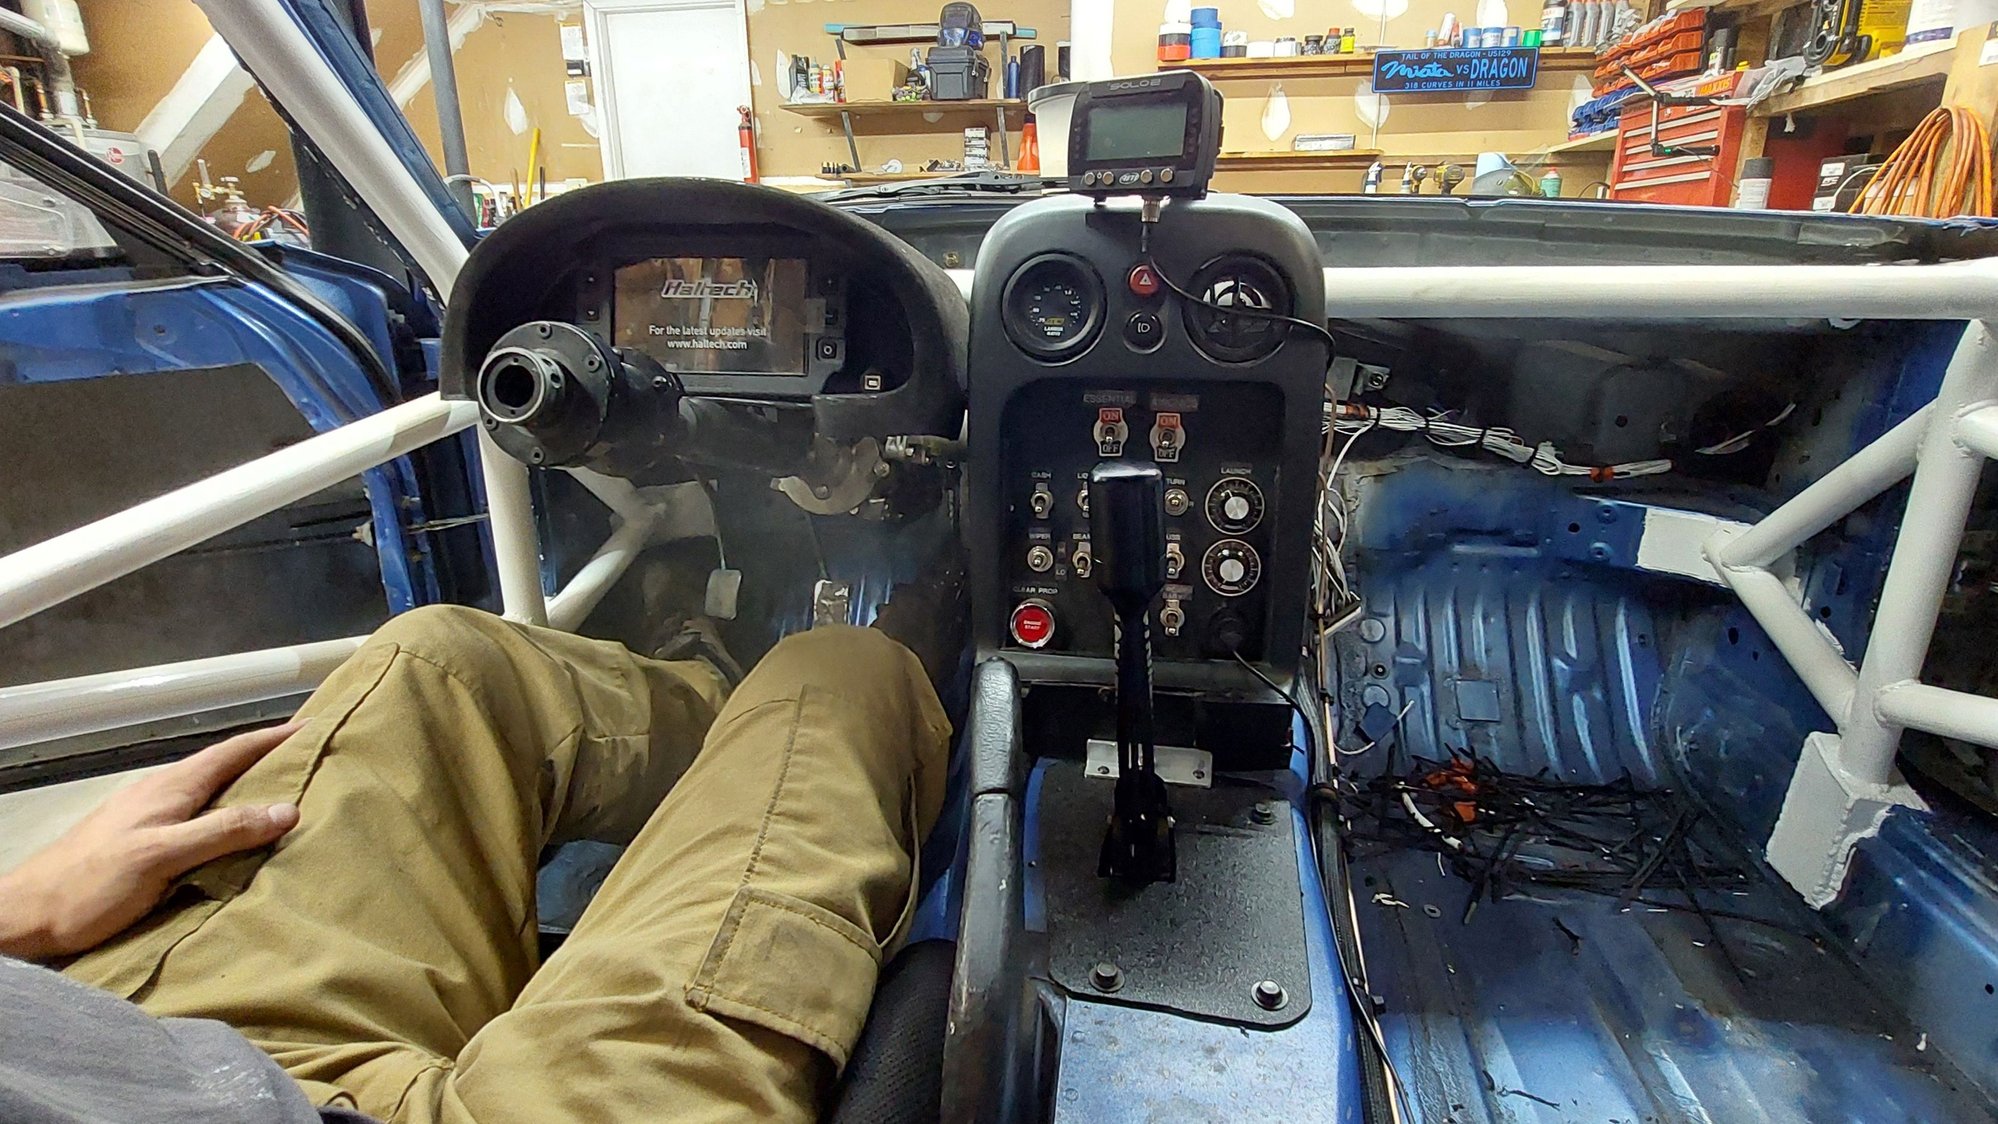
Yup, that's an IC-7 nestled in the dash. My Pi dash had served me very well for a few years, but it was time to finally upgrade to something more purpose built instead of my DIY version. As I'm moving away from a Tuner Studio based ECU, it wouldn't have worked for me at all regardless. The pricetag on it was a tough, tough swallow(retail on them is around $1100), but the quicker boot times, more robust hardware, additional IO ports, and CAN communication should make it worthwhile.
As a final-ish touch on the interior, I rigged up something that seems simple on the surface, but took me a few to design something I was happy with- door handles, or more accurately, door release latches.
Most methods I see relies on a line strung straight across the door from OE latch to a hardmount, as pictured:
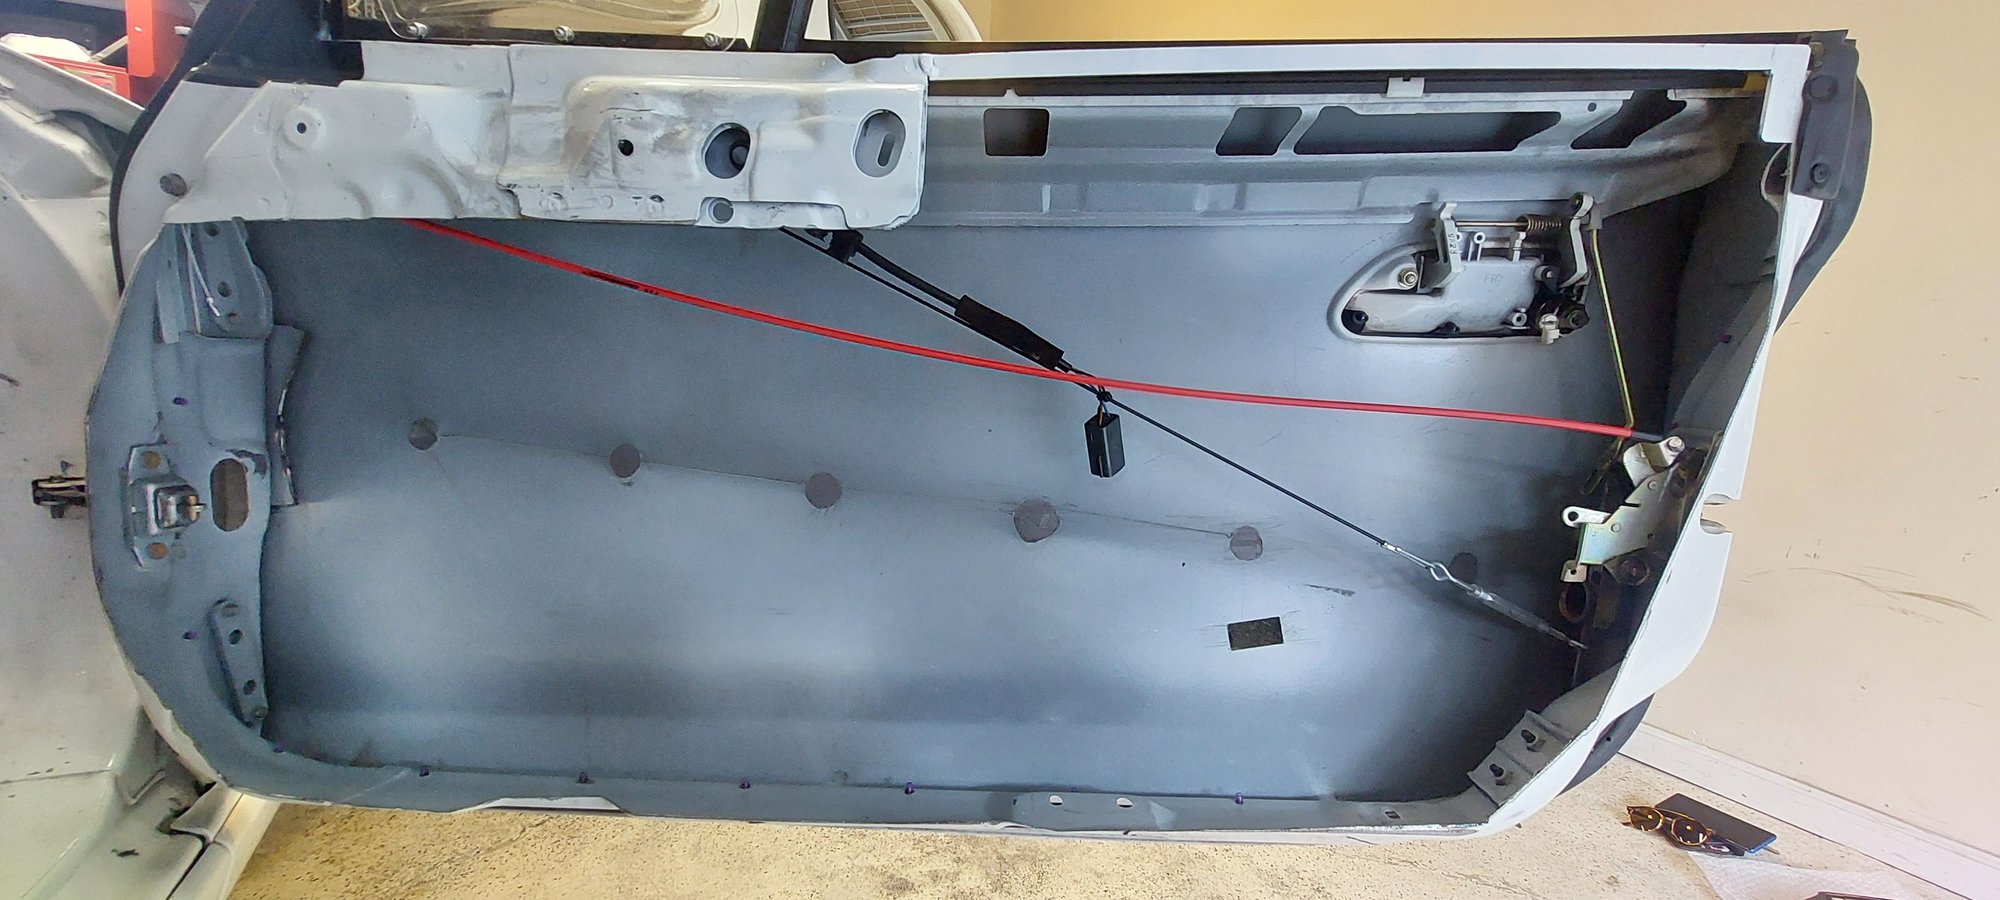
Due to the positioning and angles of my doorbars, this wouldn't work for me as the bars tookup the same room that the line would run across. I also greatly disliked how much "slack" there was with this method, often I've had to resort to grabbing the line and pulling it forwards to actuate the latch mechanism when in cars with this design. I wanted something a little more positive, so after some testing, I came up with this triple pulley design.
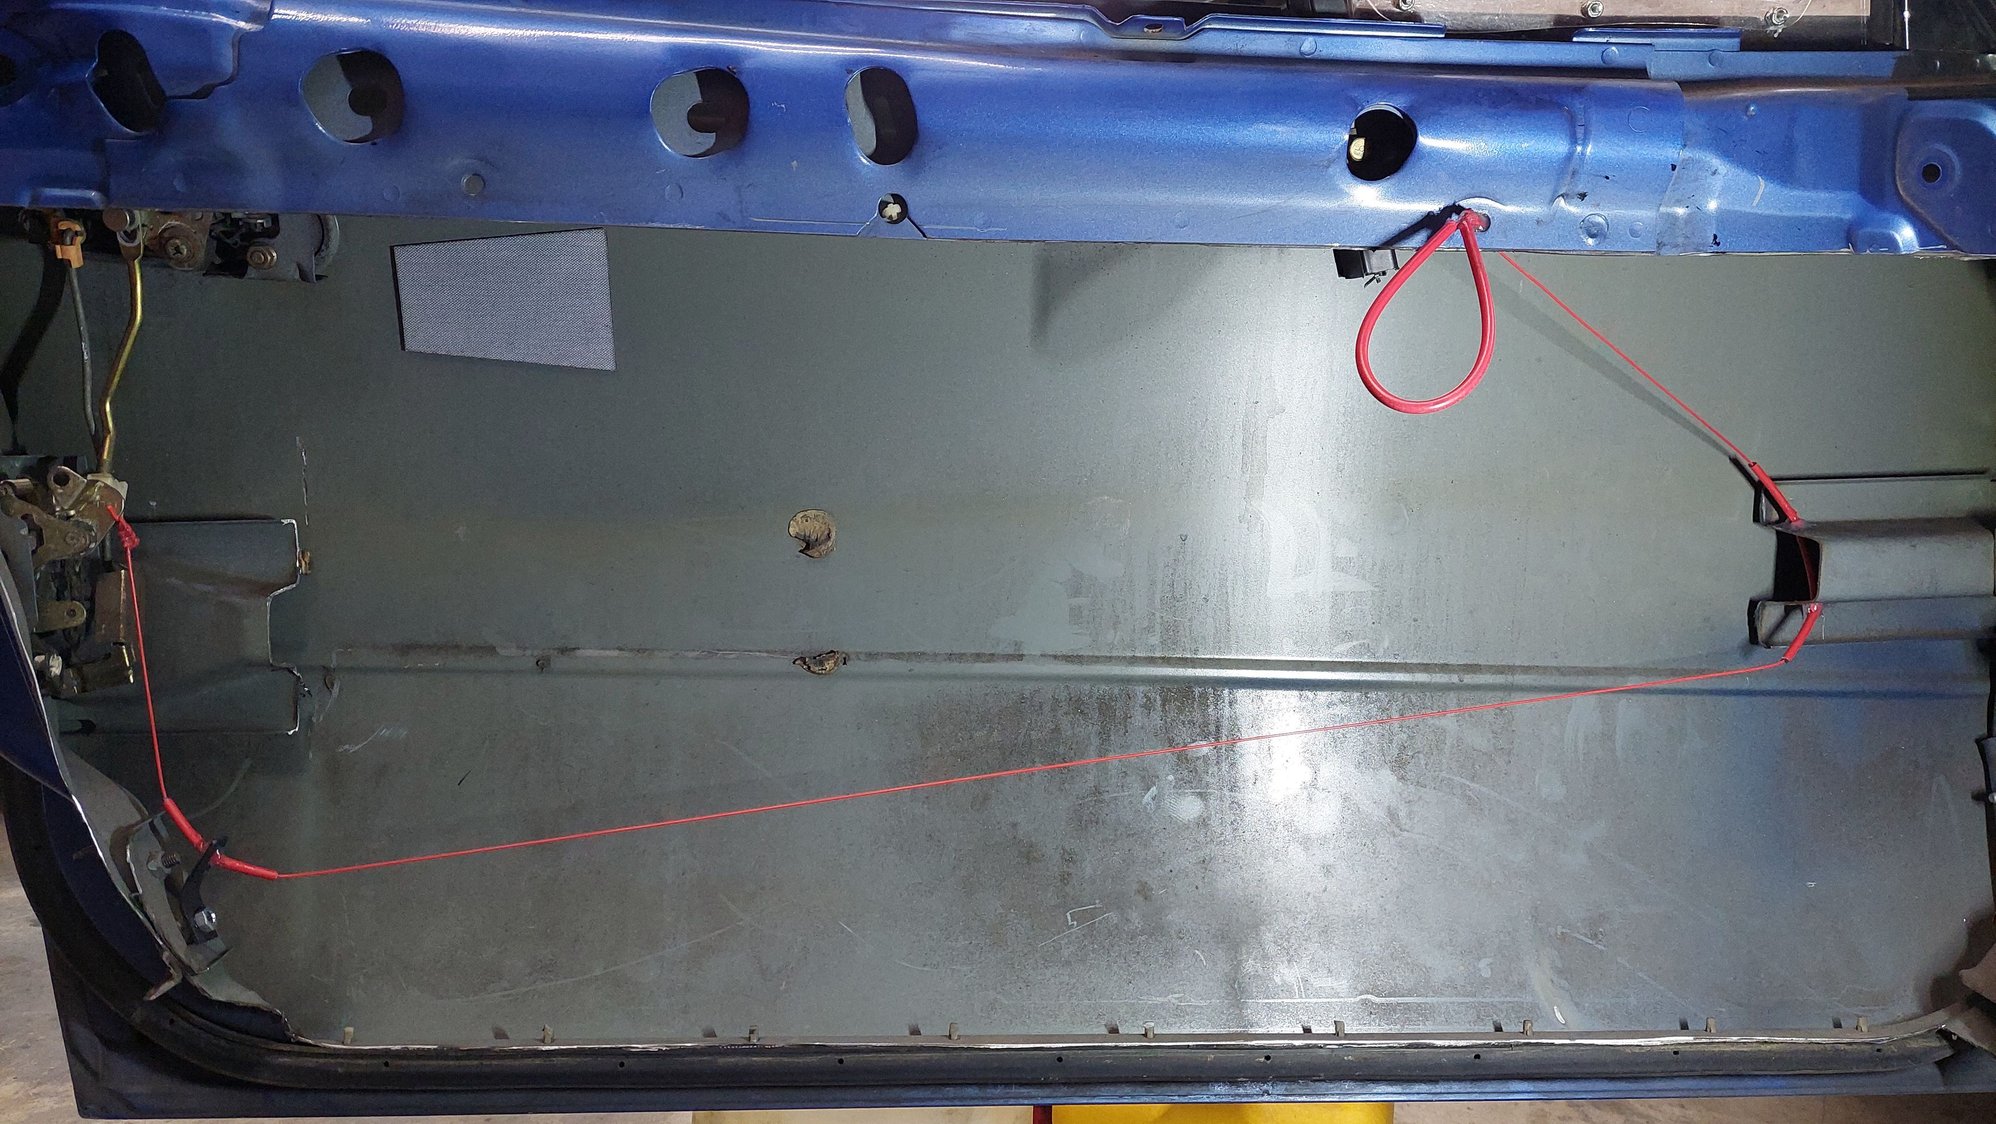
This moves the line below the doorbars, and requires less than an inch of pull to release the door. Instead of steel wire, I used... um... braided silver plated copper with a ethylene-tetrafluoroethylene protective cover.
...
.....
.........
Its 18g electrical wire. I have spools of it in red sitting around, and didn't feel like buying 10ft of steel wire to only use half. I ran it through the normal bike cable outer coating stuff and it helps keep tension on everything. Works like a treat.
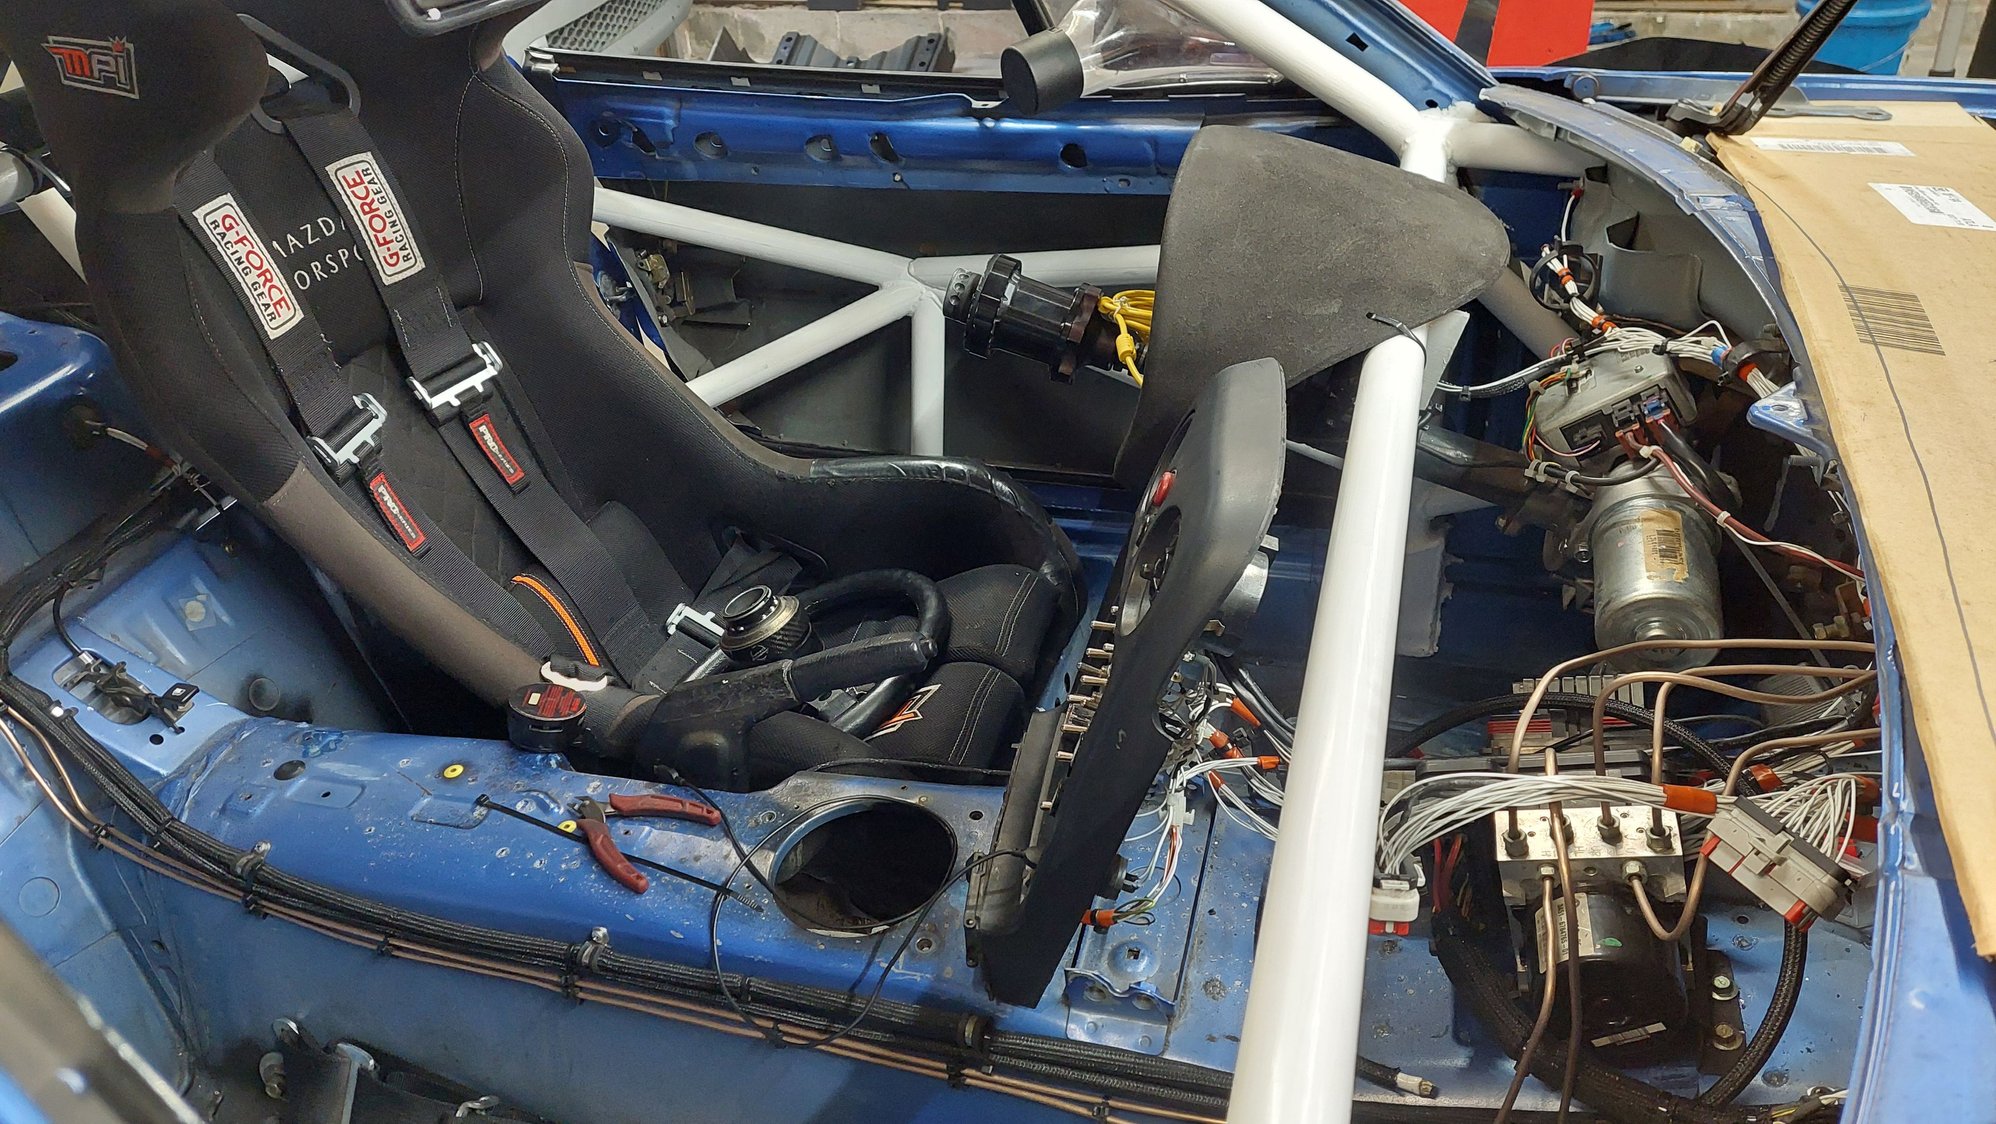
On the heels of that stroke of genius, I came up with a BRILLIANT idea. Move the ABS module out of the engine bay away from the hot exhaust, and bring it to the other side of the firewall to a more weight central location. Great upsides, only downside would be running some new brakelines. No big deal as two rolls of 25ft/ea nicad brake line was $80 from summit.
Me, later, running brake lines:
"Oh god who the **** thought this one up"
Doing all the tight bends and drilling the firewall holes was a disaster of a time sink, and of course since its nicad lines though steel panels in a chassis that is gonna get vibrated harder than a... rock polisher, my paranoia of chafing was though the roof. EVERYTHING got rubber grommets, then sealed up with silicone to make sure that those lines couldn't touch steel if they got hit by a 9 on the richter scale.
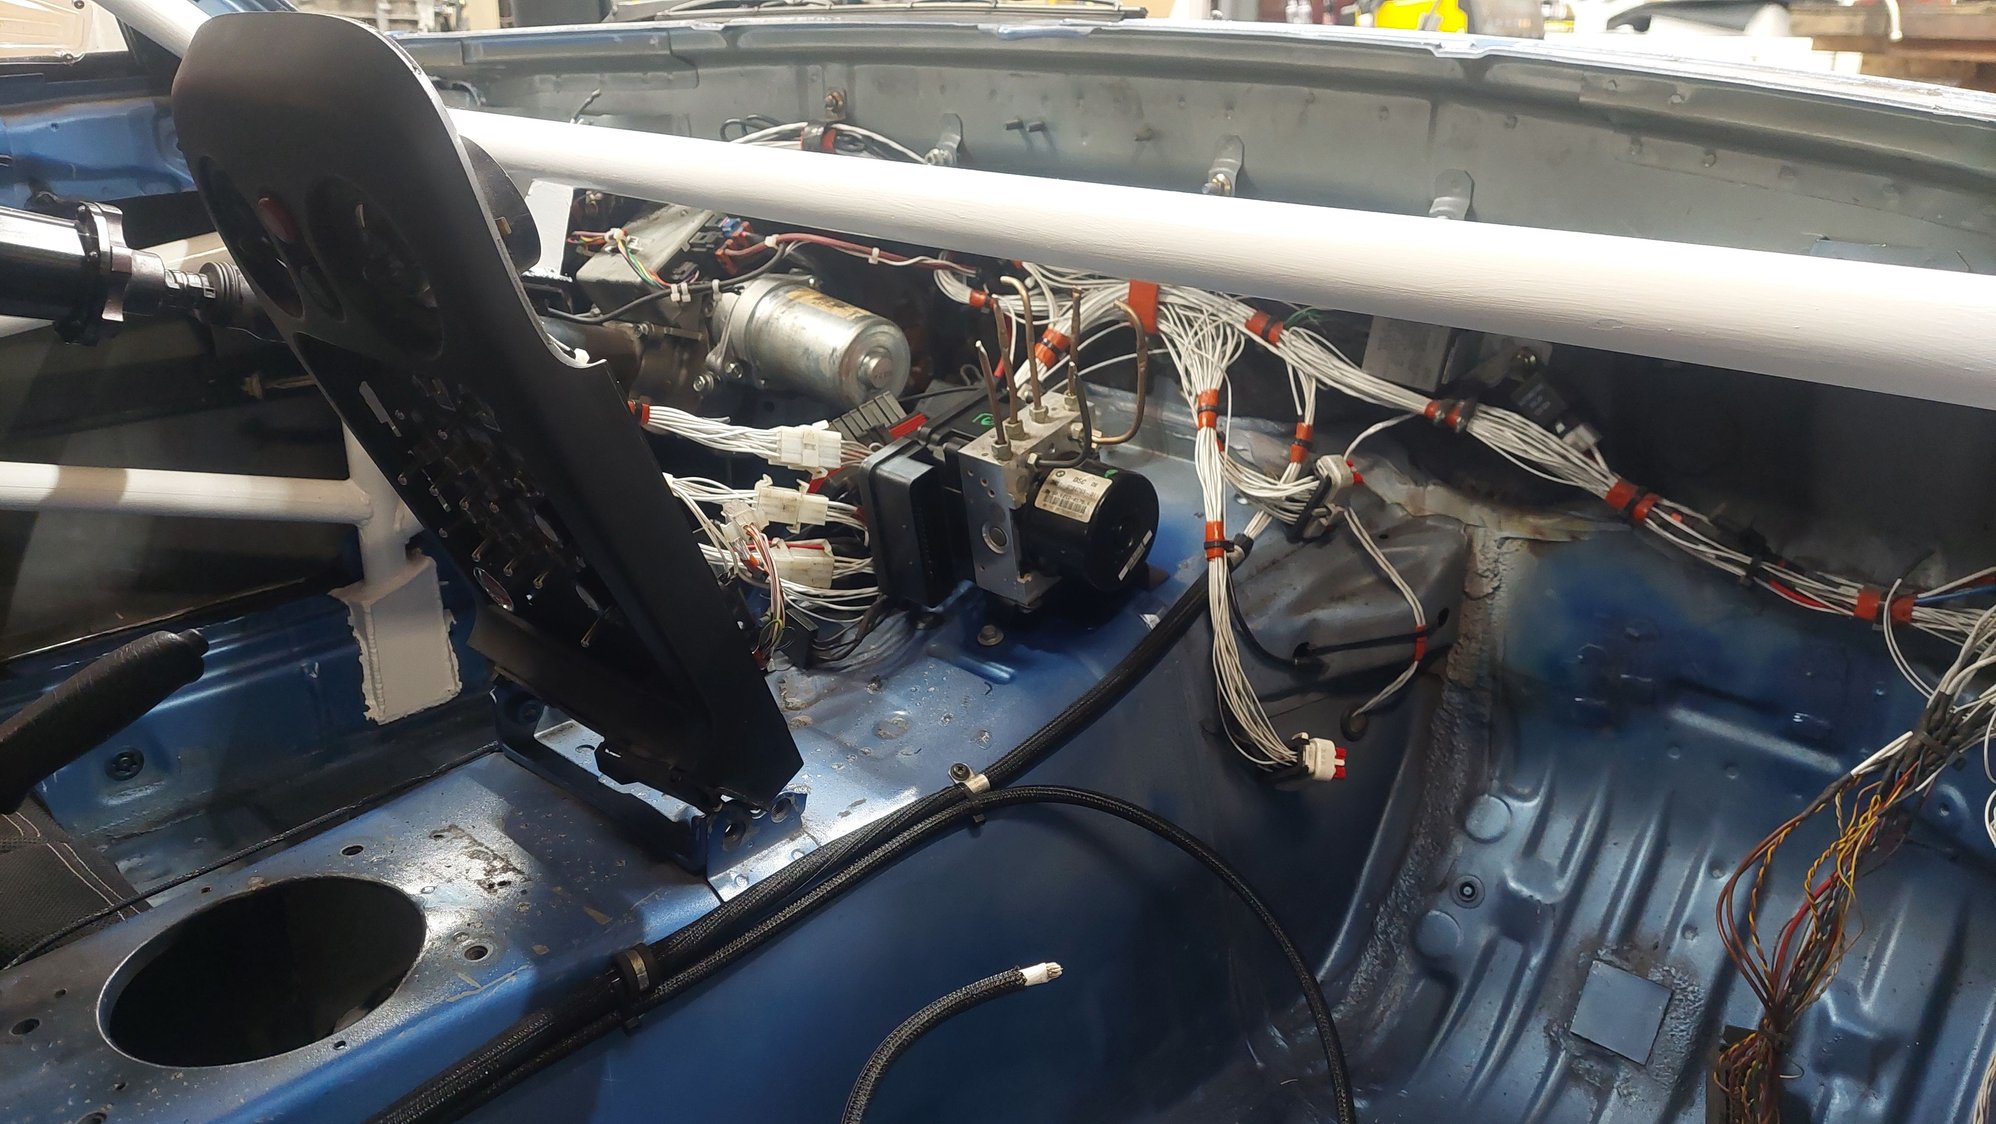
And then of course all the lines in the cabin were treated with equal amounts of paranoia, cushioned and supported with enough zipties to hold a passenger train peter parker style.
Part of me wonders if running the highly conductive copper brake lines next to the main battery feed will induce any weird eddy currents/glitches into the ABS unit...
#333
Cpt. Slow

iTrader: (25)
Join Date: Oct 2005
Location: Oregon City, OR
Posts: 14,326
Total Cats: 1,181
To be fair, he already has the lines and holes. Mark the lines, cut them in half, flare them, and he wouldn't have to remake 90% of them.
This is the flaring tool I use, hopefully he/you are using something similar:
https://www.eastwood.com/professiona...ce=google&wv=4
It sits in a vice, so the only sucky part is he'd have to completely remove the lines to flare them before reinstalling.
This is the flaring tool I use, hopefully he/you are using something similar:
https://www.eastwood.com/professiona...ce=google&wv=4
It sits in a vice, so the only sucky part is he'd have to completely remove the lines to flare them before reinstalling.
#334
This thread continues to deliver great knowledge for the rest of us. Thanks Wingman, and everyone else that chips in with tech info!
Awesome to see the CD009 fits the chassis so well. It's hard for me to want to get a Miata 6 speed for any future project when they're more expensive due to demand than stronger options. Of course there is the swap costs, but its not like the Miata 6 speed gets a lot of love letters written about it compared to the 5. Sort of seems like most people just put up with it for convenience.
Awesome to see the CD009 fits the chassis so well. It's hard for me to want to get a Miata 6 speed for any future project when they're more expensive due to demand than stronger options. Of course there is the swap costs, but its not like the Miata 6 speed gets a lot of love letters written about it compared to the 5. Sort of seems like most people just put up with it for convenience.
#336

So this engine has seen its fair share of low oil pressure events. Barber T5, Road Atlanta T10a, and NCM T15 are the biggest offenders, but any heavy braking zone has the oil pressure dropping to under 15psi, sometimes as low as 5-6psi. I've tried a combination of various things to try and keep the oil where it should be(including overfilling by TWO QUARTS and adding a timing cover baffle), but I think 1.8g+ longitudinally is just to much for the spacious Kpower sumps to deal with.
Since the car would be down for months anyway, I decided to tear it down and see just how bad the rod bearings were fairing, and make sure there wasn't something else contributing to the oil starvation(like, I dunno, the pickup falling off).
This motor had new King rod bearings installed sometime in the last two years, I think I replaced them when my V1 pickup fell off out of an abundance of caution. When I cracked the first cap off and got a good look at the bearing... My stomach did flipflops.
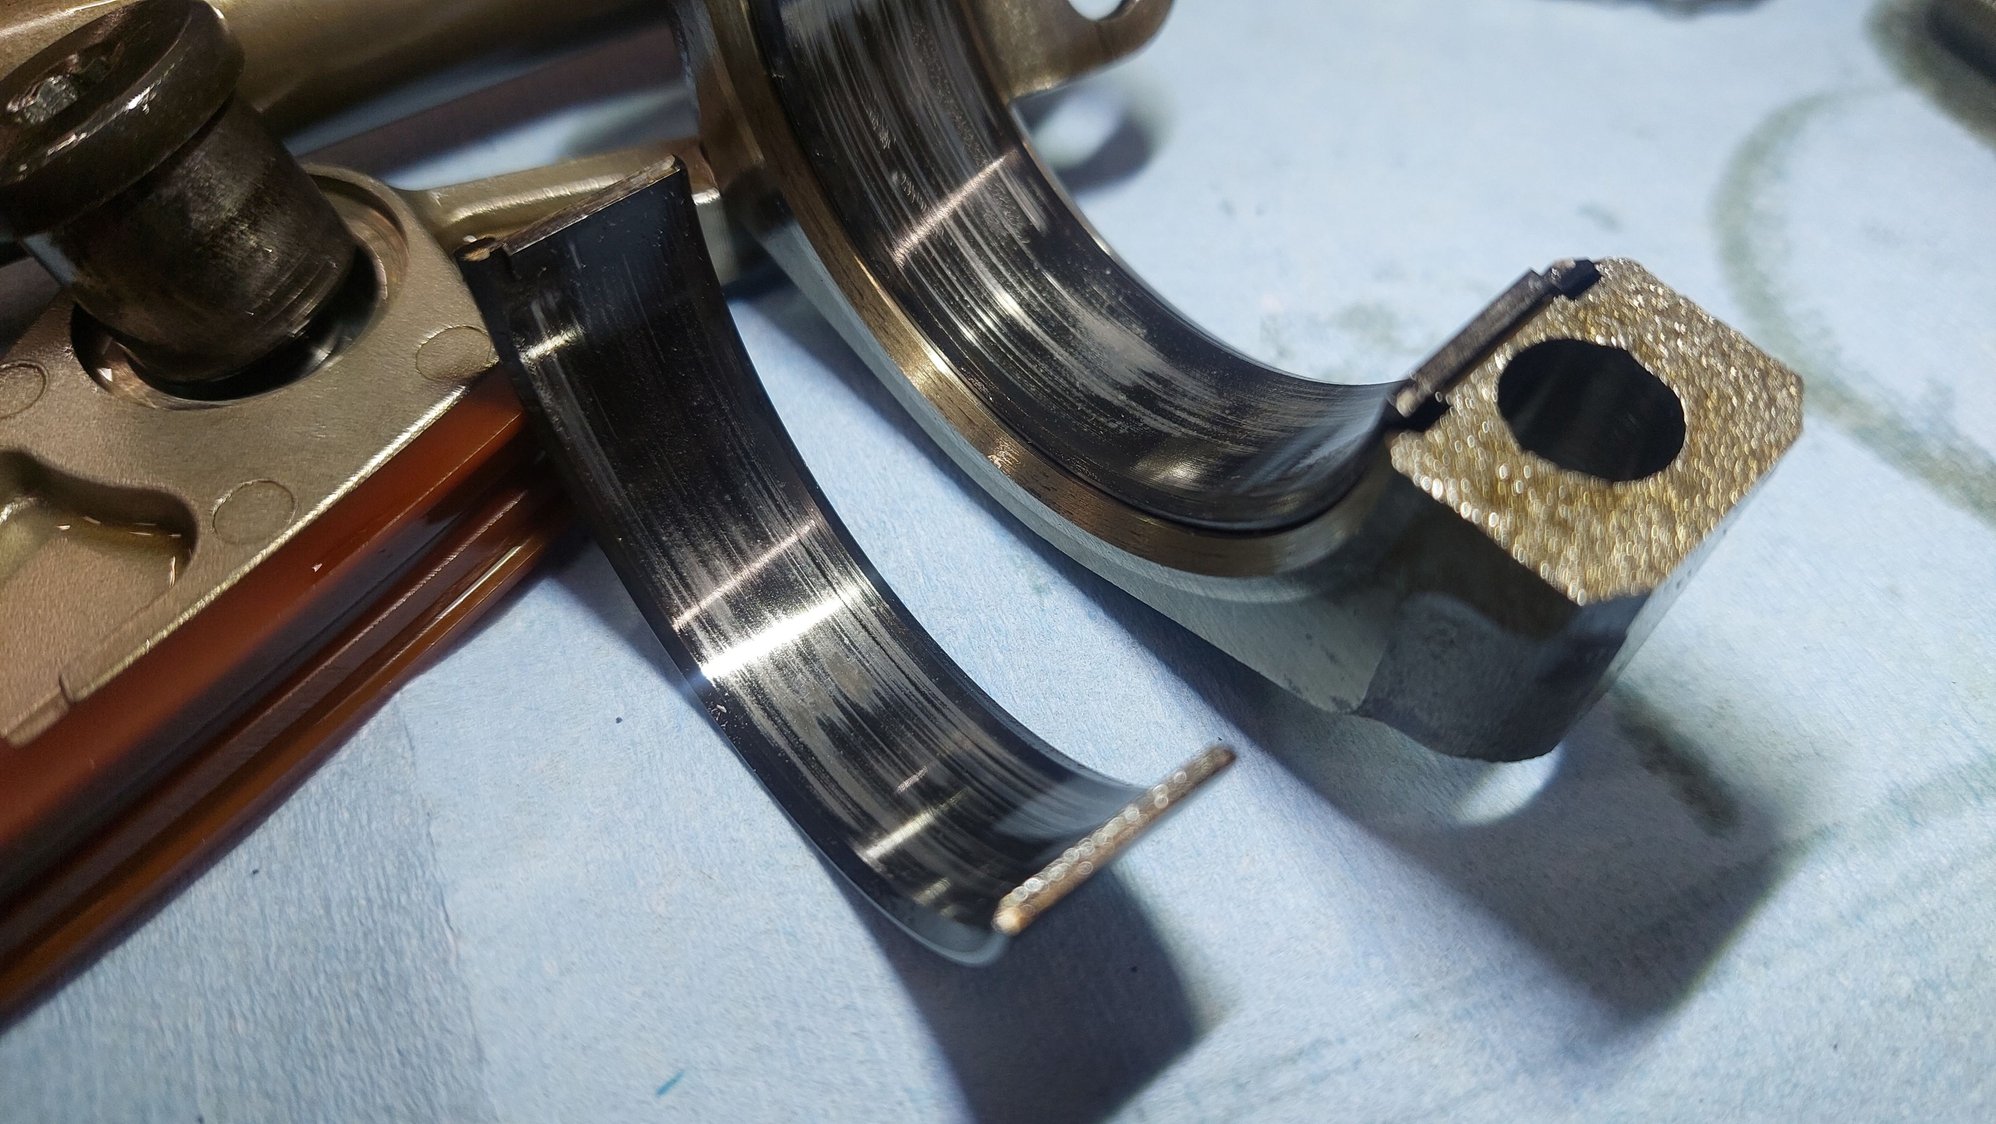
Visually, every bearing looked beyond worn, and I was trying to figure out how this motor was holding together at all. But, to the fingernail, each bearing was perfectly smooth... not a nick to be felt. I was baffled at first, then realized that King bearings have a super fancy "nano-composite polymer coating" they call pMaxKote. This is what I believe is wearing off and giving the bearings that scored look. So these bearings had definitely taken a hammering, but were holding up.
I dropped one bearing on the garage floor during removal, so I got smart and just replaced all of them with new. I opted for ACL bearings this time, if the low oil pressure events continue I'll pull the motor apart again in a year or so and see which set of bearings held up better. I don't like that rod bearings are becoming a yearly maintenance item, but short of a drysump system, I'm out of ideas for how to keep oil where it needs to be and not playing leapfrog in the pan.
While the motor was apart, I turned my attention to some other stuff that needed addressing. At some point I must have hit a curb pretty hard and left a BIG dent in the pan. I don't remember a curbstrike of this severity but the evidence is irrefutable.
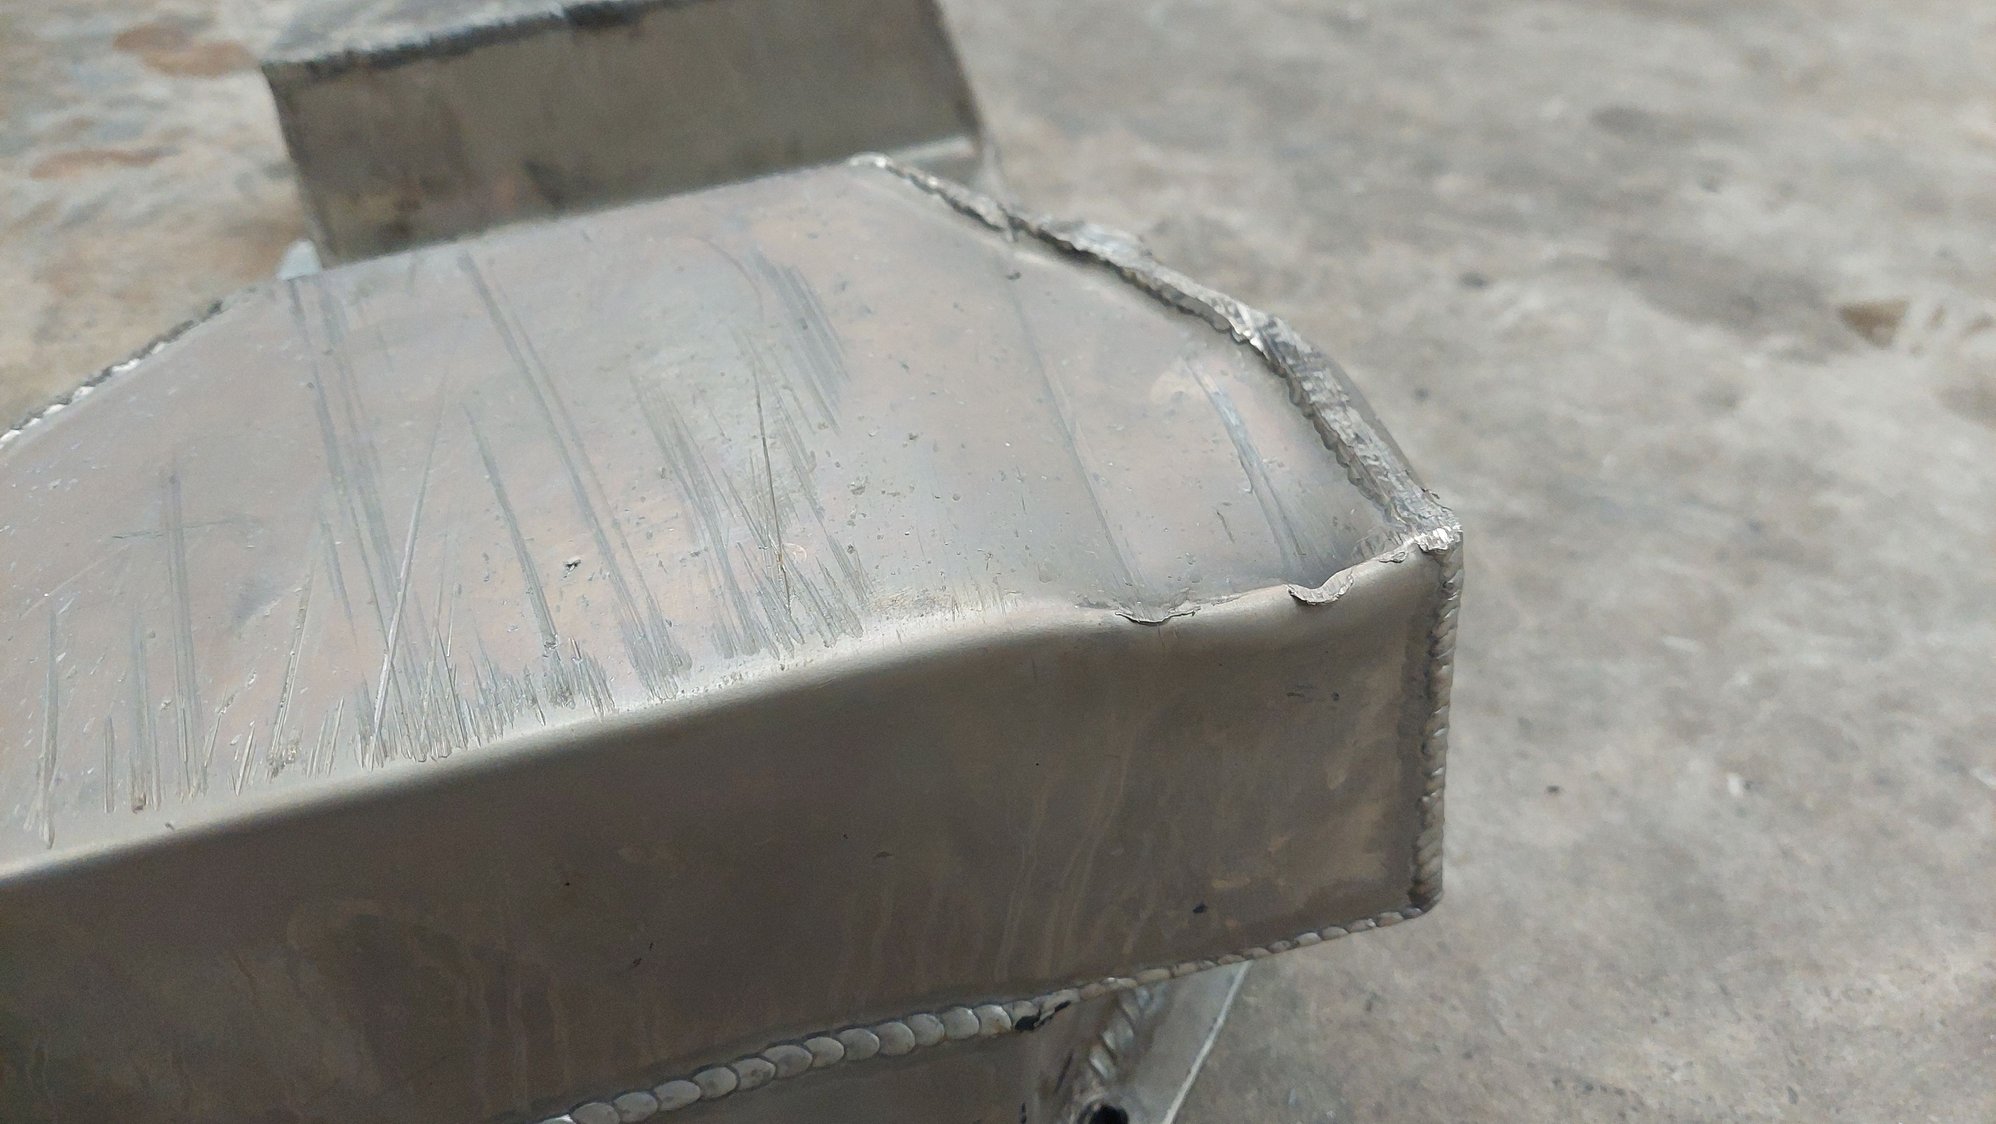
It was hit so hard it broke the welds INSIDE the pan as well... I'm just happy this wasn't leaking.
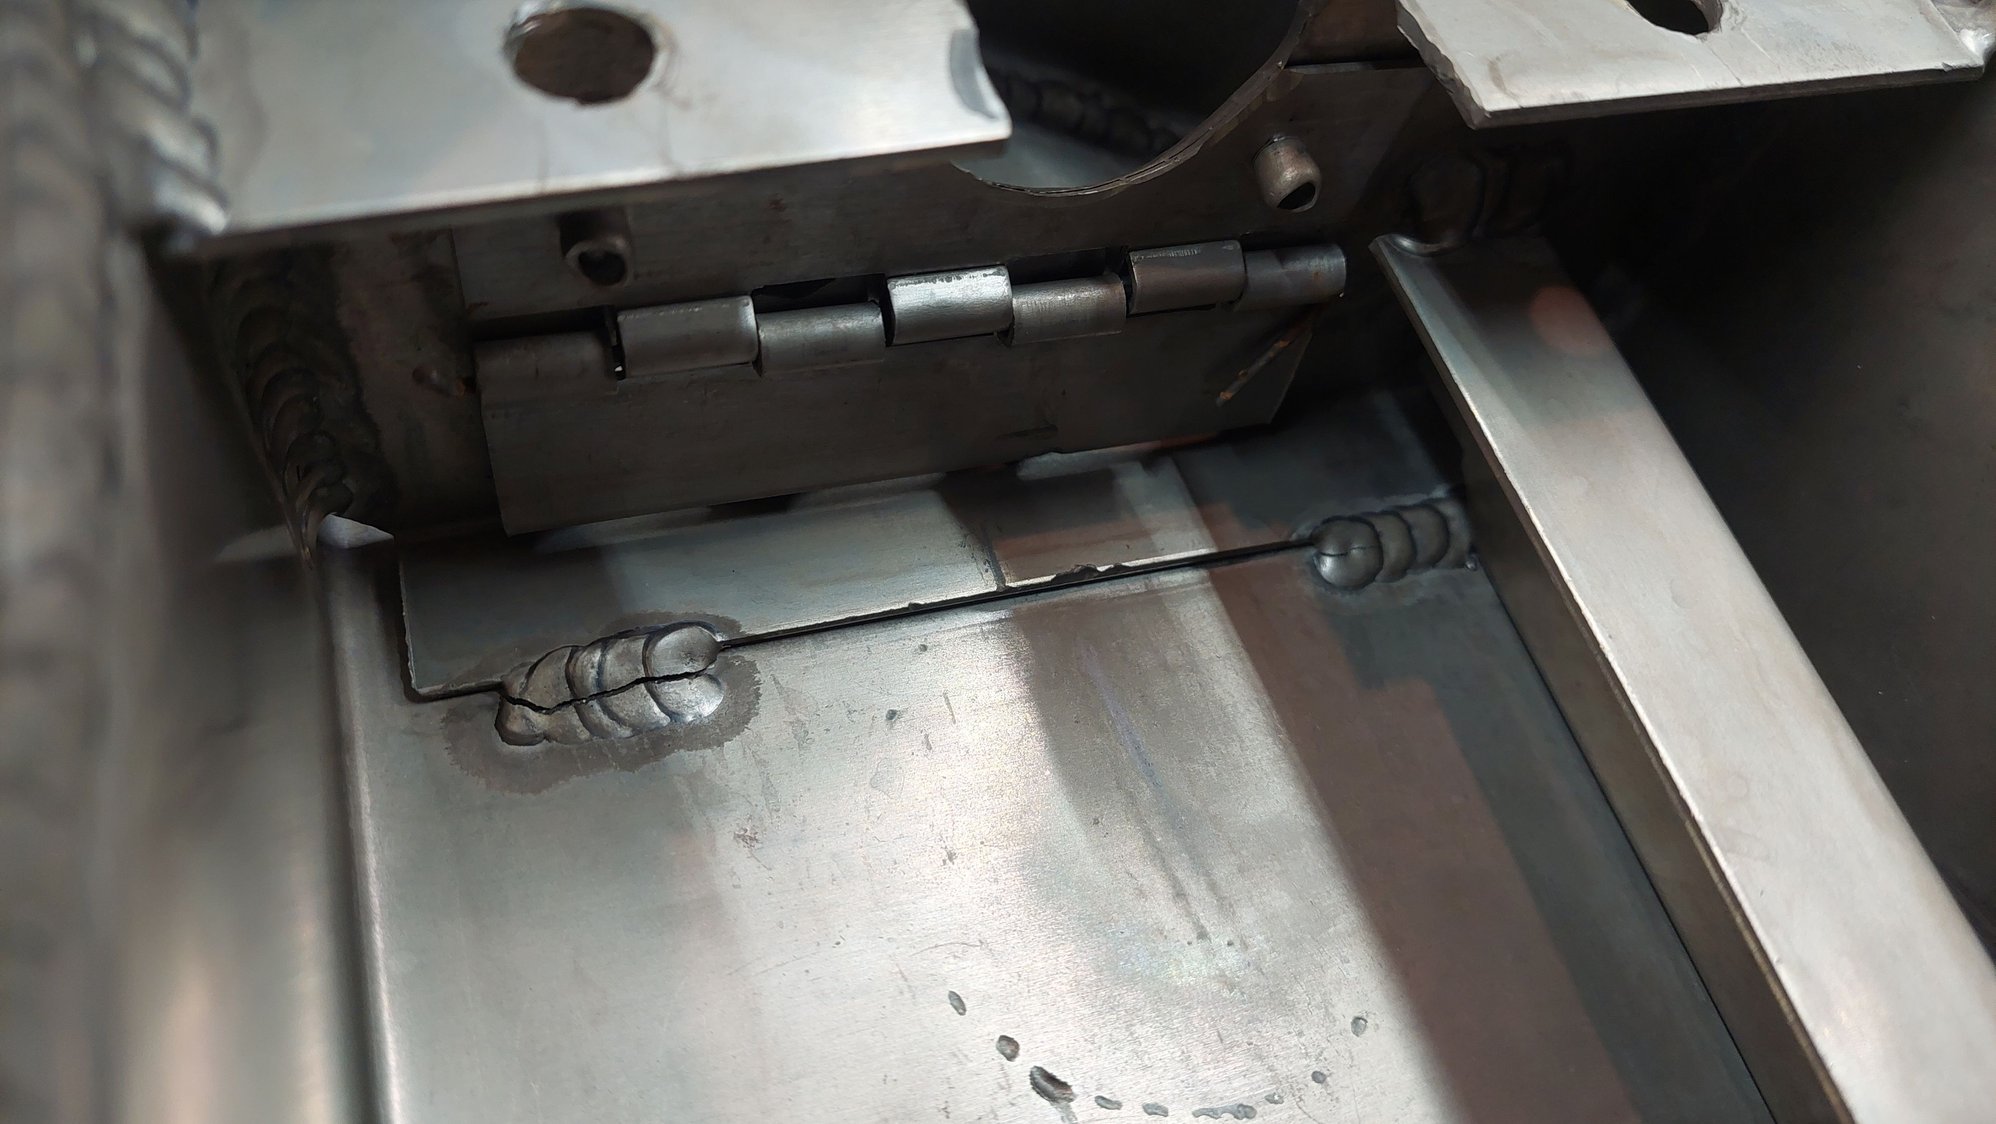
I beat out the dent in the pan as best I could with a hammer and 2x4, rewelded the internal welds, and then ran a fresh layer of bead over all the exterior welds on the pan that were getting eaten away.
Before:
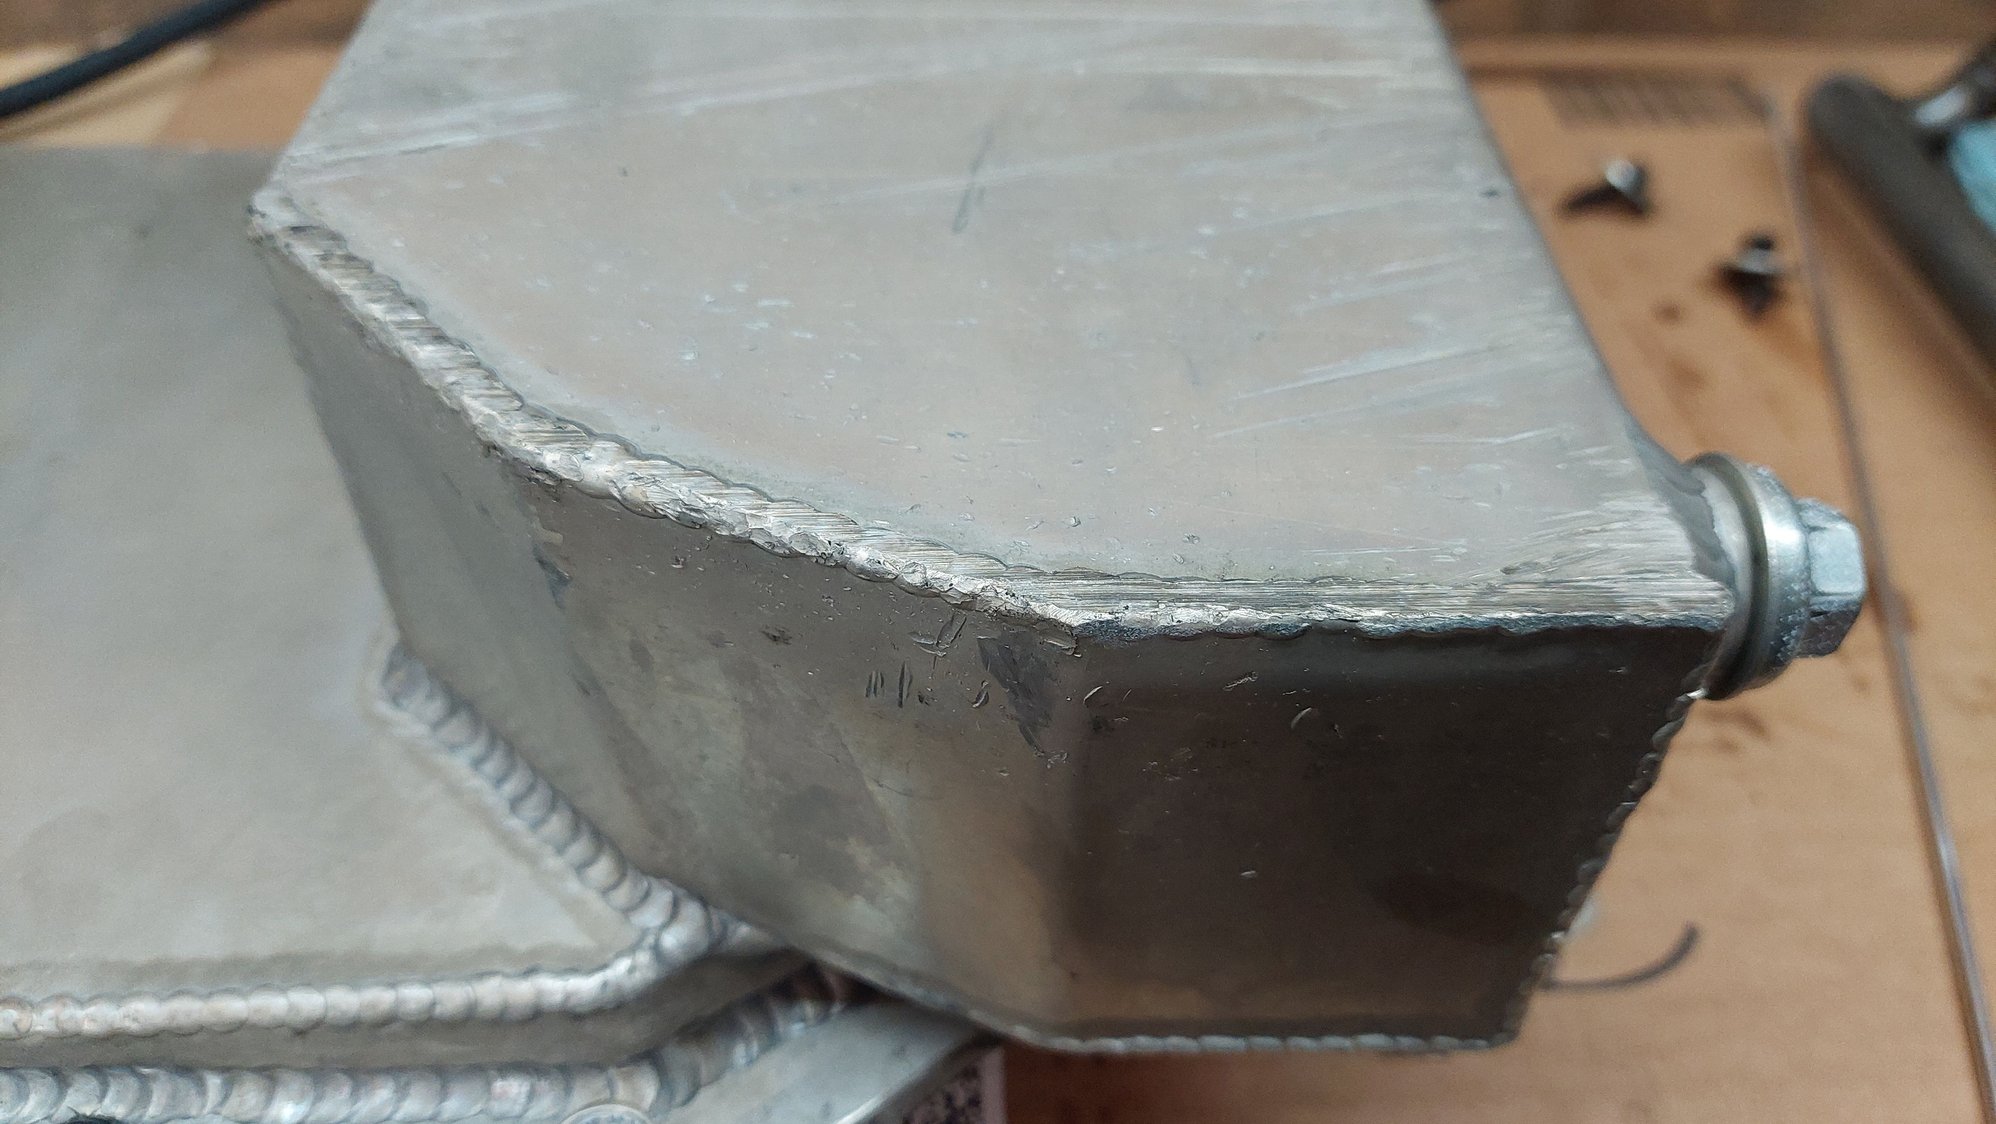
And after, featuring some bad aluminum welding and a slightly less dented pan.
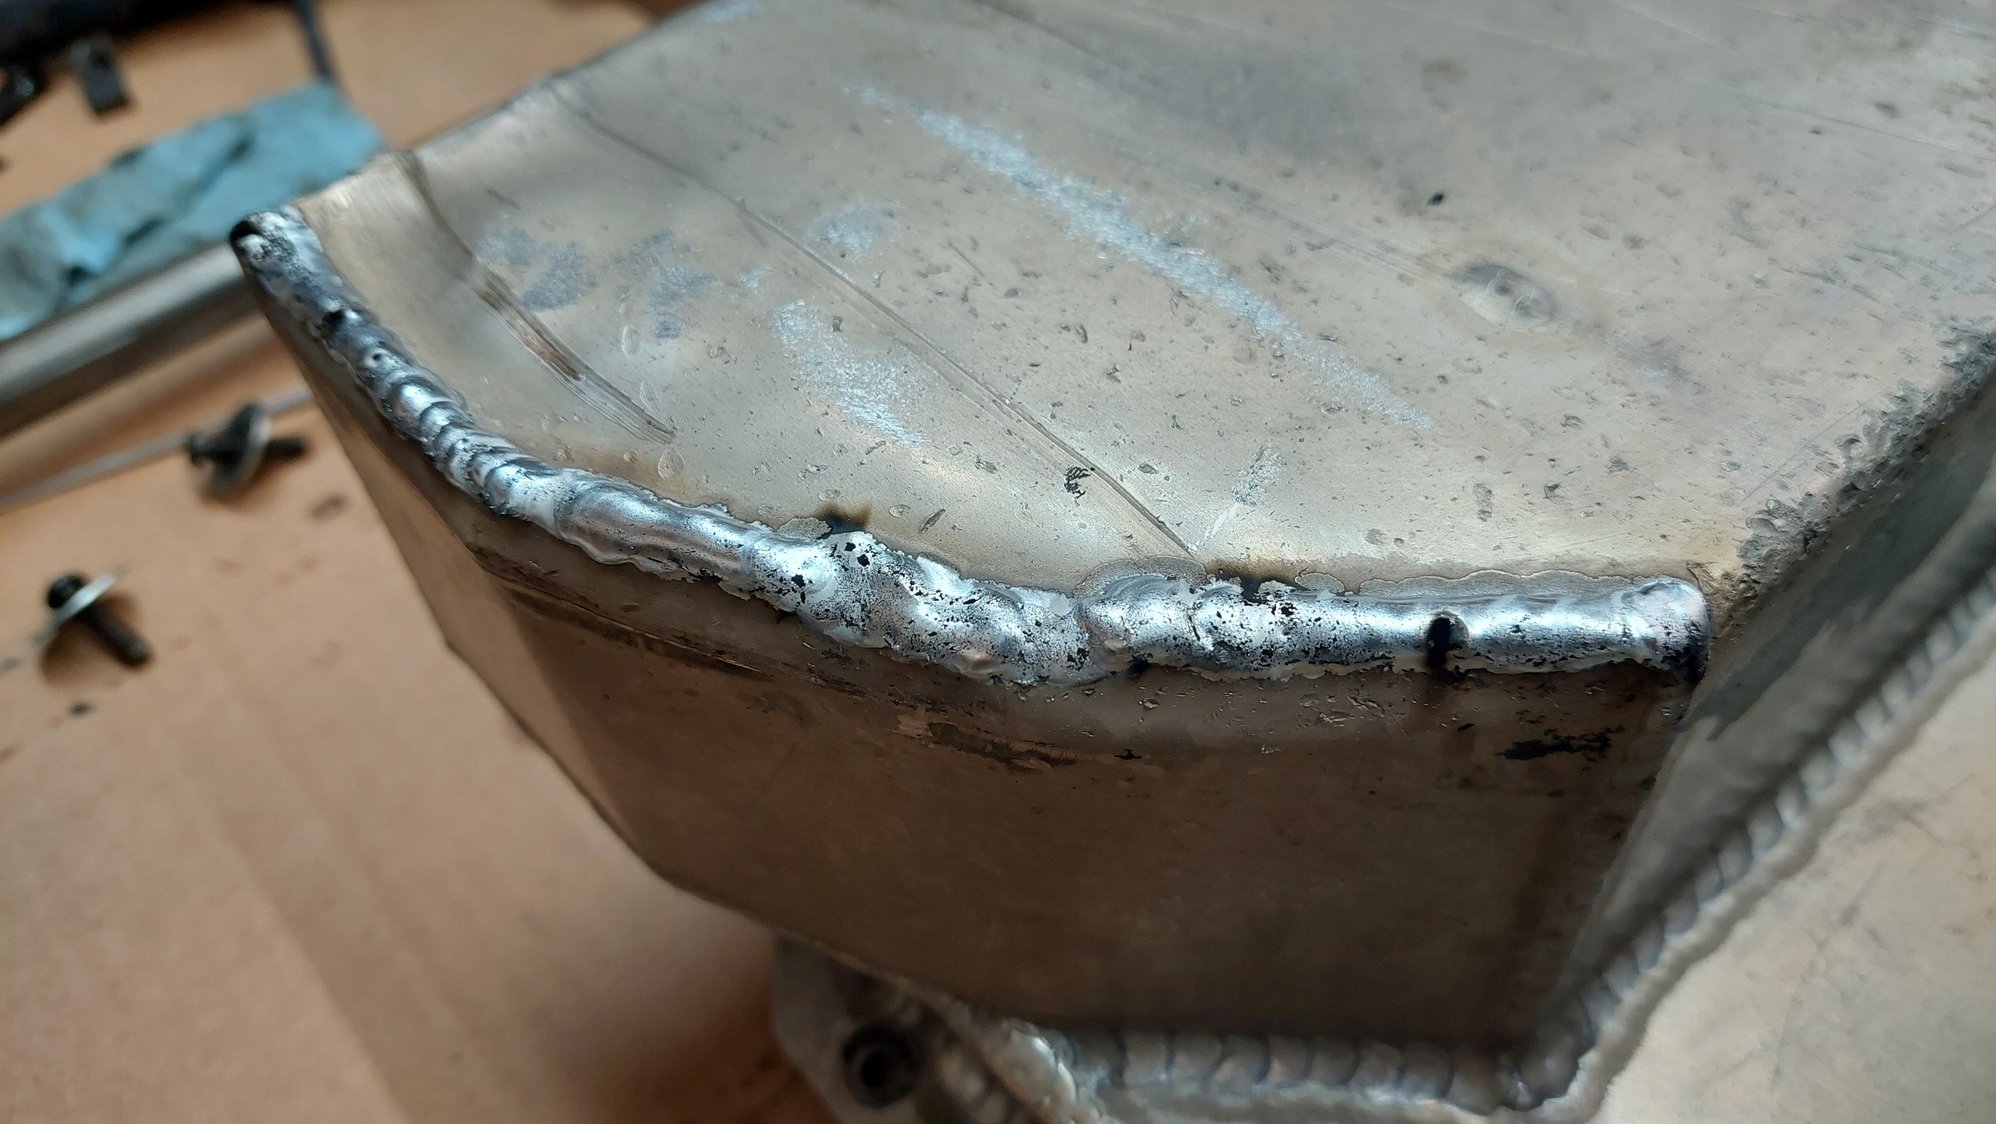
I had gone into the pan with the hope I could add some extra baffling or doors to help prevent oil starve under brakes, but failed to come up with anything substantial that I could pull off with the tools at my disposal. In the end, I added one small baffle to try and slow the forward oil slosh, but I'm skeptical of it making any real difference. I think what's happening is the oil is going up and out that round hole that the pickup sits in when the motor pitches forward under brakes. Can't close off that hole because then the oil pickup won't slide down into the sump and your pan doesn't fit.
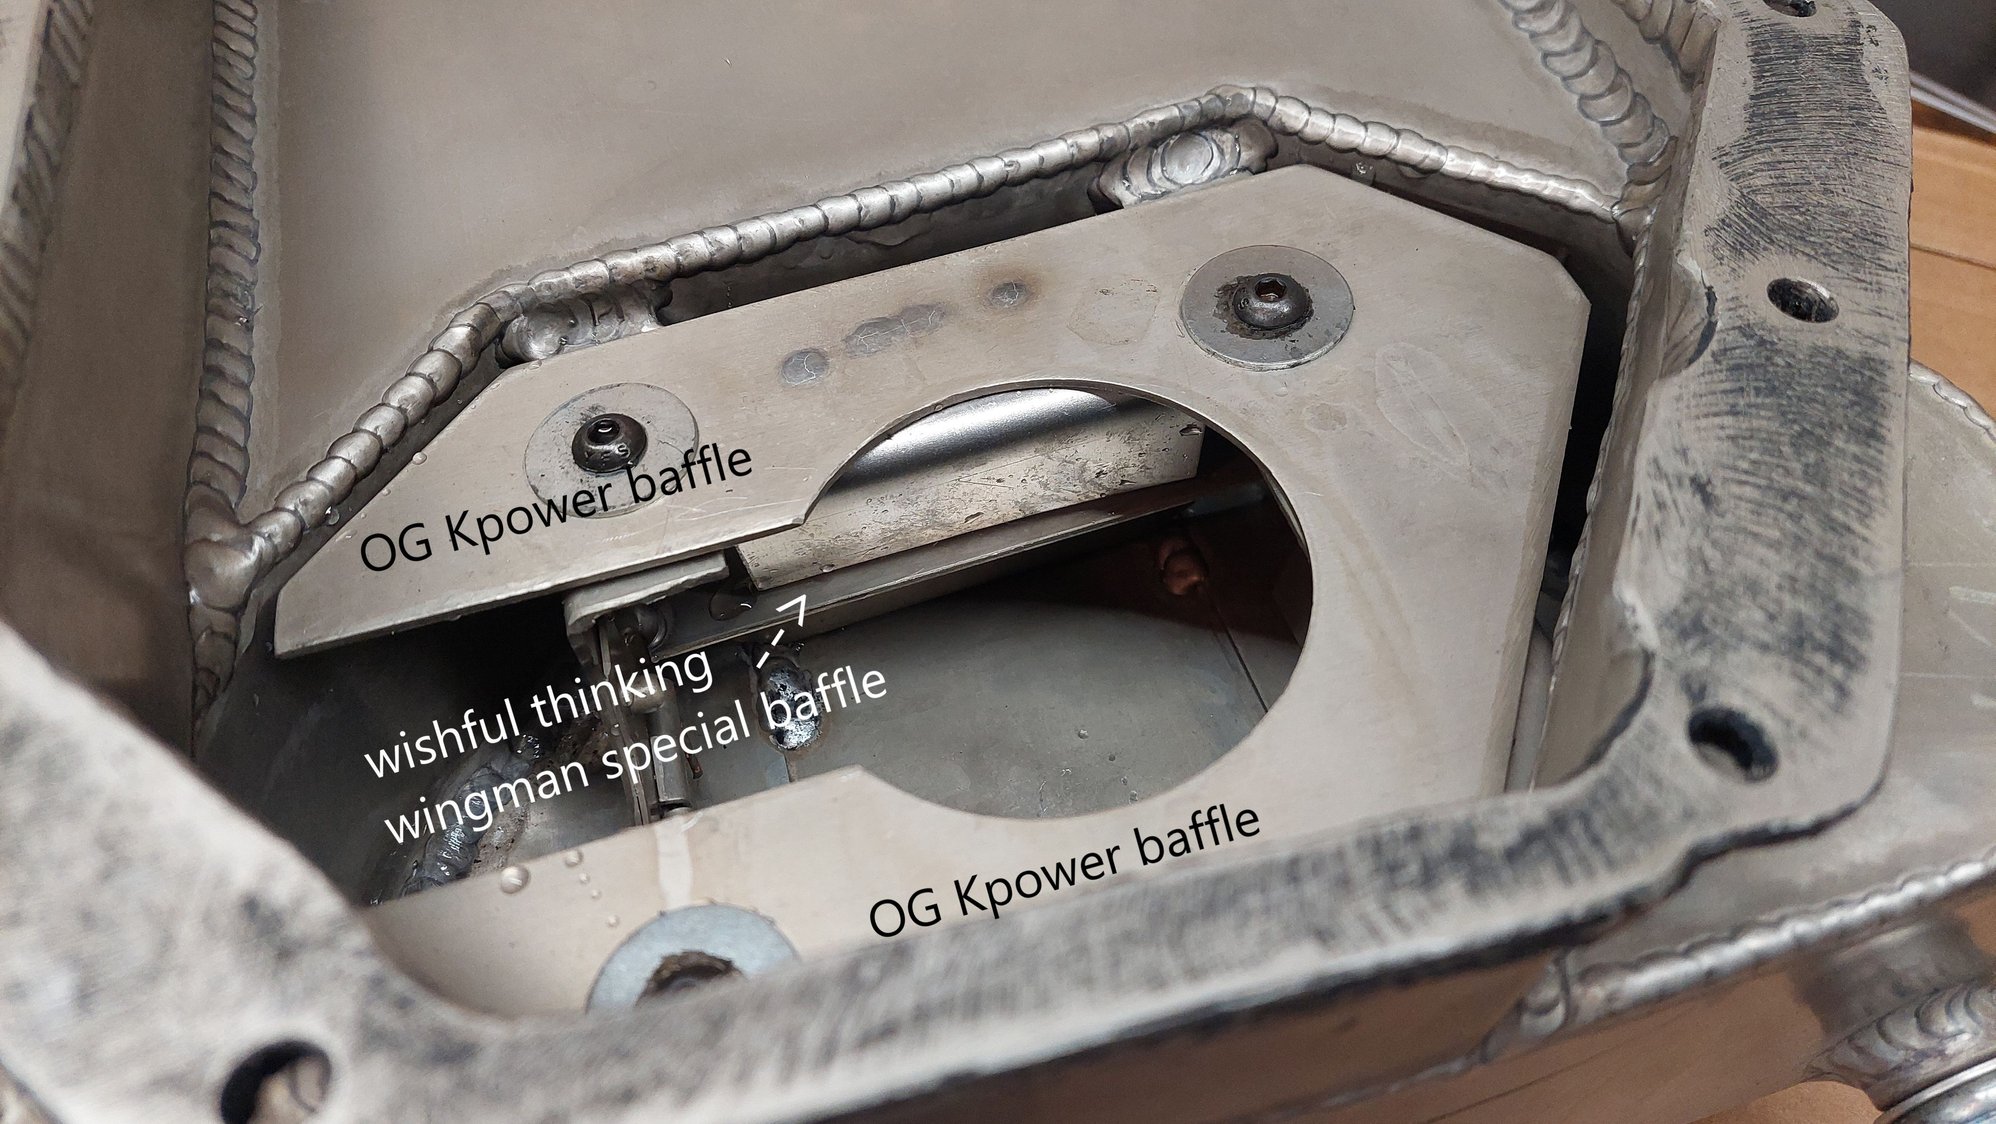
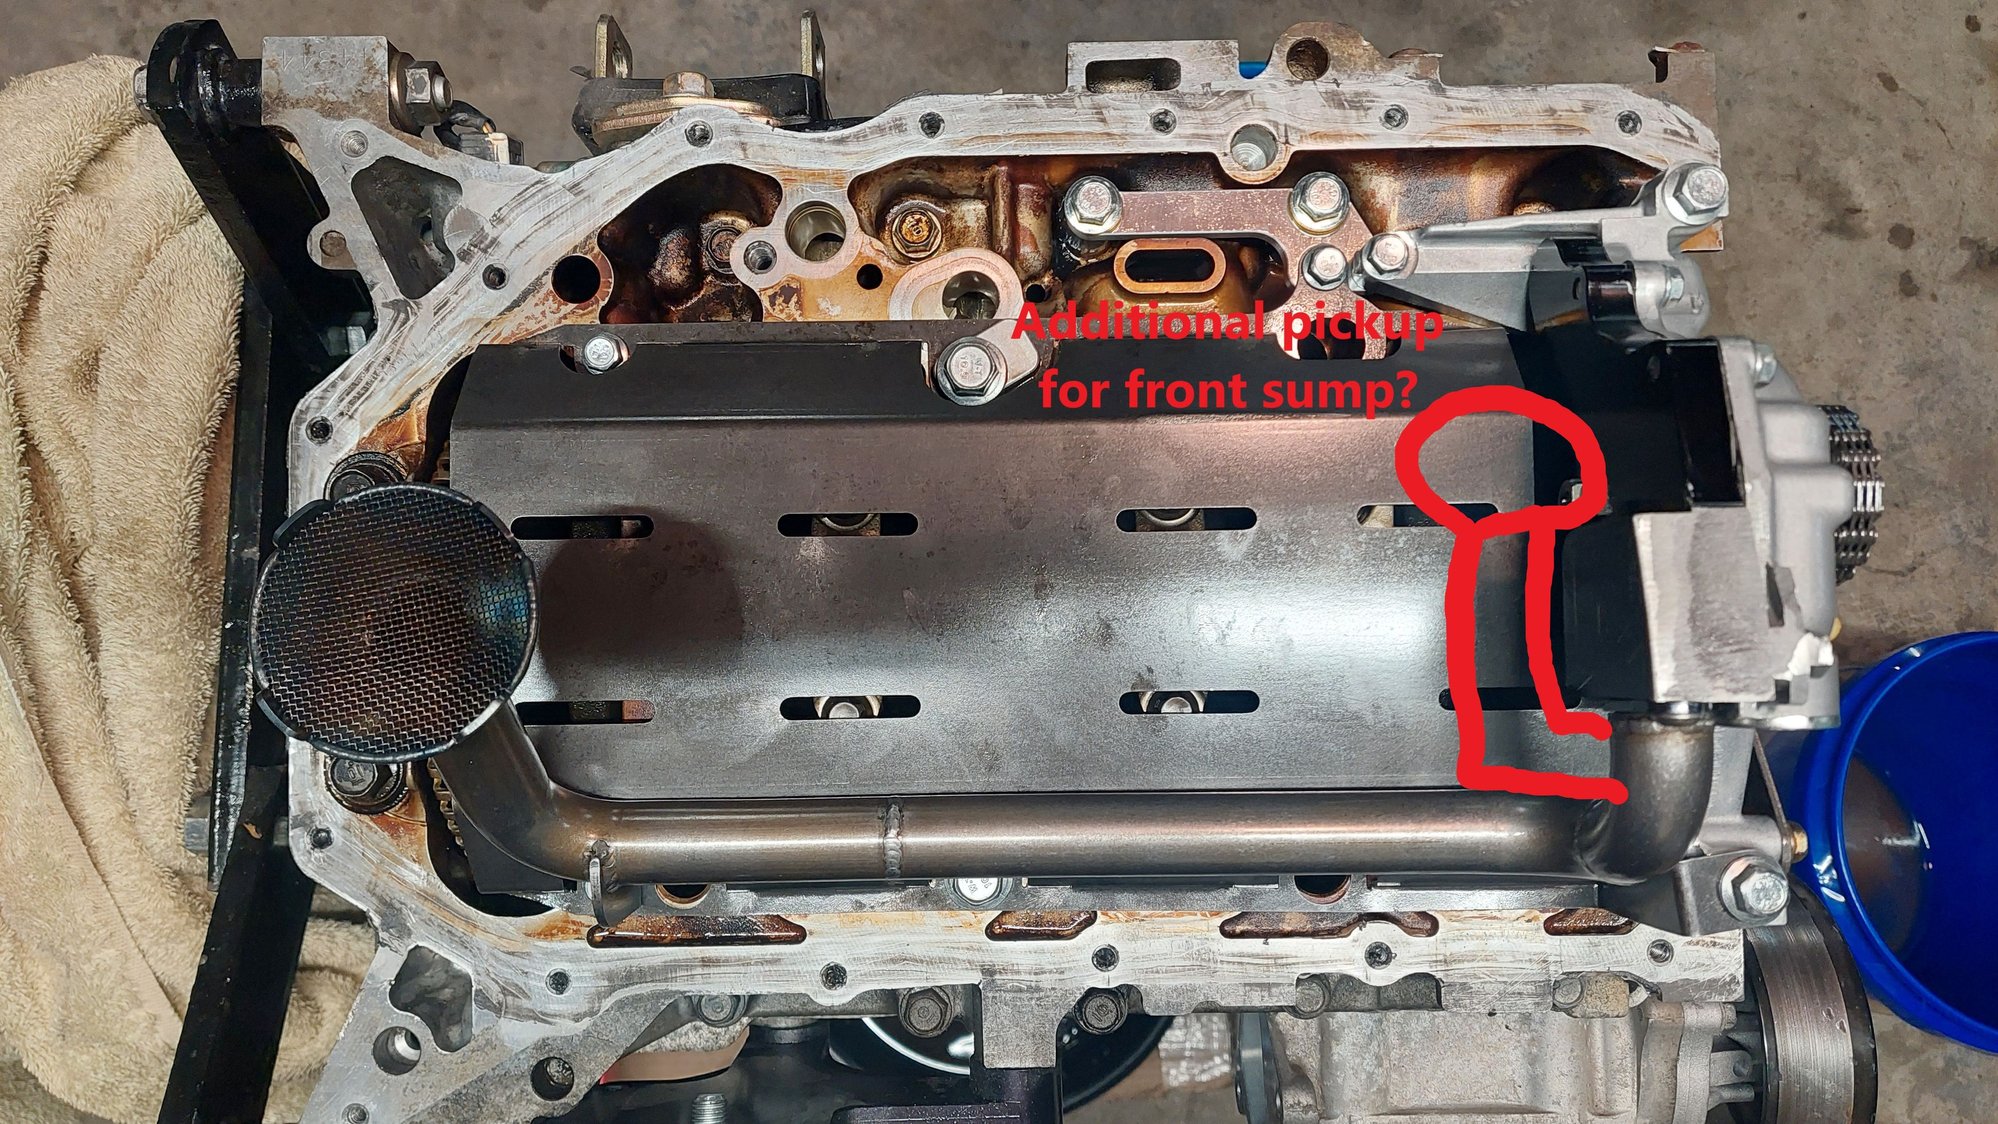
I toyed around with the idea of adding an extra oil pickup to the OG Kpower pickup tube that pulls oil from the front sump. I know this sump will always have ample oil in it, even under braking, but I couldn't find any good information on how/if dual sump pickups work, and the only OE application I could dig up was the E36 dual pickup, but no good information on if this used check valves, dual pumps, or weather it really worked to prevent aeration/starvation at all. Lacking concrete information to go off of, I opted to not chop up my pickup and restored everything to original specs.
If anyone has thoughts/information on a setup like this, let me know. Drysumps, while quite nice and have their own set of advantages, are very expensive and I don't know how you would fit it in a Miata without moving to the V8R tubular subframe. There's not exactly a kit for "K24Z3 drysump in a Miata" as far as I know...
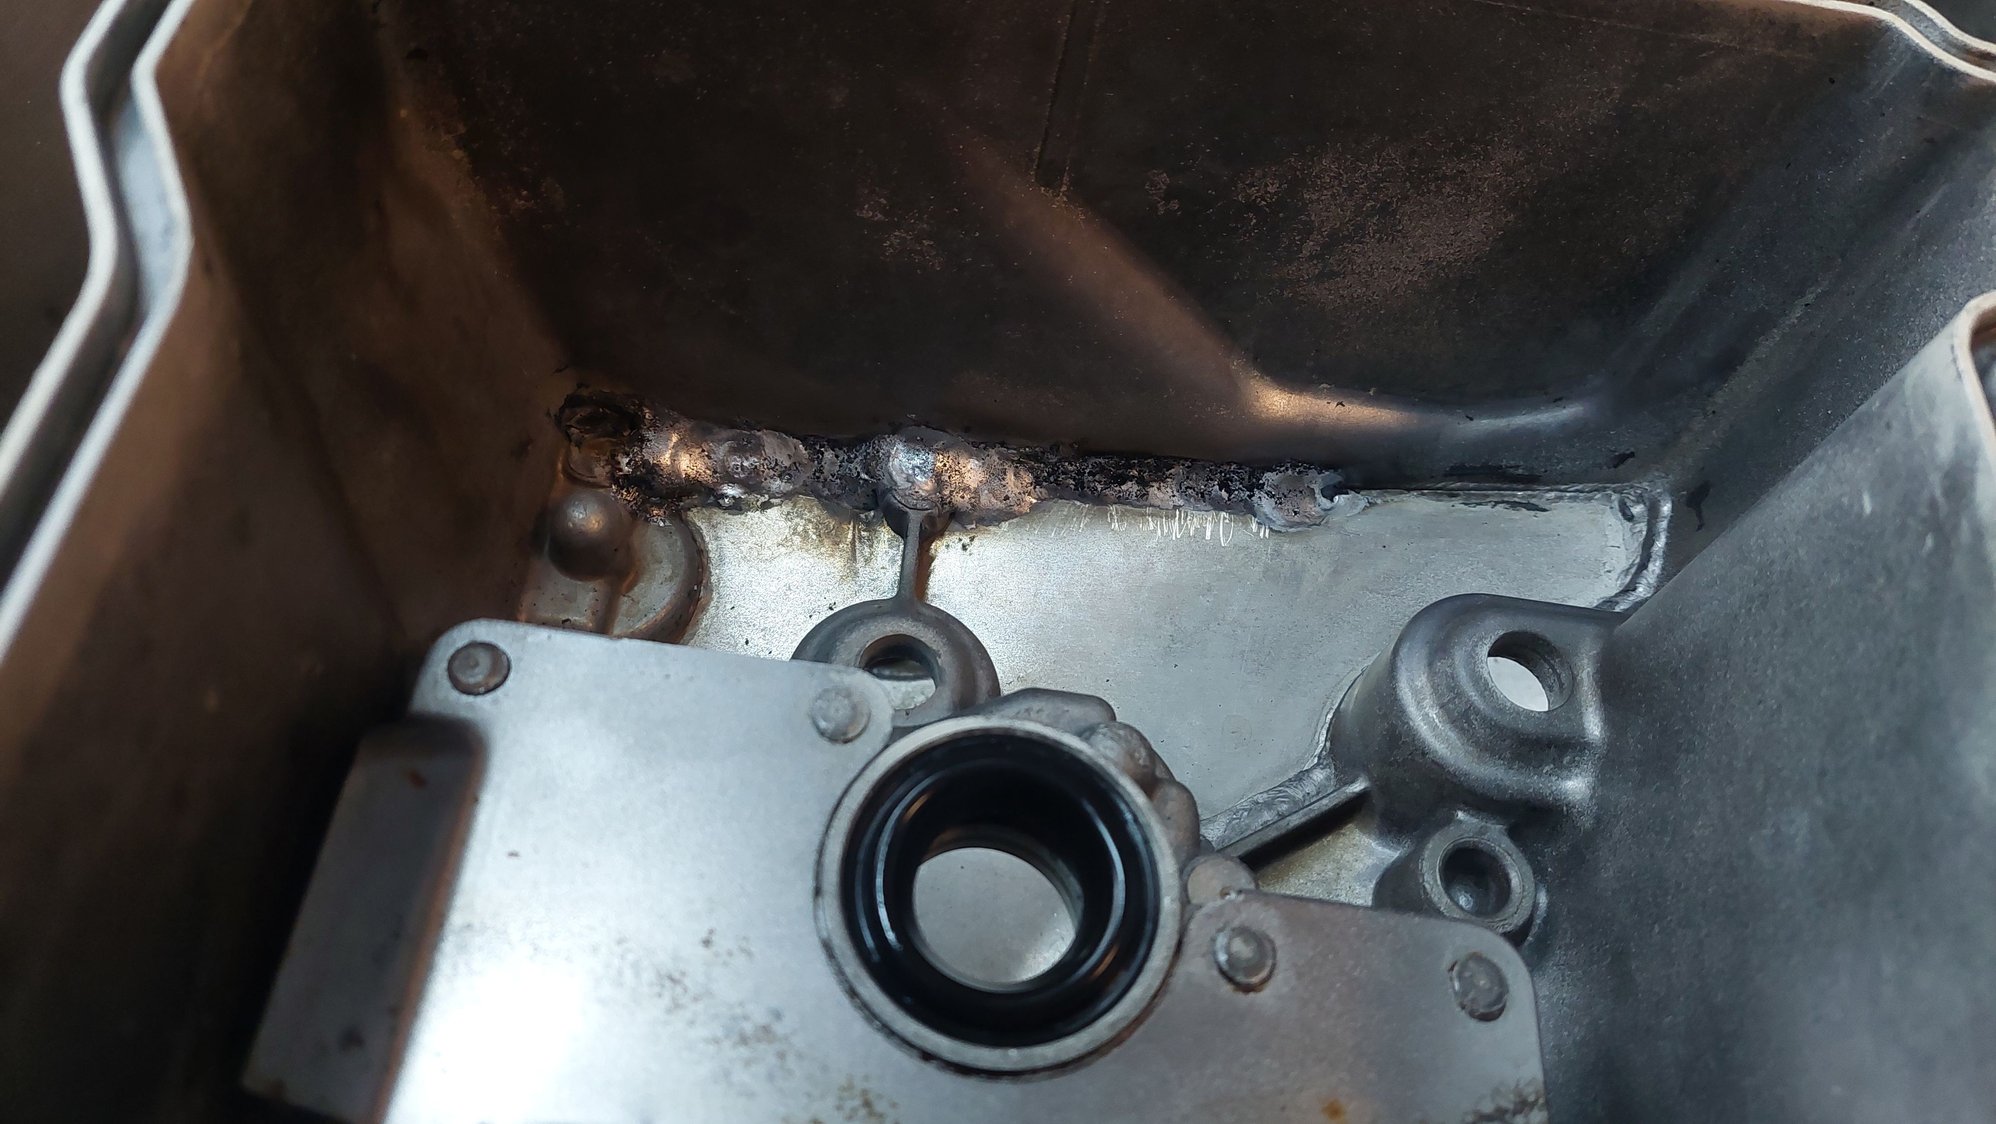
Speaking of oil, my Kpower valve cover has always leaked oil from the front of the chopped cover. Never a large amount, but I would come in from a session and find a few drops seeping through the welds. I took this opportunity to lay some ugly beads on the backside of their trim plate to put an end to this.
At this point the bottom end was reassembled and ready to be reunited with the head. But, as happens with most projects, the scope had creeped.
My initial plan when I pulled the motor apart had been to inspect the rod bearings, replaced if needed, add baffling, reassemble and call it good. But in talking with a few people that tune these specific motors frequently, I was warned that as I started to push the motor past the 500whp mark, EGT's would become a huge issue due to the restrictive single port design the K24Z3's feature. The same design that makes the R40 head so good at quickly spooling turbos and providing tons of low end grunt comes back to bite them by becoming a bottleneck and choking flow at higher RPM.
As a precaution and some margin against melting valves, I installed a full set of the 4Piston Ferrea competition plus valves. I'm not going to be revving this motor super high(current redline is set to 7600) and it runs exclusively E85 at this point, so I'm hoping these three things together will ward off any malice in the combustion palace. Am I tracking EGT's? Nope. What I don't know can't hurt my turbine wheel.
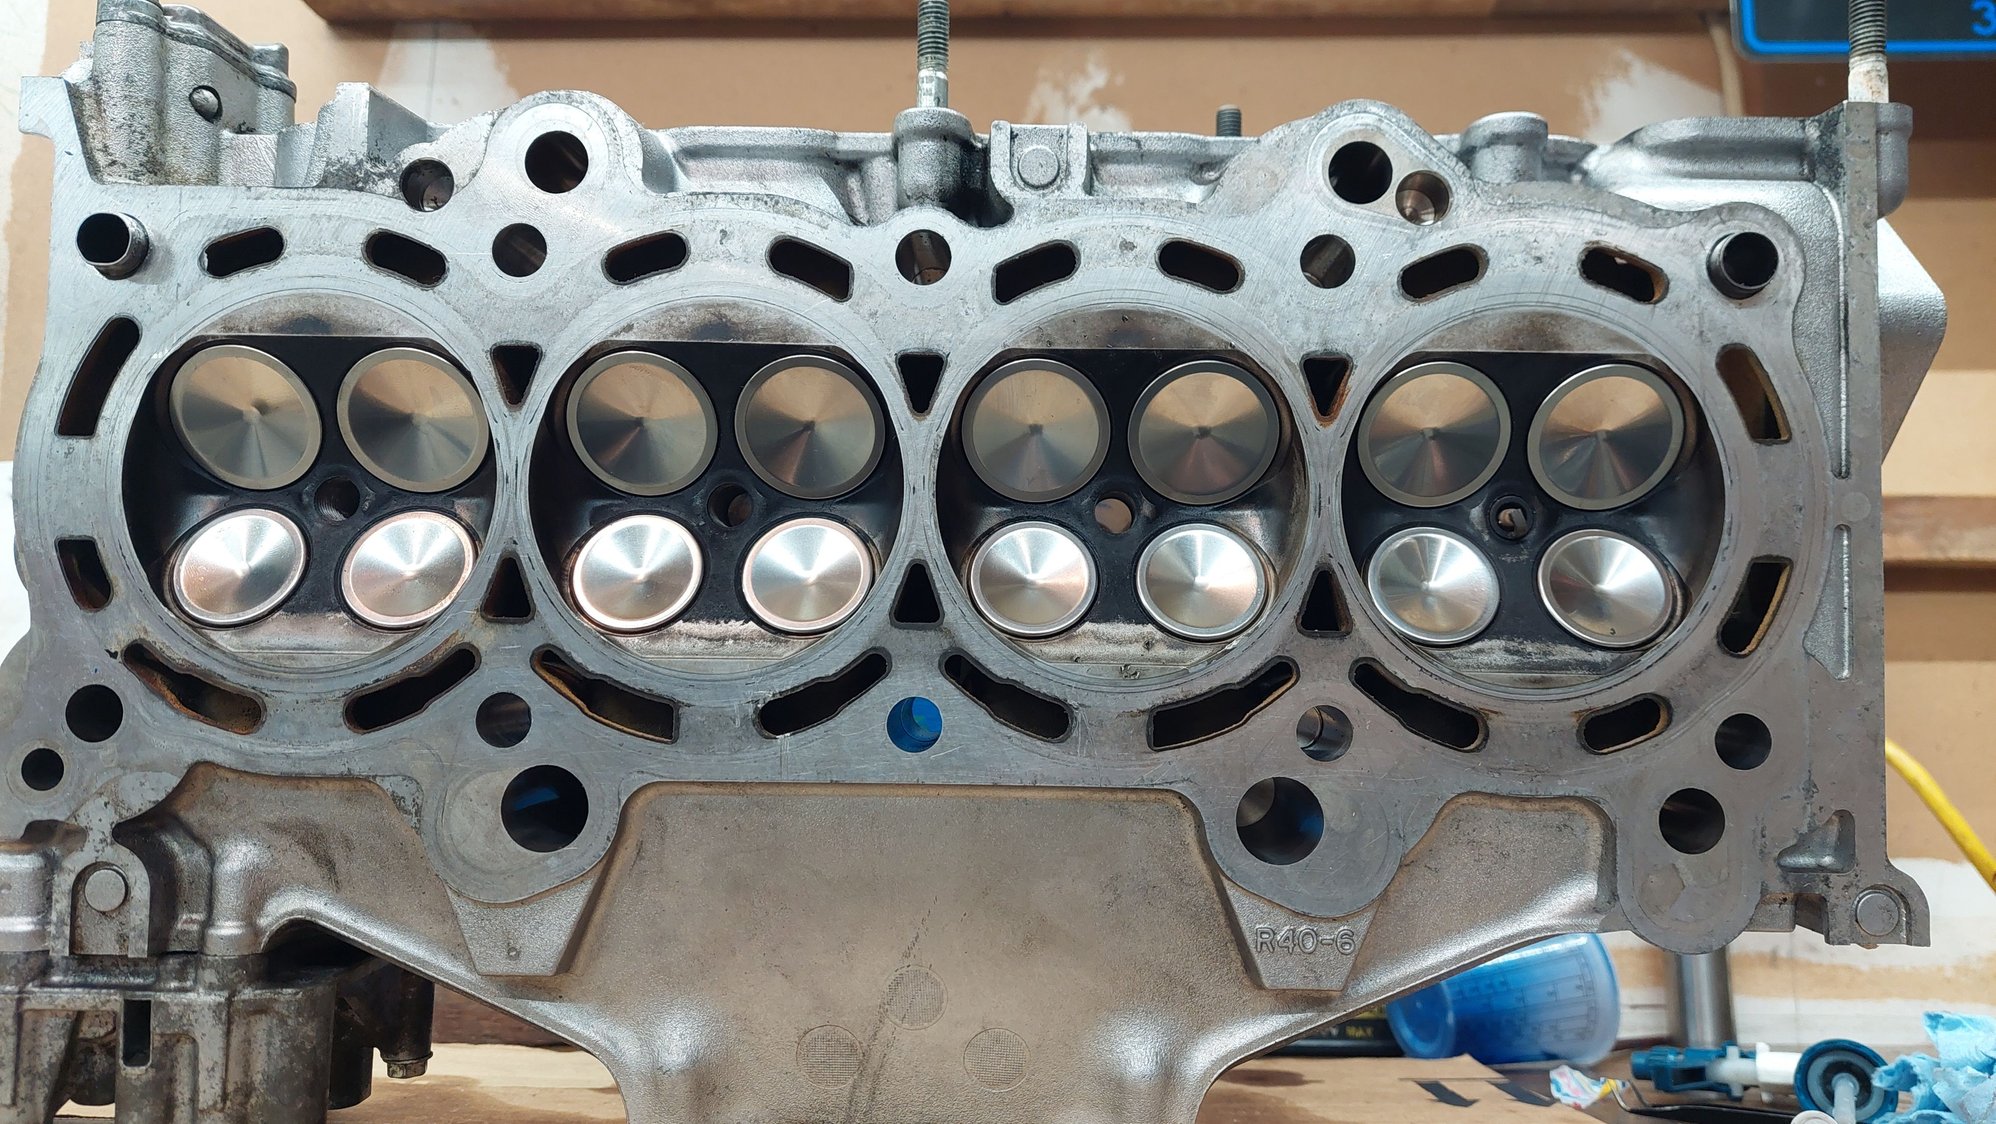
To keep things locked down tight for when I run allofit, I also installed 4Piston ARP heavy duty headstuds. Fingers crossed these items effectively "bulletproof" me from melted valves, lifting the head, or blowing a headgasket.
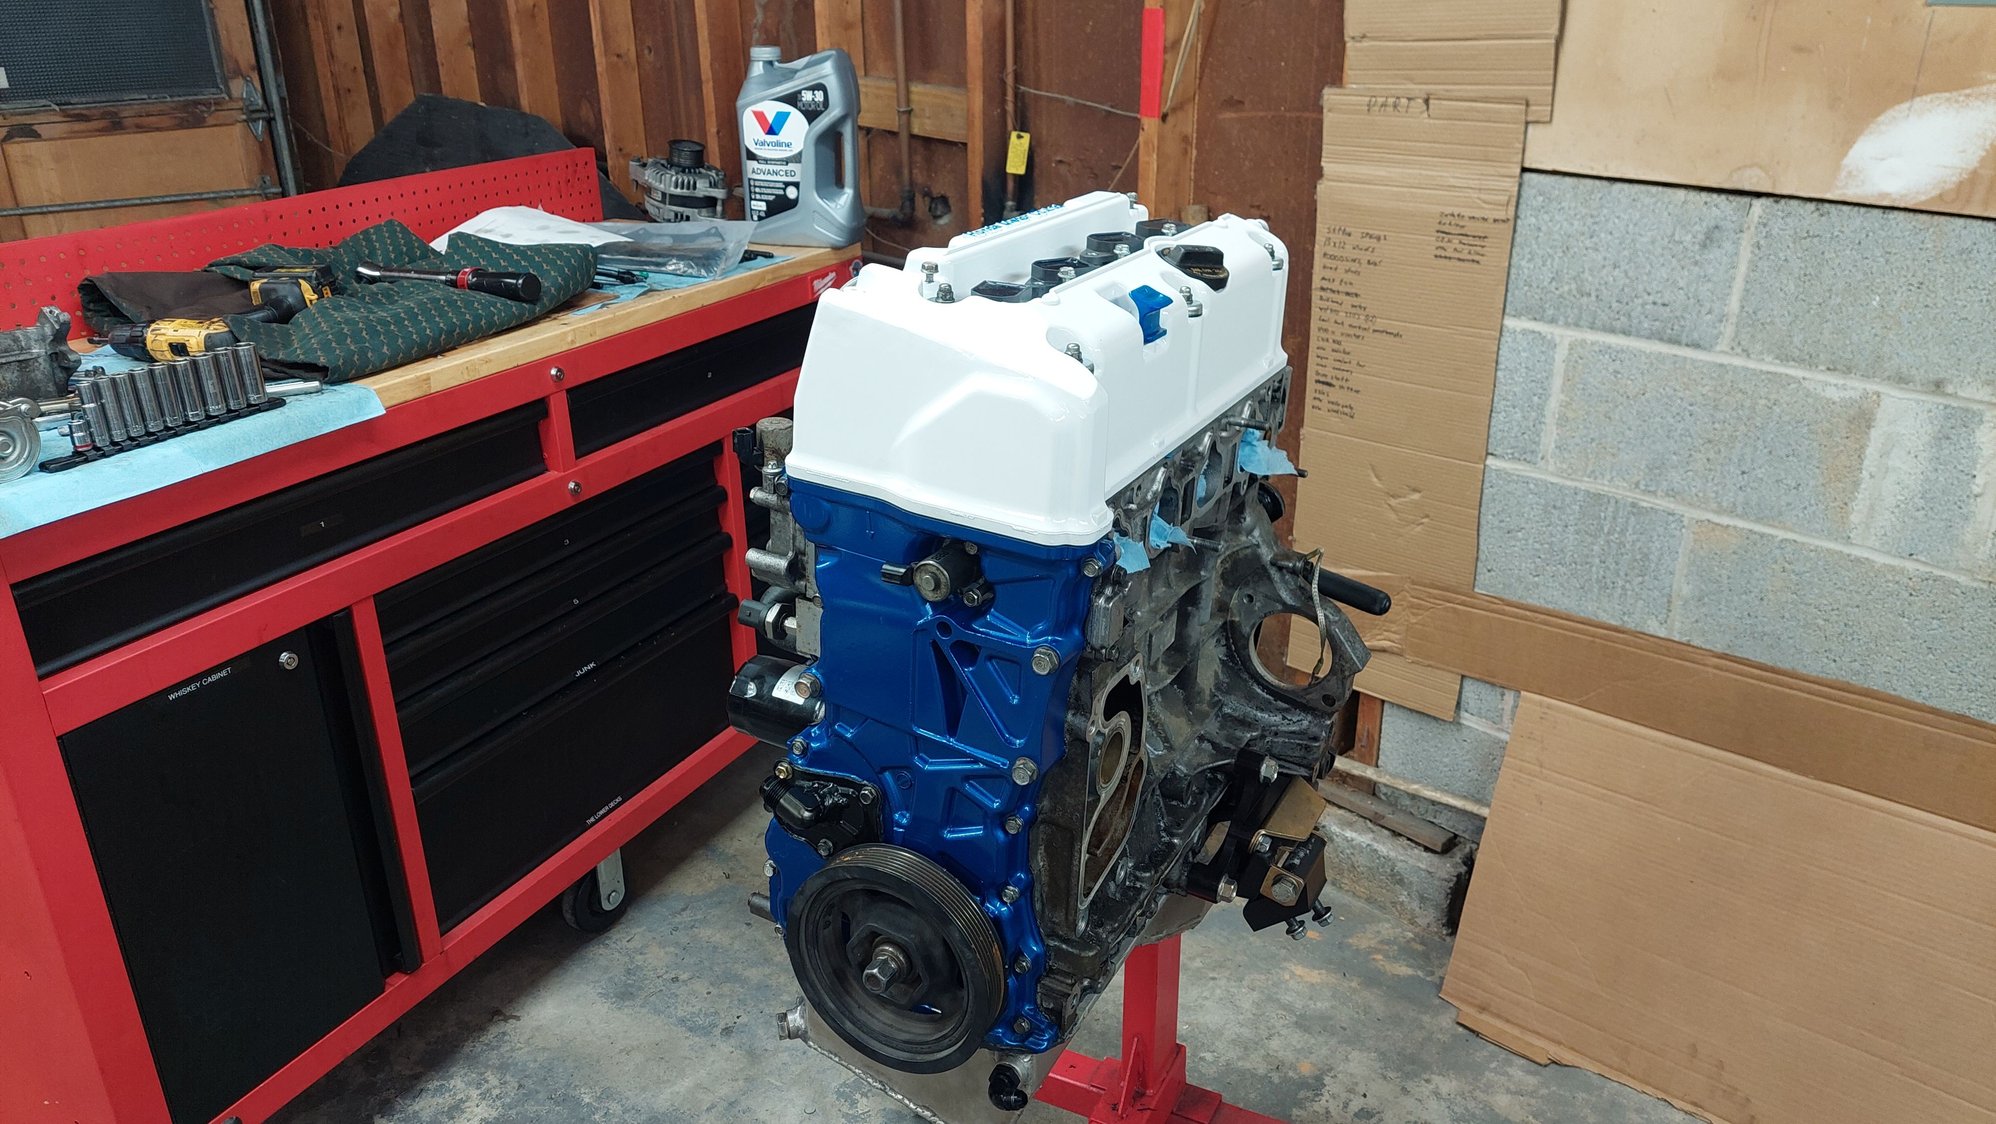
And with my motor budget waaaaay in the rearview mirror at this point, I hit everything with a fresh splash of paint and the motor was finally ready to go back into the car, exactly as shown here.
Exactly. As. Shown.
Last edited by Wingman703; 06-28-2024 at 09:16 AM.
#338
Seconding the Accusump. I ran one in the racecar (BP) after getting the oil light coming on under brakes at a particular slightly downhill corner, always there, don't remember elsewhere. Like you running more oil than 'H' on dipstick, but the Accusump fixed it. I used a manual tap, boot-mounted the device.
#340
Elite Member
iTrader: (15)
Join Date: Jan 2007
Location: Murfreesboro,TN
Posts: 2,066
Total Cats: 275
Thriding Accusump. It's a relativity cheap safety measure. I don't have one in my car yet, but will before the end of the year after talking with other racers. Most I've spoke with just open it up to pre-lube the motor on start up, then close it for warm up, then open it back up once they are on their warm up lap.


