When you click on links to various merchants on this site and make a purchase, this can result in this site earning a commission. Affiliate programs and affiliations include, but are not limited to, the eBay Partner Network.
IIRC The K swap kit comes with Energy Suspension poly motor mounts. Those should be fine, but only time will tell.
It does come with poly mounts, but I wanted to go with rubber for less NVH.
EDIT:
An Issue I ran into at this stage was that the K24Z3 upper timing chain guide interfered with my Kmiata modified valve cover. The solution is getting an older version of the timing chain guide that is smaller, 14540-PRB-A01
Yeah I actually talked to Stefan on IG. I'm going to test fit my oil pan over the subframe and mark it. I'll snap a few pics when I do it. I was gonna run rubber engine mounts but with how tight the clearance is now I'm reconsidering it.
I think I put a few pictures in my build thread. It's a really hard area to photograph with the shiny pan and dark subframe.
It sounds like this must happening to most or all the swaps. All 3 of us here had the exact same issue and ground it out. Test fit the pan, then shift it all the way to the passenger side and you'll see where it hits.
Updates,
The clutch master cylinder is in. I had to shorten the firewall stud on the driver's side because there isn't enough space between the end of the stud and the new master cylinder to get a wrench on it. I used an offset box end wrench to tighten that tricky nut down.
Next issue is the oil pan and windage tray fitment. First issue was that the windage tray made contact with the connecting rod bolt heads right on the bracket that Kmiata welds onto there. From the look of it they could have made that bracket sit 3-5mm farther out so hopefully they will address this in future kits.
I ground down the bracket for all 4 cylinders on the intake side. Exhaust side seemed to be fine.
The other windage tray issue was that it sat on top of the bolt flange that you have to screw into the oil jet. This caused it to not sit flush with the block and because it sat up too high it fouled on the oil pan. Solution? do some more grinding.
As you can see there's a whole for the bolt head but it doesn't fit over the flange. The windage tray bracket by the oil pump not sitting flat
All the grinding I did to get it sitting flat. (don't worry i thoroughly cleaned all the shavings off of it before reinstallation)
At this point I think, that's it, oil pan is going on! Nope.
Now the oil pan was fouling on the oil pickup tube. The tube was just too high (or low if you flipped the motor right side up). So I contacted Kmiata and David was very quick to help me out. He sent me a prepaid shipping label to send back the pan and intake tube so they can be checked and made right.
Hopefully these are all just growing pains for this kit. since in many ways it is a new kit and very different than the k24a2 kit.
I think I put a few pictures in my build thread. It's a really hard area to photograph with the shiny pan and dark subframe.
It sounds like this must happening to most or all the swaps. All 3 of us here had the exact same issue and ground it out. Test fit the pan, then shift it all the way to the passenger side and you'll see where it hits.
@AutoFreak57 should I grind down just the passenger side or do some on the dirver side too? I'd rather err on the side of caution and grind more away now than find out later.
@AutoFreak57 should I grind down just the passenger side or do some on the dirver side too? I'd rather err on the side of caution and grind more away now than find out later.
Here are the pics I took.
I only had an issue on the passenger side. Driver side has plenty of space. Its almost like the engine was shifted too far to the right.
I finally got the oil pan on. After the windage tray issues the oil pan wouldnt clear the oil pickup tube. So I had to send that back in to Kmiata, David was very good about he whole process. Once I got it back I realized the factory bolts are too long and wont work. So I ordered 13 M6-1.0 18mm and 4 M6-1.0 14mm allen head bolts. The shorter ones are for the tight spot at the back of the pan and the oil pan to timing chain cover. The timing chain cover also needs some new bolts. 4 M10-1.25 35mm, they must have a 14mm head or else the flange is too large to fit in the recesses.
I also got the clutch slave in. You've got to trim down the oem stud on the left side or else you cant get a tool on the nut to tighten it.
I cut and terminated my fuel hard lines. I used Earls AT165056ERL, 5/16 hard line to an6 fittings. They were a right pain to get on. I had to use a wire wheel on a dremel to take all the paint off the hard lines so I could get thefitting to slip on. And even then I had to heat up the fittings to make it happen. I also reused the hardline bracket to secure them to the body.
And finally I shimmed the valves. At worst they were maybe 2 thousands off spec. I think intake was .009" and exhaust .010-.011"
Ah, makes sense then.
Maybe in the future the kit will include all the small bolts needed.
I'm about to start the work on my engine so this thread is pretty helpful in sourcing miscellaneous bolts and such ahead of time.
I cut and terminated my fuel hard lines. I used Earls AT165056ERL, 5/16 hard line to an6 fittings. They were a right pain to get on. I had to use a wire wheel on a dremel to take all the paint off the hard lines so I could get thefitting to slip on. And even then I had to heat up the fittings to make it happen. I also reused the hardline bracket to secure them to the body.
I used the same adapter. Glad I'm not the only one that struggled to install it.
Originally Posted by Bopop
Ah, makes sense then.
Maybe in the future the kit will include all the small bolts needed.
I'm about to start the work on my engine so this thread is pretty helpful in sourcing miscellaneous bolts and such ahead of time.
You can use a normal hex head bolt. Its tight, but not impossible to install.
Ah, makes sense then.
Maybe in the future the kit will include all the small bolts needed.
I'm about to start the work on my engine so this thread is pretty helpful in sourcing miscellaneous bolts and such ahead of time.
Glad it's been helpful for you! Here's another tip, if you're using the modified valve cover you have to get the upper chain guide from the K24a2, it's narrower. Honda OEM 14540-PRB-A01.
Glad it's been helpful for you! Here's another tip, if you're using the modified valve cover you have to get the upper chain guide from the K24a2, it's narrower. Honda OEM 14540-PRB-A01.
Thankfully I have an NB so that shouldn't be needed. Appreciate it though.
Originally Posted by AutoFreak57
You can use a normal hex head bolt. Its tight, but not impossible to install.
But it still needs to be the shorter one right? As in j can't use the ones that came with engine.
As y'all can see progress has been made. Engine is ready to be mated to the trans.
Kmiata sent out an email about having to shave the crank pulley so it doesnt rub on their CNC'd valve cover. See the gray circle on the pulley in this pic? That's what you have to shave down. I HIGHLY recommend covering that polished surface with painters tape to protect it when grinding down the pulley so you dont slip and mar it like i did. Some steel wool took care of my issue but it was preventable.
I also did the rear main seal. I can attest to everyone else on the internet. Get a wood screw and screw it into the seal then pull it out with vice grips. I tried many other methods till i consulted the internet and found that one. I had to drill a pilot hole just to get the screw started.
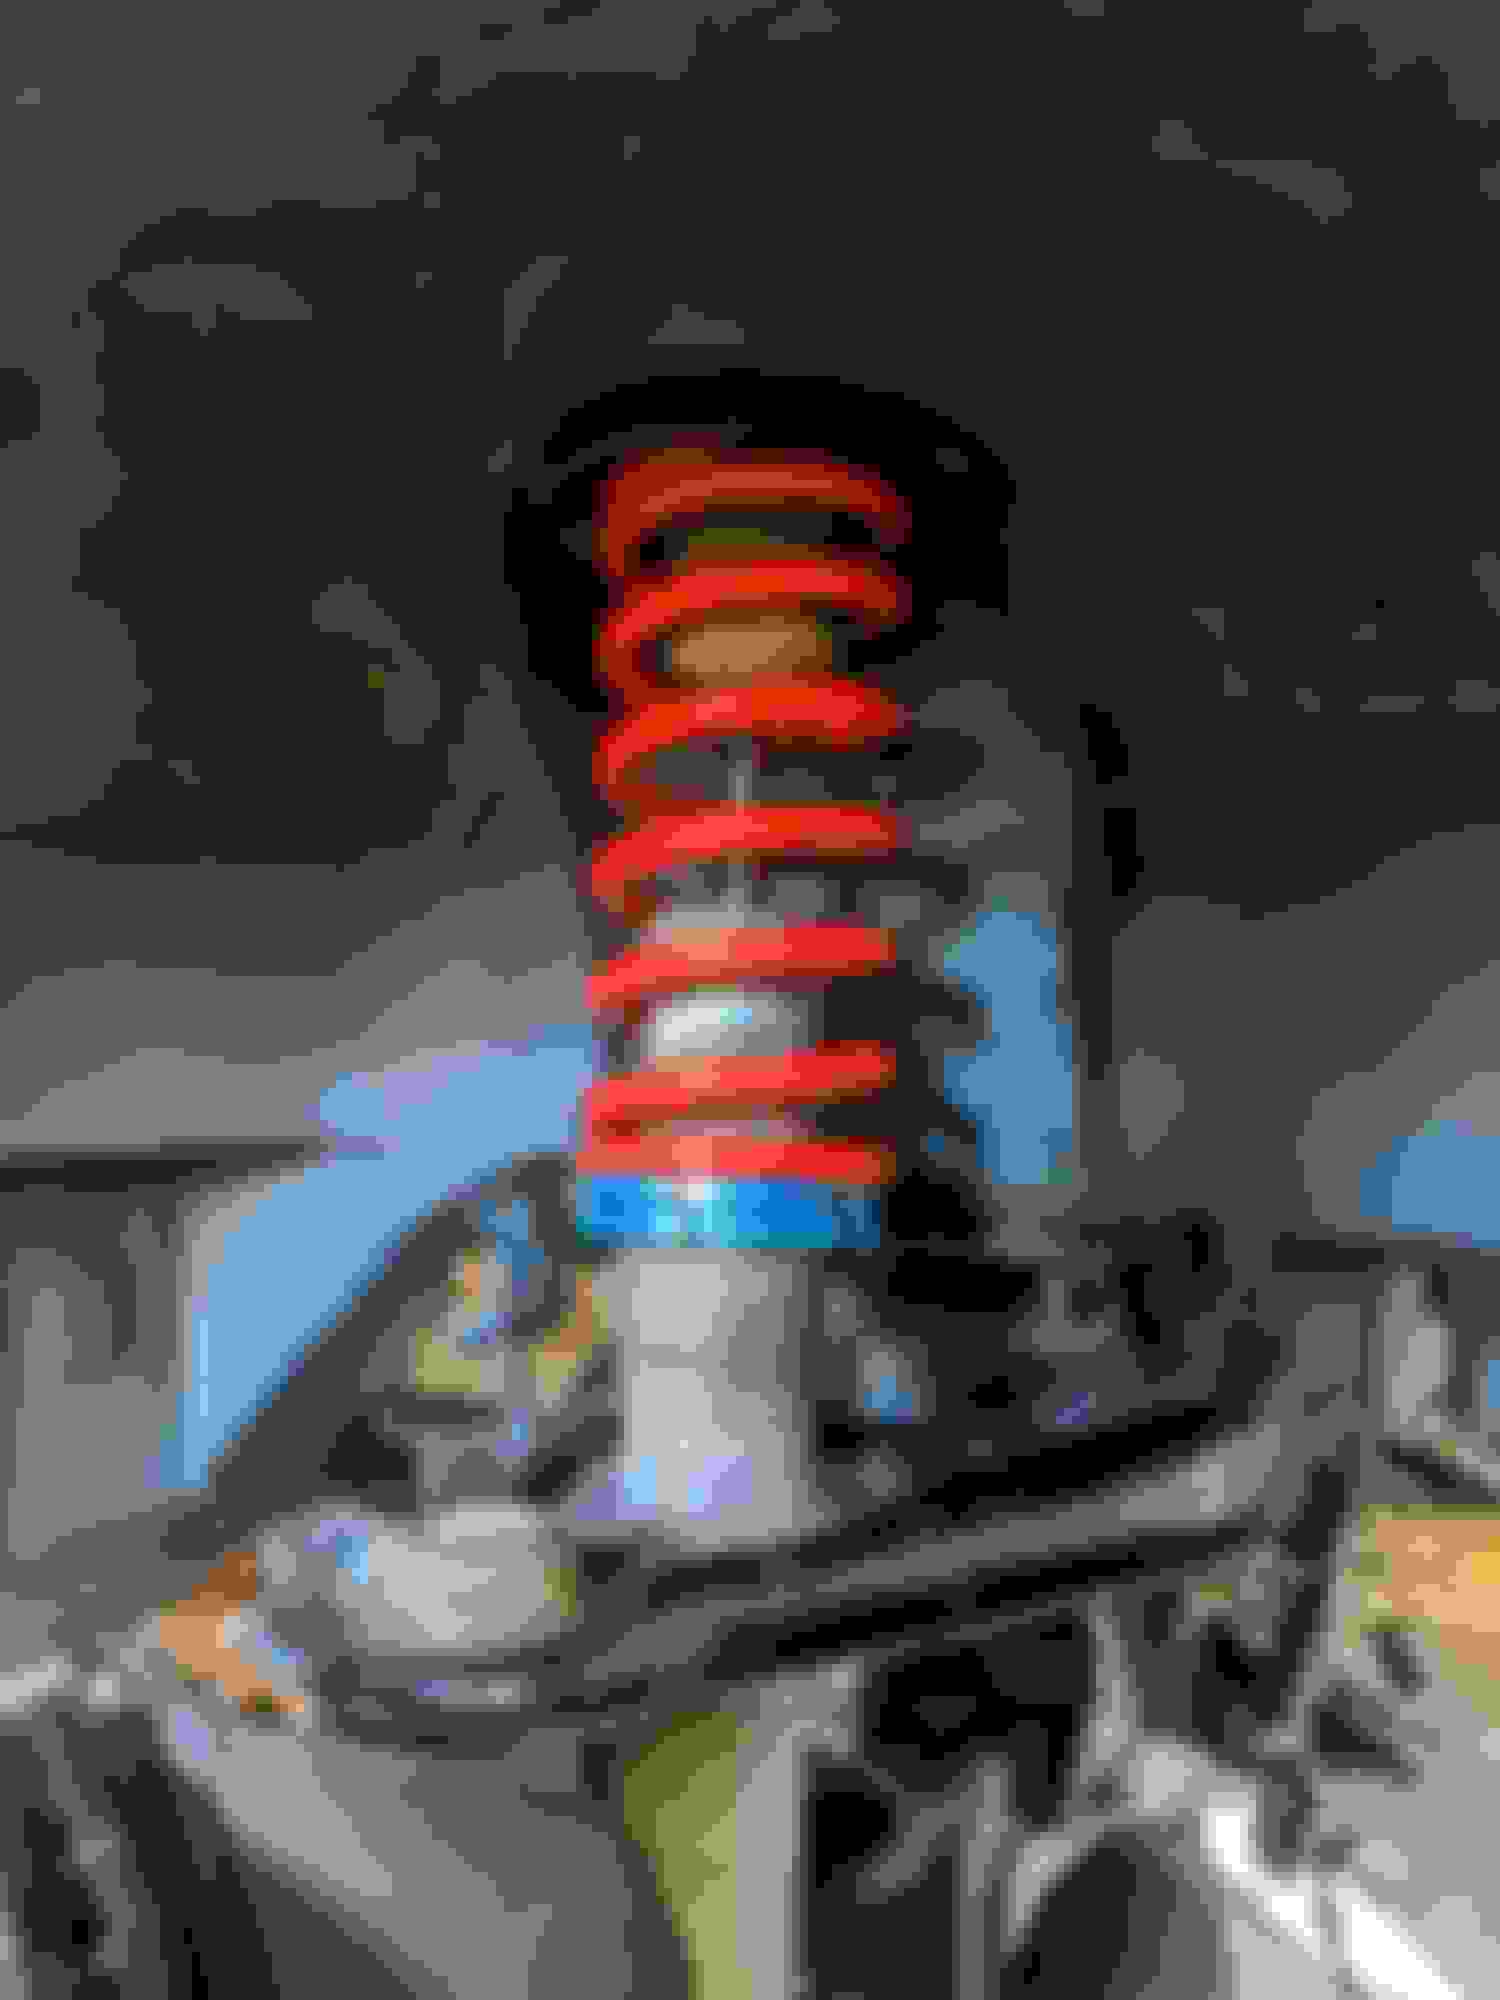
and realized that the harsh bottoming out feeling i would occasionally get in the front on my VMAXX's wasn't the shock running out of travel it was the shock spring binding, coil bind, because I run such a high ride hight haha. Thankfully FM has a solution for this. They sell a single 8in spring that replaces the 5in spring plus helper spring setup that they used to ship with. The single longer spring can run a higher ride hight without the risk of coil bind
You can see the signs of coil bind on the old spring
And in this pic the installed longer spring
Next up I'll be taking some heat control measures and running some fuel lines
What hood are you going to run? In the picture you have a normal valve cover on the motor, but K Miata sells the cut/ trimmed valve cover specifically for NAs.
What hood are you going to run? In the picture you have a normal valve cover on the motor, but K Miata sells the cut/ trimmed valve cover specifically for NAs.
No, that's the modified valve cover from Kmiata. I'm praying that my hood fits and I don't need subframe spacers.
 03-03-2020, 12:25 PM


 0
0