UK Greddy Turbo restore/rebuild
#1
Hi All , been doing an awful lot of reading on here lately, not much posting.
Previously posted short thread here - https://www.miataturbo.net/diy-turbo...a-turbo-71563/
Time for a proper build thread.
Car purchased Feb 2013. On the road August 2014, have been snagging/putting a few miles on it since. Still got some way to go.
I've kept a load of photos of the build on my flickr for anyone interested, in rough chronological order -https://www.flickr.com/photos/simonholehan/sets/72157632958932381/
In short, I bought the car as a runner, someones long term project, obviously spent a bit on it in some areas, but was a bit ropey, more a loose collection of (some admittedly decent and well chosen) parts than anything really. 18 month rebuilding later, here we are. A little welcome help from my Dad (welding) and mate (painter). It was slow - but it was also cheap, fun, I haven't paid a cent in labour, and I now have a really solid base for properly tuning the engine and running all the boosts!
So here's some yukky before -
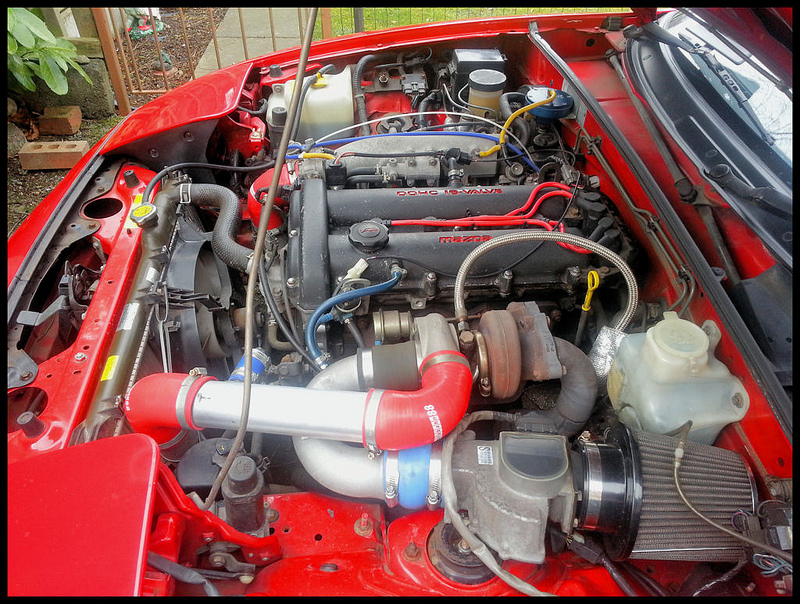 Day 1 Bay hotside by simonholehan, on Flickr
 Day 1 boost control & turbo by simonholehan, on Flickr
 Day 1 Console by simonholehan, on Flickr
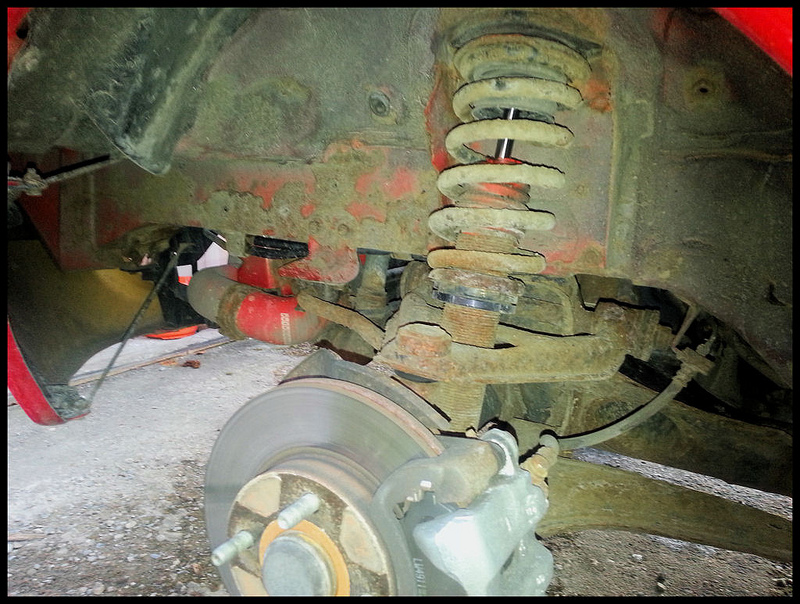 Day 1 NSF wheelarch by simonholehan, on Flickr
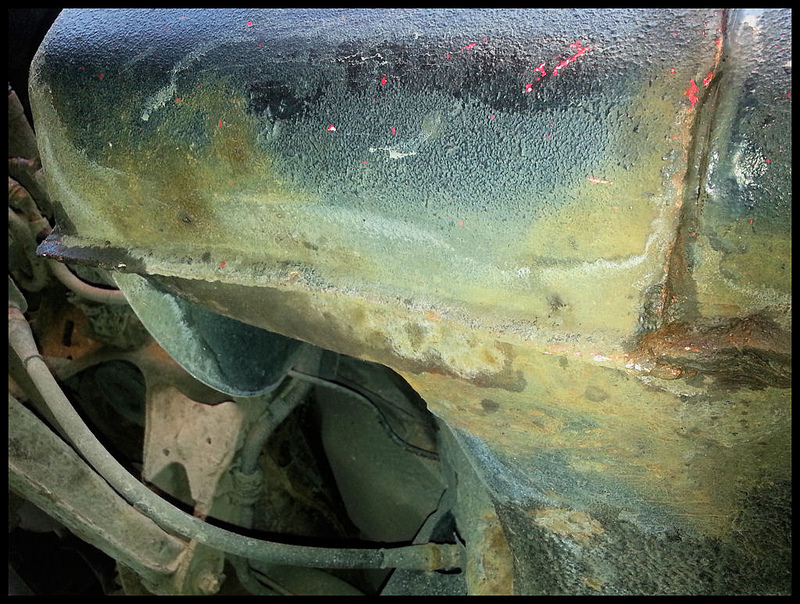 Day 1 OSR sill 3 by simonholehan, on Flickr
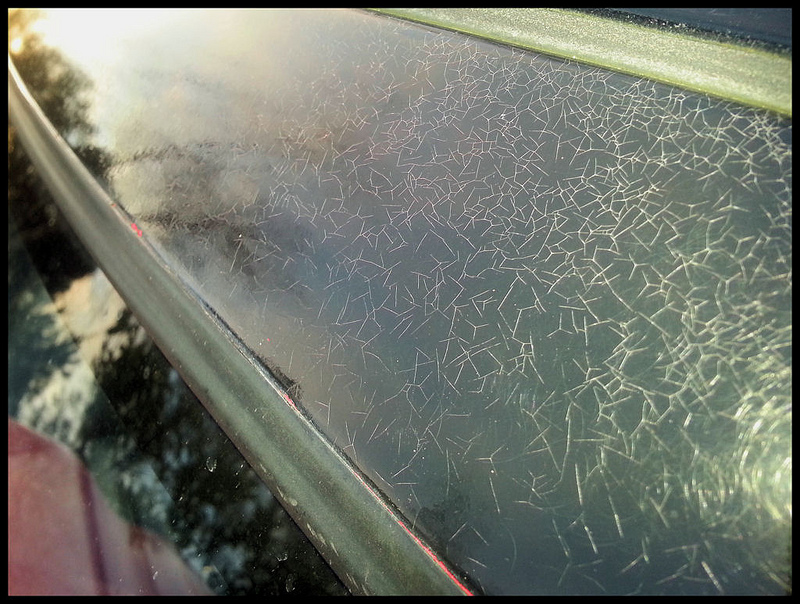 Day 1 screen surround by simonholehan, on Flickr
Add in a lot of this kind of stuff -
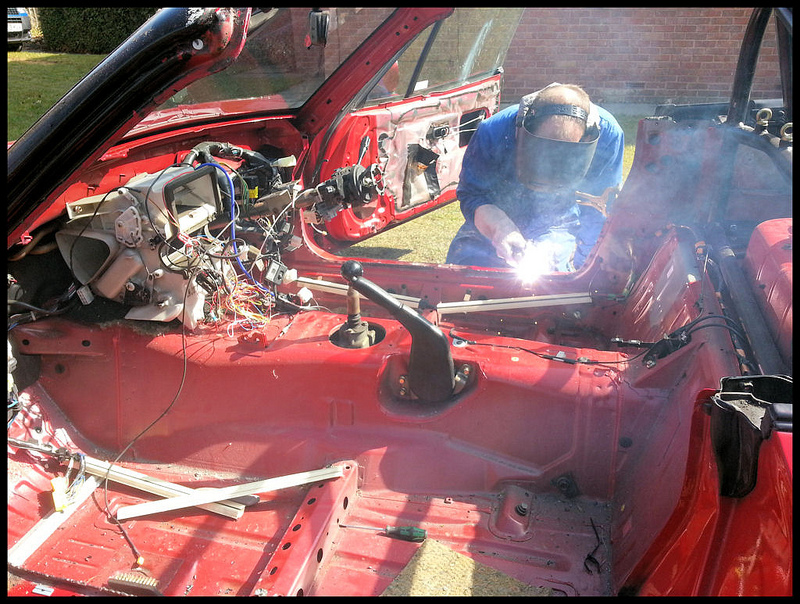 welding 2 by simonholehan, on Flickr
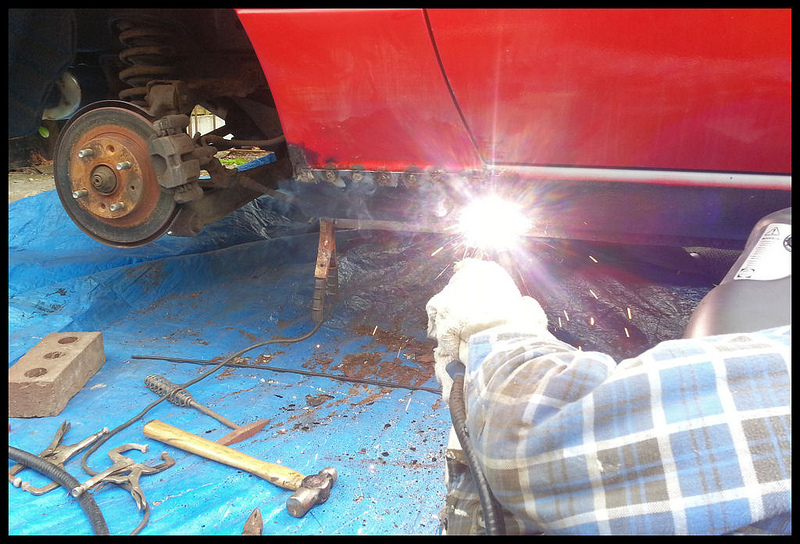 Welding outer sill by simonholehan, on Flickr
 Welding outer sill by simonholehan, on Flickr
 Playing cars by simonholehan, on Flickr (The Rev 5 SW20 I had last year which replaced my last Mazda - good car, but was not a patch on the roadster, hence this project)
 NS Innner rear sill by simonholehan, on Flickr
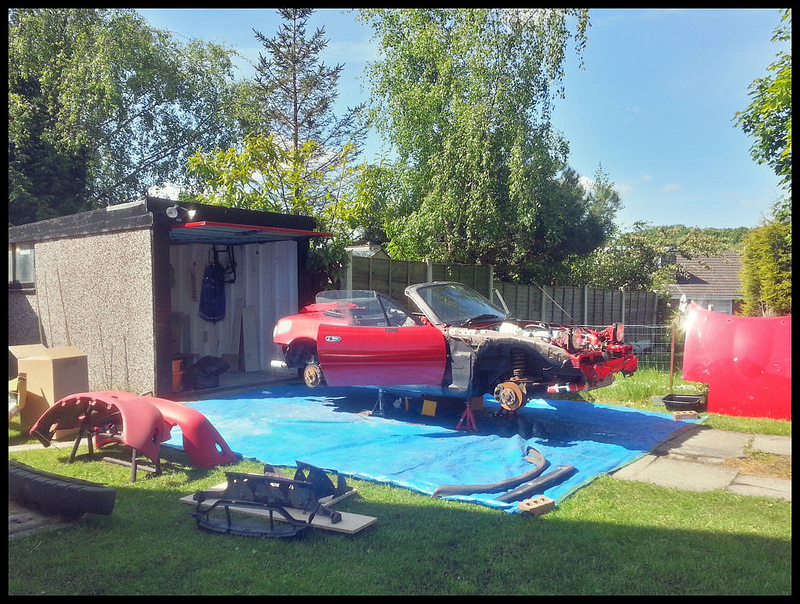 Sunshine garage by simonholehan, on Flickr
All the work has been done outside, right there on my drive out of my tiny UK style garage!
 Felt carpet 1 by simonholehan, on Flickr
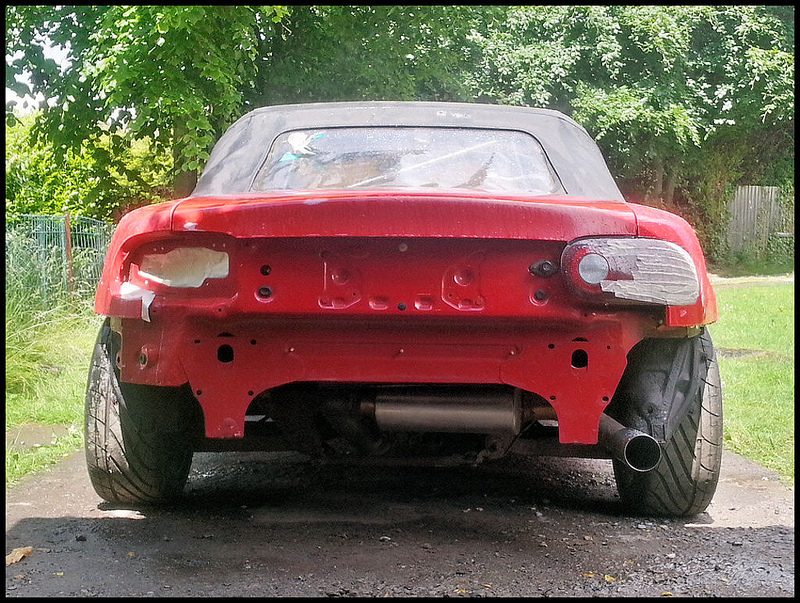 Rain again by simonholehan, on Flickr
 Paint 'booth' by simonholehan, on Flickr
 Paint 'booth' by simonholehan, on Flickr
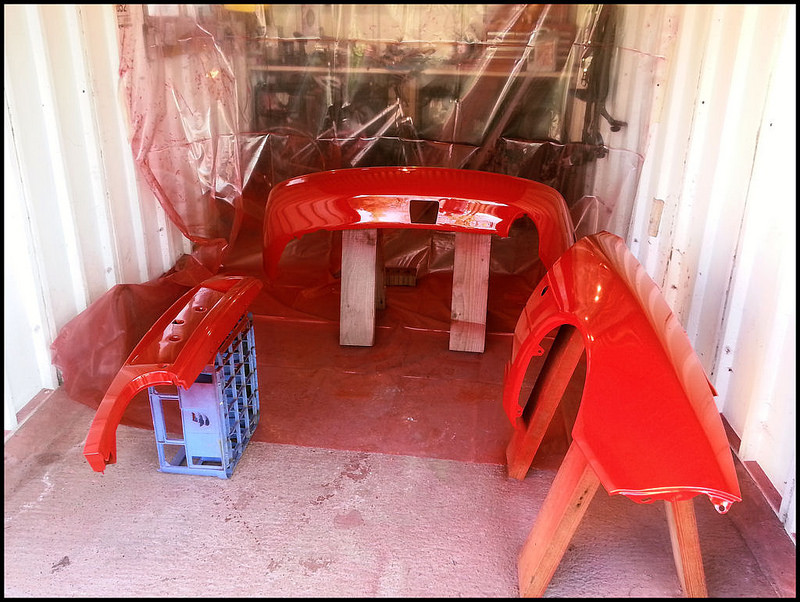 Drying paint by simonholehan, on Flickr
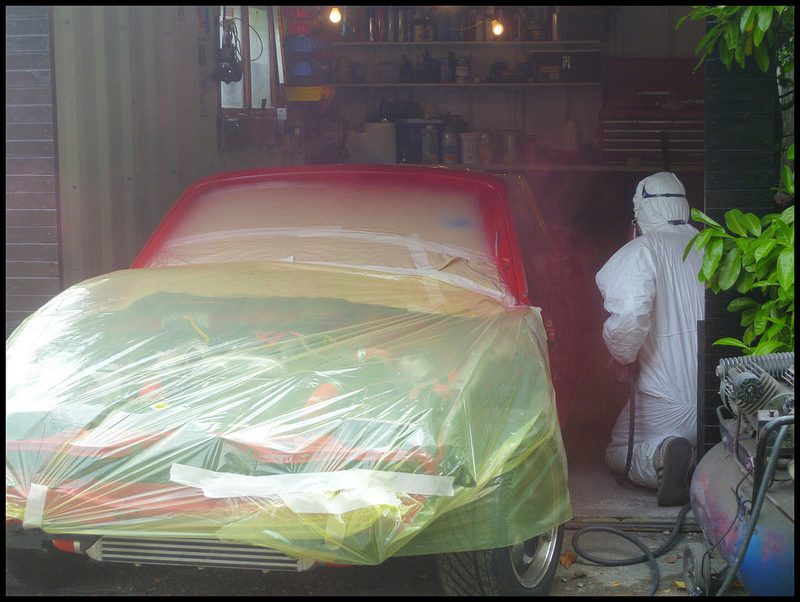 Spraying by simonholehan, on Flickr
 Spraying by simonholehan, on Flickr
Which brings us to this August, and the finished (ha!) article, I'm pretty please with it.
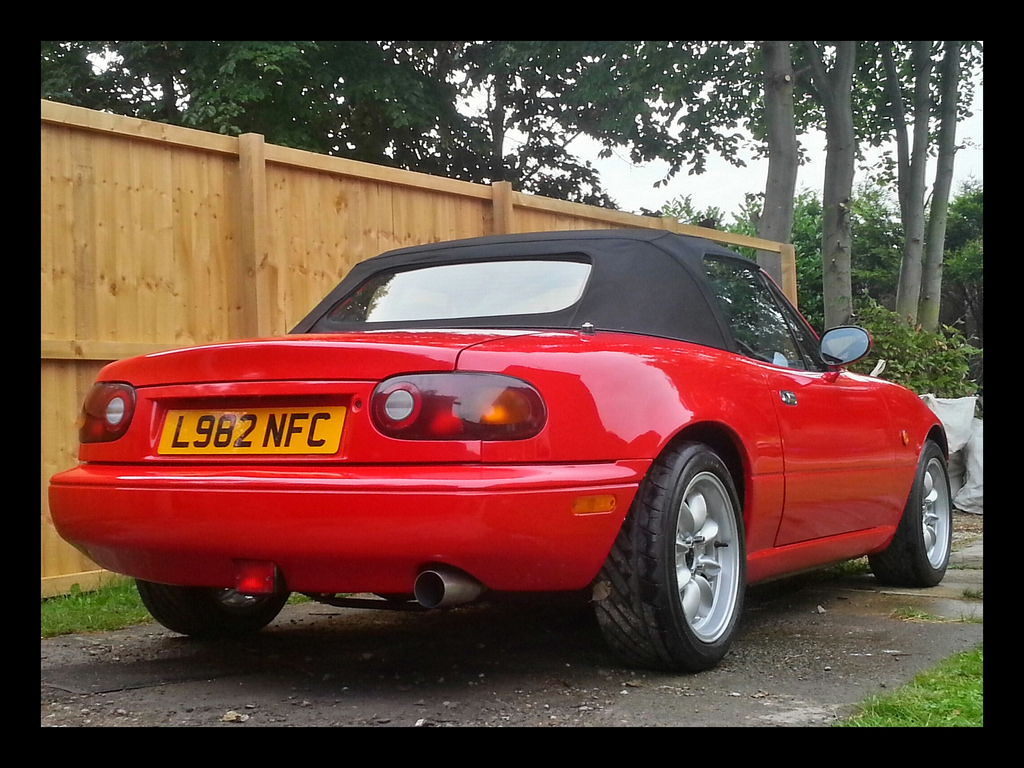 IMG_20140805_200504 by simonholehan, on Flickr
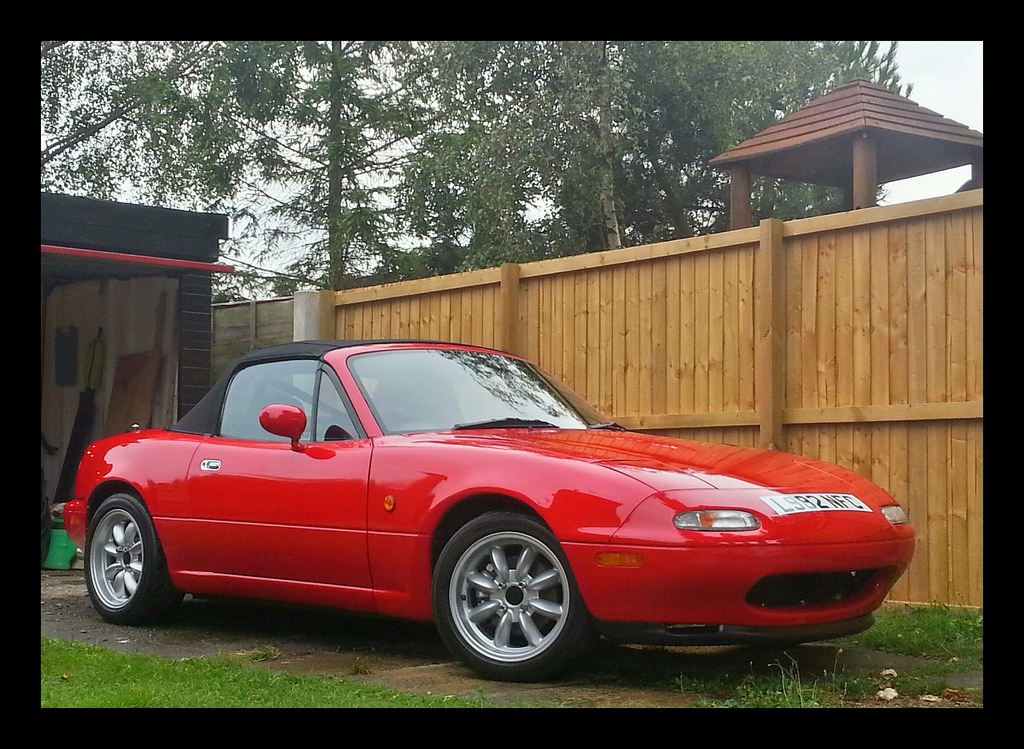 IMG_20140805_200900 by simonholehan, on Flickr
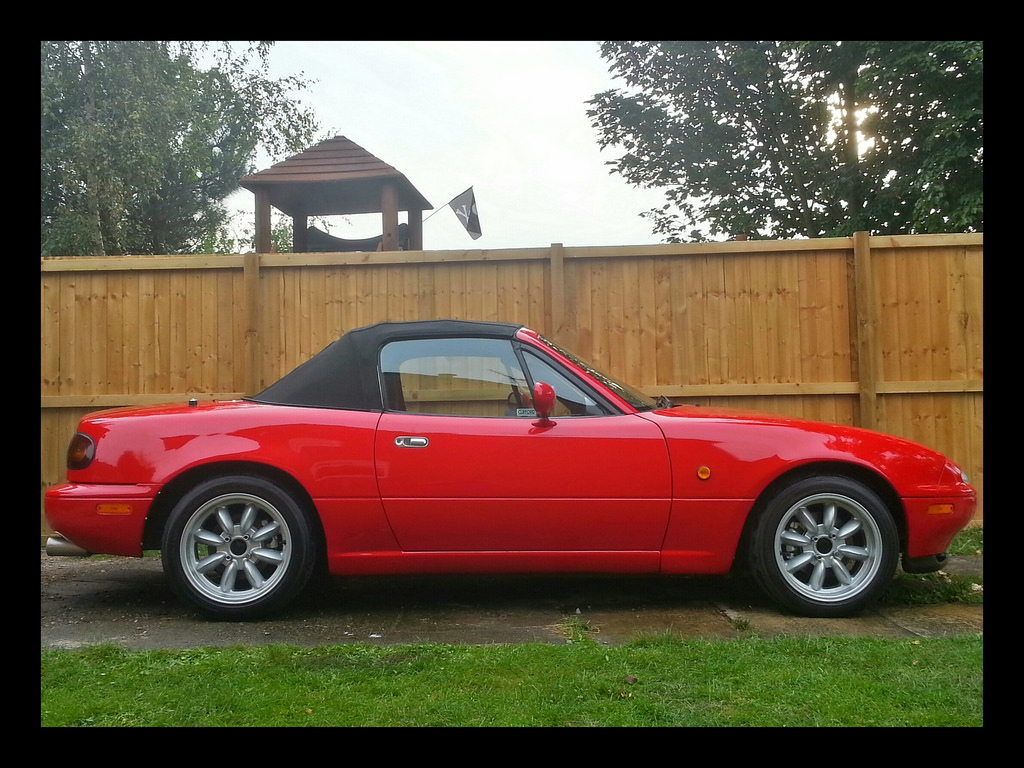 IMG_20140805_201105 by simonholehan, on Flickr
And at last on its maiden trip out a few weeks ago -
 Finished wide by simonholehan, on Flickr
So that is briefly -
Stripped to semi-bare shell
Lots of rust sorted
Part seam welded
All underside restored
All suspension restored, rebuilt Gaz shocks, all bolts, new diff, powdercoating etc etc
*some* bushes replace
Most hoses replaced
All ignition stuff replaced
All interior stripped and rebuilt with 2 stage insulation etc
New seats, dash, door cards etc.
Engine bay stripped
EVERYTHING servicable has been serviced. Every nut and bolt checked or replaced.
Belts, pump, filters blah blah...
New hood
OEM brakes all round, 1.8 sized, 4x new calipers
Turbo rebuilt+clocked
Everything aftermarket re-worked, re-wired, re-routed, replaced etc
New I/C and piping
New pattern wings
Full paintjob, all panels off in SU red
Lots and new fasteners everywhere
Lots of stainless fasteners where appropriate
etc etc...
Its a touch disheartening to put 18 months of work into a few sentences, but given I actually have a job and stuff, it was a hell of a lot of work!
I'm super pleased with the result though, pity I missed the great summer we had here but not to worry.
So in terms of the engine, I've basically sorted mostly what was there when I bought it (and was ostensibly working well, and had done lots of miles)
The current power spec then is a
1993 1600cc long nose BP6 @ ~ 80k miles, good balanced compression
Greddy cast manifold + fabbed downpipe
TDO5H-15G, rebuilt and re-balanced, clocked outlet straight down
Fabbed and mounted an ebay 5psi actuator
1.8 red injectors
AEM wideband
Gizzmo boost control
Vortech FMU
E-manage
Medium sized I/C done in the common fashion, 2" hot side 2.5" cool side piping.
TurboXS knock lite + bosch sensor
Its currently just running about 6 psi, with a reasonable DIY tune (rich and retarded), and I run on 99ron fuel.
But of course, its Emamage, so its a bit juicy, sluggish off-boost, and got a horrid flat spot (no o2 clamp!)
I think we all know whats next. Currently totting up either a Reverant solution or a DIY PNP, and some injectors, then that gives me a nice winter project to work on the engine and power side that the car now deserves!
Previously posted short thread here - https://www.miataturbo.net/diy-turbo...a-turbo-71563/
Time for a proper build thread.
Car purchased Feb 2013. On the road August 2014, have been snagging/putting a few miles on it since. Still got some way to go.
I've kept a load of photos of the build on my flickr for anyone interested, in rough chronological order -https://www.flickr.com/photos/simonholehan/sets/72157632958932381/
In short, I bought the car as a runner, someones long term project, obviously spent a bit on it in some areas, but was a bit ropey, more a loose collection of (some admittedly decent and well chosen) parts than anything really. 18 month rebuilding later, here we are. A little welcome help from my Dad (welding) and mate (painter). It was slow - but it was also cheap, fun, I haven't paid a cent in labour, and I now have a really solid base for properly tuning the engine and running all the boosts!
So here's some yukky before -
 Day 1 Bay hotside by simonholehan, on Flickr
 Day 1 boost control & turbo by simonholehan, on Flickr
 Day 1 Console by simonholehan, on Flickr
 Day 1 NSF wheelarch by simonholehan, on Flickr
 Day 1 OSR sill 3 by simonholehan, on Flickr
 Day 1 screen surround by simonholehan, on Flickr
Add in a lot of this kind of stuff -
 welding 2 by simonholehan, on Flickr
 Welding outer sill by simonholehan, on Flickr
 Welding outer sill by simonholehan, on Flickr
 Playing cars by simonholehan, on Flickr (The Rev 5 SW20 I had last year which replaced my last Mazda - good car, but was not a patch on the roadster, hence this project)
 NS Innner rear sill by simonholehan, on Flickr
 Sunshine garage by simonholehan, on Flickr
 All the work has been done outside, right there on my drive out of my tiny UK style garage!
 Felt carpet 1 by simonholehan, on Flickr
 Rain again by simonholehan, on Flickr
 Paint 'booth' by simonholehan, on Flickr
 Paint 'booth' by simonholehan, on Flickr
 Drying paint by simonholehan, on Flickr
 Spraying by simonholehan, on Flickr
 Spraying by simonholehan, on Flickr
Which brings us to this August, and the finished (ha!) article, I'm pretty please with it.
 IMG_20140805_200504 by simonholehan, on Flickr
 IMG_20140805_200900 by simonholehan, on Flickr
 IMG_20140805_201105 by simonholehan, on Flickr
And at last on its maiden trip out a few weeks ago -
 Finished wide by simonholehan, on Flickr
So that is briefly -
Stripped to semi-bare shell
Lots of rust sorted
Part seam welded
All underside restored
All suspension restored, rebuilt Gaz shocks, all bolts, new diff, powdercoating etc etc
*some* bushes replace
Most hoses replaced
All ignition stuff replaced
All interior stripped and rebuilt with 2 stage insulation etc
New seats, dash, door cards etc.
Engine bay stripped
EVERYTHING servicable has been serviced. Every nut and bolt checked or replaced.
Belts, pump, filters blah blah...
New hood
OEM brakes all round, 1.8 sized, 4x new calipers
Turbo rebuilt+clocked
Everything aftermarket re-worked, re-wired, re-routed, replaced etc
New I/C and piping
New pattern wings
Full paintjob, all panels off in SU red
Lots and new fasteners everywhere
Lots of stainless fasteners where appropriate
etc etc...
Its a touch disheartening to put 18 months of work into a few sentences, but given I actually have a job and stuff, it was a hell of a lot of work!
I'm super pleased with the result though, pity I missed the great summer we had here but not to worry.
So in terms of the engine, I've basically sorted mostly what was there when I bought it (and was ostensibly working well, and had done lots of miles)
The current power spec then is a
1993 1600cc long nose BP6 @ ~ 80k miles, good balanced compression
Greddy cast manifold + fabbed downpipe
TDO5H-15G, rebuilt and re-balanced, clocked outlet straight down
Fabbed and mounted an ebay 5psi actuator
1.8 red injectors
AEM wideband
Gizzmo boost control
Vortech FMU
E-manage
Medium sized I/C done in the common fashion, 2" hot side 2.5" cool side piping.
TurboXS knock lite + bosch sensor
Its currently just running about 6 psi, with a reasonable DIY tune (rich and retarded), and I run on 99ron fuel.
But of course, its Emamage, so its a bit juicy, sluggish off-boost, and got a horrid flat spot (no o2 clamp!)
I think we all know whats next. Currently totting up either a Reverant solution or a DIY PNP, and some injectors, then that gives me a nice winter project to work on the engine and power side that the car now deserves!
#5
I don't *think* they do!
We chose the times carefully depending on wind and weather. Nobody is too close, and nobody ended up with pink washing or window panes.
We actually intended to paint mainly in the garage or under the tent, but in practice we found the best results and LESS stuff got in the paint if we did it in the open air. A couple of parts got bugs in but the beauty of DIY was it cost nothing more than time to rub down and try again. We used a fast dry hardener similar to what a smart repair / Dent wizard type guy would use which again minimized the wet paints exposure!
Overall it looks great for DIY, glossy, uniform colour. The paint is thick so lots of headroom for polishing out scrapes.
#7
As this is primarily a road car, its important to have a stereo. When I bought the car the tombstone had been fillered and balsa wood-ed (?) with the gauges slapped in. That went in the bin. Seats wrecked/ripped, gaiter torn, carpets filthy etc. I just picked up a half decent, not too OTT headunit, and during the rebuild I replaced the seats with some really good condition early versions. There's a pair of Coax pioneer speakers in the doors, I used the same 3M rubber sound deadening as the cabin to dress the door skins - so the speakers sound great, deep, with no rattles. Useful audio with the top down! The carpets were all cleaned, door card cleaned up etc etc. I have a 'Luisi Nardi' steering wheel and a Voodoo weigthed ****. Just enough shine/brushed silver, no chrome overload here thanks. Its clean, not too far from standard, and IMO just 'right'.
 Interior by simonholehan, on Flickr
Maybe some nice pedals, not sure.
I now have my wideband in the top vent, boost controller and a nice stack boost gauge in the bottom. Like a pillock dropped the expensive stack boost gauge and now '0' is 10psi. Also - you can't see it at the bottom. I really don't want to cut holes in the dash but I'm gonna look for a good 1 bar, analog boost gauge (for useful resolution, no need to read to 3 bar!) and work out how to house it up high within view.
So today the other half was working, it was absolutely glorious when I got up and I know the car was full of Shells finest 99 octane. Would be rude not to head out, did just over 200 miles, saw an gaggle of NC owners on a club run from another region pass by with furious waving, car behaved in the nice cool air yet dry sticky roads in the sun.
Apologies for massive photo-whoring...
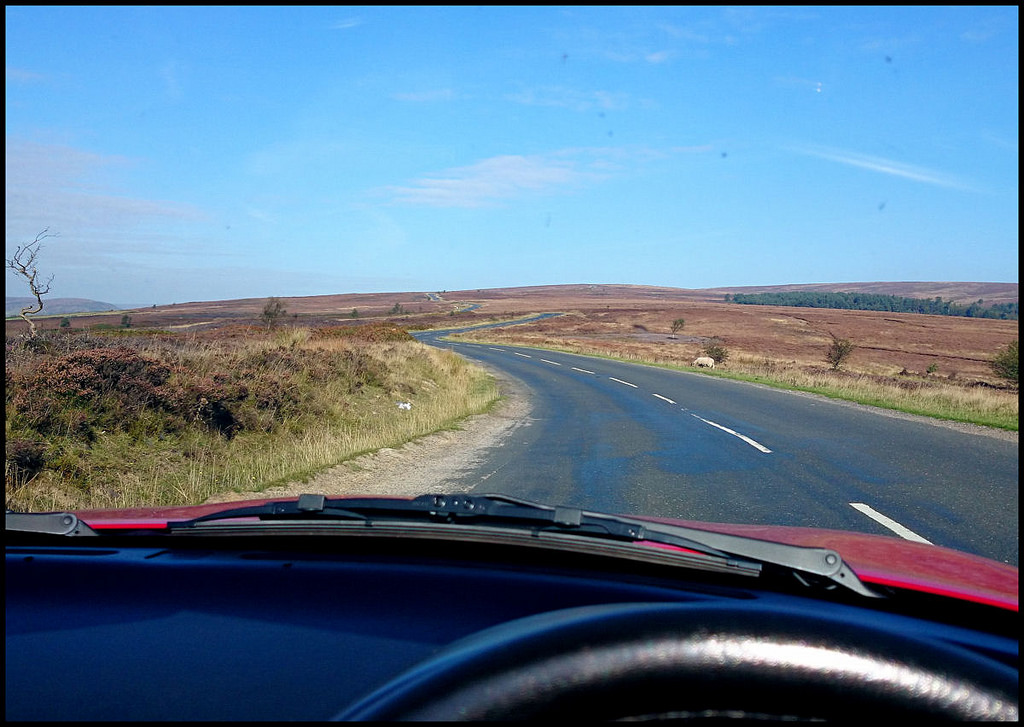 Blakey ahead by simonholehan, on Flickr
Classic British roads, proper Roadster territory, I'm very lucky! Just got to watch out for Sheep.
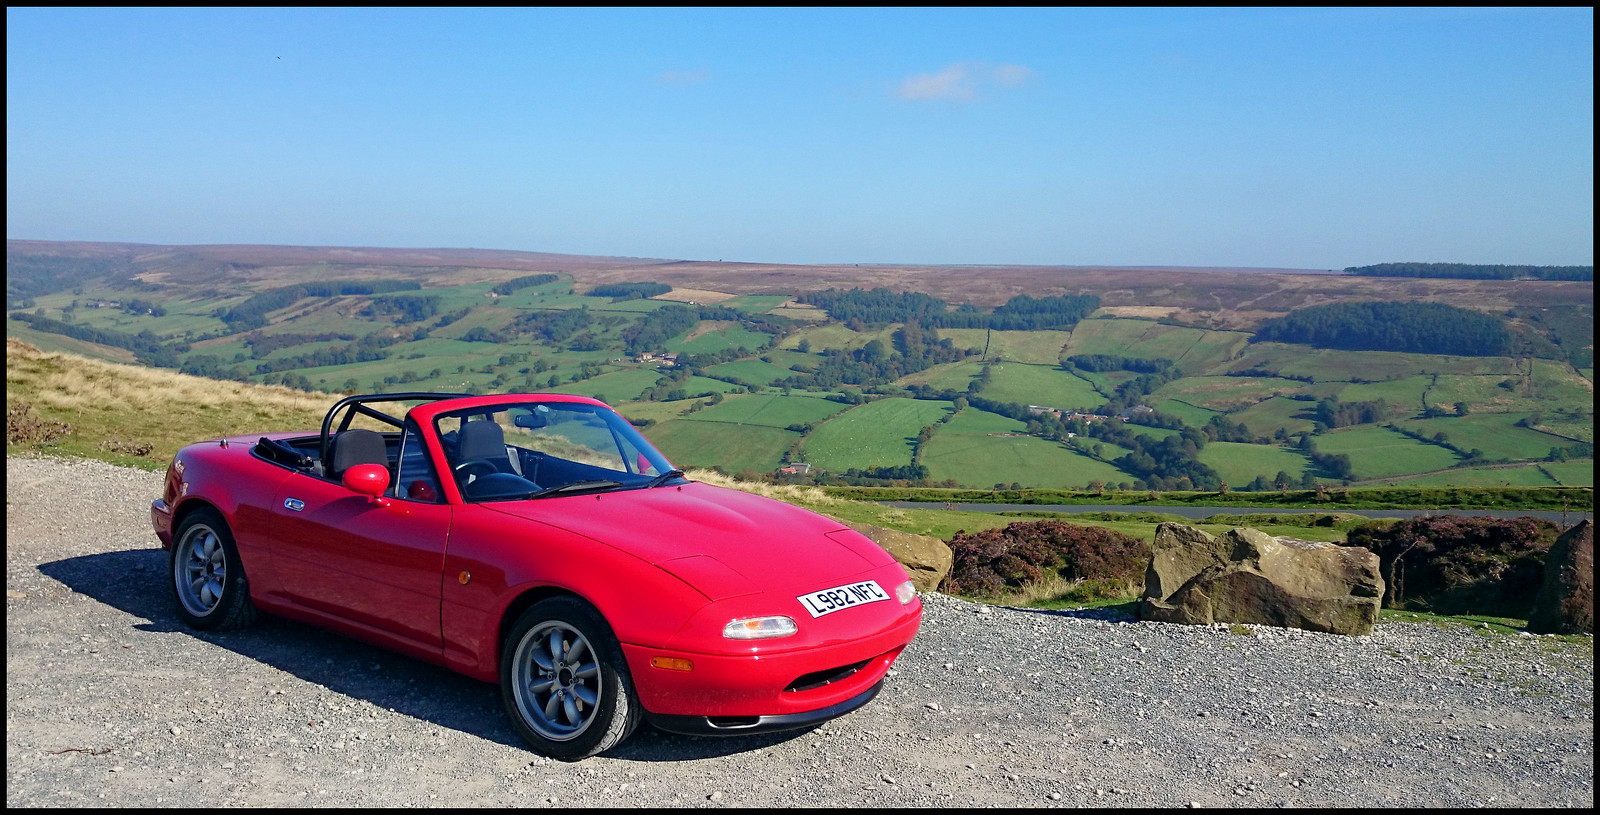 Chimney bank pano full size by simonholehan, on Flickr
Today was a good day Local show n' shine tomorrow in the Park.
 Interior by simonholehan, on Flickr
Maybe some nice pedals, not sure.
I now have my wideband in the top vent, boost controller and a nice stack boost gauge in the bottom. Like a pillock dropped the expensive stack boost gauge and now '0' is 10psi. Also - you can't see it at the bottom. I really don't want to cut holes in the dash but I'm gonna look for a good 1 bar, analog boost gauge (for useful resolution, no need to read to 3 bar!) and work out how to house it up high within view.
So today the other half was working, it was absolutely glorious when I got up and I know the car was full of Shells finest 99 octane. Would be rude not to head out, did just over 200 miles, saw an gaggle of NC owners on a club run from another region pass by with furious waving, car behaved in the nice cool air yet dry sticky roads in the sun.
Apologies for massive photo-whoring...
 Blakey ahead by simonholehan, on Flickr
 Classic British roads, proper Roadster territory, I'm very lucky! Just got to watch out for Sheep.
 Chimney bank pano full size by simonholehan, on Flickr
Today was a good day
 Local show n' shine tomorrow in the Park.
#11
Awesome resto project - very tasteful (the wheels and such).
I am, however, a bit biased toward Classic Red 1.6 NAs: https://www.miataturbo.net/build-thr...e-51374/page4/
-Zach
I am, however, a bit biased toward Classic Red 1.6 NAs: https://www.miataturbo.net/build-thr...e-51374/page4/
-Zach
#13
Thanks all.
My gearbox is getting very noisy. Originally presumed it was the difference (1.6puny diff) but swapped it out for a spare vlsd and it was only part of the story. Gearbox is definitely on the way out, it's on 90k, done maybe 20k with boost?
Guess I should source a replacement box. Maybe get a box, prop, different and shafts from a 99. I know I should put a torsen in (my 94 jdm car that it) but they have gone way up in price recently.
My main worry is strength of the different, not traction - strong open diff better than weak semi-locking different for a road car?
Anyway last time I pulled a clutch on the drive I nearly died bench pressing it back in from below. So I might pull the motor.
Gives me a chance to clean up, paint a few bits... What else is worth doing with the motor out?
#15
Text update, no pics. Its mega-miserable weather season now so it probably won't move till the new year.
I posted on another thread a while back -
So, my mileage varied. Fitted replacement gearbox (lovely), then got all excited, put my foot down, and munched through the 1.6 VLSD in a day or two. Its not given up, but it sounds horrendous.
Early type 4.1 ratio Torsen purchased along with prop. Just need to get some half shafts. Will change it over Christmas holidays.
While the engine was out to do the box I checked the clutch (seemed recent), cleaned up the bay, ditched the convoluted stupid clutch line (which I don't think you LHD guys have).
also had to fix up my rain rail as the car was pissing water in, and have pulled out the knocklite, wideband, boost gauge etc to tidy up even further.
Hopefully - that means that once diff is in, the car will be mechanically good to just get some good miles driving in in the new year.
I posted on another thread a while back -
Early type 4.1 ratio Torsen purchased along with prop. Just need to get some half shafts. Will change it over Christmas holidays.
While the engine was out to do the box I checked the clutch (seemed recent), cleaned up the bay, ditched the convoluted stupid clutch line (which I don't think you LHD guys have).
also had to fix up my rain rail as the car was pissing water in, and have pulled out the knocklite, wideband, boost gauge etc to tidy up even further.
Hopefully - that means that once diff is in, the car will be mechanically good to just get some good miles driving in in the new year.
#17
Wow, was that November?
Update - I've built and installed a kitchen, sorted the garden, had a holiday, worked loads... Which meant time to sort the car out.
Now back on the road with an early Torsen. It drives so much better, just like how I remember my old 1.8 S-Special JDM car.
You have no idea.
Dropped the whole subframe out. Drive axles - sledgehammer, presses, fire, more hammer, more fire, more hydraulic press (I am an engineer for a firm that makes Buses - so you can imagine the size of the presses used to press bearings and kingpins into a Bus axle), more hammer, etc etc.
Then the long lower bolts, they all needed cutting into segments and much hammering...
The diff bushes got chewed to bits, then cracked a diff casing trying to press them, so needed a new case.
Eventually, its all back together now with the subframe and arms all blasted and painted, some new bushes, shocks cleaned up etc etc.
Car has now (this week) gone into daily use. I've owned it 3 years and driven less than 1000 miles - that is criminal. I am going to drive the **** out of it this year. And I need to check the cooling system is ok then have a go at this trackday lark!
Update - I've built and installed a kitchen, sorted the garden, had a holiday, worked loads... Which meant time to sort the car out.
Now back on the road with an early Torsen. It drives so much better, just like how I remember my old 1.8 S-Special JDM car.
Dropped the whole subframe out. Drive axles - sledgehammer, presses, fire, more hammer, more fire, more hydraulic press (I am an engineer for a firm that makes Buses - so you can imagine the size of the presses used to press bearings and kingpins into a Bus axle), more hammer, etc etc.
Then the long lower bolts, they all needed cutting into segments and much hammering...
The diff bushes got chewed to bits, then cracked a diff casing trying to press them, so needed a new case.
Eventually, its all back together now with the subframe and arms all blasted and painted, some new bushes, shocks cleaned up etc etc.
Car has now (this week) gone into daily use. I've owned it 3 years and driven less than 1000 miles - that is criminal. I am going to drive the **** out of it this year. And I need to check the cooling system is ok then have a go at this trackday lark!
#18
Trackday booked next weekend. Car running great, other than my exhaust is wrecked - its a cheap powerflow custom job, but they have not built it very well and left a silencer box hanging way too low. This has been catching and is now on the verge of bursting open.
I will probably replace with an off-the-shelf item from MX-5 parts -yes, its a bit small, but they are well made and I'm not running ALLOFIT.
In other news, my new standalone ECU has arrived and awaiting install after trackday - see here - https://www.miataturbo.net/ecus-tuni...7/#post1239149
I will probably replace with an off-the-shelf item from MX-5 parts -yes, its a bit small, but they are well made and I'm not running ALLOFIT.
In other news, my new standalone ECU has arrived and awaiting install after trackday - see here - https://www.miataturbo.net/ecus-tuni...7/#post1239149
Last edited by snotrag; 06-10-2015 at 08:57 AM. Reason: typo
#20
Trackday initiation - passed with flying colours.
Car was great. No overheating, oil pressure generally good, tyres good for about 20 minutes before they got hot. Handled great, engine felt strong, really came alive.
And it was a crap tonne of fun. Did some novice sessions in the morning, should have gone for intermediate as there were a few plodders, but not a problem. Then OPL all afternoon, my brain was giving up before the car (look at my race face! Scowling with concentration!).
So next step - get the ECU in and tuned, and match that with the cooling upgrades and I should be making good, safe power. And book more track time!
Couple of great photos from Phil @ PGDesigns.


