Track and occasional street MSM

 05-27-2015, 08:24 PM
#83
Senior Member
Thread Starter
iTrader: (3)

Join Date: Jul 2011
Location: STL
Posts: 524
Total Cats: 24
Installed some Xidas 1.5 weeks ago. Drove around on them a bit, mostly on full soft, with 800/500 springs. I am surprised at how well they absorb everything. Much less jarring than VMAXXXXXXX and yet much stiffer, in a good way.
So then I got the car aligned and corner weighted, today. And set them half way though the adjusters. Seriously impressed. Nice weather and day off work seemed better spent enjoying the car than tinkering, so I left them like that all afternoon. Xidas are awesome and I can't wait to get them on the track.
Happy with how the corner weighting turned out. We adjusted the left front 2 turns and nothing else. Connecting the sway bars added a total of 0lbs to each corner. Either I got lucky setting ride heights, or this car is super easy to setup.
The heaviest Miata in existence
LF 698 RF 665
LR 687 RR 645
50% F/R **** yeah
Pretty much ready for Hallett next month.

Reply
 0
0

0
05-31-2015, 08:18 PM
#86
Senior Member
Thread Starter
iTrader: (3)
Join Date: Jul 2011
Location: STL
Posts: 524
Total Cats: 24
I picked this hardtop up from Scrambles, it needs a bit of work.
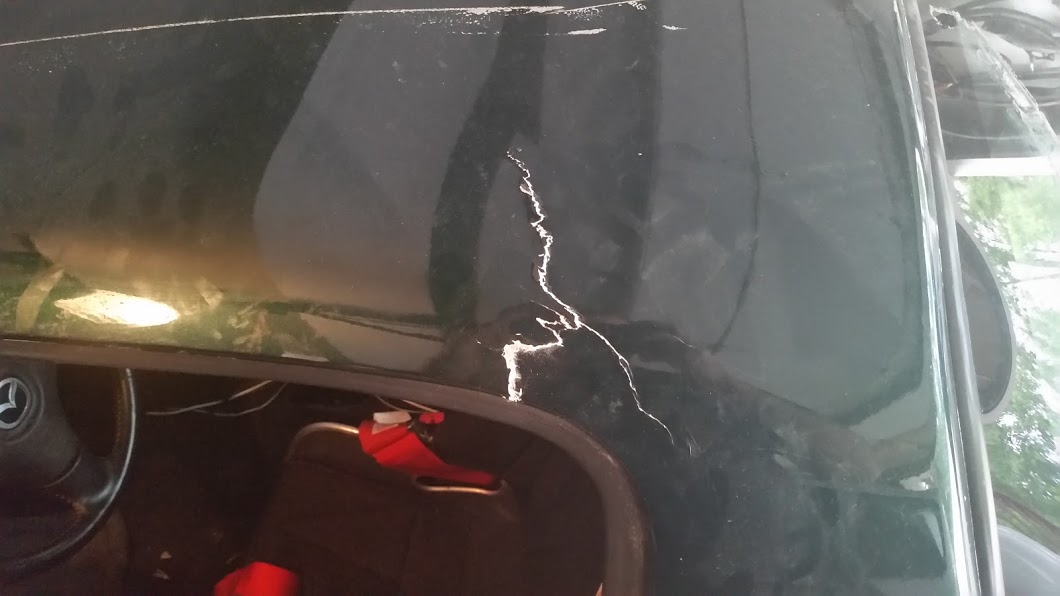
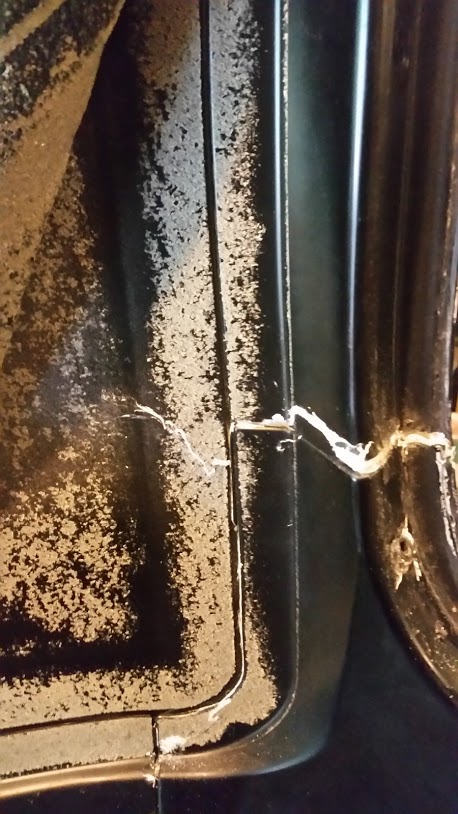
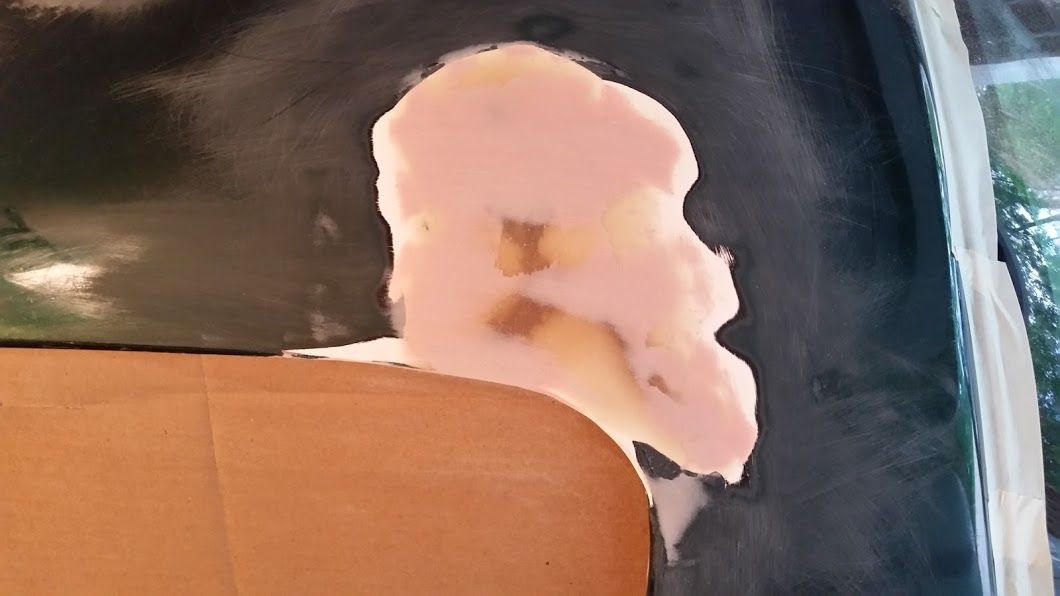
Once I got some frankenstein's and bolted in place, it trued up and the work began. Cut out the crack and did some sanding.

My first fiberglass repair
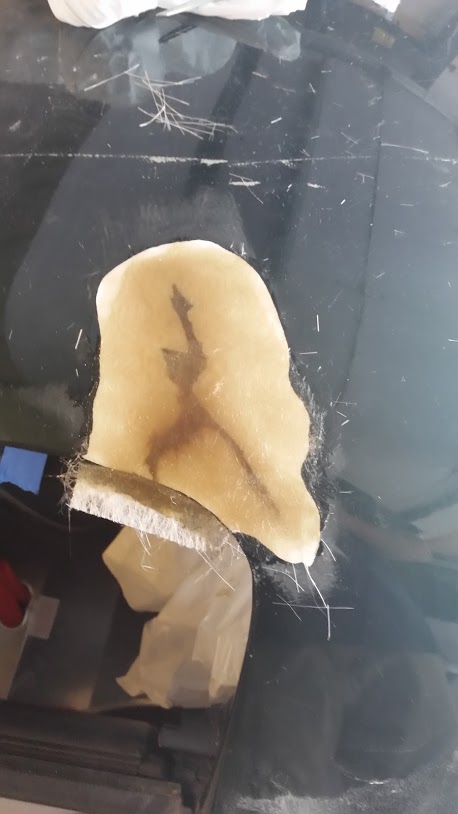
Not counting overlap, 3 progressively larger layers up top and 2 underneath. I hope that's enough, the larger gaps could have used another layer or 2 I think but the resin was turning to gel so that will have to do.
Depending on how it looks after sanding and filler, will either spray can it black or I'll pick up a spray gun from HF and have some Titanium Gray mixed up.
Once I got some frankenstein's and bolted in place, it trued up and the work began. Cut out the crack and did some sanding.
My first fiberglass repair
Not counting overlap, 3 progressively larger layers up top and 2 underneath. I hope that's enough, the larger gaps could have used another layer or 2 I think but the resin was turning to gel so that will have to do.
Depending on how it looks after sanding and filler, will either spray can it black or I'll pick up a spray gun from HF and have some Titanium Gray mixed up.
Reply
0
0

 05-31-2015, 08:30 PM
#88
Senior Member
Thread Starter
iTrader: (3)
Join Date: Jul 2011
Location: STL
Posts: 524
Total Cats: 24
YouTube, where else? This was probably the best video I found
Bought the 1qt kit from Advanced and it was way too much. The 1/2 pint would have been plenty. Although considering they were only a couple dollars difference after a $10 off coupon maybe it wasn't such a bad idea.
Assuming the repair actually holds up, fiberglass repair is incredibly easy.
Bought the 1qt kit from Advanced and it was way too much. The 1/2 pint would have been plenty. Although considering they were only a couple dollars difference after a $10 off coupon maybe it wasn't such a bad idea.
Assuming the repair actually holds up, fiberglass repair is incredibly easy.
Reply
0
0
 07-23-2015, 11:41 PM
#91
Senior Member
Thread Starter
iTrader: (3)
Join Date: Jul 2011
Location: STL
Posts: 524
Total Cats: 24
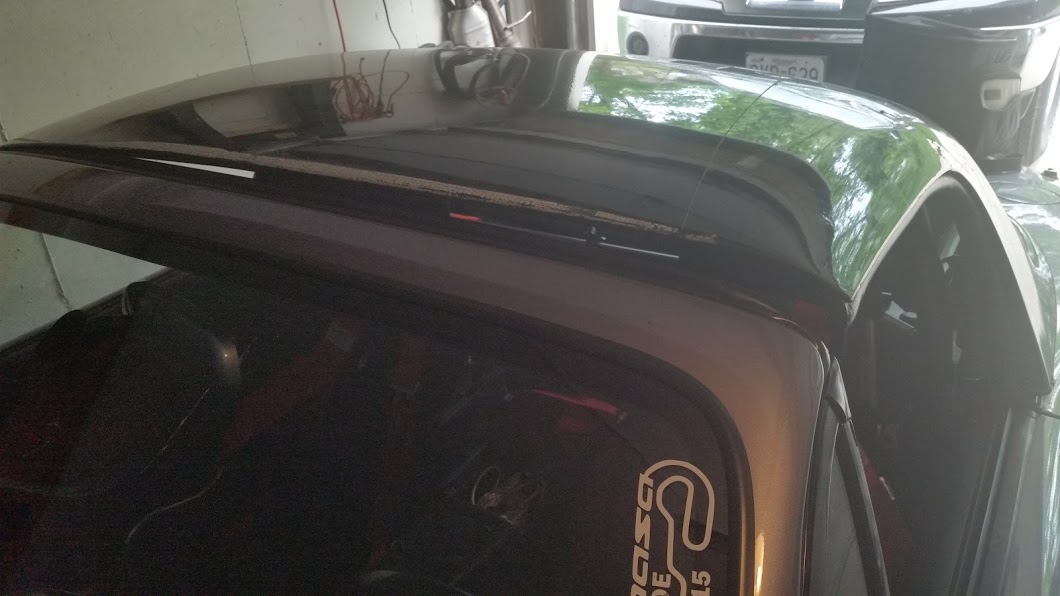
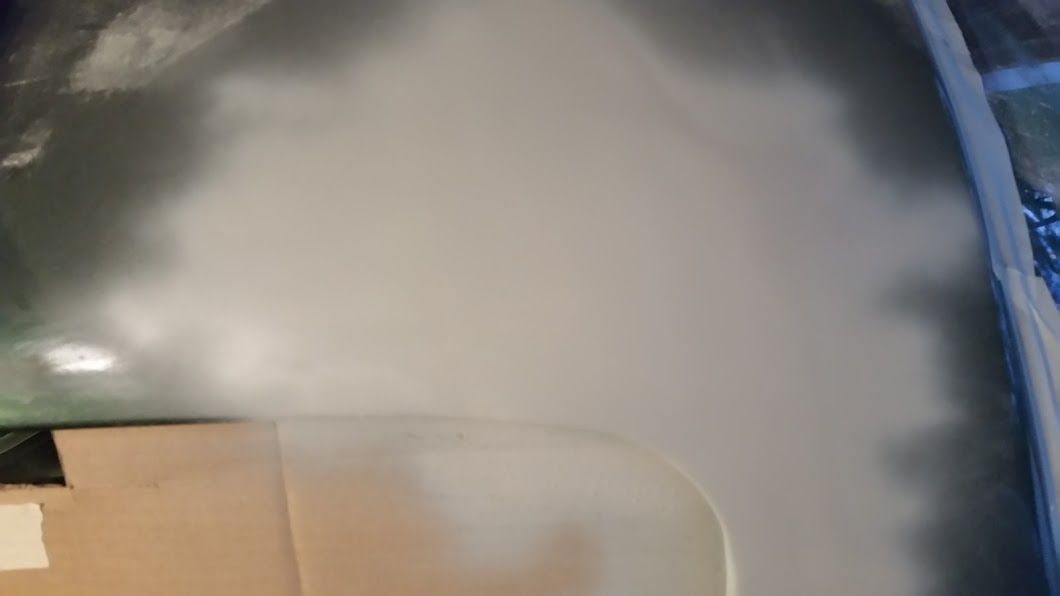
It's rained non-stop through all of June and part of July before switching straight into St Louis' awesome hot and humid summer weather. This has made painting difficult. Finally had an evening of decently low, for us anyway, humidity and I got to lay down some primer. After 600 grit wet sanding it now looks like this

Somewhere under this is a fiberglass repair

Somewhere under this is a fiberglass repair
Reply
0
0
08-25-2015, 11:47 PM
#92
Senior Member
Thread Starter
iTrader: (3)
Join Date: Jul 2011
Location: STL
Posts: 524
Total Cats: 24
Got sick of the hood prop falling out with every wind gust at the track, marring the fender and hood paint as it comes slamming down. So I fixed that with an IL Motorsports hood lift kit. They probably weigh twice what the stock prop does, and is totally worth the penalty.

Last trackday I watched as tech grabbed the top of my seat and wiggled it around a bit. Never noticed how much it moved before. He didn't say anything but it concerned me. So I added a pair of back braces from I/O Port. Now the whole car moves when you grab the seat anywhere. Passenger side got one as well.

And I finally "finished" the hardtop repair. In retrospect I should have just taken it to Maco after doing the prep work. As it turns out, my aerosol can painting skills are a little lacking. Paint job is far from perfect with dust and other crap in the base and clear coats, a slight zebra effect, almost no paint on the leading edge, and a giant run in both base and clear above the driver's window. Wet sanded with 1500 after the clear dried and that scuffed it all up, a light polish by hand helped but it definitely needs some 2000/2500 and a powered buffer to get a decent shine out of it. Too cheap to buy a HF buffer for this so not sure if that will ever get done. Either way, I'm still happy with how it came out and my total costs. All together I'm only at $350-400 for the top

The above has all taken place the last month or 2. Last night I went to Home Depot Racing and picked up some supplies for the latest project. Initial plans for the side mounts won't work out, a couple oil cooler lines are in the way, so another trip is in order to finish it up. Ok, who am I kidding, more like 2-3 more trips.

Last trackday I watched as tech grabbed the top of my seat and wiggled it around a bit. Never noticed how much it moved before. He didn't say anything but it concerned me. So I added a pair of back braces from I/O Port. Now the whole car moves when you grab the seat anywhere. Passenger side got one as well.
And I finally "finished" the hardtop repair. In retrospect I should have just taken it to Maco after doing the prep work. As it turns out, my aerosol can painting skills are a little lacking. Paint job is far from perfect with dust and other crap in the base and clear coats, a slight zebra effect, almost no paint on the leading edge, and a giant run in both base and clear above the driver's window. Wet sanded with 1500 after the clear dried and that scuffed it all up, a light polish by hand helped but it definitely needs some 2000/2500 and a powered buffer to get a decent shine out of it. Too cheap to buy a HF buffer for this so not sure if that will ever get done. Either way, I'm still happy with how it came out and my total costs. All together I'm only at $350-400 for the top
The above has all taken place the last month or 2. Last night I went to Home Depot Racing and picked up some supplies for the latest project. Initial plans for the side mounts won't work out, a couple oil cooler lines are in the way, so another trip is in order to finish it up. Ok, who am I kidding, more like 2-3 more trips.
Reply
0
0
09-16-2015, 04:45 PM
#93
Senior Member
Thread Starter
iTrader: (3)
Join Date: Jul 2011
Location: STL
Posts: 524
Total Cats: 24
Splitter is done and survived some grass trimming at Hallett
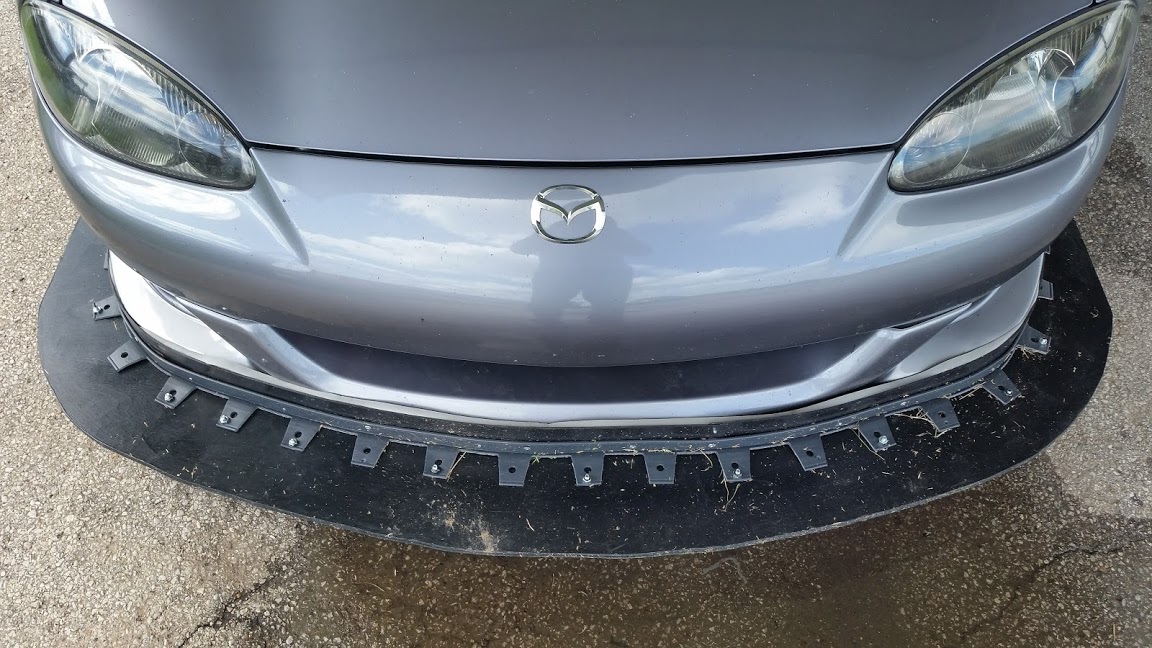
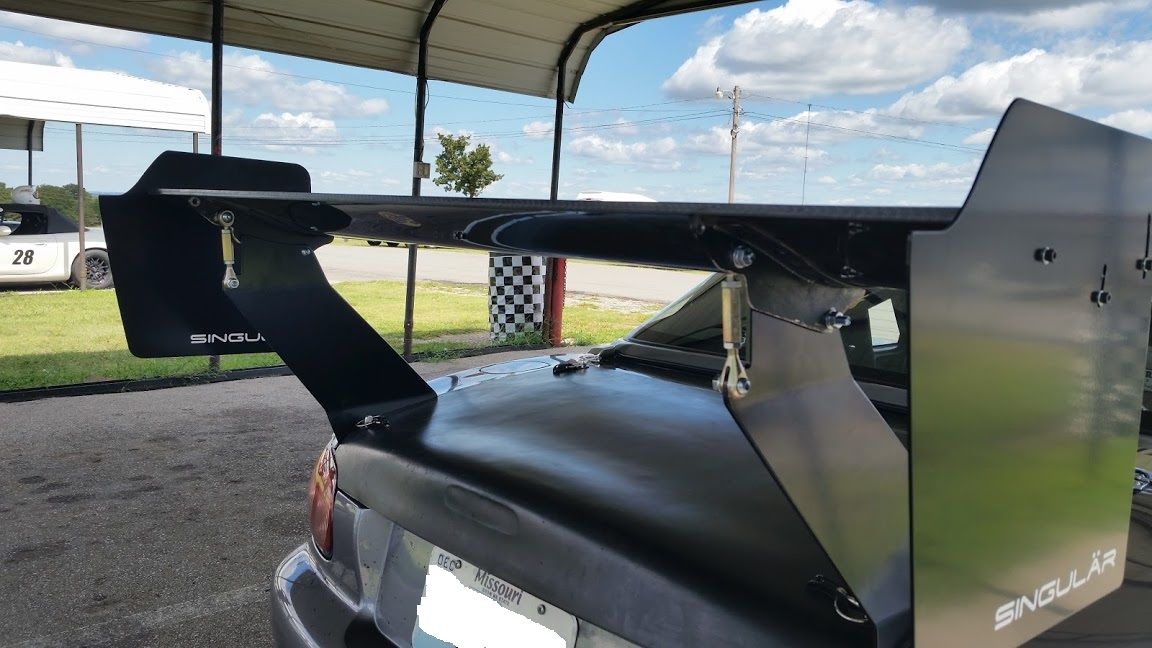
I had some custom CoT mounts made and they are awesome. Also added the Singular end plates and a Treasure Coast Miata fiberglass trunk lid.

Had some minor brake issues late Friday with a sticky caliper and this happened

I had some custom CoT mounts made and they are awesome. Also added the Singular end plates and a Treasure Coast Miata fiberglass trunk lid.
Had some minor brake issues late Friday with a sticky caliper and this happened
Last edited by midpack; 09-17-2015 at 10:49 PM. Reason: fixed broken images
Reply
0
0
10-11-2015, 08:23 PM
#94
Senior Member
Thread Starter
iTrader: (3)
Join Date: Jul 2011
Location: STL
Posts: 524
Total Cats: 24
Brakes are back together with Dynapro + PFC01 up front and M-Tuned bracket + sport caliper/rotor + PFC11 in the rear. These pads have much better street manners than DTC60s, so much grip even when cold. Can't wait to try them on the track.
Weather is nice so cleaned the car up and headed out to Augusta Brewery for lunch and a beer. Couldn't help myself and took the long way there and back.
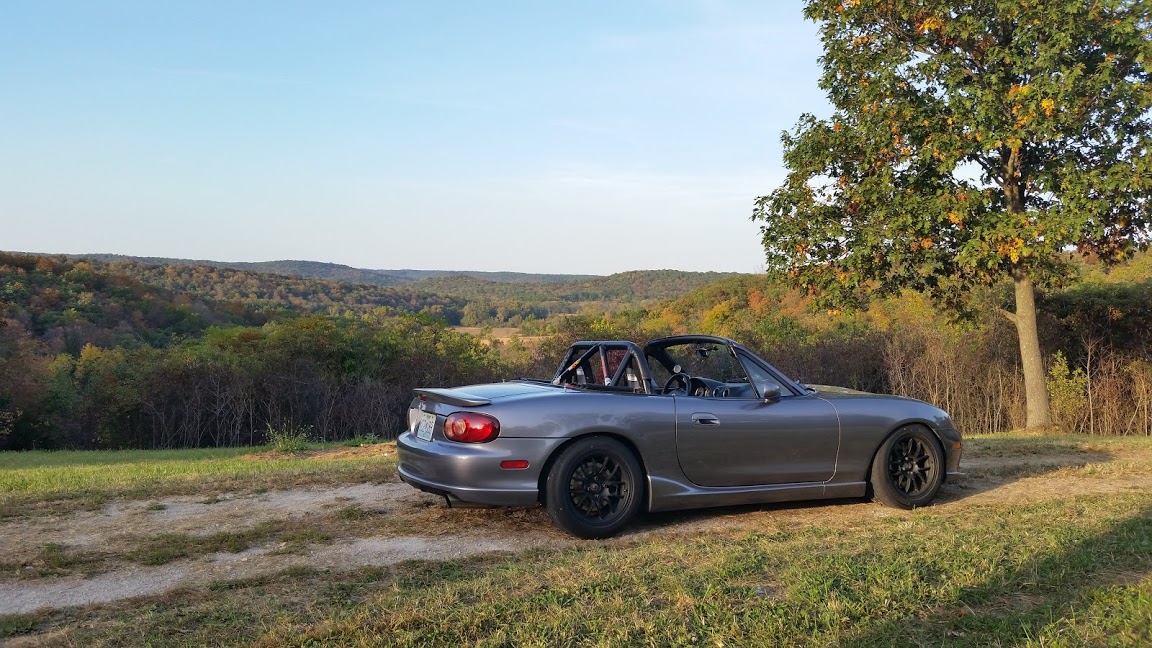
Weather is nice so cleaned the car up and headed out to Augusta Brewery for lunch and a beer. Couldn't help myself and took the long way there and back.
Reply
1
1
04-04-2016, 07:00 PM
#95
Senior Member
Thread Starter
iTrader: (3)
Join Date: Jul 2011
Location: STL
Posts: 524
Total Cats: 24
So long since any updates, and barely anything done.
Anyone near grid for the HPDE4 sessions at Road Atlanta last Dec can attest that my car burns oil at idle. That was a lovely discovery Saturday morning. Fortunately I made it through the weekend without any other issues, and it only happened at idle so oil consumption was minimal. Car sat all winter without doing anything to fix it.
Thought it was my crappy, kinked, oil drain line. So I drilled the pan and built a better line.
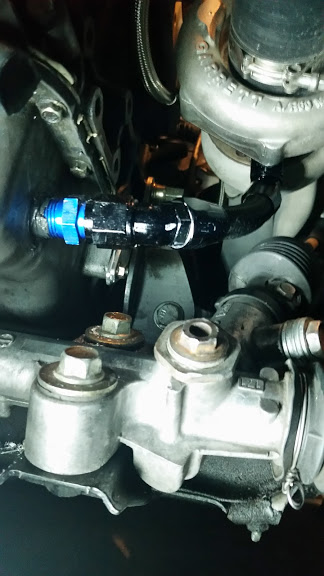
Still burns oil at idle. ****.
So I pulled some parts off.
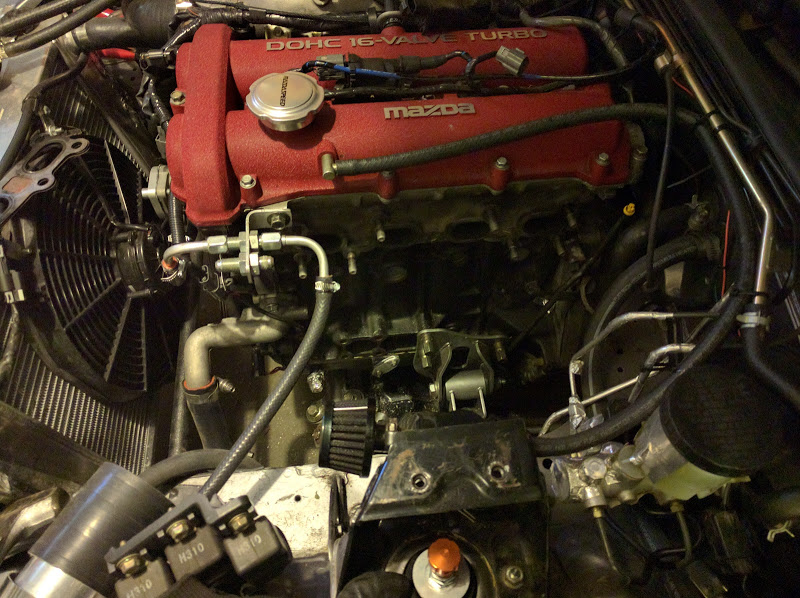
You can see an AWR mount, that was installed just before Road Atlanta, hiding below. The car is officially annoying at idle now. Must mean it's an actual race car.
No signs of any oil leaks pre-turbo so the CHRA is being sent to ATP for an exchange. Added a some reference marks so I remember how to clock it.
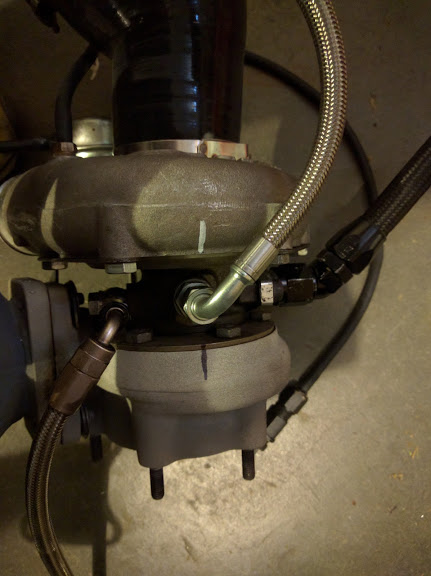
Abe's awesome work is still awesome. White Lightning coating is not so white anymore, heat makes it turn brown. The gradient is much more noticeable in person than with crappy phone pics. Since I didn't coat it for looks, this does not bother me one bit. Slight exhaust leak somewhere between cold and hot, maybe I will have the turbo and manifold surfaces flattened while the turbo is out, but probably not.
Anyone near grid for the HPDE4 sessions at Road Atlanta last Dec can attest that my car burns oil at idle. That was a lovely discovery Saturday morning. Fortunately I made it through the weekend without any other issues, and it only happened at idle so oil consumption was minimal. Car sat all winter without doing anything to fix it.
Thought it was my crappy, kinked, oil drain line. So I drilled the pan and built a better line.
Still burns oil at idle. ****.
So I pulled some parts off.
You can see an AWR mount, that was installed just before Road Atlanta, hiding below. The car is officially annoying at idle now. Must mean it's an actual race car.
No signs of any oil leaks pre-turbo so the CHRA is being sent to ATP for an exchange. Added a some reference marks so I remember how to clock it.
Abe's awesome work is still awesome. White Lightning coating is not so white anymore, heat makes it turn brown. The gradient is much more noticeable in person than with crappy phone pics. Since I didn't coat it for looks, this does not bother me one bit. Slight exhaust leak somewhere between cold and hot, maybe I will have the turbo and manifold surfaces flattened while the turbo is out, but probably not.
Reply
1
1
06-28-2016, 09:27 PM
#96
Senior Member
Thread Starter
iTrader: (3)
Join Date: Jul 2011
Location: STL
Posts: 524
Total Cats: 24
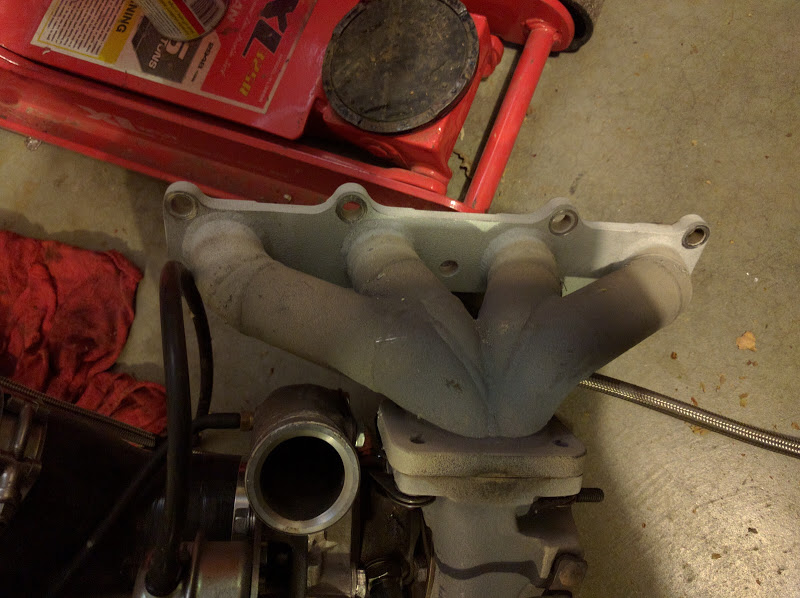
ATP service is great. 2 day turnaround for a CHRA exchange and I got this pretty thing back.

While bolting the turbo up to the manifold I managed to damage the White Lightning coating from where it was getting banged / rubbed against the workbench. There is still a layer of coating, only less thick in a few small spots now. Oh well.
After installation I ended up with an exhaust leak on each side of the straight pipe. One of the gaskets didn't look all that great so Abe sent me some new ones. Still leaks at both connections. I'll replace the clamps next.
Shortly after the CHRA came back, we put in an offer on a new house. After living in a townhouse with a low ceiling garage for 12 years, having a yard, driveway, and better garage is ******* awesome. Seriously, I learned to duck for the garage opener years ago, guests however were not as accustomed and frequently banged their head on it. At least the opener I put in a couple years ago is plastic vs the metal one I learned to avoid. My car has a new home and I can finally hang this bitching Mazdaspeed sign somewhere.
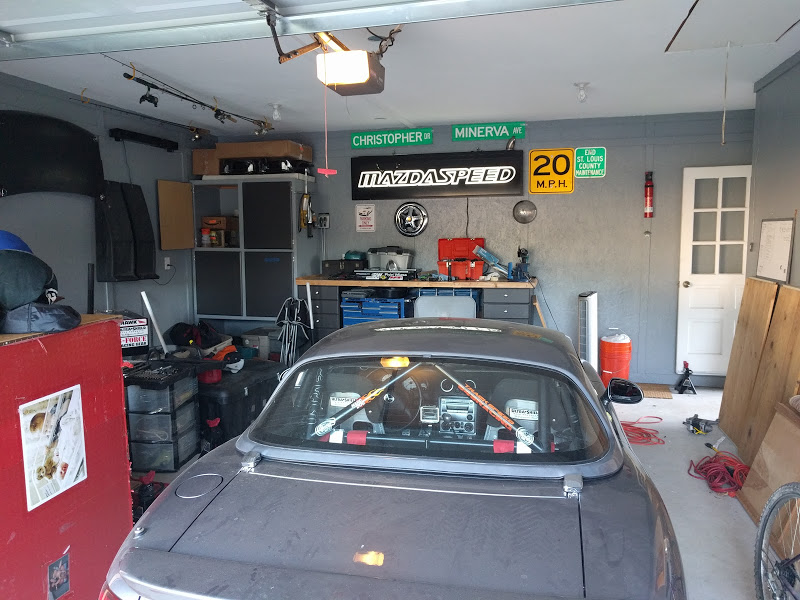
I haven't been on the track since December and have maybe a tank of gas through the car since. That needs remedied.
While bolting the turbo up to the manifold I managed to damage the White Lightning coating from where it was getting banged / rubbed against the workbench. There is still a layer of coating, only less thick in a few small spots now. Oh well.
After installation I ended up with an exhaust leak on each side of the straight pipe. One of the gaskets didn't look all that great so Abe sent me some new ones. Still leaks at both connections. I'll replace the clamps next.
Shortly after the CHRA came back, we put in an offer on a new house. After living in a townhouse with a low ceiling garage for 12 years, having a yard, driveway, and better garage is ******* awesome. Seriously, I learned to duck for the garage opener years ago, guests however were not as accustomed and frequently banged their head on it. At least the opener I put in a couple years ago is plastic vs the metal one I learned to avoid. My car has a new home and I can finally hang this bitching Mazdaspeed sign somewhere.
I haven't been on the track since December and have maybe a tank of gas through the car since. That needs remedied.
Reply
0
0
 10-08-2016, 09:34 PM
#98
Senior Member
Thread Starter
iTrader: (3)
Join Date: Jul 2011
Location: STL
Posts: 524
Total Cats: 24
Noticed an exhaust leak when unloading the car after Miatas @ Hallett, figured it was just a loose connection somewhere after 2 days of abuse. No such luck.
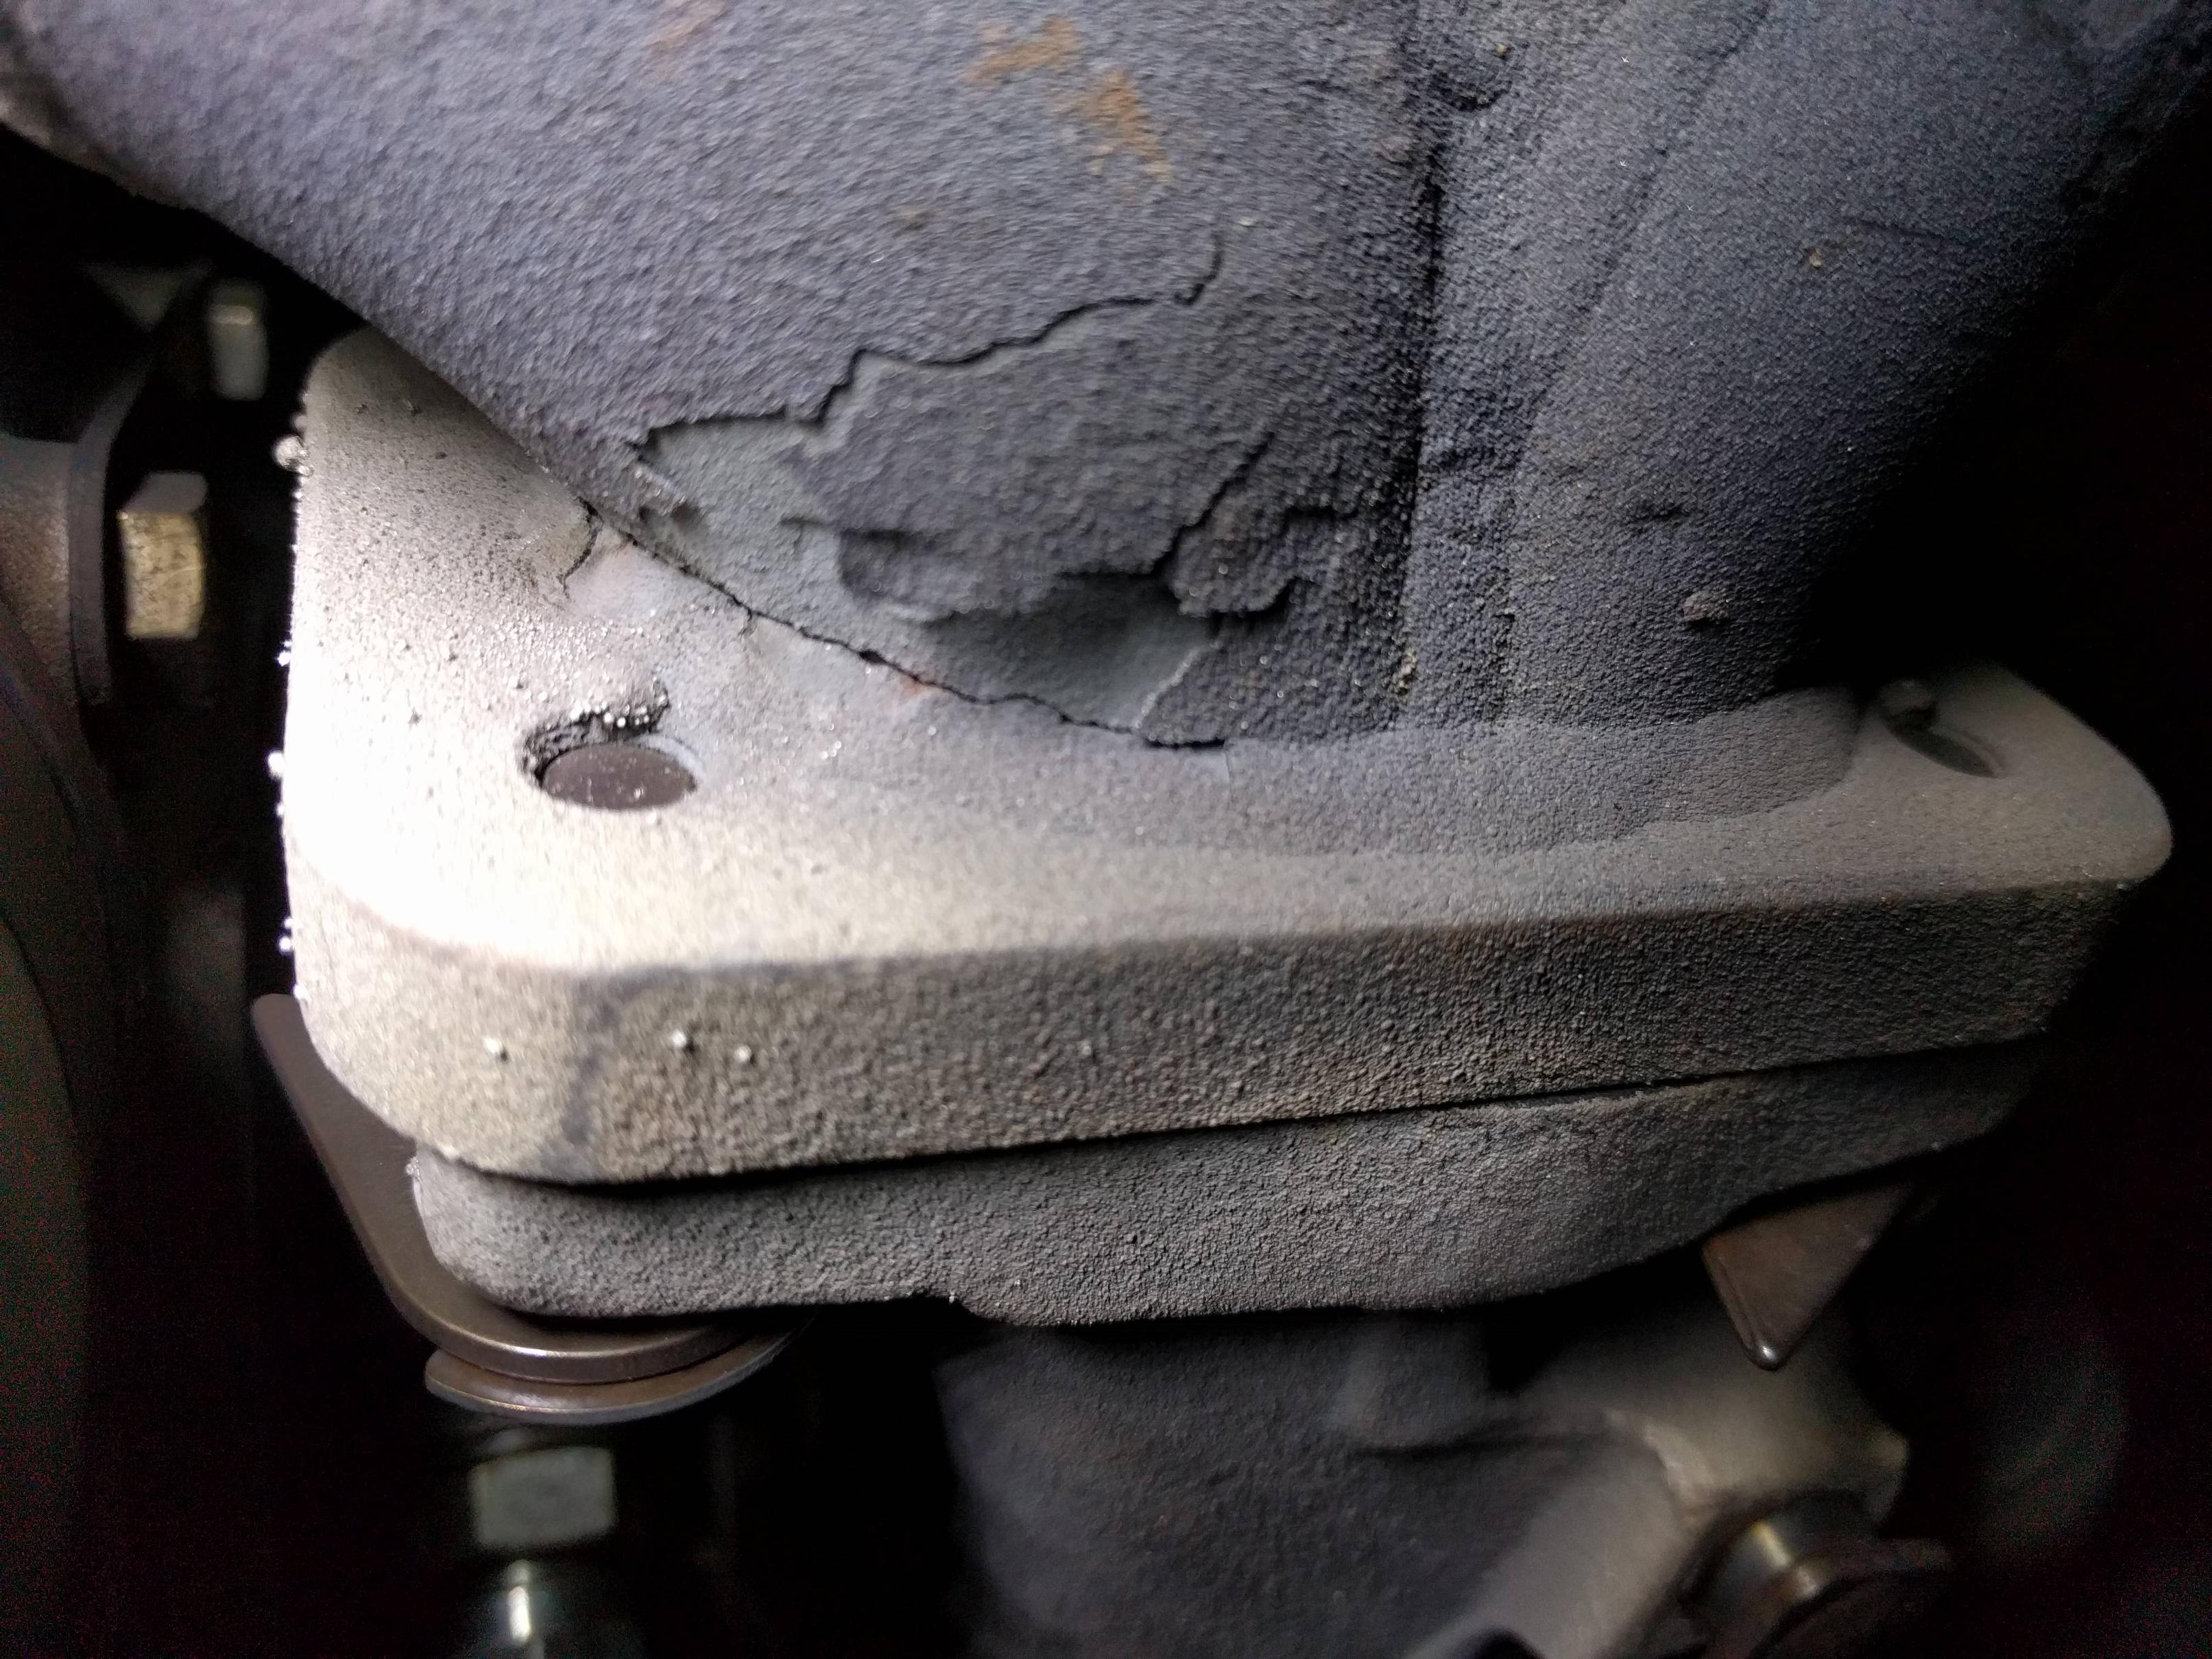
Hopefully Abe will fix it.
Hopefully Abe will fix it.
Reply
0
0
10-09-2016, 11:33 PM
#99
Elite Member
iTrader: (37)

Join Date: Apr 2010
Location: Very NorCal
Posts: 10,448
Total Cats: 1,900
I used high temp header paint and made my White Lightning nice and black, helps hide that brown you were talking about. How thick is the coating on there?
Sucks about the crack. Didn't someone else also have one split in that same spot not long ago?
Sucks about the crack. Didn't someone else also have one split in that same spot not long ago?
Reply
0
0


