
Round 2: Wannabe turbo NB6C
 03-25-2015, 10:03 AM
#1
Junior Member

Thread Starter
Join Date: Aug 2005
Location: Cayman Islands
Posts: 440
Total Cats: 17
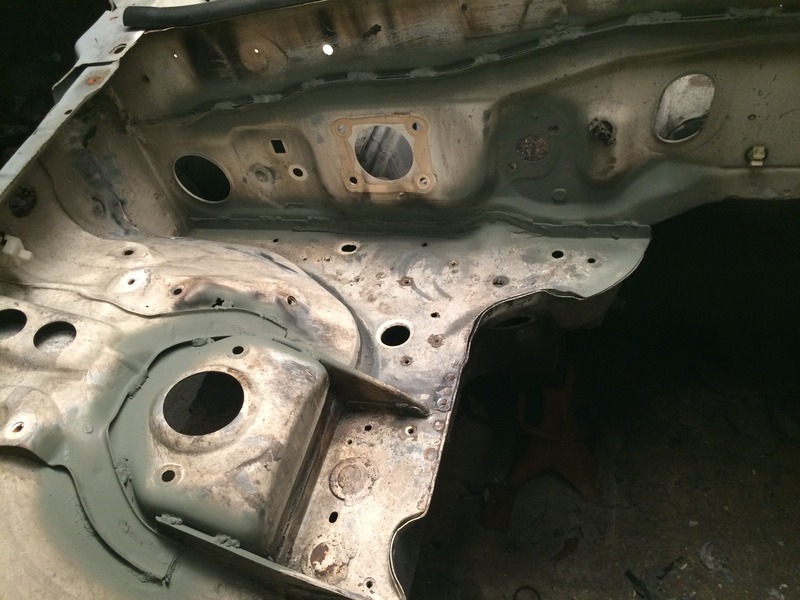
Picked up a white NB6C off a friend for a really good price this week 
It's got rust in a few areas (which you will see below), bilsteins with no bump stops and unknown coilovers, 15x8 Konig Helium's, 225/45 R1R's and a Koyo radiator.
Immediate plan is to sort the rust, seam/spot weld the chassis, make new floor plates and gussets for a cusco bolt in cage that I have had for years and get it to paint.
The car came with some parts waiting to go on; Energy suspension bushing kit, Moog front inner tie rod ends, new clutch master, slave and braided line. I have an S13 T25, Evo 550 injectors, synapse recirc valve and a Haltech PS1000 collecting dust for now. The plan is 200-225whp on the stock motor.
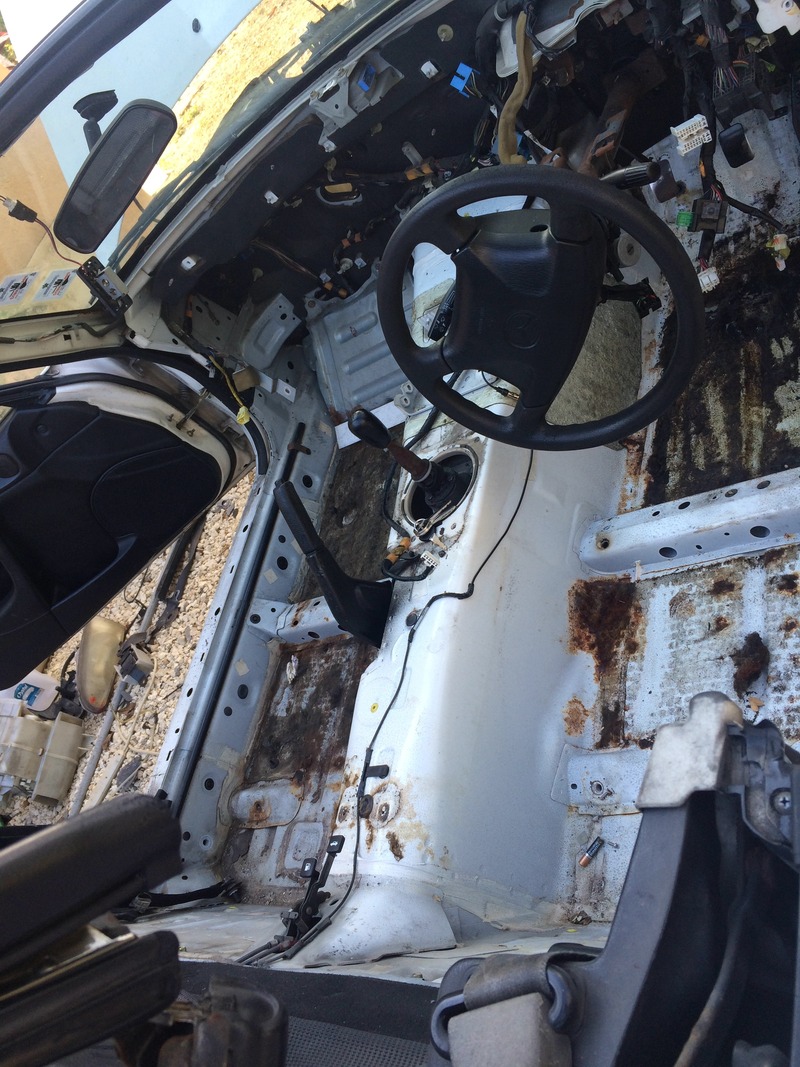
Got most of the interior stripped
Clutch master has apparently been leaking fluid for some time
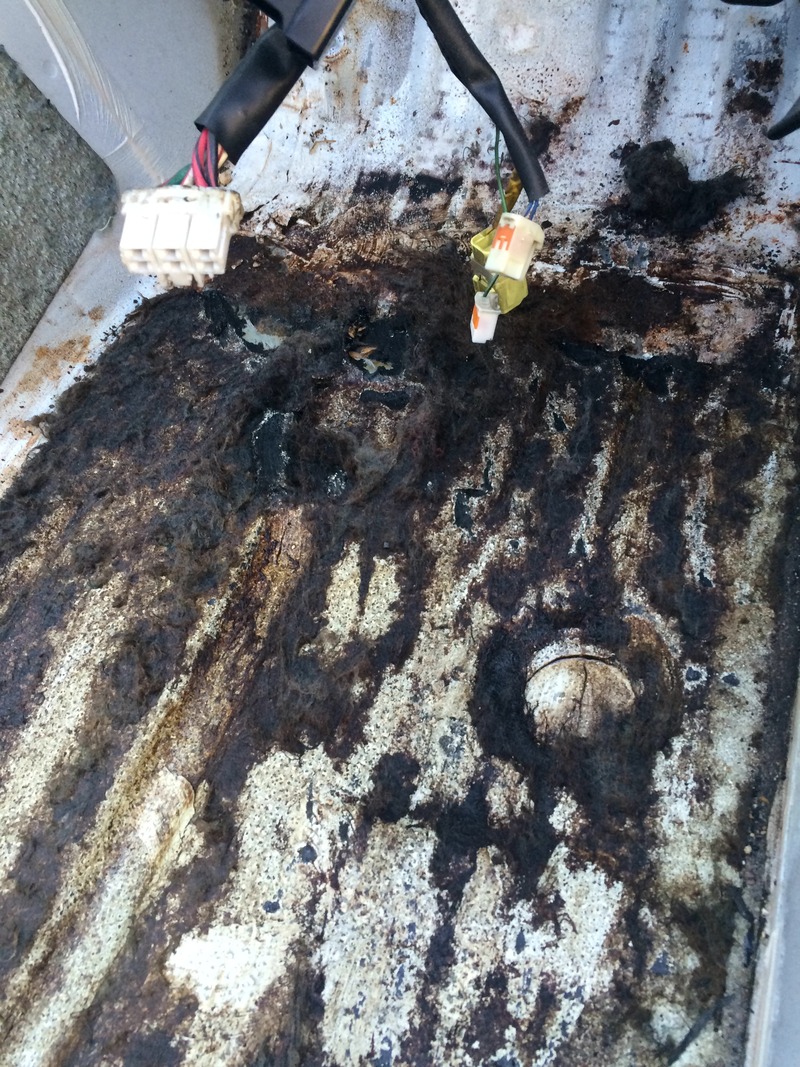
Hole in the passenger floor
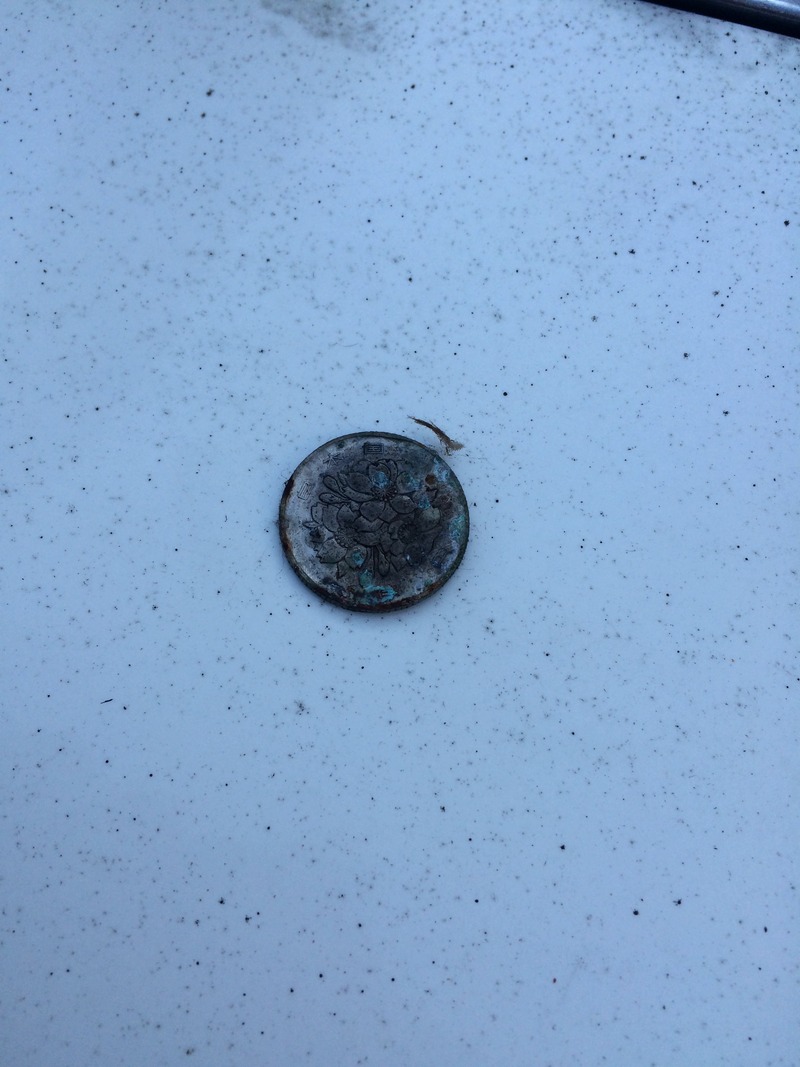
100 yen coin
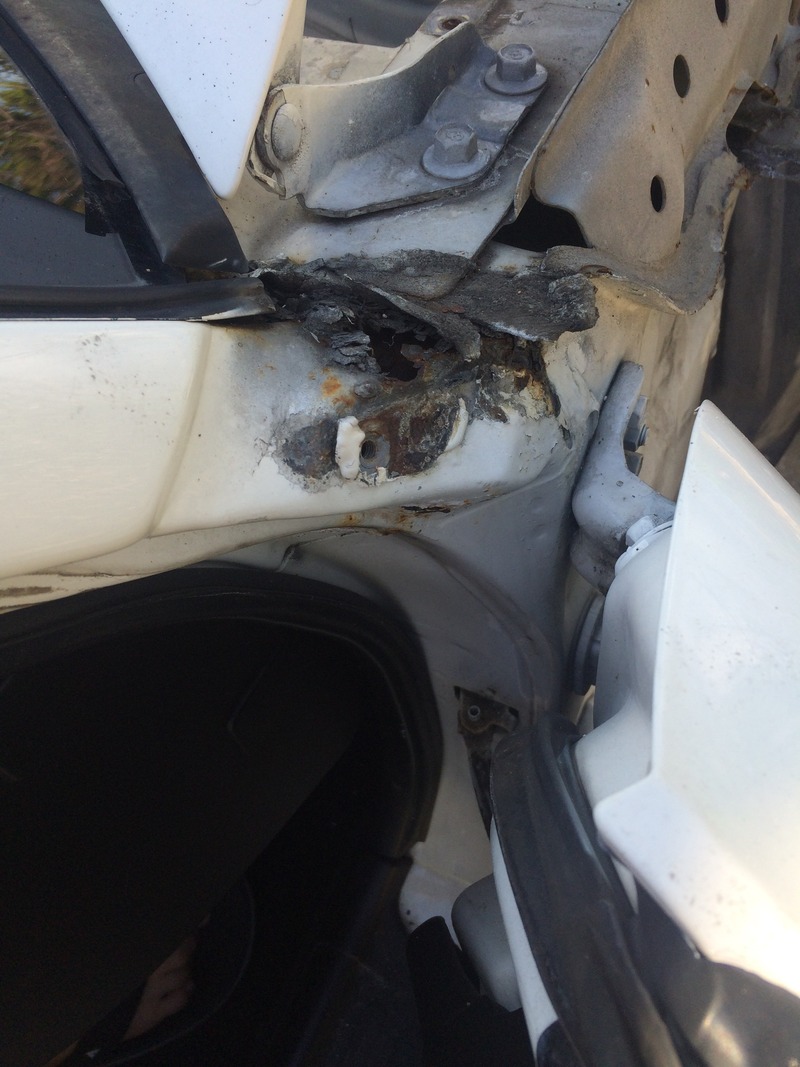
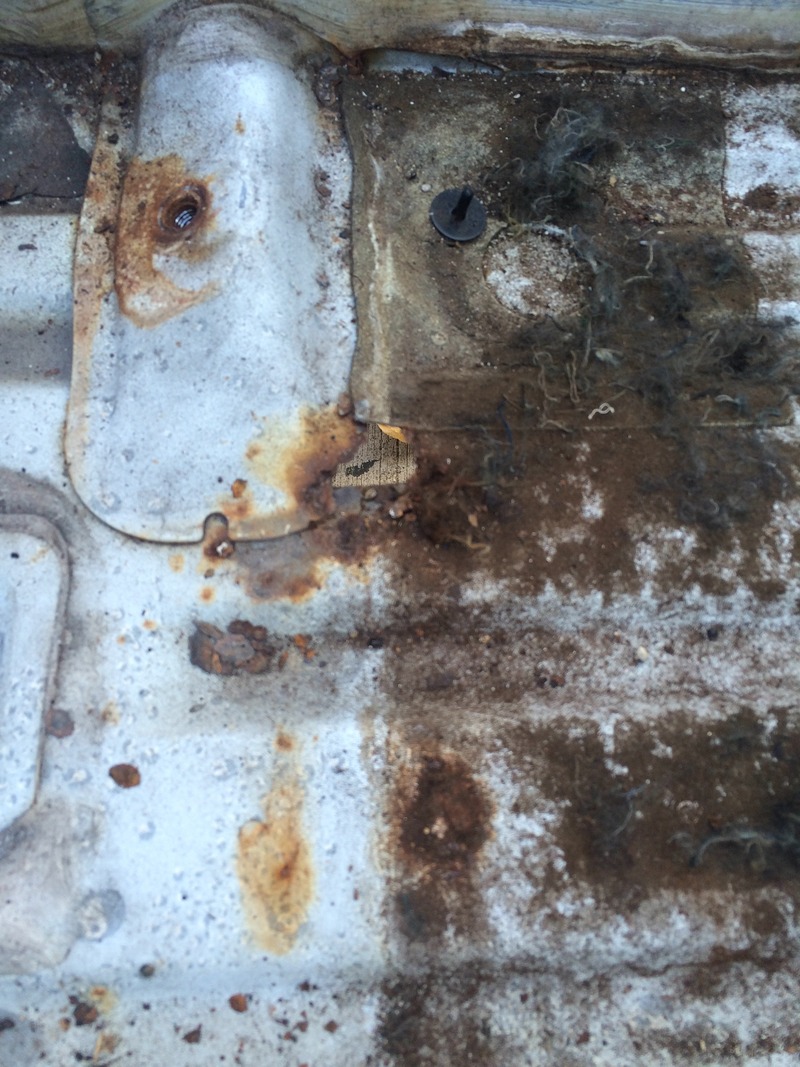
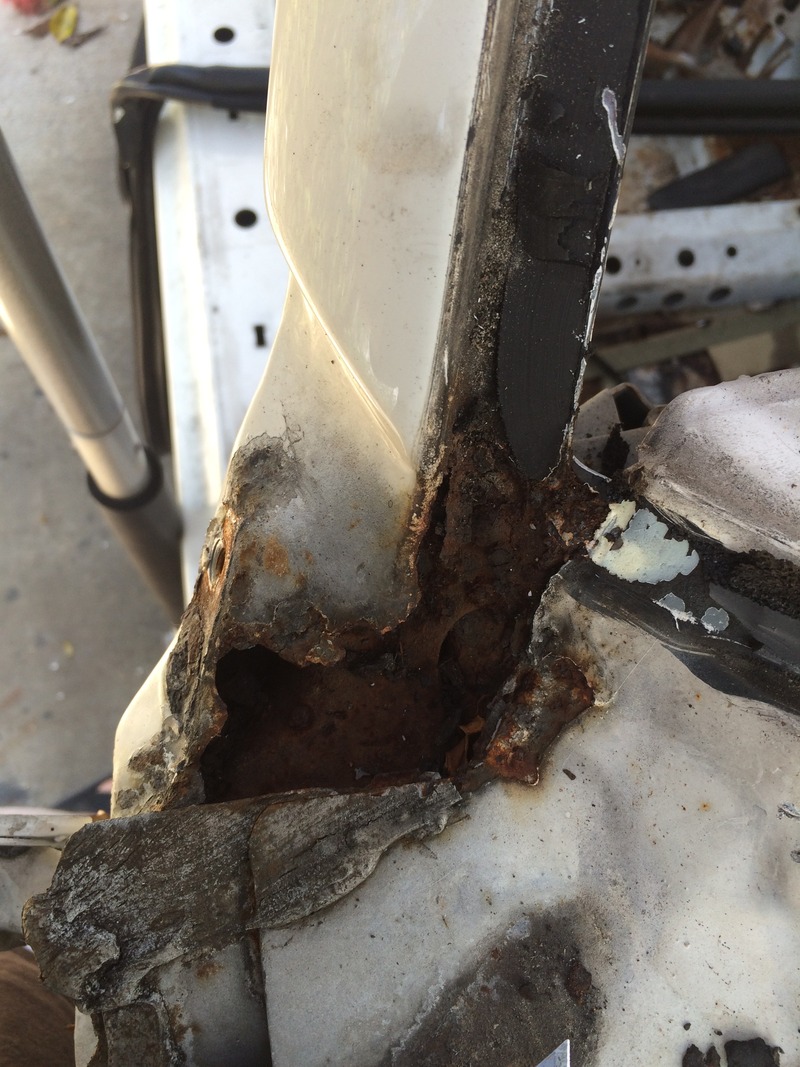
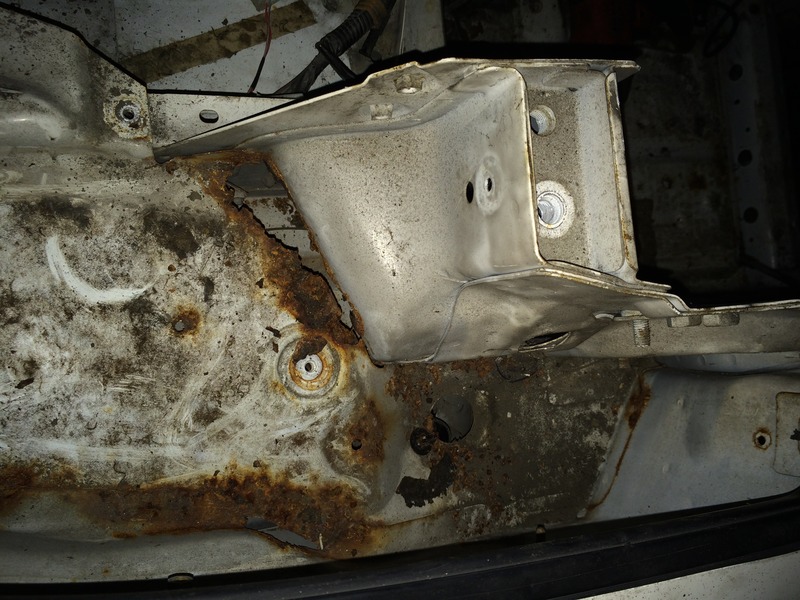
And the heart breaker I bought some 16ga sheet to patch this area up once I get the windshield out and cut the rust away. The other side has but it's surface and not so bad.
Other than that there is a patch of rust right behind the drivers side seat belt tower. I hope no more large rust related surprises await me underneath.
It's got rust in a few areas (which you will see below), bilsteins with no bump stops and unknown coilovers, 15x8 Konig Helium's, 225/45 R1R's and a Koyo radiator.
Immediate plan is to sort the rust, seam/spot weld the chassis, make new floor plates and gussets for a cusco bolt in cage that I have had for years and get it to paint.
The car came with some parts waiting to go on; Energy suspension bushing kit, Moog front inner tie rod ends, new clutch master, slave and braided line. I have an S13 T25, Evo 550 injectors, synapse recirc valve and a Haltech PS1000 collecting dust for now. The plan is 200-225whp on the stock motor.
Got most of the interior stripped
Clutch master has apparently been leaking fluid for some time
Hole in the passenger floor
100 yen coin
And the heart breaker
I bought some 16ga sheet to patch this area up once I get the windshield out and cut the rust away. The other side has but it's surface and not so bad.Other than that there is a patch of rust right behind the drivers side seat belt tower. I hope no more large rust related surprises await me underneath.

Reply
 0
0

0
04-04-2015, 02:25 PM
#2
Junior Member
Thread Starter
Join Date: Aug 2005
Location: Cayman Islands
Posts: 440
Total Cats: 17
Got some more work done!

Chassis and drivetrain separated
Yesterday I pulled the windshield and front wiring harness.
I have some 16ga sheet to replate those 2 spots.
Will be cleaning all this up later on today and removing all the seam sealant I can to prep for seam welding.
Chassis and drivetrain separated
Yesterday I pulled the windshield and front wiring harness.
I have some 16ga sheet to replate those 2 spots.
Will be cleaning all this up later on today and removing all the seam sealant I can to prep for seam welding.
Reply
0
0
04-05-2015, 10:16 PM
#3
Junior Member
Thread Starter
Join Date: Aug 2005
Location: Cayman Islands
Posts: 440
Total Cats: 17
it's cleaning up nicely. Sorry for the potato pics
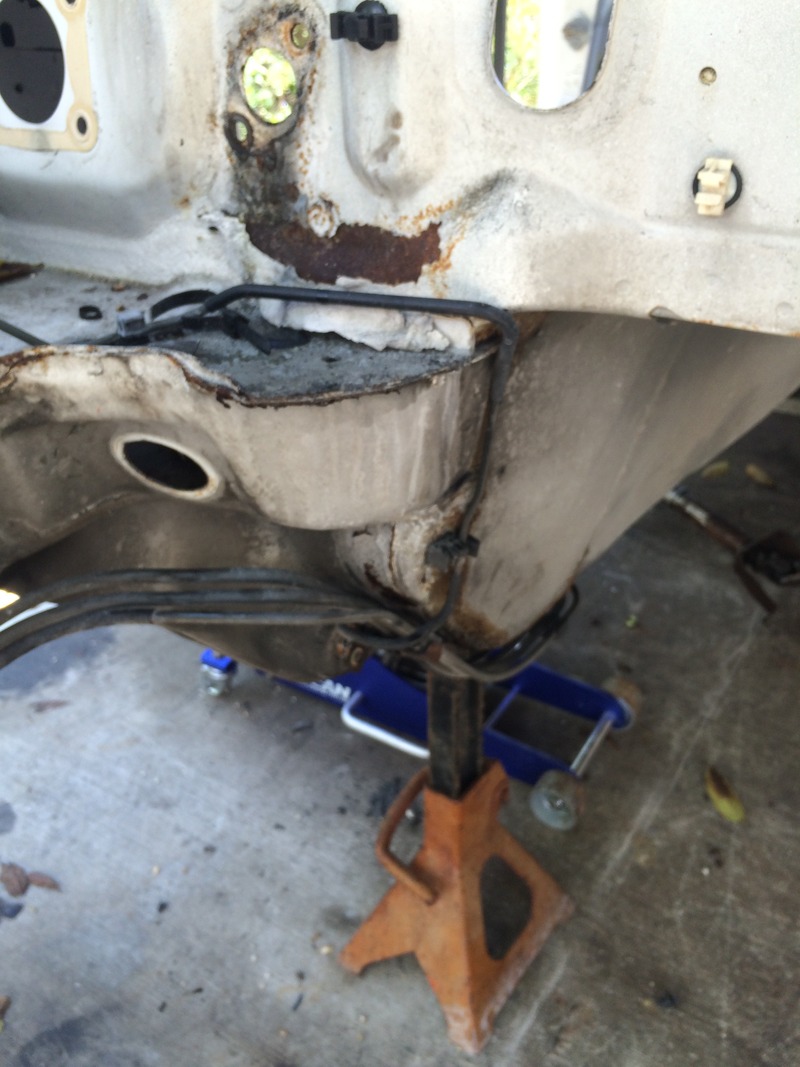
Got the fuel tank dropped & ebrake removed so now it's just seams to clean. Most of the seam welding will be done by adding spot welds but a few area's will be stitch.
started on the upper fire wall seam. I will be welding it from the back side also.
Also got some stuff on the way from rock auto
Stoptech front & rear pads
Centric front & rear caliper rebuild kits
Centric front & rear pad hardware
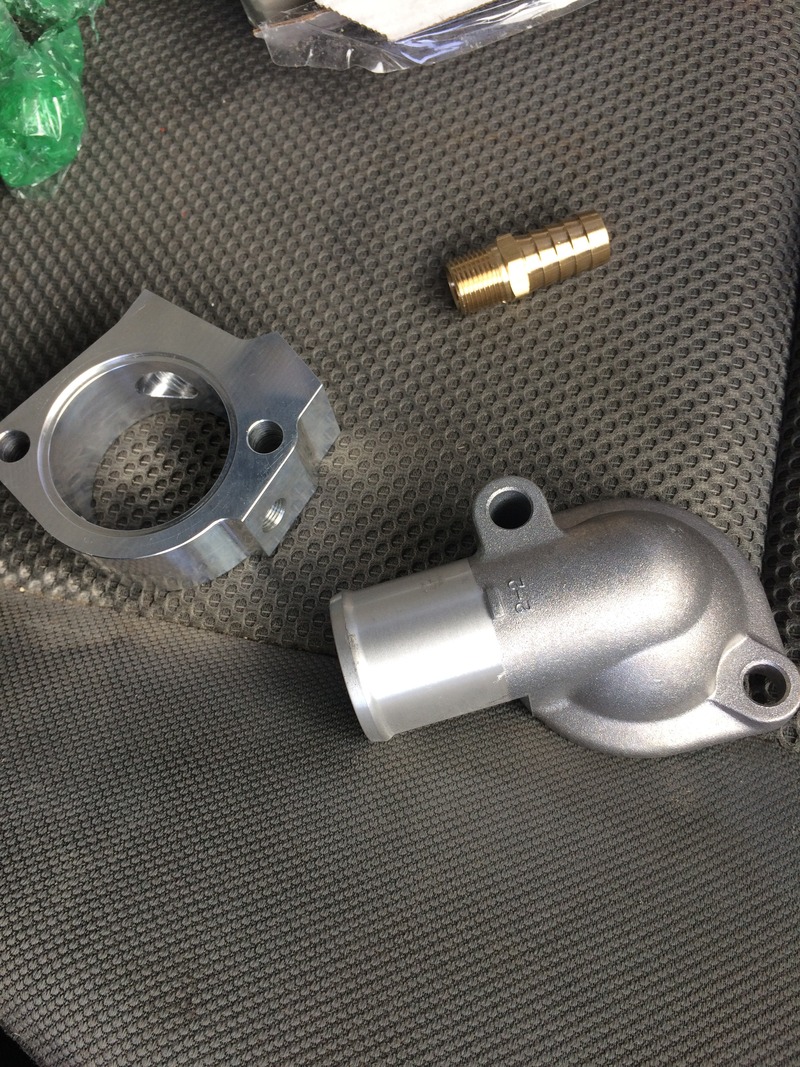
Gates waterpump
Gates timing belt kit
180* thermostat
GM coolant hose for reroute
Plan is to have the welding completed by friday so the shell can go to paint.
Got the fuel tank dropped & ebrake removed so now it's just seams to clean. Most of the seam welding will be done by adding spot welds but a few area's will be stitch.
started on the upper fire wall seam. I will be welding it from the back side also.
Also got some stuff on the way from rock auto
Stoptech front & rear pads
Centric front & rear caliper rebuild kits
Centric front & rear pad hardware
Gates waterpump
Gates timing belt kit
180* thermostat
GM coolant hose for reroute
Plan is to have the welding completed by friday so the shell can go to paint.
Reply
0
0
 04-06-2015, 10:34 AM
#5
Junior Member
Thread Starter
Join Date: Aug 2005
Location: Cayman Islands
Posts: 440
Total Cats: 17
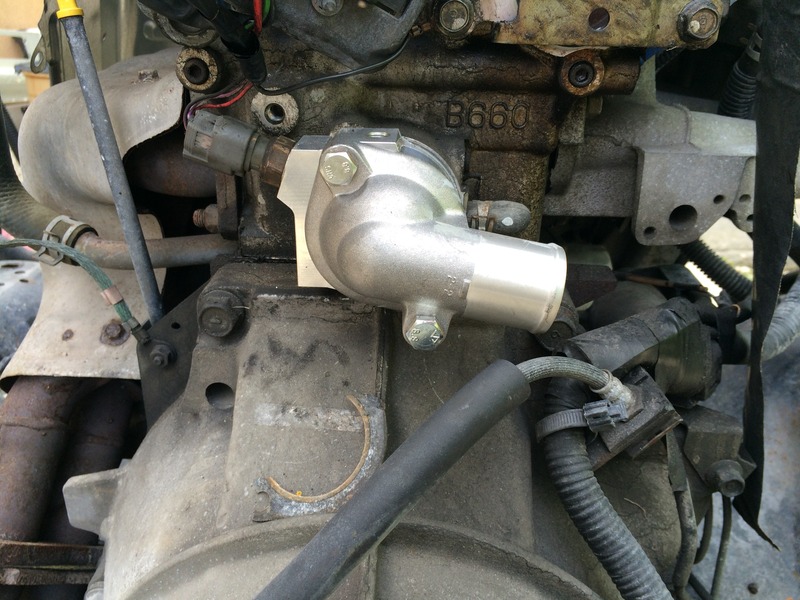
Thanks for the tip. Where I live the temps are 80*F+ year round, I have never had issue with car's taking long to warm up.
I will check what the thermostat that's in there now is. If it's a hotter one I'll just keep it in there.
I will check what the thermostat that's in there now is. If it's a hotter one I'll just keep it in there.
Reply
1
1
04-12-2015, 11:41 PM
#6
Junior Member
Thread Starter
Join Date: Aug 2005
Location: Cayman Islands
Posts: 440
Total Cats: 17
I got alot of work done last night
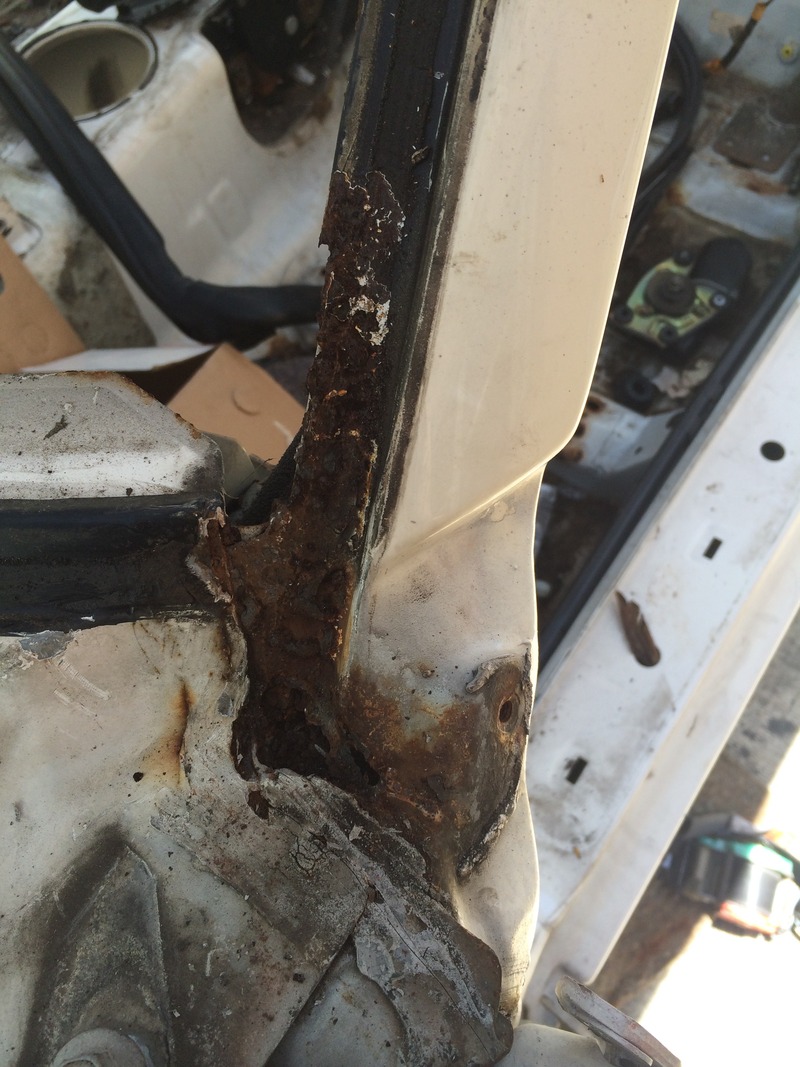
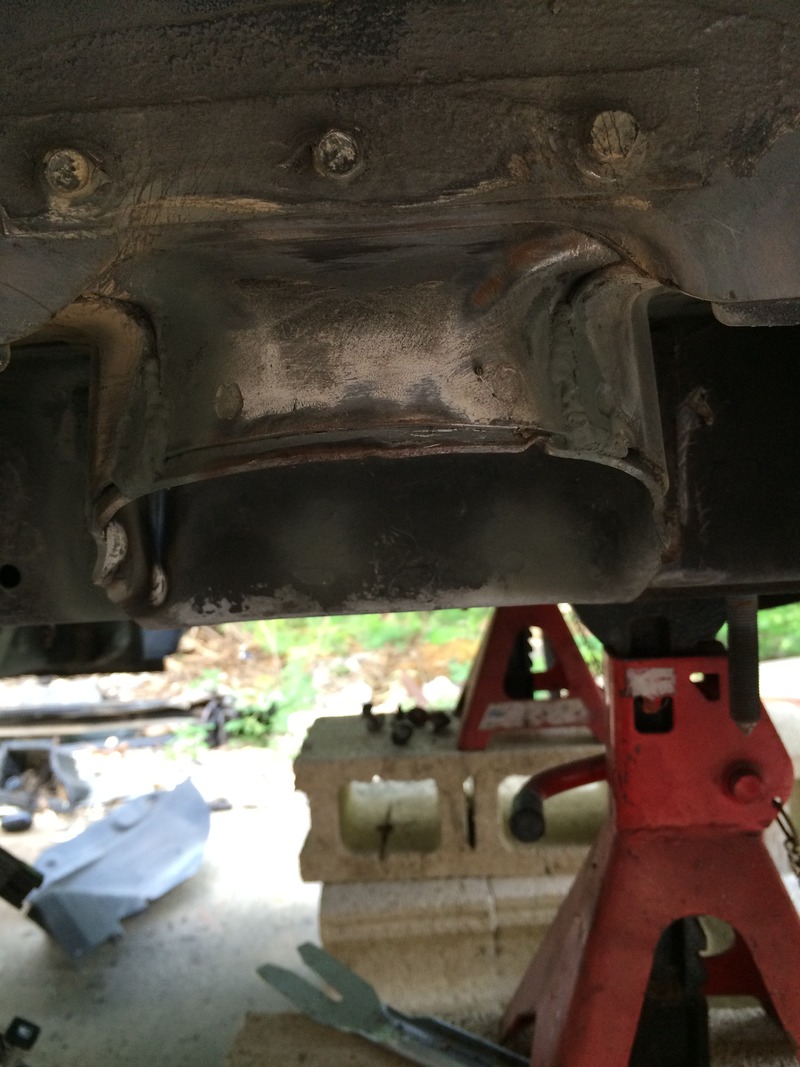
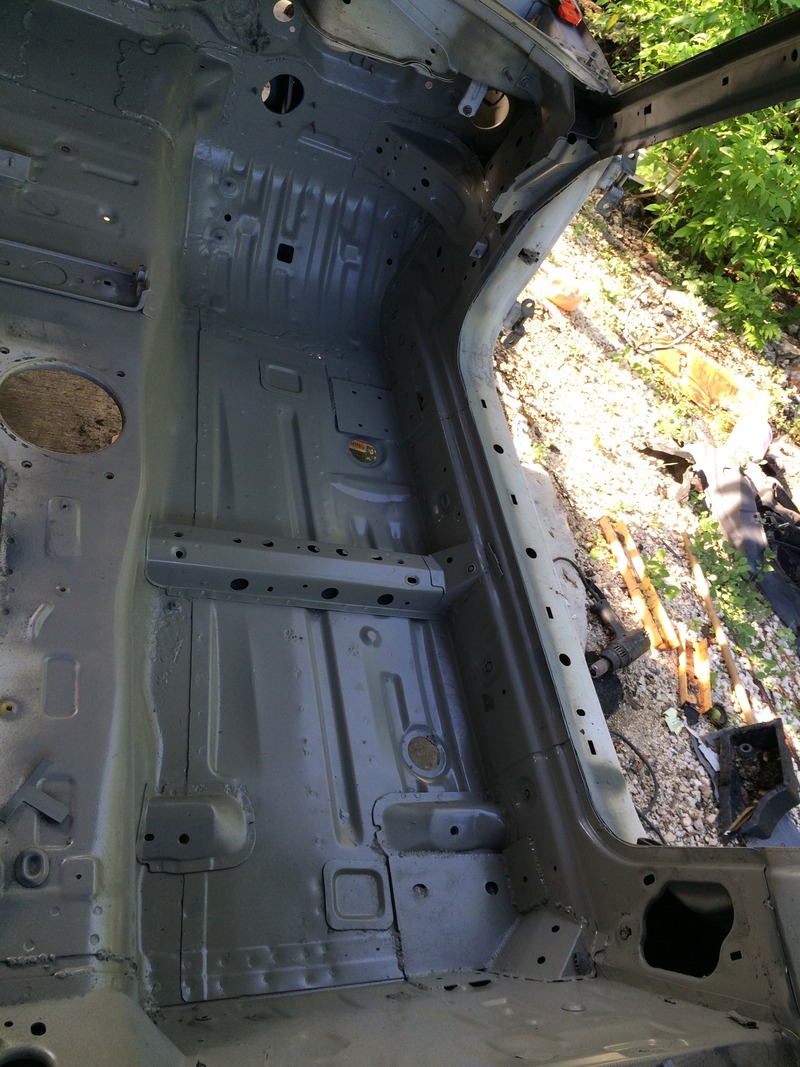
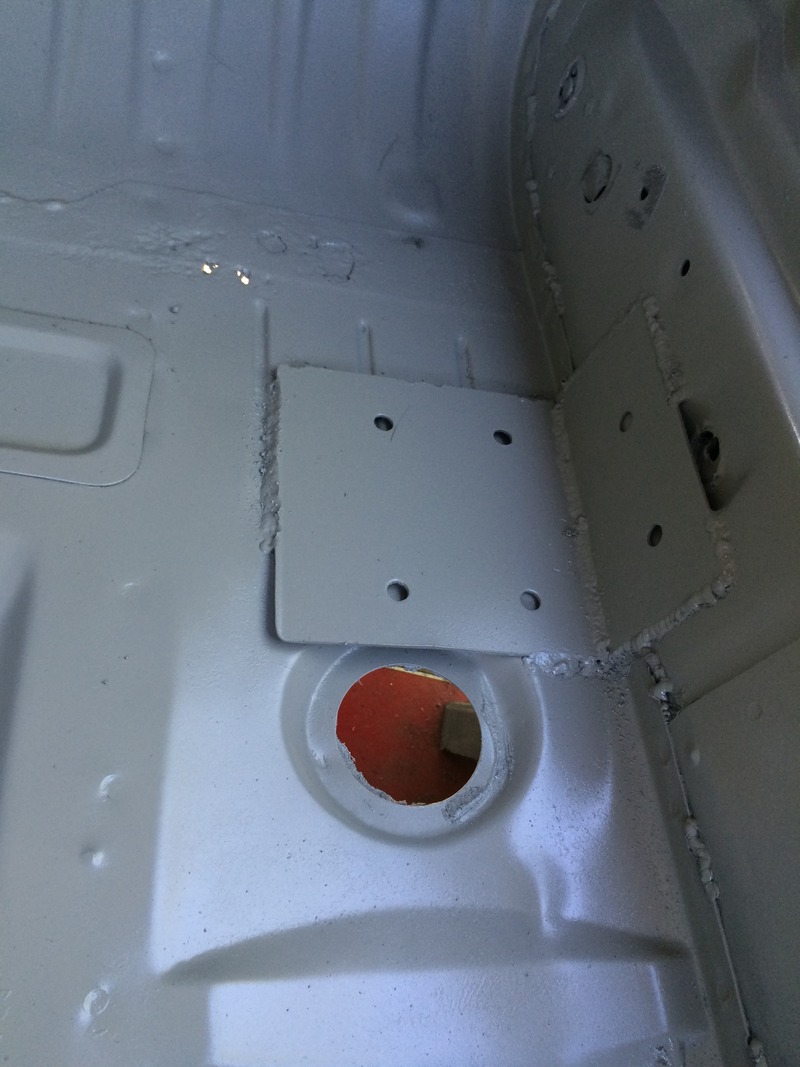
Passenger side windshield rust repair. I used 2 sheets of 16ga sheet. Everything has been coated in Ospho, Rustoleum etching primer and Rustoleum epoxy enamel. It just needs some sealant to be ready for proper paint
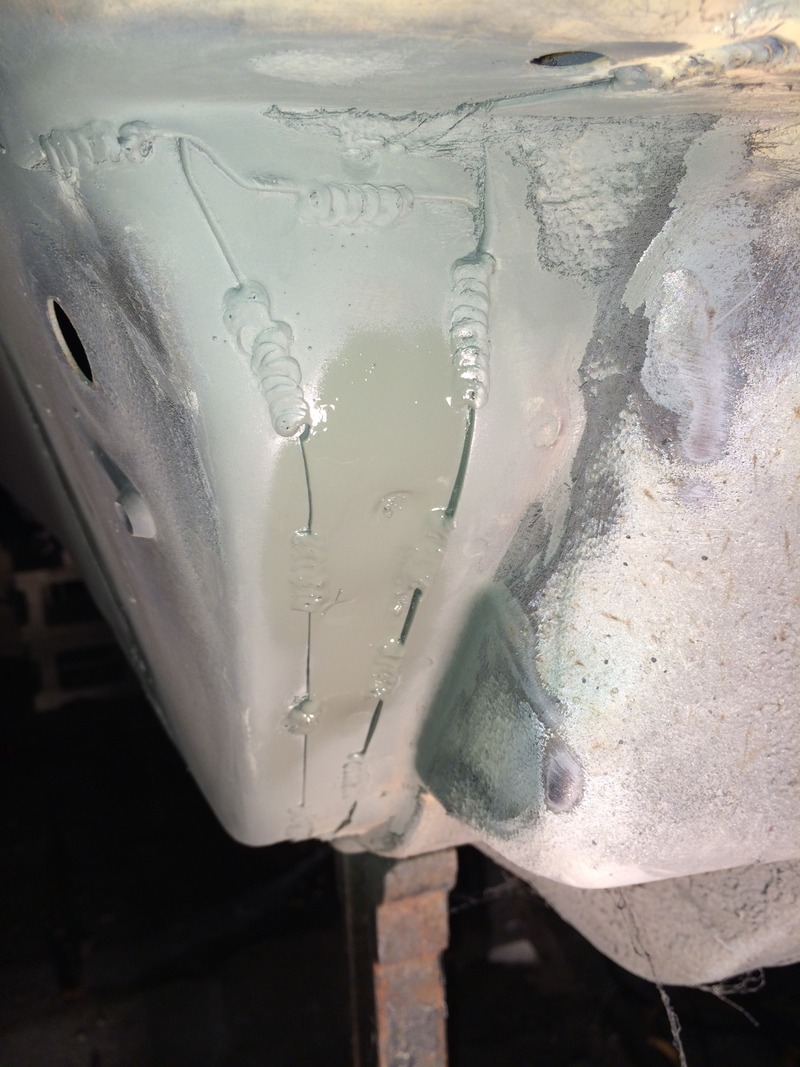
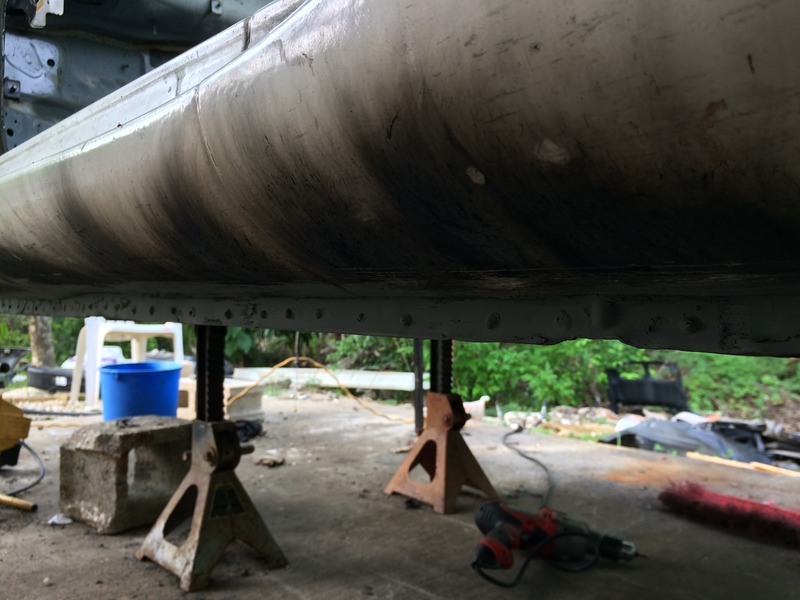
Rear firewall and transmission tunnel. I still have to weld the other side of the seam under the car. I plan to add some spot welds also once I get a new bit, the one I have is dull as ****
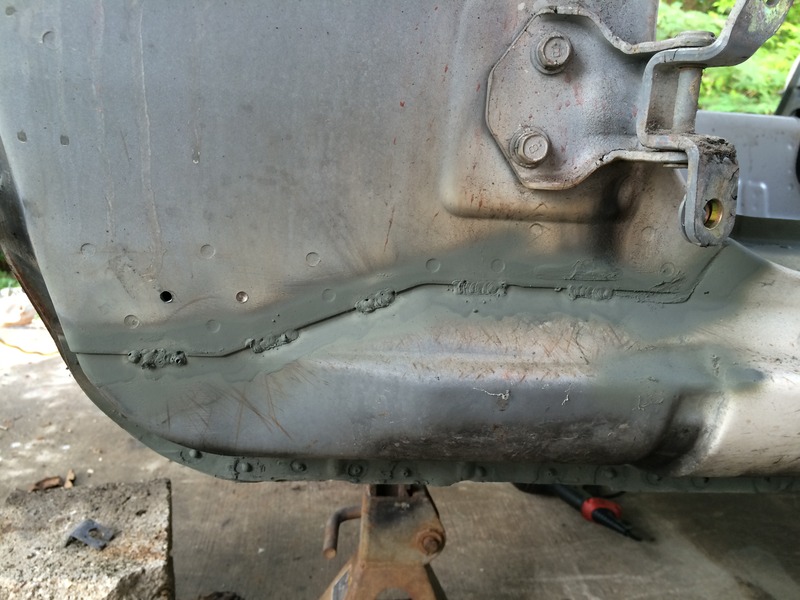
Drivers side shock tower is almost finished. I still have the recessed area to the right to do but the seam sealant in that location is too real. Also you can see some of the firewall welding action
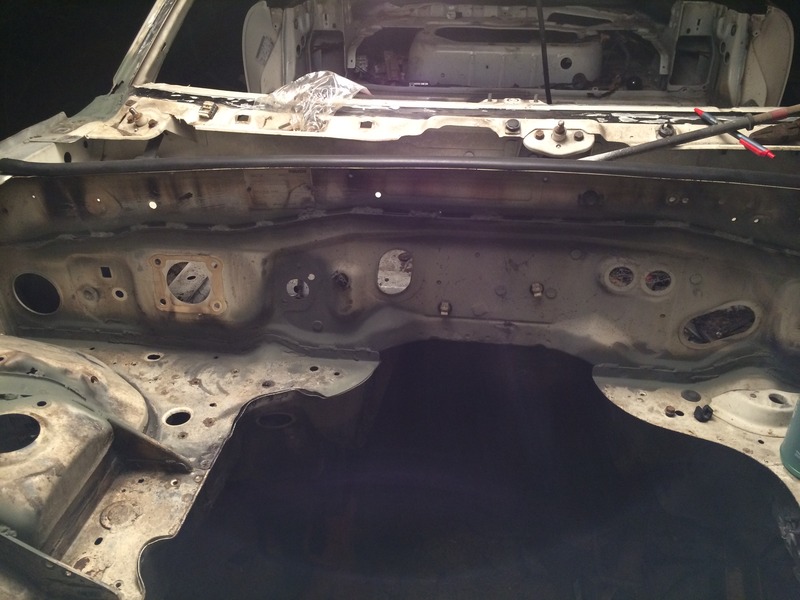
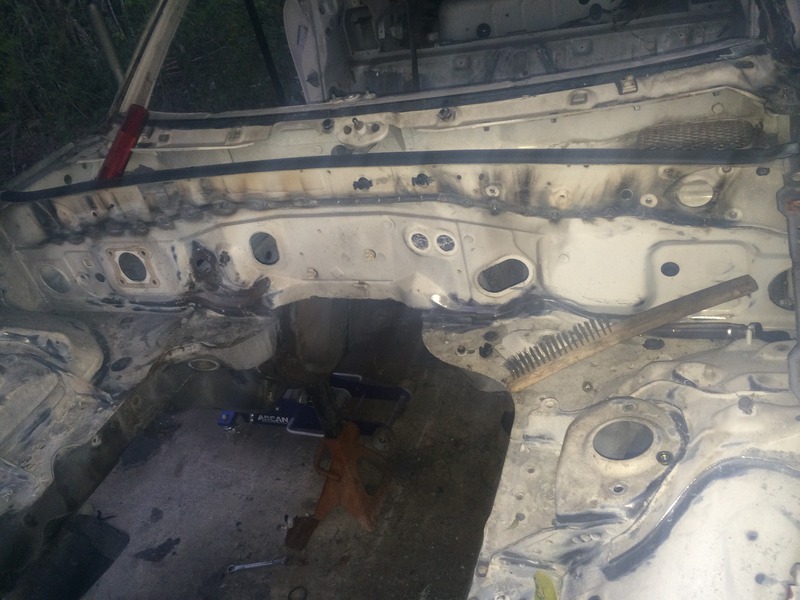
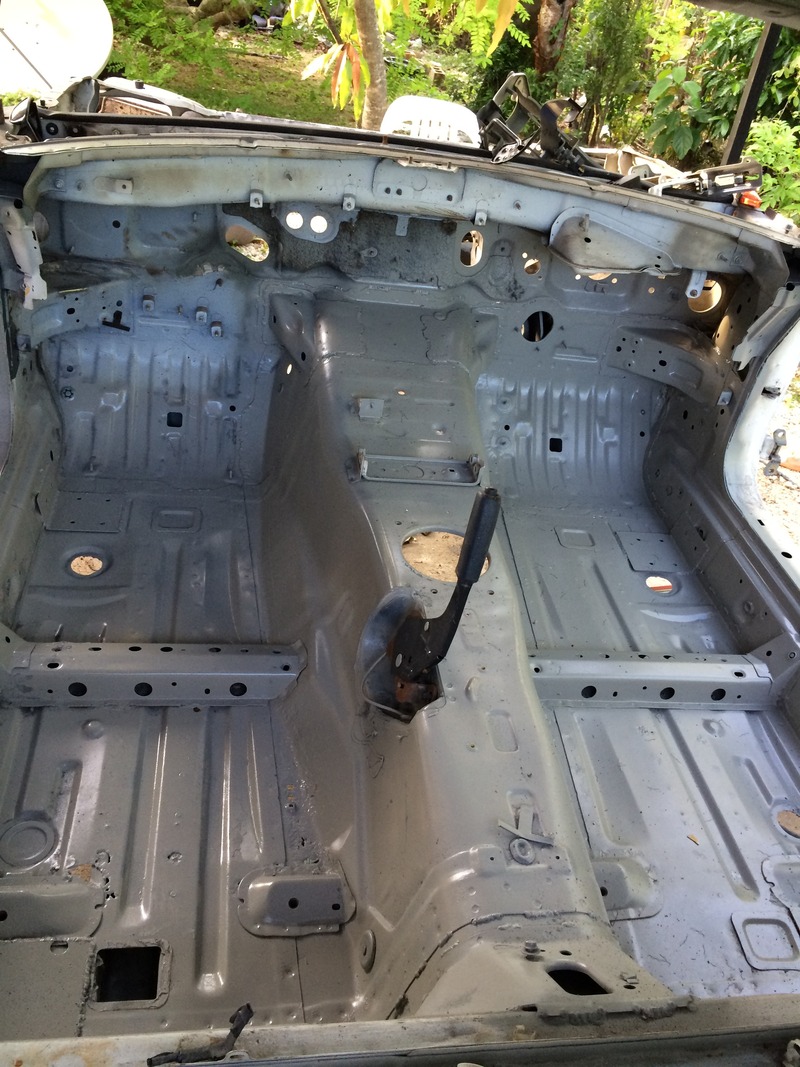
wider shot of the bay.
All the welds are being done with a Lincoln Weldpack 125HD, all hail flux core! I am not fixing to use my Longevity tig on any of these sealant infested joins. I am wire wheeling, razor bladeing, propane torching out whatever sealant I can get to but there is always some left that gets to snap, crackle & popping :(
I am also picking up an RX7 motor and transmission from a friend who is swapping an LS1 into his FD Plan is to get the car back together with the stock drive train, sort the suspension and brakes then gather up parts and **** for the rotary swap over the next year.
Passenger side windshield rust repair. I used 2 sheets of 16ga sheet. Everything has been coated in Ospho, Rustoleum etching primer and Rustoleum epoxy enamel. It just needs some sealant to be ready for proper paint
Rear firewall and transmission tunnel. I still have to weld the other side of the seam under the car. I plan to add some spot welds also once I get a new bit, the one I have is dull as ****
Drivers side shock tower is almost finished. I still have the recessed area to the right to do but the seam sealant in that location is too real. Also you can see some of the firewall welding action
wider shot of the bay.
All the welds are being done with a Lincoln Weldpack 125HD, all hail flux core! I am not fixing to use my Longevity tig on any of these sealant infested joins. I am wire wheeling, razor bladeing, propane torching out whatever sealant I can get to but there is always some left that gets to snap, crackle & popping :(
I am also picking up an RX7 motor and transmission from a friend who is swapping an LS1 into his FD
Plan is to get the car back together with the stock drive train, sort the suspension and brakes then gather up parts and **** for the rotary swap over the next year.
Reply
1
1
 04-17-2015, 10:30 PM
#8
Junior Member
Thread Starter
Join Date: Aug 2005
Location: Cayman Islands
Posts: 440
Total Cats: 17
I have managed to drill all the spot weld holes for the windshield opening and door seams. My right elbow is toast. Tomorrow the plan is to finish seam welding the car, I have to drill some more spot weld holes by the rear seatbelt/gas tank area.
There are some feral cat's that are living in the bush next to the car so I hope to snap a picture to make this build thread legit.
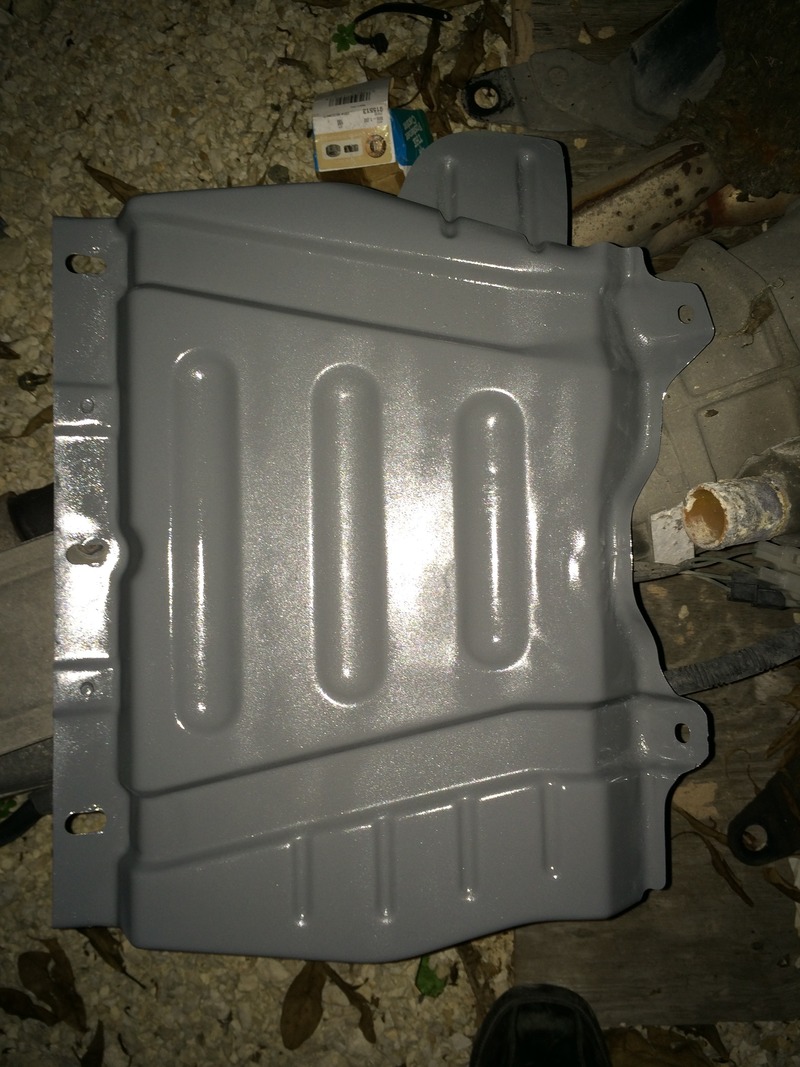
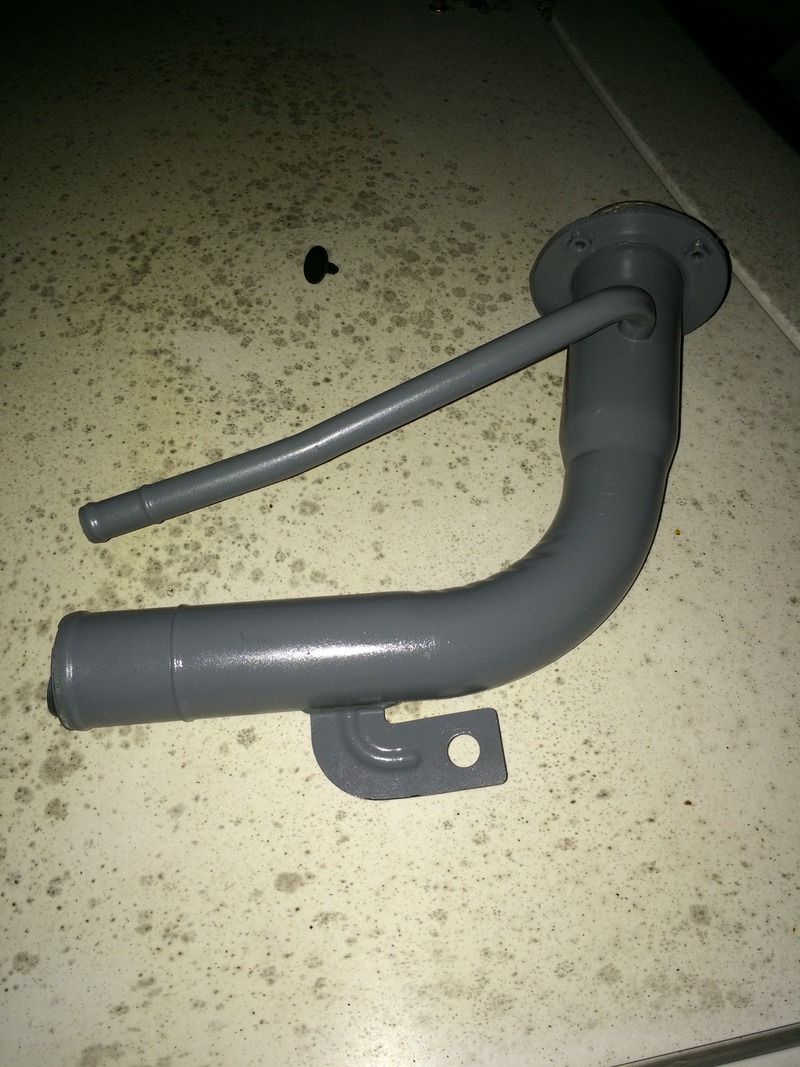
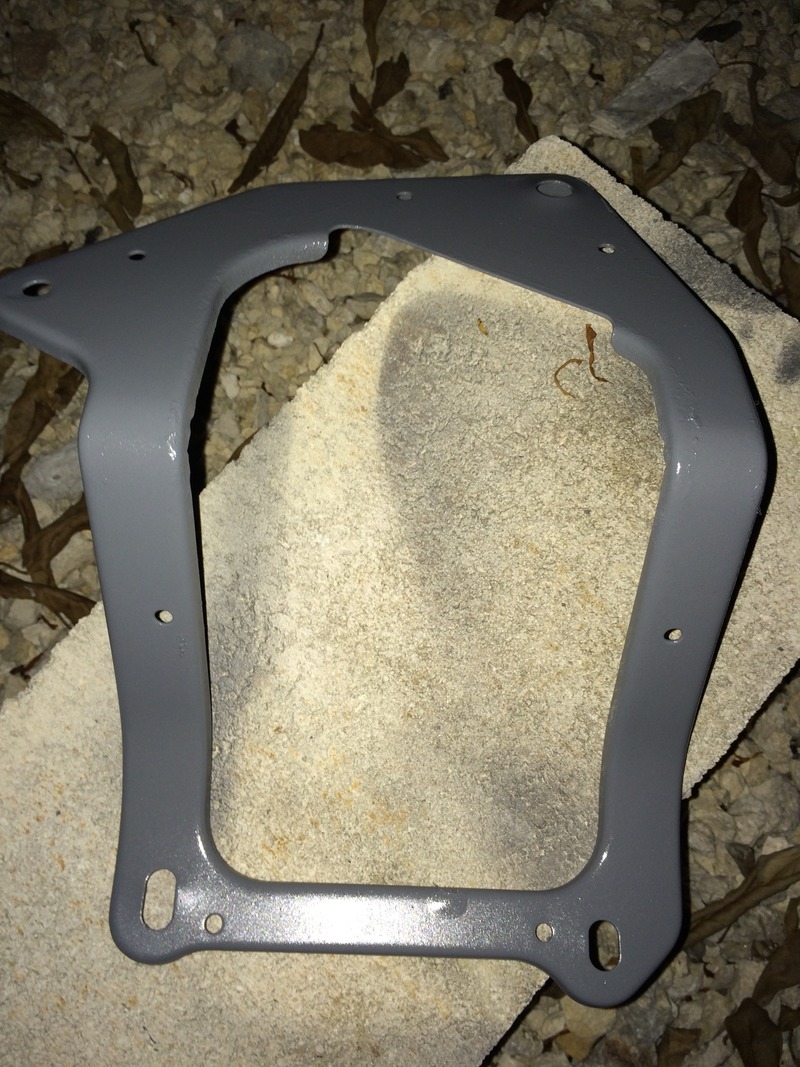
I did manage to get the ecu cover, rear metal panel thing, fuel tank filler, the metal thing that secures the rubber boot around the fuel tank filler and the soft top brackets painted. Etch primer and rustoleum gloss grey all the things!


Have some rusty parts to cut off of the 2 outer brackets
I found out that the soft top water drain bins were blocked tighter than a nuns ----. Why is that relevant you ask....
More **** to cut out and replate.
Does it make any sense re-installing those plastic drain bins if I put on a hard top?
Also any insight if the following spot welds are worth the tennis elbow?
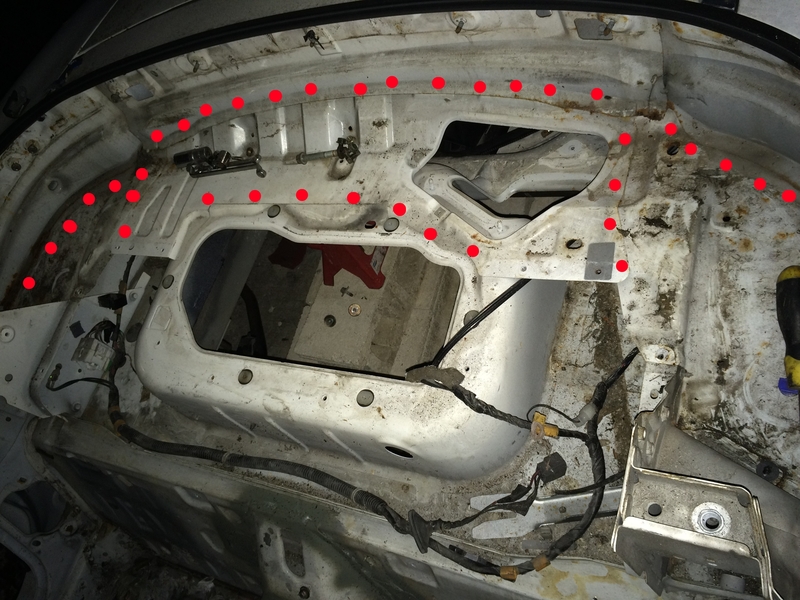
There are some feral cat's that are living in the bush next to the car so I hope to snap a picture to make this build thread legit.
I did manage to get the ecu cover, rear metal panel thing, fuel tank filler, the metal thing that secures the rubber boot around the fuel tank filler and the soft top brackets painted. Etch primer and rustoleum gloss grey all the things!
Have some rusty parts to cut off of the 2 outer brackets
I found out that the soft top water drain bins were blocked tighter than a nuns ----. Why is that relevant you ask....
More **** to cut out and replate.
Does it make any sense re-installing those plastic drain bins if I put on a hard top?
Also any insight if the following spot welds are worth the tennis elbow?
Reply
0
0
04-19-2015, 08:28 AM
#9
Junior Member
Thread Starter
Join Date: Aug 2005
Location: Cayman Islands
Posts: 440
Total Cats: 17
I took a better look at the area in the last pic above. Doesn't look like there is any merit in adding spot welds there. I will just make a seat belt tower brace.
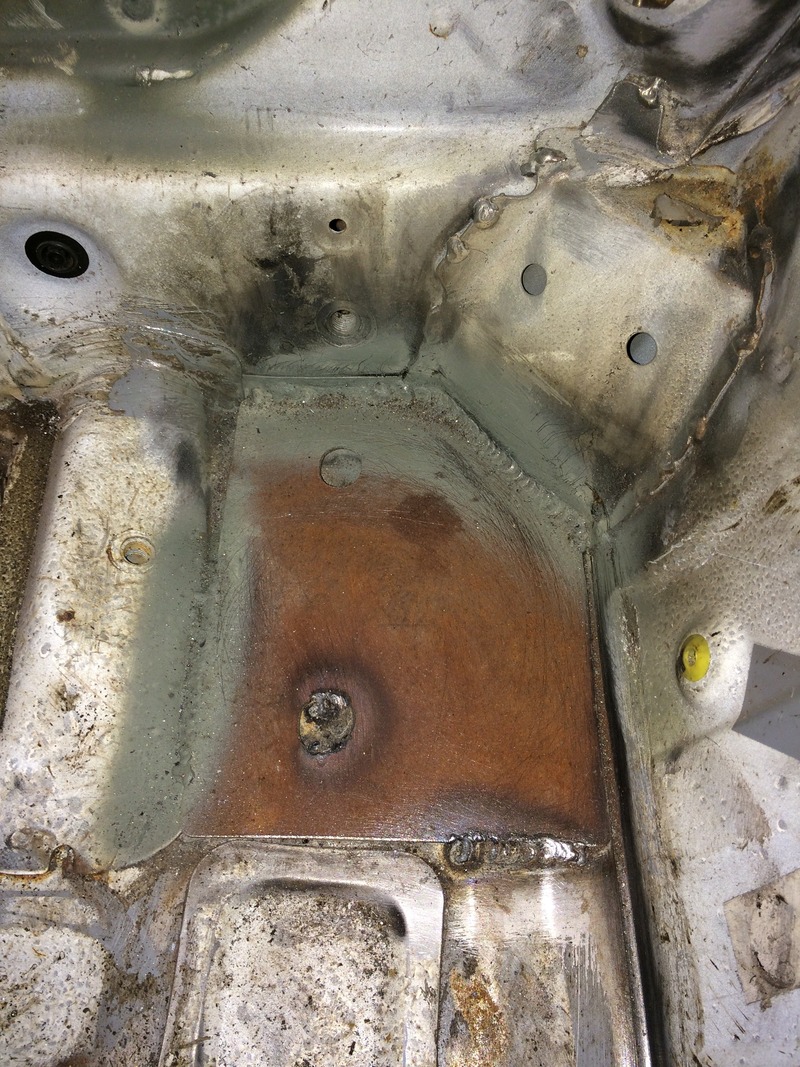
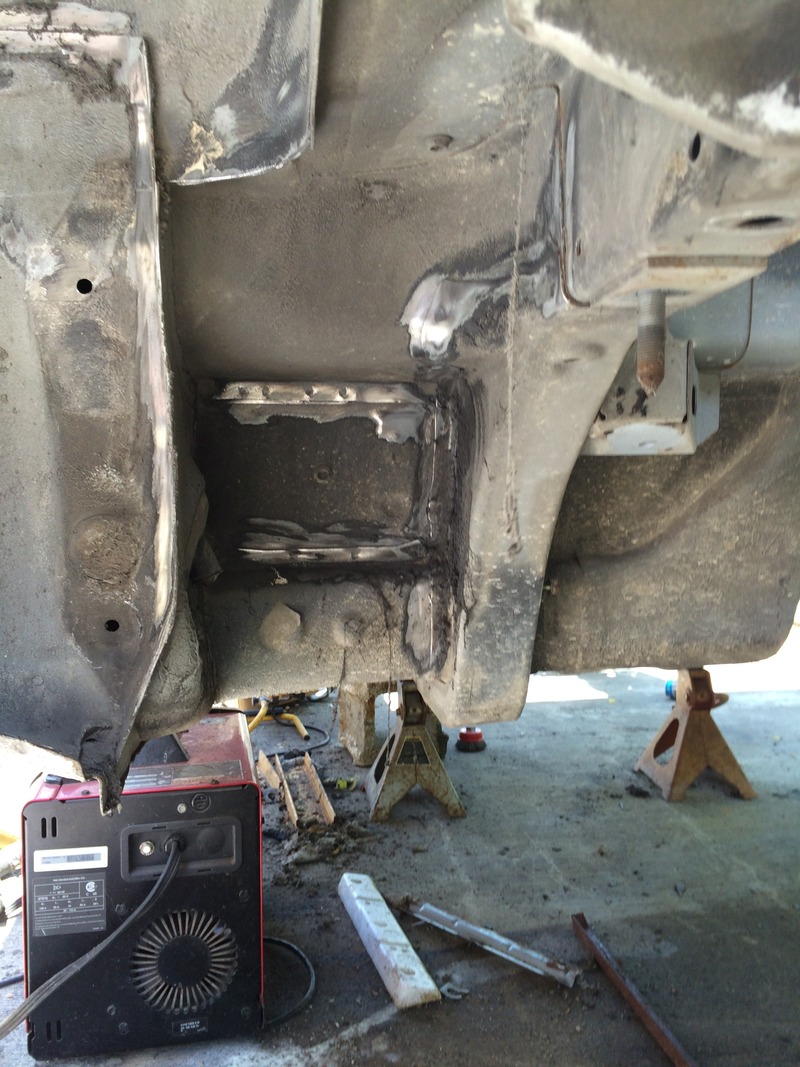
Main hoop base plate. This is 12ga steel sheet. The feet on the cusco cage are 11ga. I will be welding some nuts on some 11ga and welding that plate to the underside. I still have to add the side, corner and back plate.
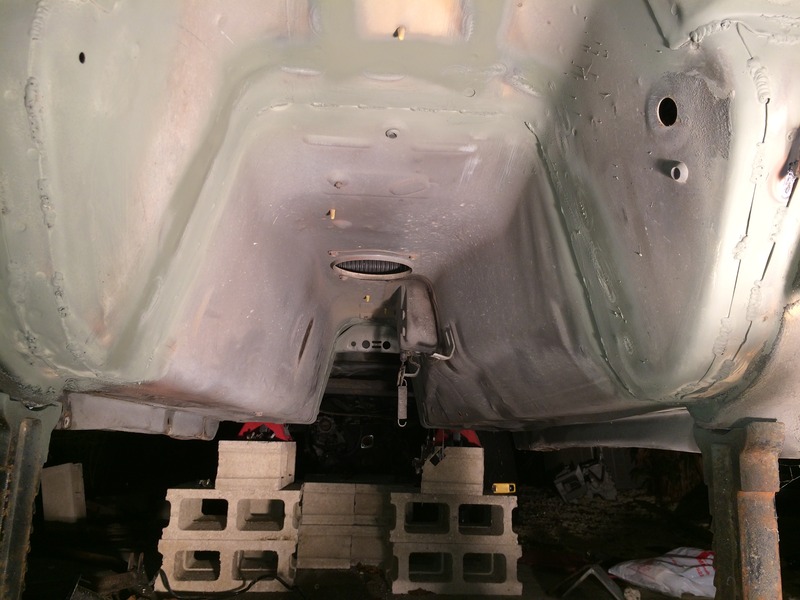
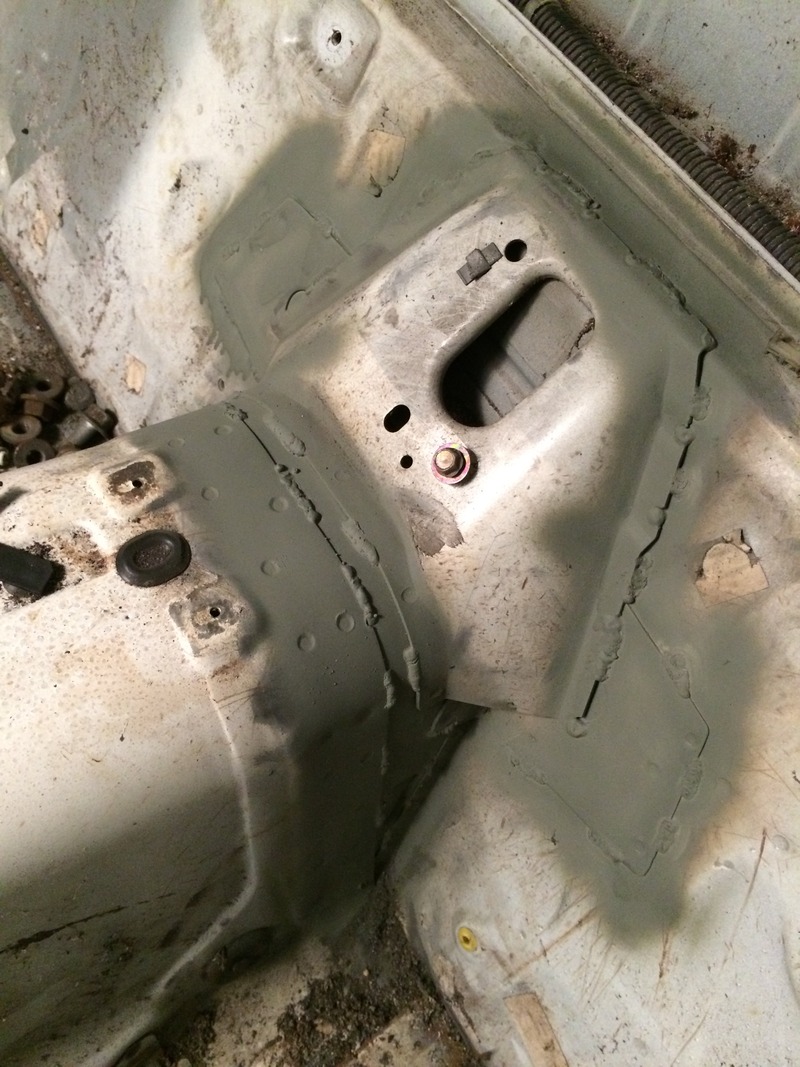
Front of the transmission tunnel. Can't see the rear but that's done as well.
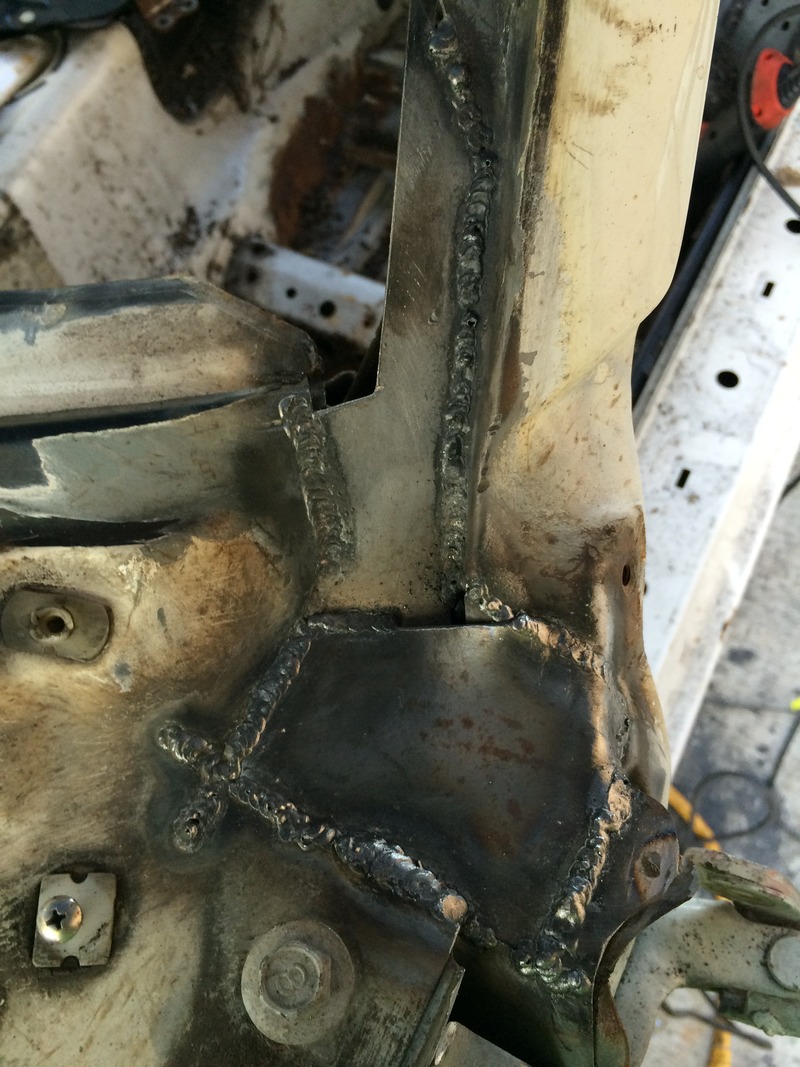
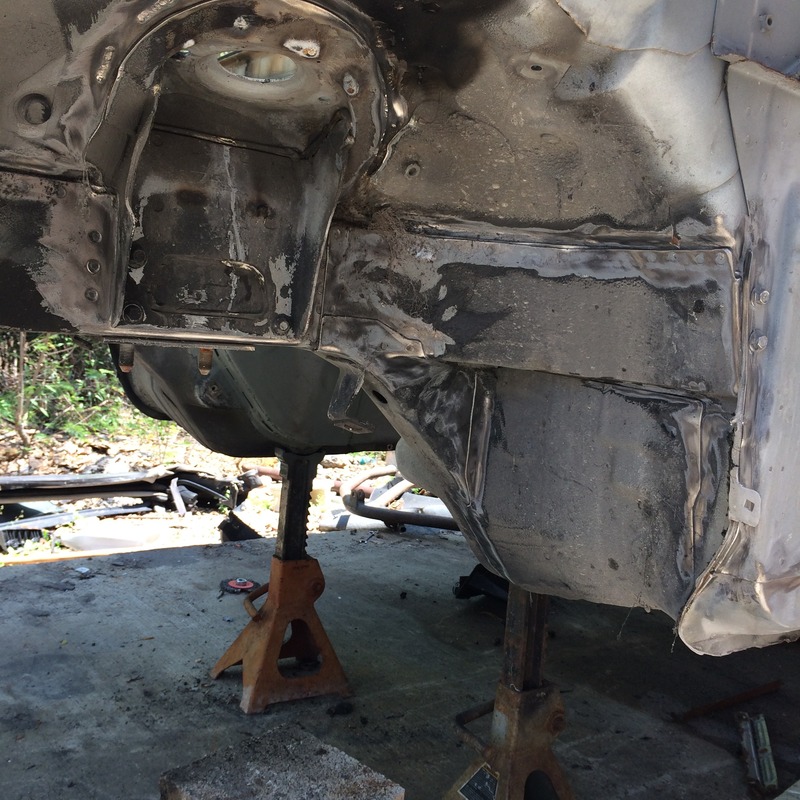
Close up of some of the passenger side welds
My boss came over to get some help painting the wheels on his STI so I didn't get to tackle the wheel wells. The body shop is tied up until the end of June so I have time on my side.
Main hoop base plate. This is 12ga steel sheet. The feet on the cusco cage are 11ga. I will be welding some nuts on some 11ga and welding that plate to the underside. I still have to add the side, corner and back plate.
Front of the transmission tunnel. Can't see the rear but that's done as well.
Close up of some of the passenger side welds
My boss came over to get some help painting the wheels on his STI so I didn't get to tackle the wheel wells. The body shop is tied up until the end of June so I have time on my side.
Reply
0
0
04-19-2015, 06:55 PM
#10
Junior Member
Thread Starter
Join Date: Aug 2005
Location: Cayman Islands
Posts: 440
Total Cats: 17
Got a little more done today
Started cleaning out the rear wheel well and found there are a multitude of places to weld up under there. **** sealant! Wirewheeling that **** has me looking like I lost a fight with spiderman
Front wheel well 80% clean
I took a break from the wire wheel and pulled one side of the rear drive train down. Car has an open diff
Upper cleaned up, painted and drying.
Managed to **** up my right shoulder, guess I overworked it
Reply
0
0
05-04-2015, 04:35 PM
#11
Junior Member
Thread Starter
Join Date: Aug 2005
Location: Cayman Islands
Posts: 440
Total Cats: 17
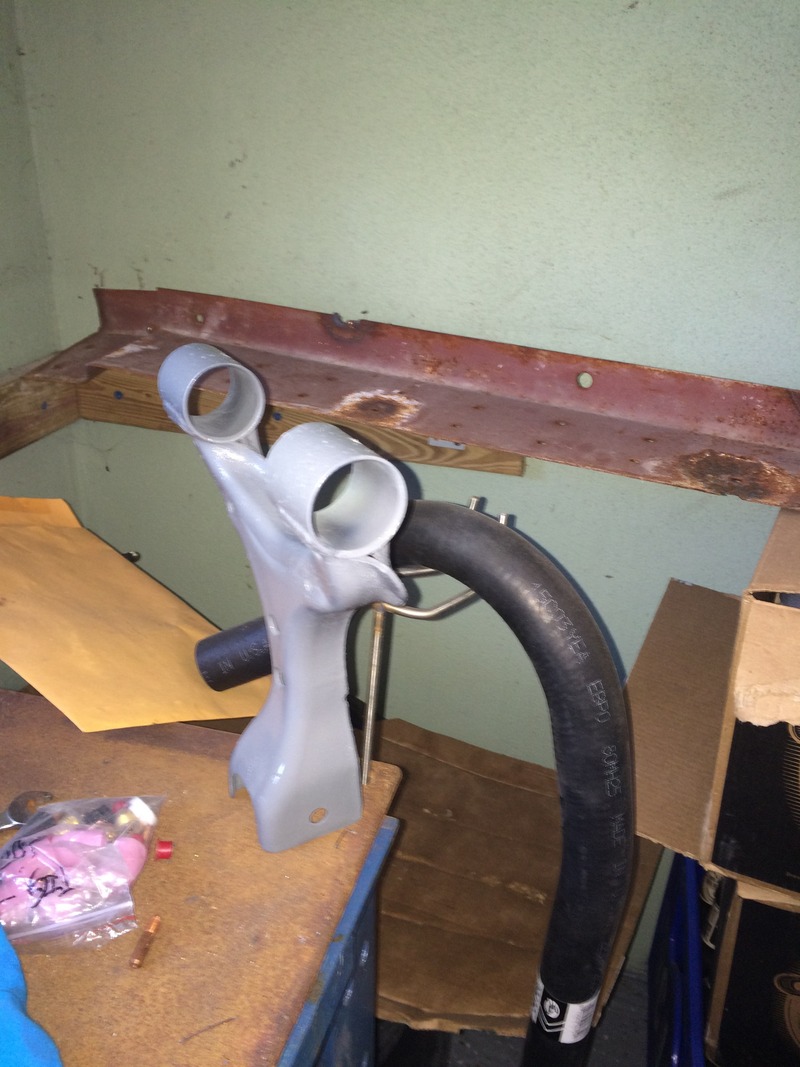
Not much to report. I did get the reroute stuff though!
Friday I'll be back on sealant cleaning duty and finish breaking down the rear suspension for bushings & paint.
Friday I'll be back on sealant cleaning duty and finish breaking down the rear suspension for bushings & paint.
Reply
0
0
05-10-2015, 06:02 PM
#12
Junior Member
Thread Starter
Join Date: Aug 2005
Location: Cayman Islands
Posts: 440
Total Cats: 17

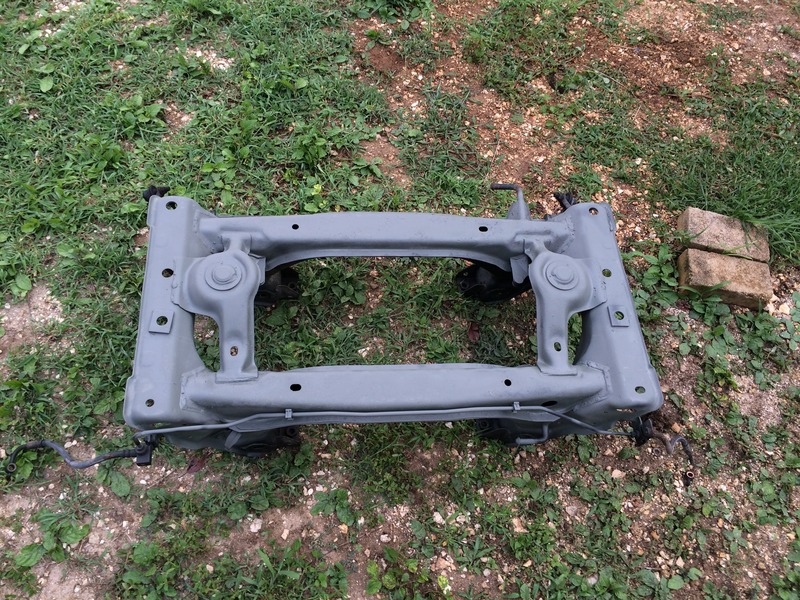
Picked up the FD motor & transmission
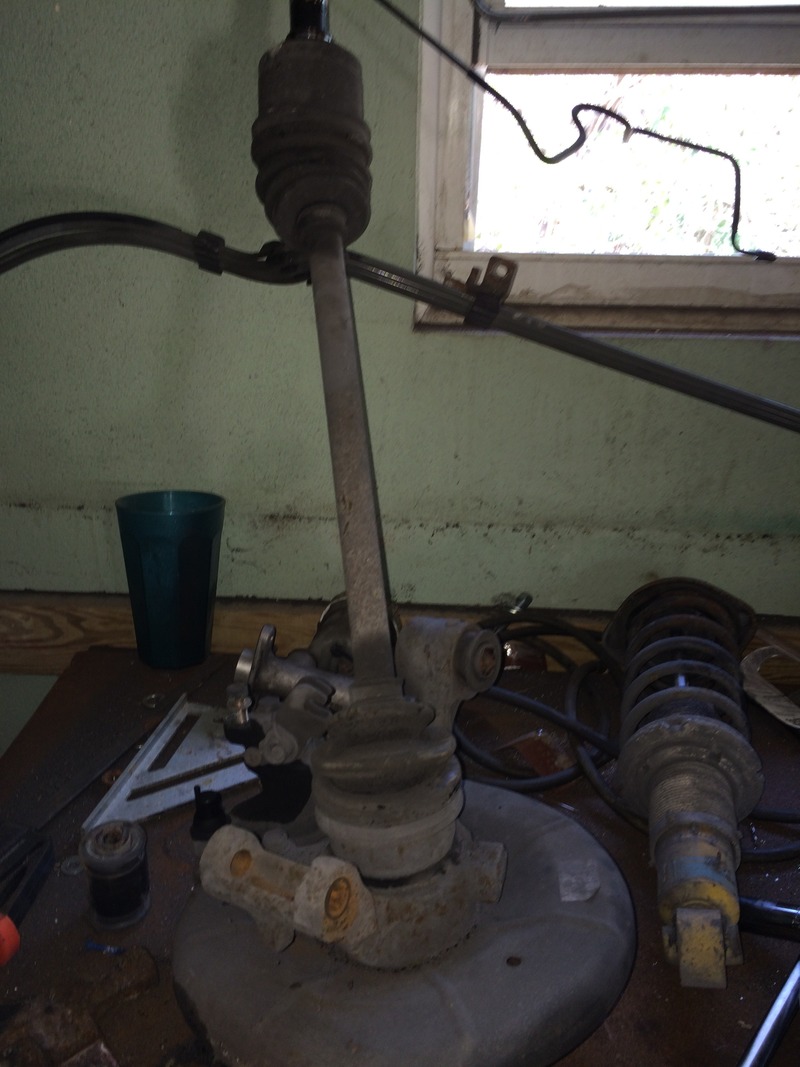
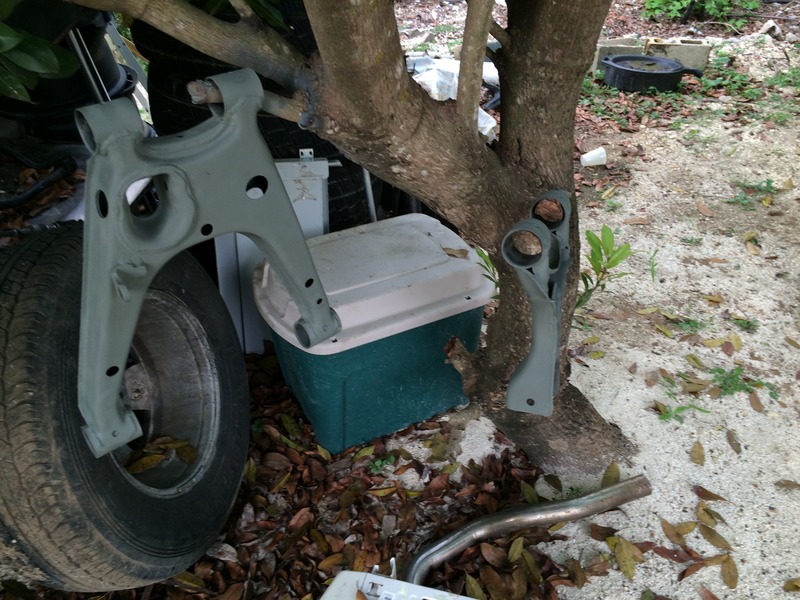
Pressed the last bushing out of, wirebrushed and painted the drivers side lower control arm. Also got the energy suspension bushings installed in the upper arm and knuckle.
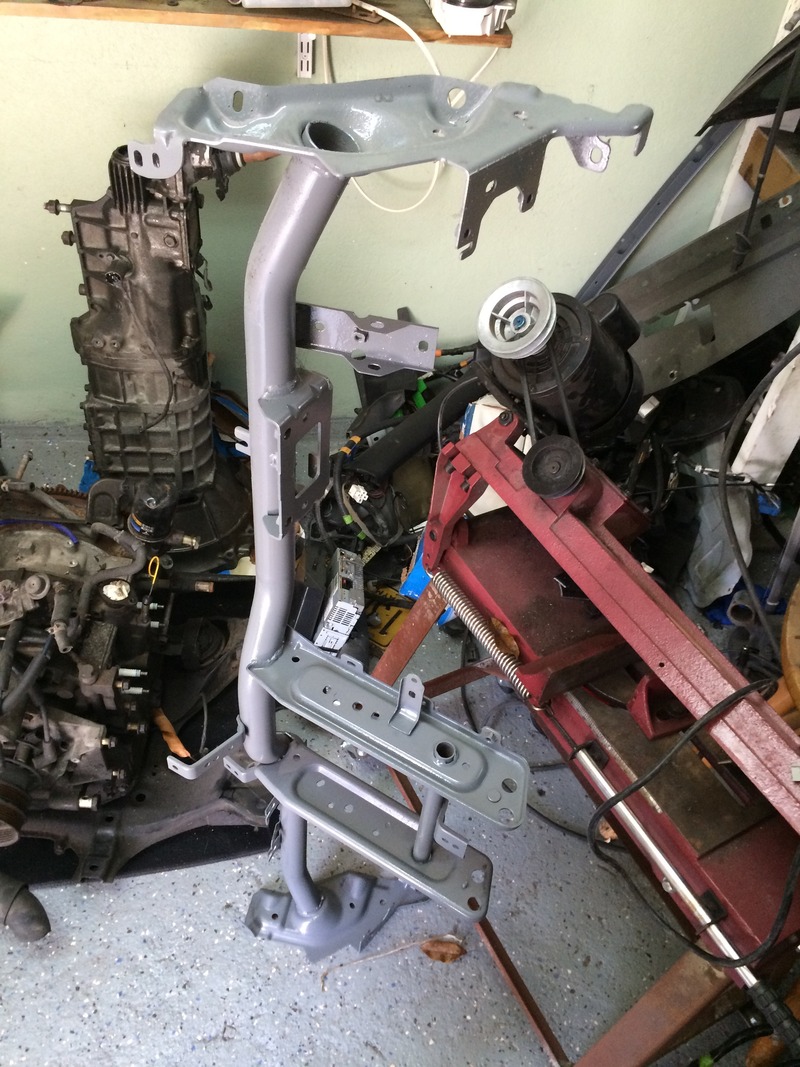
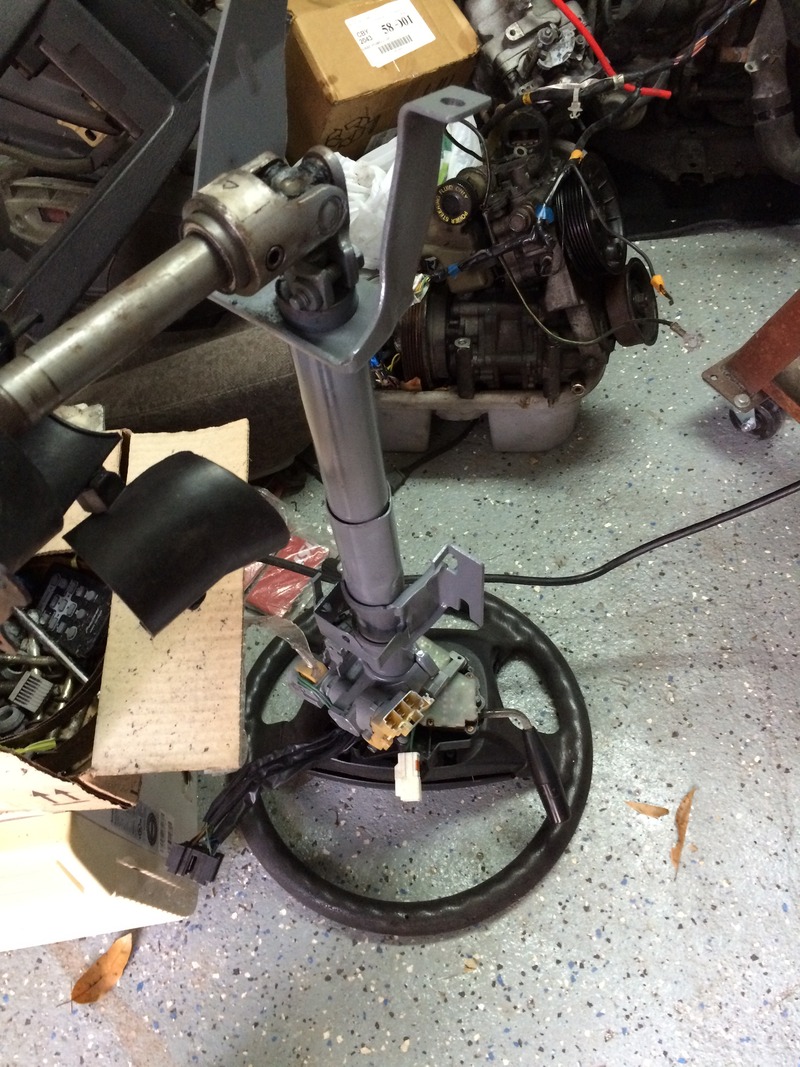
Finished painting the dash bar & steering column.
hopefully I get a day off this week to get back to the main work
Reply
0
0
05-15-2015, 11:01 PM
#13
Junior Member
Thread Starter
Join Date: Aug 2005
Location: Cayman Islands
Posts: 440
Total Cats: 17
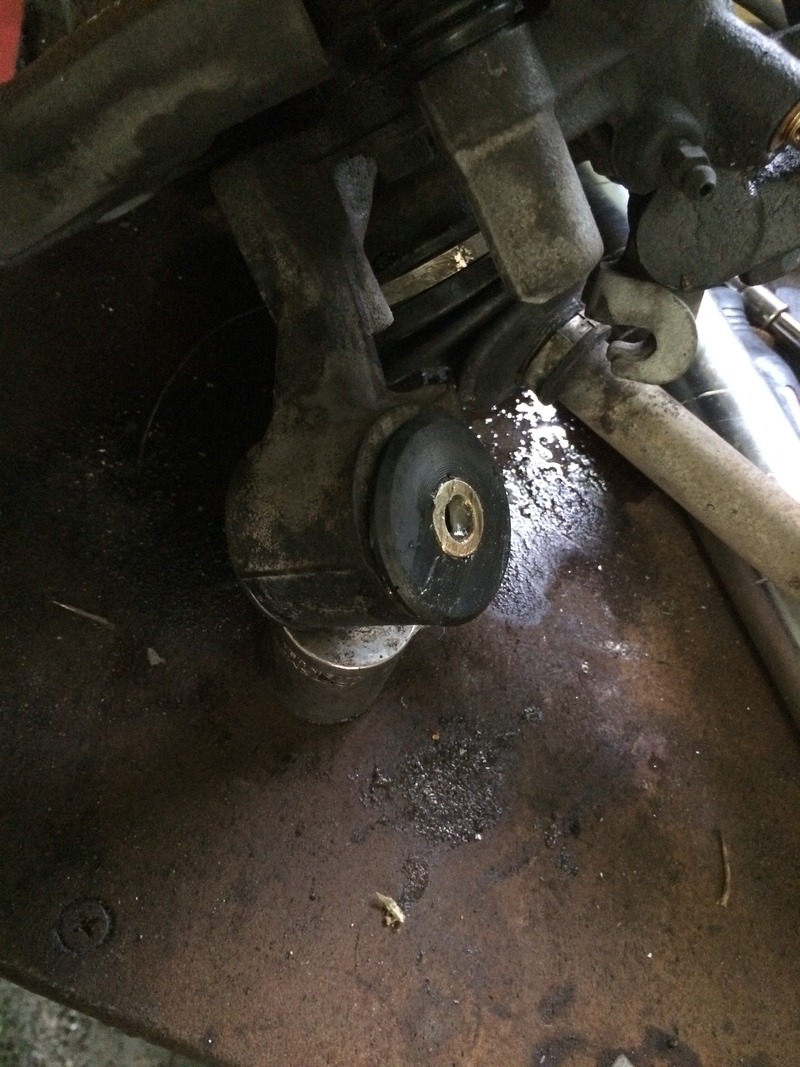
#teamskouspacer. I did degrease that area after the pic, pulled the rear CAS plug and re-sealed with some permatex grey. I need to add a 1/8 & 3/8 NPT plugs since I am not running a gauge or heater.
Hard to spot with the primer but I started on the rear wheel well
**** the pinch weld. That **** is so full of sealant. cocksuckingninnymuggins
Spots & stitch. No matter how much you scrape out with a razor blade, sealant burns and bubbles. FML why have I done this. Ignore the hole, I went straight through with the spot weld bit
rear arms soaking in some etch primer after a clean
Ran out of etch primer after cleaning up the rear subframe
The painted steering column I mentioned in the last post

Ignore greasy hand prints. Energy suspension hyper lube is the devils ---- lube and sticks to everything

Rear knuckle upper bushings installed. Degreased axles and **** since the diff seals were shot
I am bushed. Doing this **** in caribbean heat ain't fun. Better than the cold though....or at least I'm built to cope with the heat.
Family allowing tuesday I might get to sort out the wheel wells and call the seam welding complete. I still have to do 3-4 rust patches and then it is ready to take a flat bed to the body shop

Reply
0
0
05-19-2015, 09:21 PM
#14
Junior Member
Thread Starter
Join Date: Aug 2005
Location: Cayman Islands
Posts: 440
Total Cats: 17
I have the interior mostly buttoned up. I have to cut out and replate some holes on the passenger side. Not sure when I will get time to go back at the car so I just painted everything.
Base plates for the main hoop and front tubes are done. I still need to add for the rear tubes. The next big push will be to weld up the wheel wells.
My brother is taking the diff to work tomorrow to knock out the bushings. I have installed all the rear bushings. Once I get all that stuff back I will be reinstalling the rear subframe/control arms & hubs so I can roll the rear fenders, hind sight

Reply
0
0
05-20-2015, 05:57 PM
#15
Junior Member
Thread Starter
Join Date: Aug 2005
Location: Cayman Islands
Posts: 440
Total Cats: 17
Immediate to do:
Strip to bare shell
clean & paint dash bar & pedal assemblies
disassemble/clean/paint rear subframe & control arms
install rear control arm bushings
install rear diff bushings
weld in cage base plate supports
finish seam welding
repair passenger floor rust
repair drivers b pillar rust
repair drivers rear fender rust
patch hole in drivers a pillar
fab seat brackets
depower steering rack
disassemble/clean/paint front subframe & control arms
install front control arm bushings
To buy:
Caliper rebuild kits
Stoptech street pads
Gates waterpump/timing belt kit
Front main seal
Hardtop
Torsen
Rear calipers
windshield seal
5xracing shifter rebuild kit
MComp engine mounts
Brake lines & fittings
v8roadster fronts way bar brackets
Coilovers
finish seam welding
repair passenger floor rust
repair drivers b pillar rust
repair drivers rear fender rust
patch hole in drivers a pillar
fab seat brackets
depower steering rack
disassemble/clean/paint front subframe & control arms
install front control arm bushings
To buy:
Stoptech street pads
Gates waterpump/timing belt kit
Front main seal
Hardtop
Torsen
Rear calipers
windshield seal
5xracing shifter rebuild kit
MComp engine mounts
Brake lines & fittings
v8roadster fronts way bar brackets
Coilovers
Reply
0
0
05-25-2015, 05:14 PM
#16
Junior Member
Thread Starter
Join Date: Aug 2005
Location: Cayman Islands
Posts: 440
Total Cats: 17
Hardtop confirmed 
Not bad for $365
If I was having to pay for freight mind you it would have ended up just as much as a top from the US.
Also said **** it and had the guy bid on some Monoflex coilovers. Hopefully "I" win those and the big stuff is sorted for the moment.
Not bad for $365
If I was having to pay for freight mind you it would have ended up just as much as a top from the US.
Also said **** it and had the guy bid on some Monoflex coilovers. Hopefully "I" win those and the big stuff is sorted for the moment.
Reply
0
0
 05-30-2015, 09:53 PM
#19
Junior Member
Thread Starter
Join Date: Aug 2005
Location: Cayman Islands
Posts: 440
Total Cats: 17
Got a Torsen for the all time awesome price of $185. I couldn't find any with 4.10 gears so I'm stuck with the 4.30's for now.
Spotted an auction for a single plate ATS carbon clutch, I'll know by the 6th if I win that. After that I'm pretty much set for all the big parts.
Spotted an auction for a single plate ATS carbon clutch, I'll know by the 6th if I win that. After that I'm pretty much set for all the big parts.
Reply
0
0


