the REbuild thread
#1
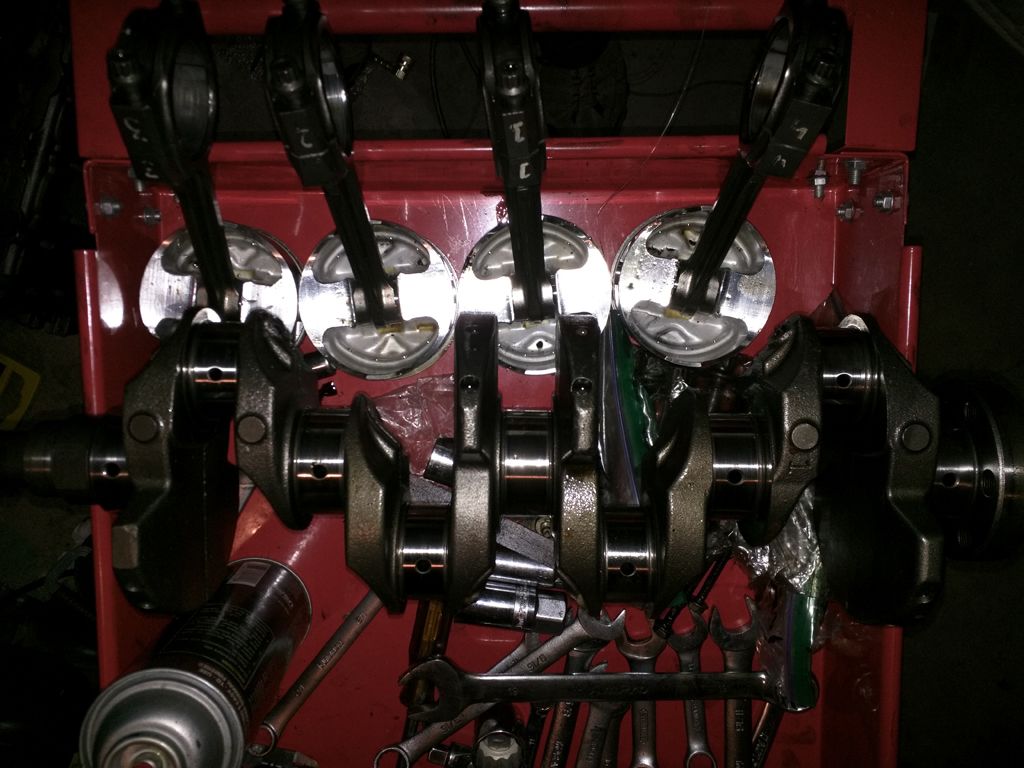
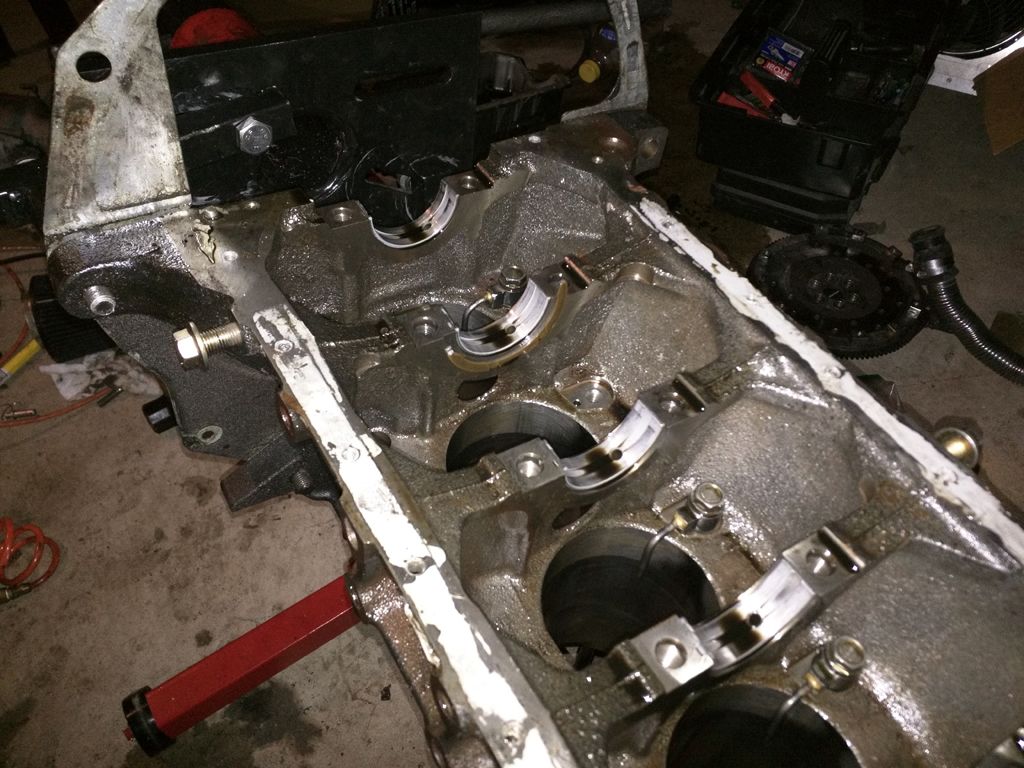
This is the documentation of my rebuild after I lost oil pressure, opened up the engine to replace the oil pump and instead discovered that one of my oil squirters had destroyed a piston, scratching a cylinder wall in the process. See carnage thread here.
As of right now, the head, rods, pistons, crank, oil pump, etc are off the block and I'm getting ready to take it to a machine shop Monday to find out what size pistons I end up needing.
Going to add double heavy valve springs, BE oil pump and one of those 949 harmonic dampers as I reassemble.
Things I'm wondering about:
1) Should I redo rod/main bearings because I have everything apart even if everything looks fine? This does seem like a good time to verify clearances are cool. I will feel kind of retarded if a spin a bearing 3 months from now and have to do this **** over again. Of course I will also feel retarded if I use the wrong size bearings or something and make things worse.
2) edit: nevermind, I see them
3) opinions on using "assembly lube" vs motor oil
Also, I learned a very valuable lesson about engine disassembly. GET AN IMPACT WRENCH. It turns hours of HNNNNGG into minutes of BRRRT.
Last edited by AlwaysBroken; 11-22-2015 at 02:27 PM.
#8
edit: valuable lesson learned, always go talk to the machinist in person. Explaining over the phone was a train wreck. In person, everything made sense and he could just show me what he was talking about.
New plan:
1) Rough bore to see how deep the scratch is, then he'll tell me the new size so I know what size pistons to get.
2) Looks like there are little ridges around the edges of the main bearing surfaces, which he wants to bore hone away so that the little ridges don't collapse after I put the bearings in and change my clearances or let the bearings settle at an angle. He said that if I wanted to switch to arp main studs, he'll do it after I get them in.
So that's pretty much it for the next week or so.
Last edited by AlwaysBroken; 12-02-2015 at 11:03 AM.
#9
Just heard back and 84.5mm pistons and ARP main studs shall be ordered. I'm going to bring by my crankshaft to have it miced and then order bearings as well.
I have double heavy valve springs and a set of valve seals on the way already. I'm going to drop the 99 head off for a rebuilding as soon as it all arrives.
So it's looking like I should have everything (give or take pistons... edit: ooh nevermind, looks like wisecos sometime next week) ready to reassemble by the end of the month.
Last edited by AlwaysBroken; 12-09-2015 at 06:32 PM.
#11
Ditching them as soon as I find a fastener of the appropriate length to plug the hole.
They're a bandaid for running cast pistons with a turbo on a low boost setup. I just don't see the benefit to keeping them. I'm open to counter-arguments but the topic has pretty much been done to death with nearly everyone reporting improvements in oil temps, oil consumption and oil pressure. Add in the ability to torque them down a bit harder without breaking anything, and it seems like a non-brainer given the cause of this rebuild.
They're a bandaid for running cast pistons with a turbo on a low boost setup. I just don't see the benefit to keeping them. I'm open to counter-arguments but the topic has pretty much been done to death with nearly everyone reporting improvements in oil temps, oil consumption and oil pressure. Add in the ability to torque them down a bit harder without breaking anything, and it seems like a non-brainer given the cause of this rebuild.
#12
i'm stuck with mine in, i hadnt thought of it during my build :\
i thought a benefit was a cooler piston which might help further prevent detonation. As far as oil temps, I think an oil cooler is in my future, but oil pressure wouldn't really be that big a concern if upgrading a pump w/ shim
i thought a benefit was a cooler piston which might help further prevent detonation. As far as oil temps, I think an oil cooler is in my future, but oil pressure wouldn't really be that big a concern if upgrading a pump w/ shim
#13
Eh, I wouldn't stress over it, since my car was fine for over 10 years with them and I never noticed the problems others have complained about. Unless yours fall out, it will probably never be an issue. I still have no idea why one of mine came out after so long. With me upgrading the oil pump anyway, it's probably massive overkill to seal the sprayers.


