Project Stella MX
#1
I had better do a build diary in here as well as one my own 16vmini forum. You guys have been really helpful so far cheers. It might look a bit disjointed as I've copied it from 16vmini.
started off a few weekend with this.......the very last time Stella will be started with the big bruiser Vauxhall engine.
then it was on with the strip down
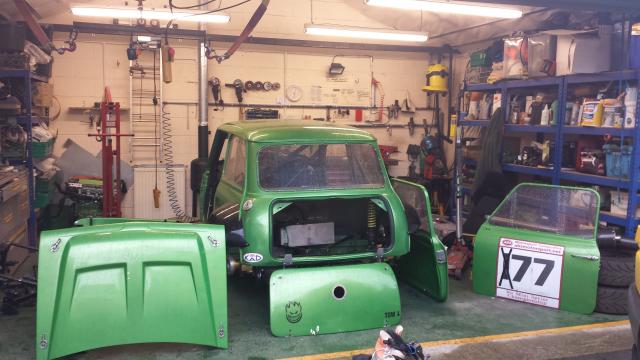
and you finish the weekend like this
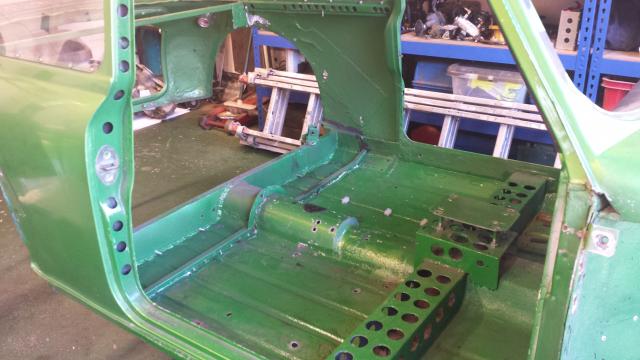
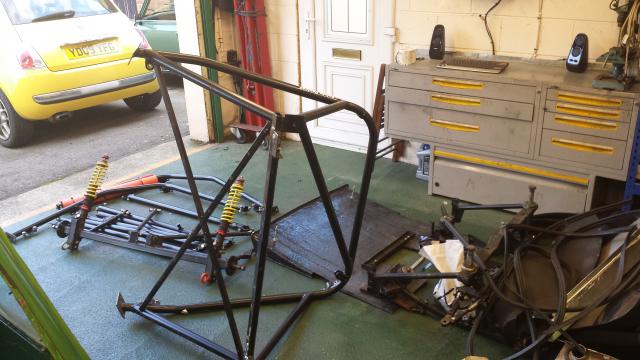
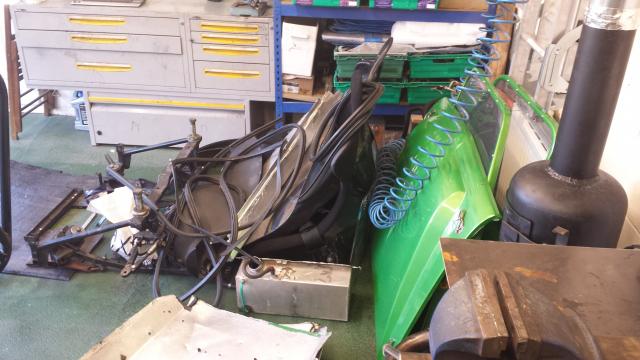
started off a few weekend with this.......the very last time Stella will be started with the big bruiser Vauxhall engine.
then it was on with the strip down

and you finish the weekend like this


#2
I'm so happy i decided to go the space frame route. The shell is really rotten around the sills
this is how i started the day off
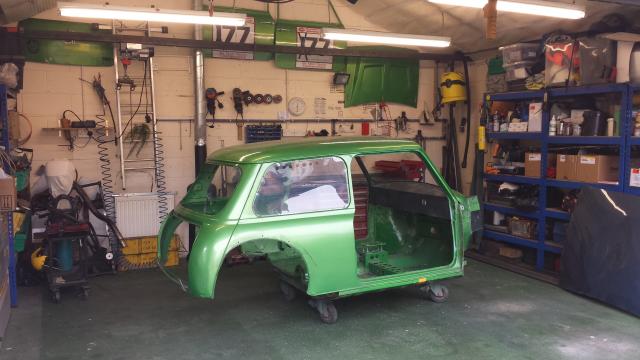
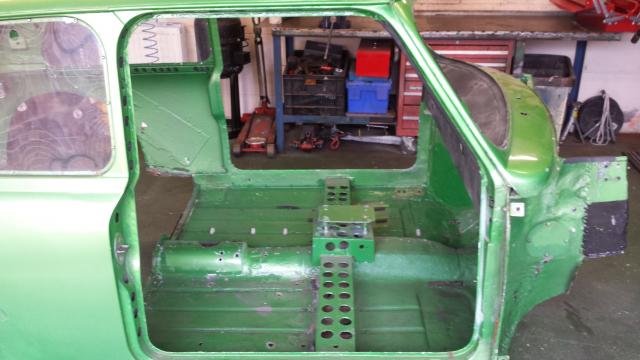
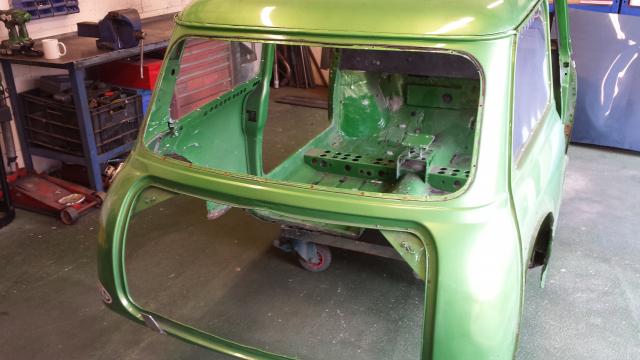
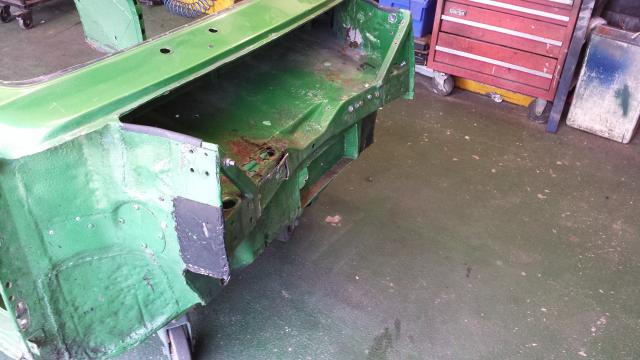
I started cutting and found my sills rotten and about 5kg's of sand and rust in them
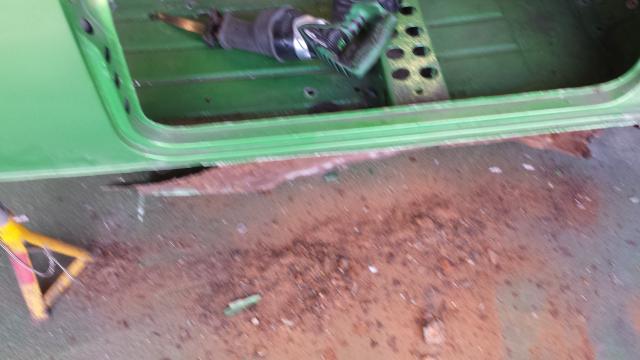
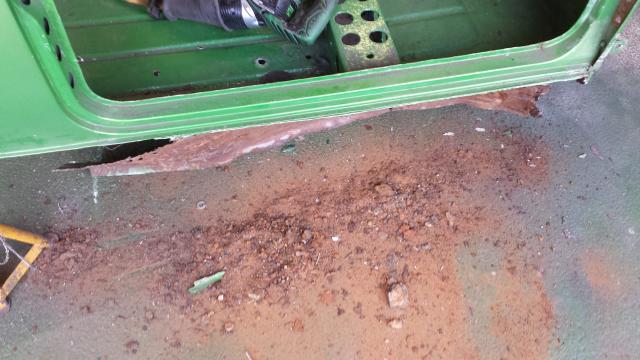
with the floor gone i had to make a temporary stand so i can move it about
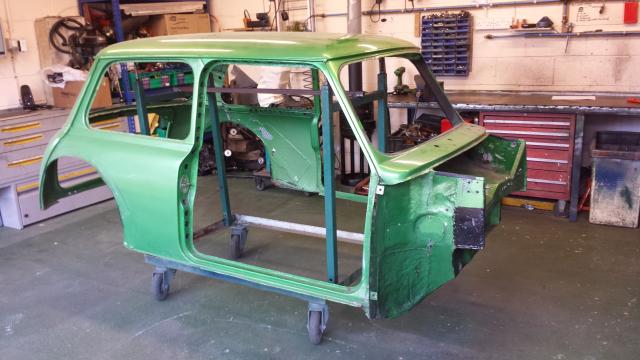
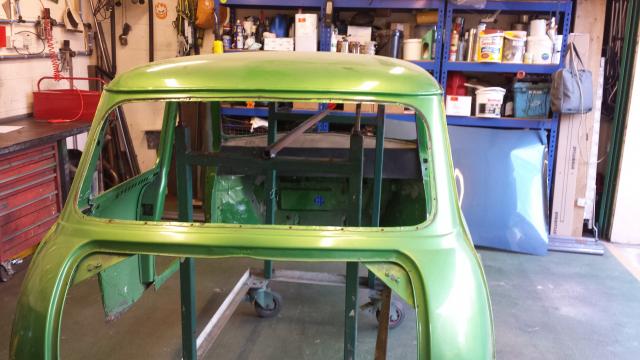
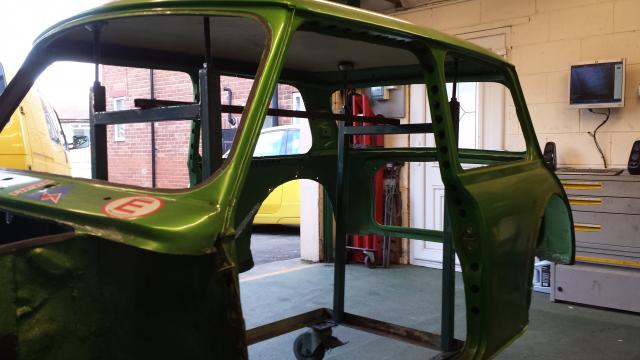
That's where i left it for today. i'll finish cutting the bulkhead out tomorrow and try and make a start on the floor. Its good to be back in the garage
this is how i started the day off


I started cutting
 and found my sills rotten and about 5kg's of sand and rust in them


with the floor gone i had to make a temporary stand so i can move it about


That's where i left it for today. i'll finish cutting the bulkhead out tomorrow and try and make a start on the floor. Its good to be back in the garage

#3
I had a good day today, bulkhead removed and i'm where i wanted to be at the end of the weekend. There is a bit of work to do to the shell to tidy it up but only a weekends work i think
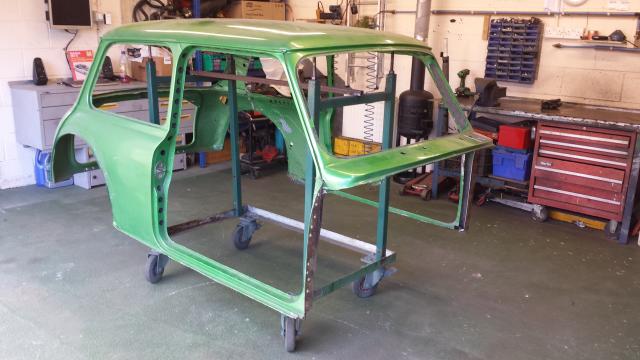
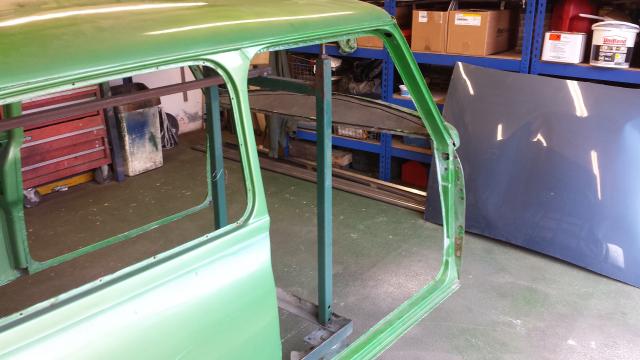
Started on the space frame base but i can't really do much more till i get the MX5 and see where the prop shaft and exhaust tunnel are going to go.
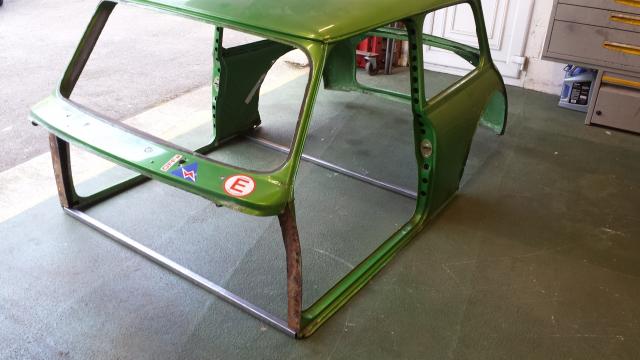
nothing is permanent yet so its just sat on the box section
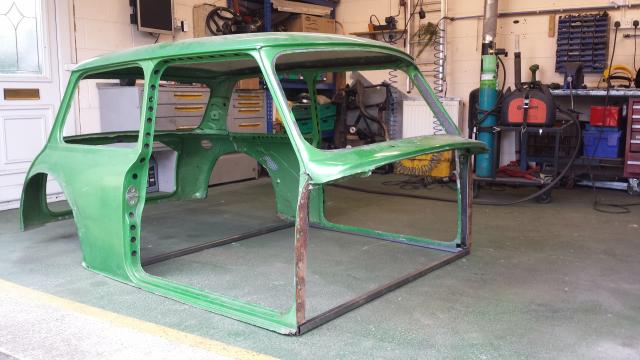
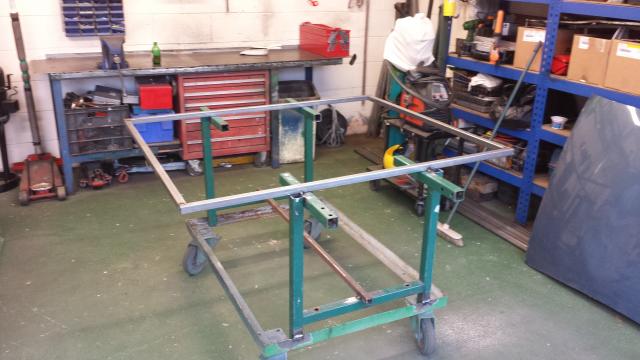
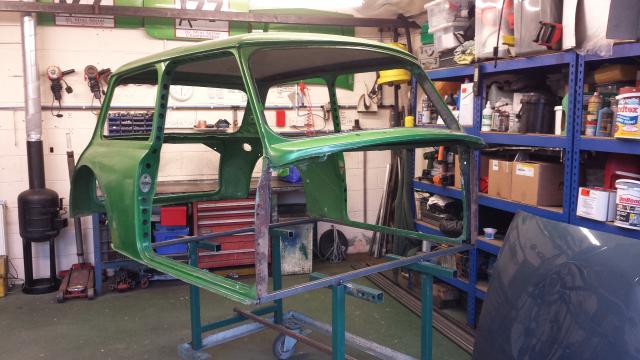
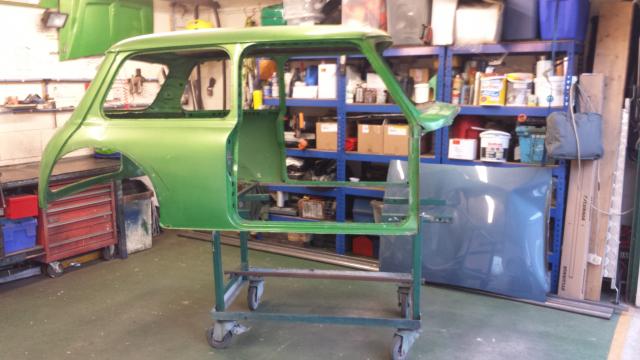
I modified my stand so i can get it a bit higher to crack on with the body work
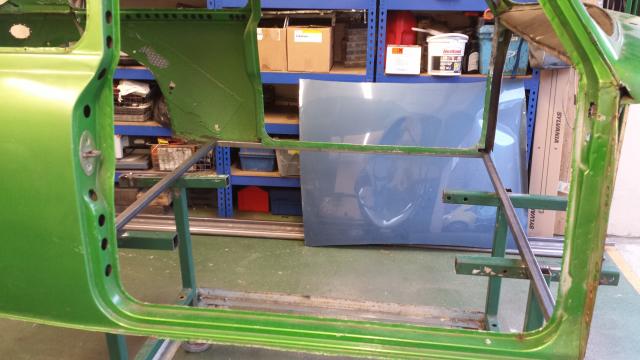
My space frame bits should be here in a few weeks but i really need the doner car to crack on.


Started on the space frame base but i can't really do much more till i get the MX5 and see where the prop shaft and exhaust tunnel are going to go.

nothing is permanent yet so its just sat on the box section

I modified my stand so i can get it a bit higher to crack on with the body work


My space frame bits should be here in a few weeks but i really need the doner car to crack on.
#4
A rather large parcel arrived yesterday from Custom cages
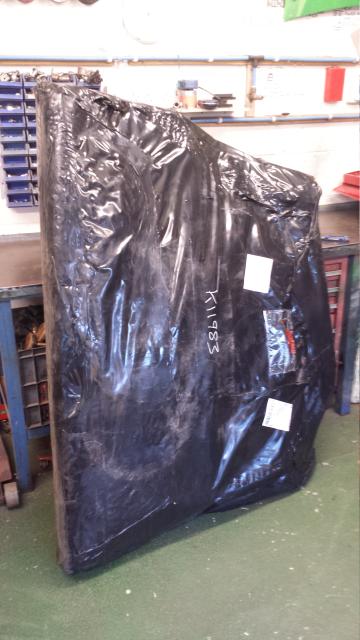
I now have lots of long bits of CDS and also some shorter bent bits
I'm going to concentrate on the shell tomorrow and maybe try and finish off the floor frame.
Bulkhead bit added.....this took longer than i thought it was going to so didn't get time to finish the space frame base.
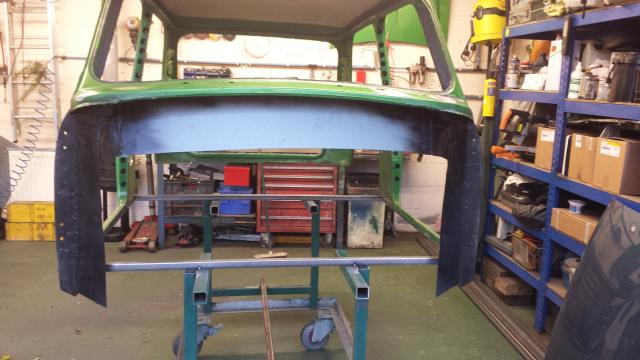
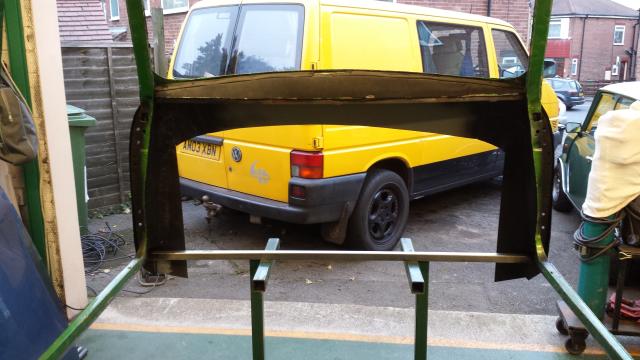

I now have lots of long bits of CDS and also some shorter bent bits

I'm going to concentrate on the shell tomorrow and maybe try and finish off the floor frame.
Bulkhead bit added.....this took longer than i thought it was going to so didn't get time to finish the space frame base.


#5
I started the day off on Sunday at 7.00am to a nice empty garage.
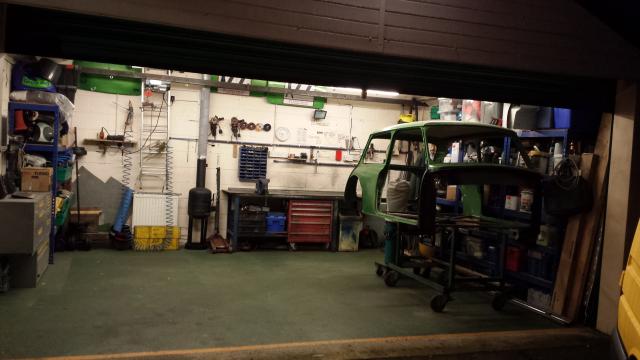
I went to collect Bill's trailer in Lincoln and went here

some of you might remember it They were having there Festival of motor sport yesterday. I had a look but couldn't find any of you guys there your invite must of got lost in the post along with mine......ok maybe not mine as i'm not a member anymore
Big thanks to Joey who came to the track with me just in case they didn't let me in on my own
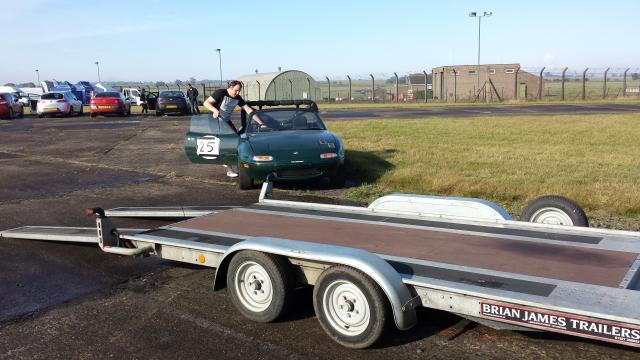

I went to collect Bill's trailer in Lincoln and went here

some of you might remember it
 They were having there Festival of motor sport yesterday. I had a look but couldn't find any of you guys there your invite must of got lost in the post along with mine......ok maybe not mine as i'm not a member anymore
Big thanks to Joey who came to the track with me just in case they didn't let me in on my own

#7
Not much to write about as i'm still stripping the horrible piece of ***** Its not my favorite car at the moment as every nut and bolt is seized. I need it gone on Saturday so a few late nights are on the cards.
The only photo's i have are the ones i took on Sunday when i still liked the thing
I can use the front and back brakes as they fit under 13" wheels
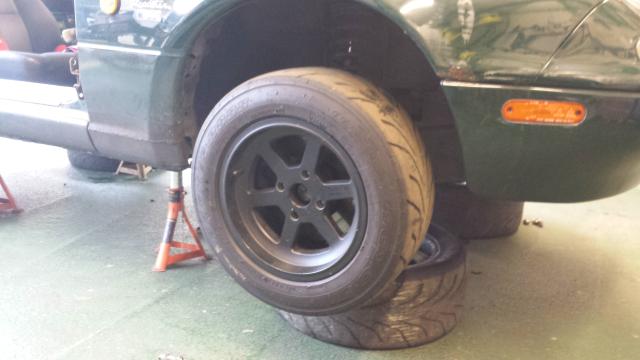
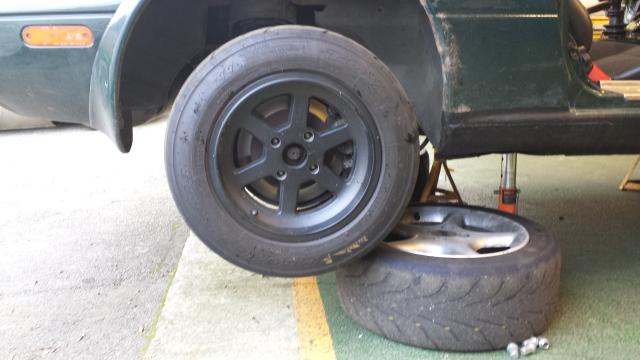
After very carefully removing the wiring loom and all the other bits i need this is where i am
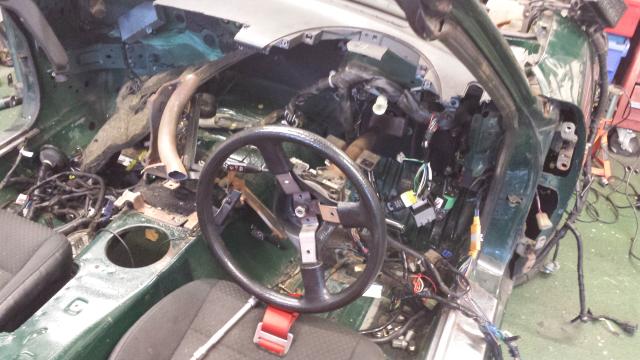
This is for Steve........its been like this for 3 days and i haven't been able sleep properly
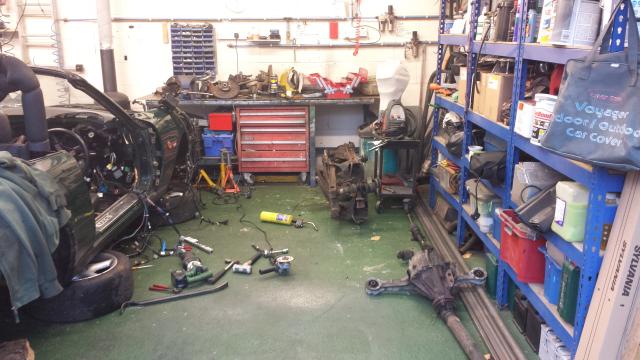
 Its not my favorite car at the moment as every nut and bolt is seized. I need it gone on Saturday so a few late nights are on the cards.
The only photo's i have are the ones i took on Sunday when i still liked the thing

I can use the front and back brakes as they fit under 13" wheels


After very carefully removing the wiring loom
 and all the other bits i need this is where i am
This is for Steve........its been like this for 3 days and i haven't been able sleep properly


#8
The MX5 is gone I weighed it in on Saturday along with the floor pan and bulkhead from Stella. I tidied up at last and i can sleep again
 .
.
Spent the day sorting out all the running gear and stripping the bearing out of the uprights. I've got one drive shaft and CV joint that will not separate from the hub. CV joint is fucked........well it is now after i tried to persuade it out with a BFH:(
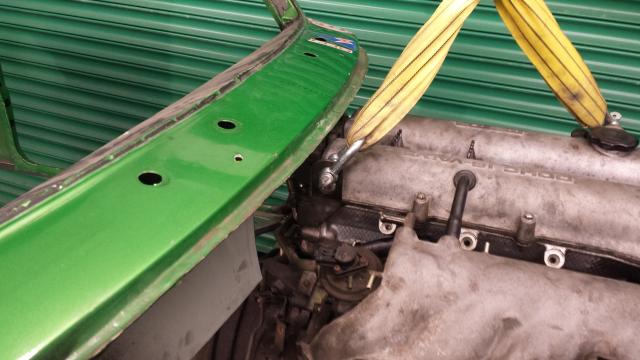
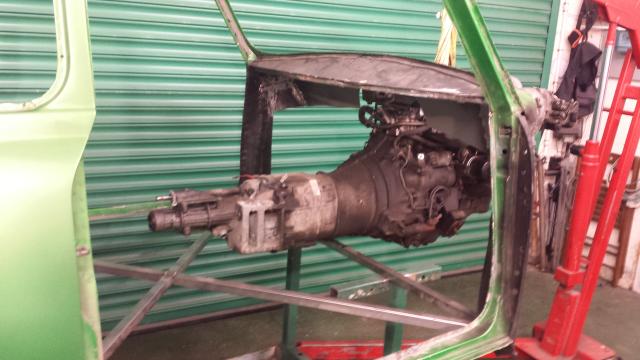
I had a look at where the engine is going to sit
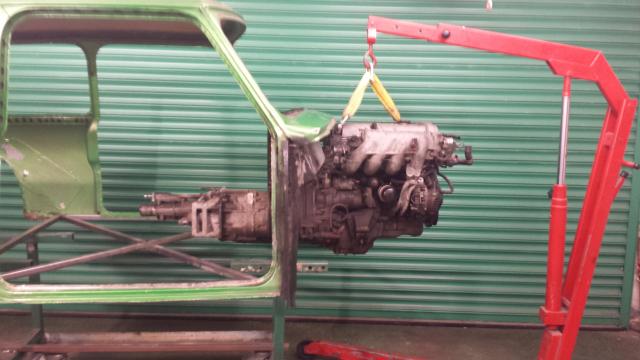
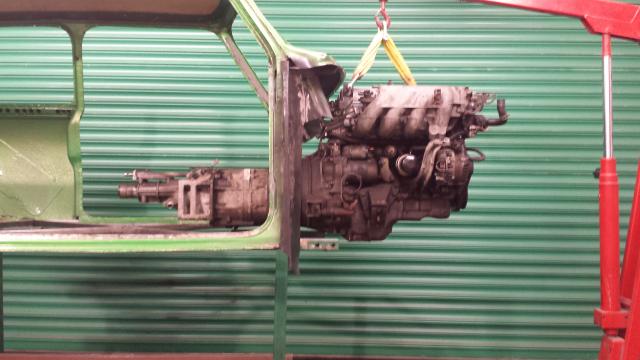
I think it needs to be back a bit further as you can see the indent on the oil pan where the steering rack needs to be.
That's all for a while anyway as i'm off on holiday to Egypt in a few weeks, i might get next weekend in.
So that brings you up to date.
I need a few things clarifying please. I didn't get to see the underside of the MX5 before i stripped it. Am i right in thinking that the indent in the oil pan IS where the steering rack is located? I'm not using the MX5 rack but have to make up the front of the space frame.
Also i need a new CV joint.......once i get other one out of the hub Do later ones that have the ABS ring fit OK in a 1994 mk1? I don't want to use ABS but can use it in conjunction with a "hall sensor" for traction control.
Cheers Paul
 I weighed it in on Saturday along with the floor pan and bulkhead from Stella. I tidied up at last and i can sleep again
 .
.Spent the day sorting out all the running gear and stripping the bearing out of the uprights. I've got one drive shaft and CV joint that will not separate from the hub. CV joint is fucked........well it is now after i tried to persuade it out with a BFH:(
I had a look at where the engine is going to sit


I think it needs to be back a bit further as you can see the indent on the oil pan where the steering rack needs to be.


That's all for a while anyway as i'm off on holiday to Egypt in a few weeks, i might get next weekend in.
So that brings you up to date.
I need a few things clarifying please. I didn't get to see the underside of the MX5 before i stripped it. Am i right in thinking that the indent in the oil pan IS where the steering rack is located? I'm not using the MX5 rack but have to make up the front of the space frame.
Also i need a new CV joint.......once i get other one out of the hub
 Do later ones that have the ABS ring fit OK in a 1994 mk1? I don't want to use ABS but can use it in conjunction with a "hall sensor" for traction control.
Cheers Paul
#13
Not much to see really work keeps getting in the way but I've made quite a lot of progress.
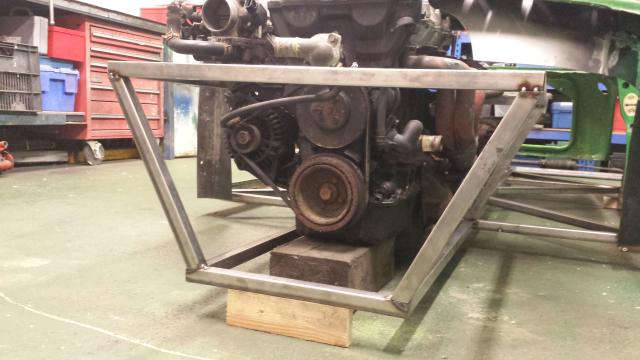
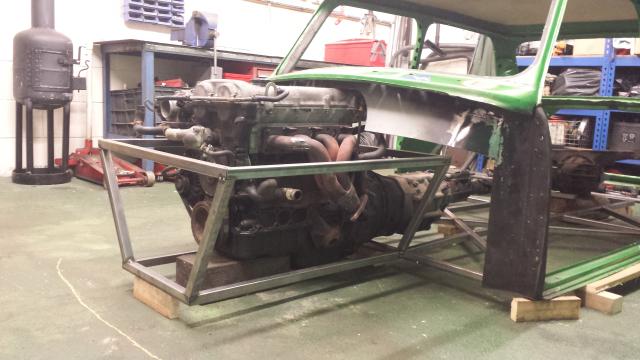
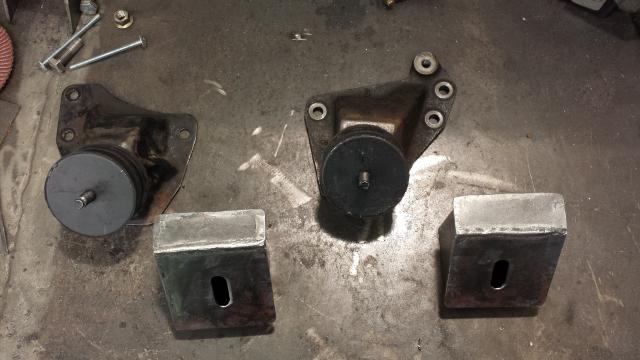
Engine mounts made.
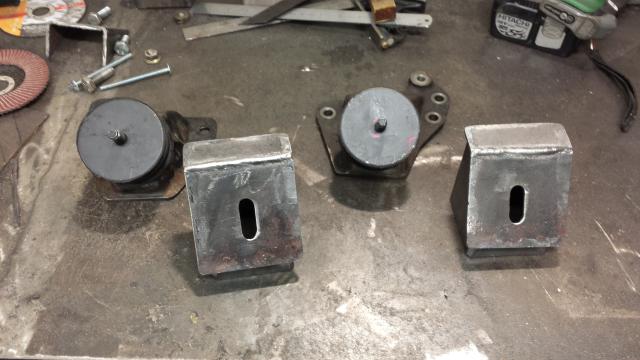
I was able to use the existing MX5 mounts but added the trusted Land Rover bobbins.
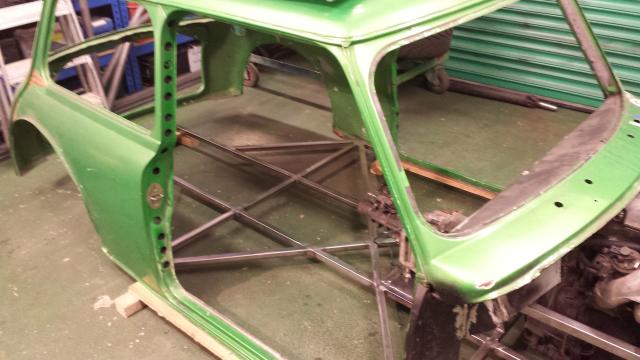
I got the base welded up as well
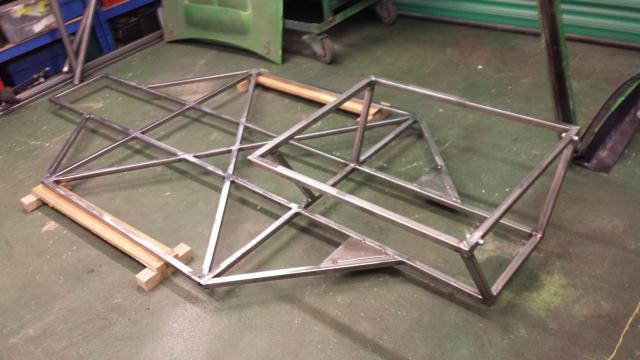
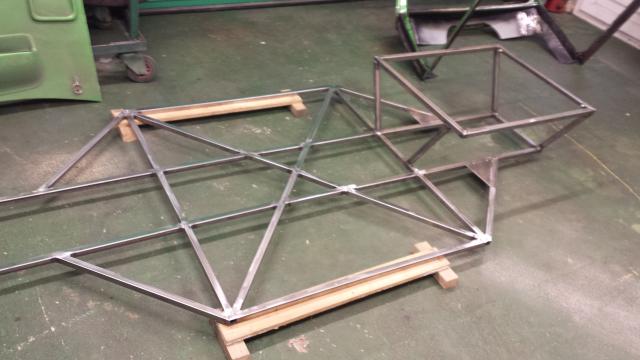
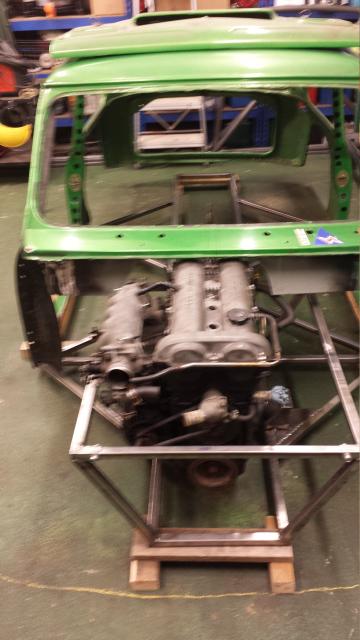
Engine is in and sat on its mounts. The mounts need a bit more bracing adding but I'll wait till the engine is out again to have a bit more room.
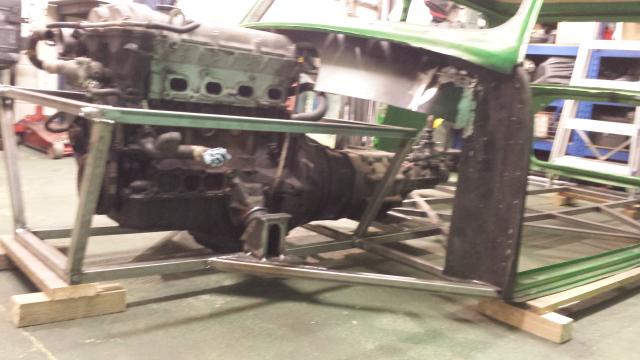
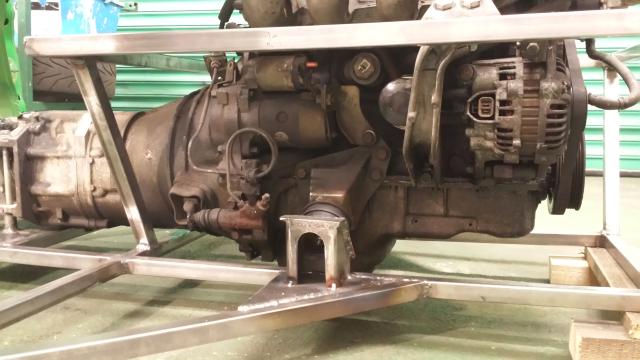
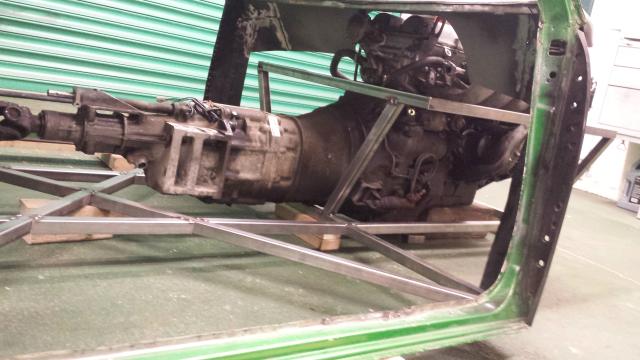
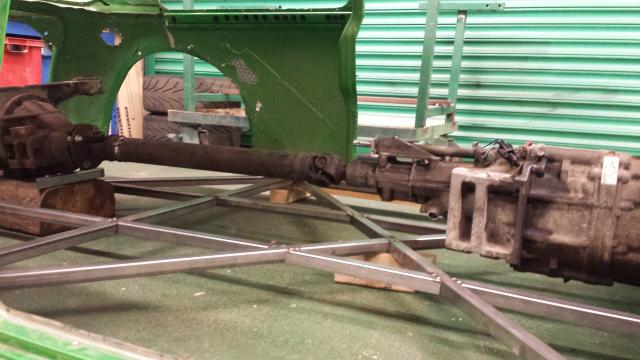
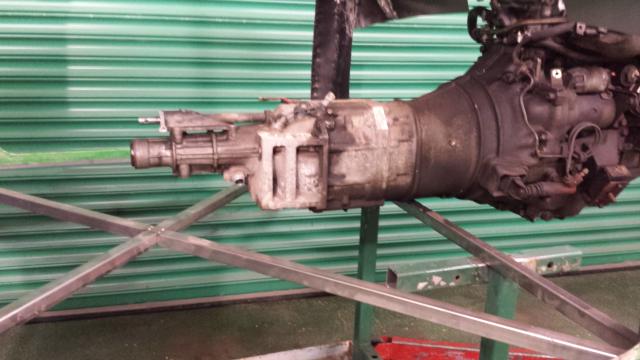
Gear box attached as well and this needs another fastening somewhere on the other side but its really solid as it is.

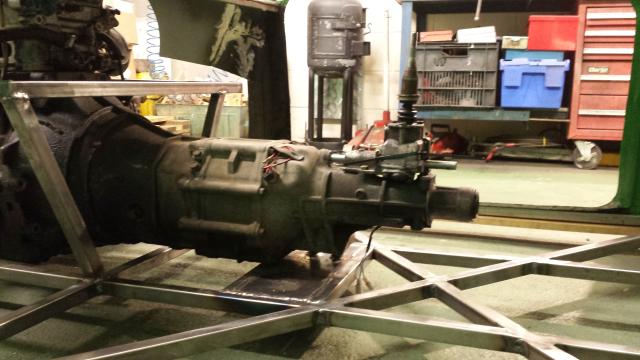
If you look at the photo i have shortened the gearbox selector.......or at least i have started as i need a new selector housing as the casting broke when removing it out of the Mazda. Thanks to Richard Cole for this link The Mite | Customizing a 1965 Sprite | Part 18 | Relocating the shifter on the Tranny. I have been able to move the engine back and still keep a good position for the shifter.
Paul
Engine mounts made.

I was able to use the existing MX5 mounts but added the trusted Land Rover bobbins.

I got the base welded up as well


Engine is in and sat on its mounts. The mounts need a bit more bracing adding but I'll wait till the engine is out again to have a bit more room.


Gear box attached as well and this needs another fastening somewhere on the other side but its really solid as it is.

If you look at the photo i have shortened the gearbox selector.......or at least i have started as i need a new selector housing as the casting broke when removing it out of the Mazda. Thanks to Richard Cole for this link The Mite | Customizing a 1965 Sprite | Part 18 | Relocating the shifter on the Tranny. I have been able to move the engine back and still keep a good position for the shifter.


Paul
#15
Joined: Oct 2011
Posts: 5,690
Total Cats: 812
From: Detroit (the part with no rules or laws)
woah woah waoh.....
Wait, i think i missed the part where you said why you're using a shitty BP motor in this project. Can you please remind me why in the hell you're doing this again?
Either way, this is awesome and i can't wait to see more. Even if it's not 9000rpm of screaming F20 ITB Honda goodness.
Wait, i think i missed the part where you said why you're using a shitty BP motor in this project. Can you please remind me why in the hell you're doing this again?
Either way, this is awesome and i can't wait to see more. Even if it's not 9000rpm of screaming F20 ITB Honda goodness.
#18
I love xmas holidays you get so much done
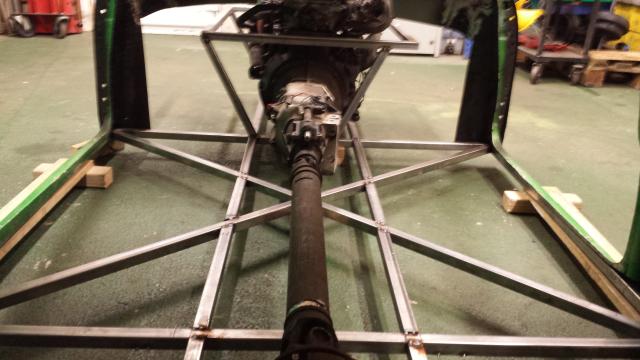
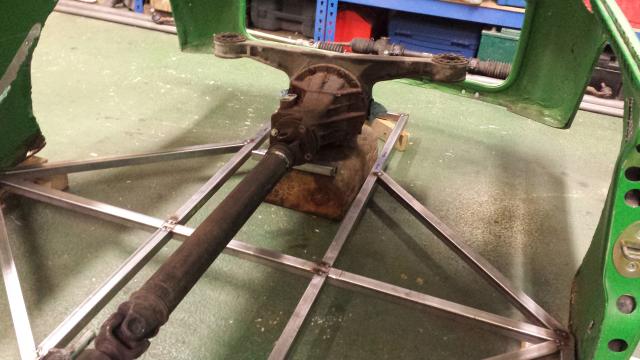
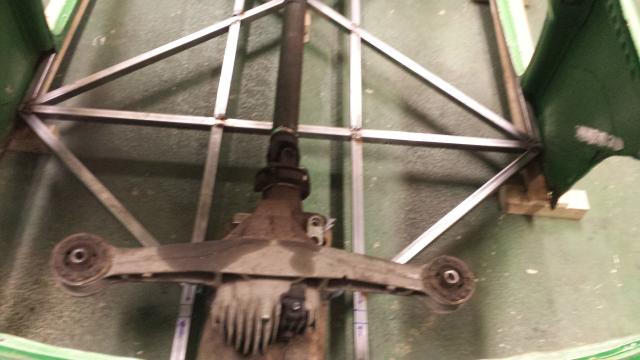
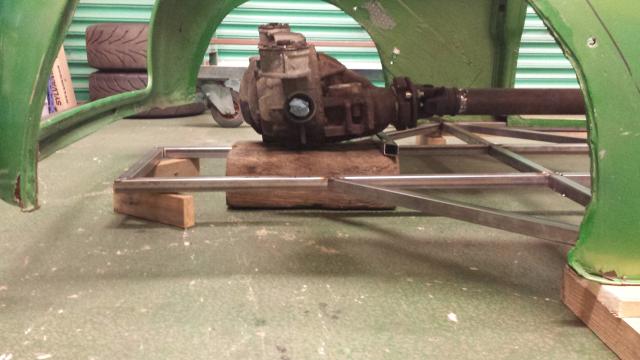
got around to altering the diff and getting rid of those big ears
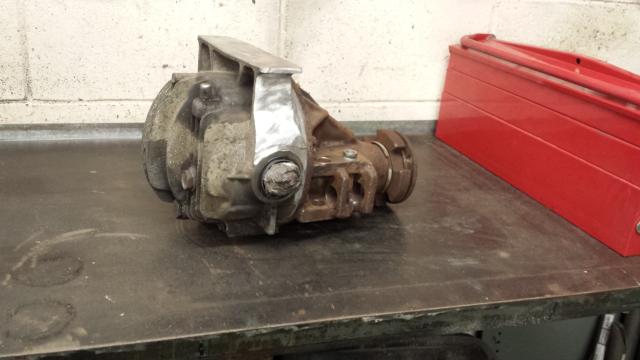
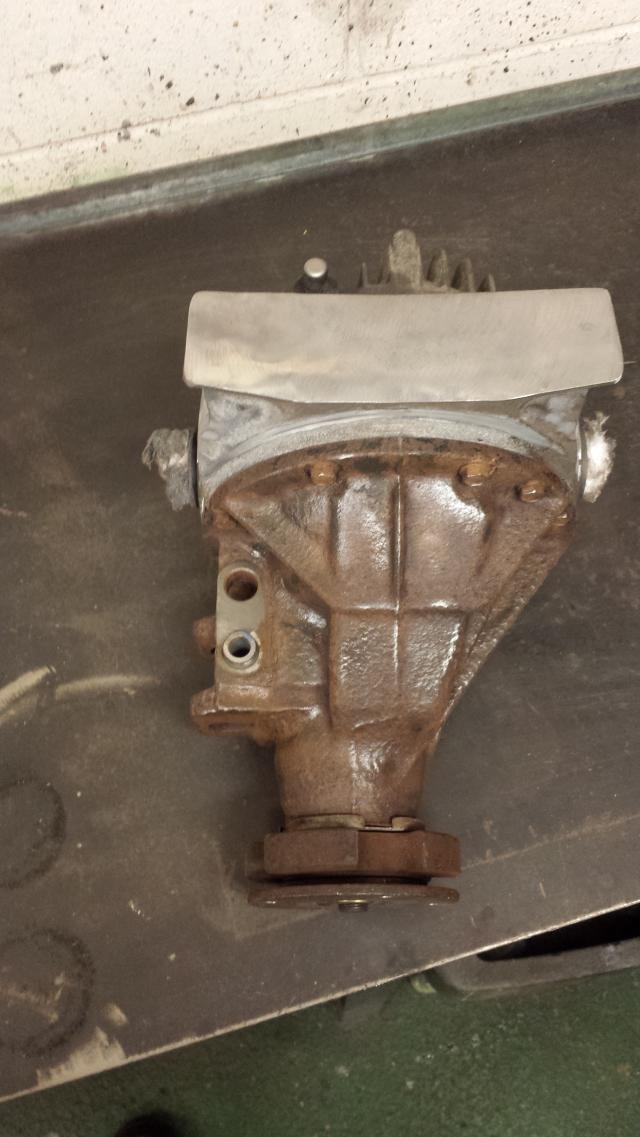
getting the wheels where i want them and removing loads of arch

got the diff cage all tacked up
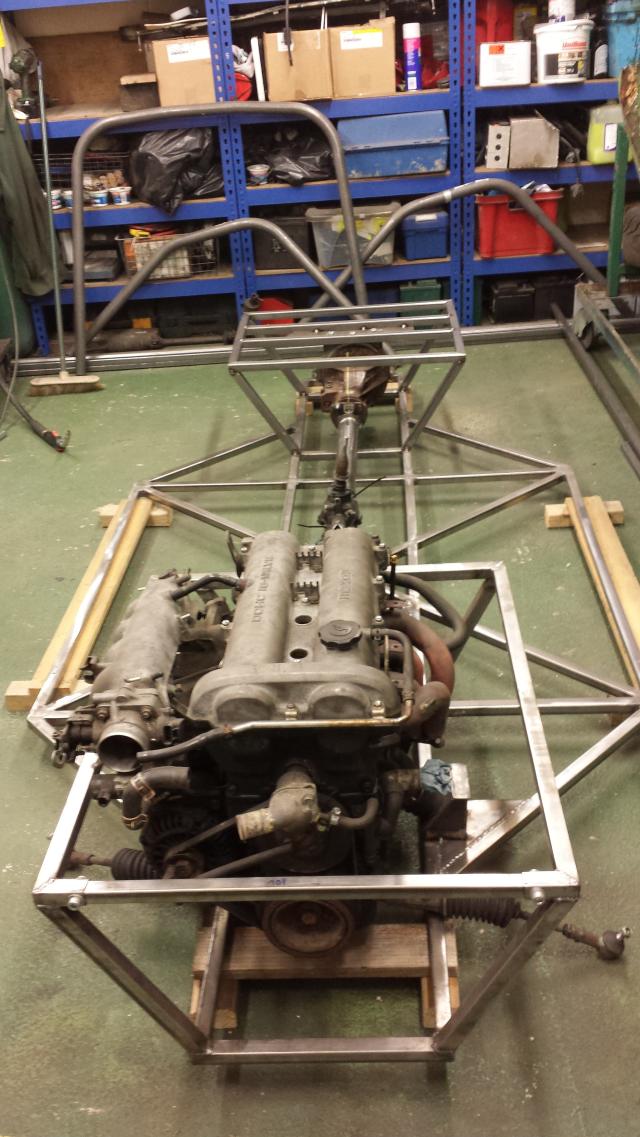
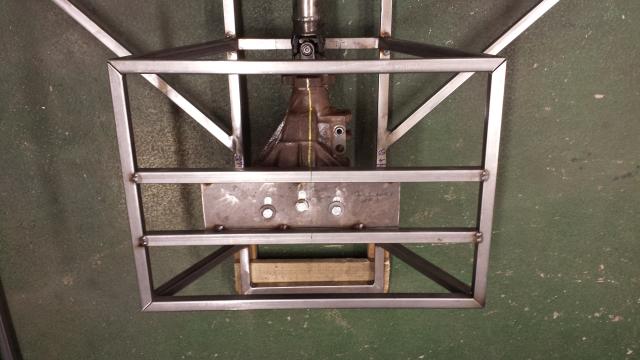
shortened the diff
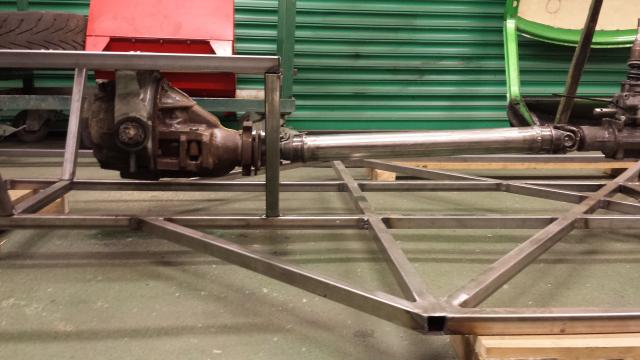
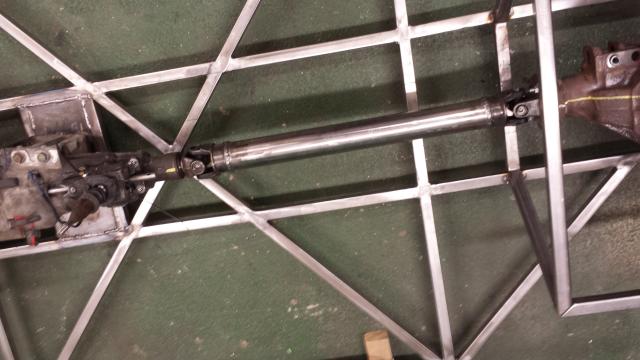
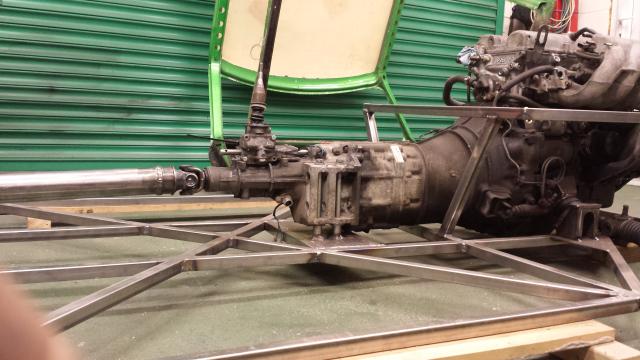
i got a bit more done than i thought i would so i should get around to the roll cage and i can tie the front subframe and diff cage into it. I also need a bit more bracing on the diff as i'm not happy with just 3 bolts and it hanging. I already know how i'm going to do this.....maybe tomorrow.
Paul
got around to altering the diff and getting rid of those big ears


getting the wheels where i want them and removing loads of arch


got the diff cage all tacked up


shortened the diff


i got a bit more done than i thought i would so i should get around to the roll cage and i can tie the front subframe and diff cage into it. I also need a bit more bracing on the diff as i'm not happy with just 3 bolts and it hanging. I already know how i'm going to do this.....maybe tomorrow.
Paul
#20
This seemed like a perfect place to end the year. Stella looks like a mini shaped vehicle again
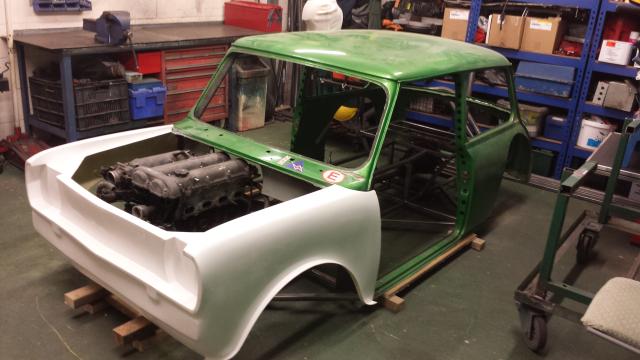
Frame is now welded
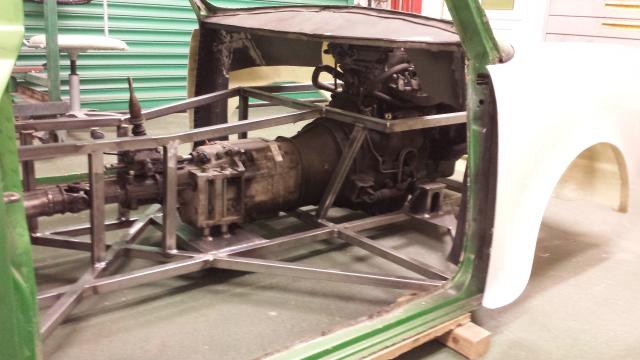
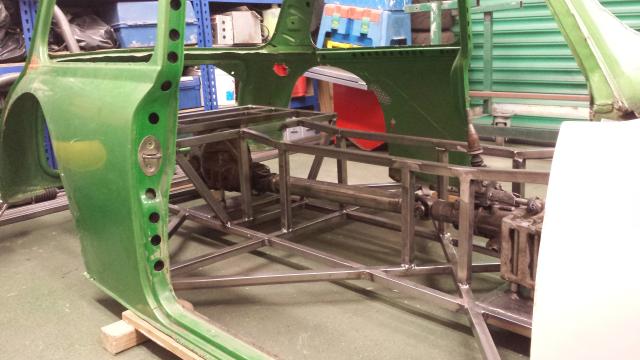
Loads of room for a radiator intercooler and oil cooler now. I had to shorten the frame by 100mm today. I'm getting rid of the front mounted thermostat housing and relocating it to the rear of the engine, which is well known coolant reroute option.
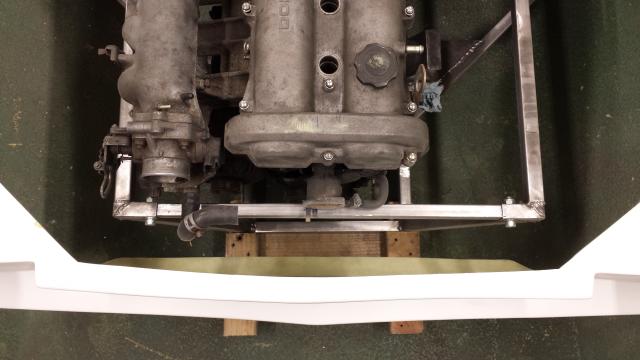
See you all next year..........well tomorrow Happy new year everyone
Paul


Frame is now welded


Loads of room for a radiator intercooler and oil cooler now. I had to shorten the frame by 100mm today. I'm getting rid of the front mounted thermostat housing and relocating it to the rear of the engine, which is well known coolant reroute option.

See you all next year..........well tomorrow
 Happy new year everyone
Paul


 [/URL
[/URL

