NOT A MIATA, FE3N+HOLSET+73 FORD COURIER BUILD


 06-25-2021, 12:18 PM
#207
Senior Member
Thread Starter

Join Date: Jan 2011
Location: sacramento ,ca
Posts: 568
Total Cats: 162
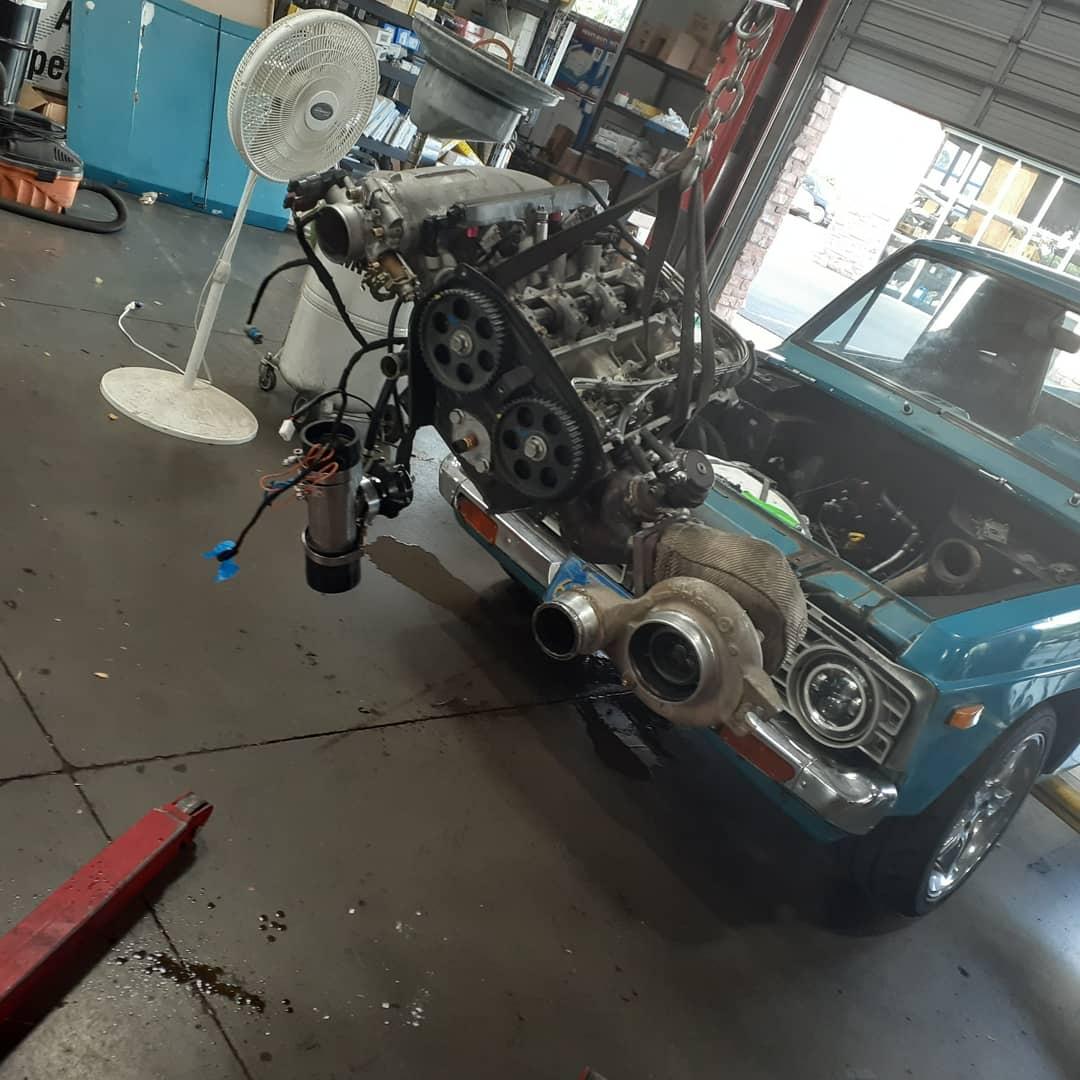
Update on my cursed truck... I stopped for gas and as I was leaving the starter solenoid stuck on and ran until the starter overheated and the battery died. I had it towed to my shop to fix it but a starter is over a week out. I put in a battery cut off switch to hold me over while I wait for a new starter to show up. On the way home I was passing someone, they cut me off so I had to let off, they moved got back on it, they cut me off again, had to let off then got back on it and the force of that surging shredded and threw my alternator belt off and made the timing belt jump 10 teeth. Reset the cam timing and it seems to run ok.
The only positive about this is the nice guy who helped me push the truck away from the pump was the owner of the Kia Stinger I raced and lost to on the freeway before I went E85. We went from 70mph to 140mph and he had a car or 2 on me :( I was sad my truck was slow until I found out he has 500whp and ran 11.90s. We agreed to a rematch from a dig when I figure out to how to make this pile of **** run for more than 2 days without leaving me stranded.
The only positive about this is the nice guy who helped me push the truck away from the pump was the owner of the Kia Stinger I raced and lost to on the freeway before I went E85. We went from 70mph to 140mph and he had a car or 2 on me :( I was sad my truck was slow until I found out he has 500whp and ran 11.90s. We agreed to a rematch from a dig when I figure out to how to make this pile of **** run for more than 2 days without leaving me stranded.

Reply
 2
2

2
 07-11-2021, 08:39 PM
#209
Senior Member
Thread Starter
Join Date: Jan 2011
Location: sacramento ,ca
Posts: 568
Total Cats: 162
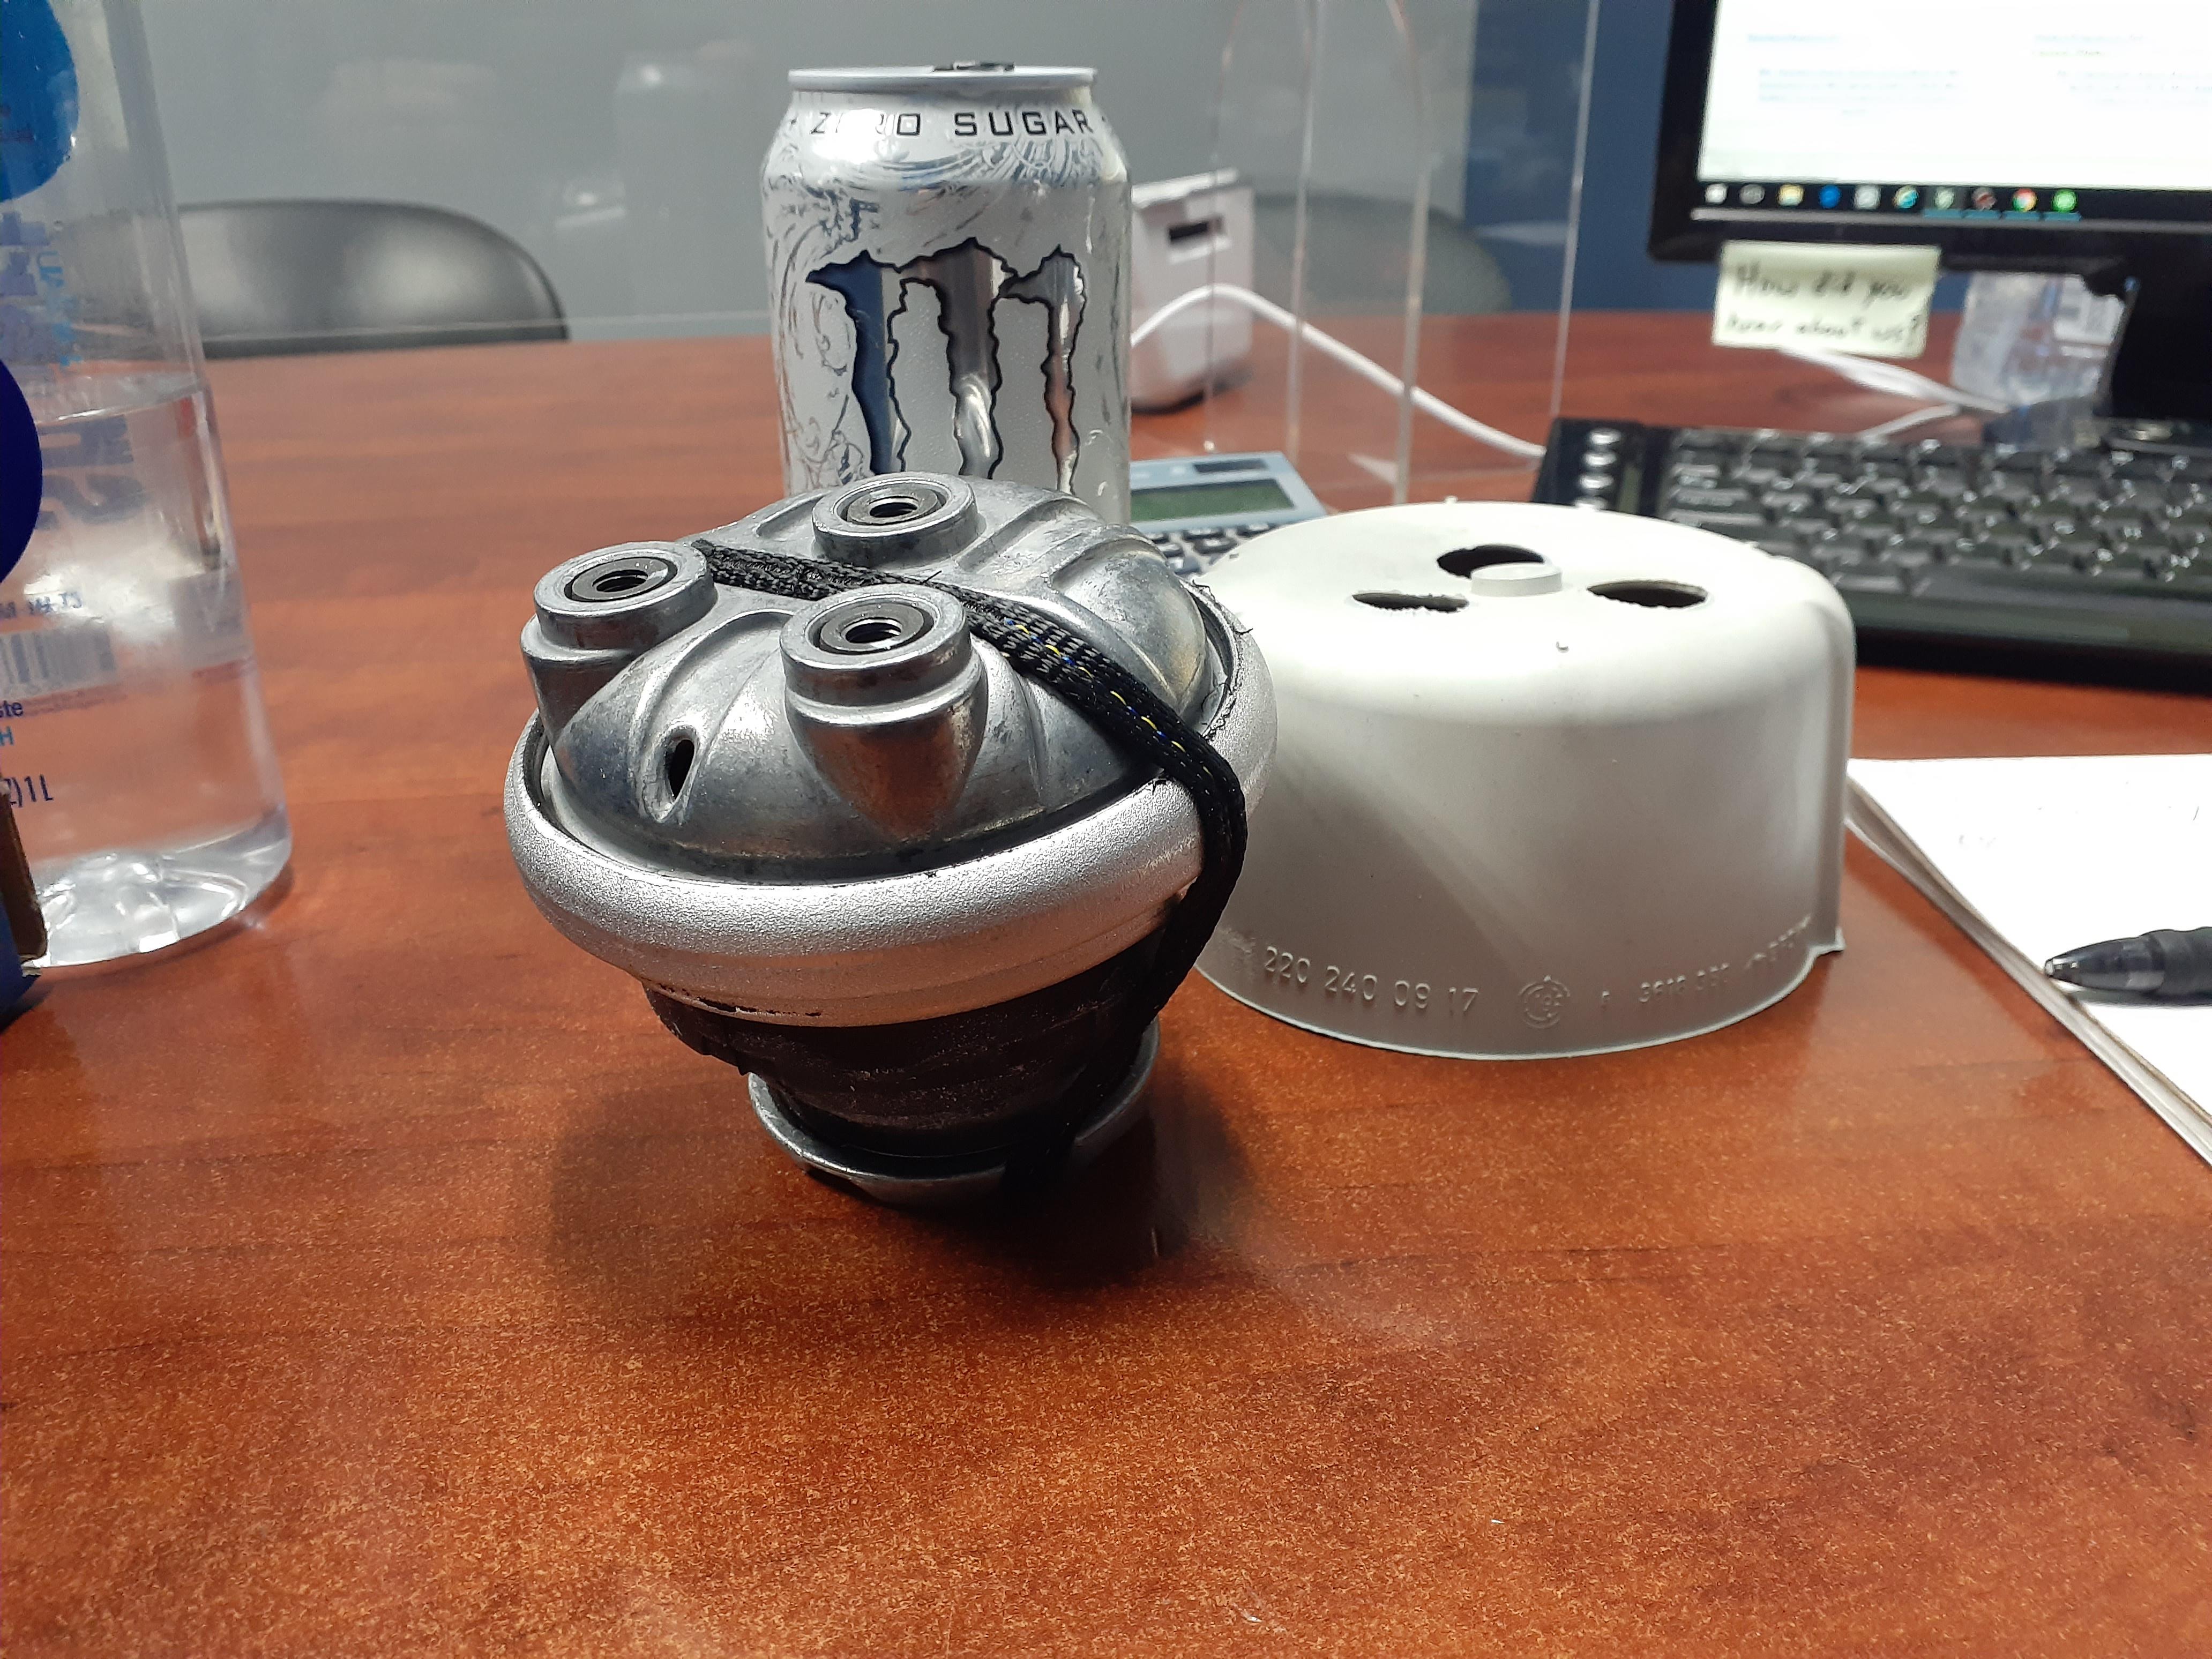
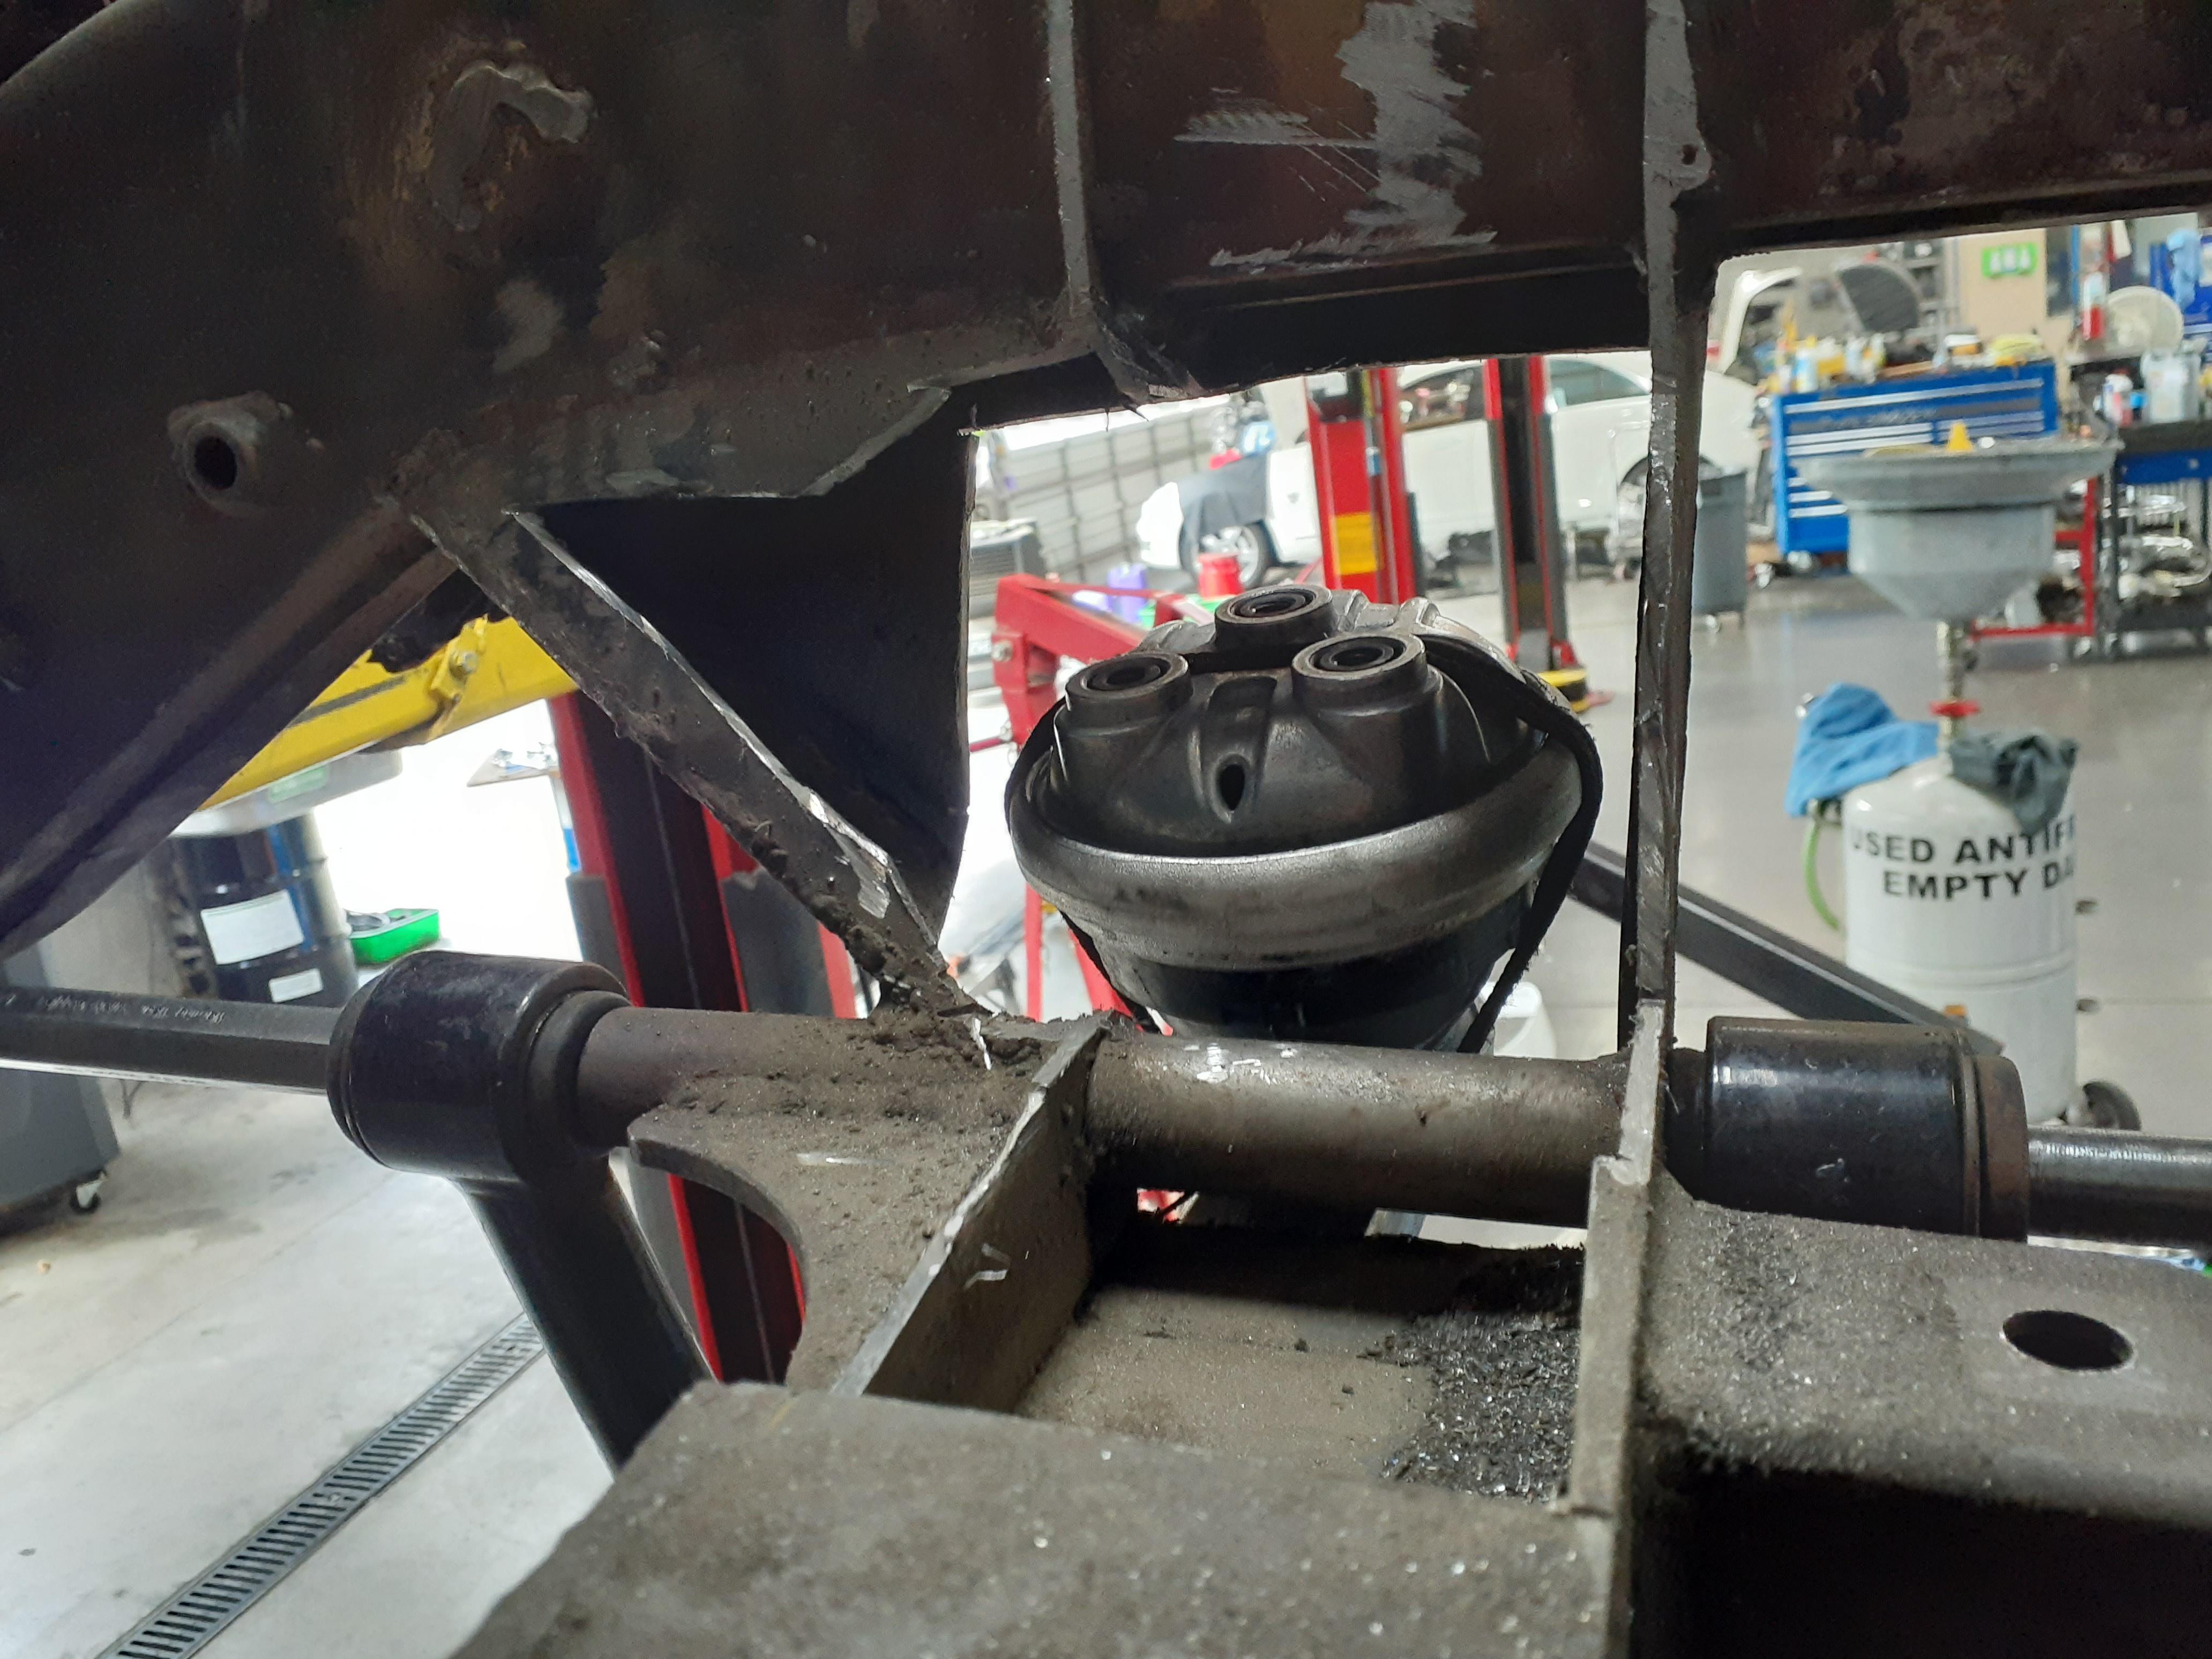
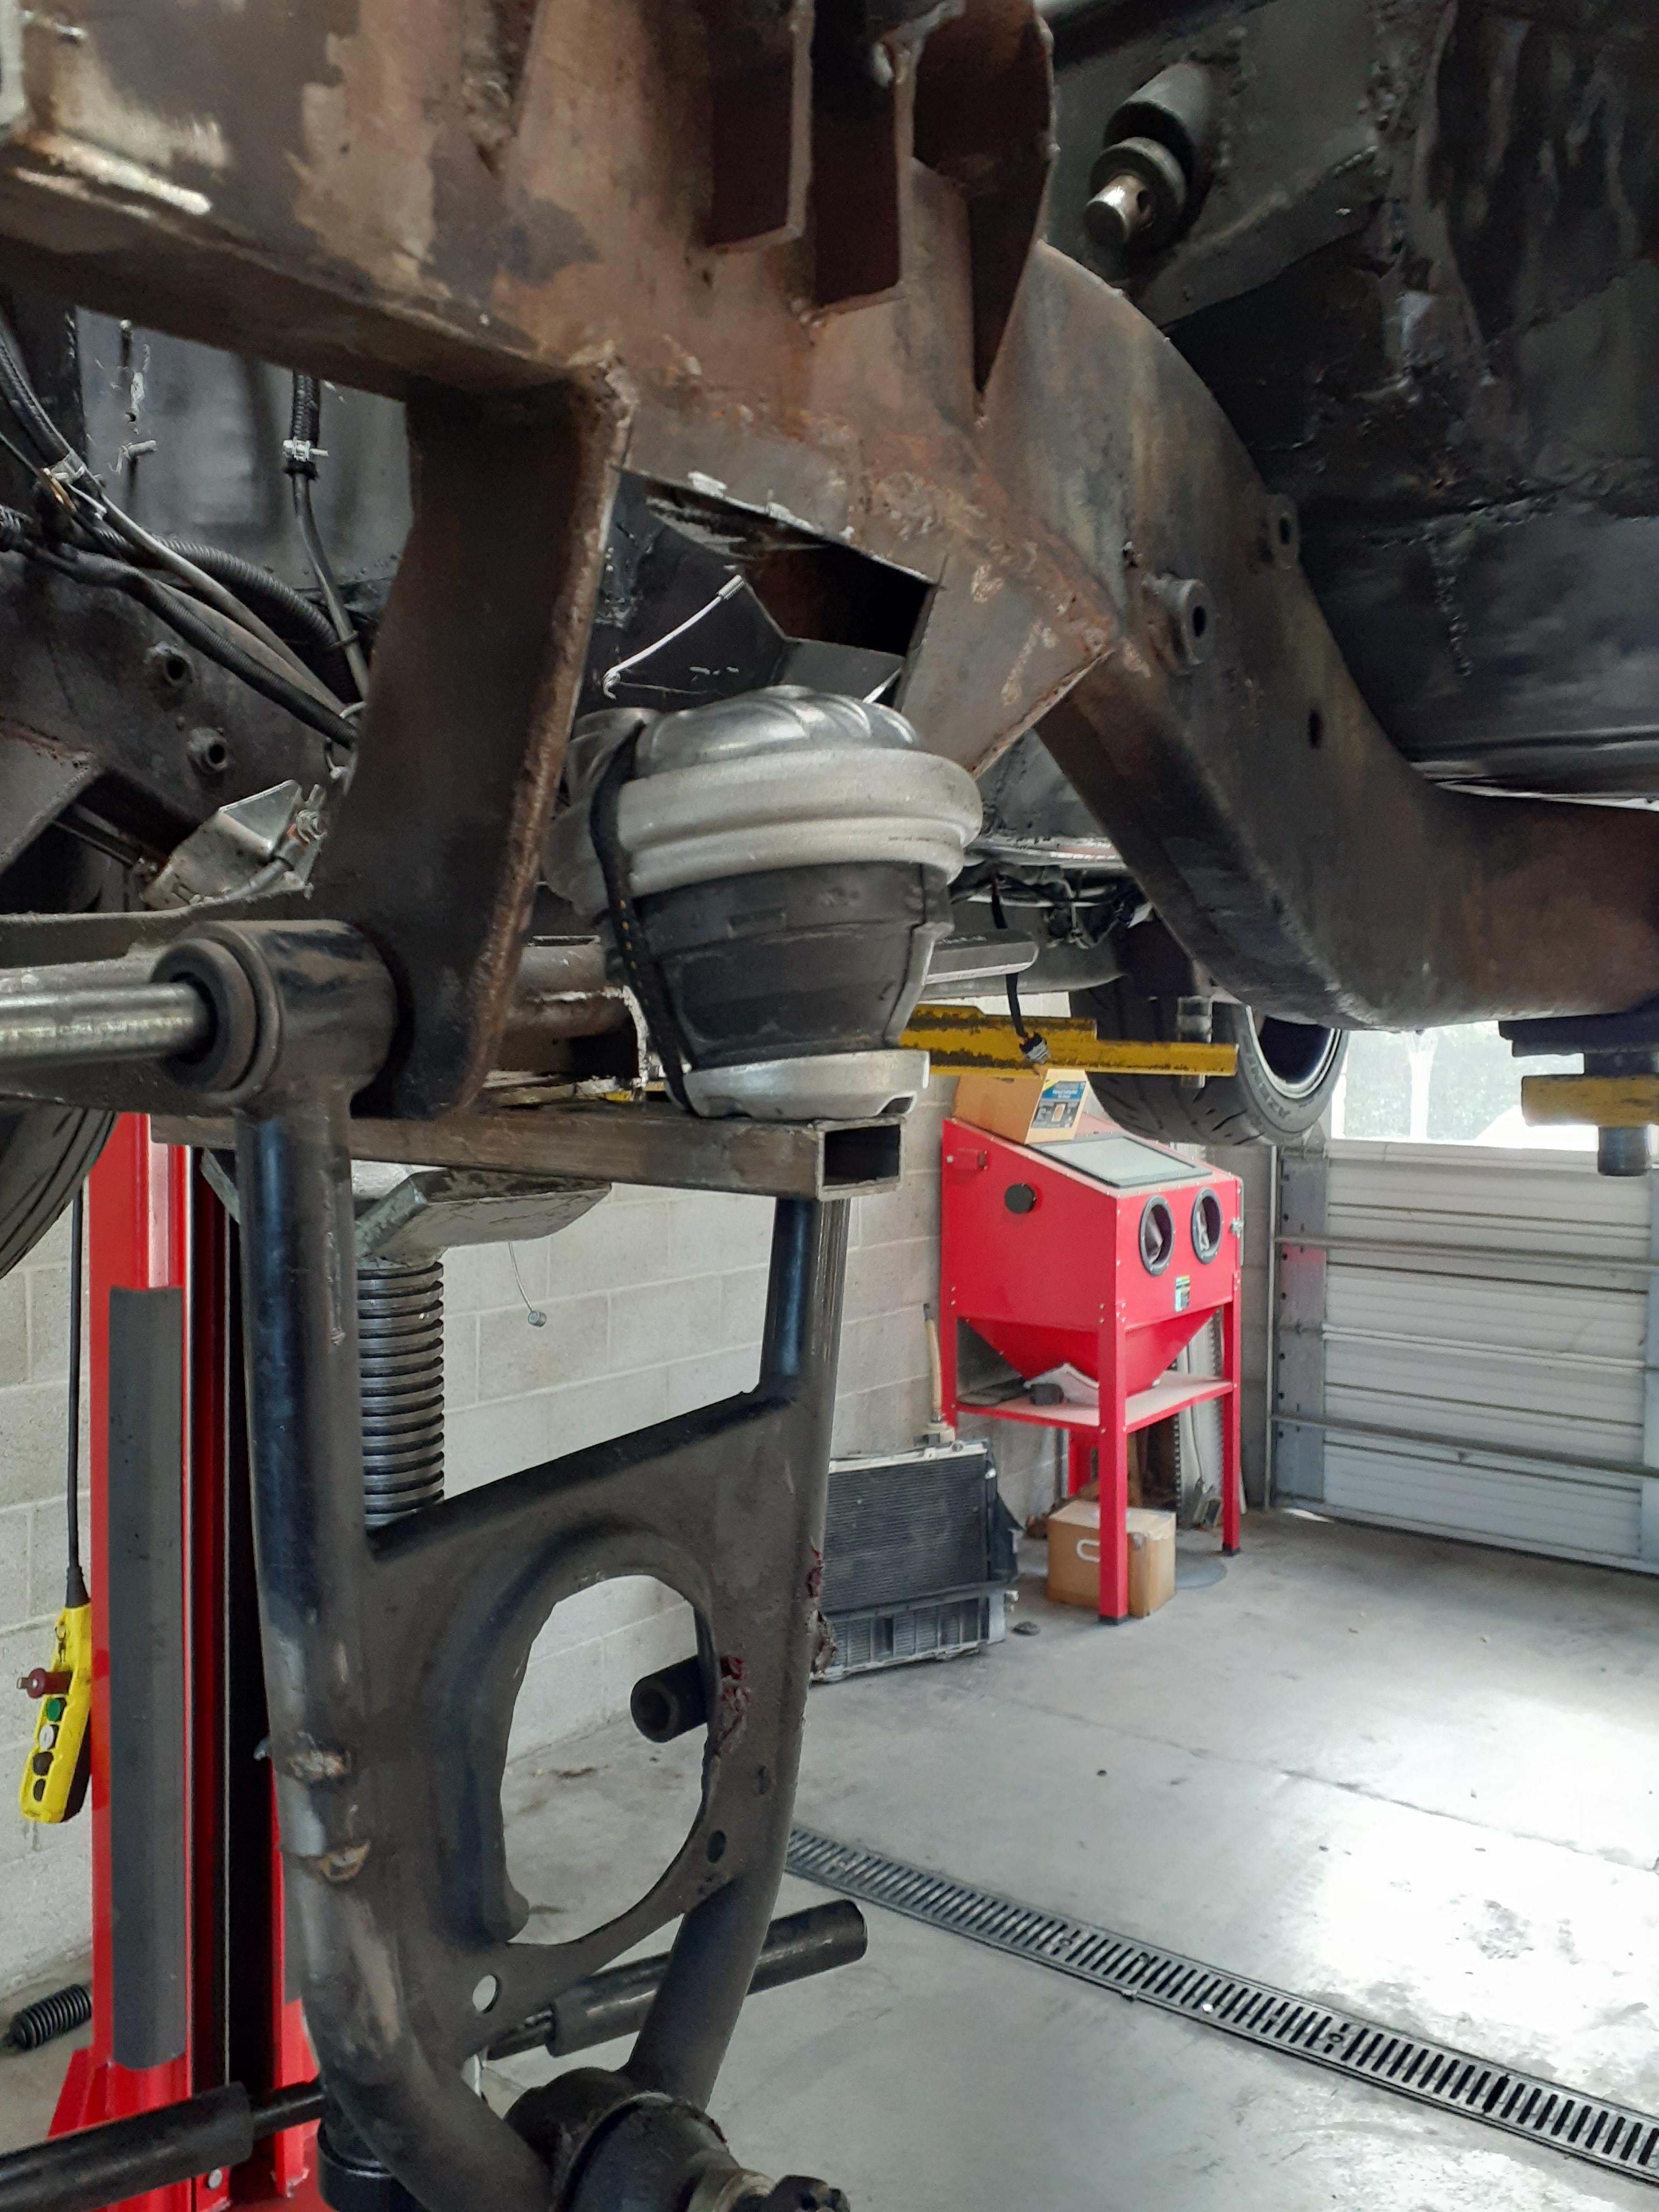
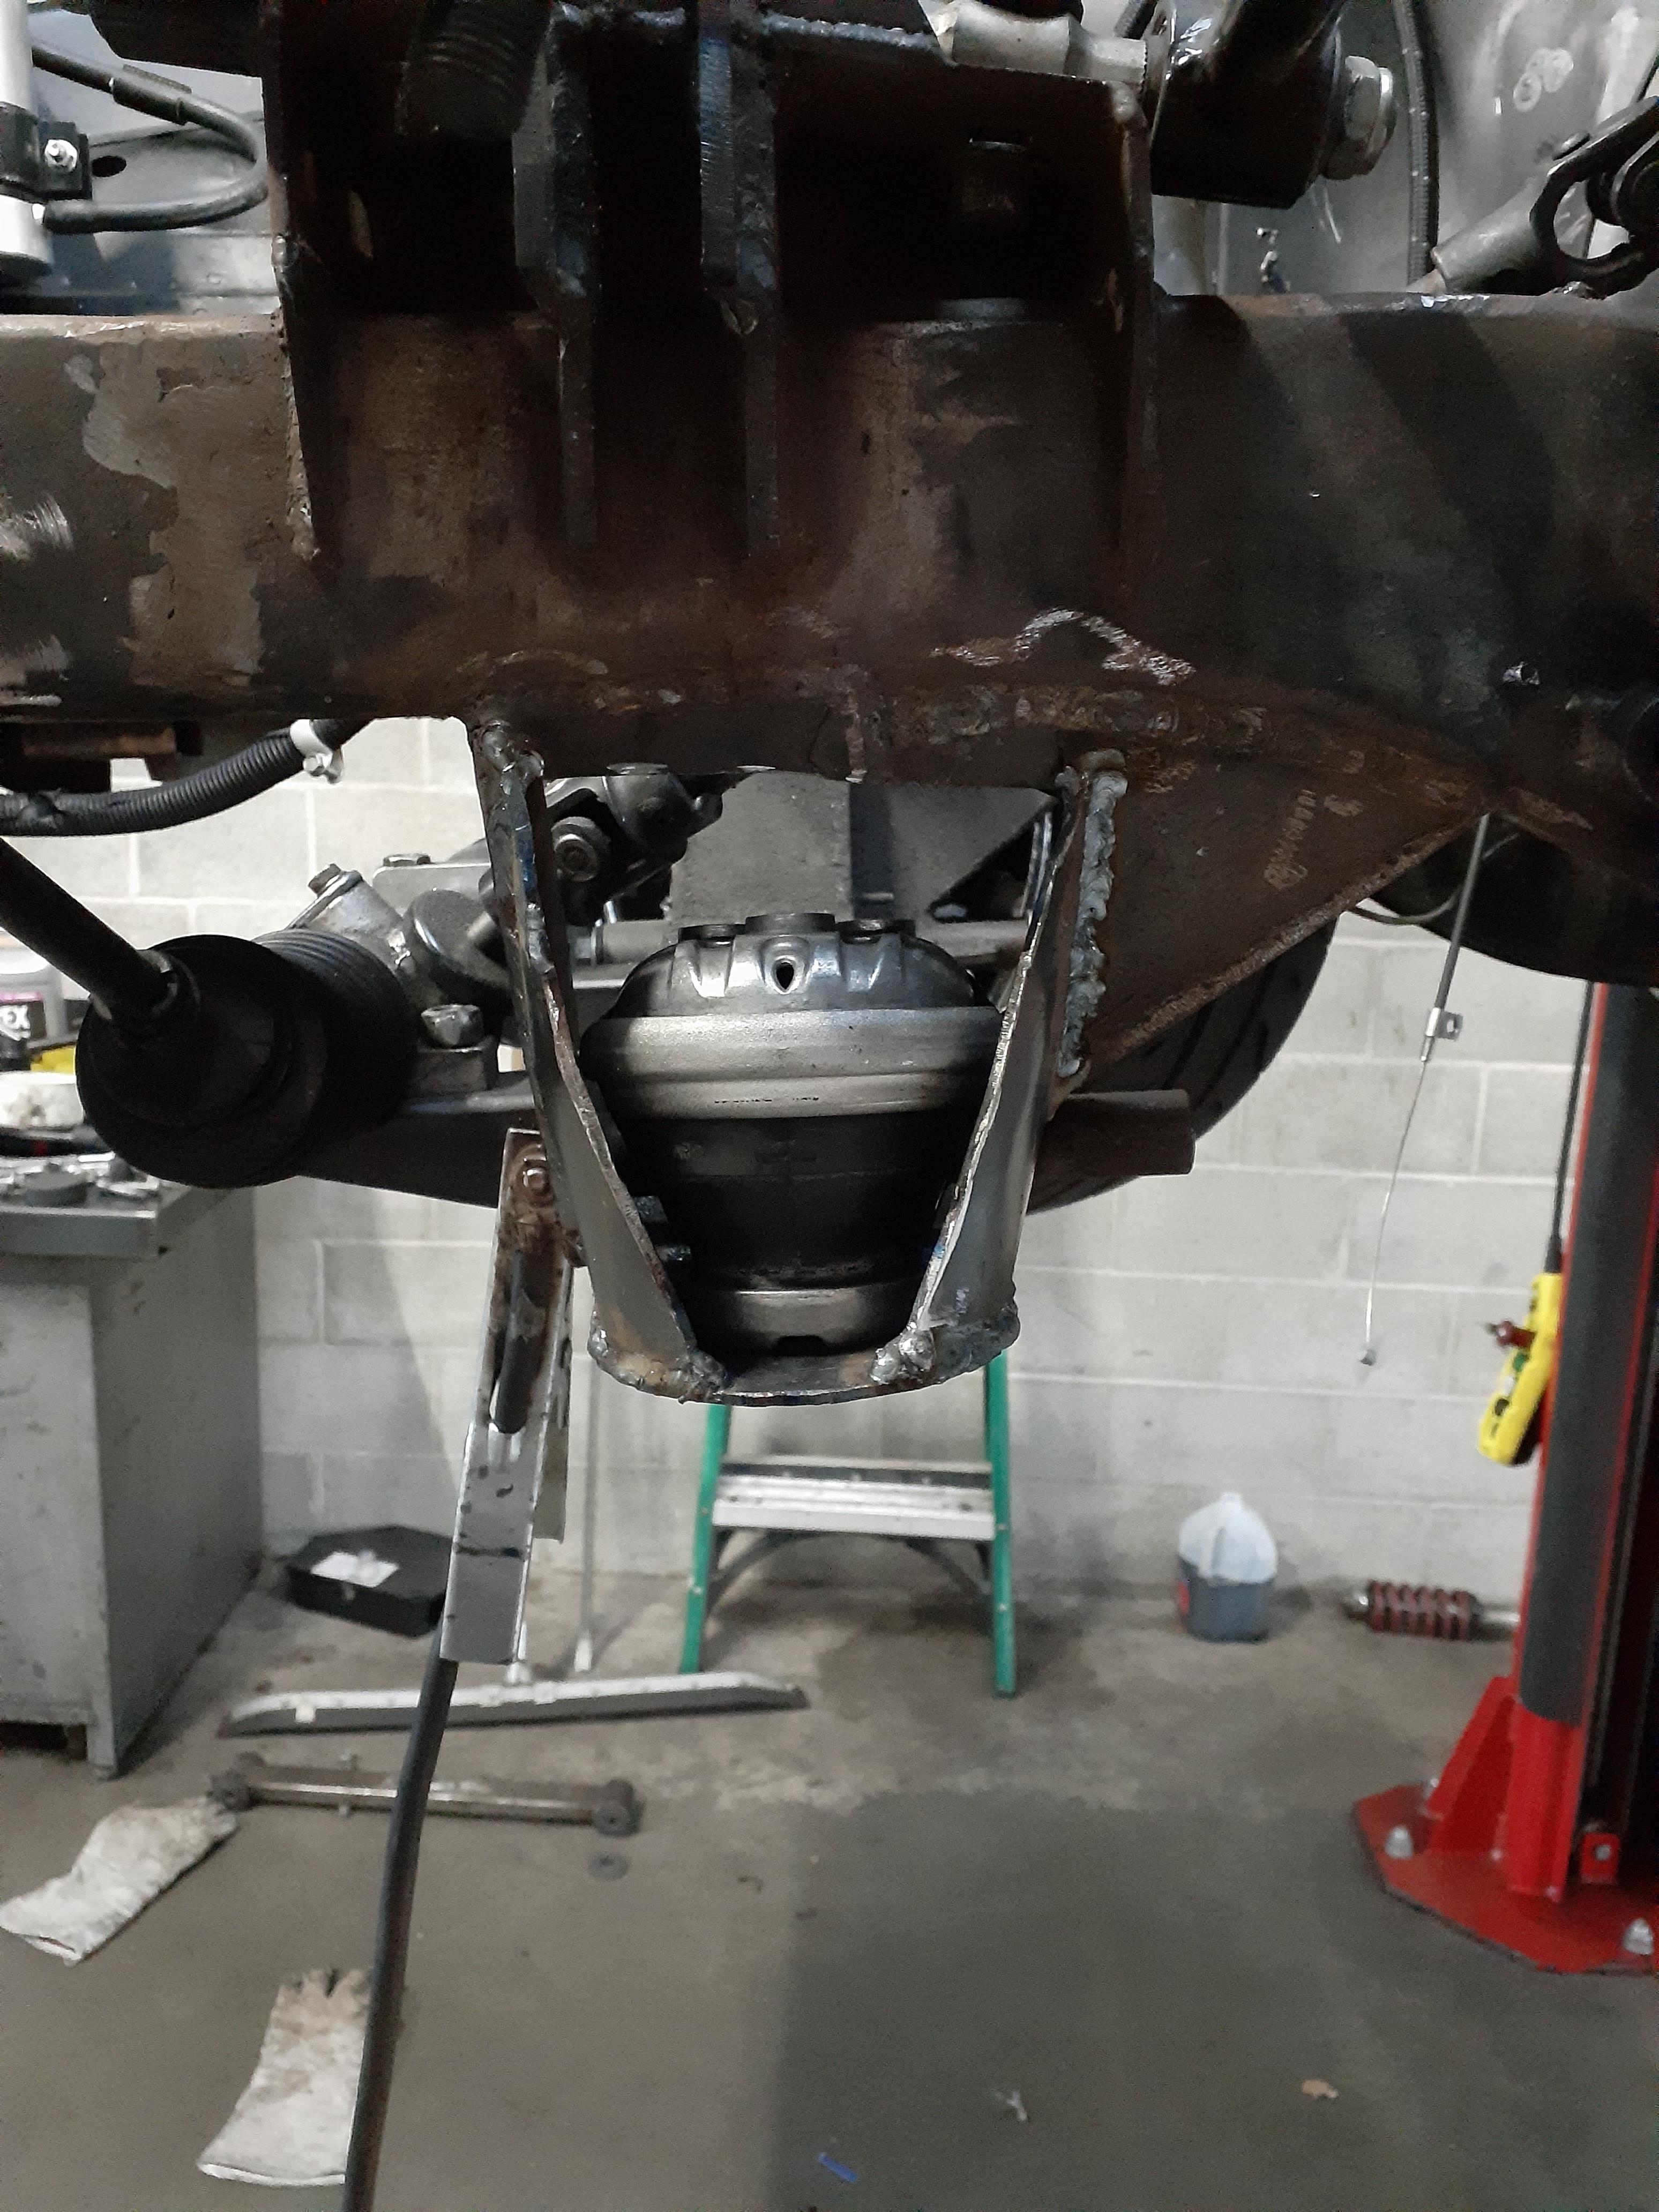
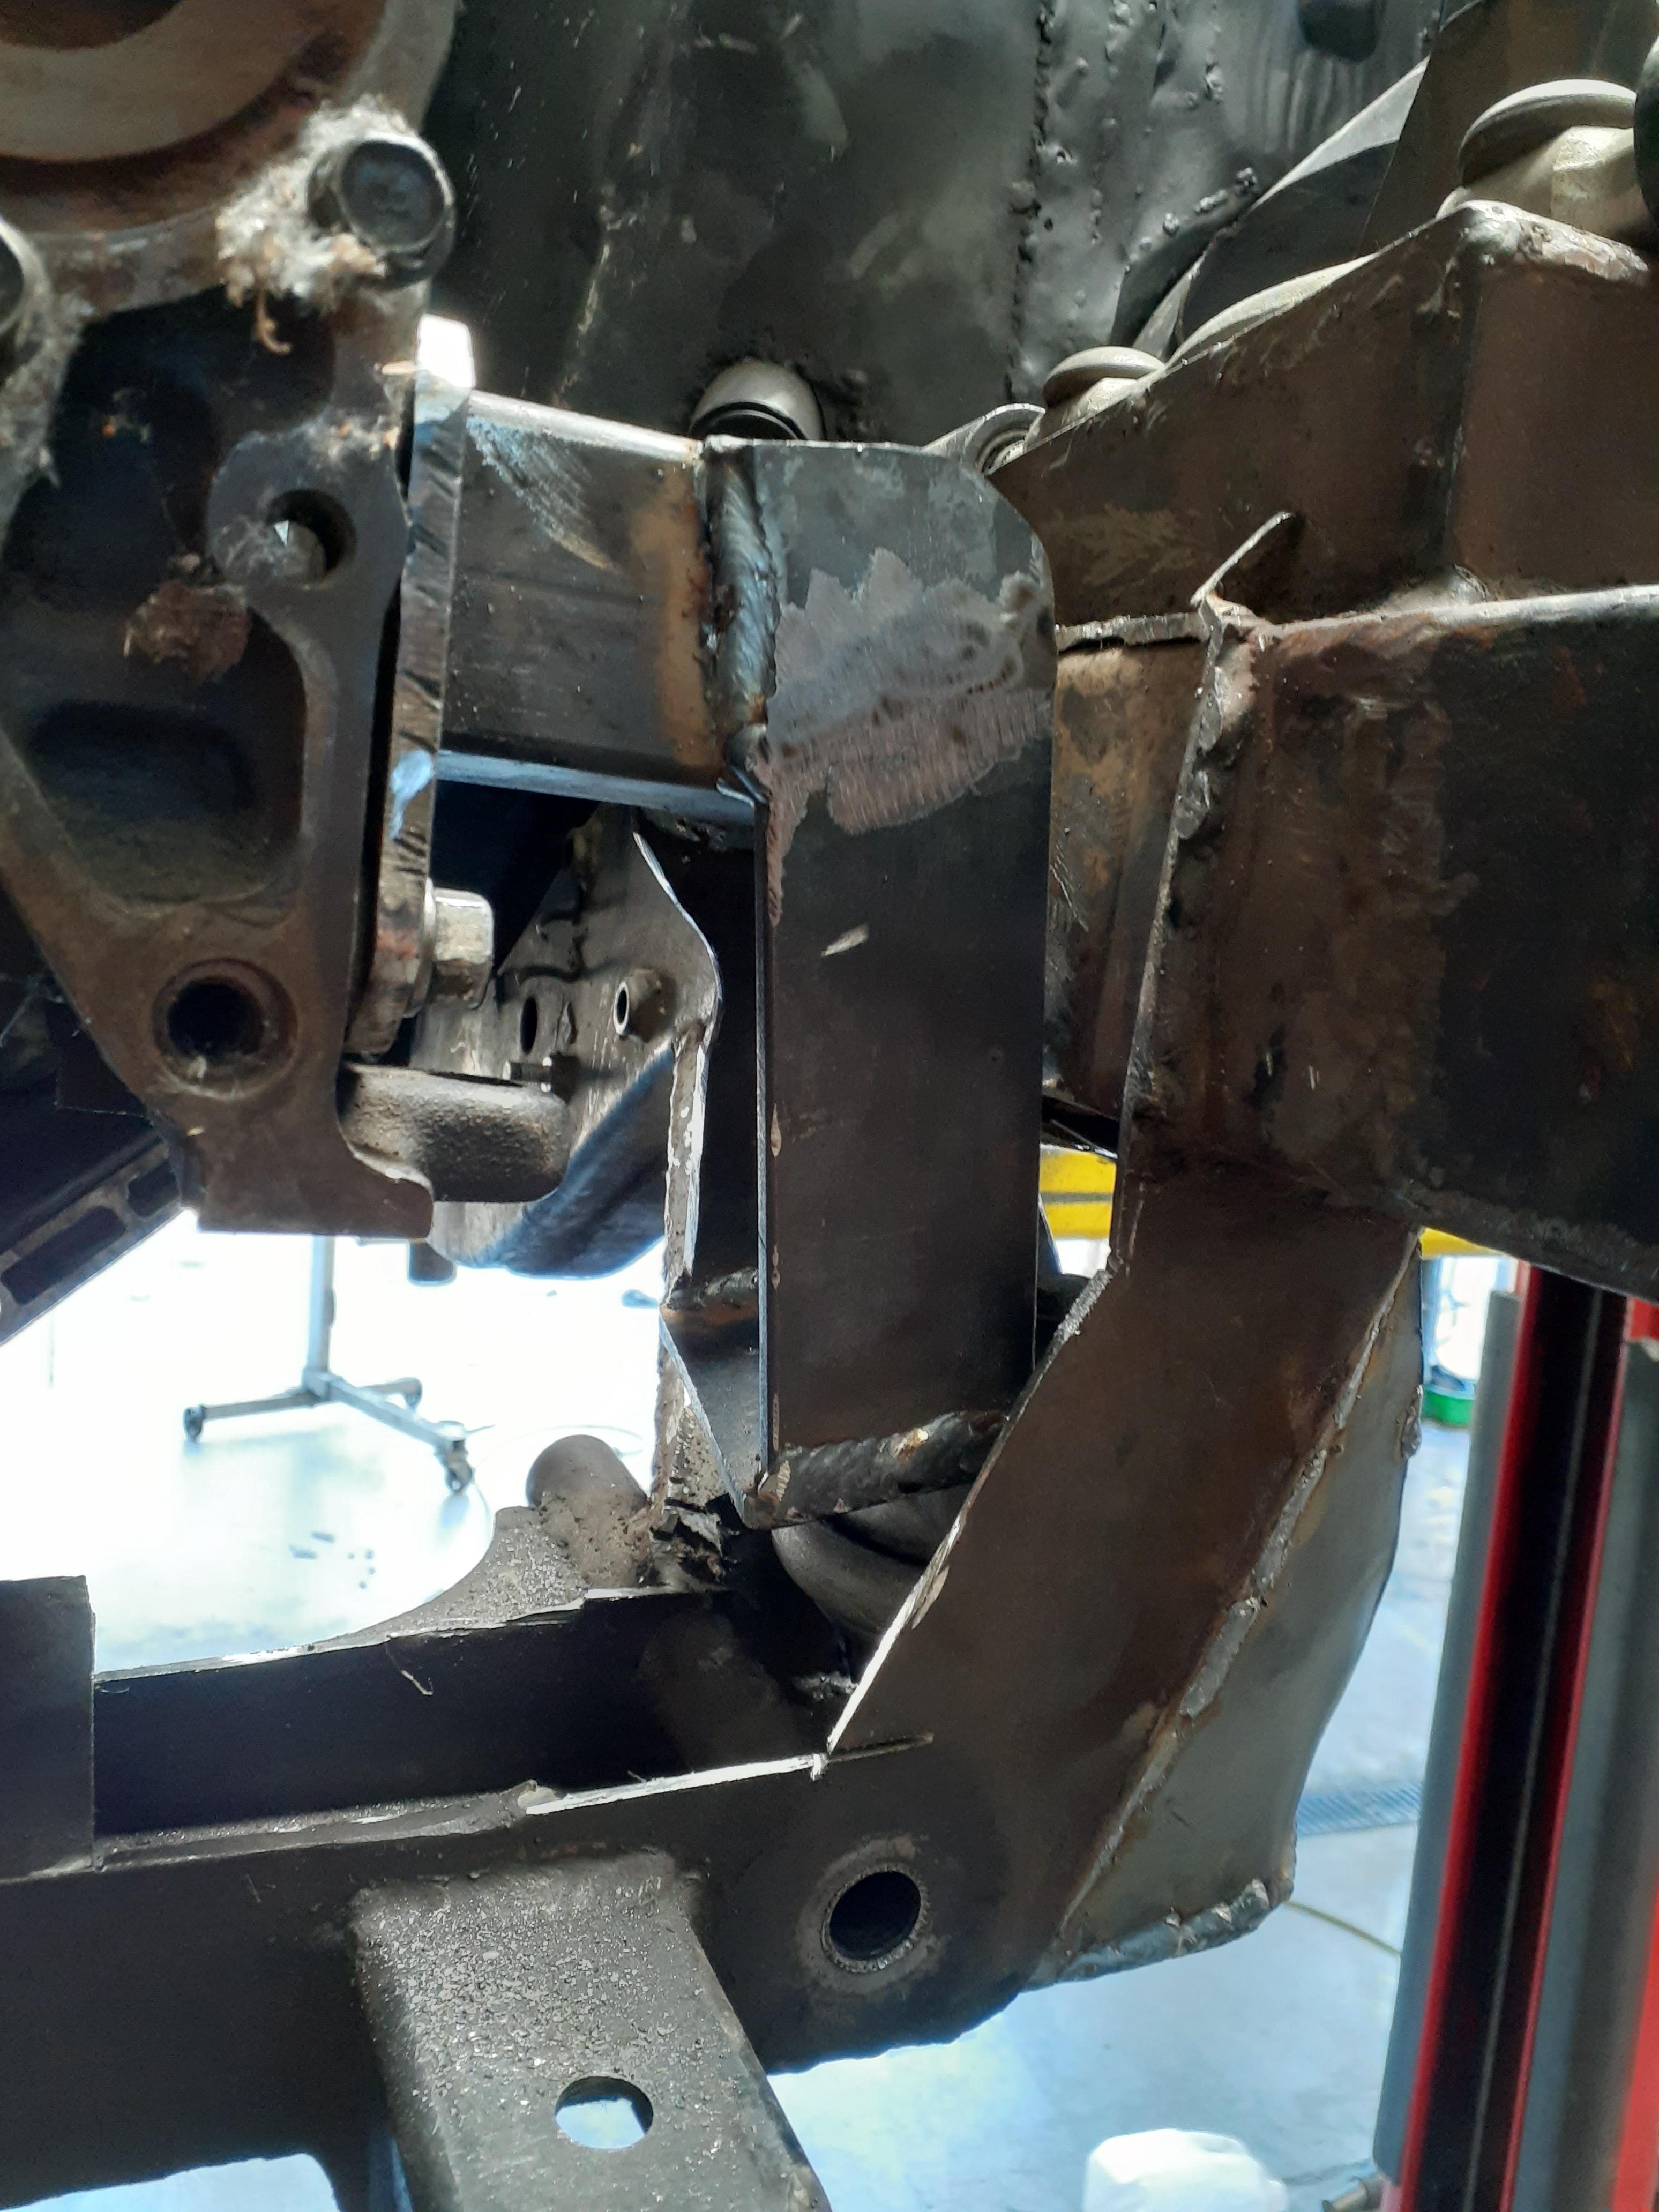
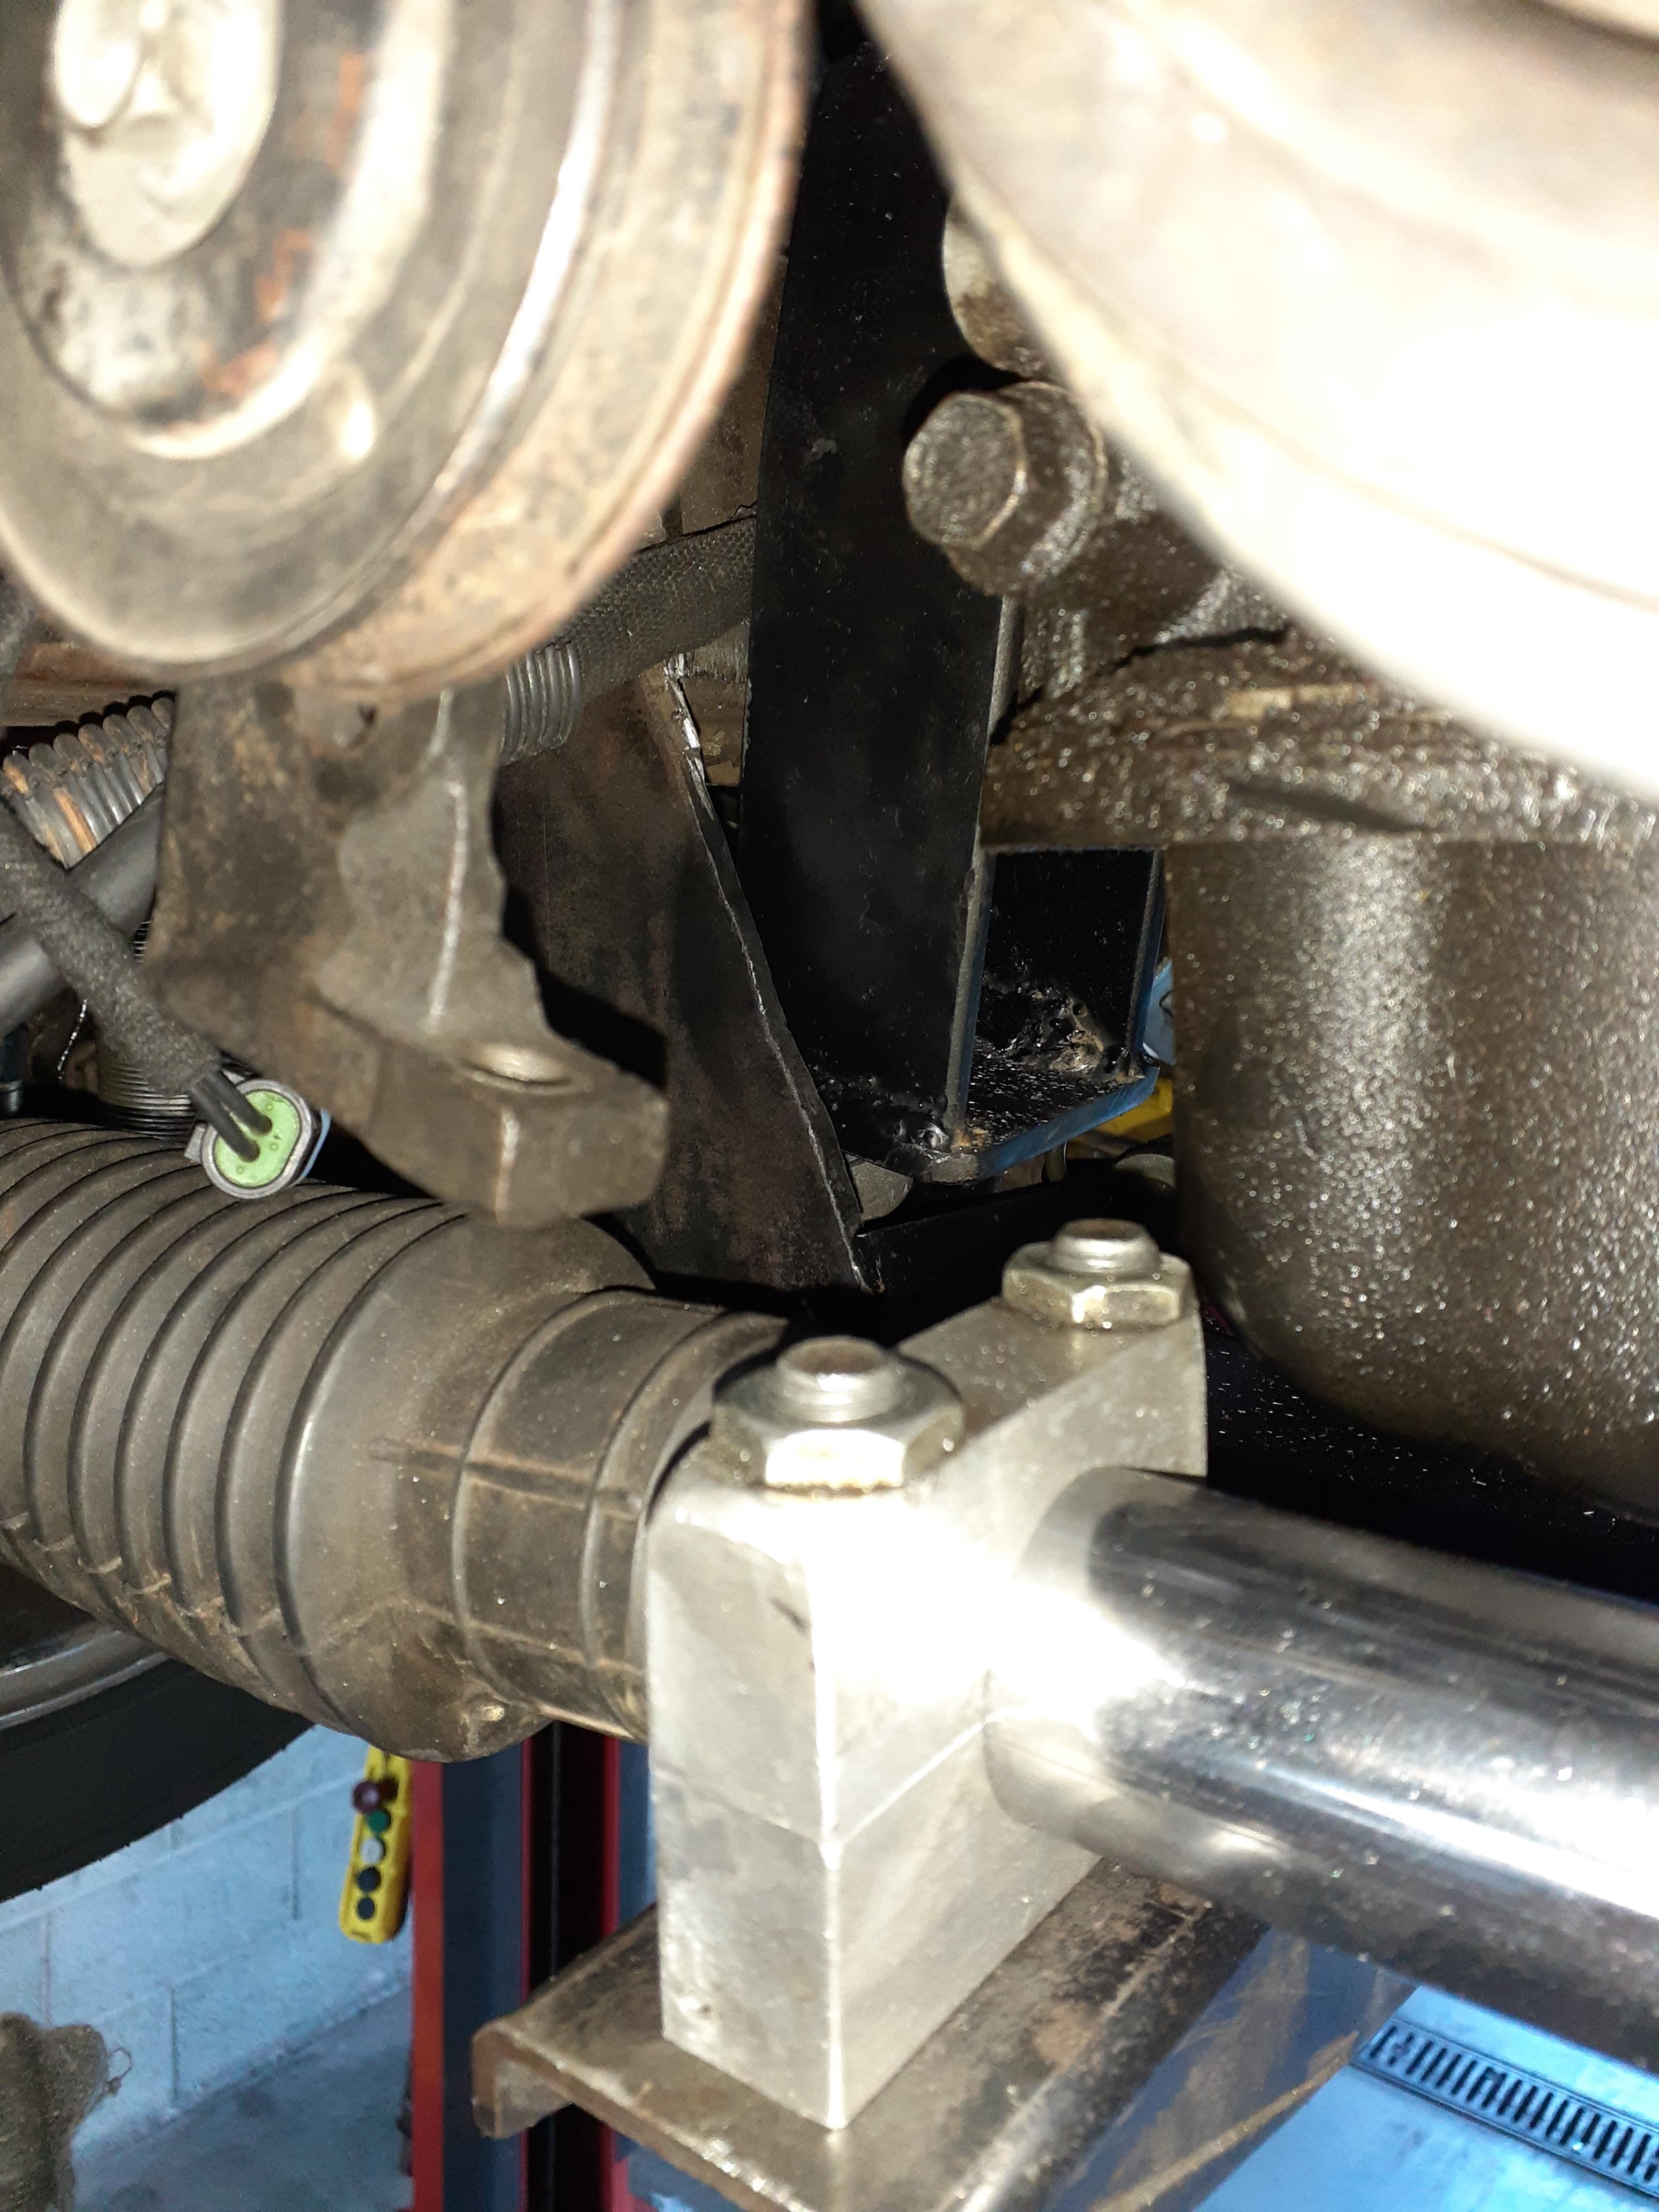
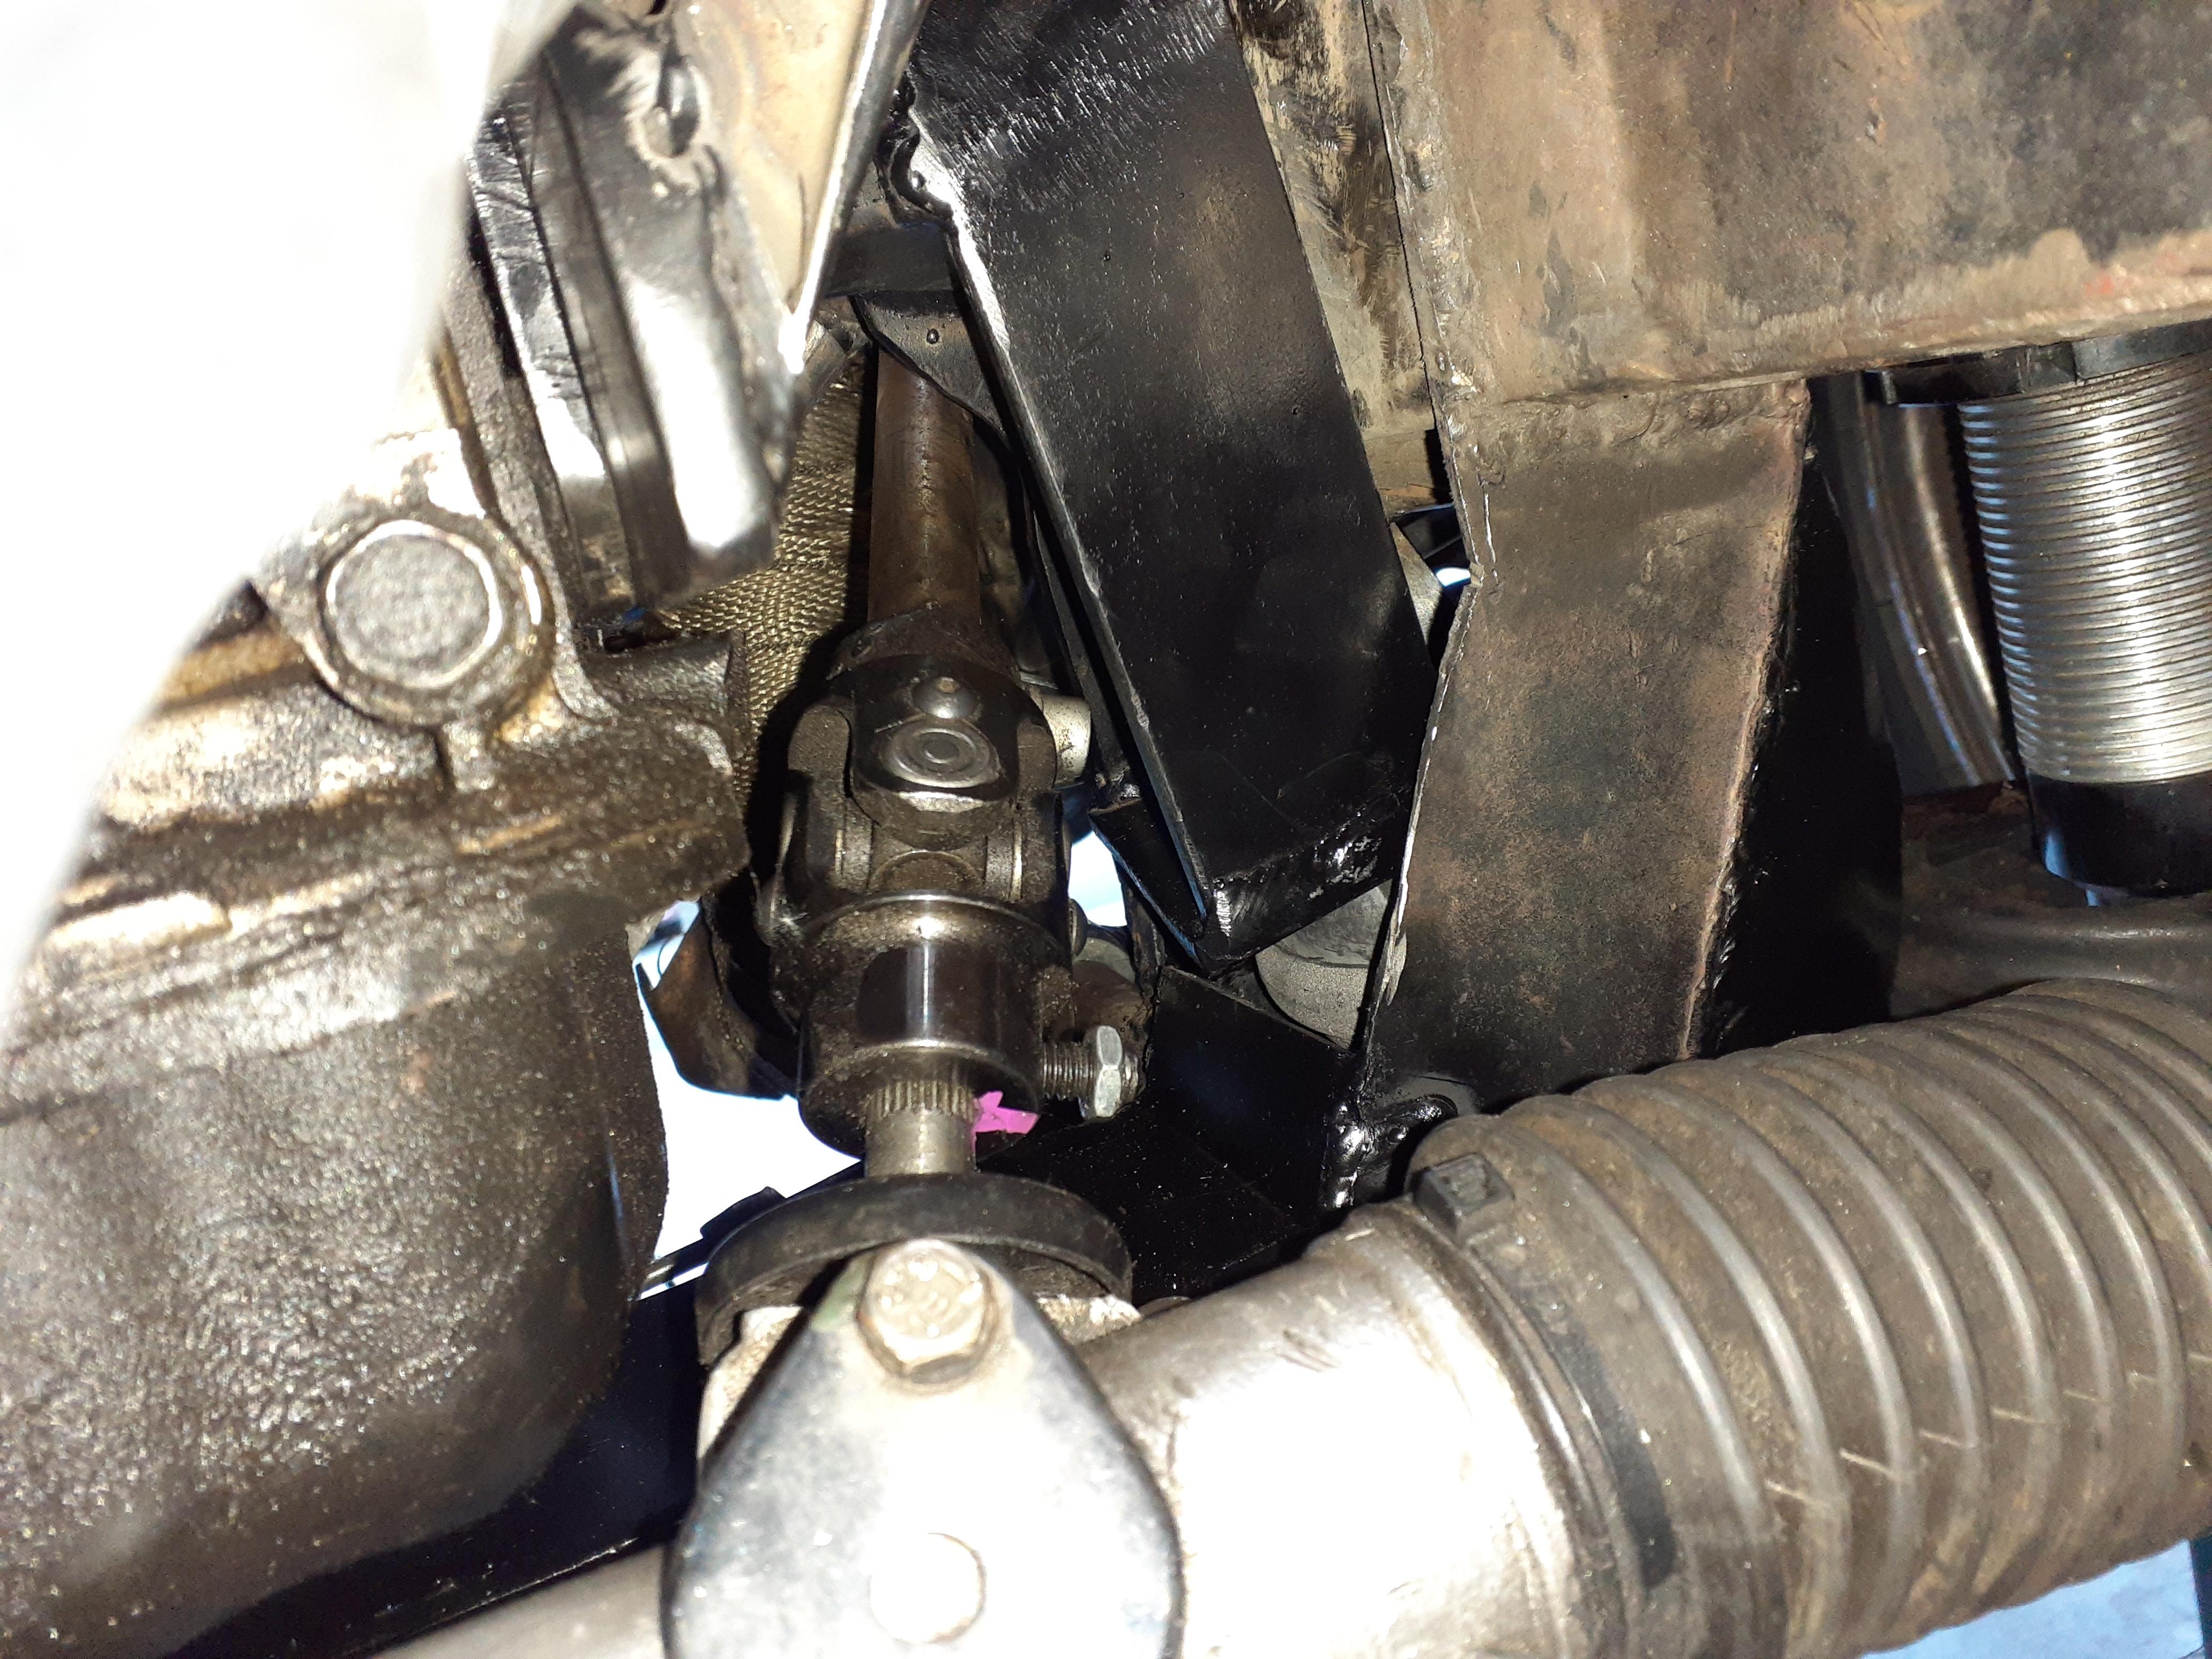
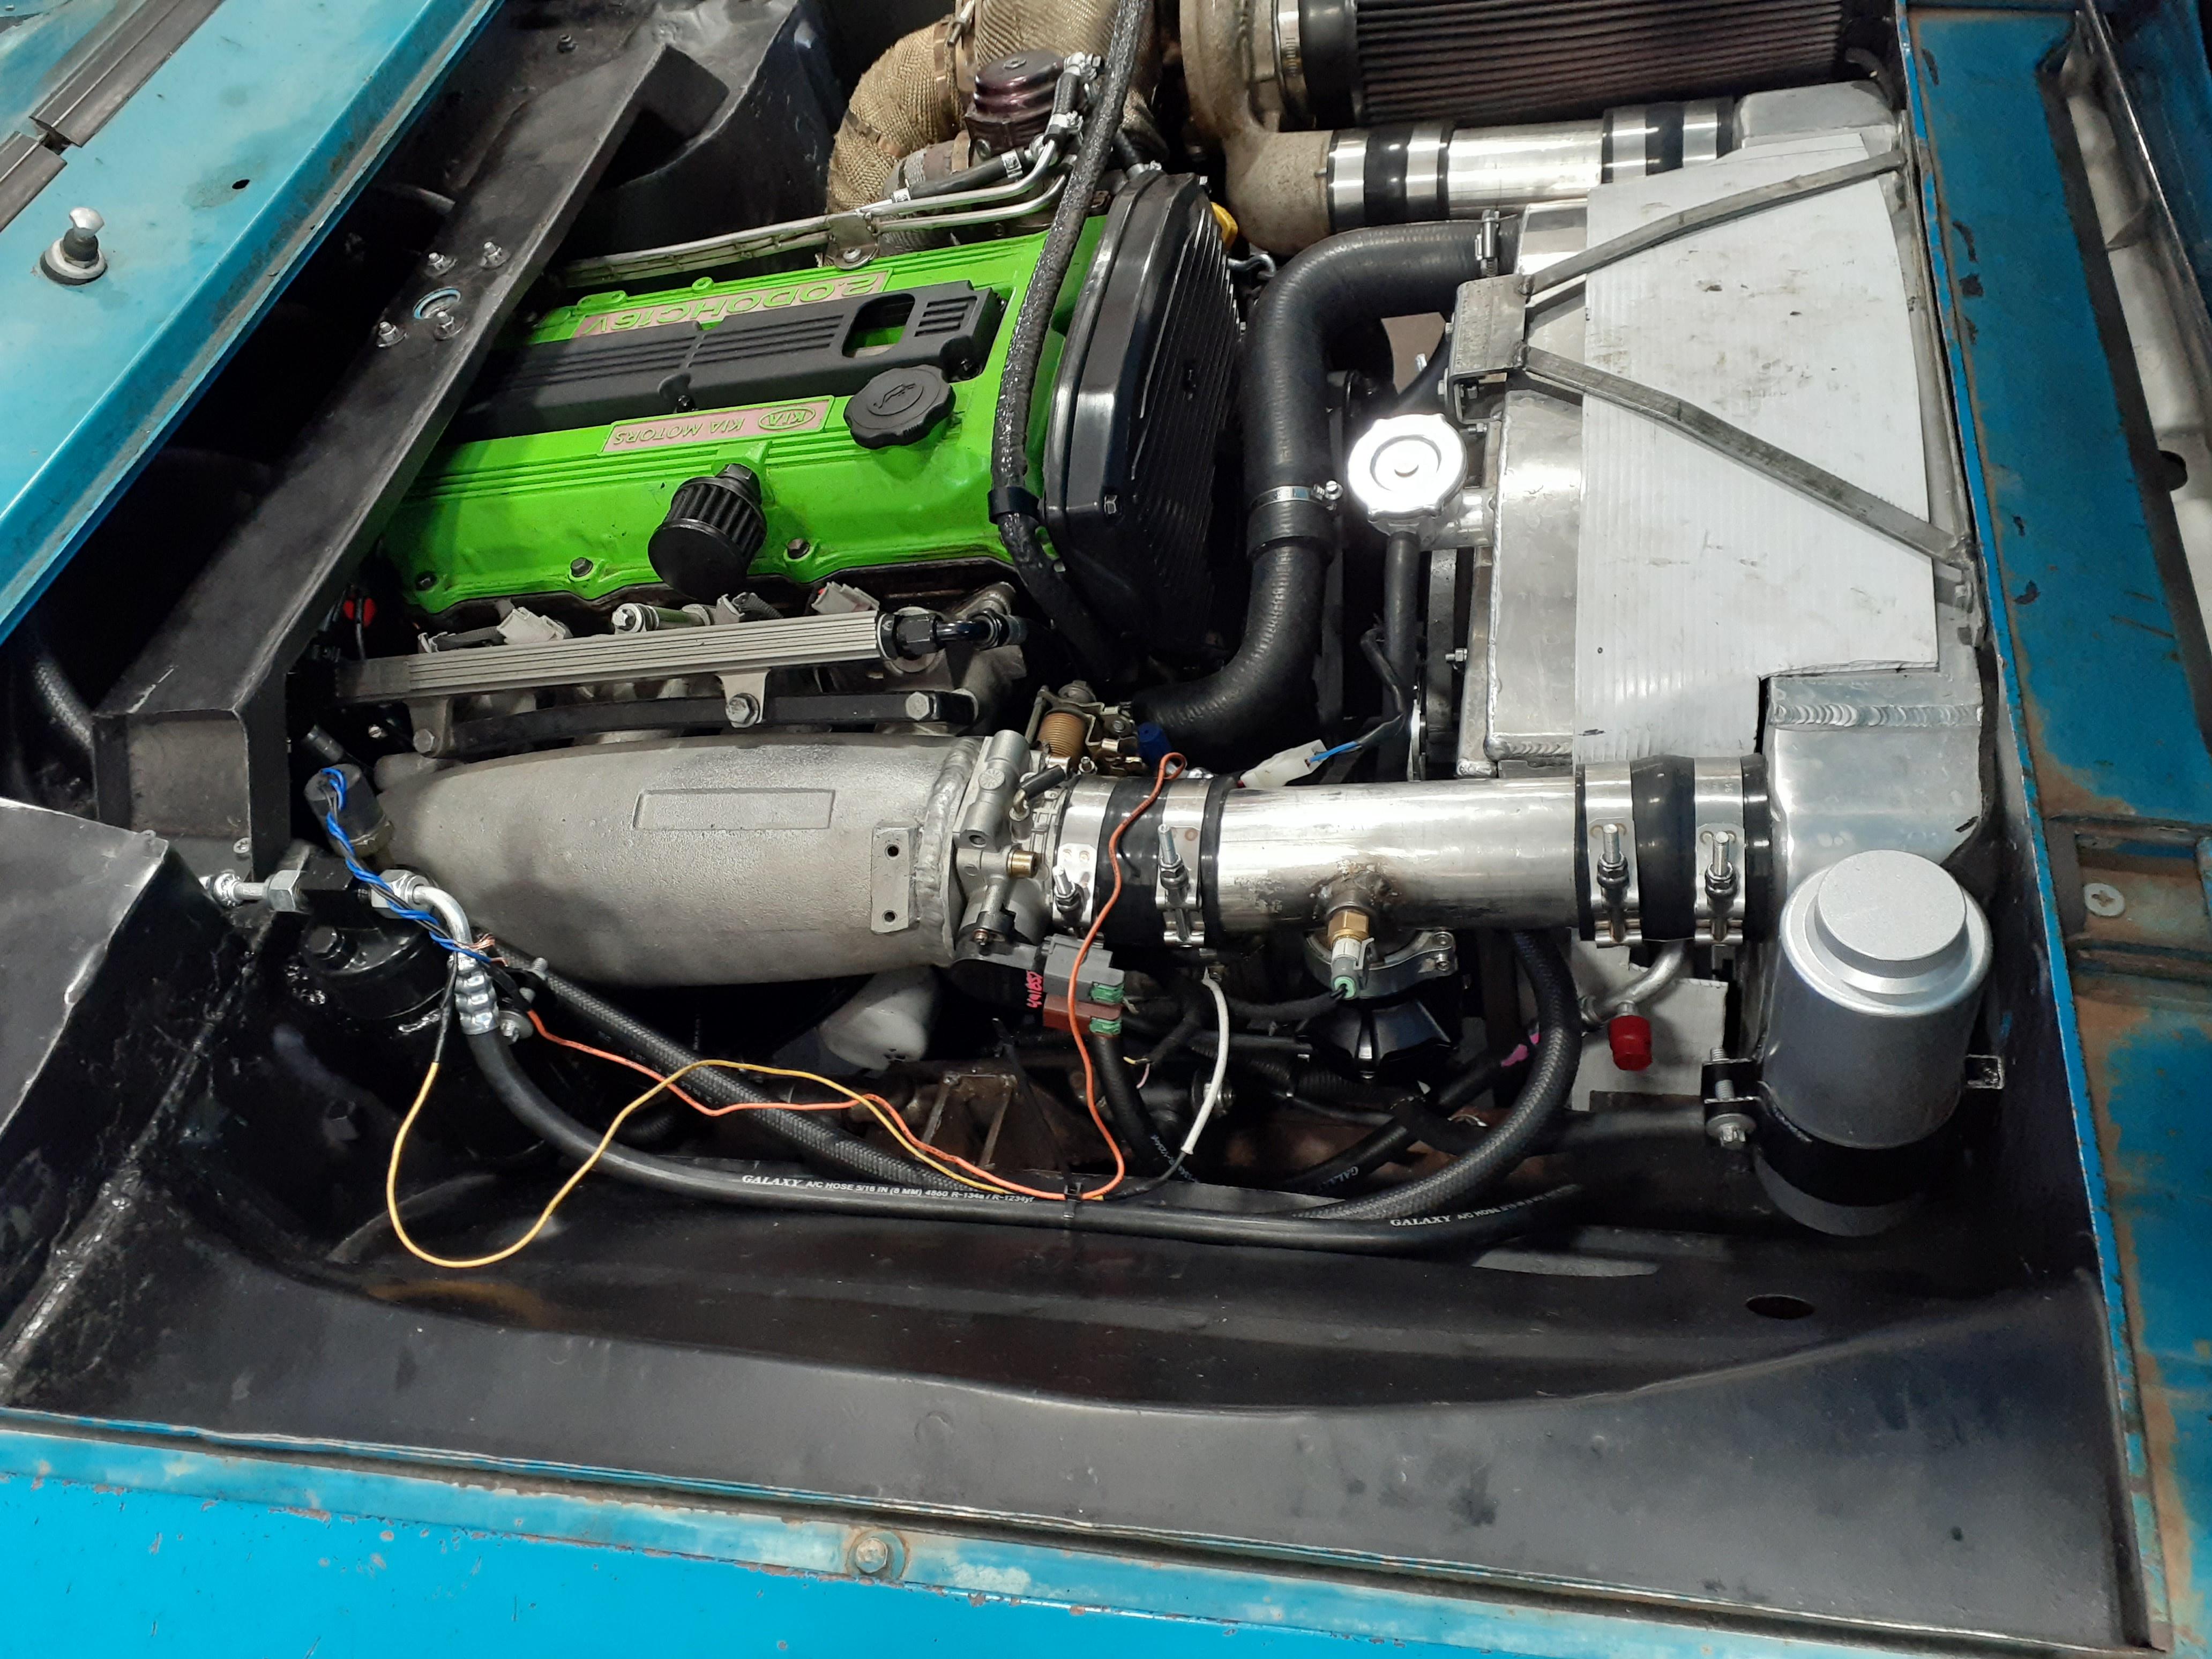
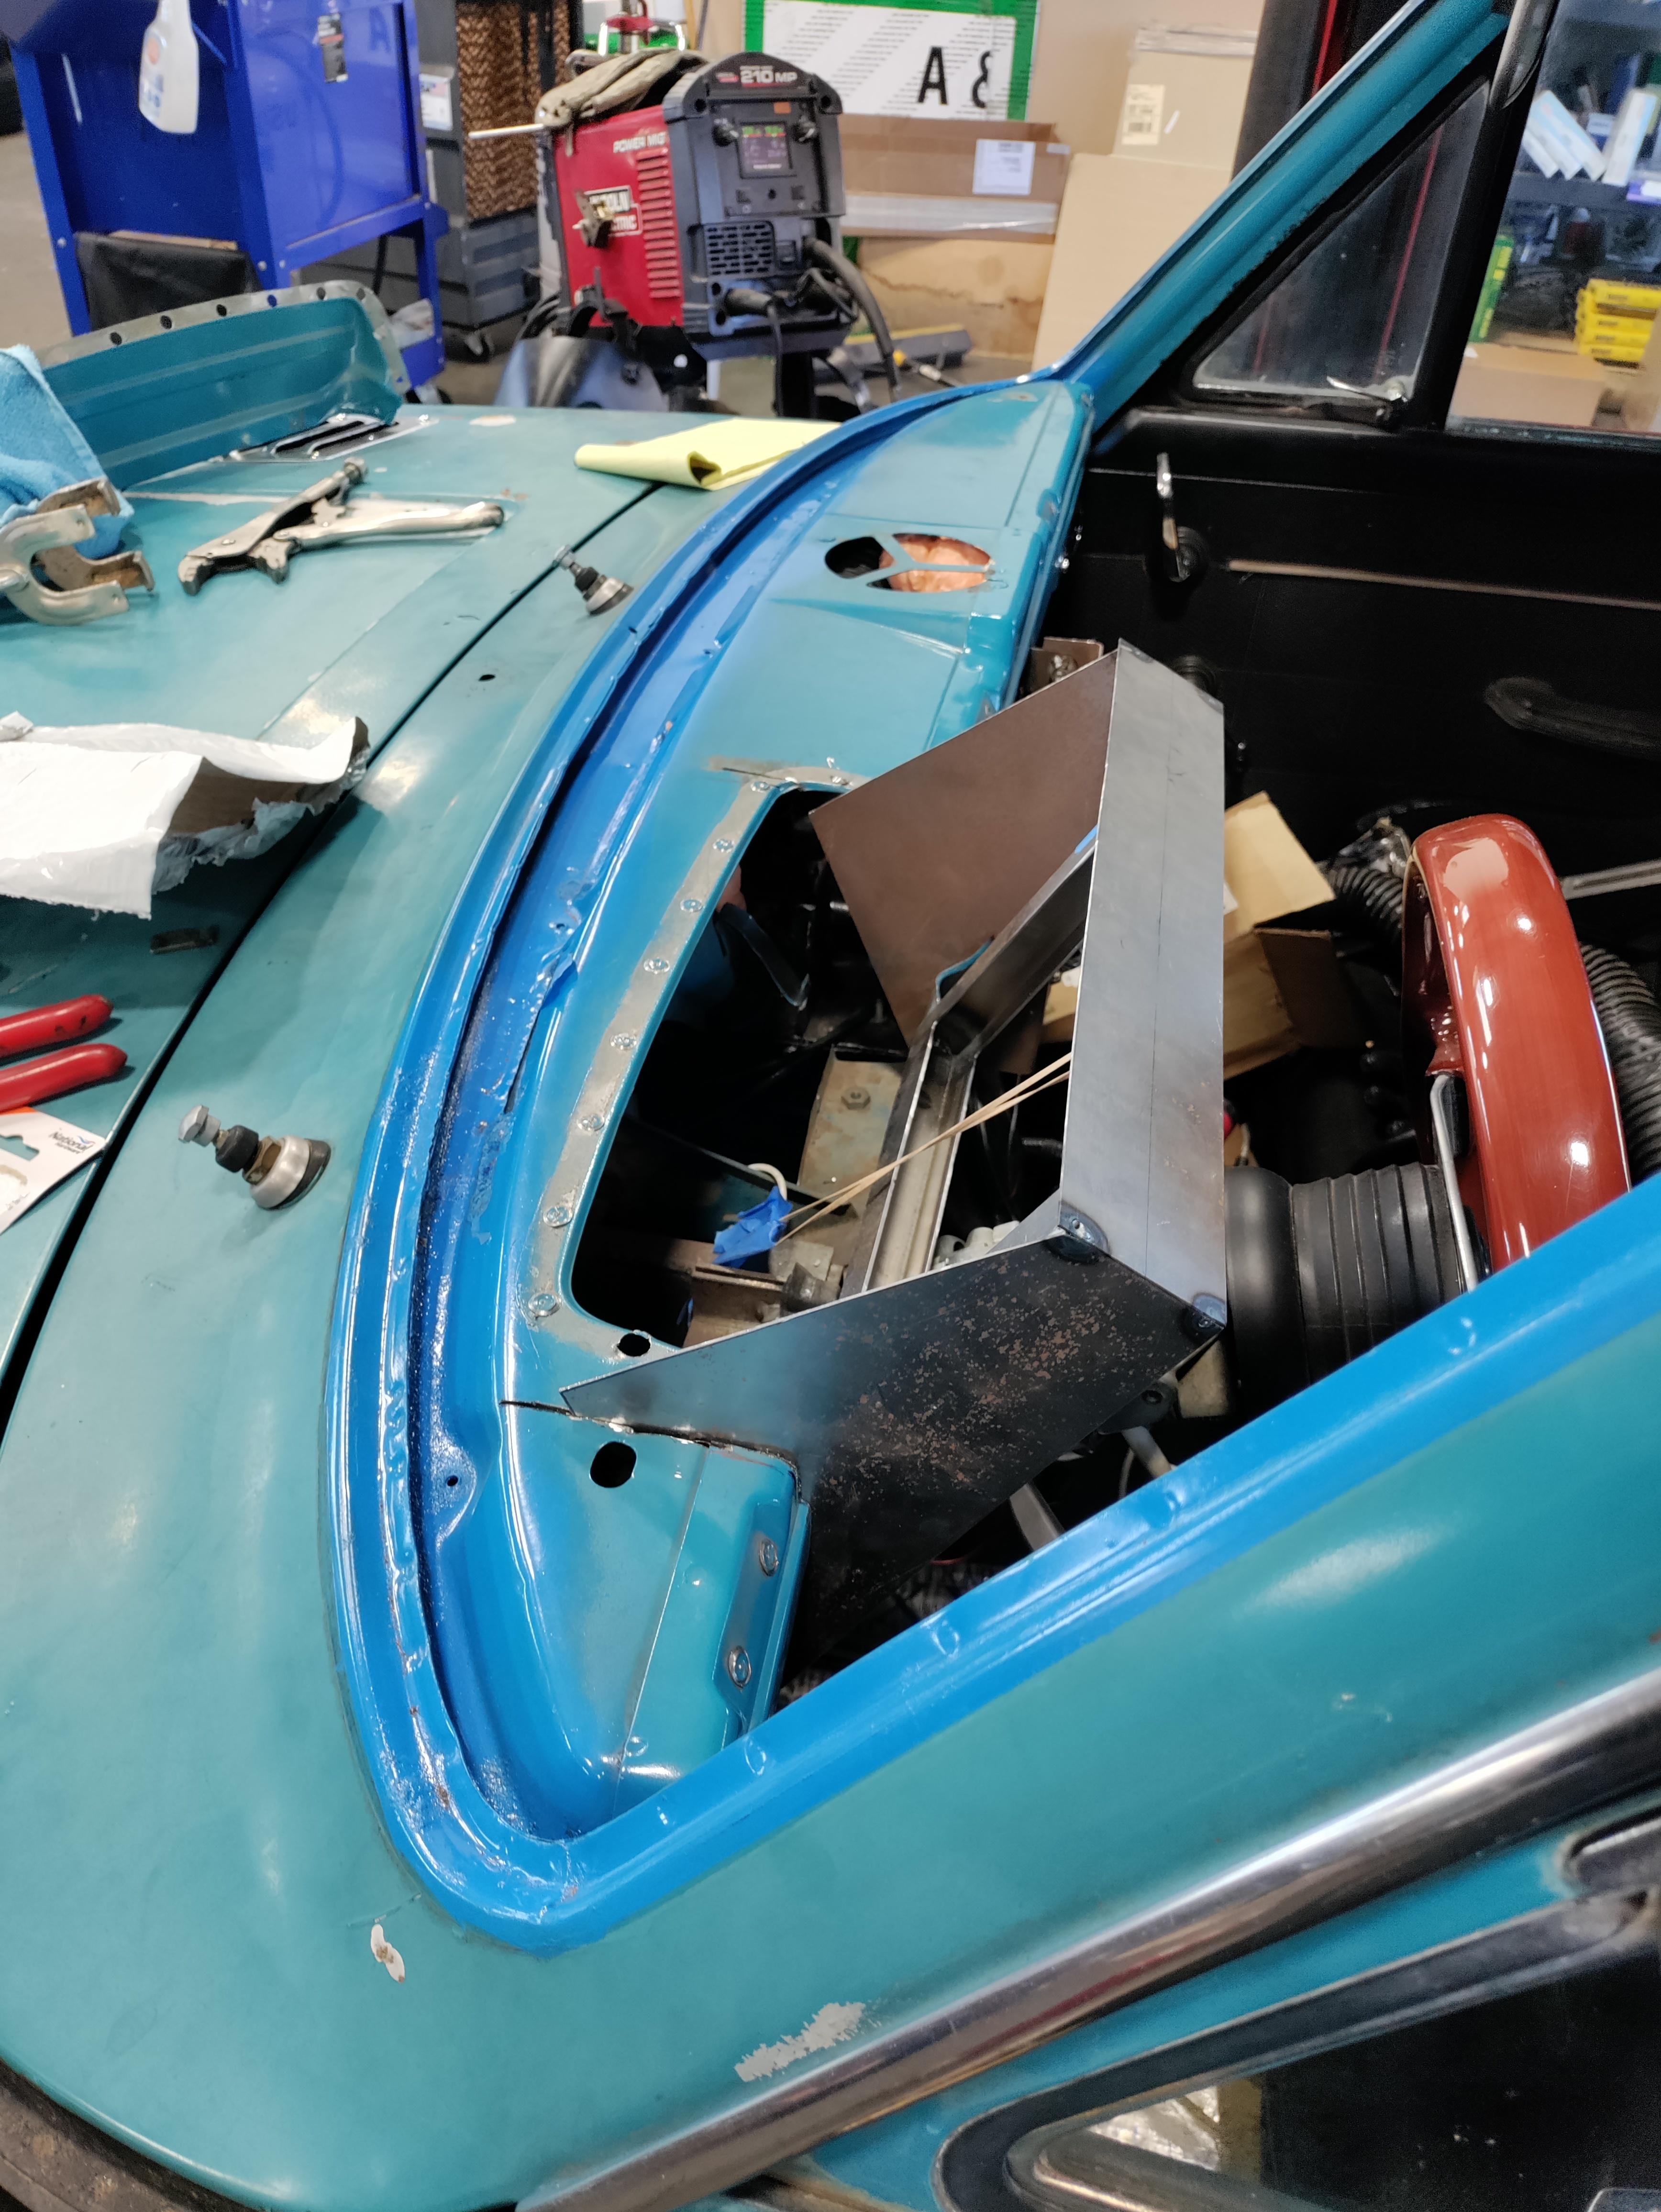
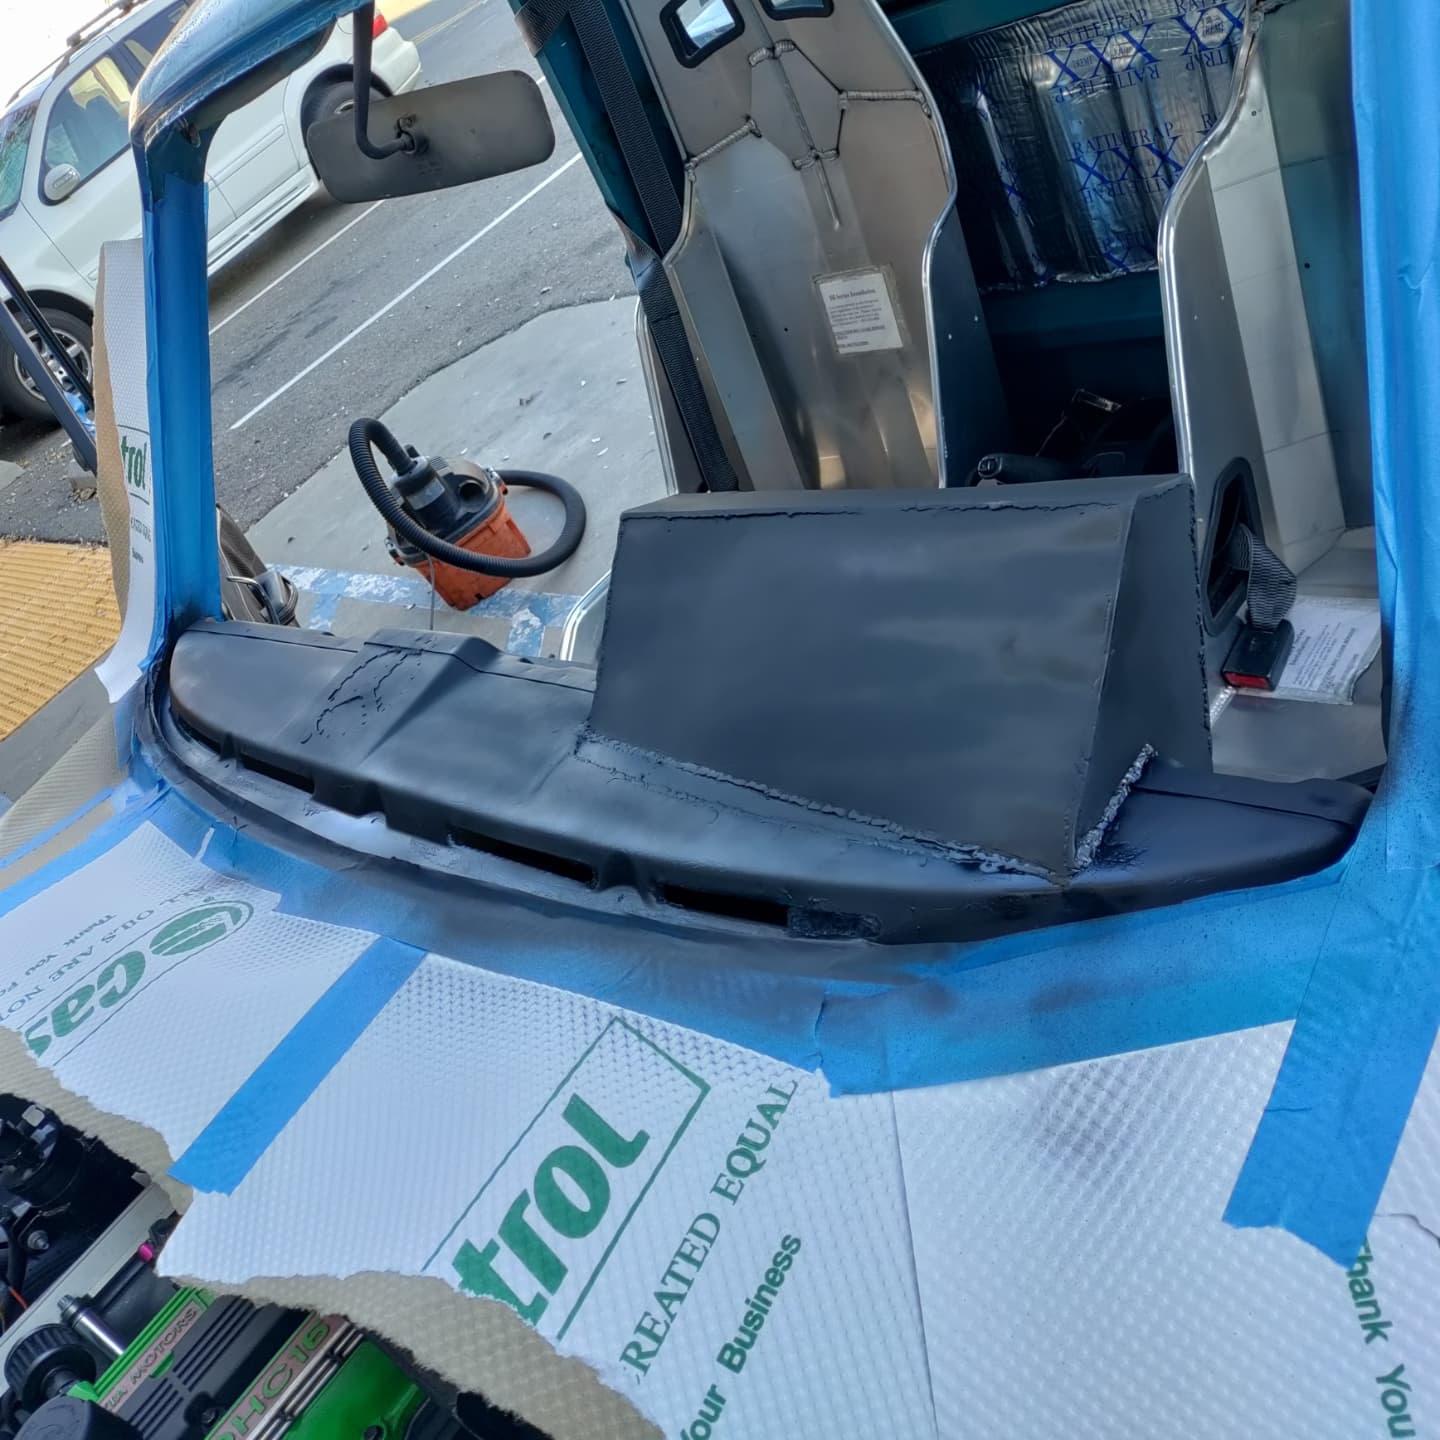
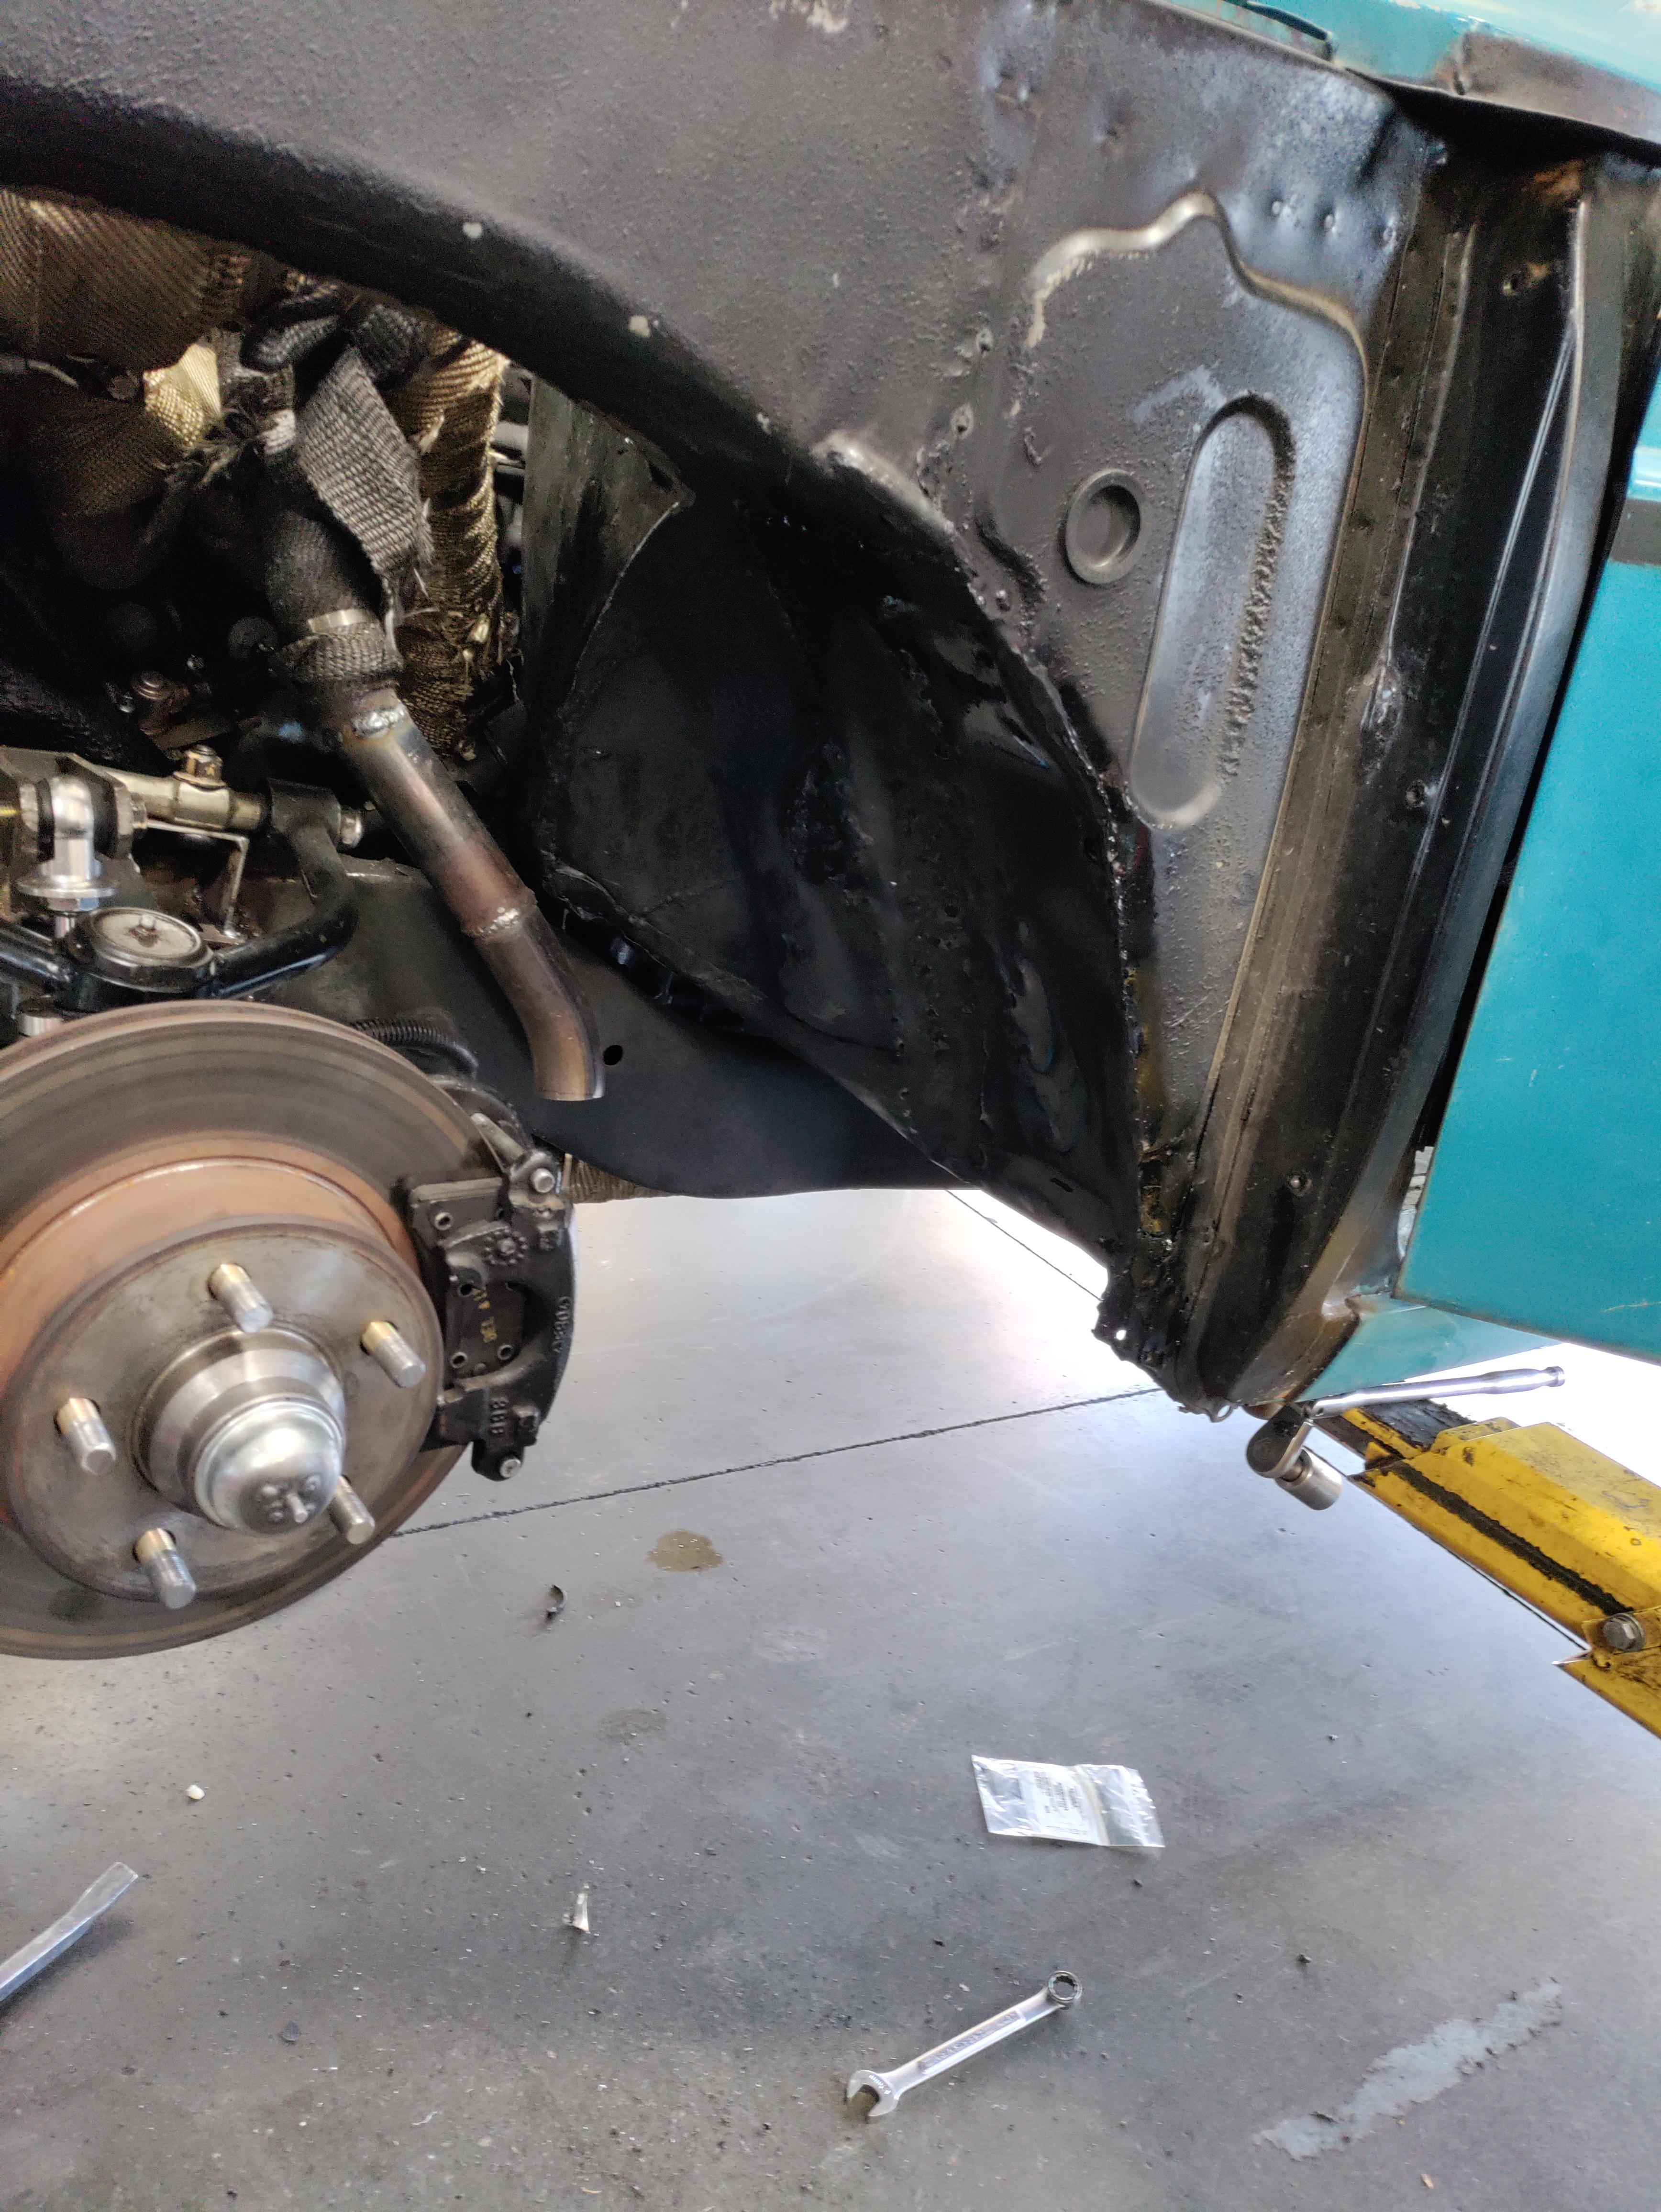
I was so sick of the vibration I finally cut out the poly engine and transmission mounts and replaced them with rear engine mounts. I chose 2005 Mercedes S600 mounts. I figured if they can hold the weight and torque of a twin turbo V12 they will do just fine in my truck. I manage a Mercedes repair shop so the cost on the parts is super cheap. 90% of the engine vibration is gone but its still louder than I was hoping for. I need to pull the windshield so i can have access to the back of the dash to finish sound proofing the firewall and finish the cluster bezel. I also need to get all the A/C lines made and get that all working, There are so many things that need to be finished still.
Reply
0
0
08-12-2021, 12:01 PM
#210
Senior Member
Thread Starter
Join Date: Jan 2011
Location: sacramento ,ca
Posts: 568
Total Cats: 162
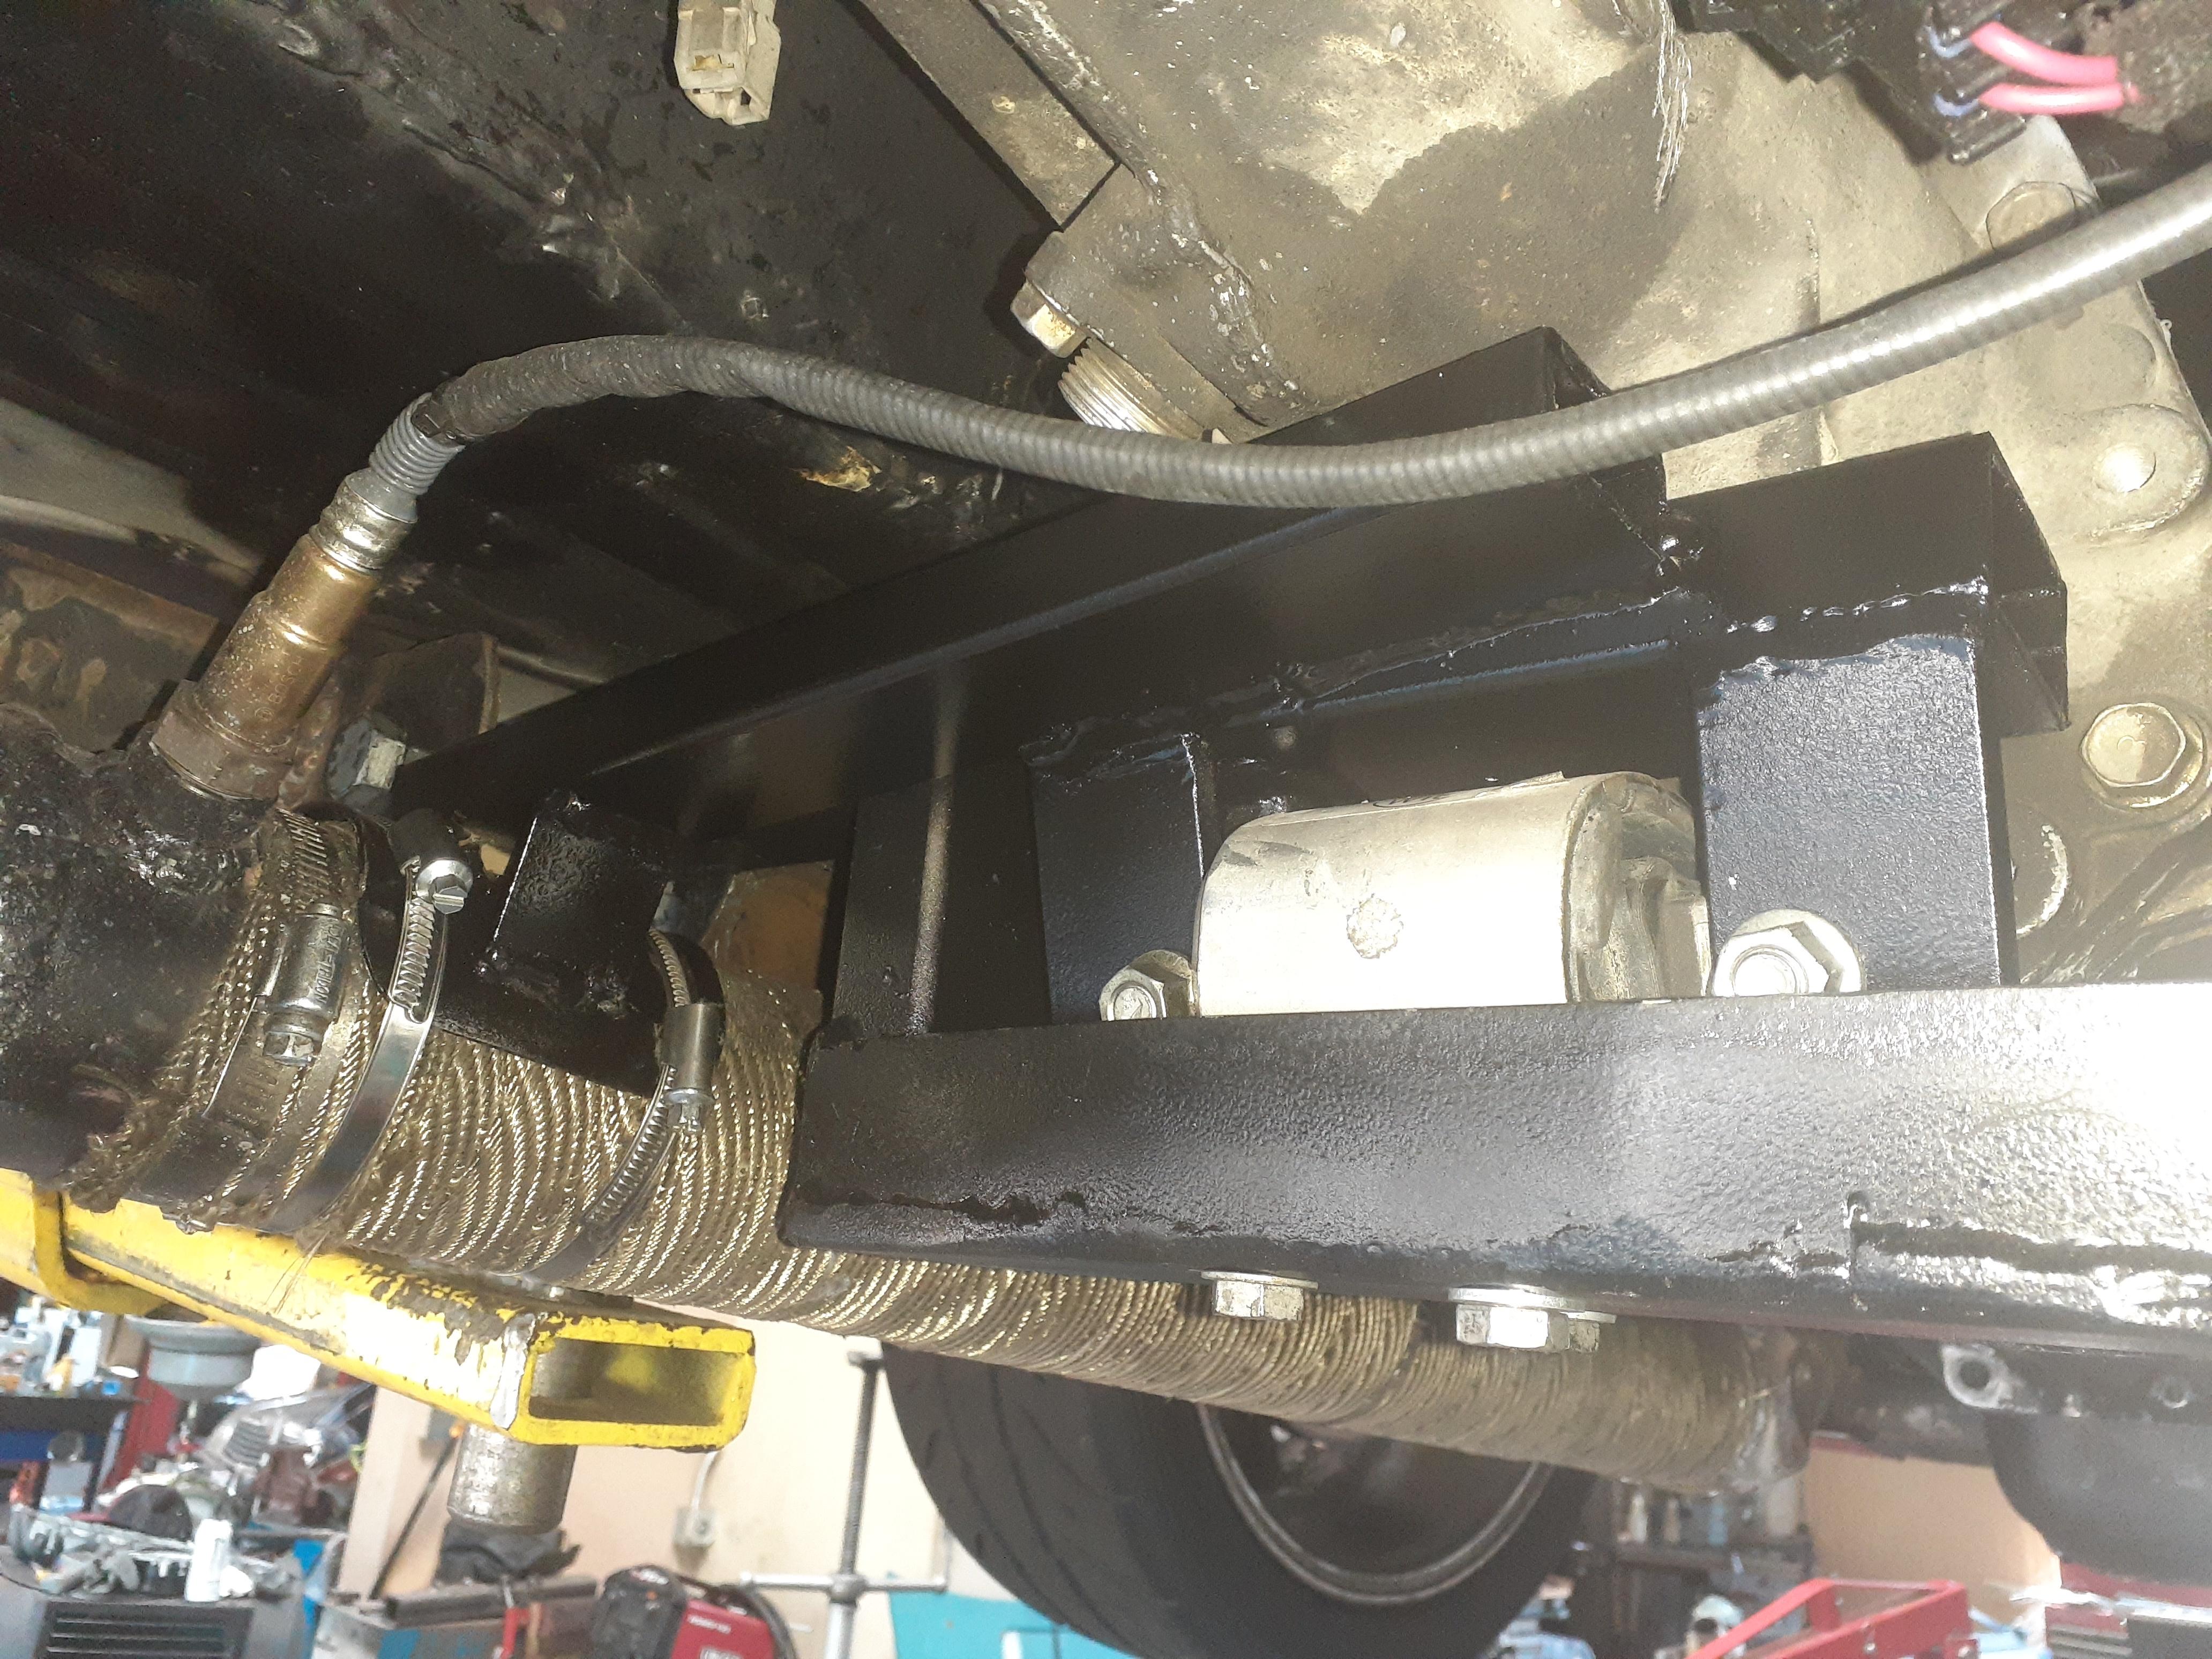
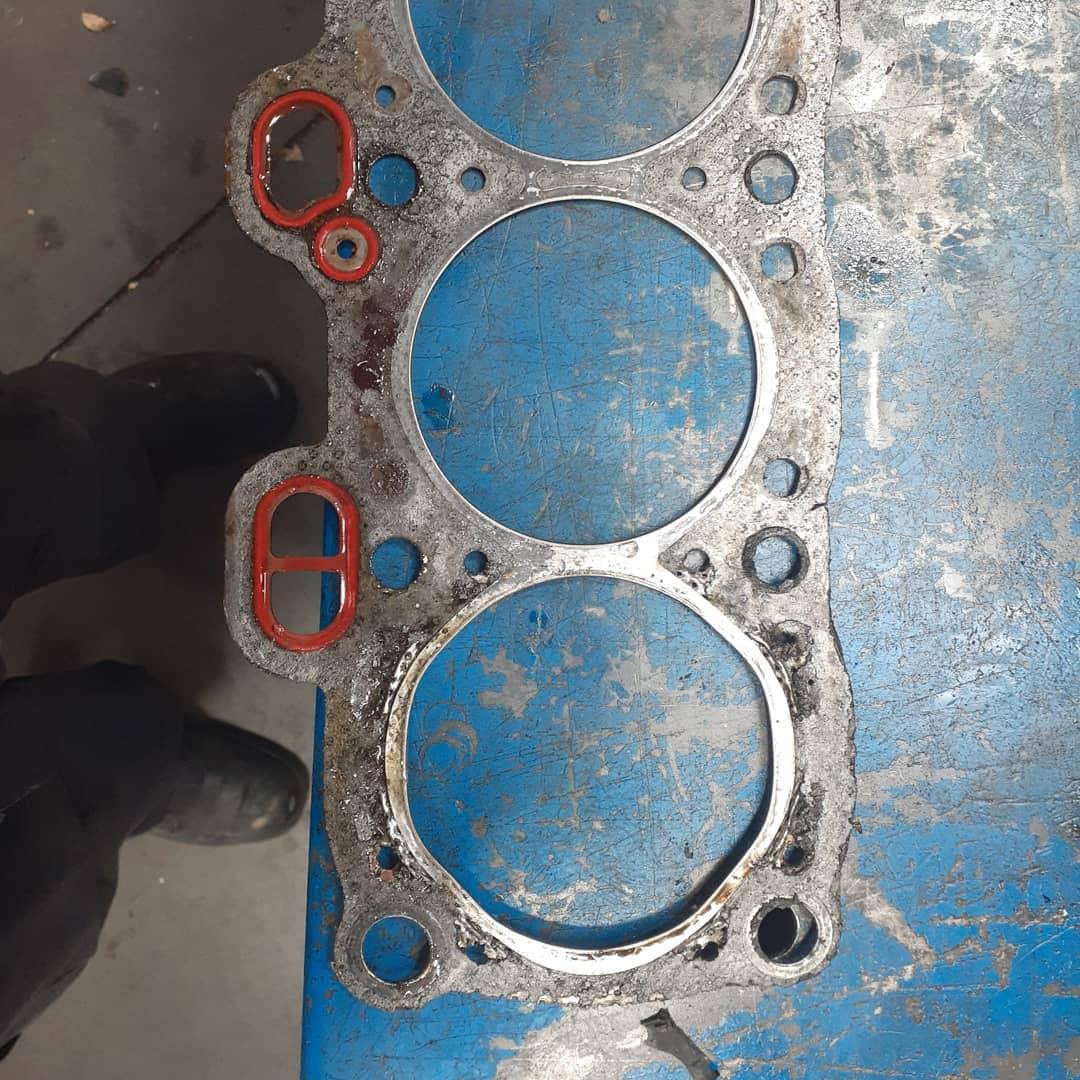
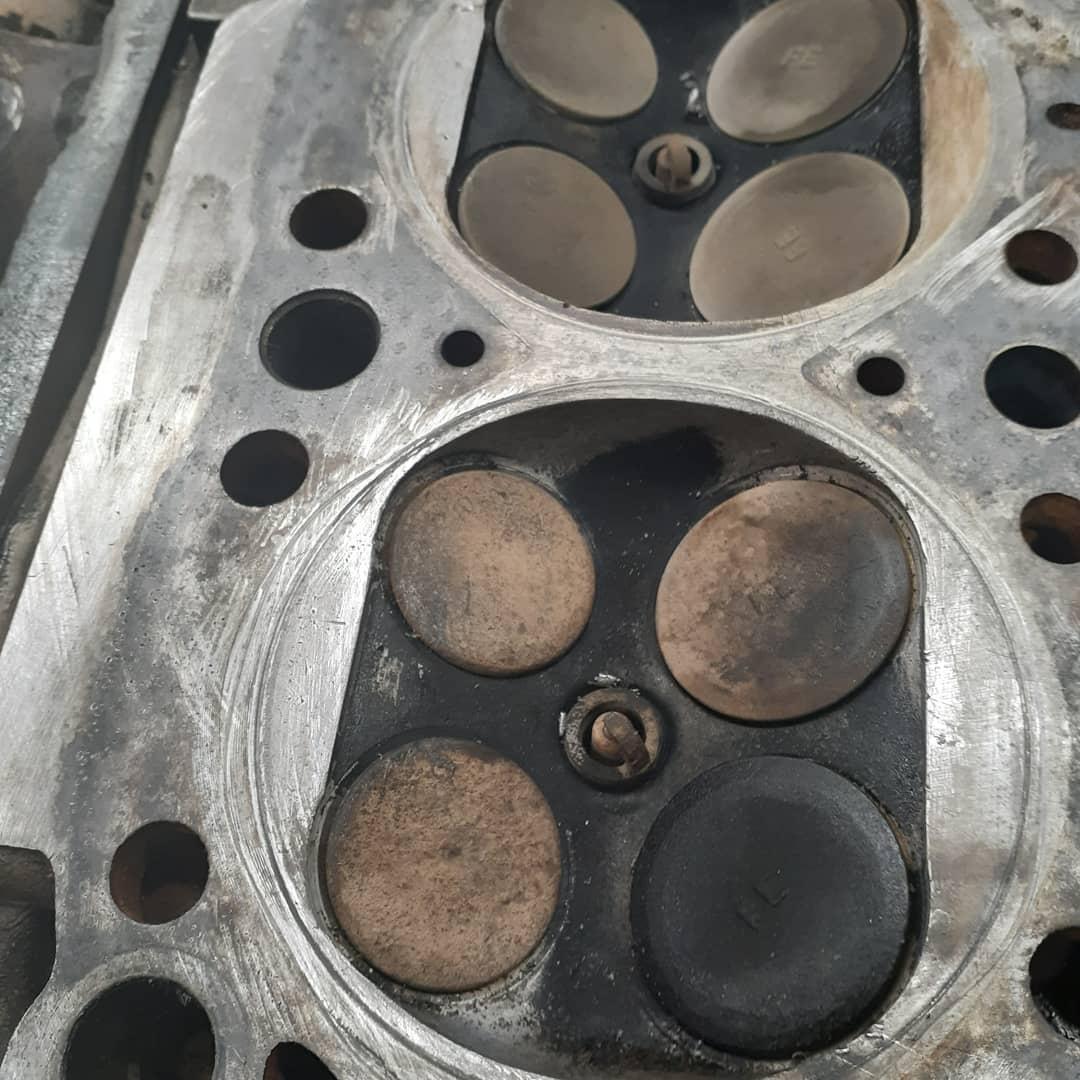
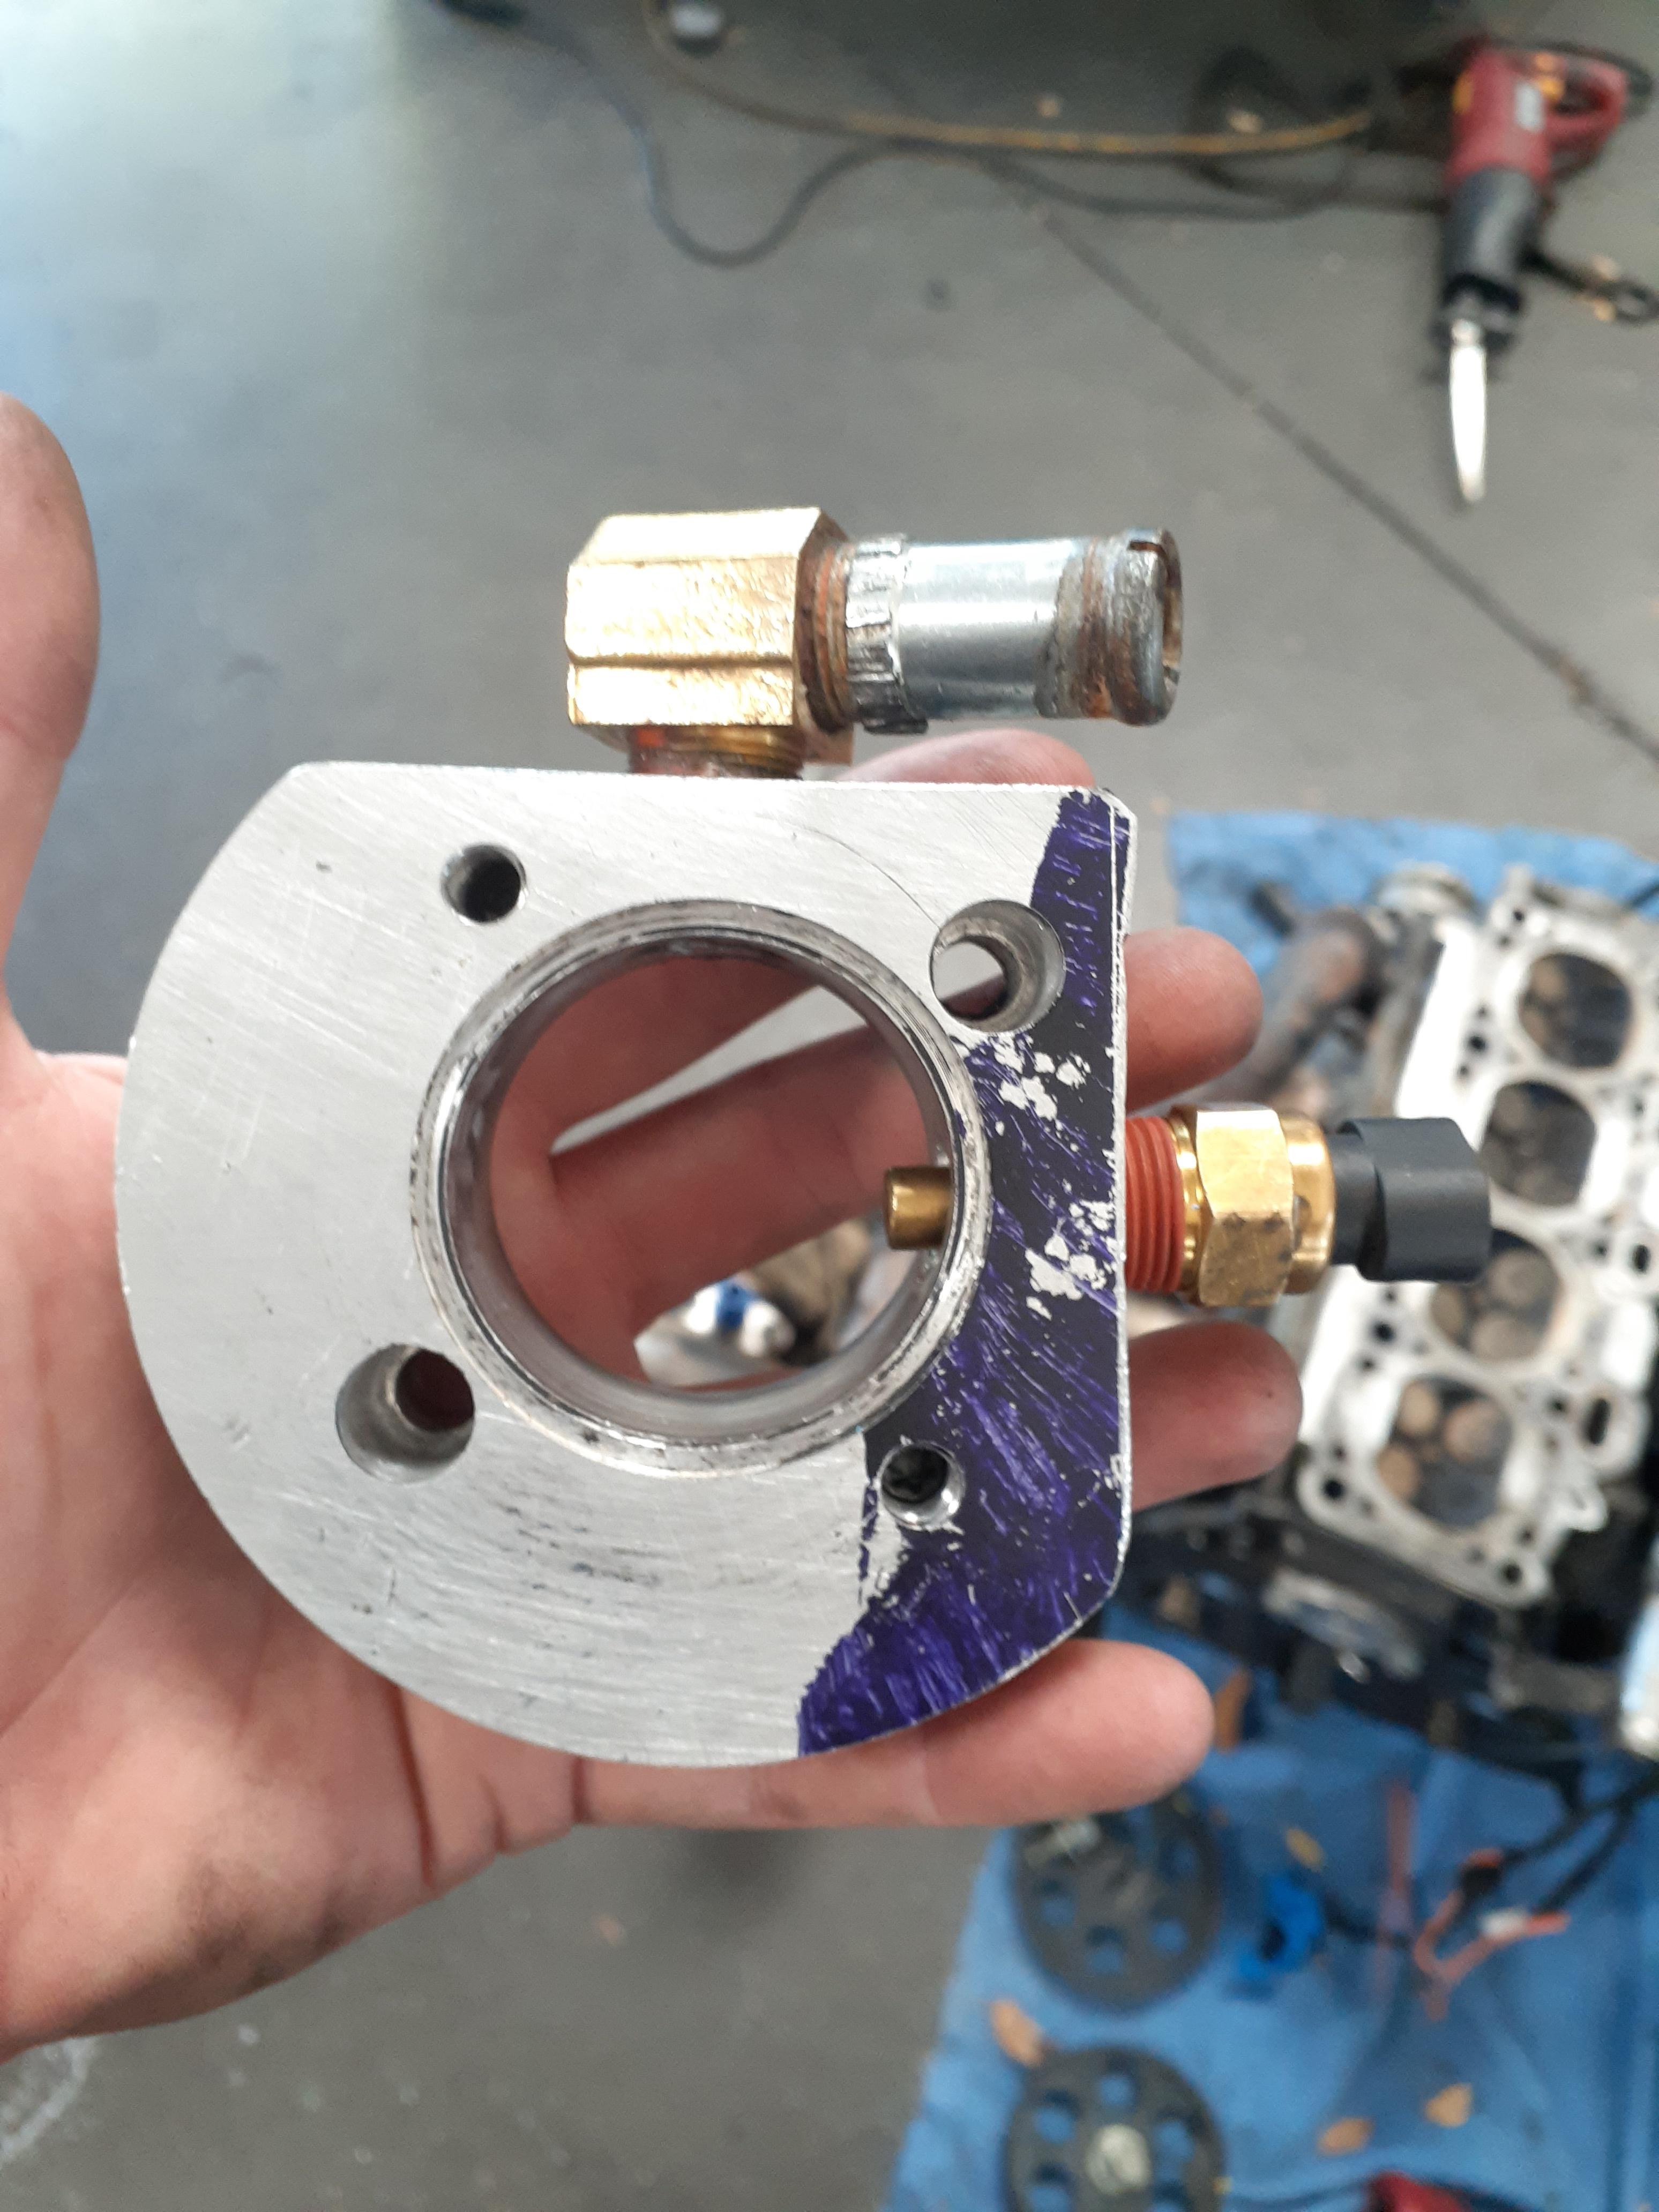
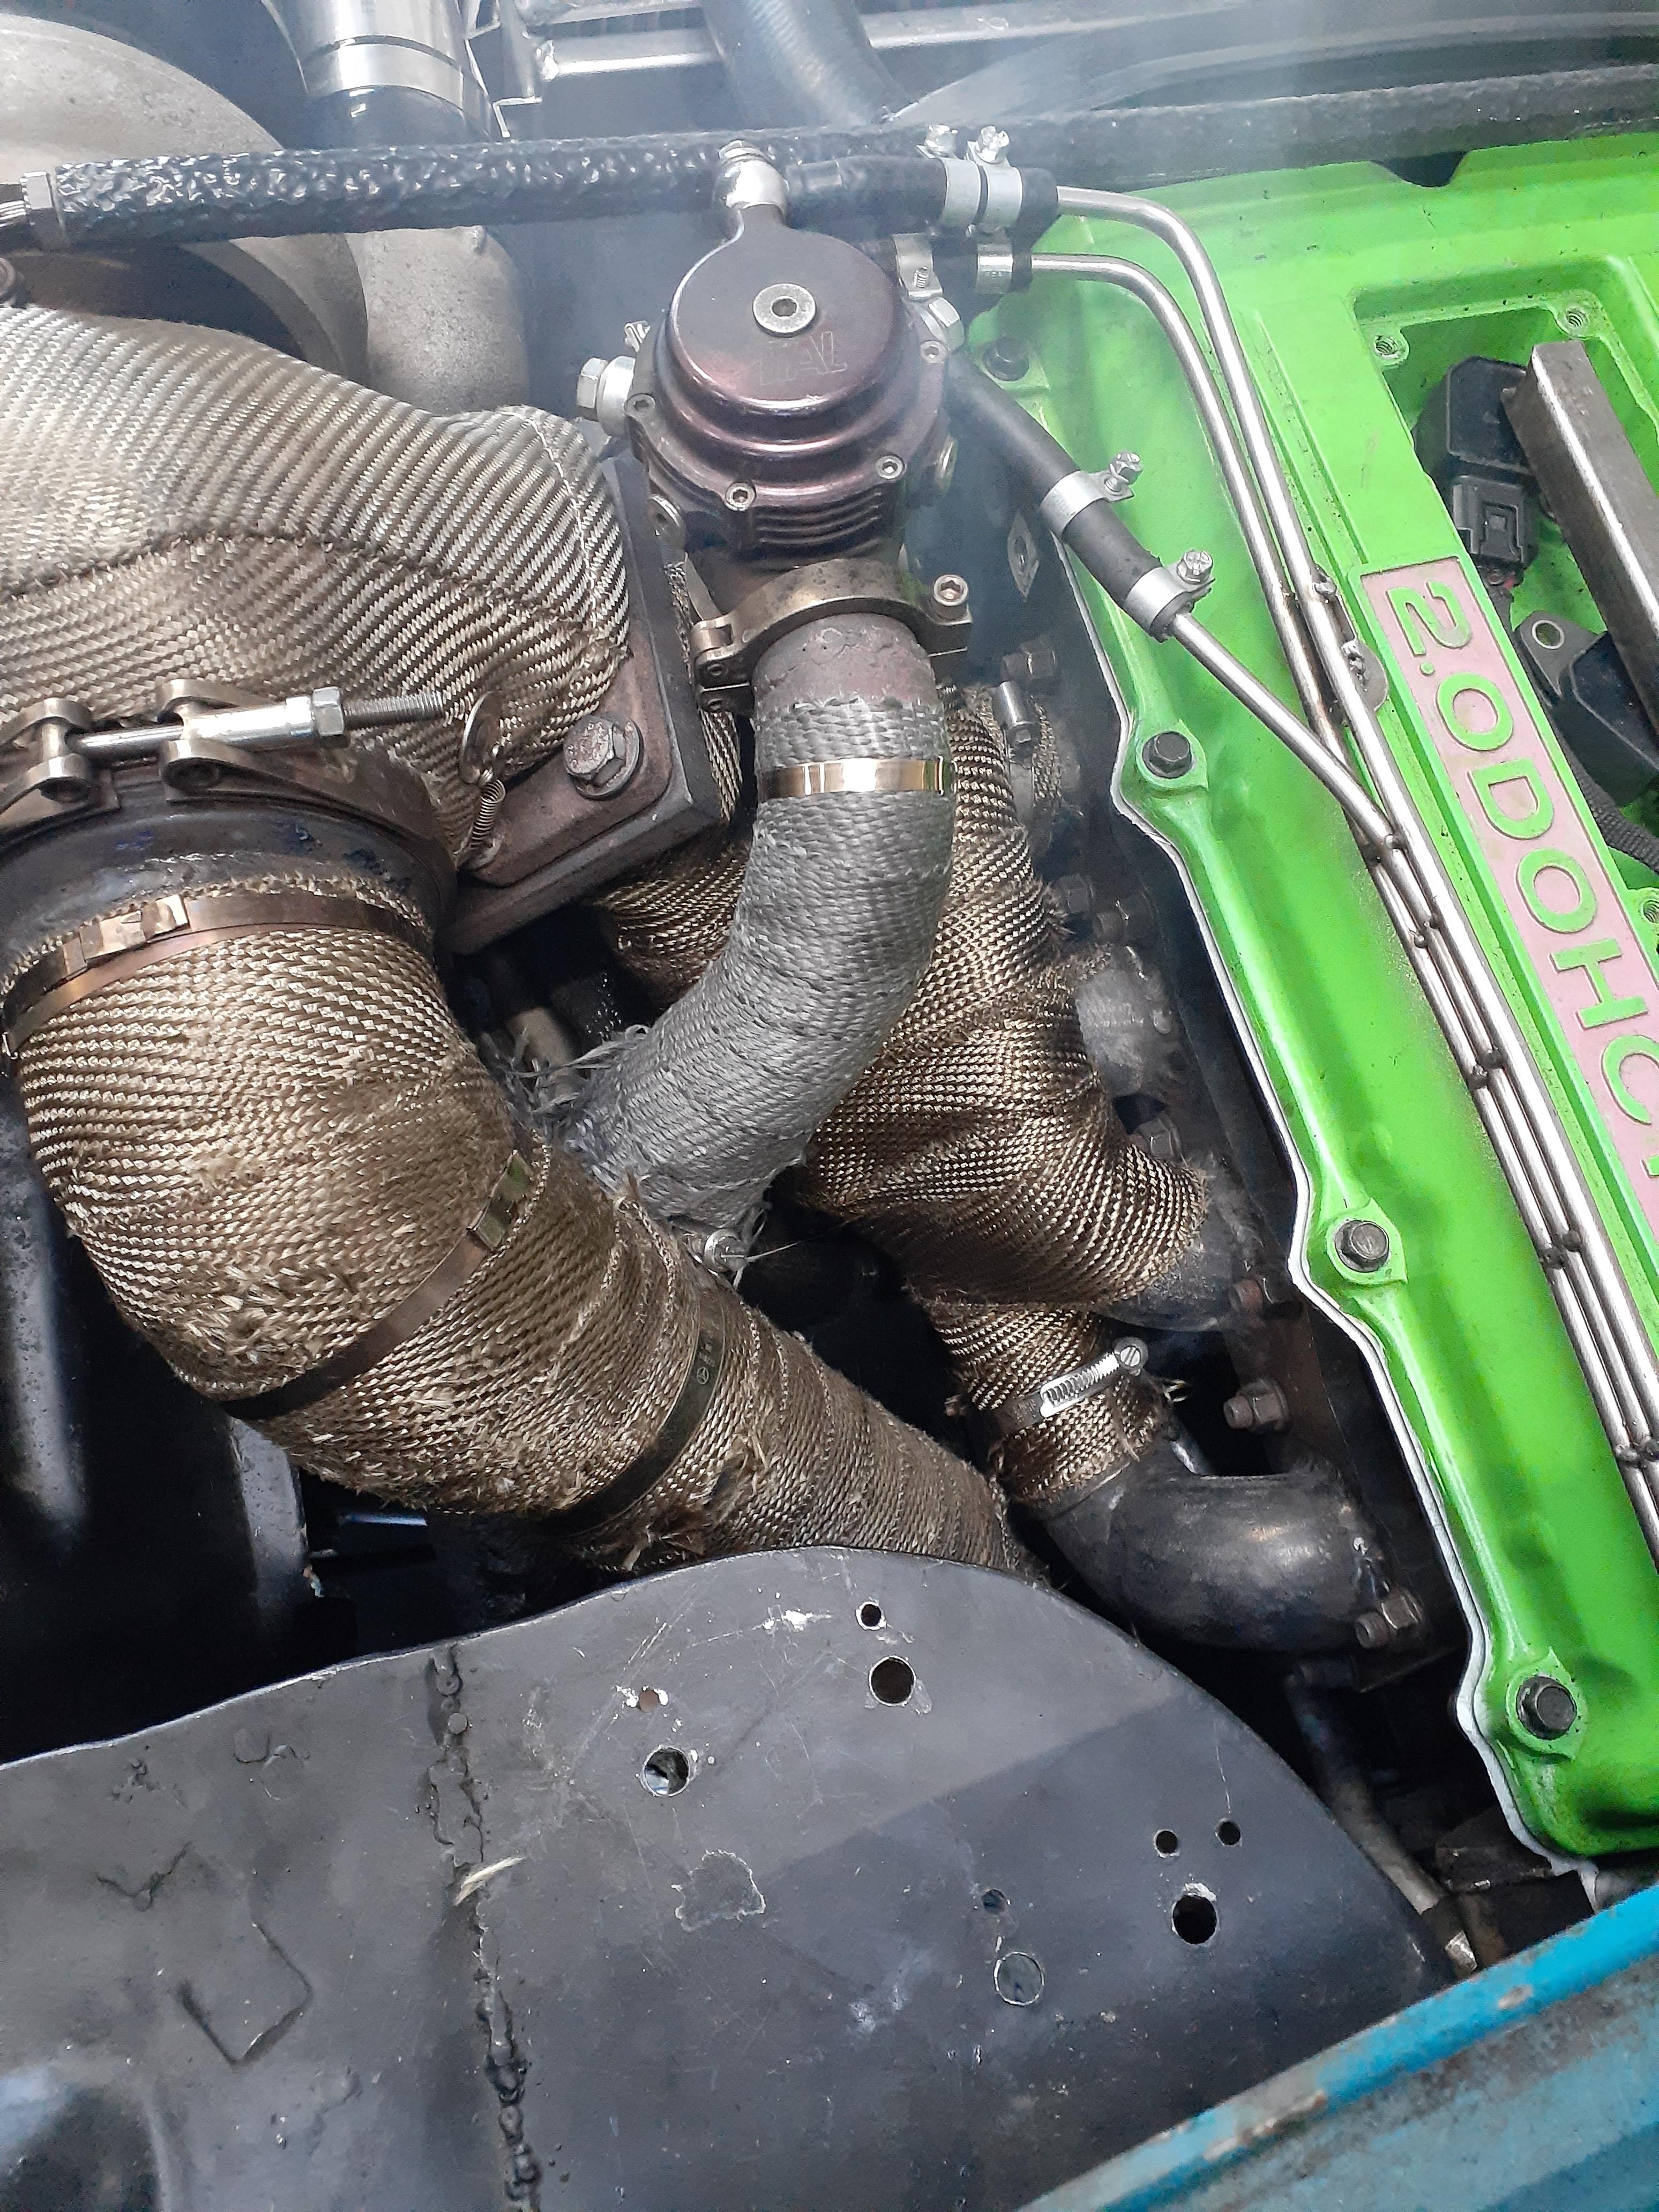
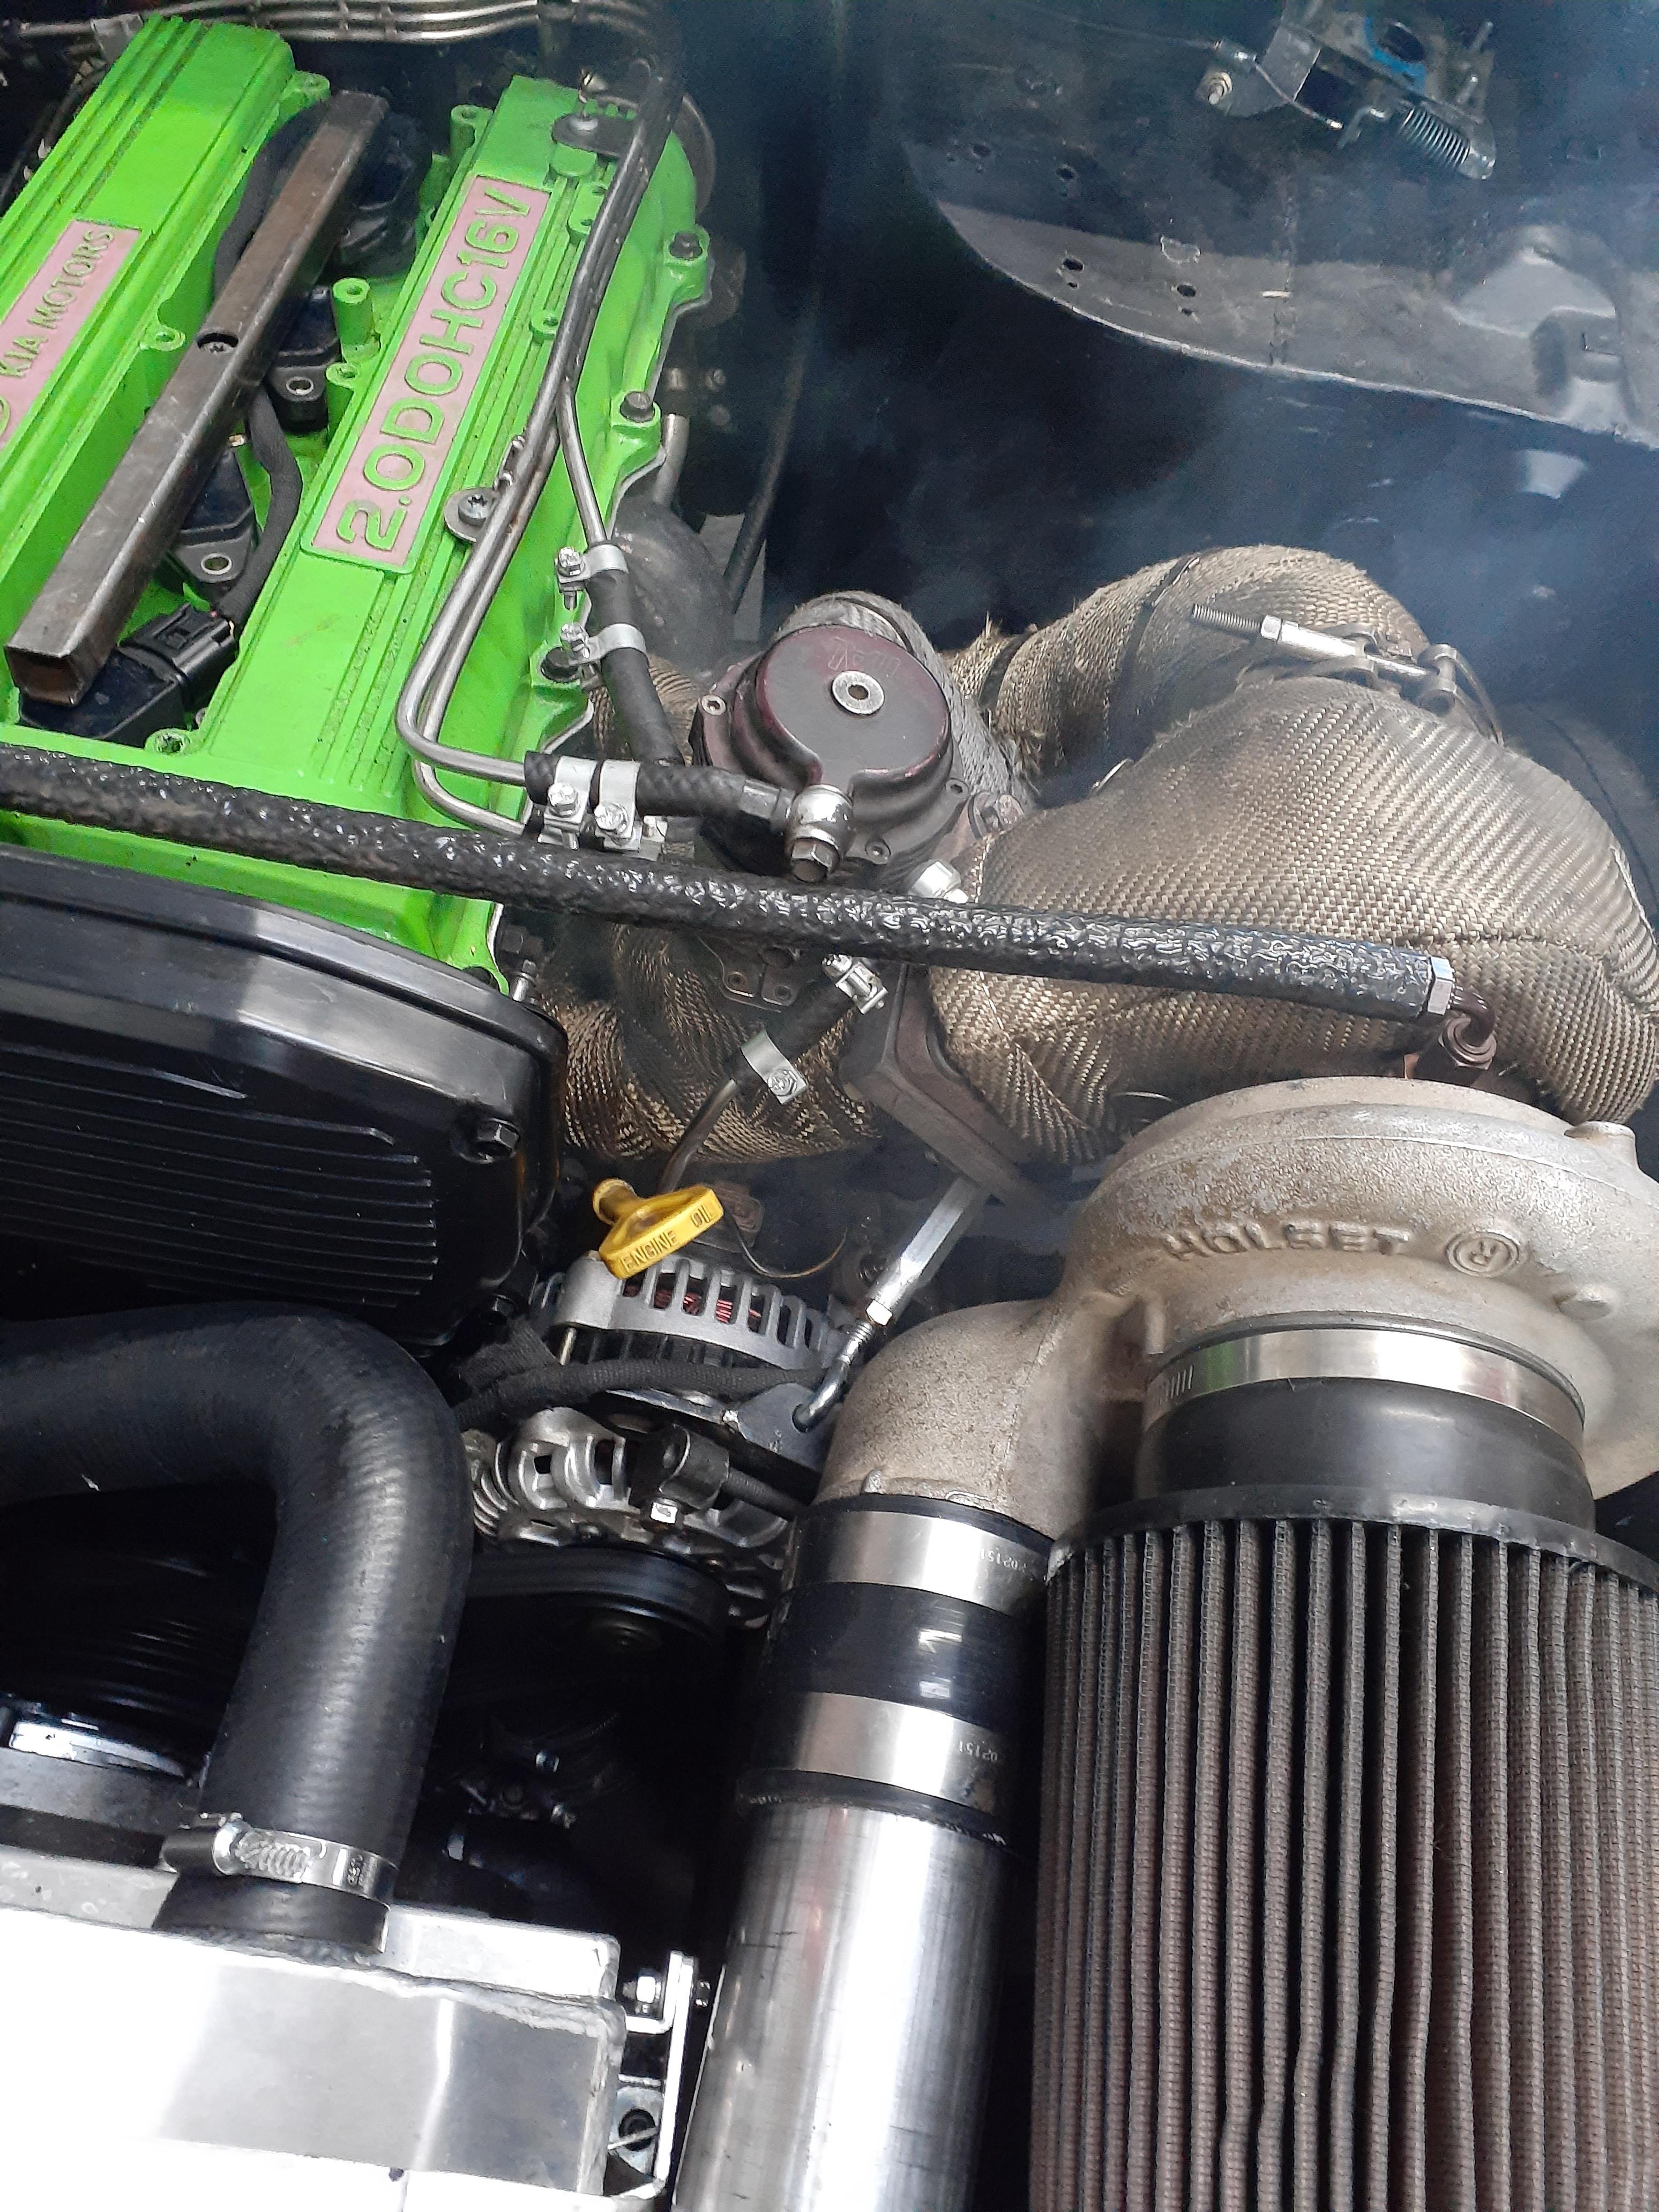
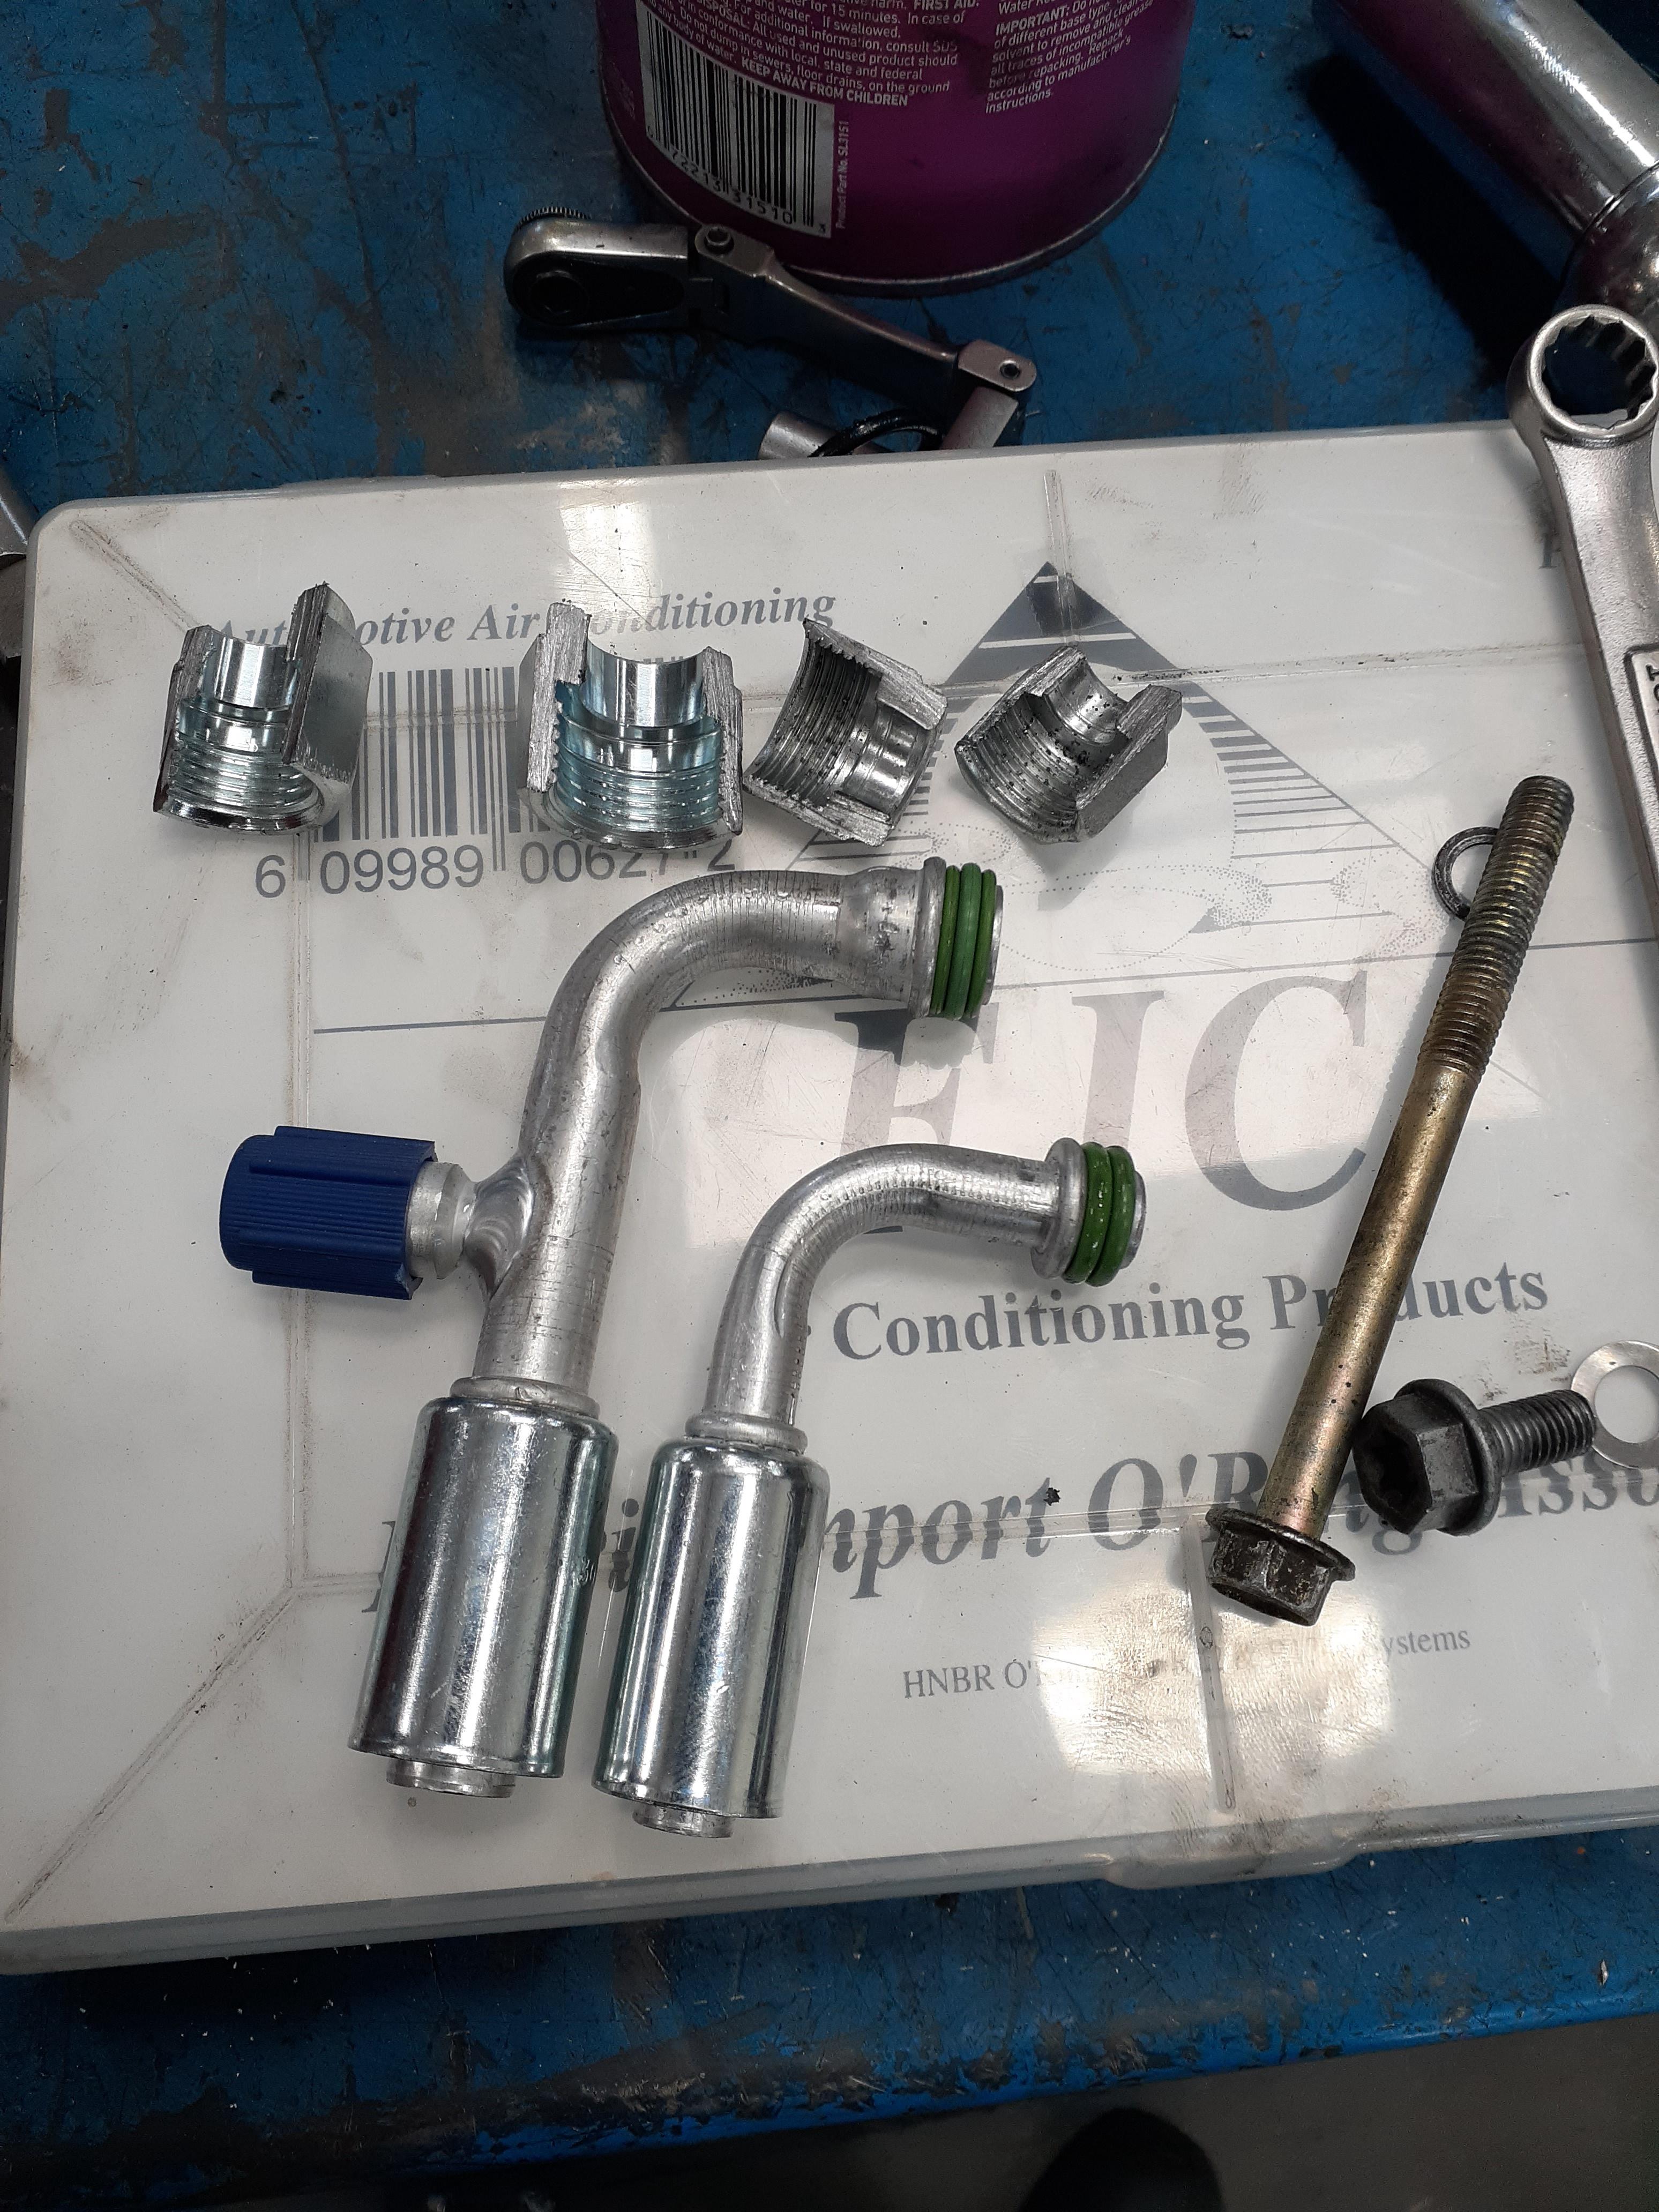
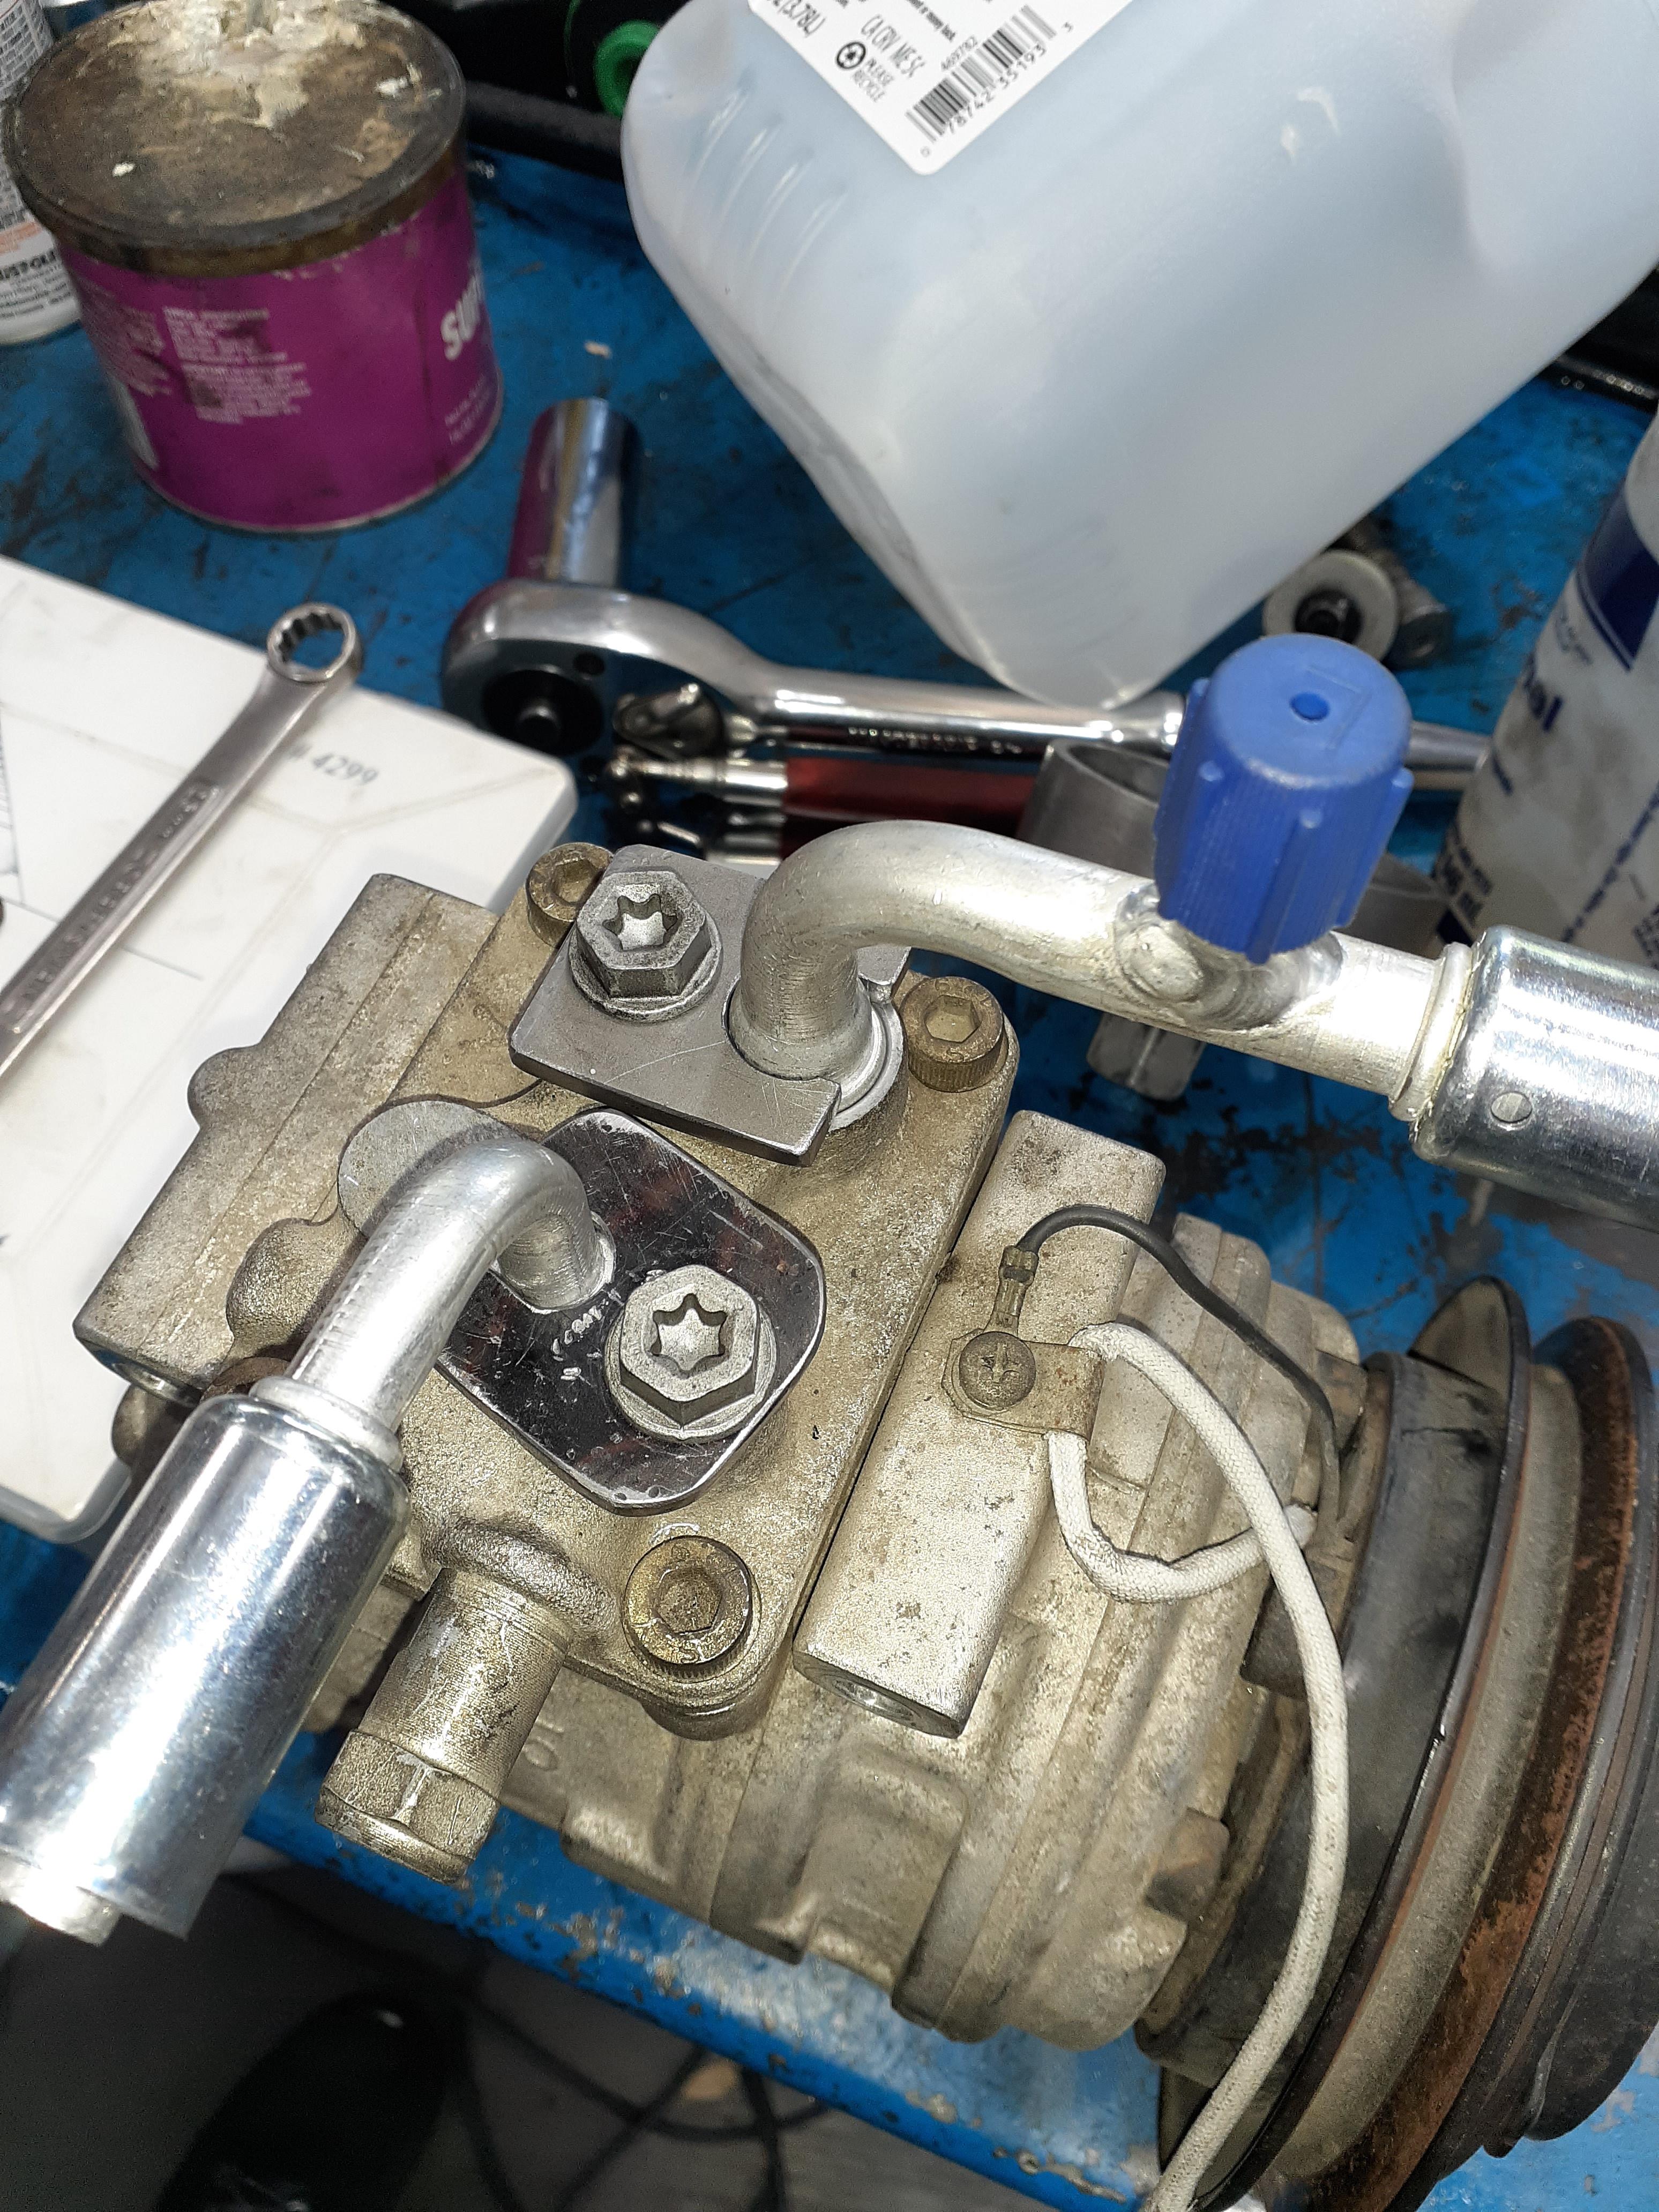
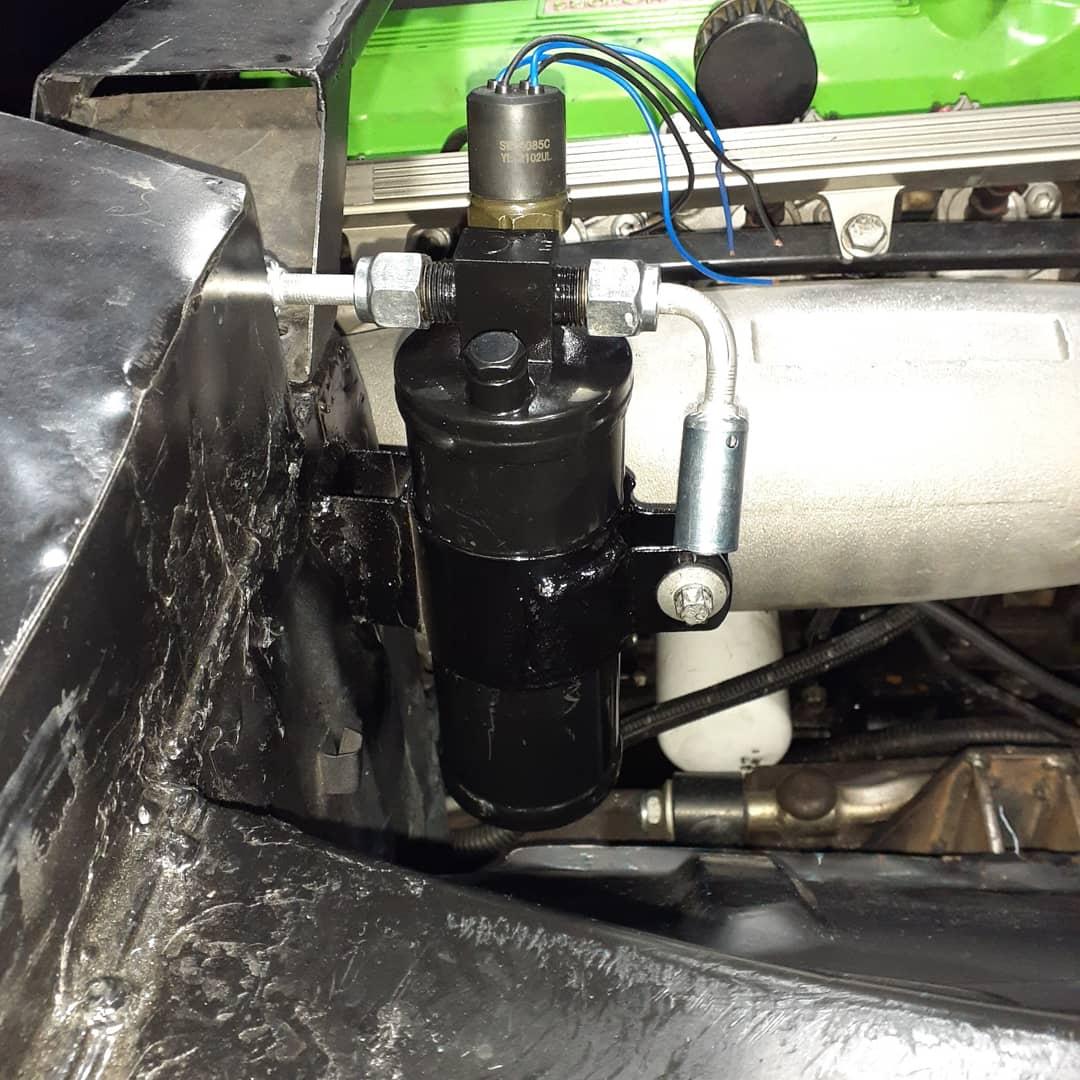
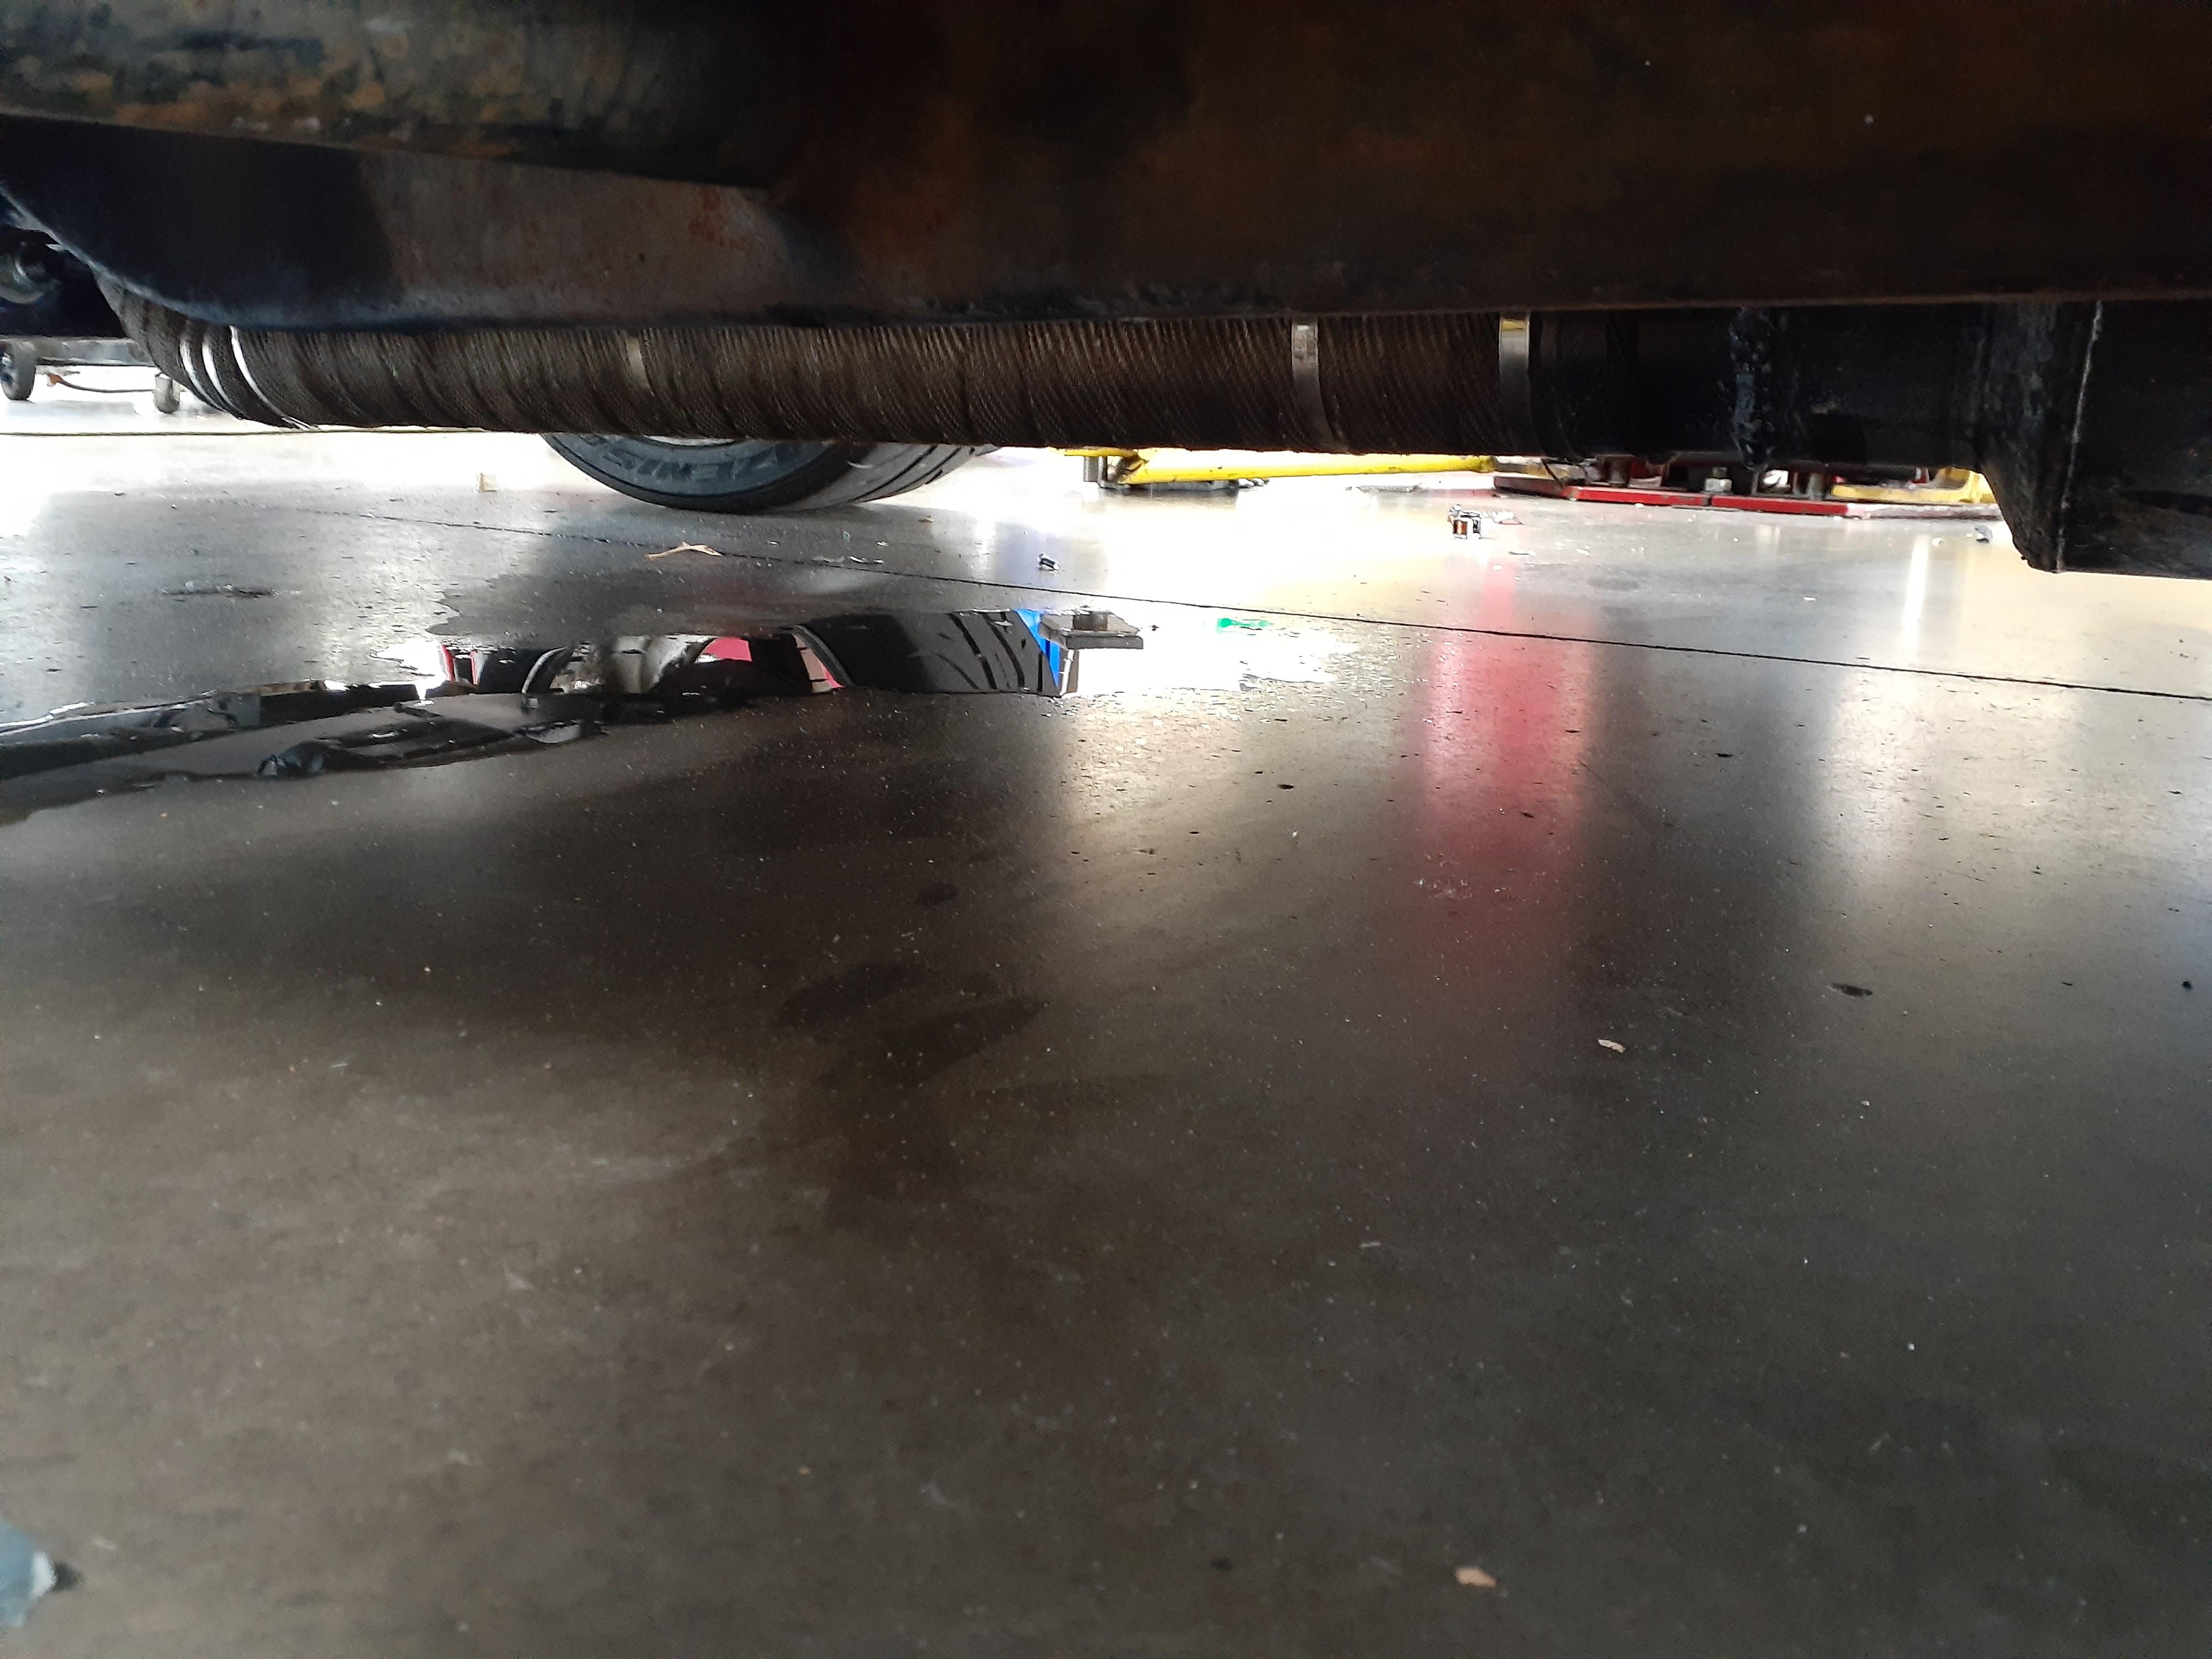
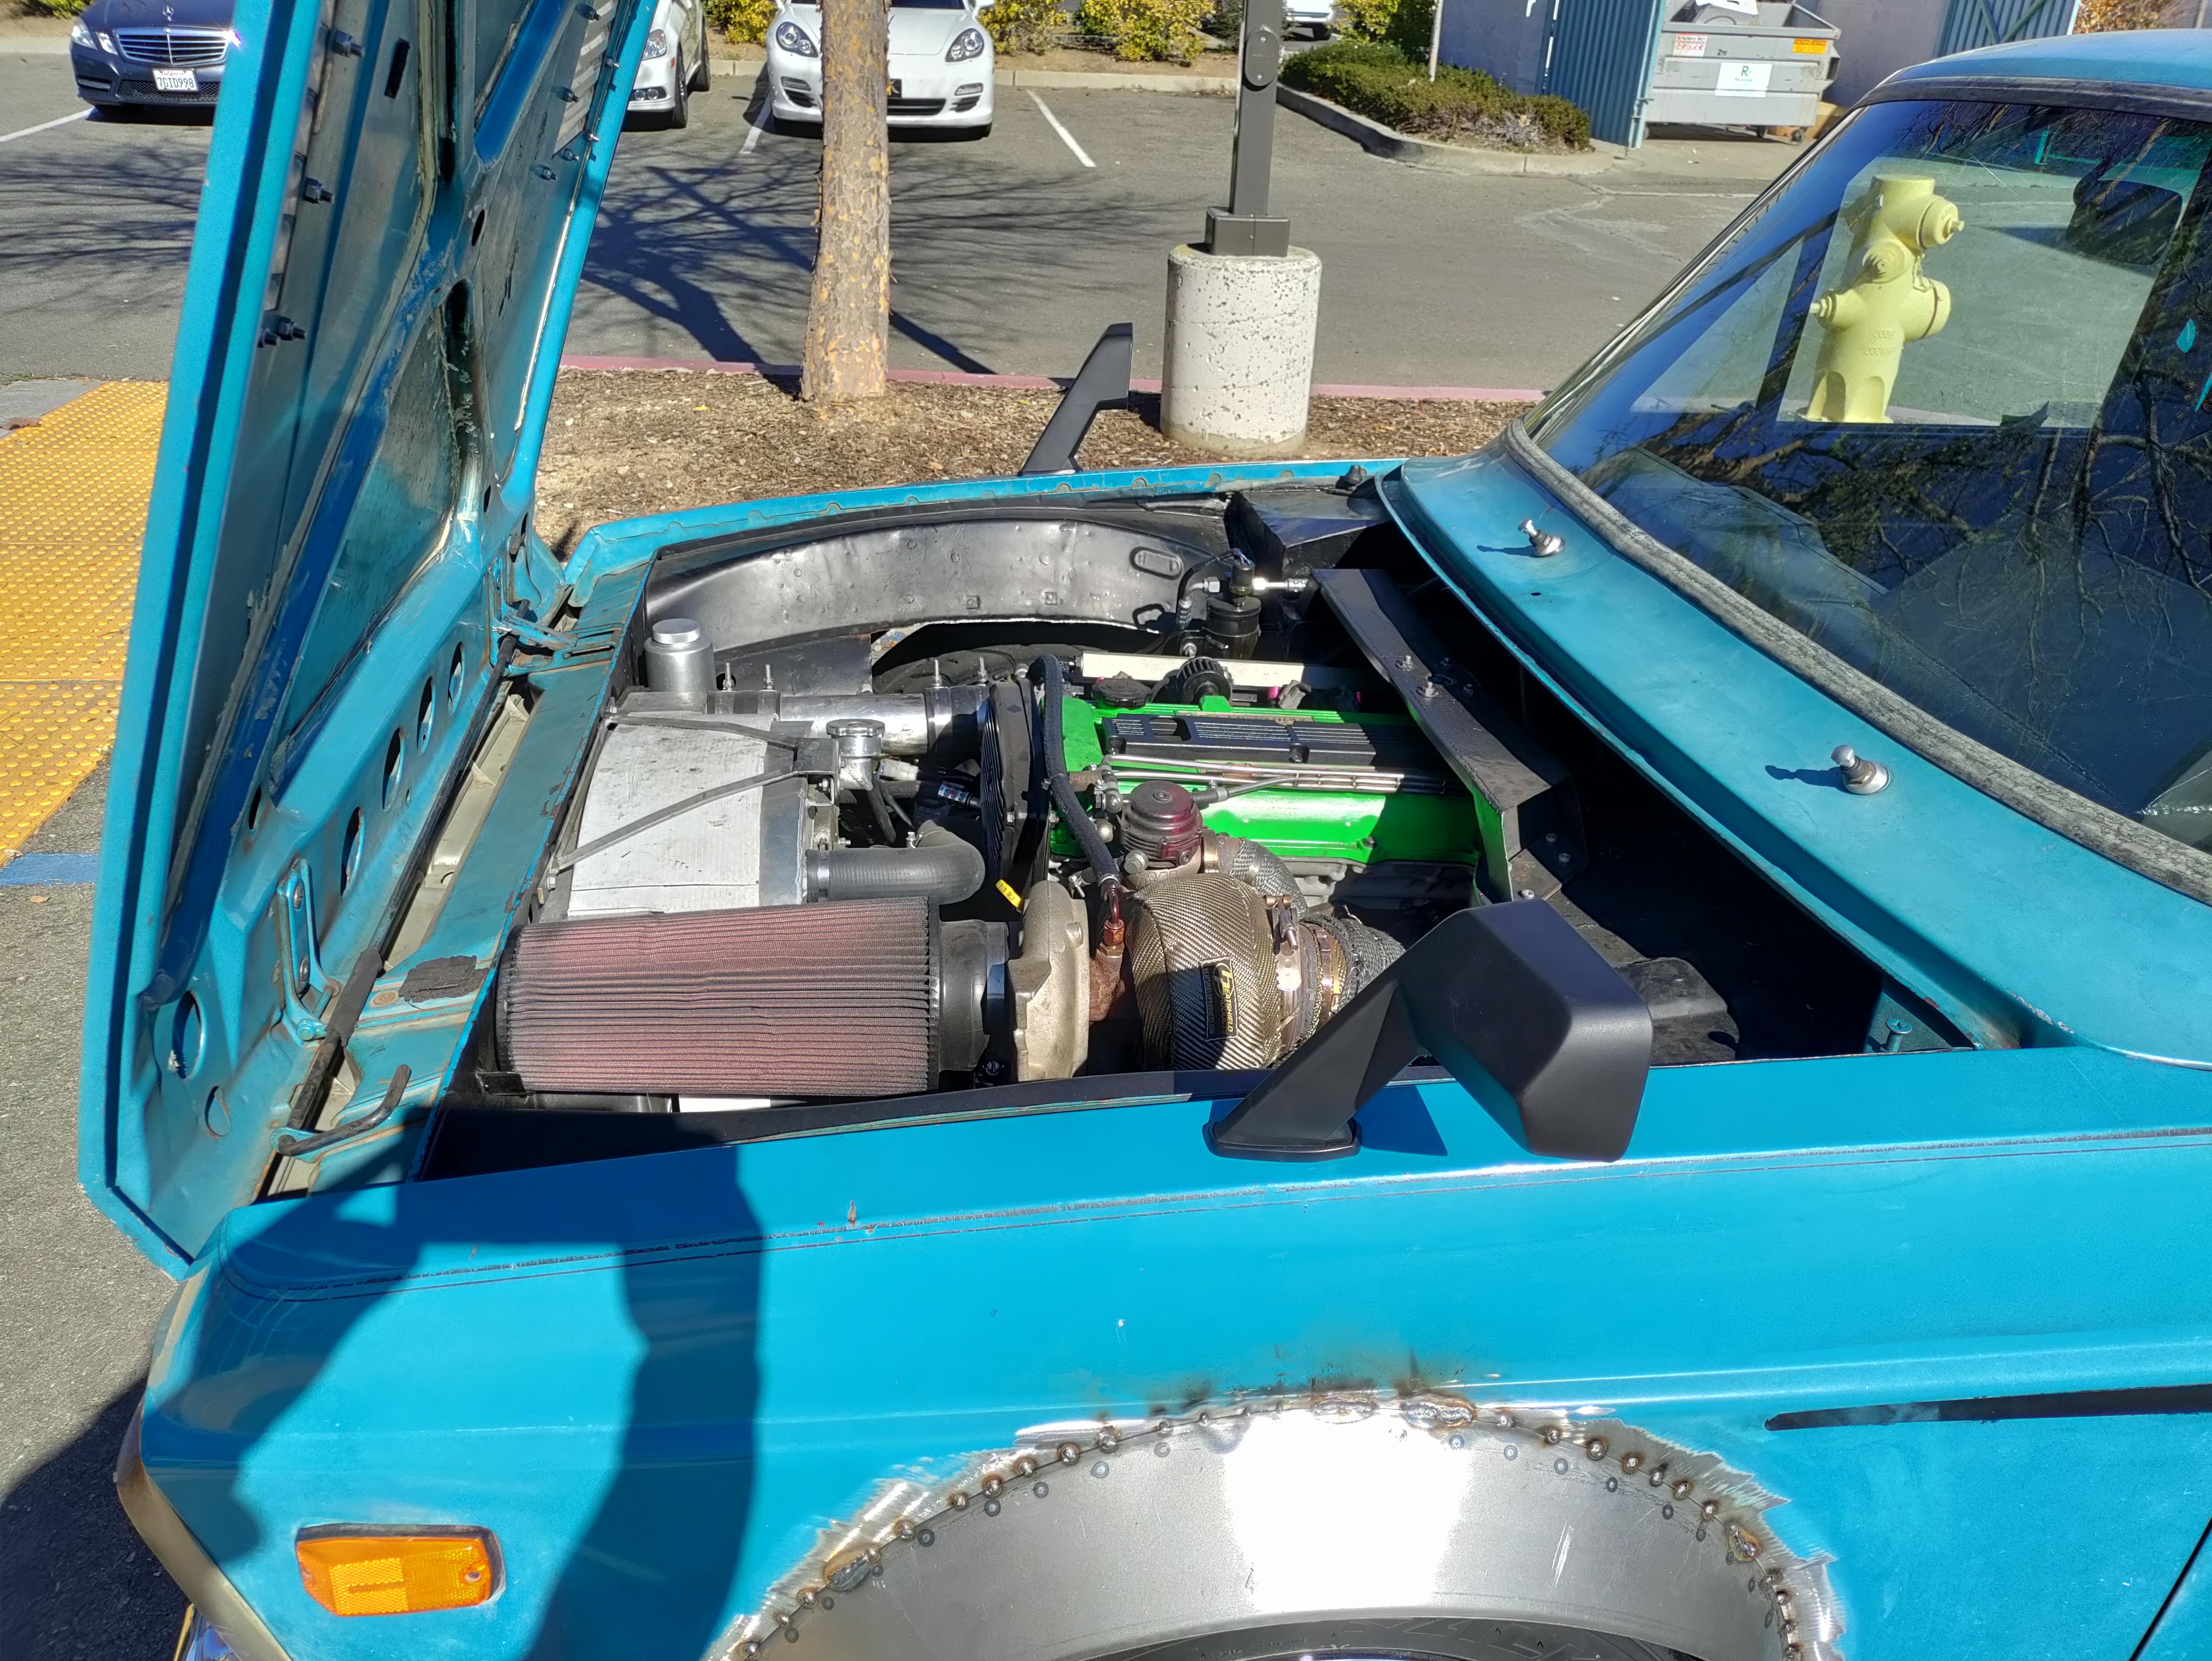
Ive been fighting a weird overheat issue since day one and finally got to the bottom of it, #1 cylinder head gasket was really bad. and since i put my clt on the front of the engine i was reading boiling coolant from the blown head gasket. i replaced the head with a spare i had and relocated the clt sensor to the thermostat housing where it should have been in the first place. coolant temps are now 194*F on the freeway when its 105*F outside. i wrapped the turbo manifold after it burned up my alternator. i finished the bracket for the a/c lines to the expansion valve. hoping to have a/c in the next week or two

Reply
1
1
08-15-2021, 07:32 PM
#211
Senior Member
Thread Starter
Join Date: Jan 2011
Location: sacramento ,ca
Posts: 568
Total Cats: 162
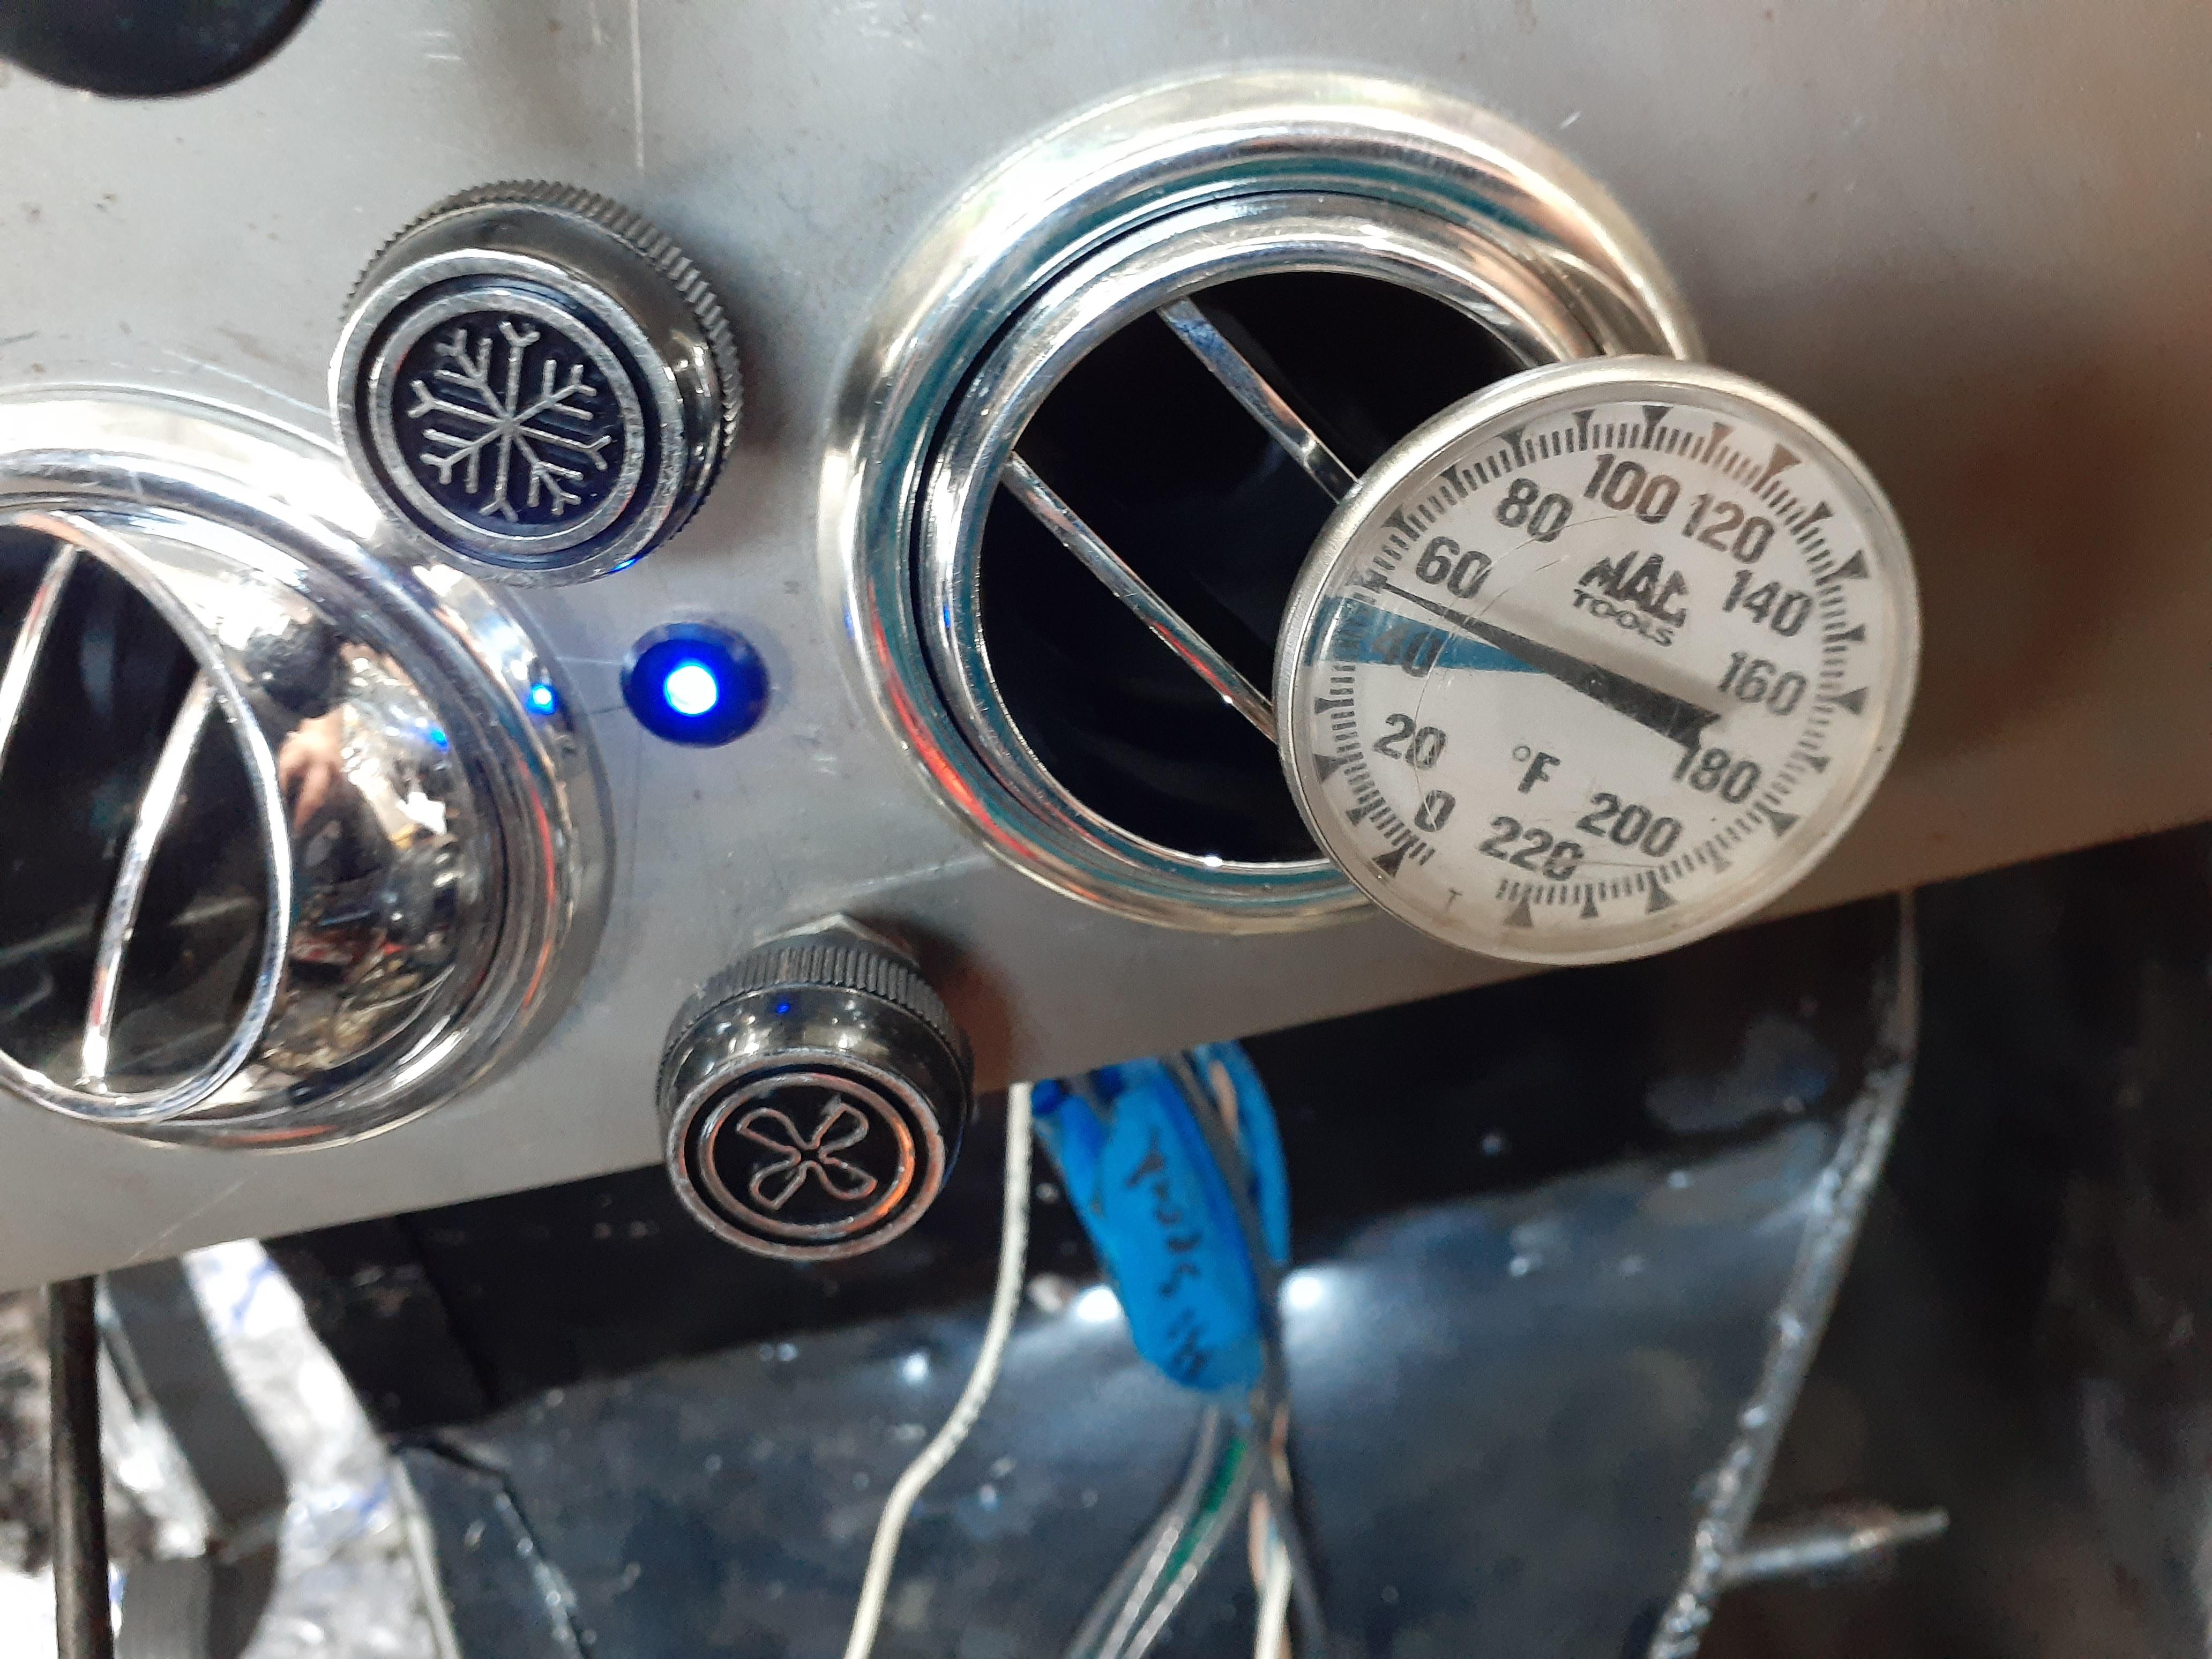
Air conditioning is in and working!!!! I'm still messing with how much to charge it with. I think I can get it to or below 40*F at the center vents with some tweaking. I was running out of time and it was over 100*F in the shop so I was ok with only 50*F at the center vent. I was also made aware that since the head gasket was replaced 28psi has maxed out my 1000cc injectors on E85. Time for more expensive upgrades :(
Reply
1
1
08-20-2021, 12:23 AM
#212
Senior Member

Join Date: May 2007
Location: Atlanta
Posts: 997
Total Cats: 156
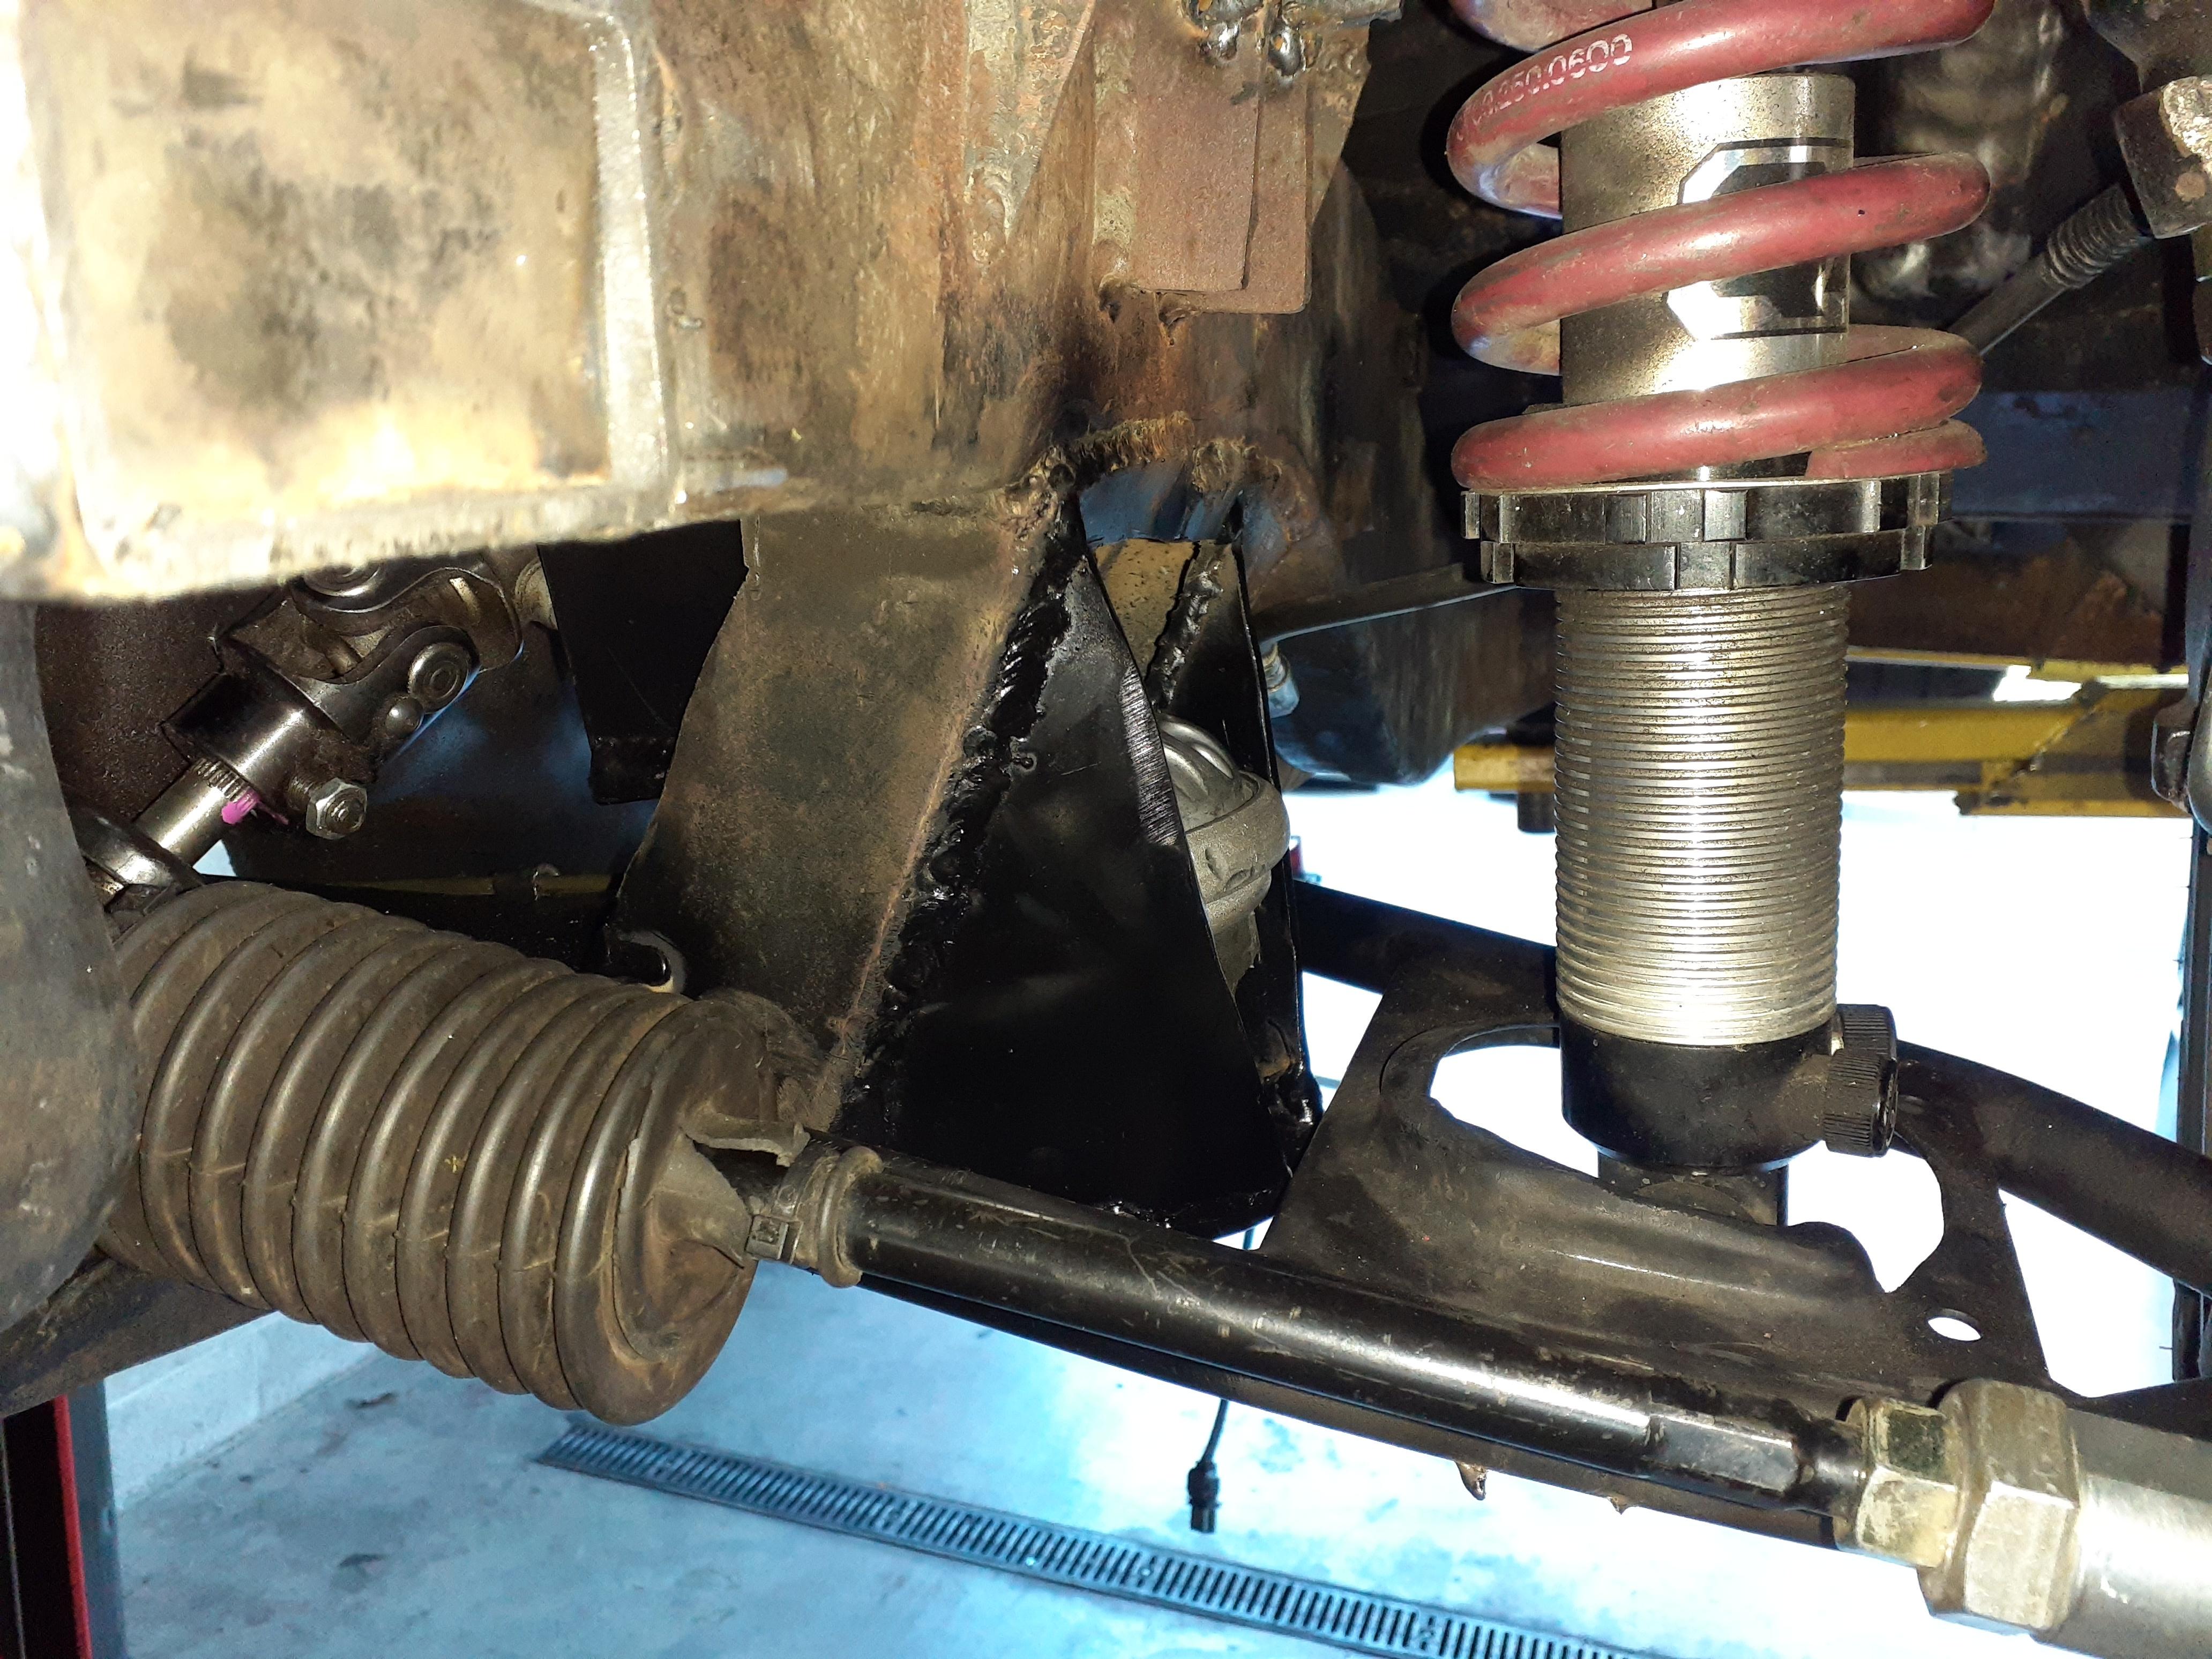
Love this build, doing an FE3 swap on a 86 B2000 - where did you source the txv valve and piping from? I was going to fab some hardlines but retain the stock r12 expansion valve and evap core, but you're giving me ideas.
Reply
0
0
08-20-2021, 09:20 AM
#213
Senior Member
Thread Starter
Join Date: Jan 2011
Location: sacramento ,ca
Posts: 568
Total Cats: 162
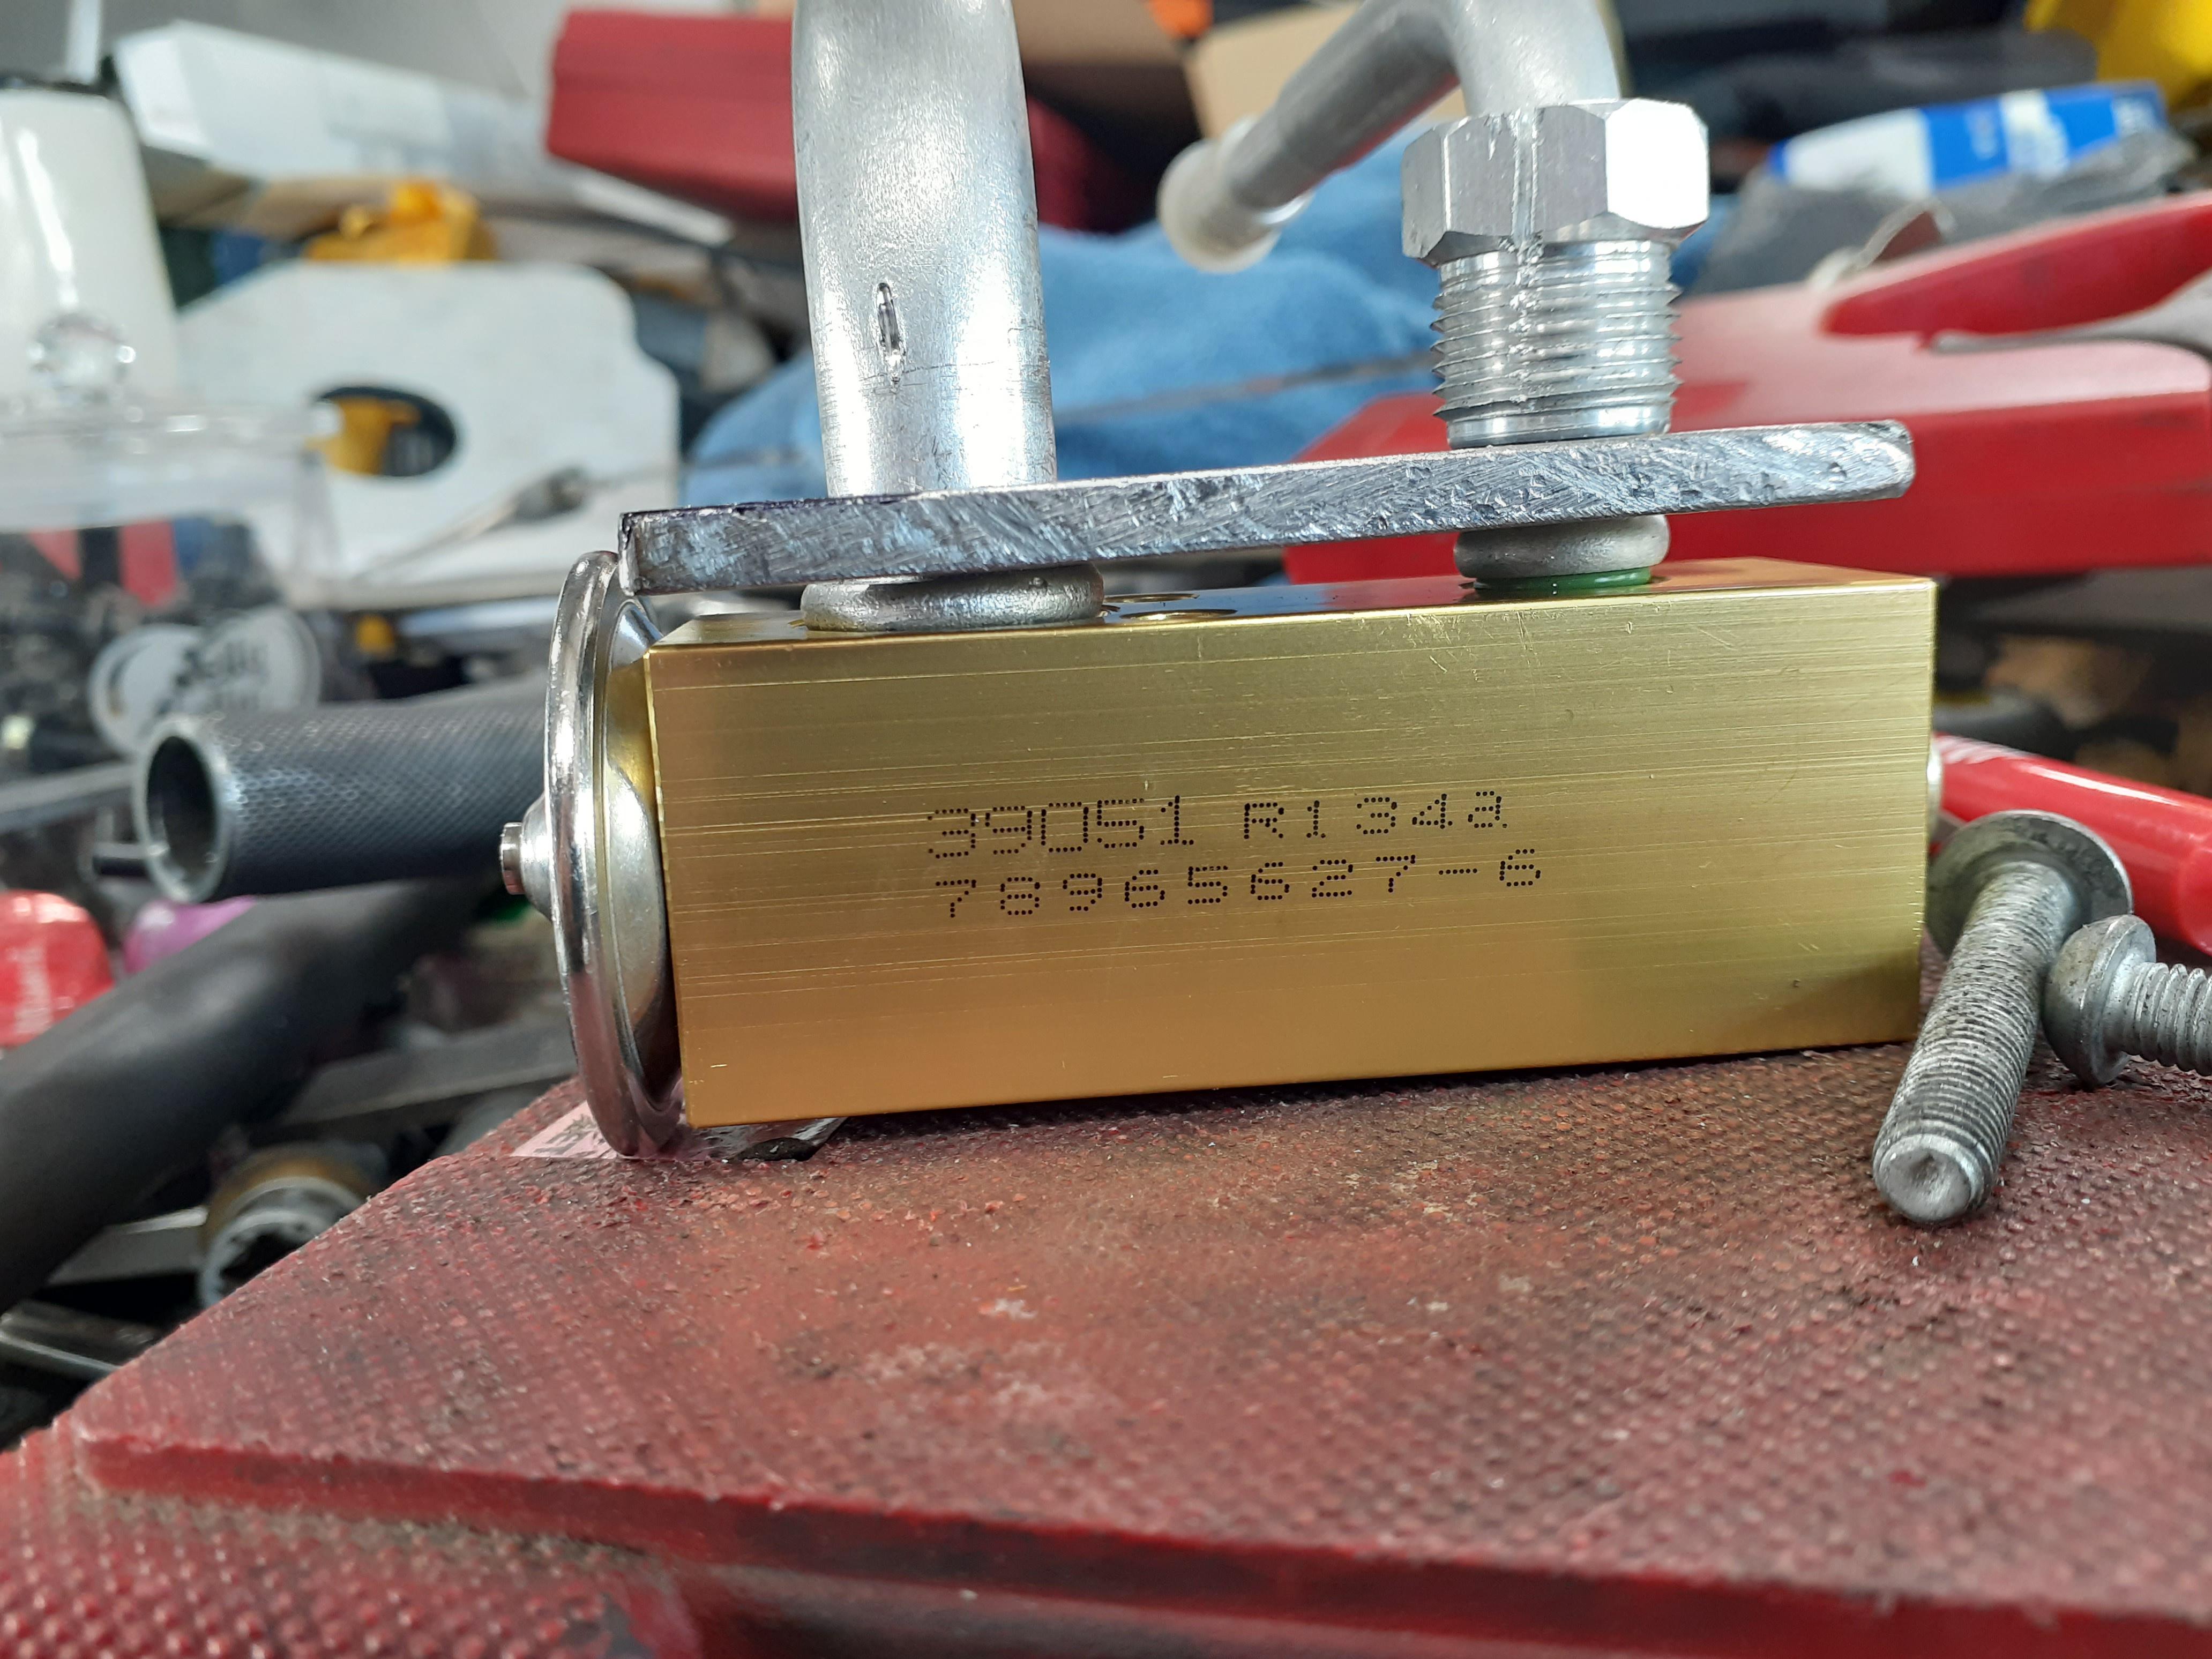
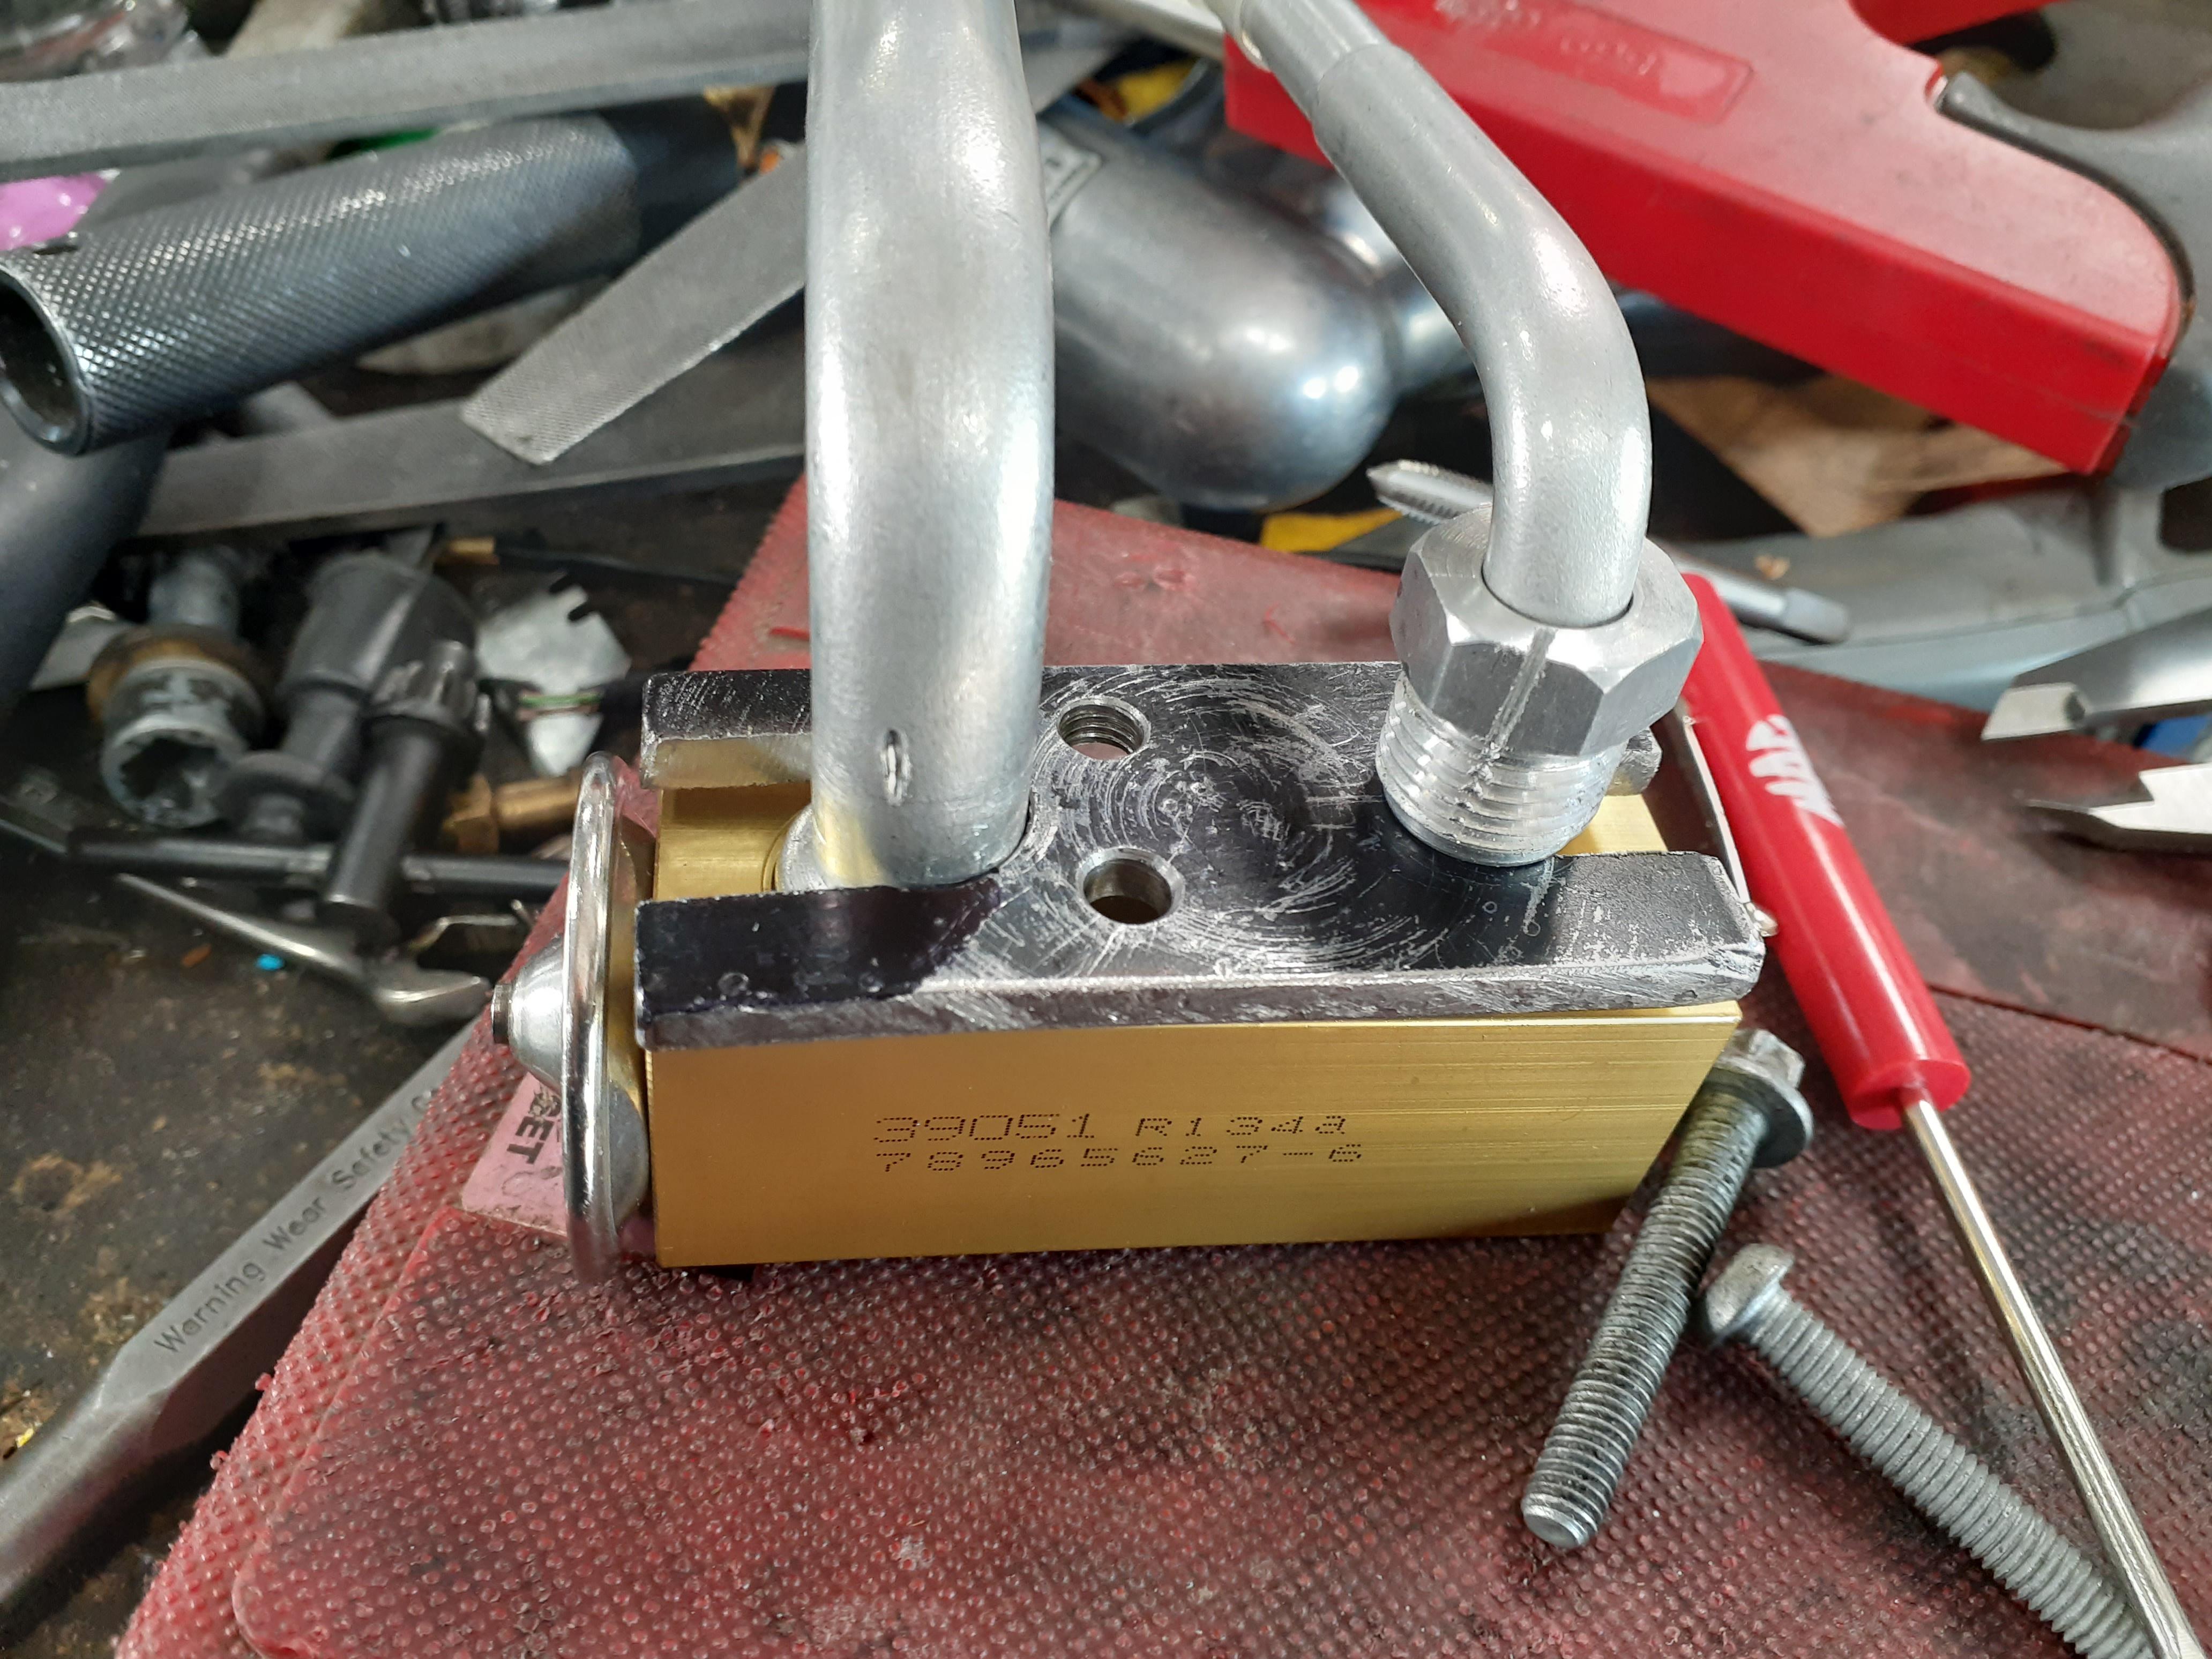
The txv and evaporator are from an 04ish dodge Durango rear ac unit. There hoses are from
https://jeepair.com/collections/hose...32066979430485
It actually works great, I thought 60* at the vents was awful but upon further testing the air going into the hvac box is 120*F+. i need heat shielding across the fire wall and air inlet box to bring that temp down. I also need a way to keep hot under hood air from blowing into the passenger fender well where the air inlet is.
Reply
0
0
10-21-2021, 02:44 PM
#214
Senior Member
Thread Starter
Join Date: Jan 2011
Location: sacramento ,ca
Posts: 568
Total Cats: 162
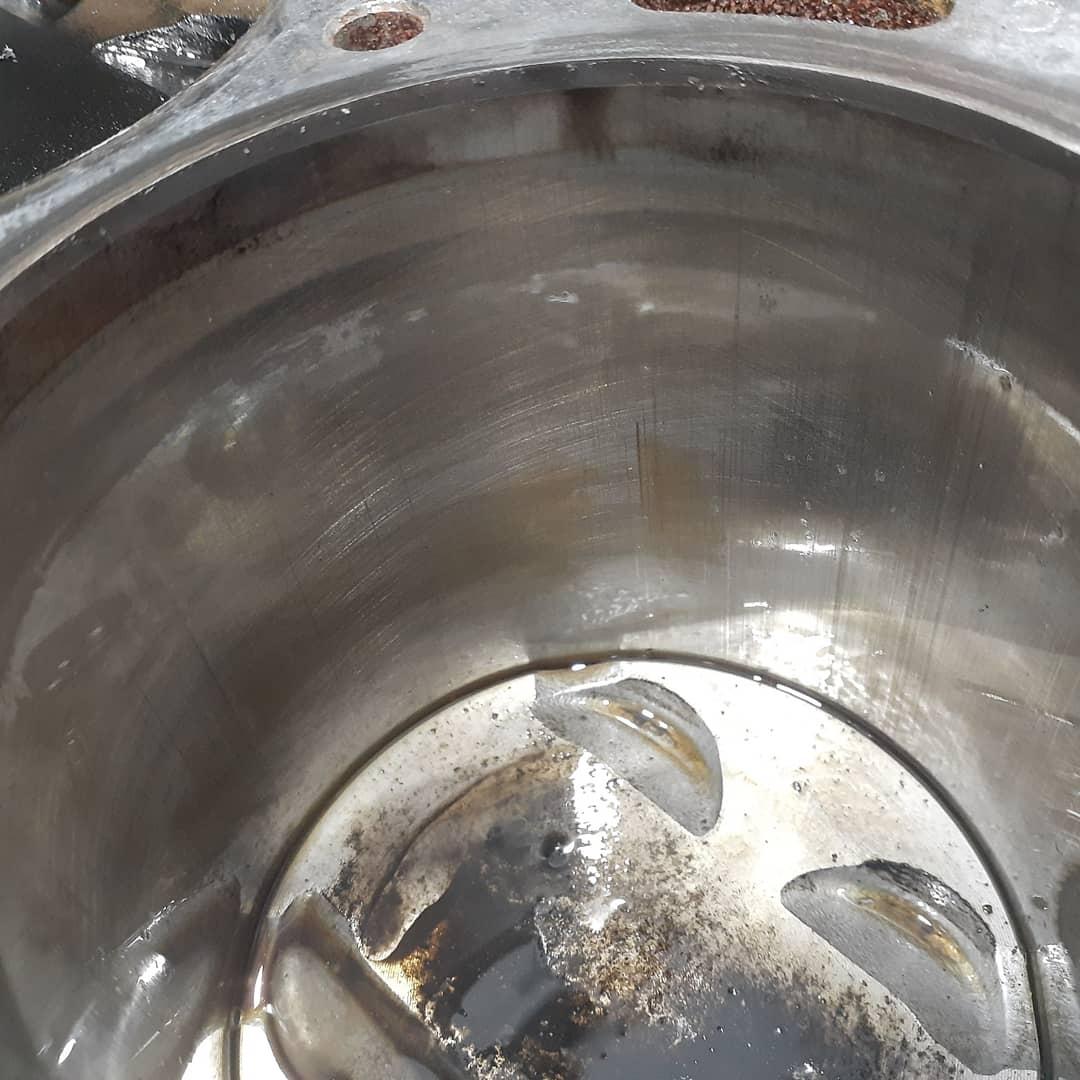
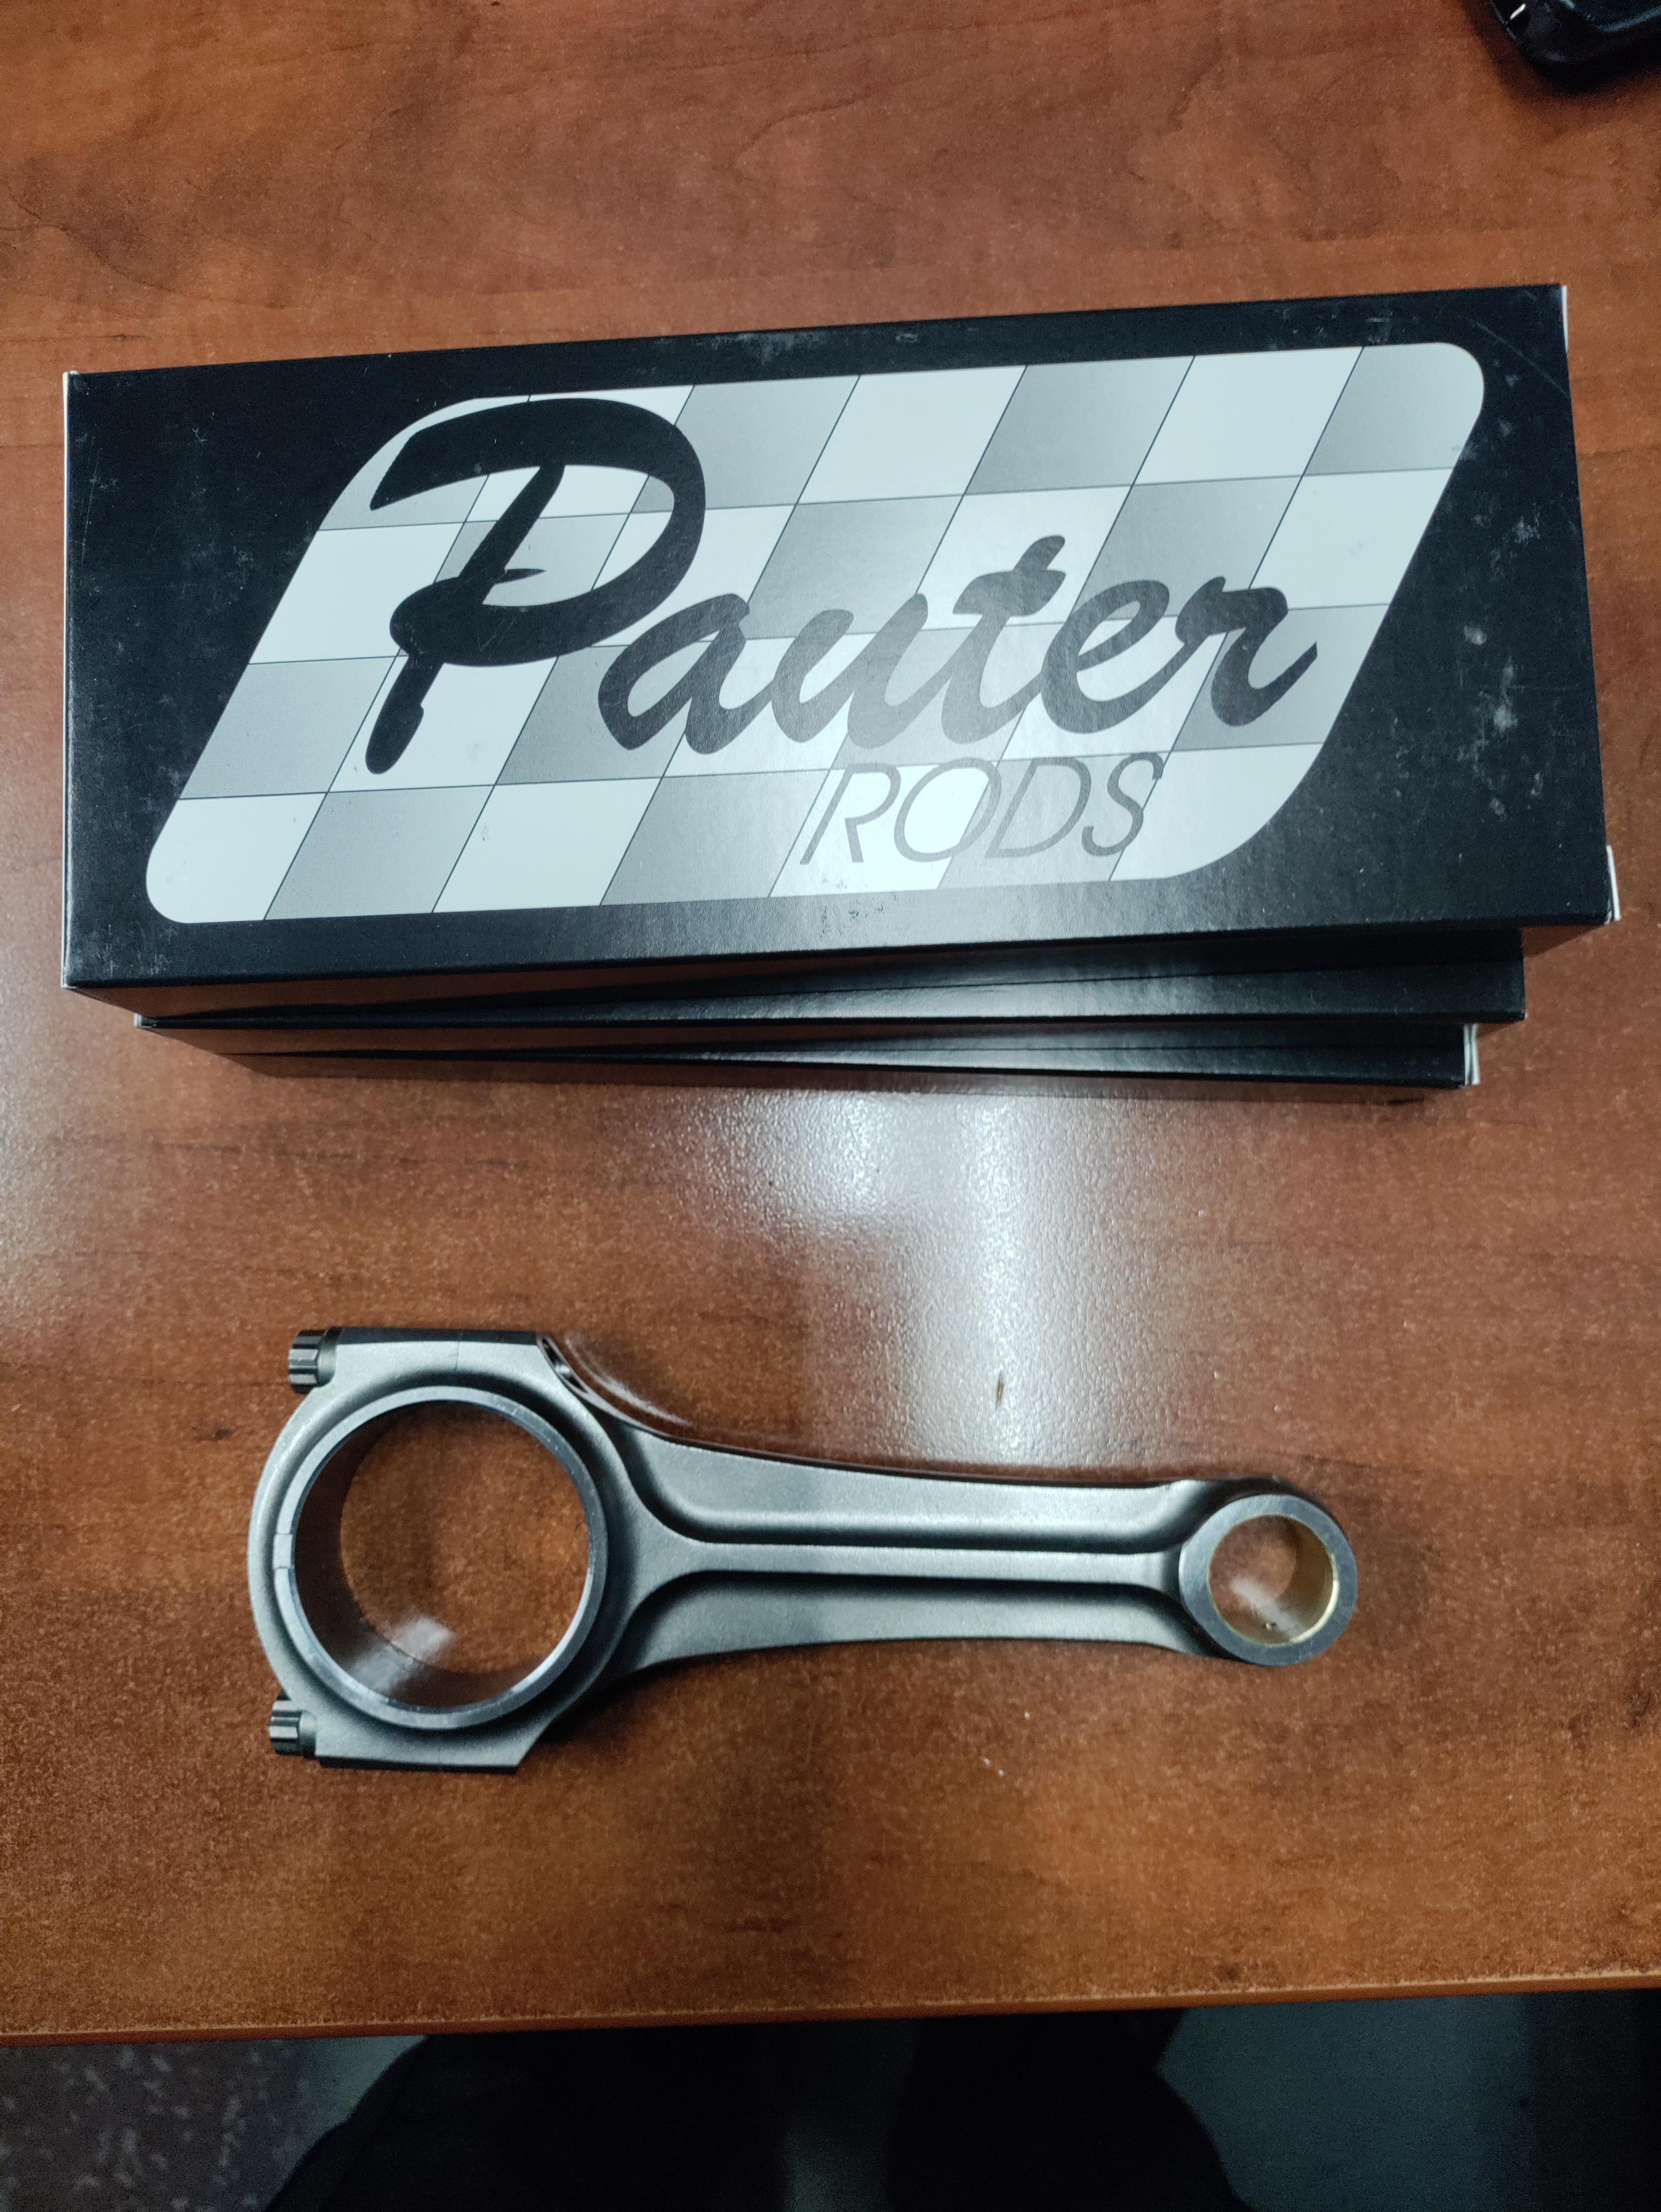
Blew another head gasket, ejected another freeze plug, and warped another head so bad that coolant pours out of the rear of the head gasket. Decided its finally time to commit to fully building a motor. I had to order custom MLS head gaskets from gaskets-to-go in Thailand. My Pauter rods just showed up today, looking though all the specs of Wiseco pistons to find something that will work cause they are 4-6 months to have a set custom made.
Reply
2
2
01-02-2022, 01:53 AM
#215
Senior Member
Thread Starter
Join Date: Jan 2011
Location: sacramento ,ca
Posts: 568
Total Cats: 162
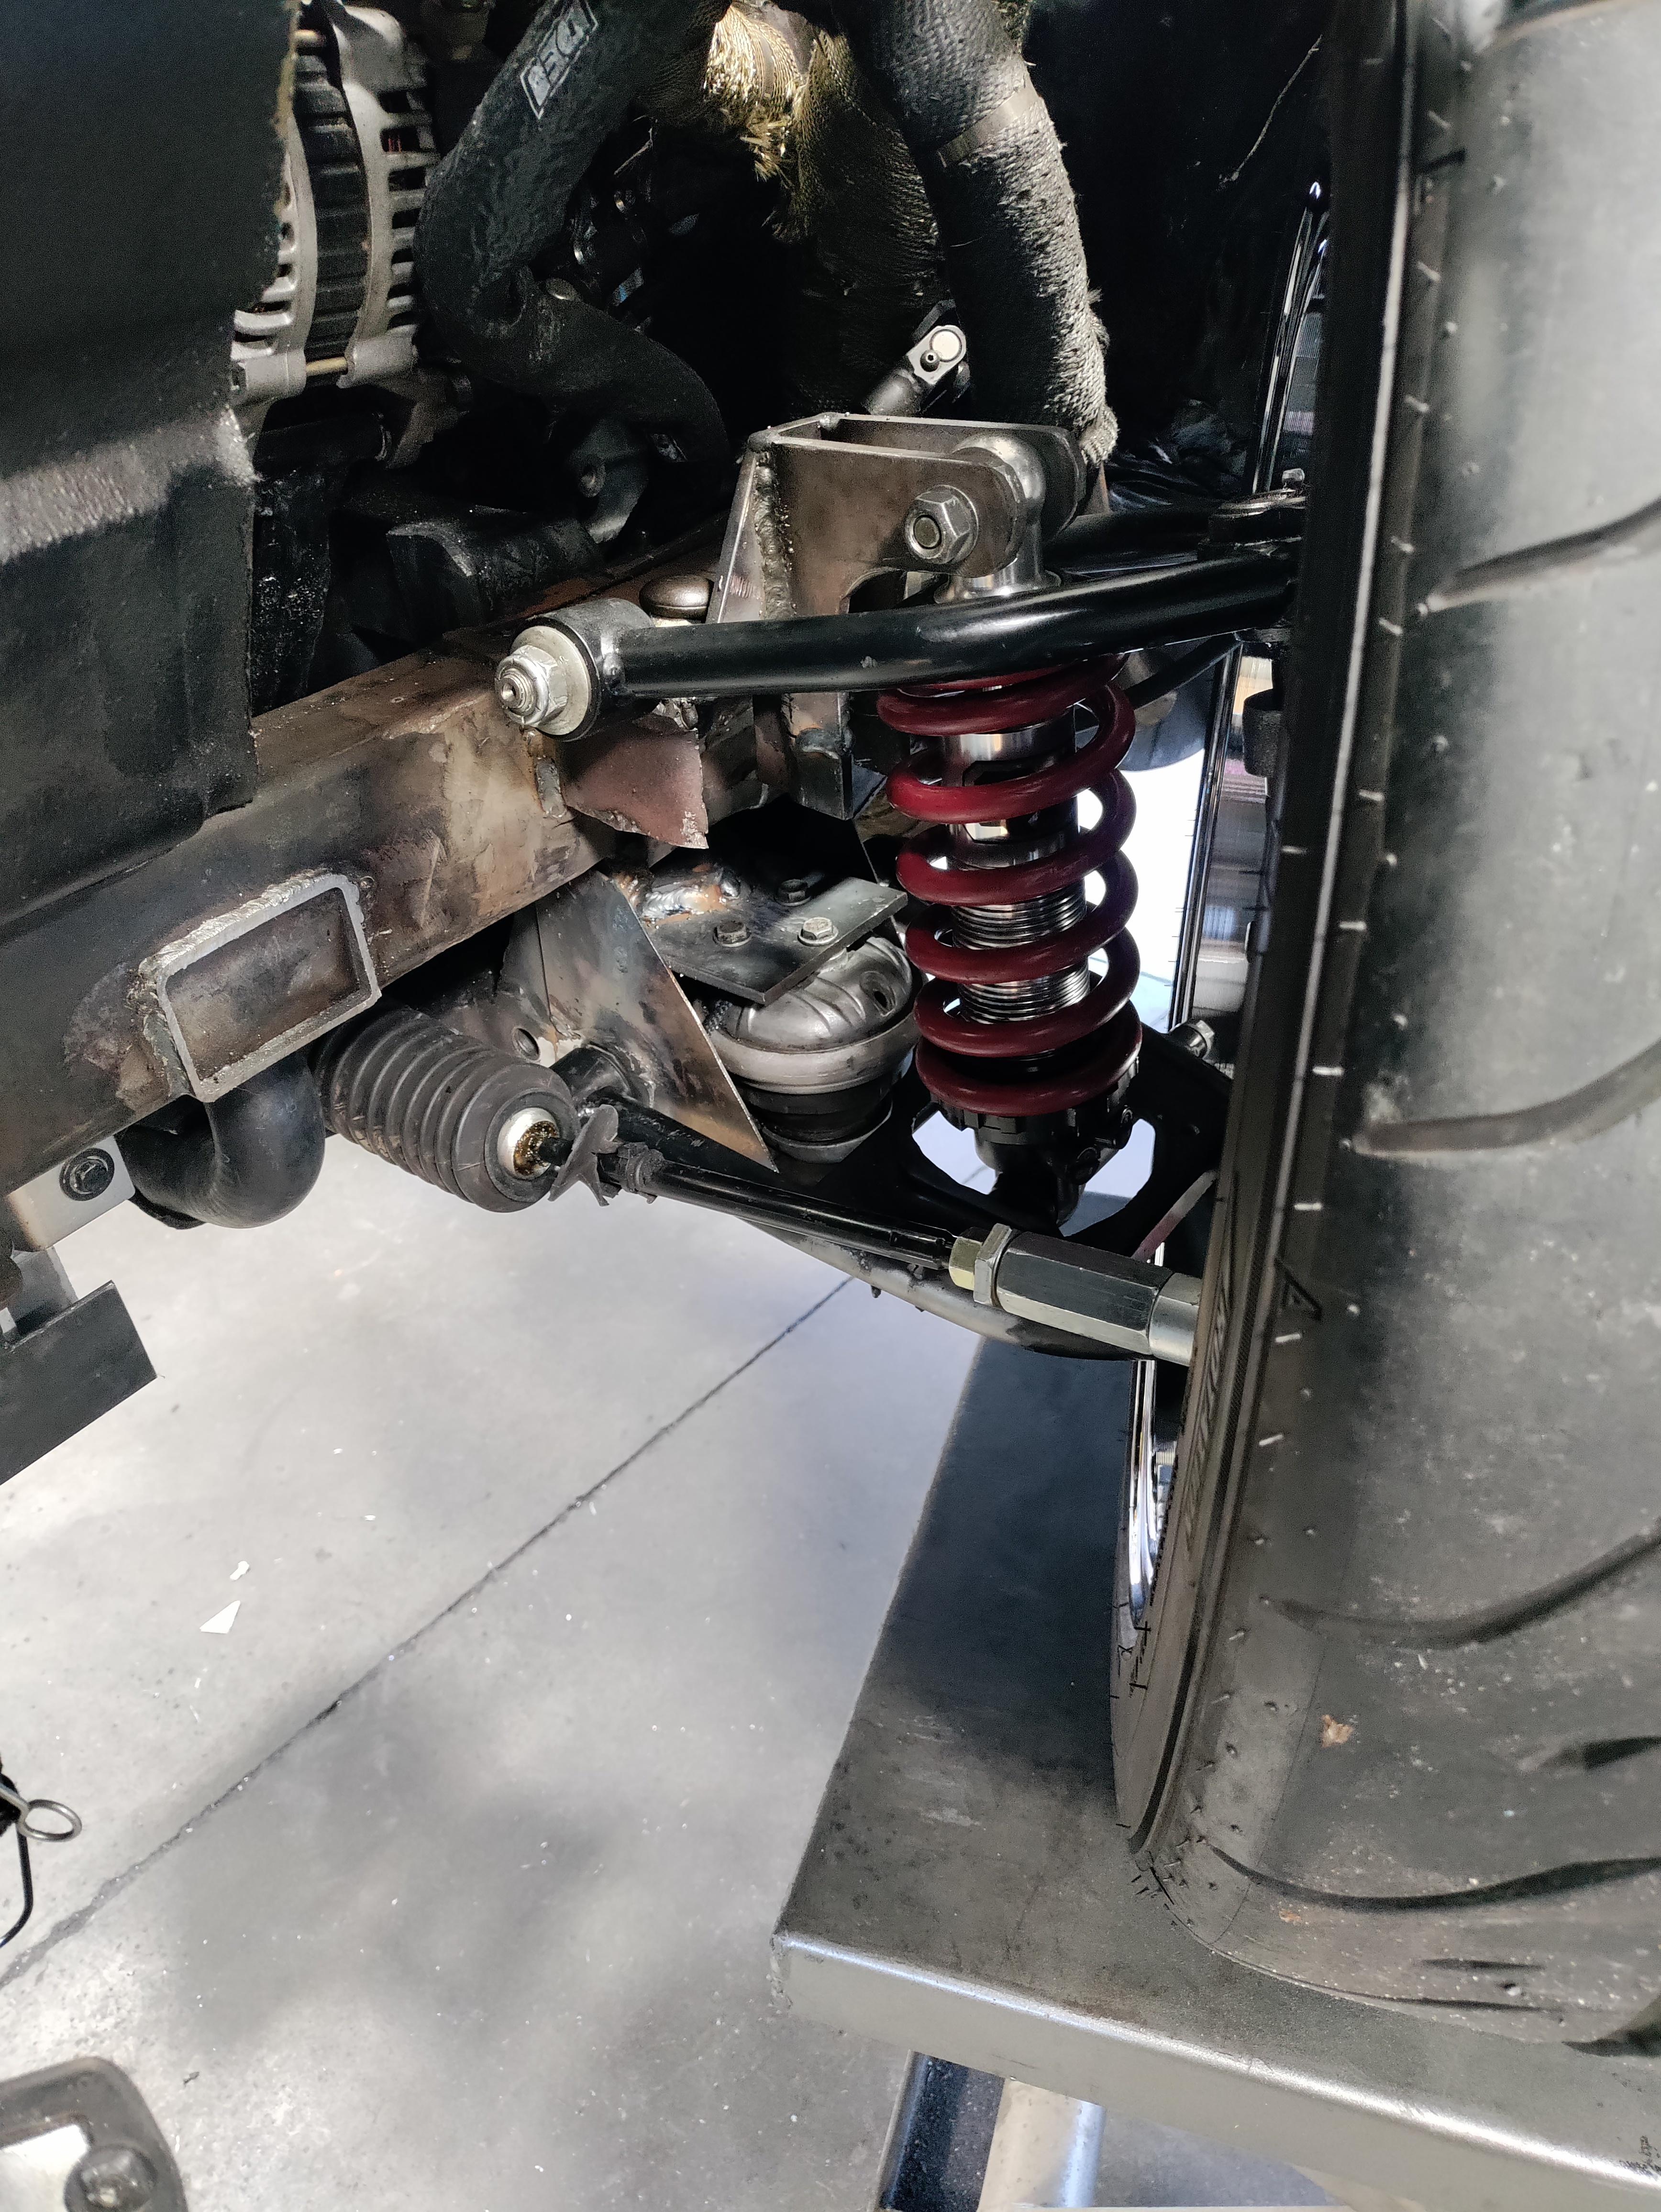
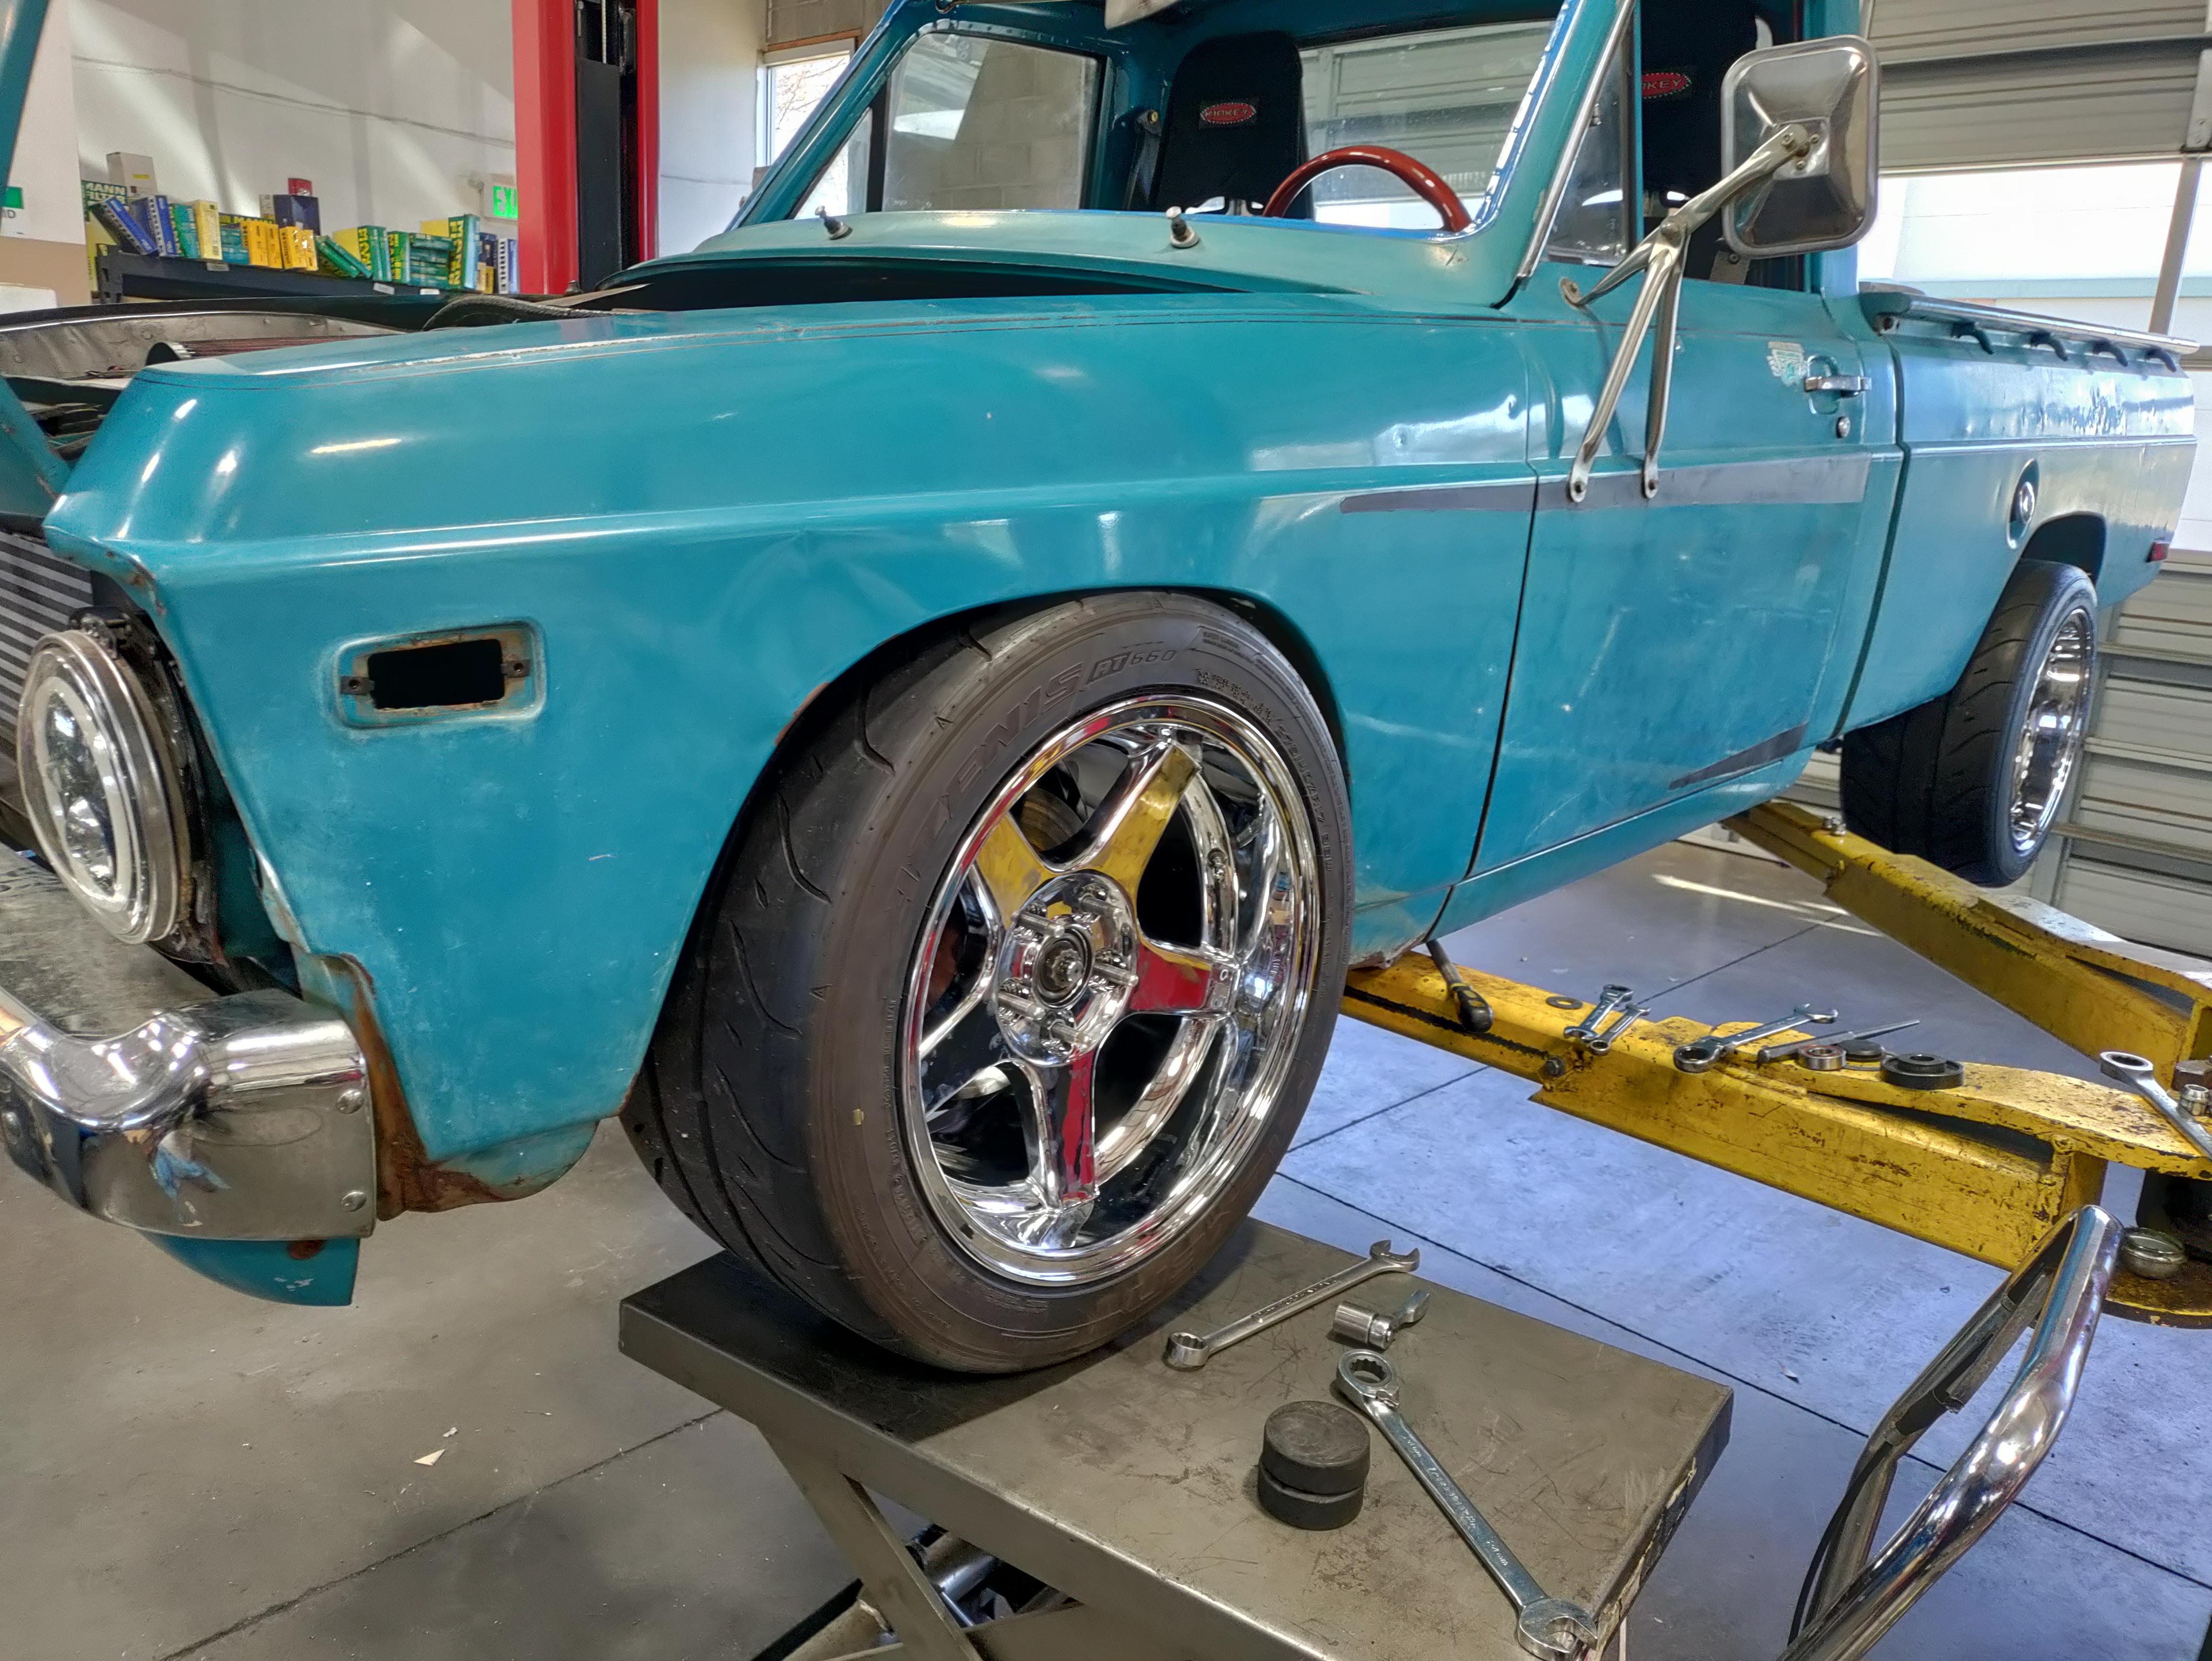
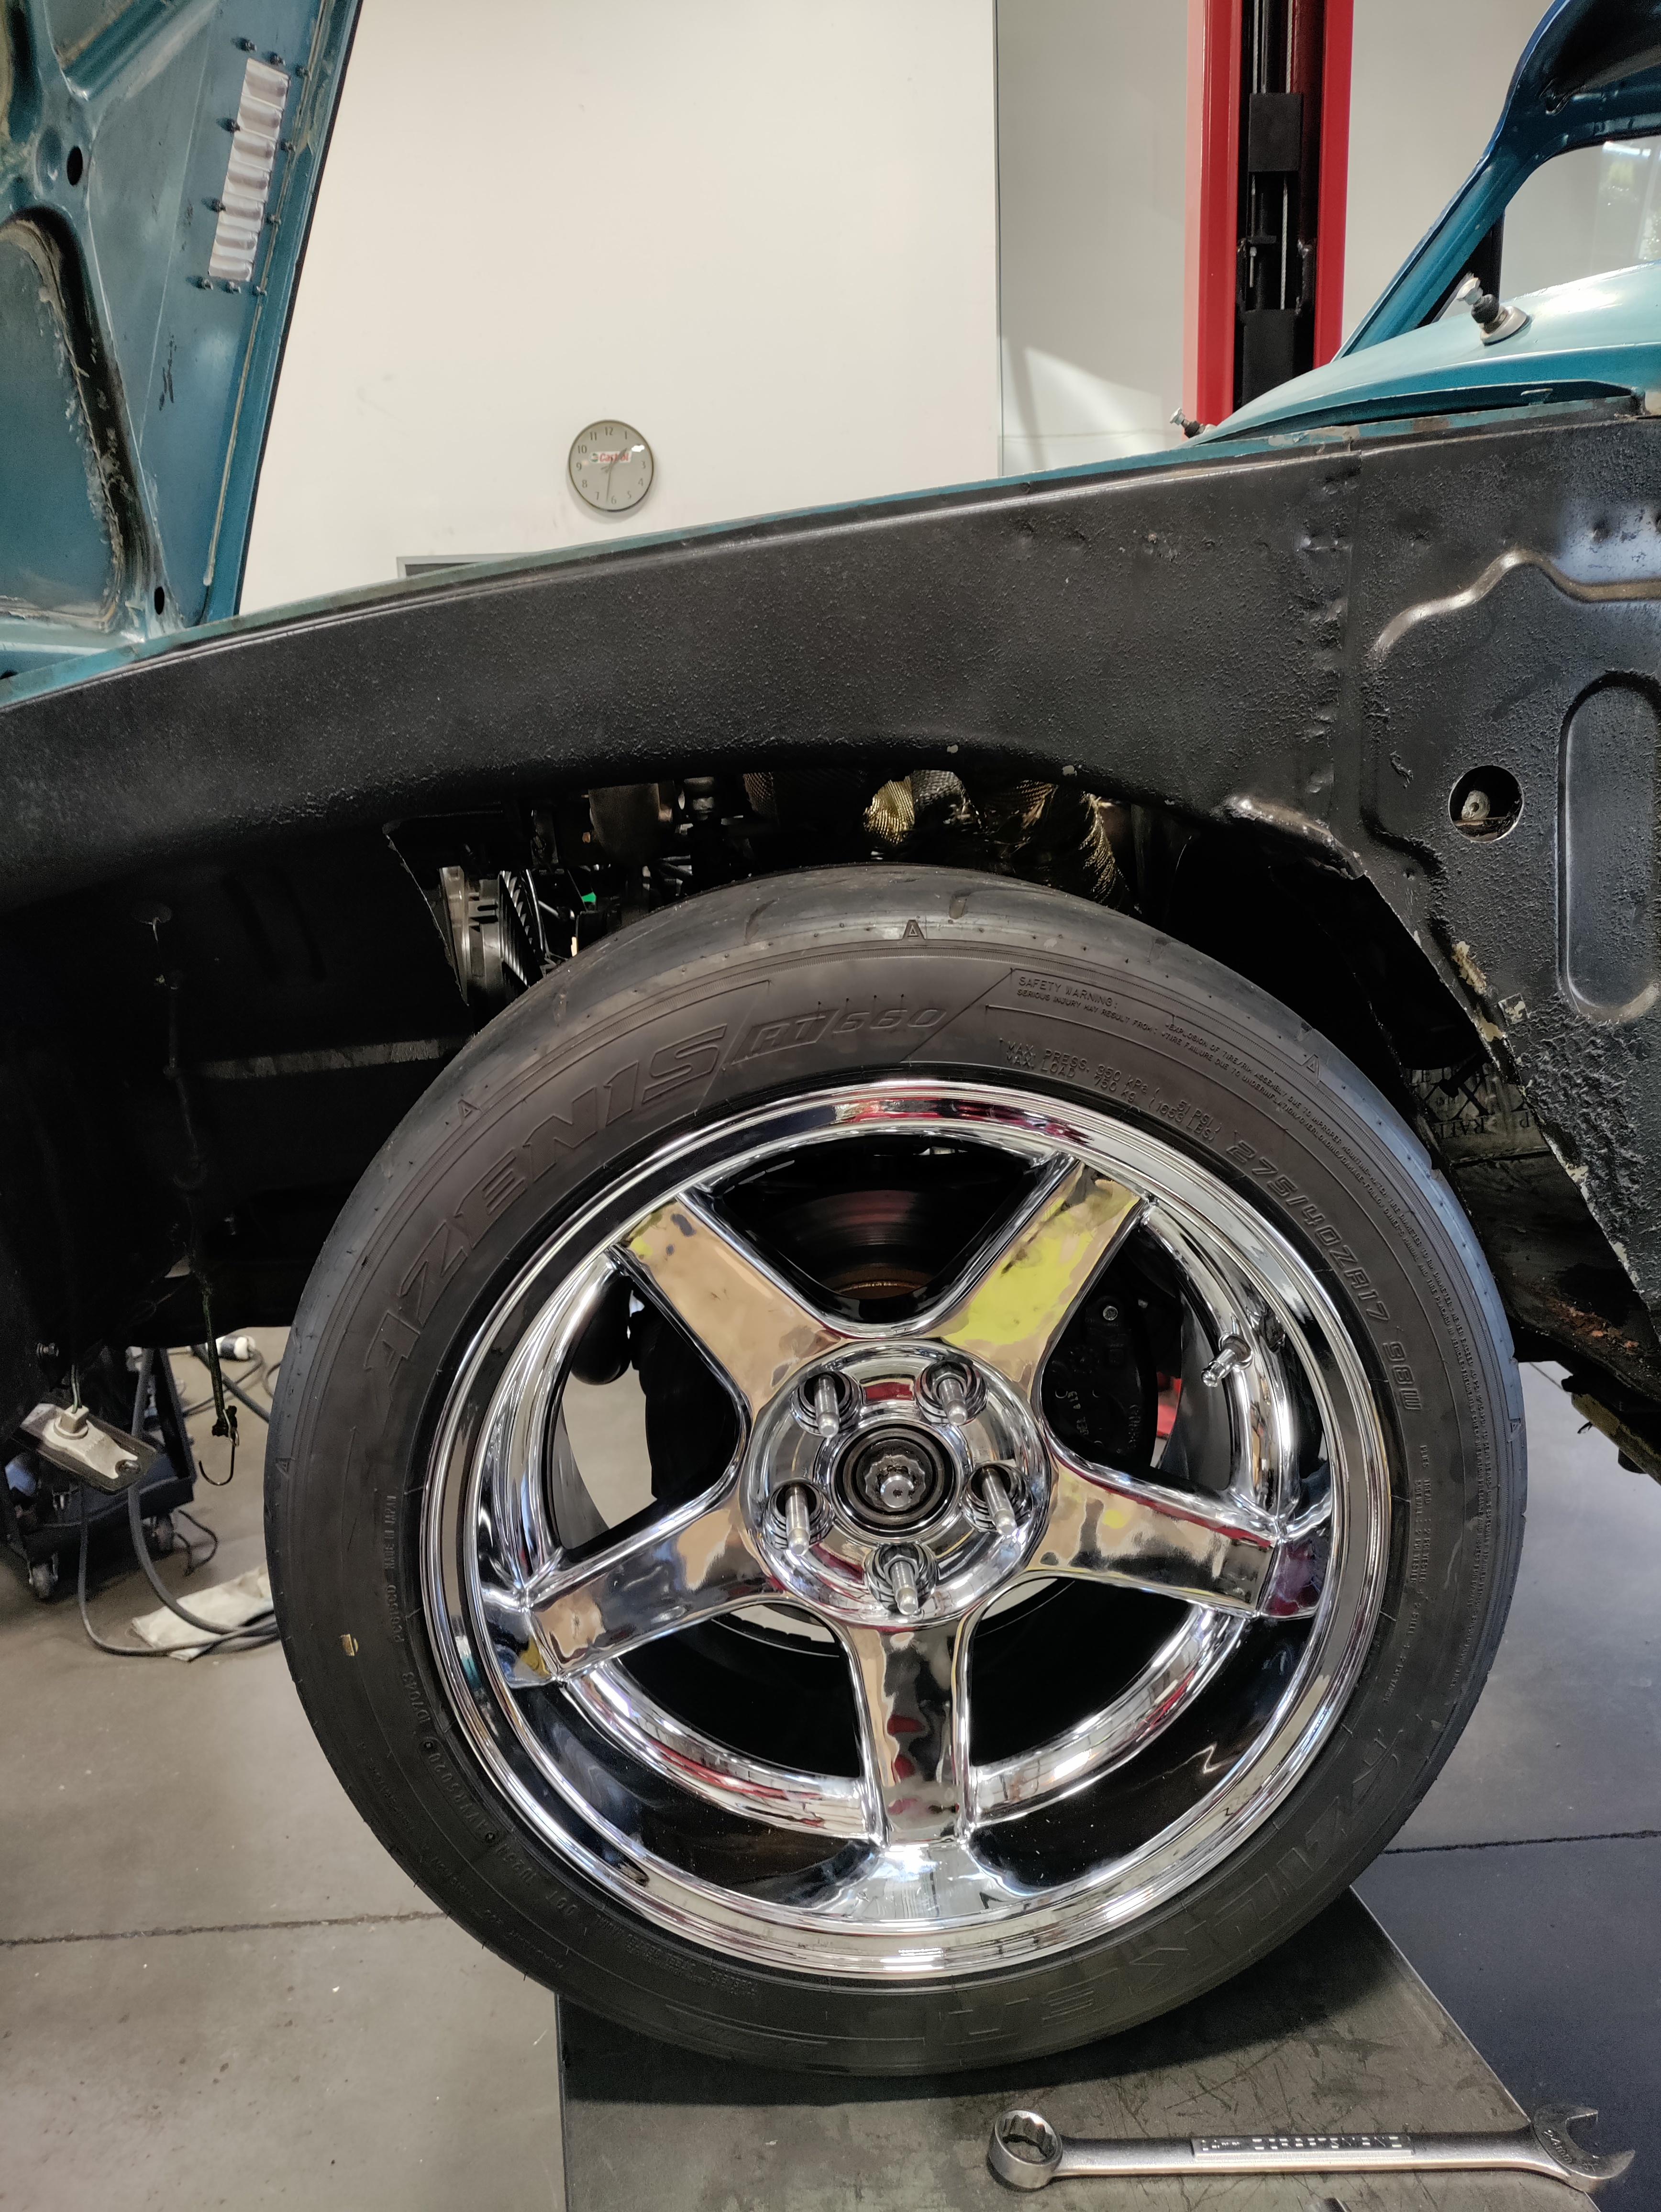
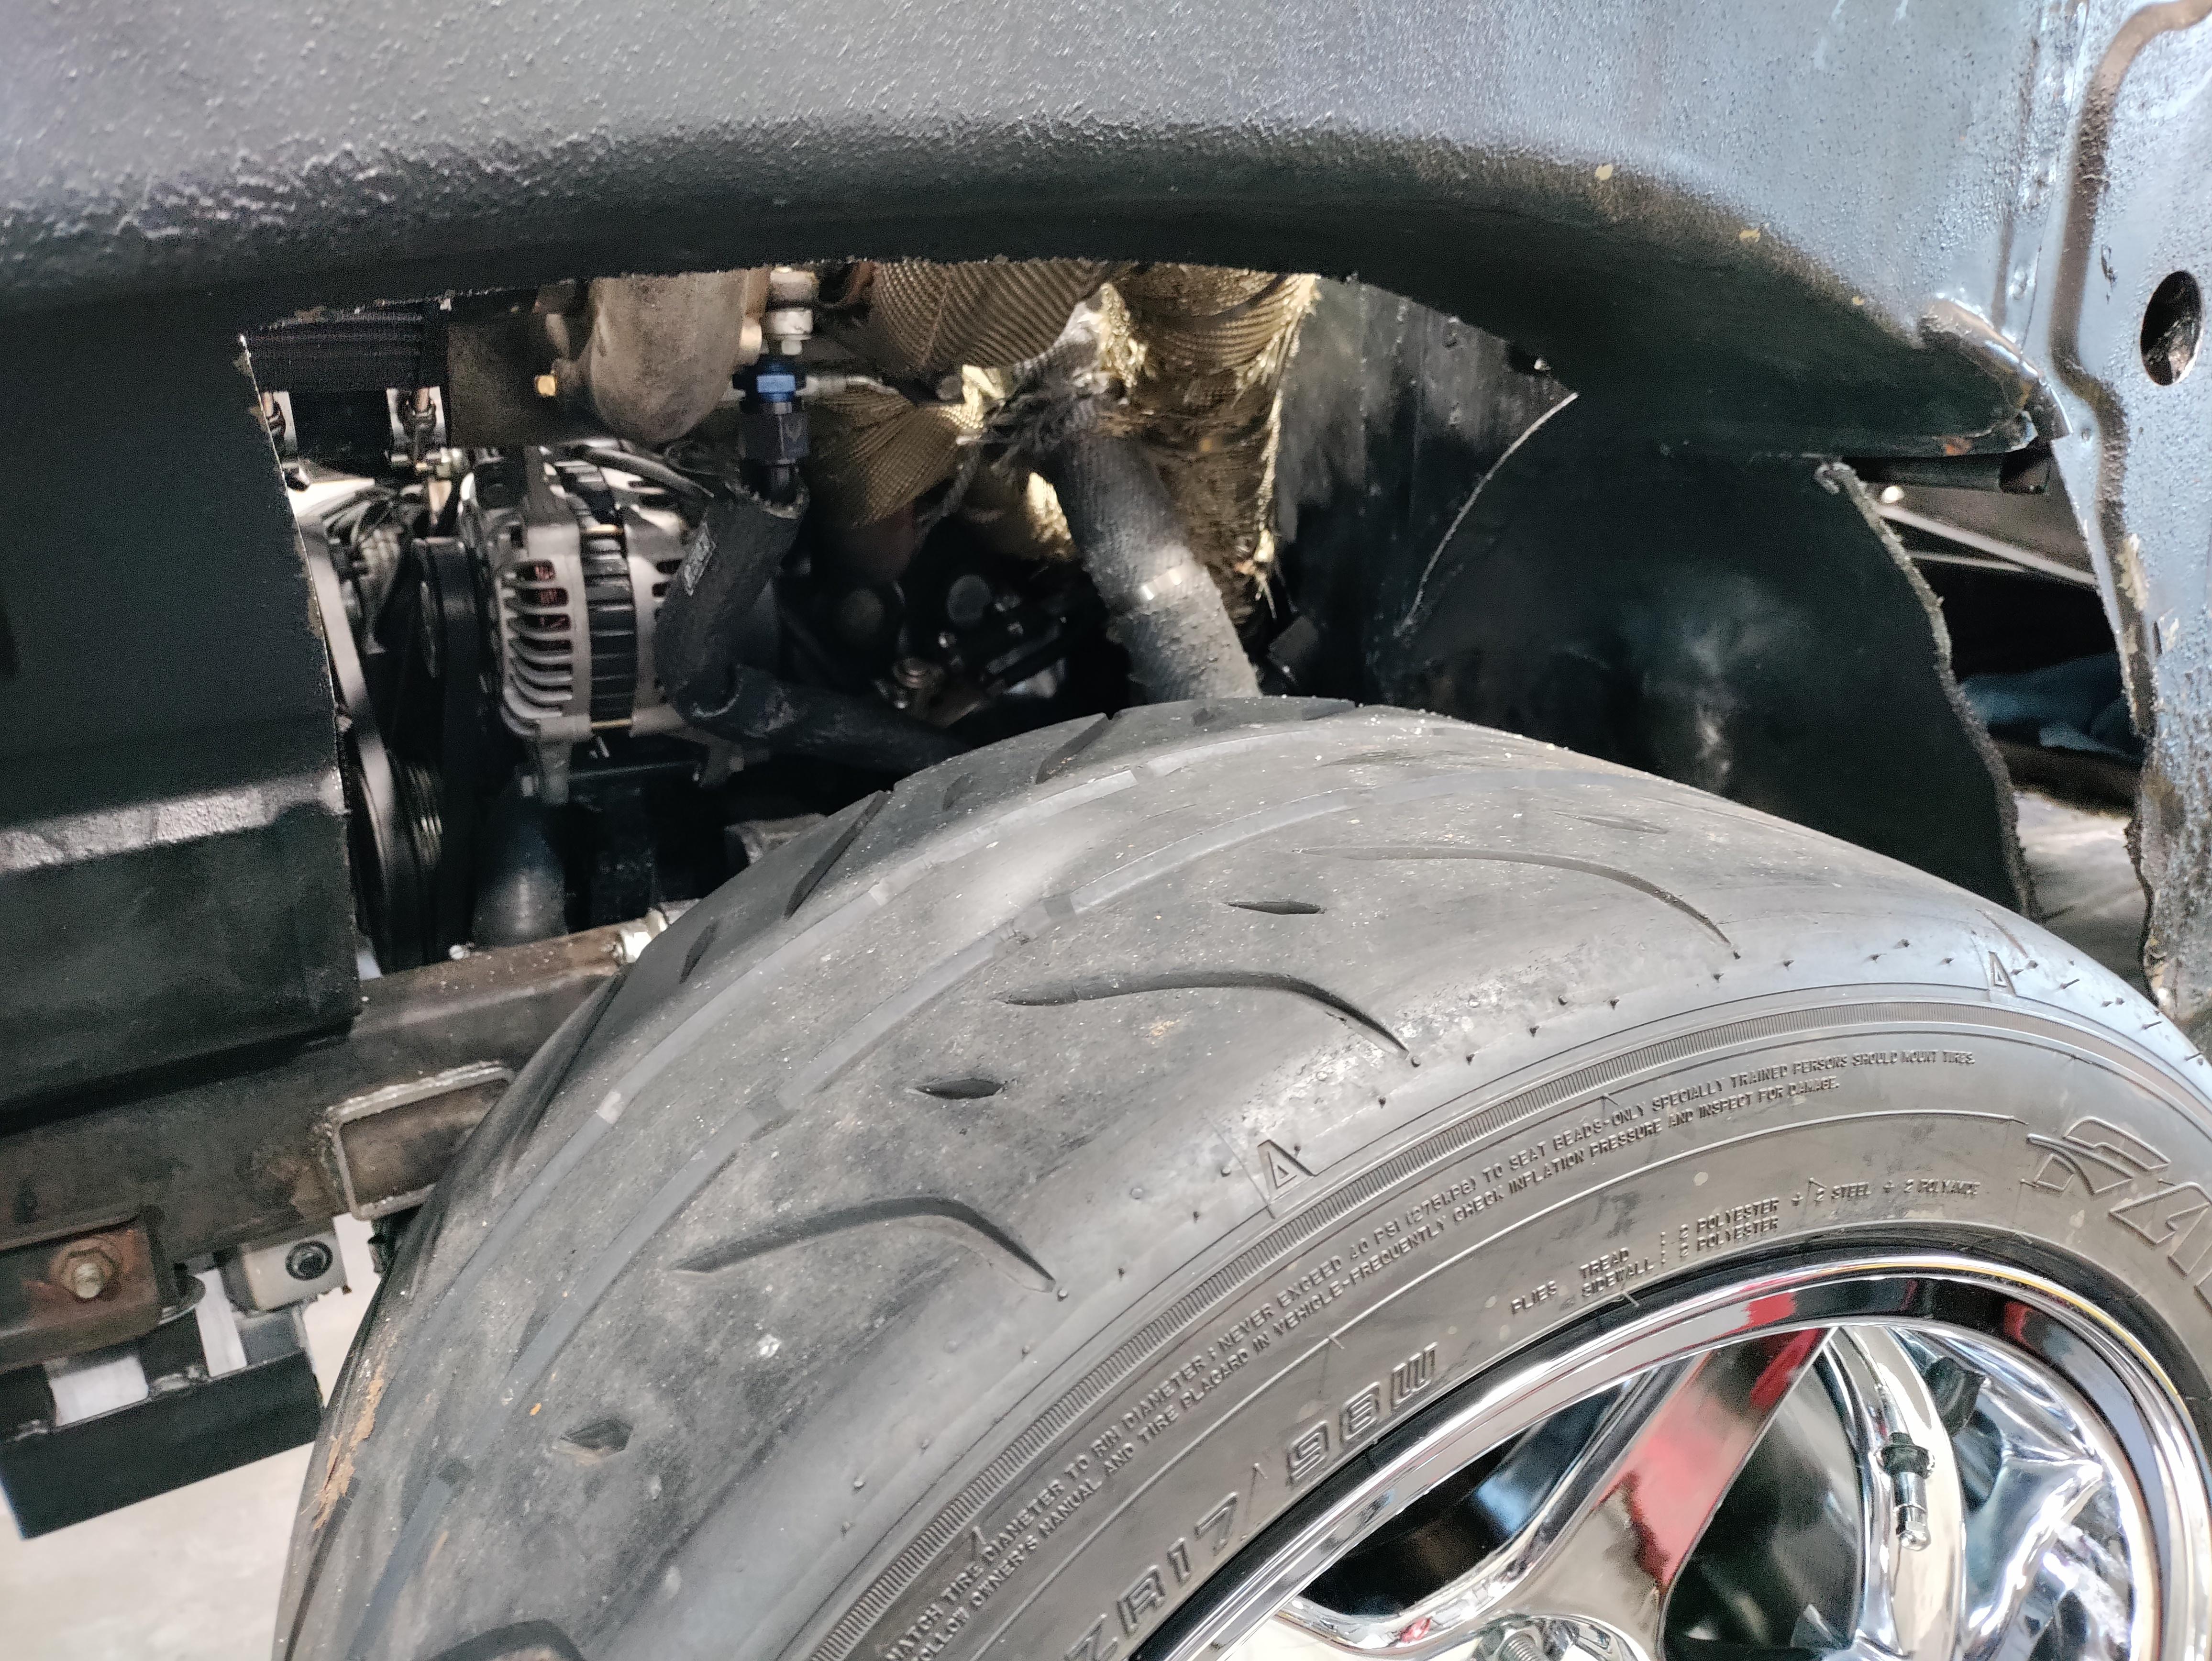
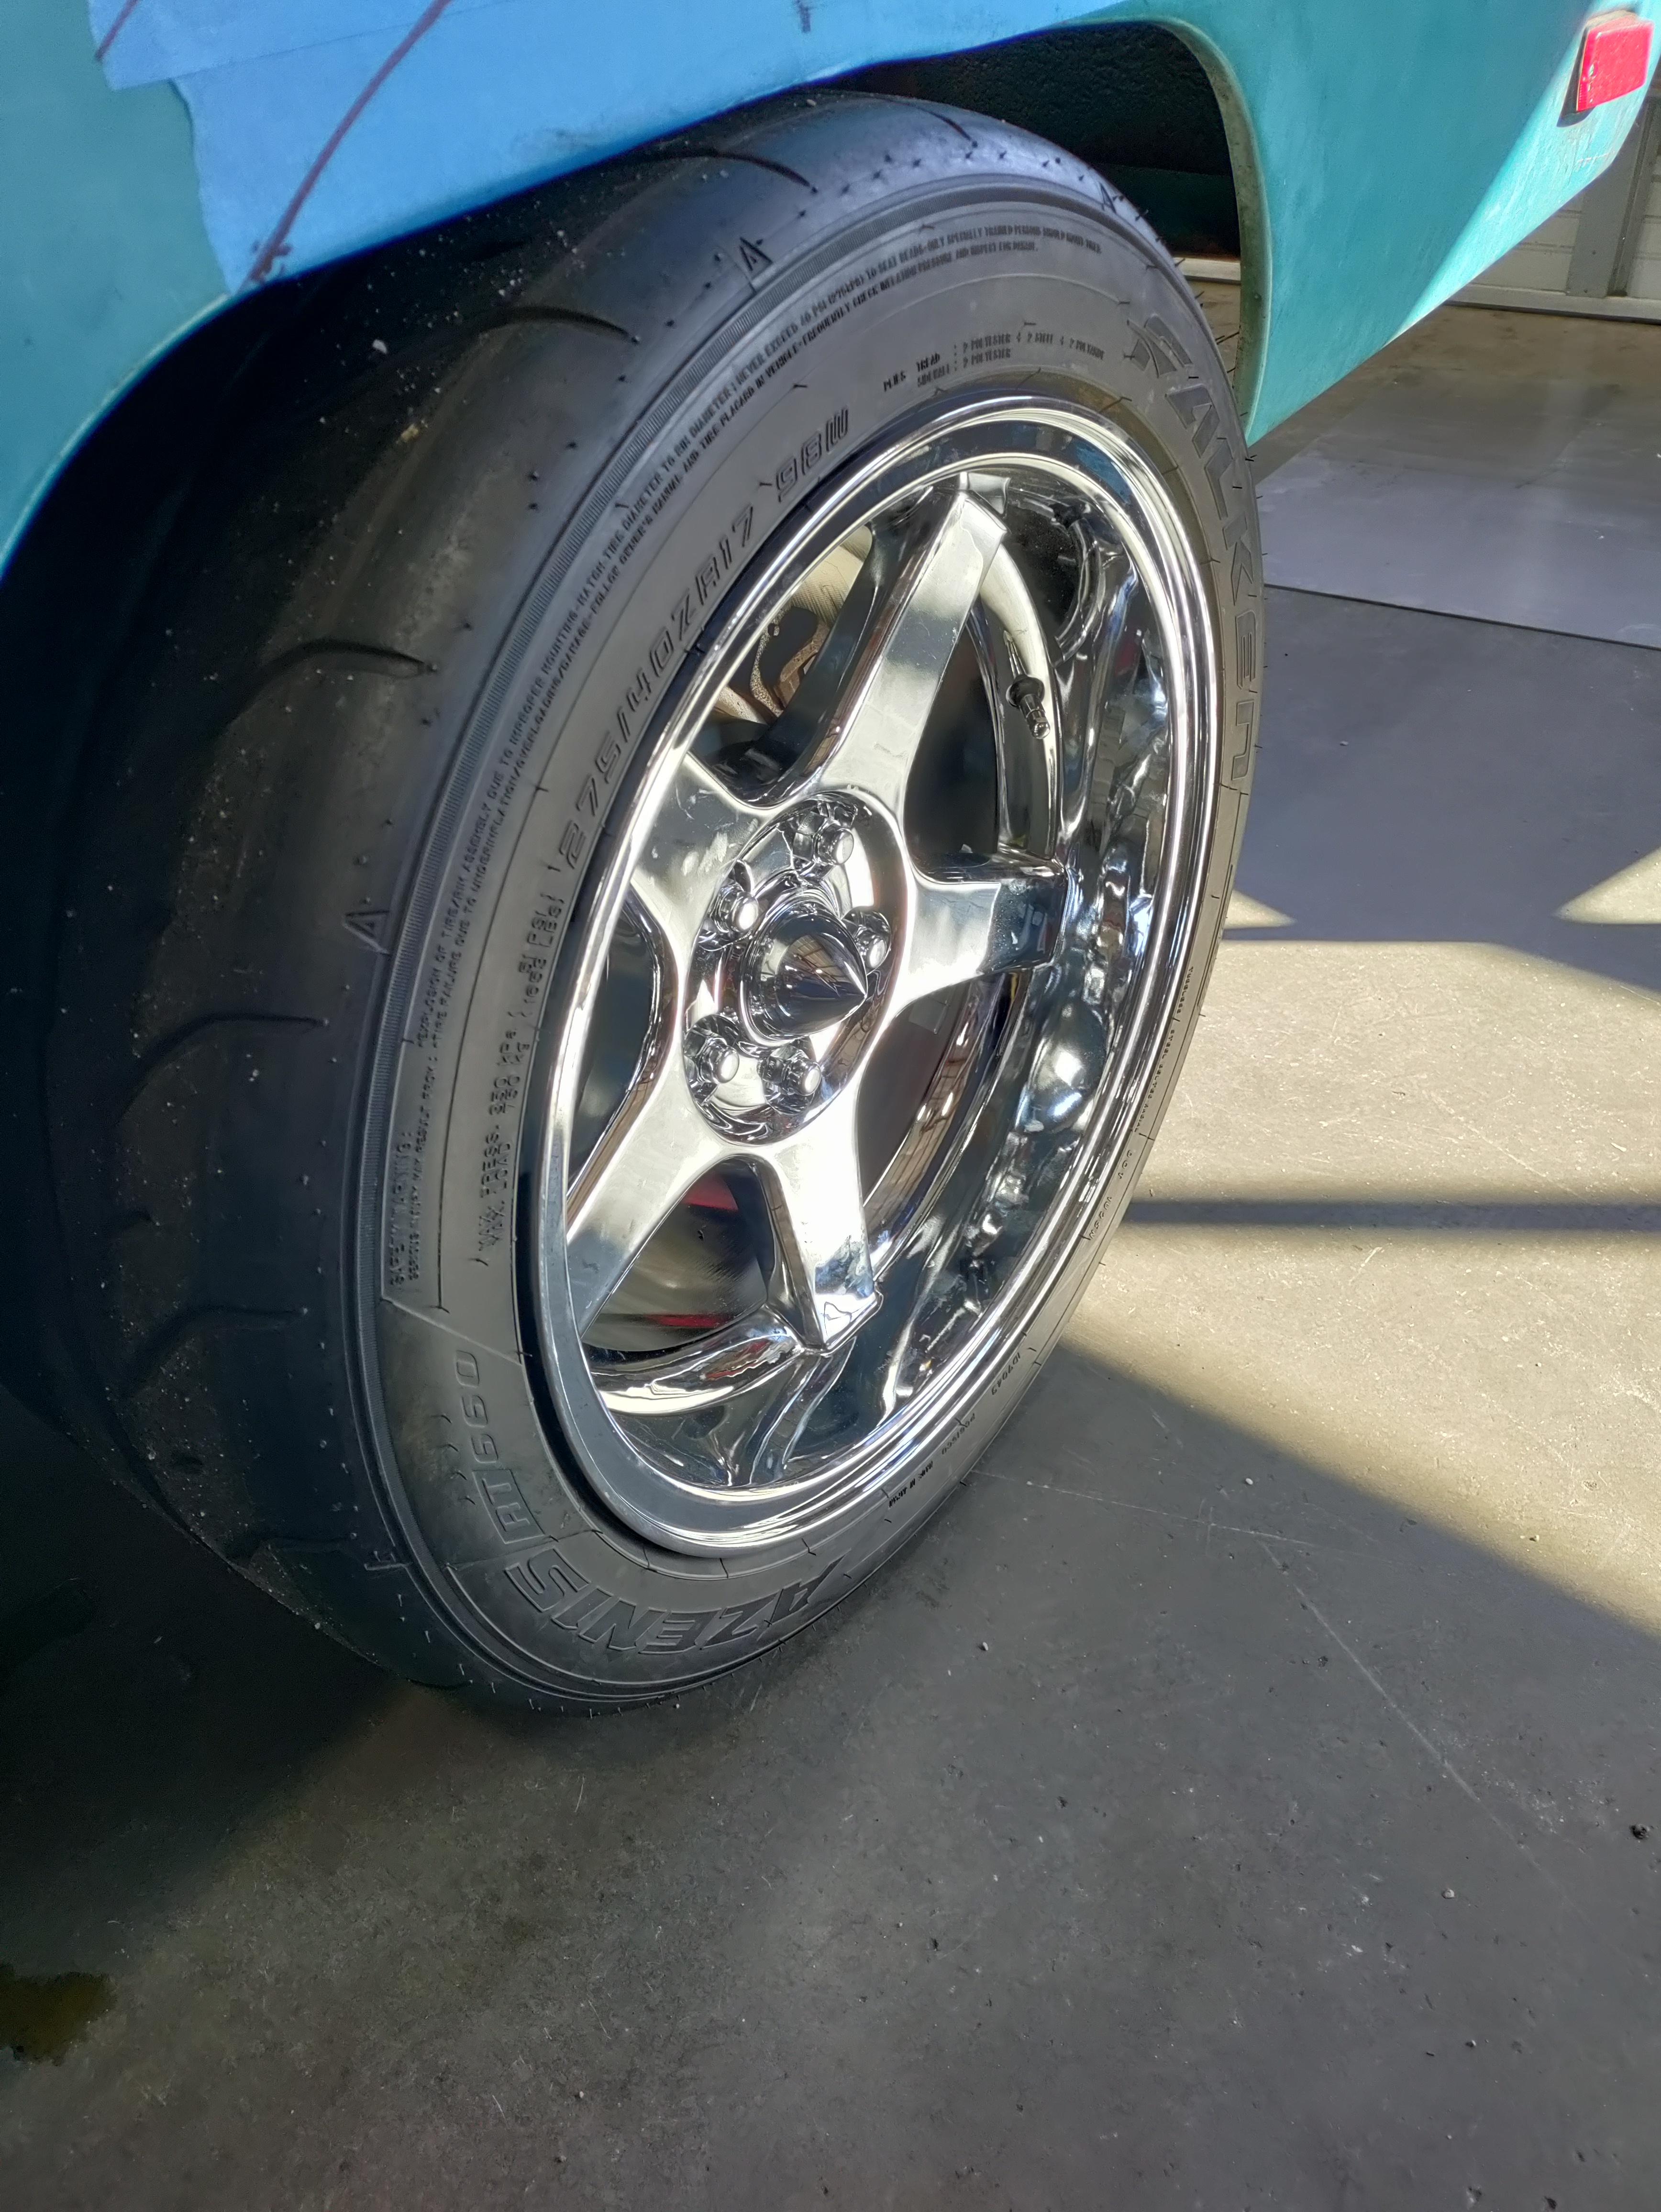
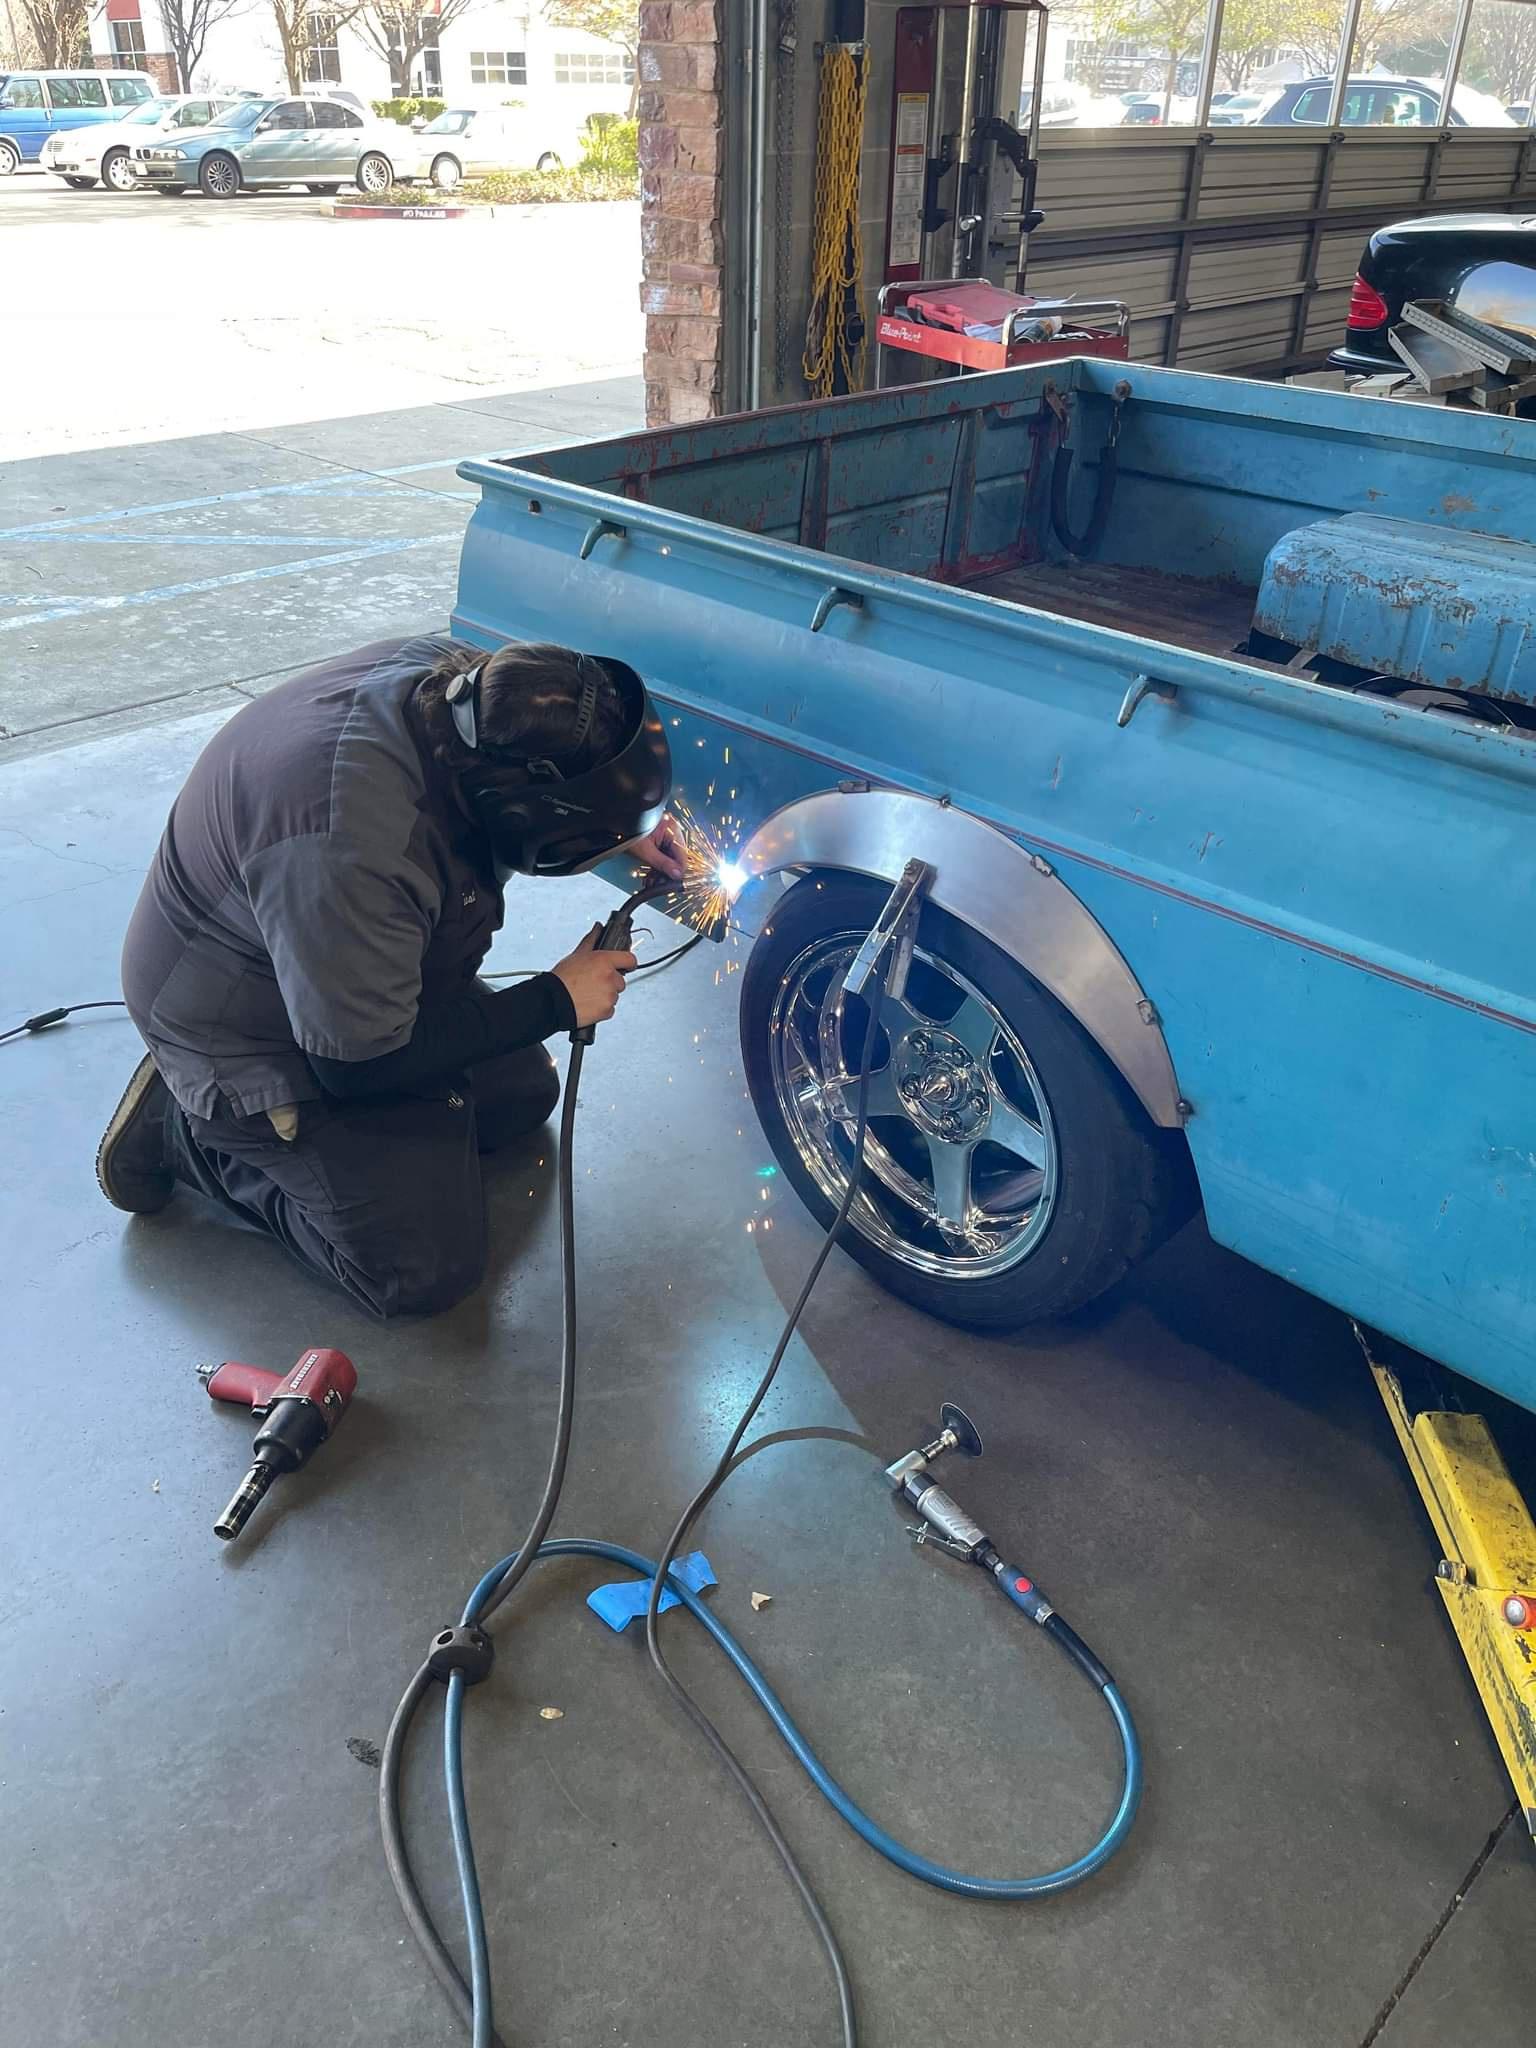
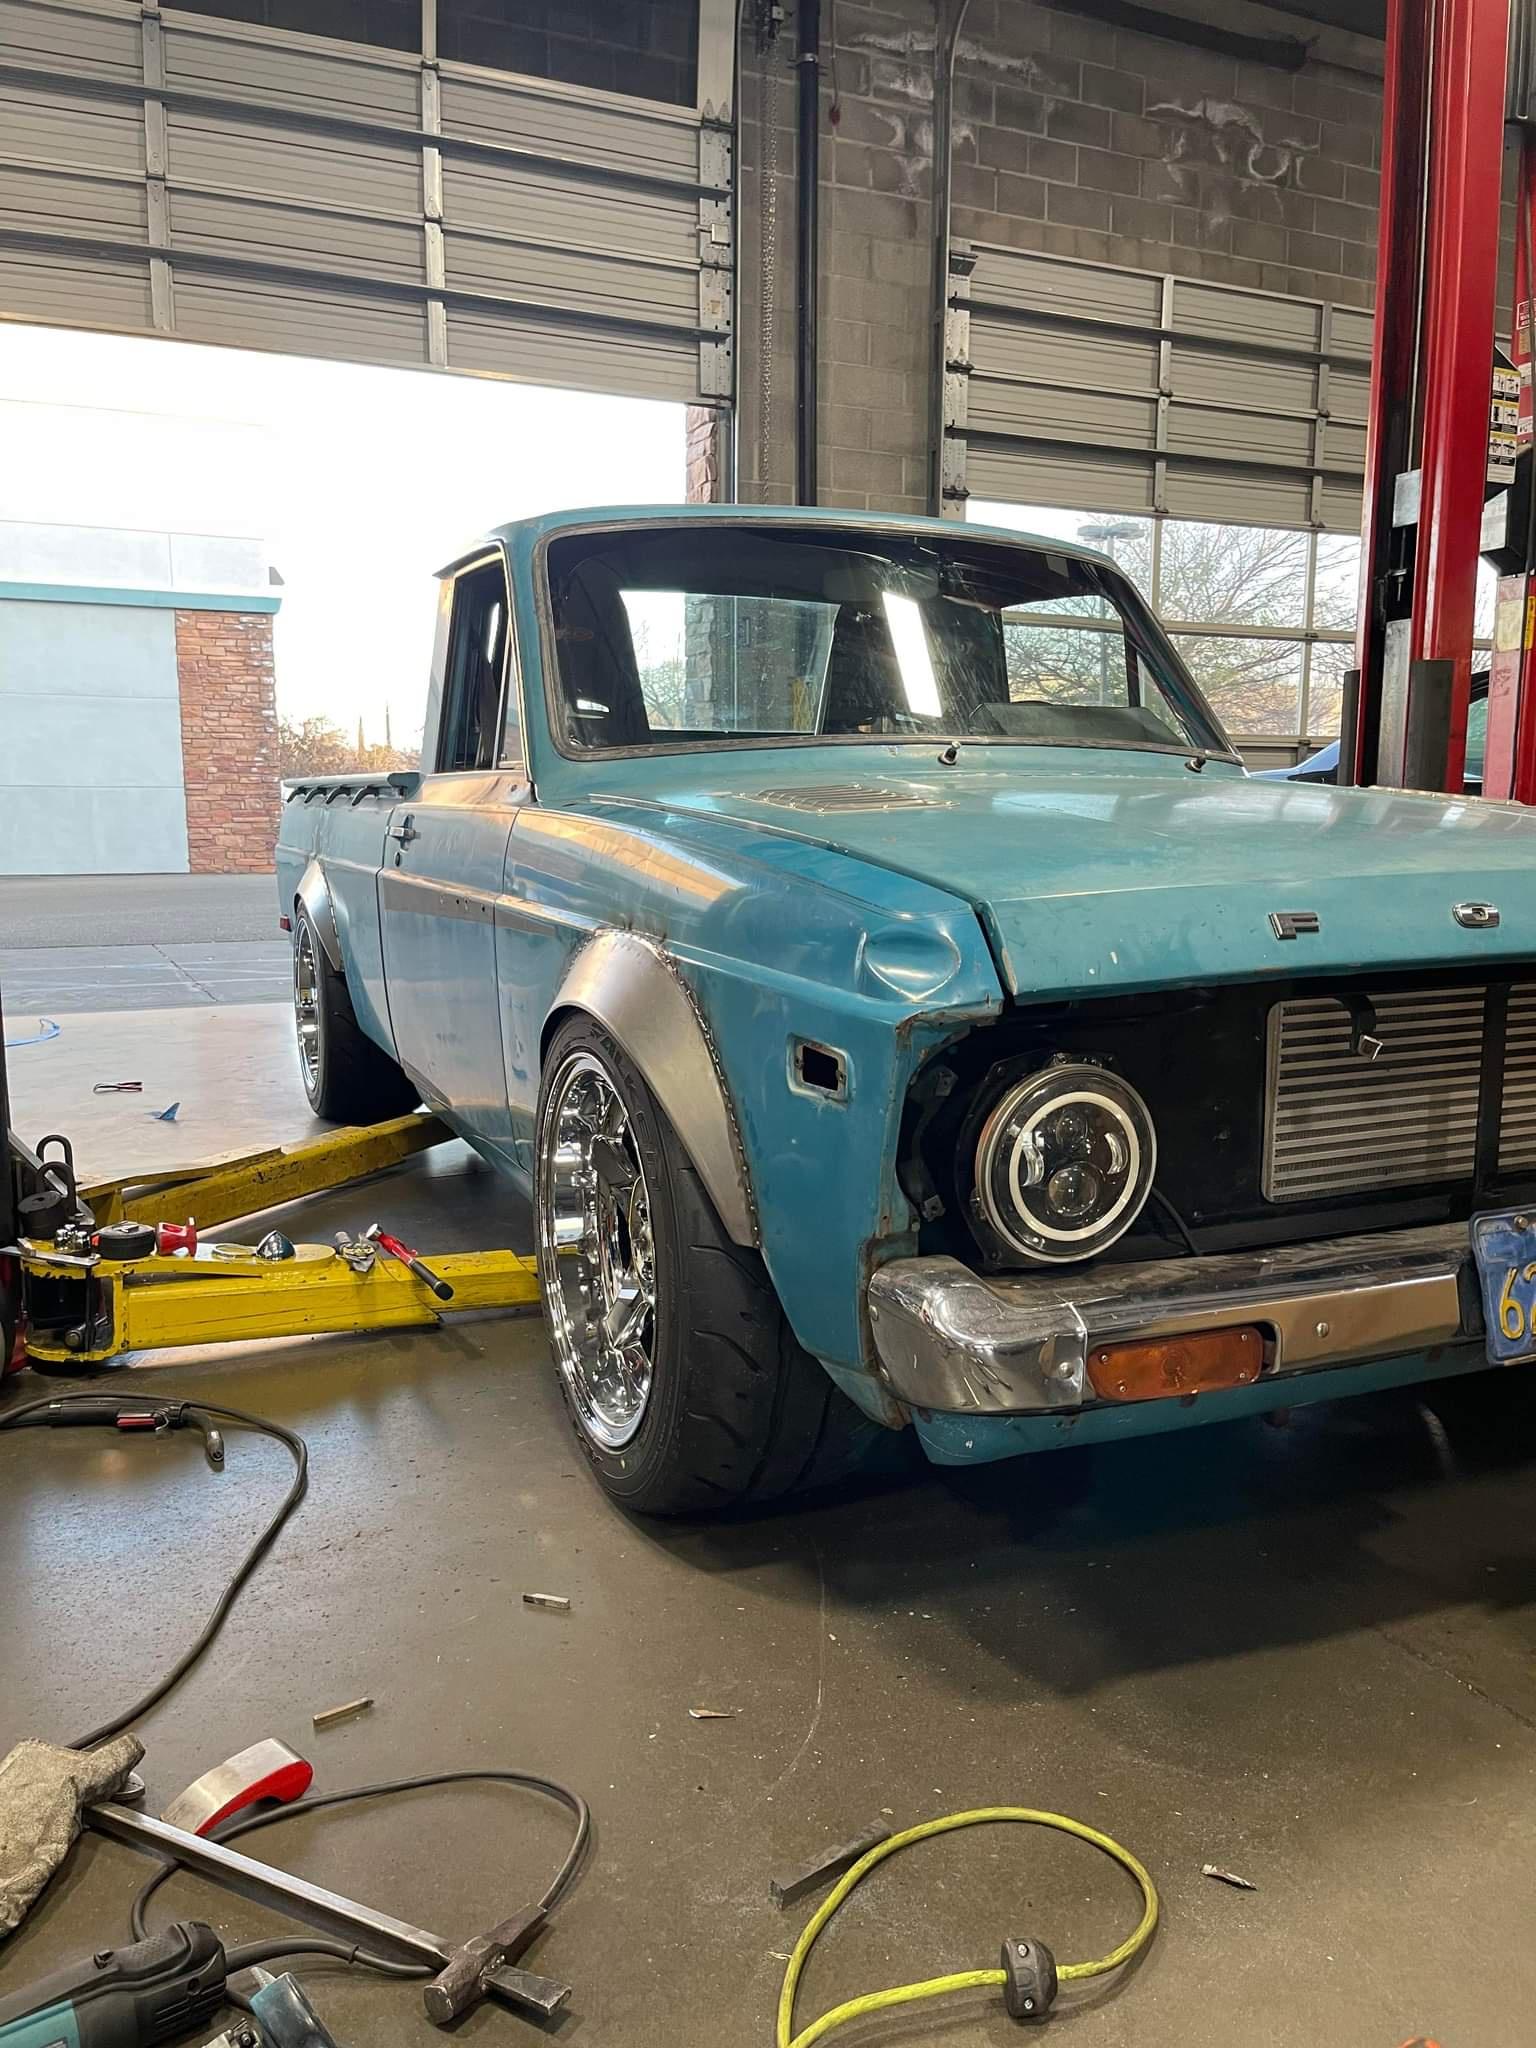
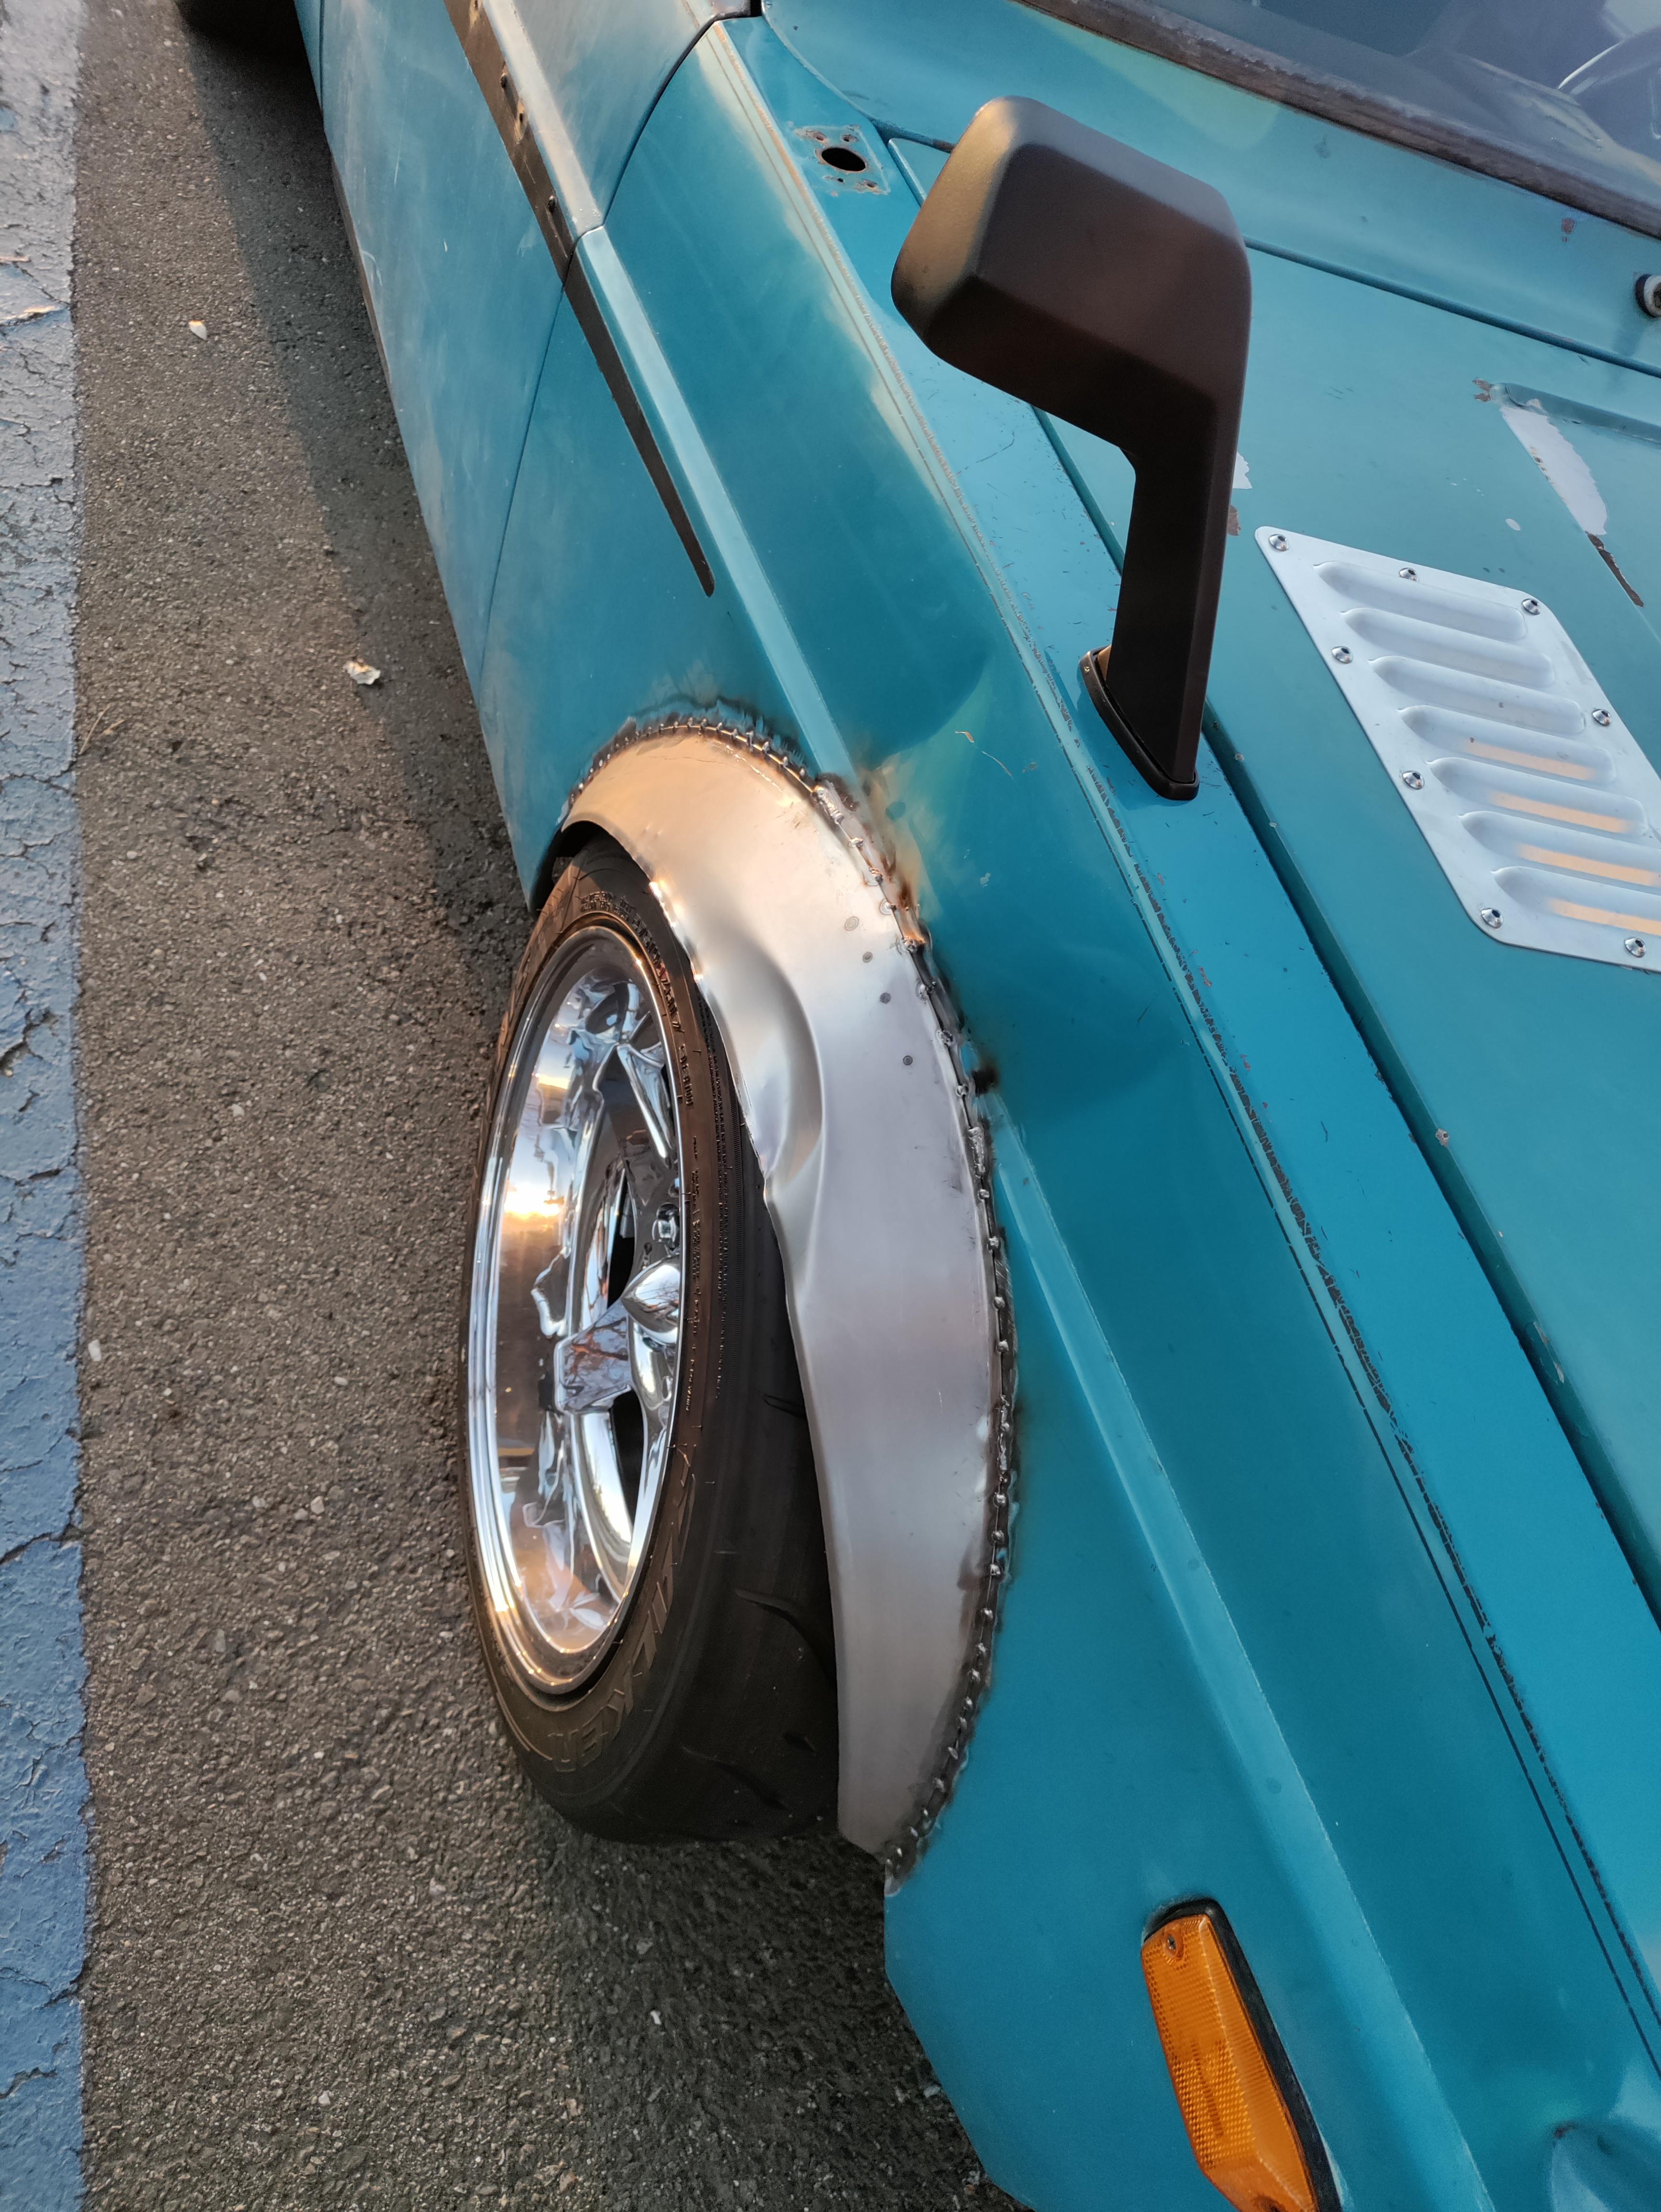
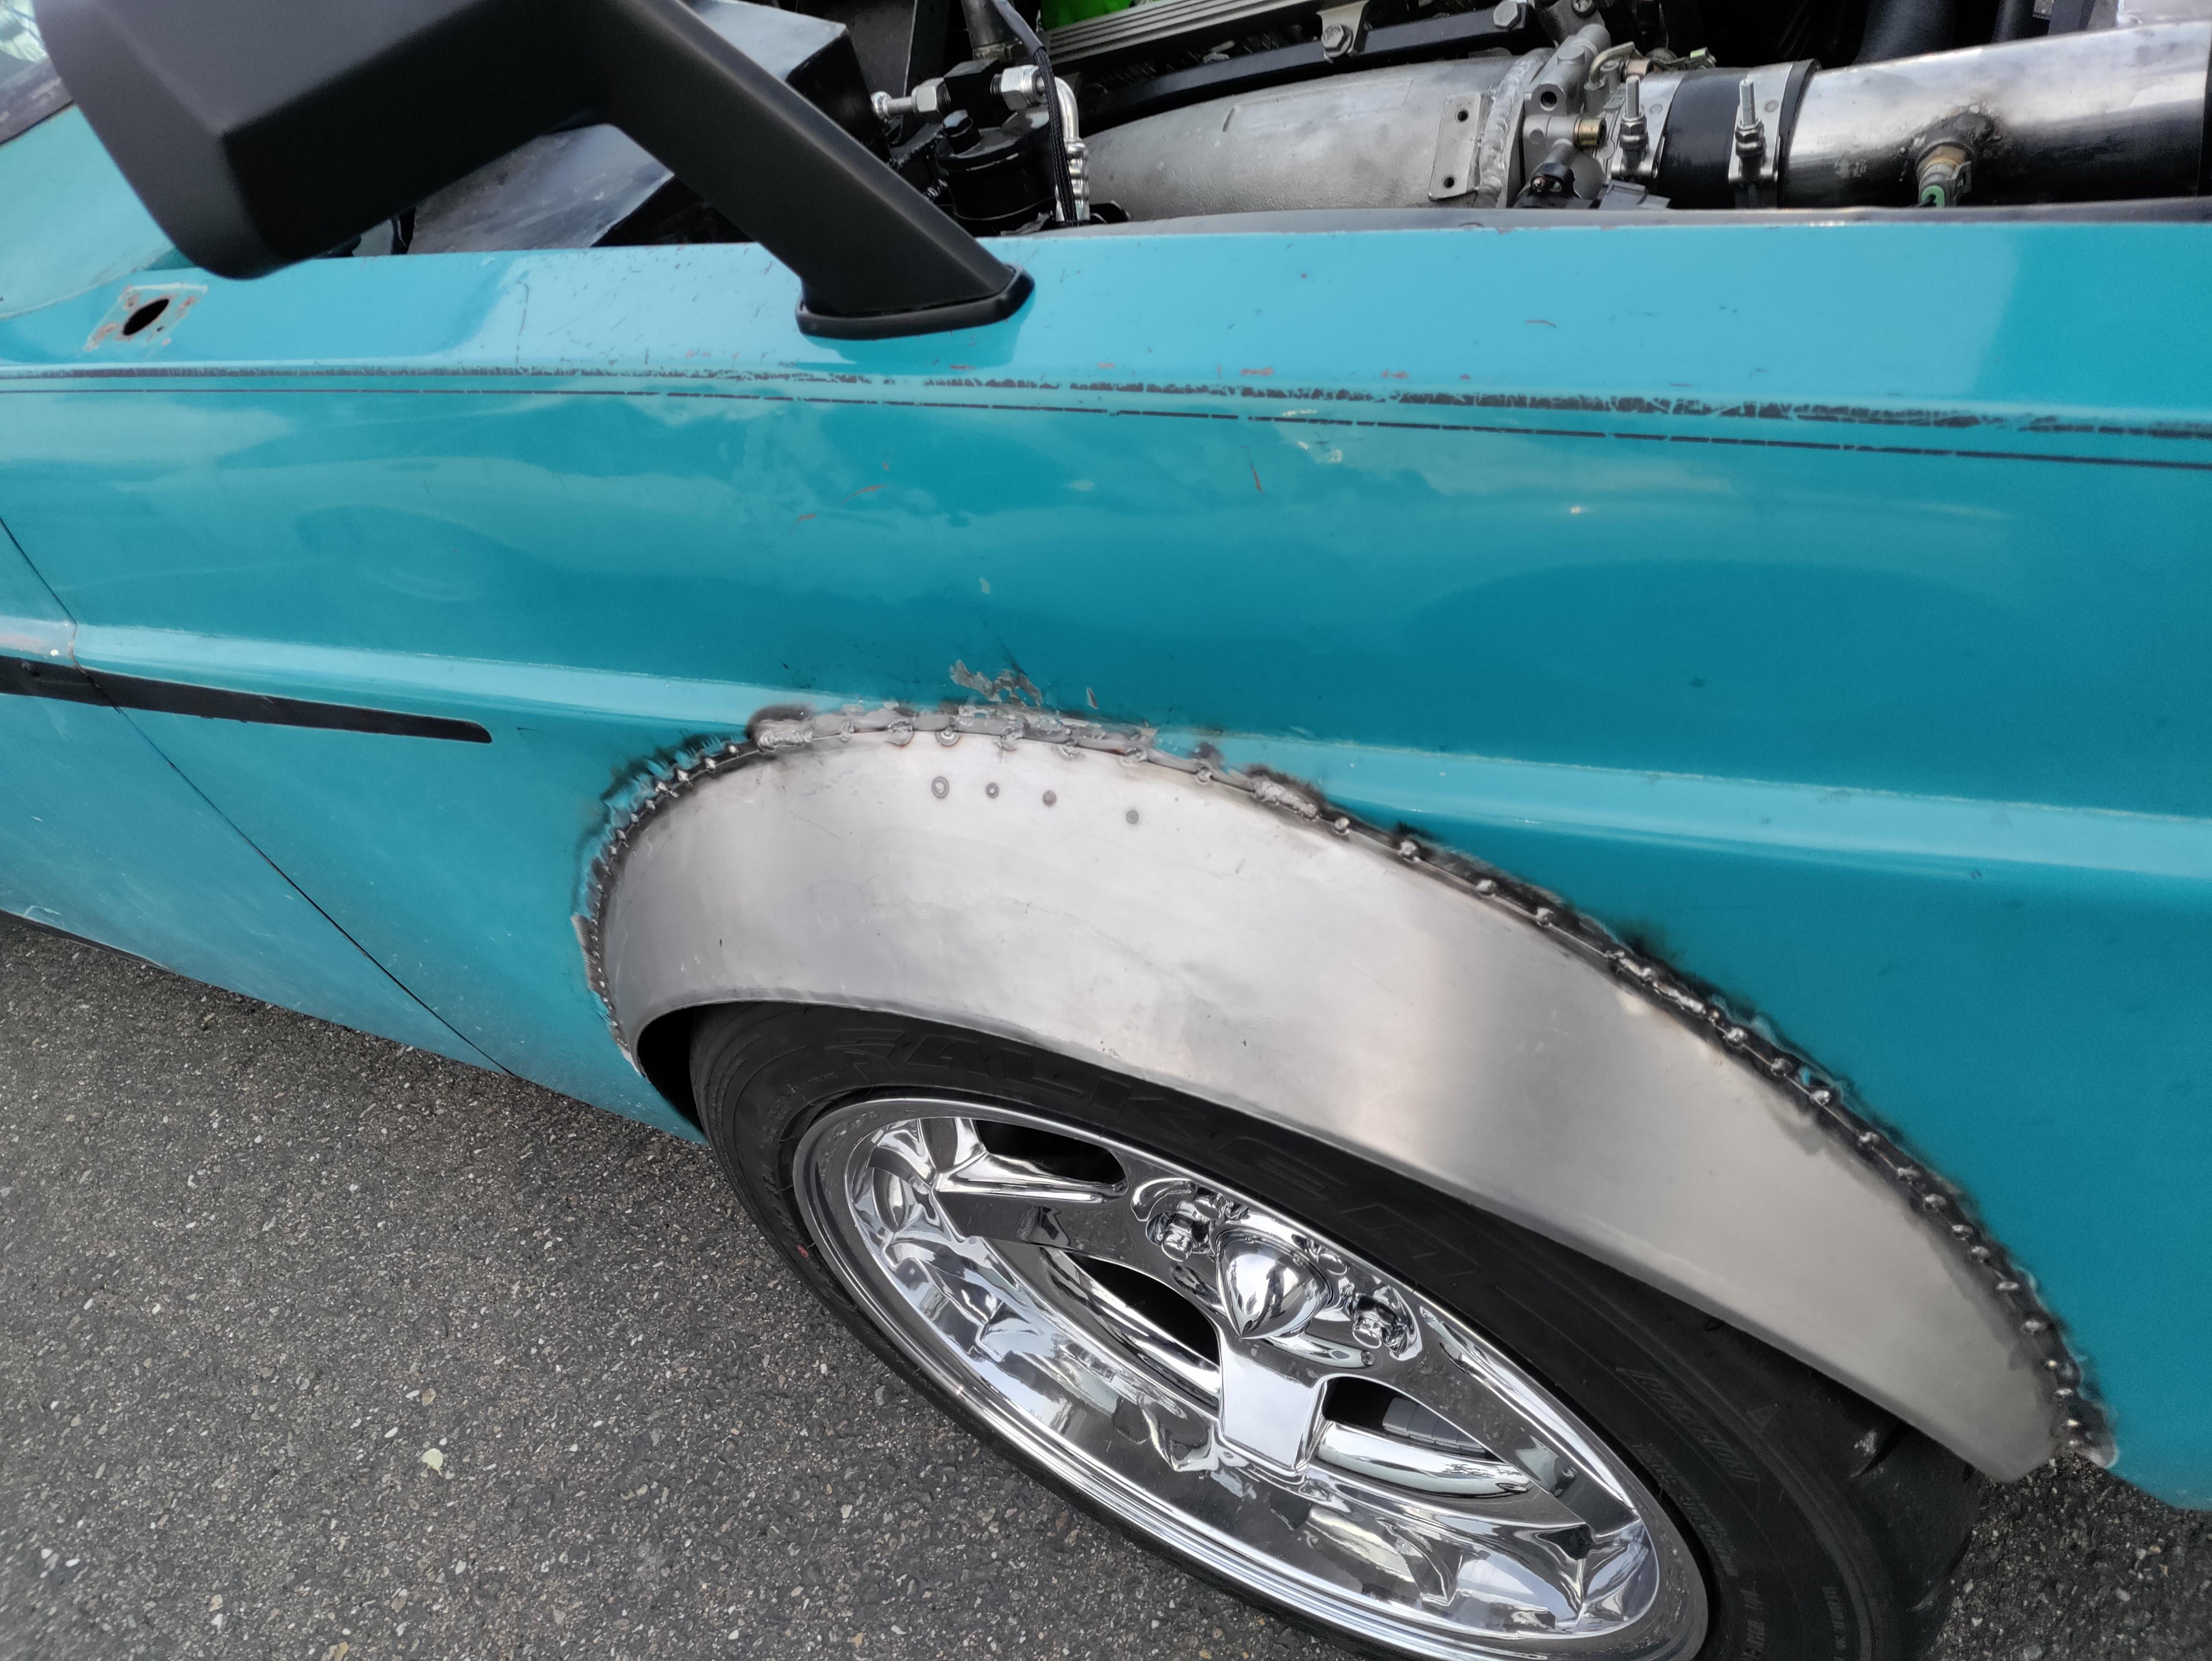
picture dump and update, MLS head gaskets arrived, and are surviving so far. boost turned down to 22psi to keep the duty cycle on the 1000CC injectors under 95%. Rods and pistons are at the machine shop getting fitted into the block. New oil pump arrived and is waiting on the machine shop to finish the motor. Injector Dynamics 1700cc injectors are also awaiting the new motor. Bought a square set of 17x10.5" mustang wheels wrapped in 275/40/17s. widened the front end to make the front tires stick out as much as the rears. Cutting out everything that will rub the tire. Fender flares are waiting for me to finish the suspension again and set new ride height before being welded on.

Reply
1
1
01-10-2022, 12:20 AM
#216
Senior Member
Thread Starter
Join Date: Jan 2011
Location: sacramento ,ca
Posts: 568
Total Cats: 162
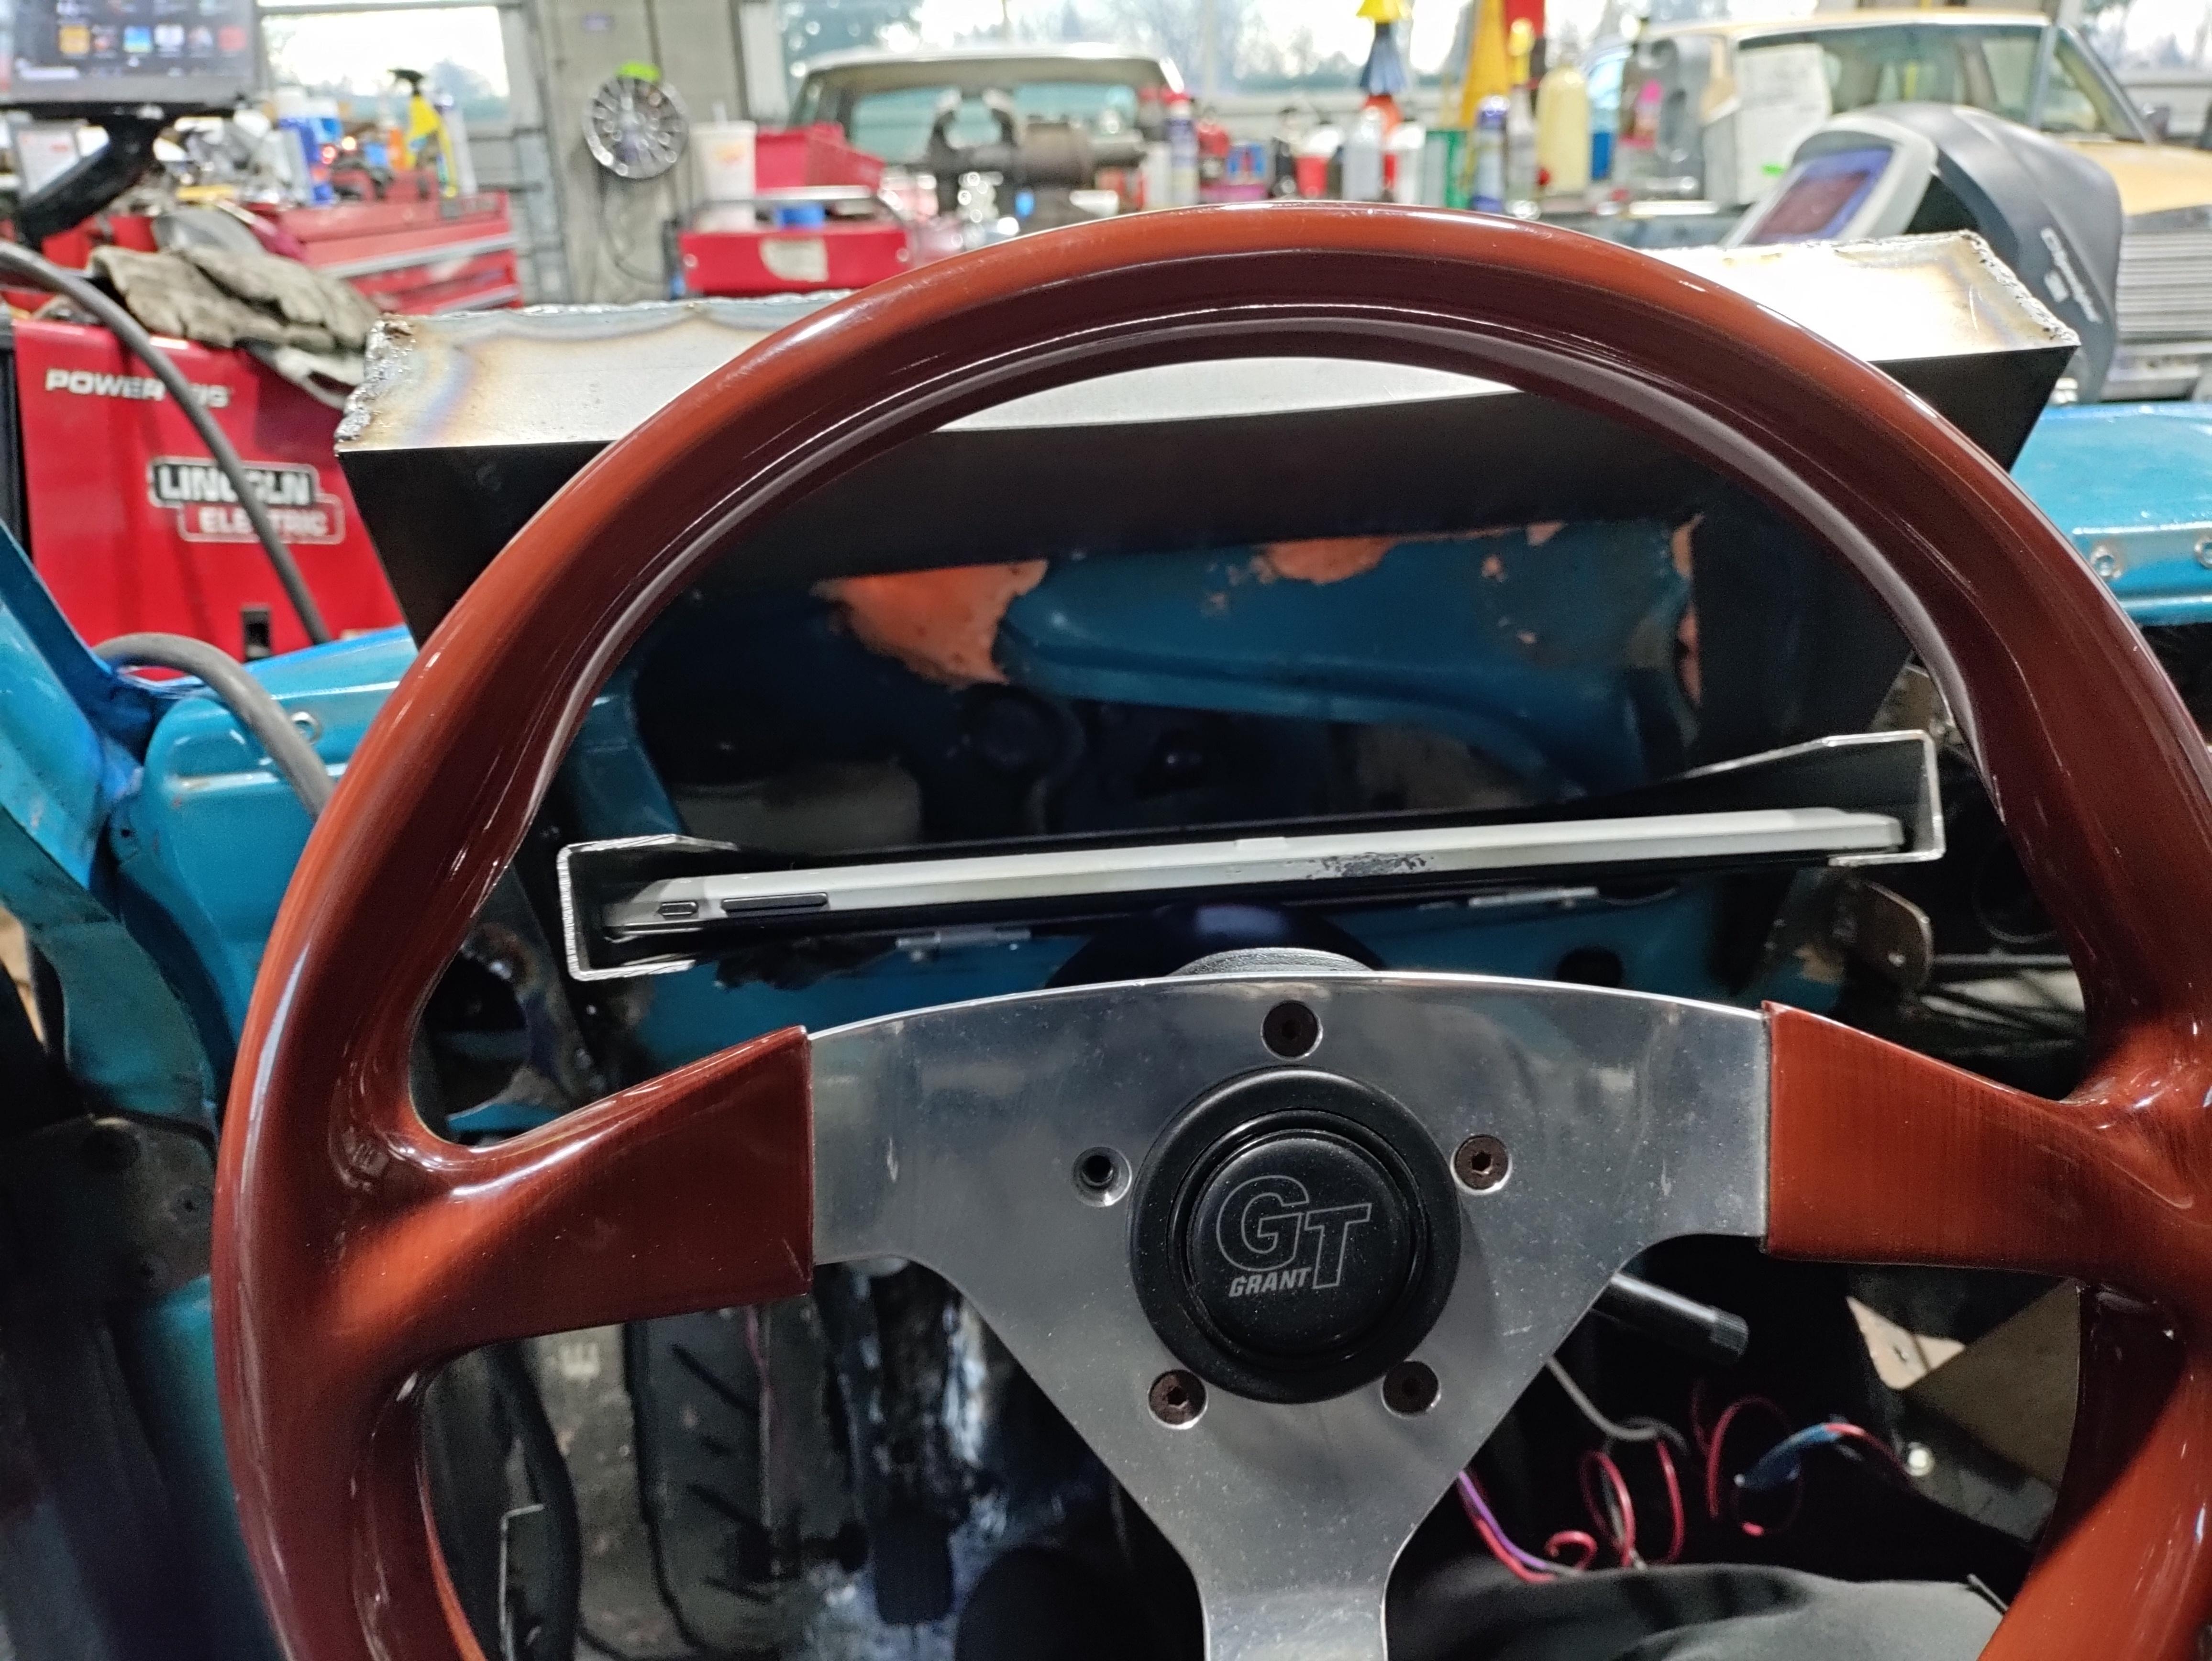
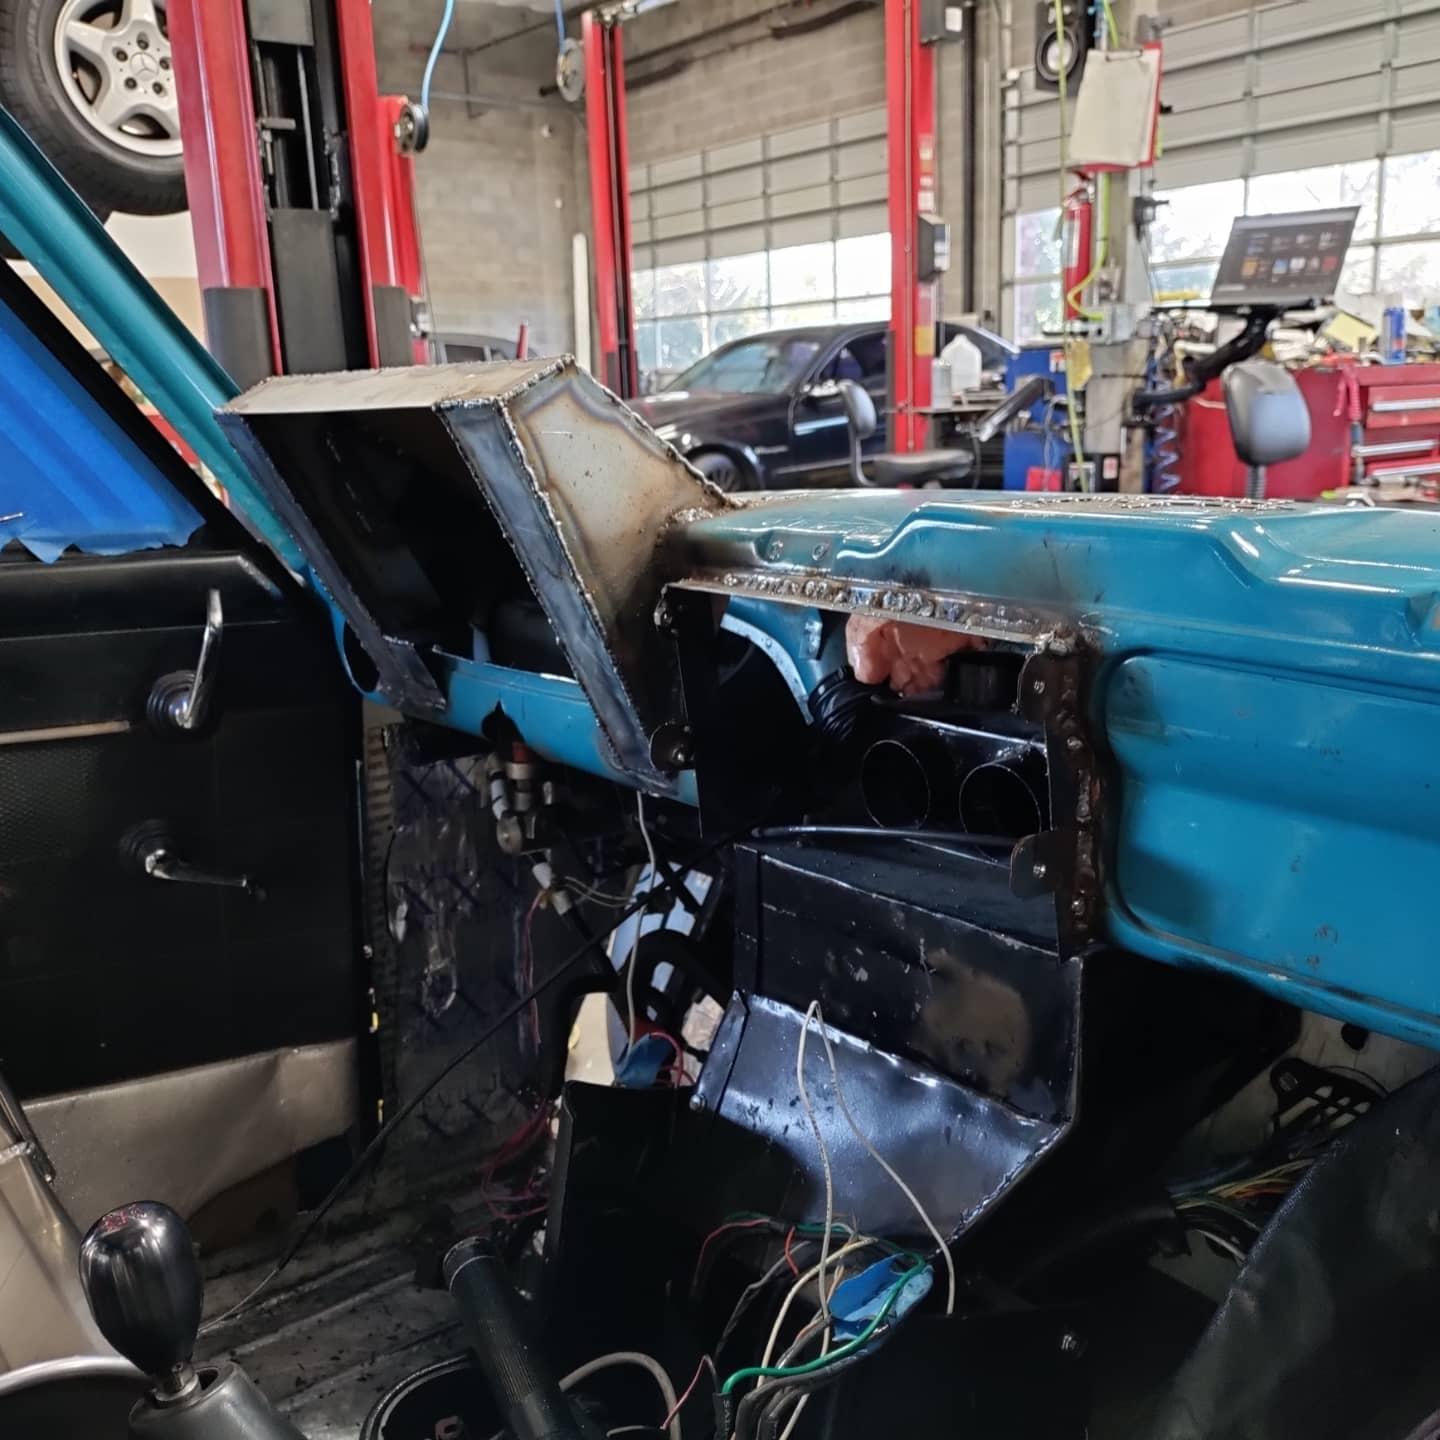
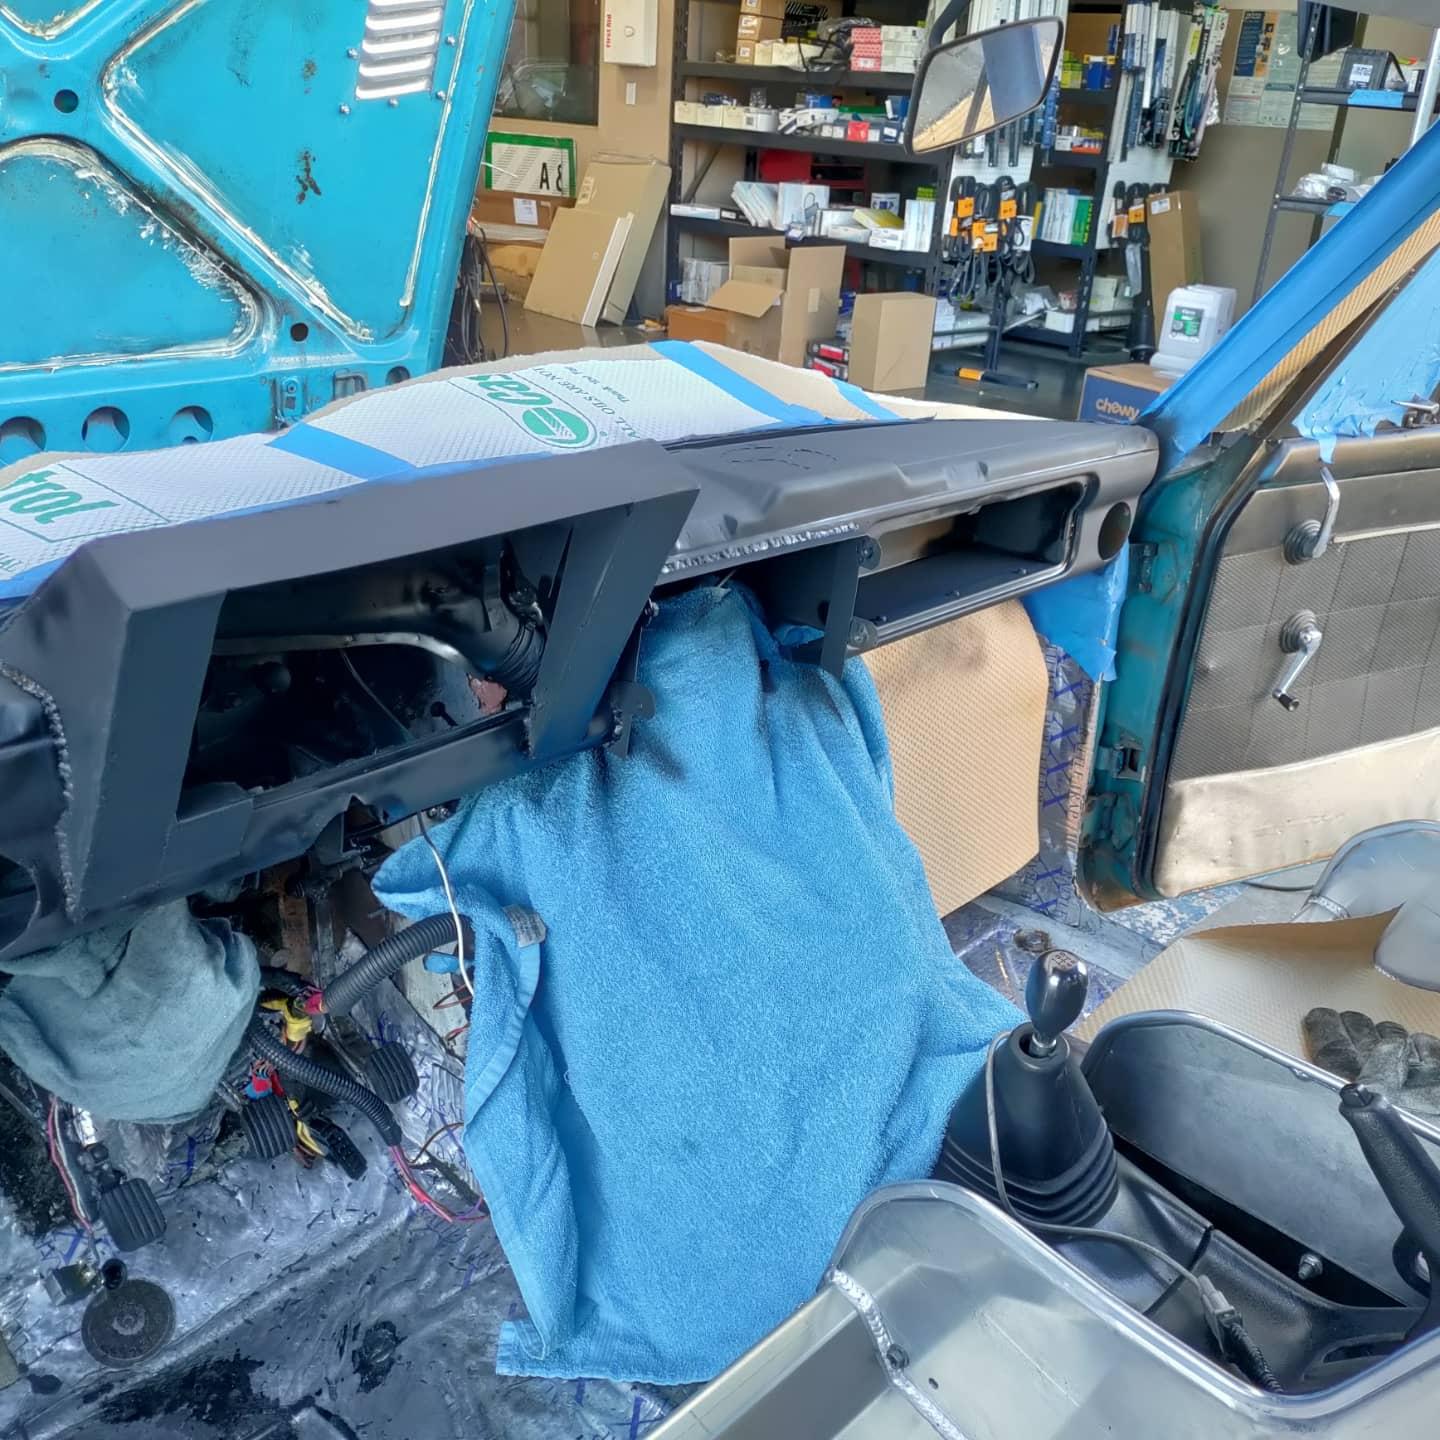
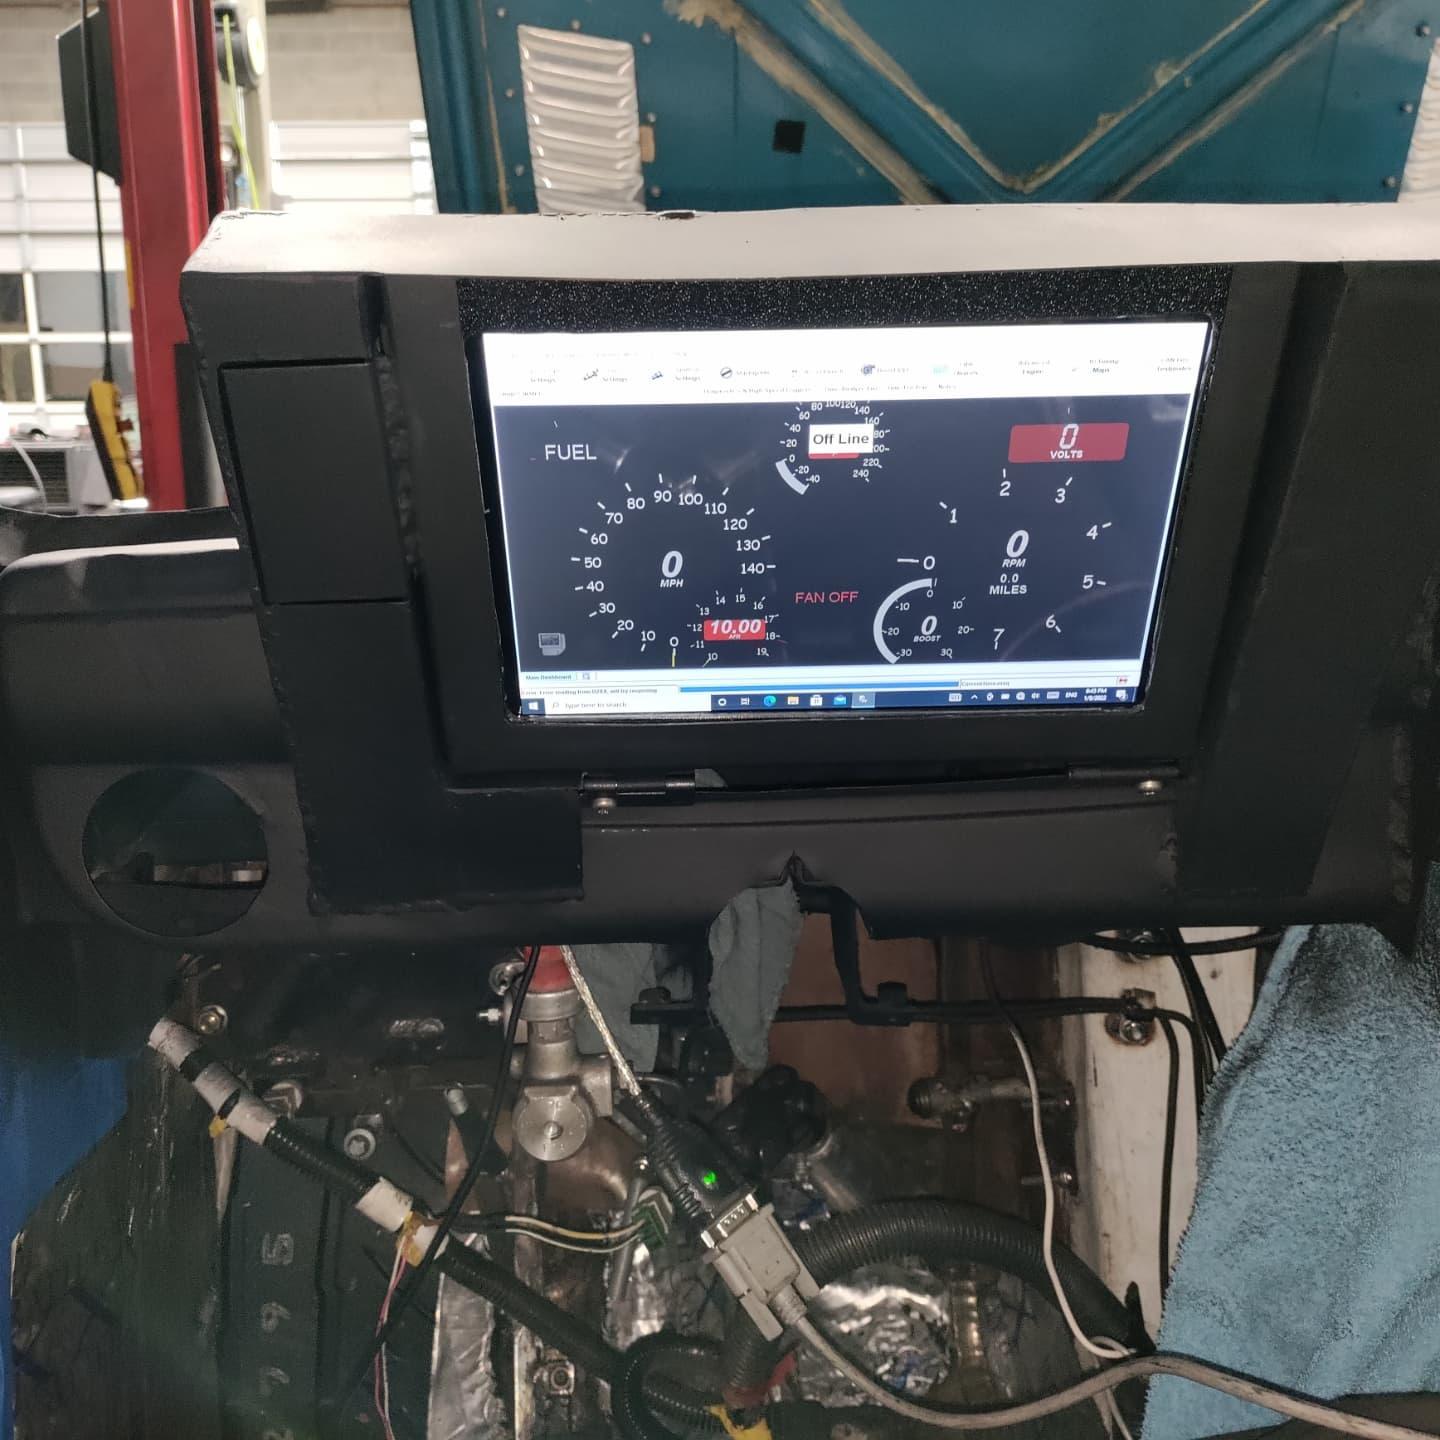
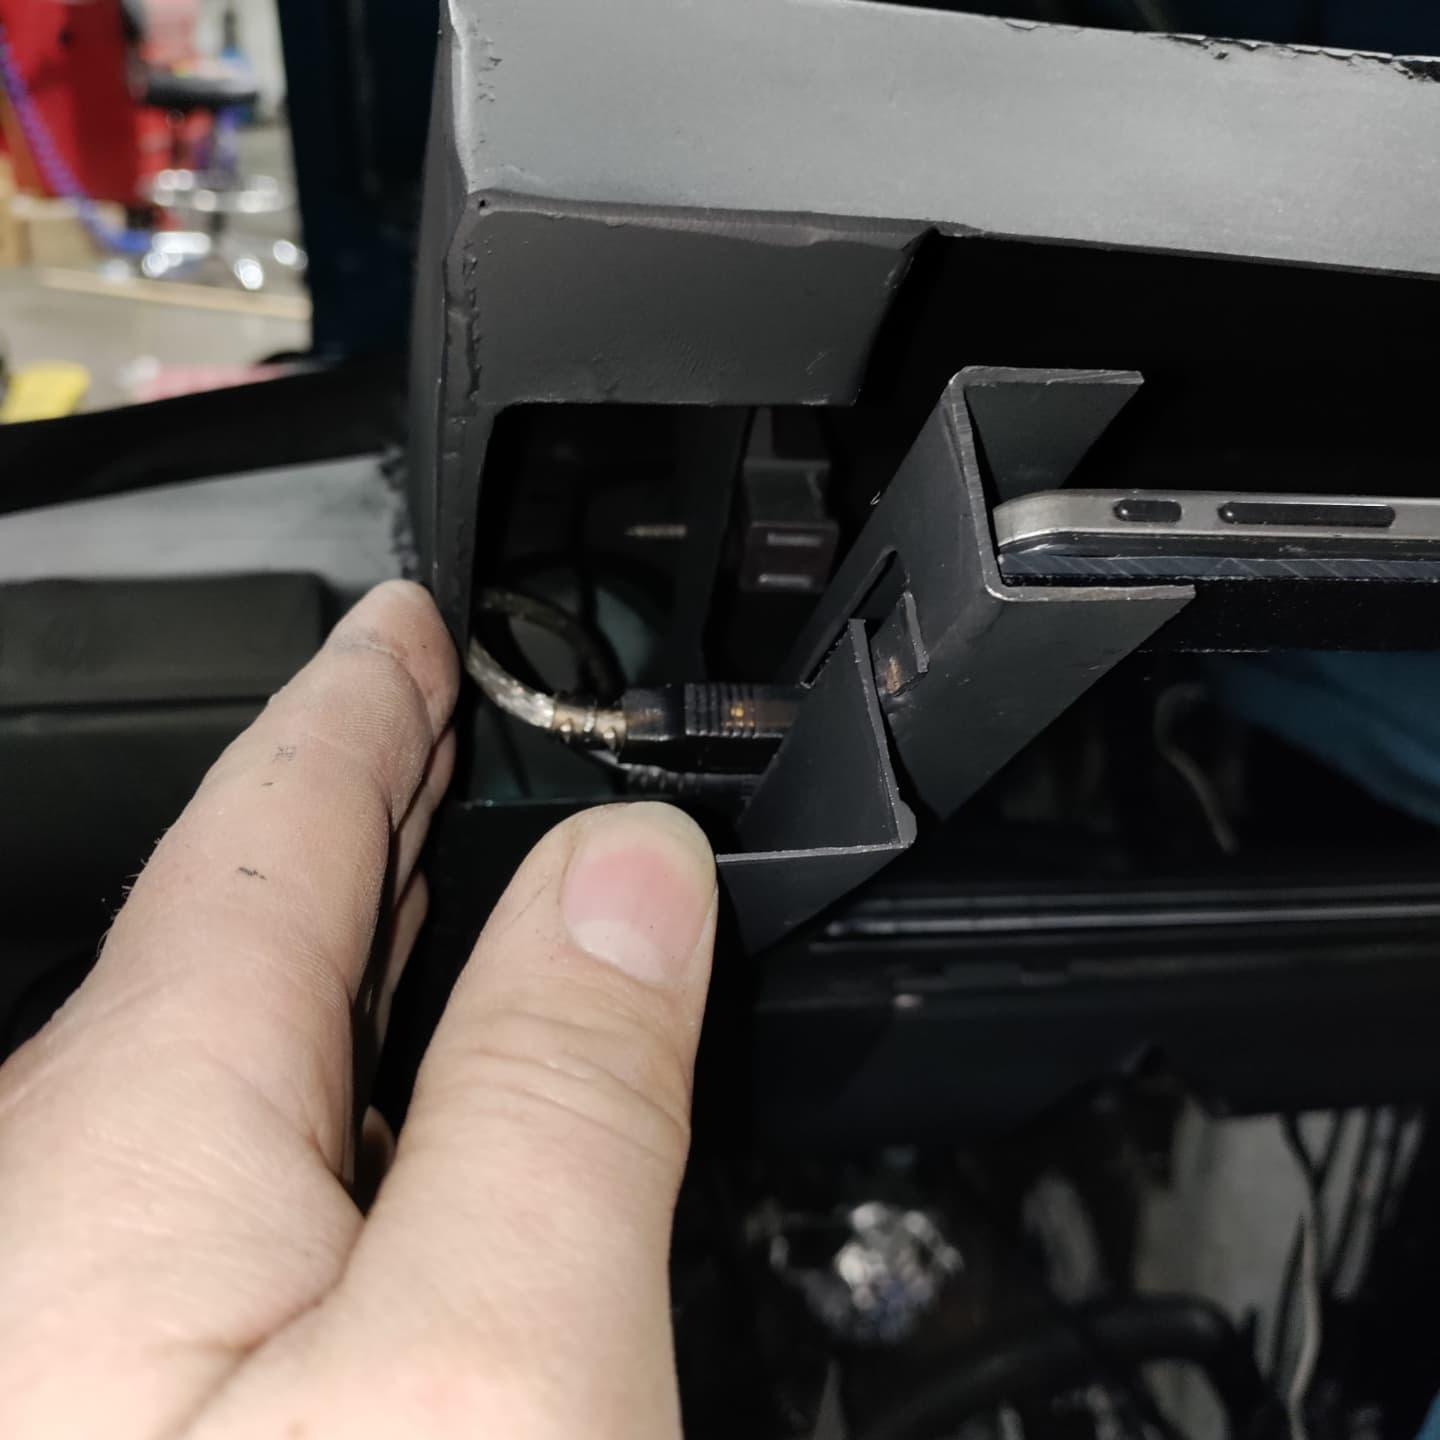
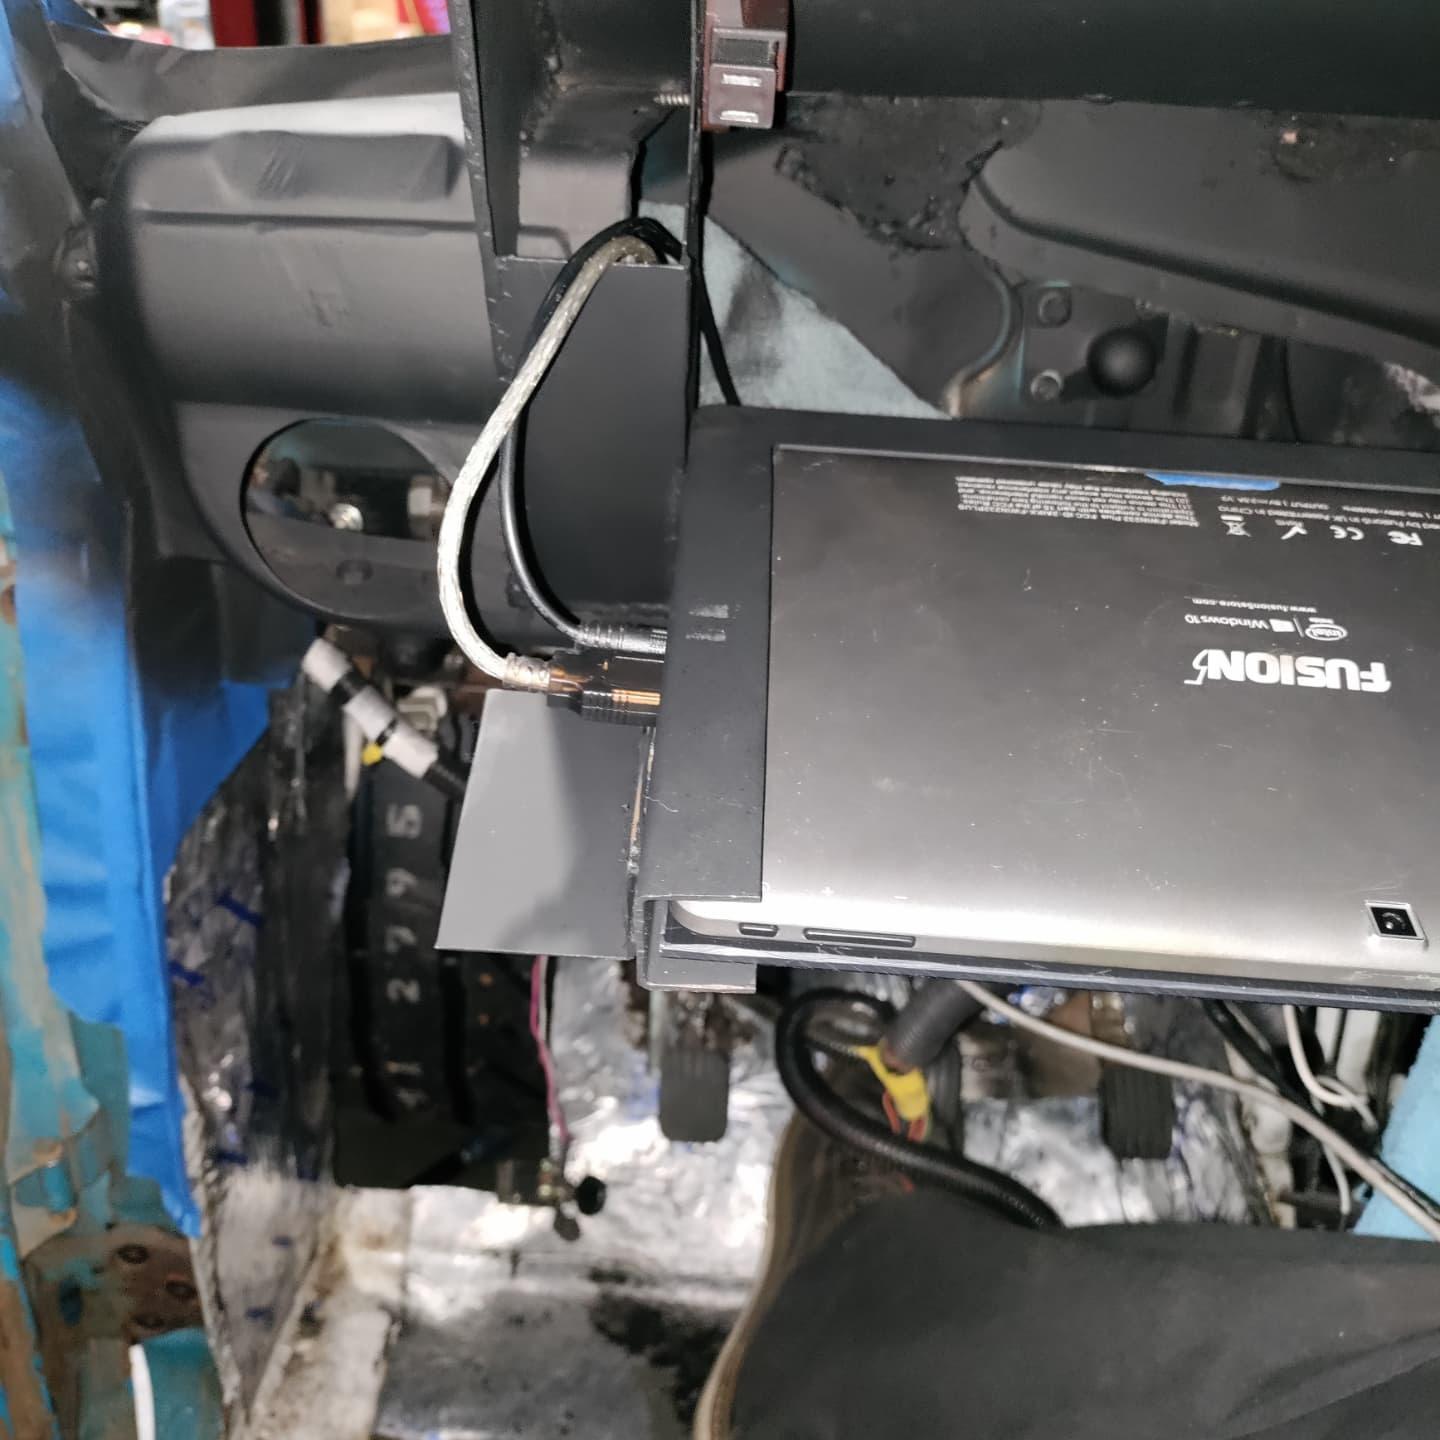
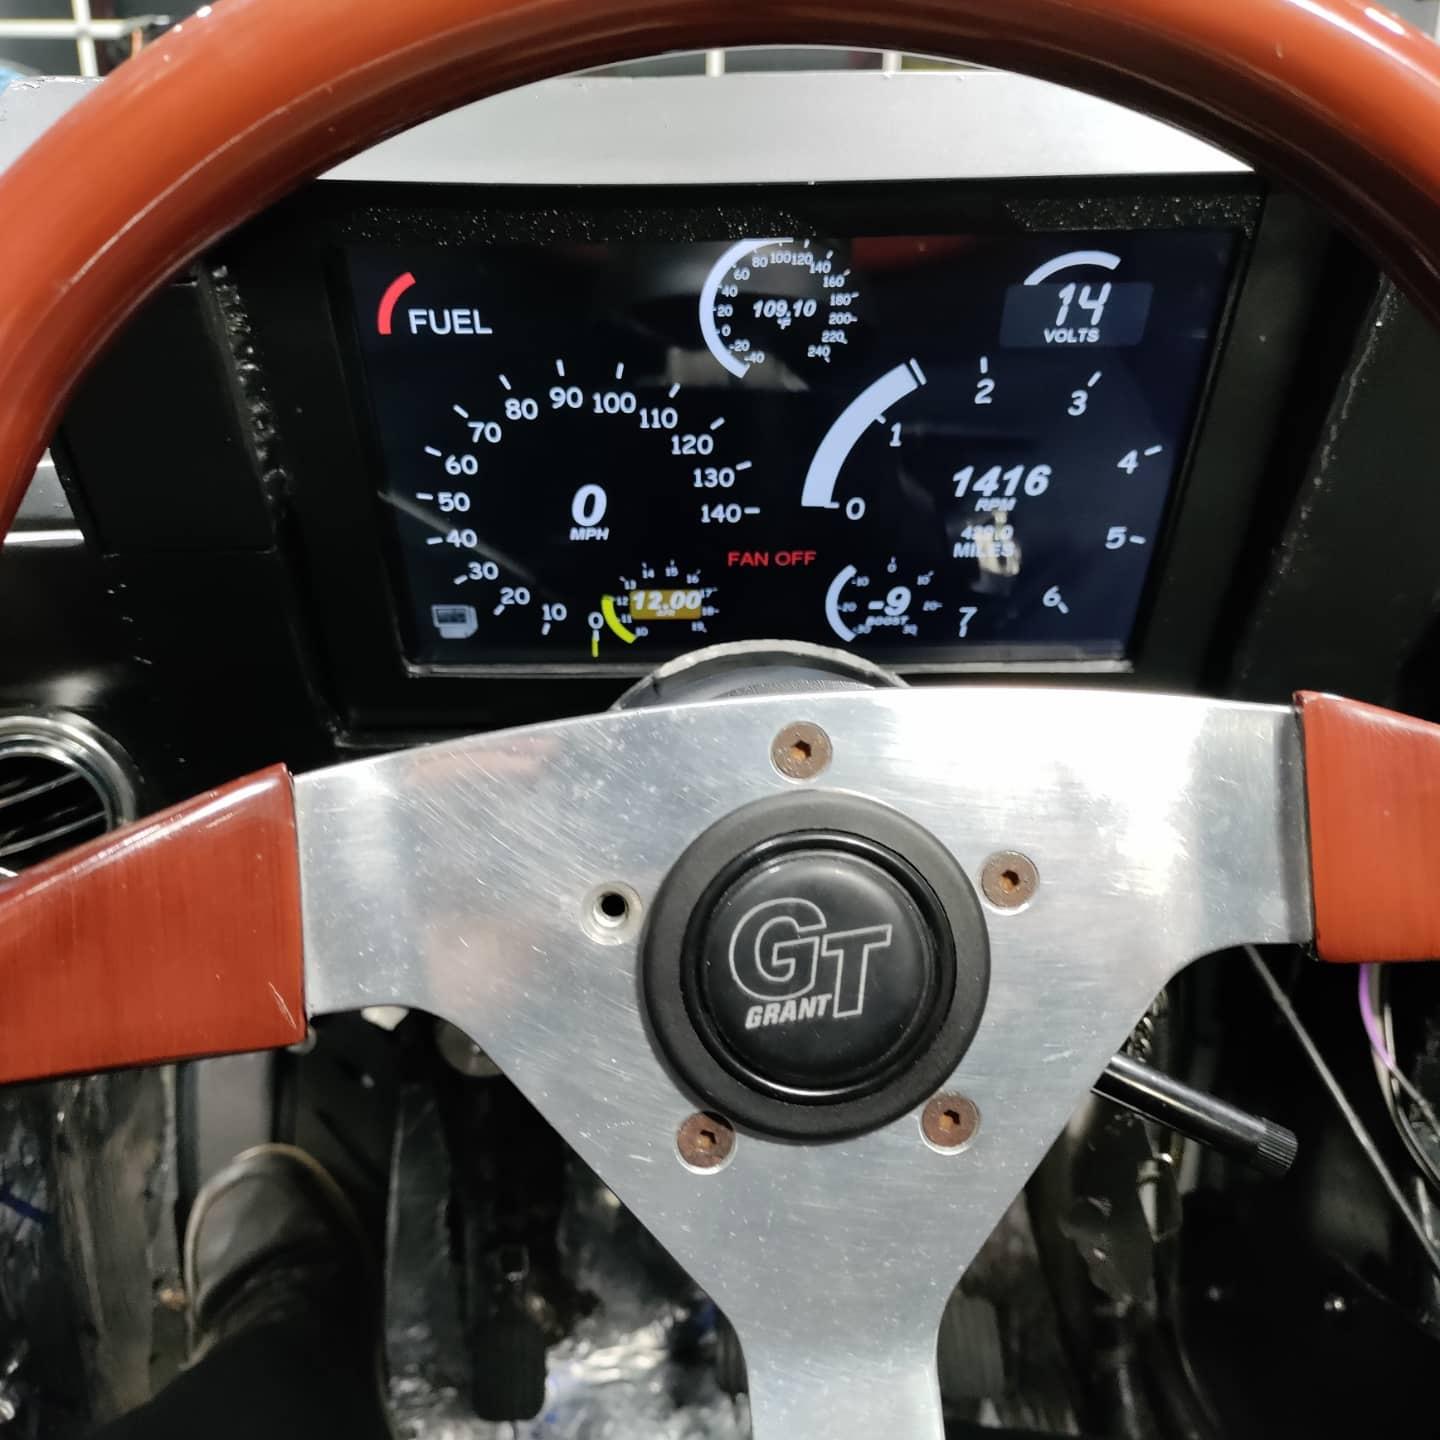
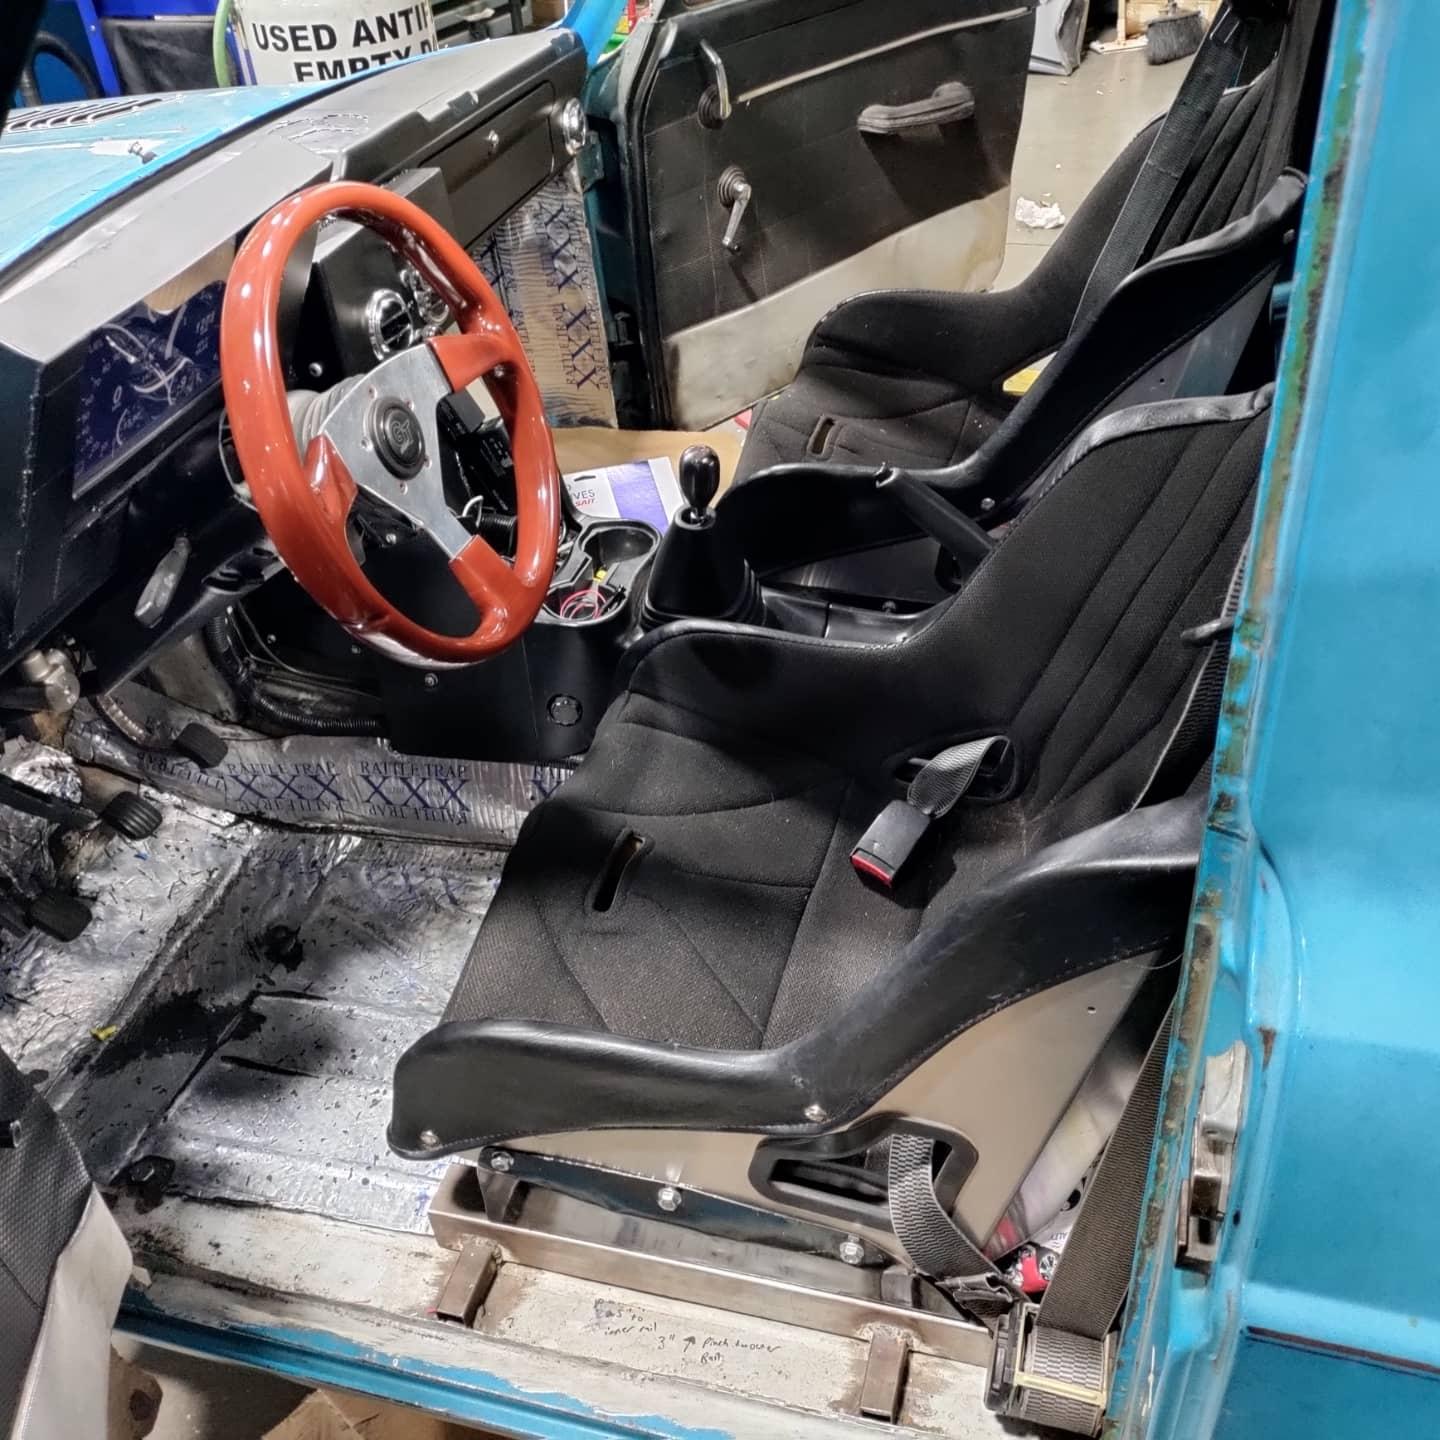
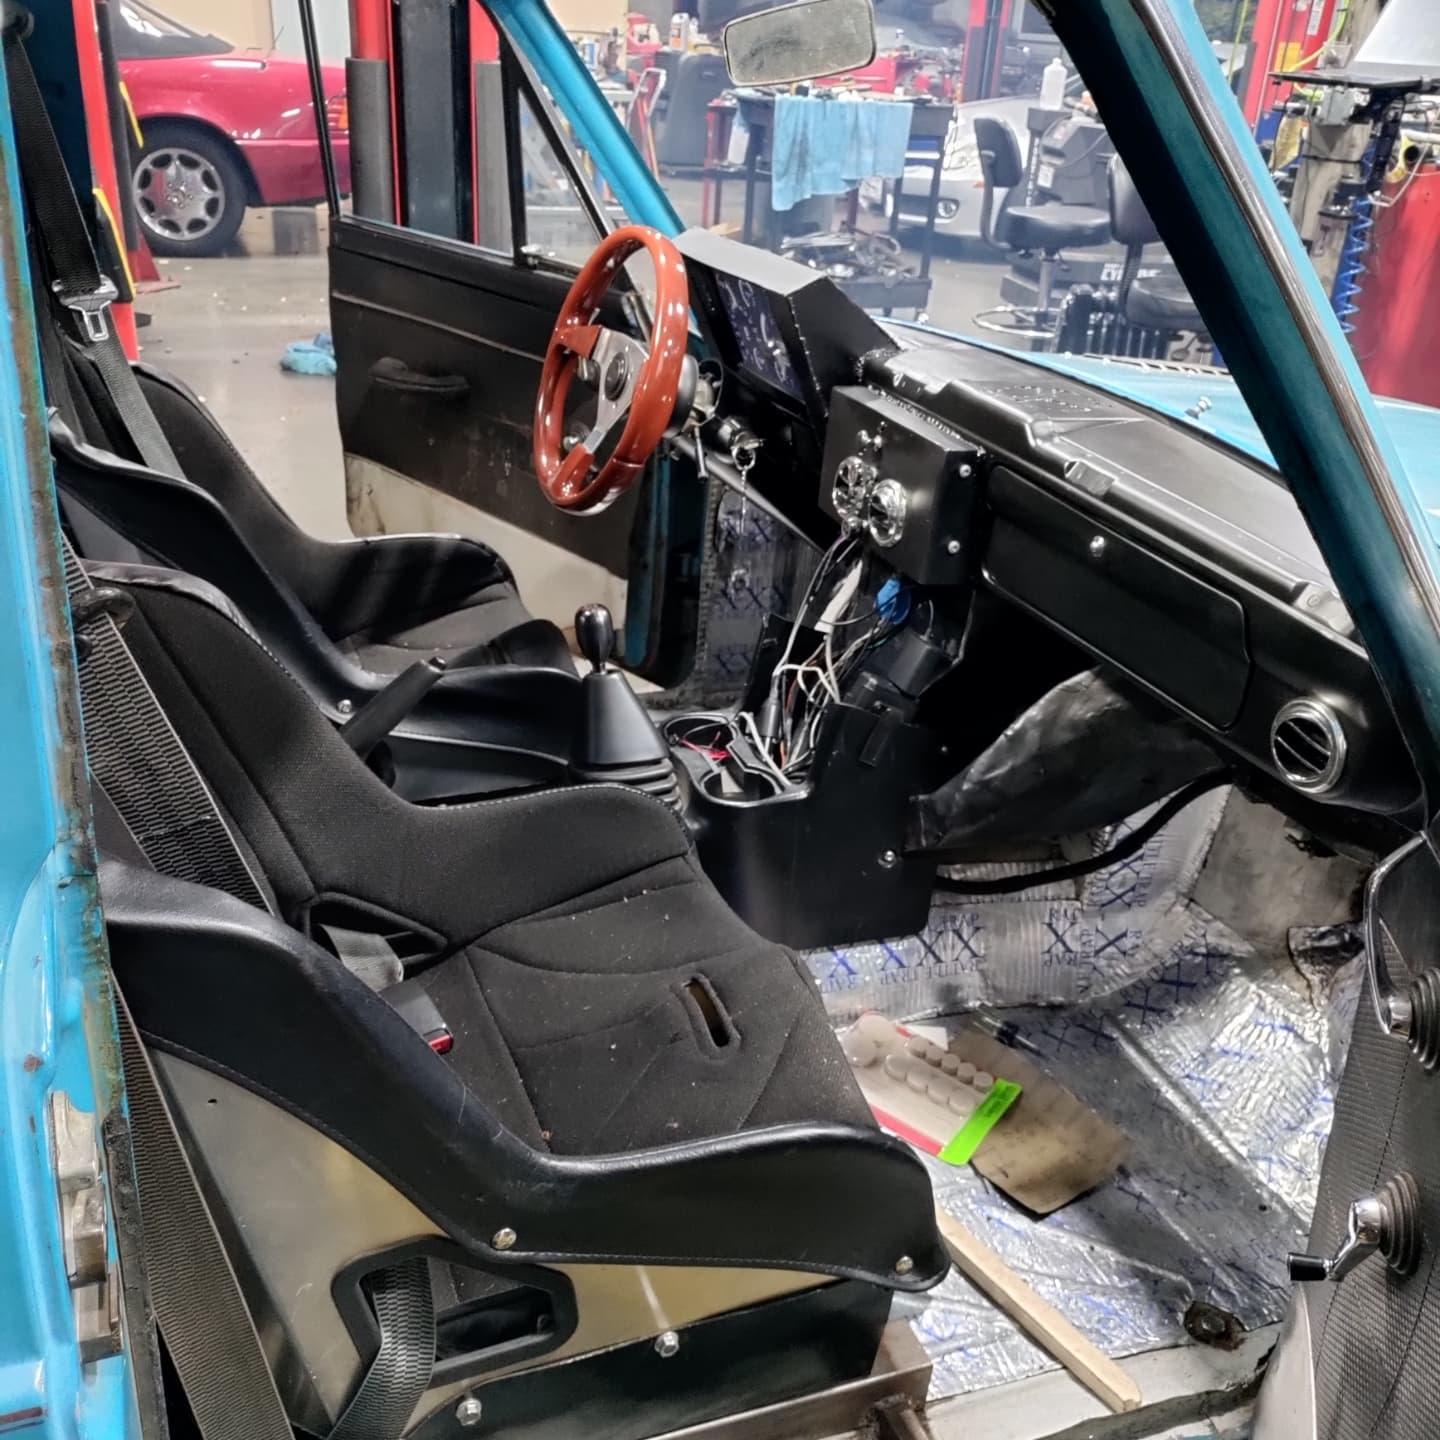
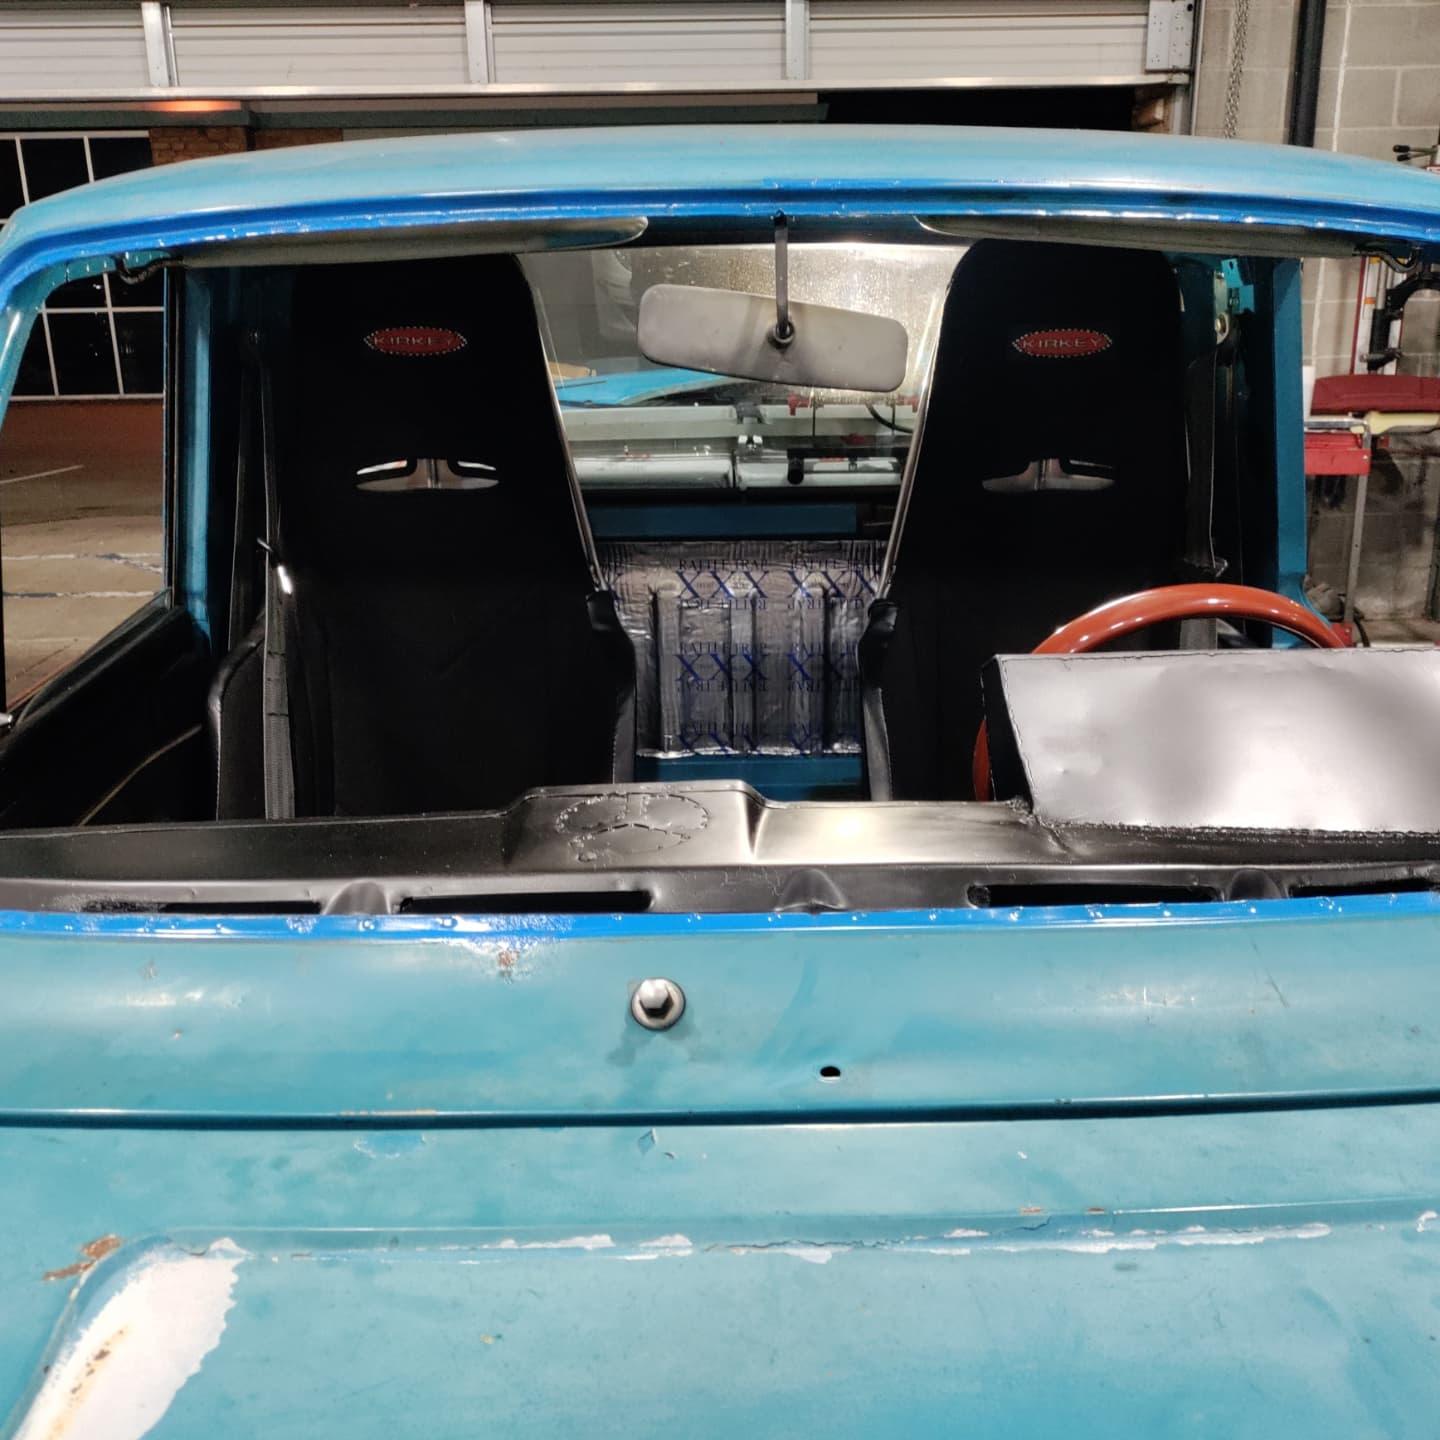
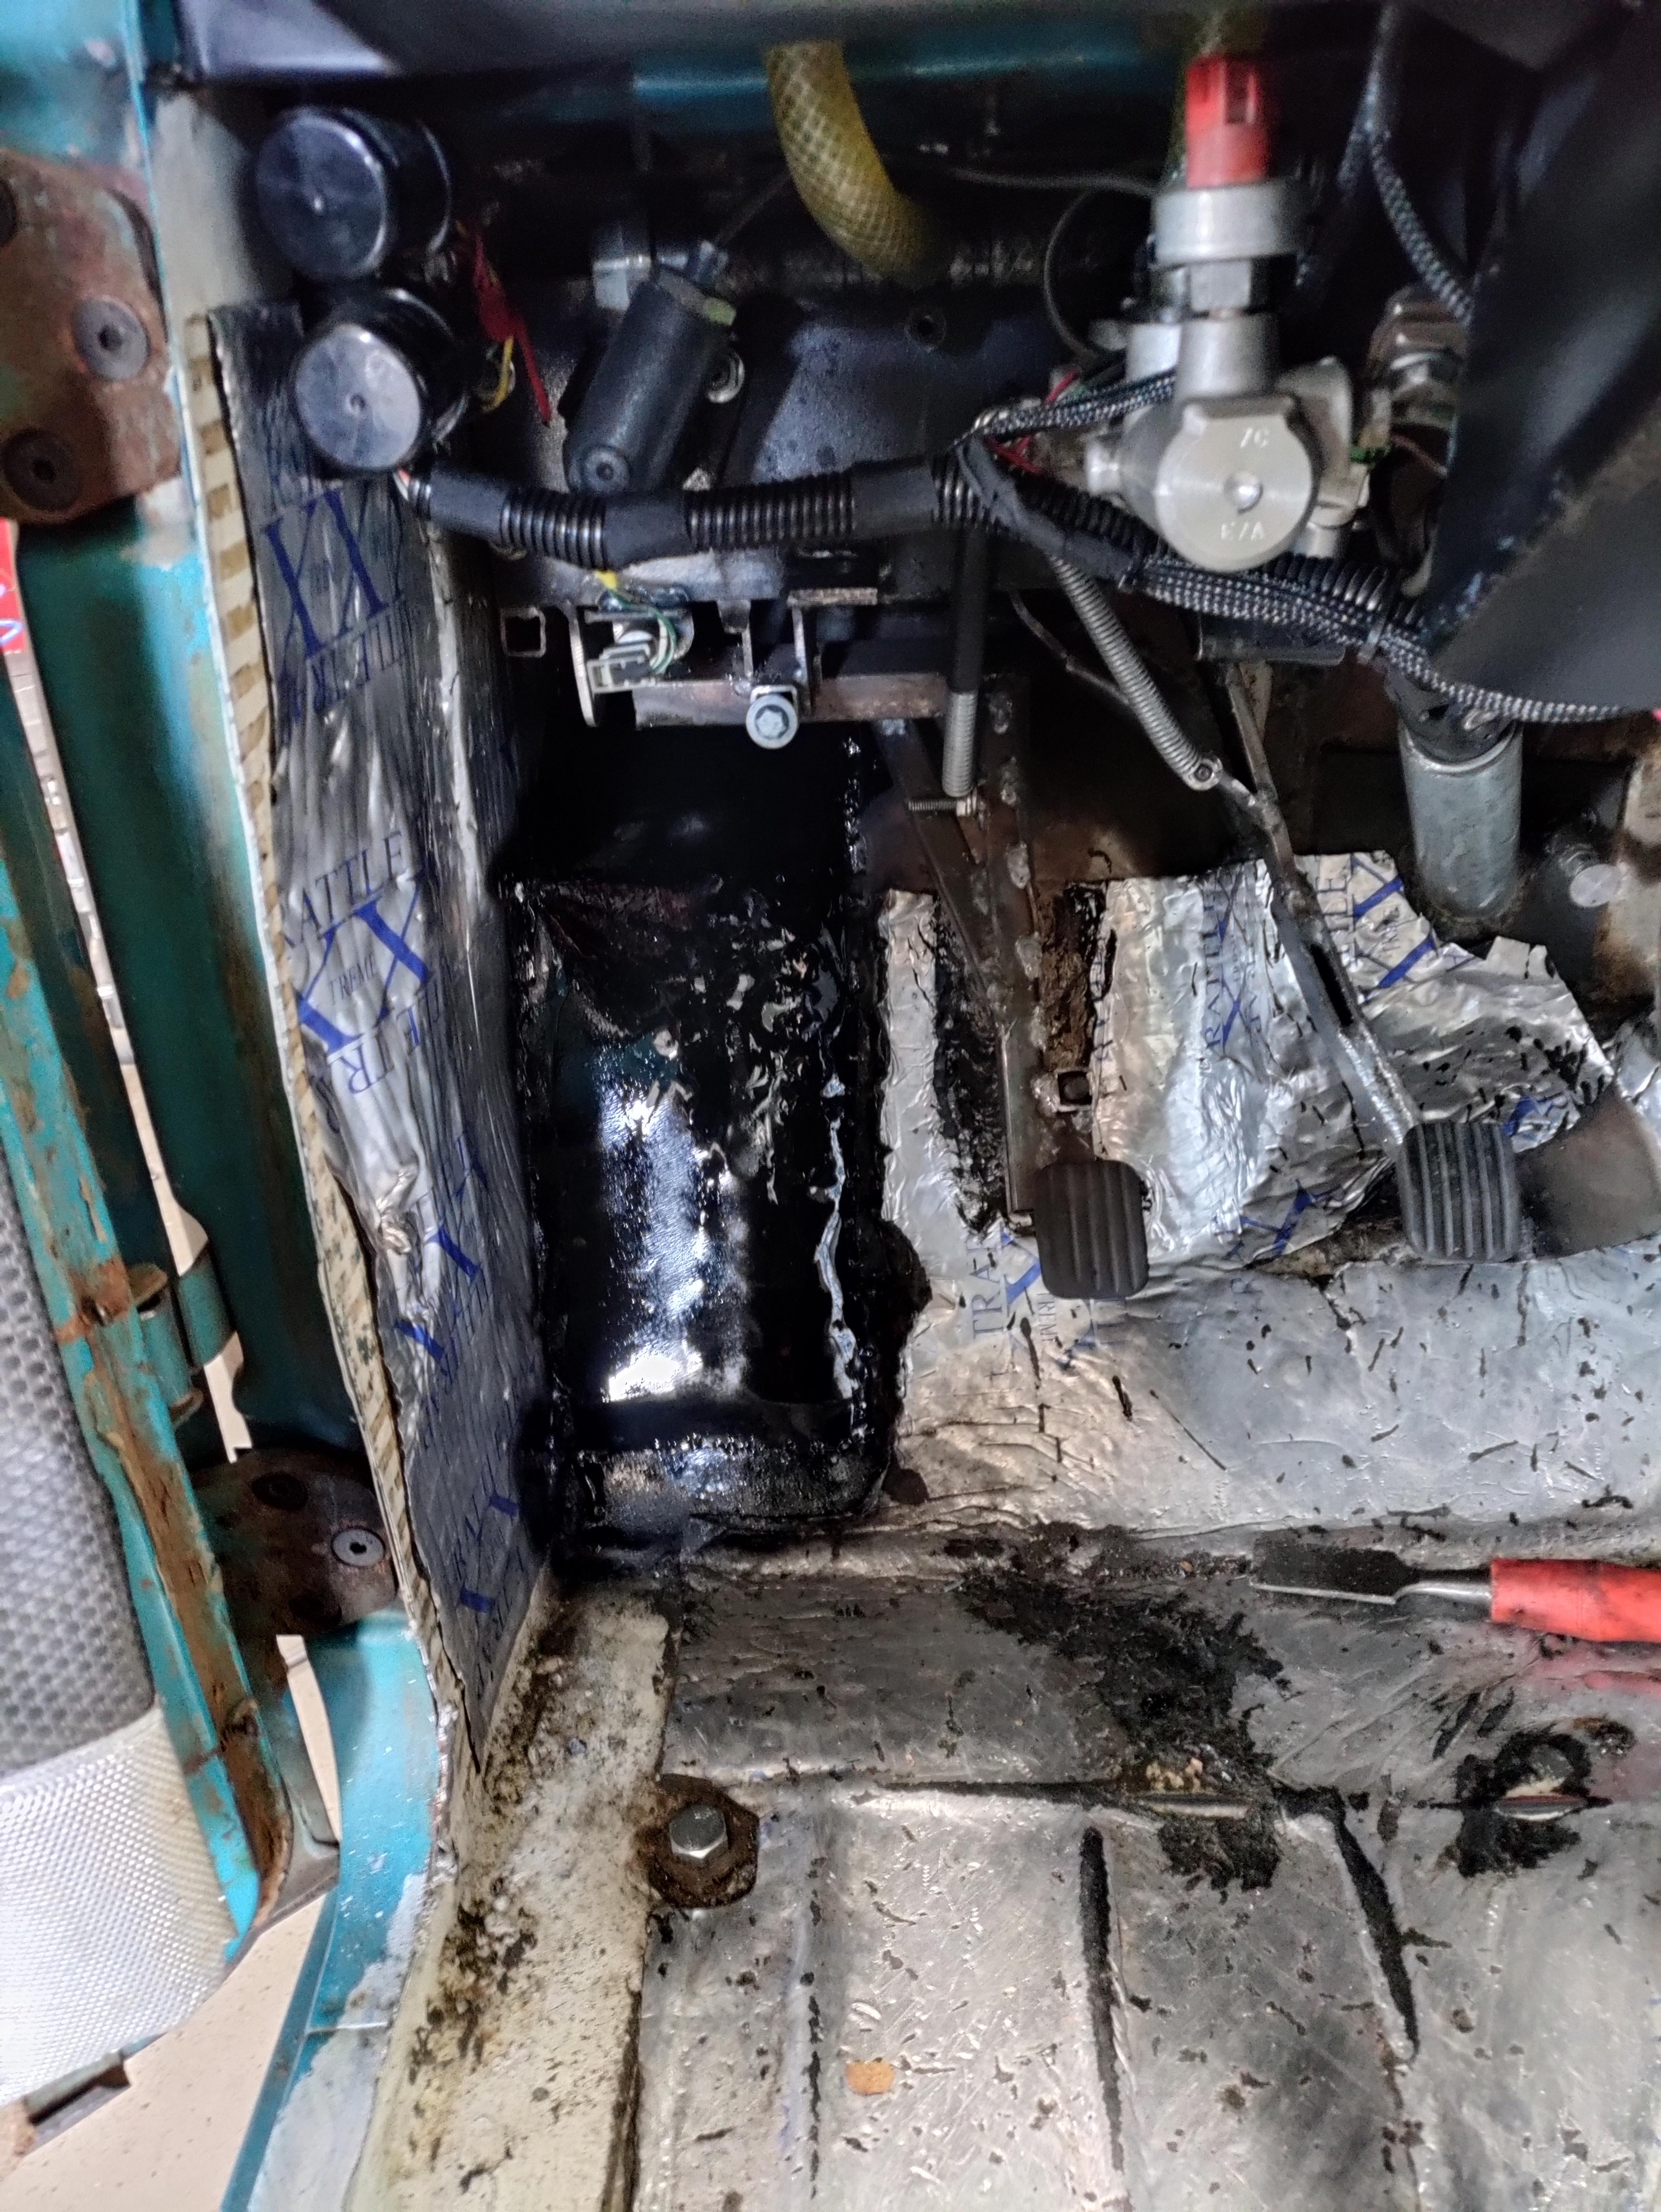
I shifted focus from suspension to the dash this weekend. After a very very long time trying to figure out how to secure my tablet cluster my brother had the awesome idea to use a push to open latch and have it fold down and just pull the tablet out of the front through the steering wheel. it needs to be a reasonably quick release to access to my brake/clutch reservoir and to remove the tablet for charging and anti-theft.

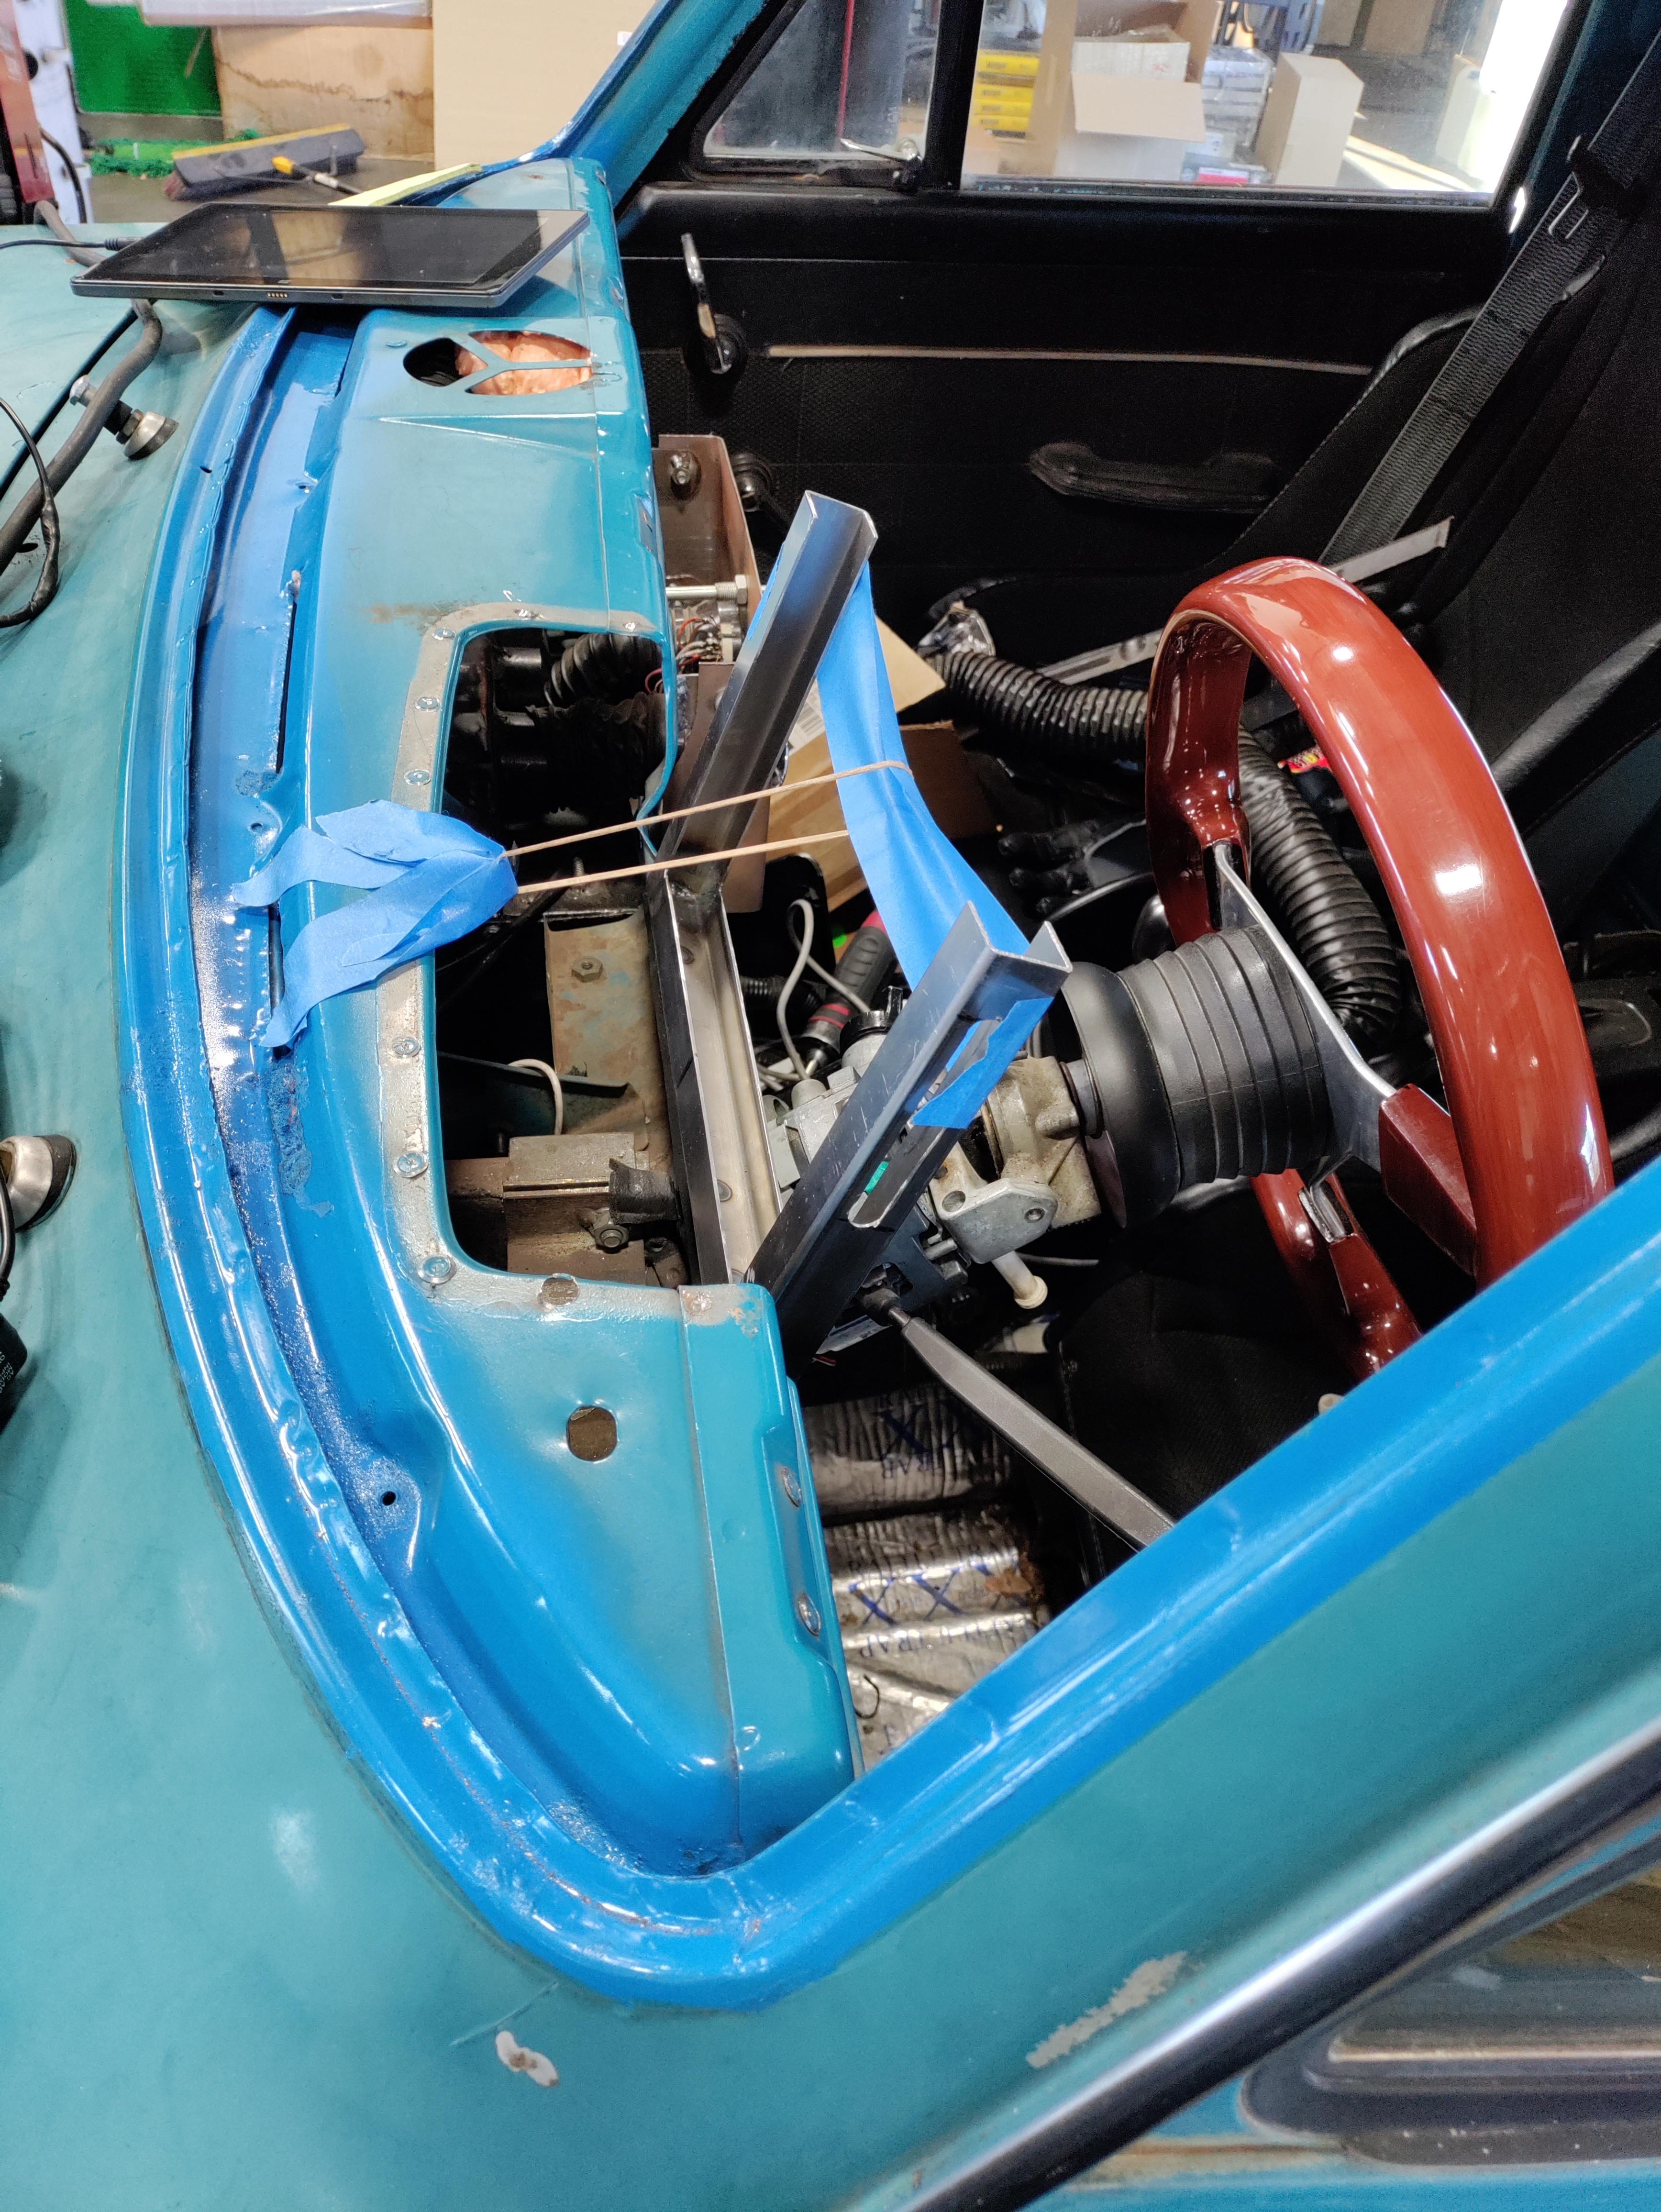


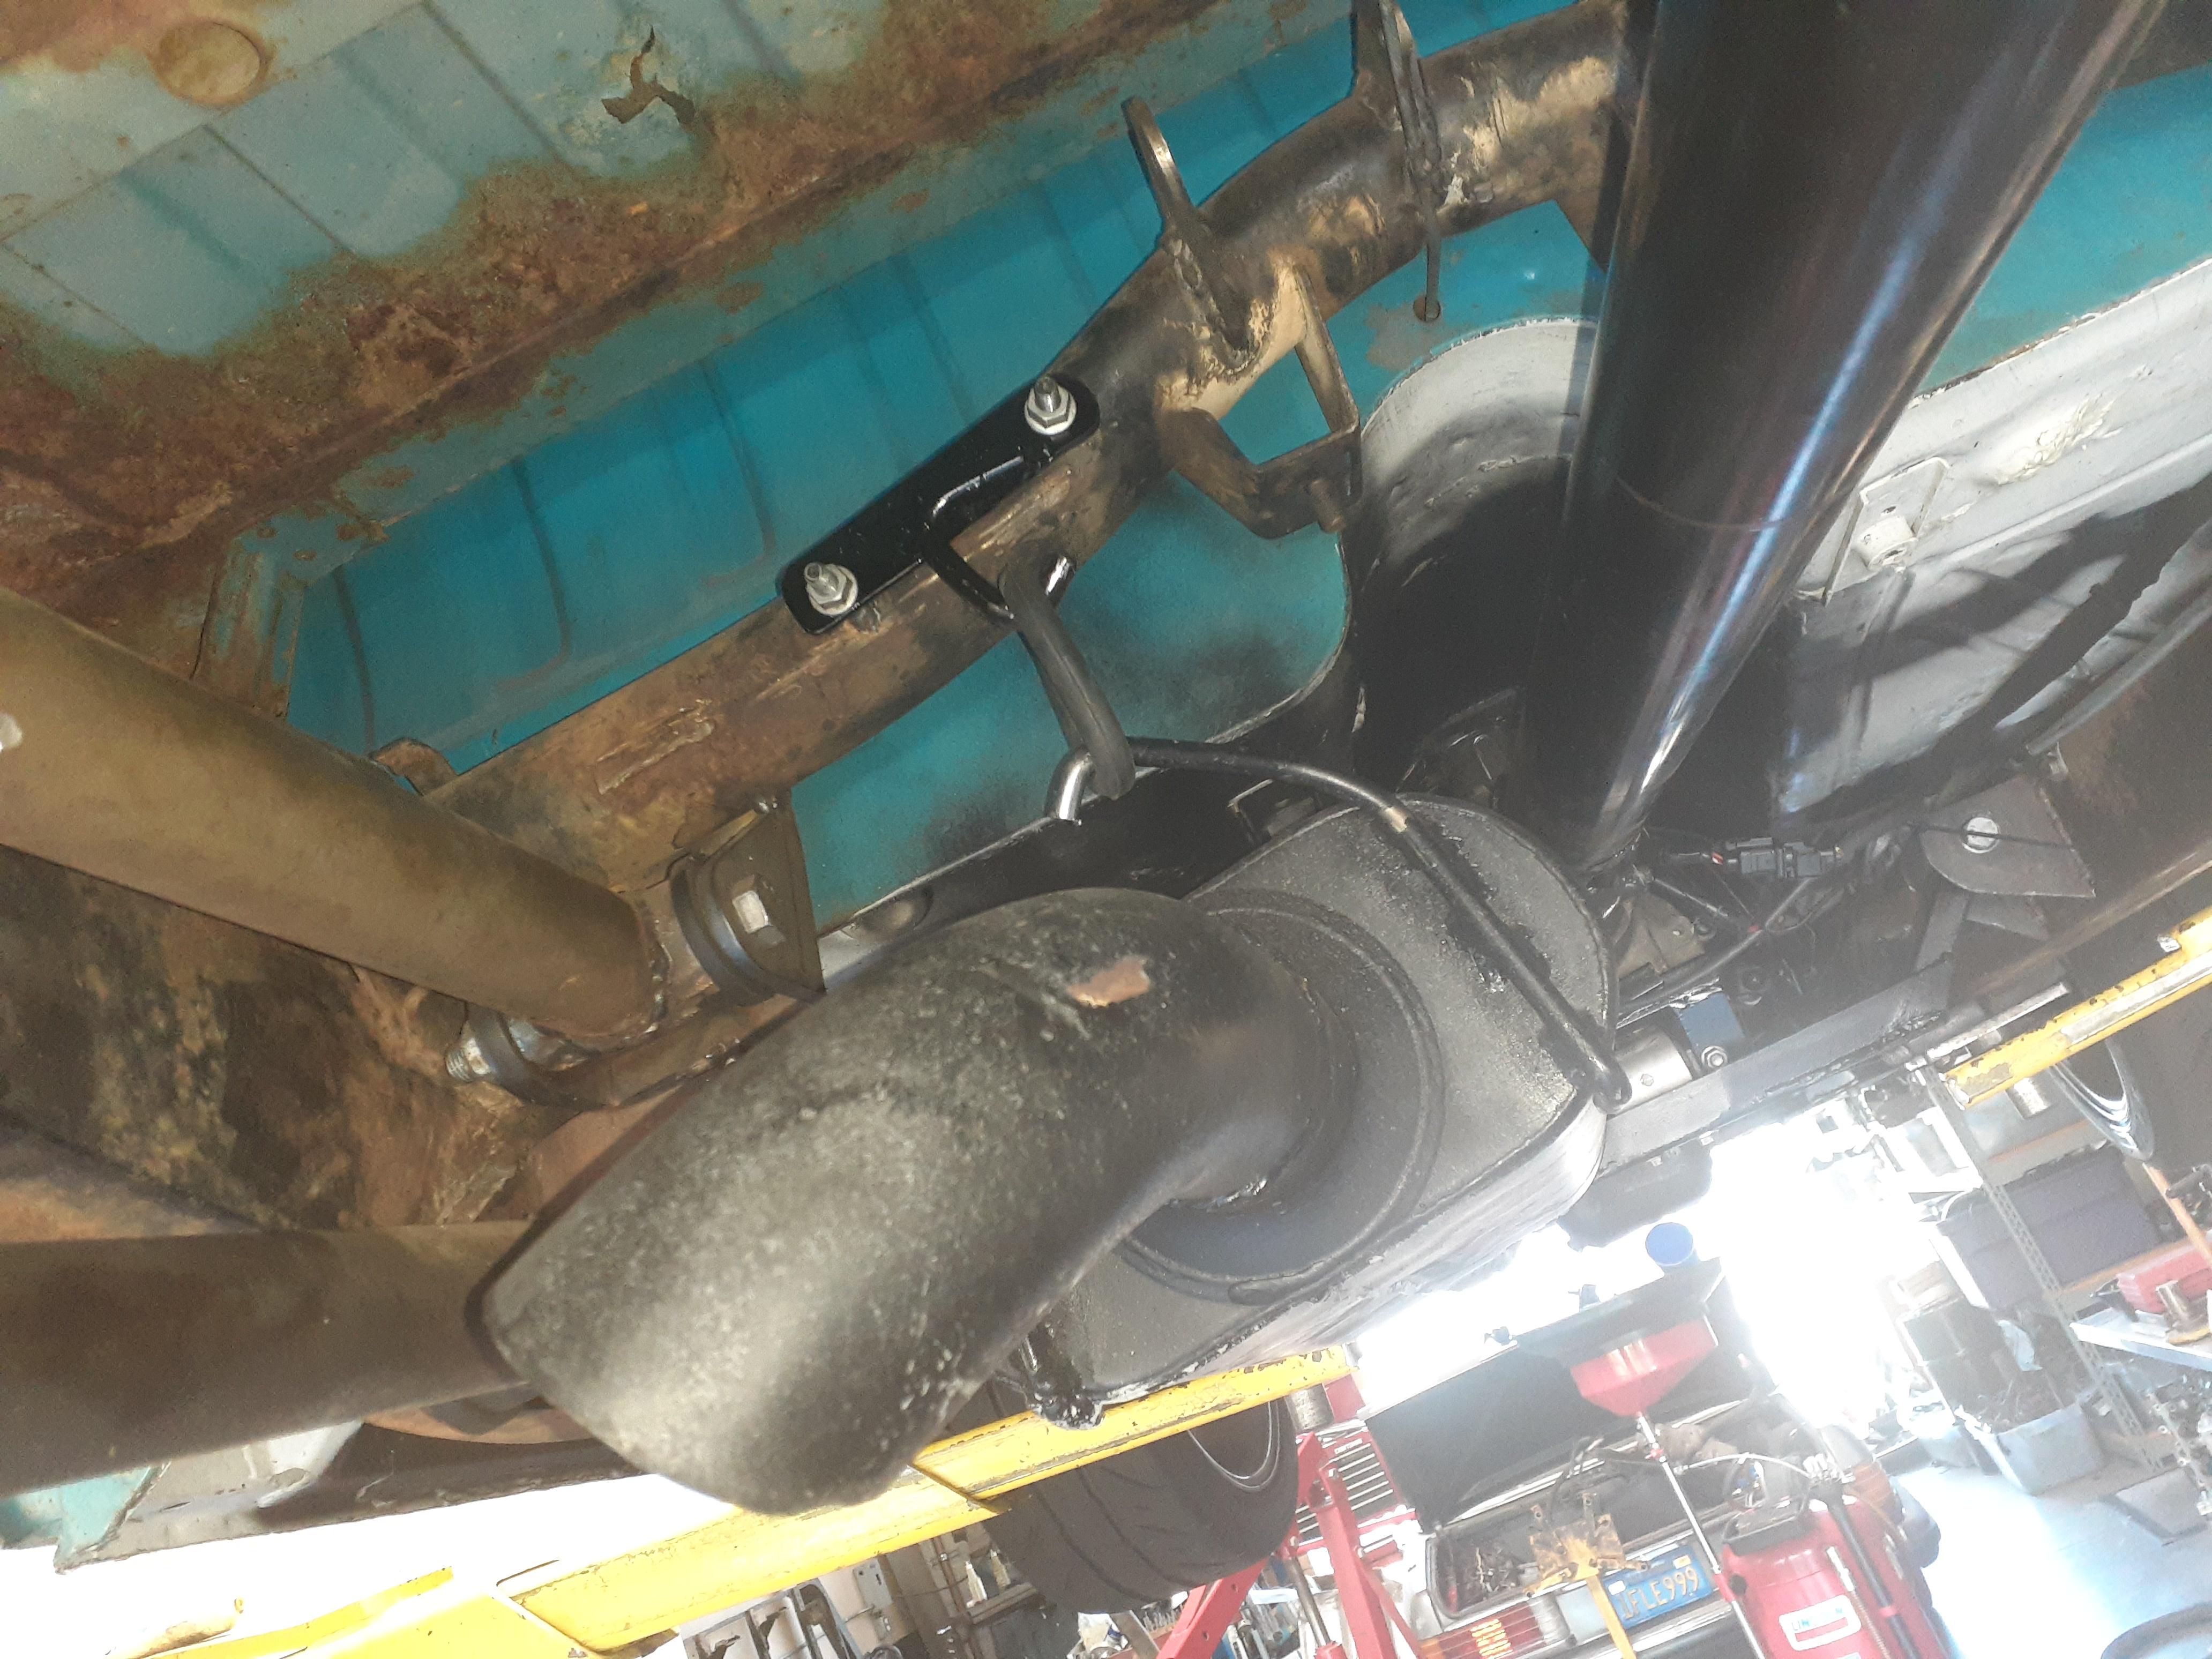
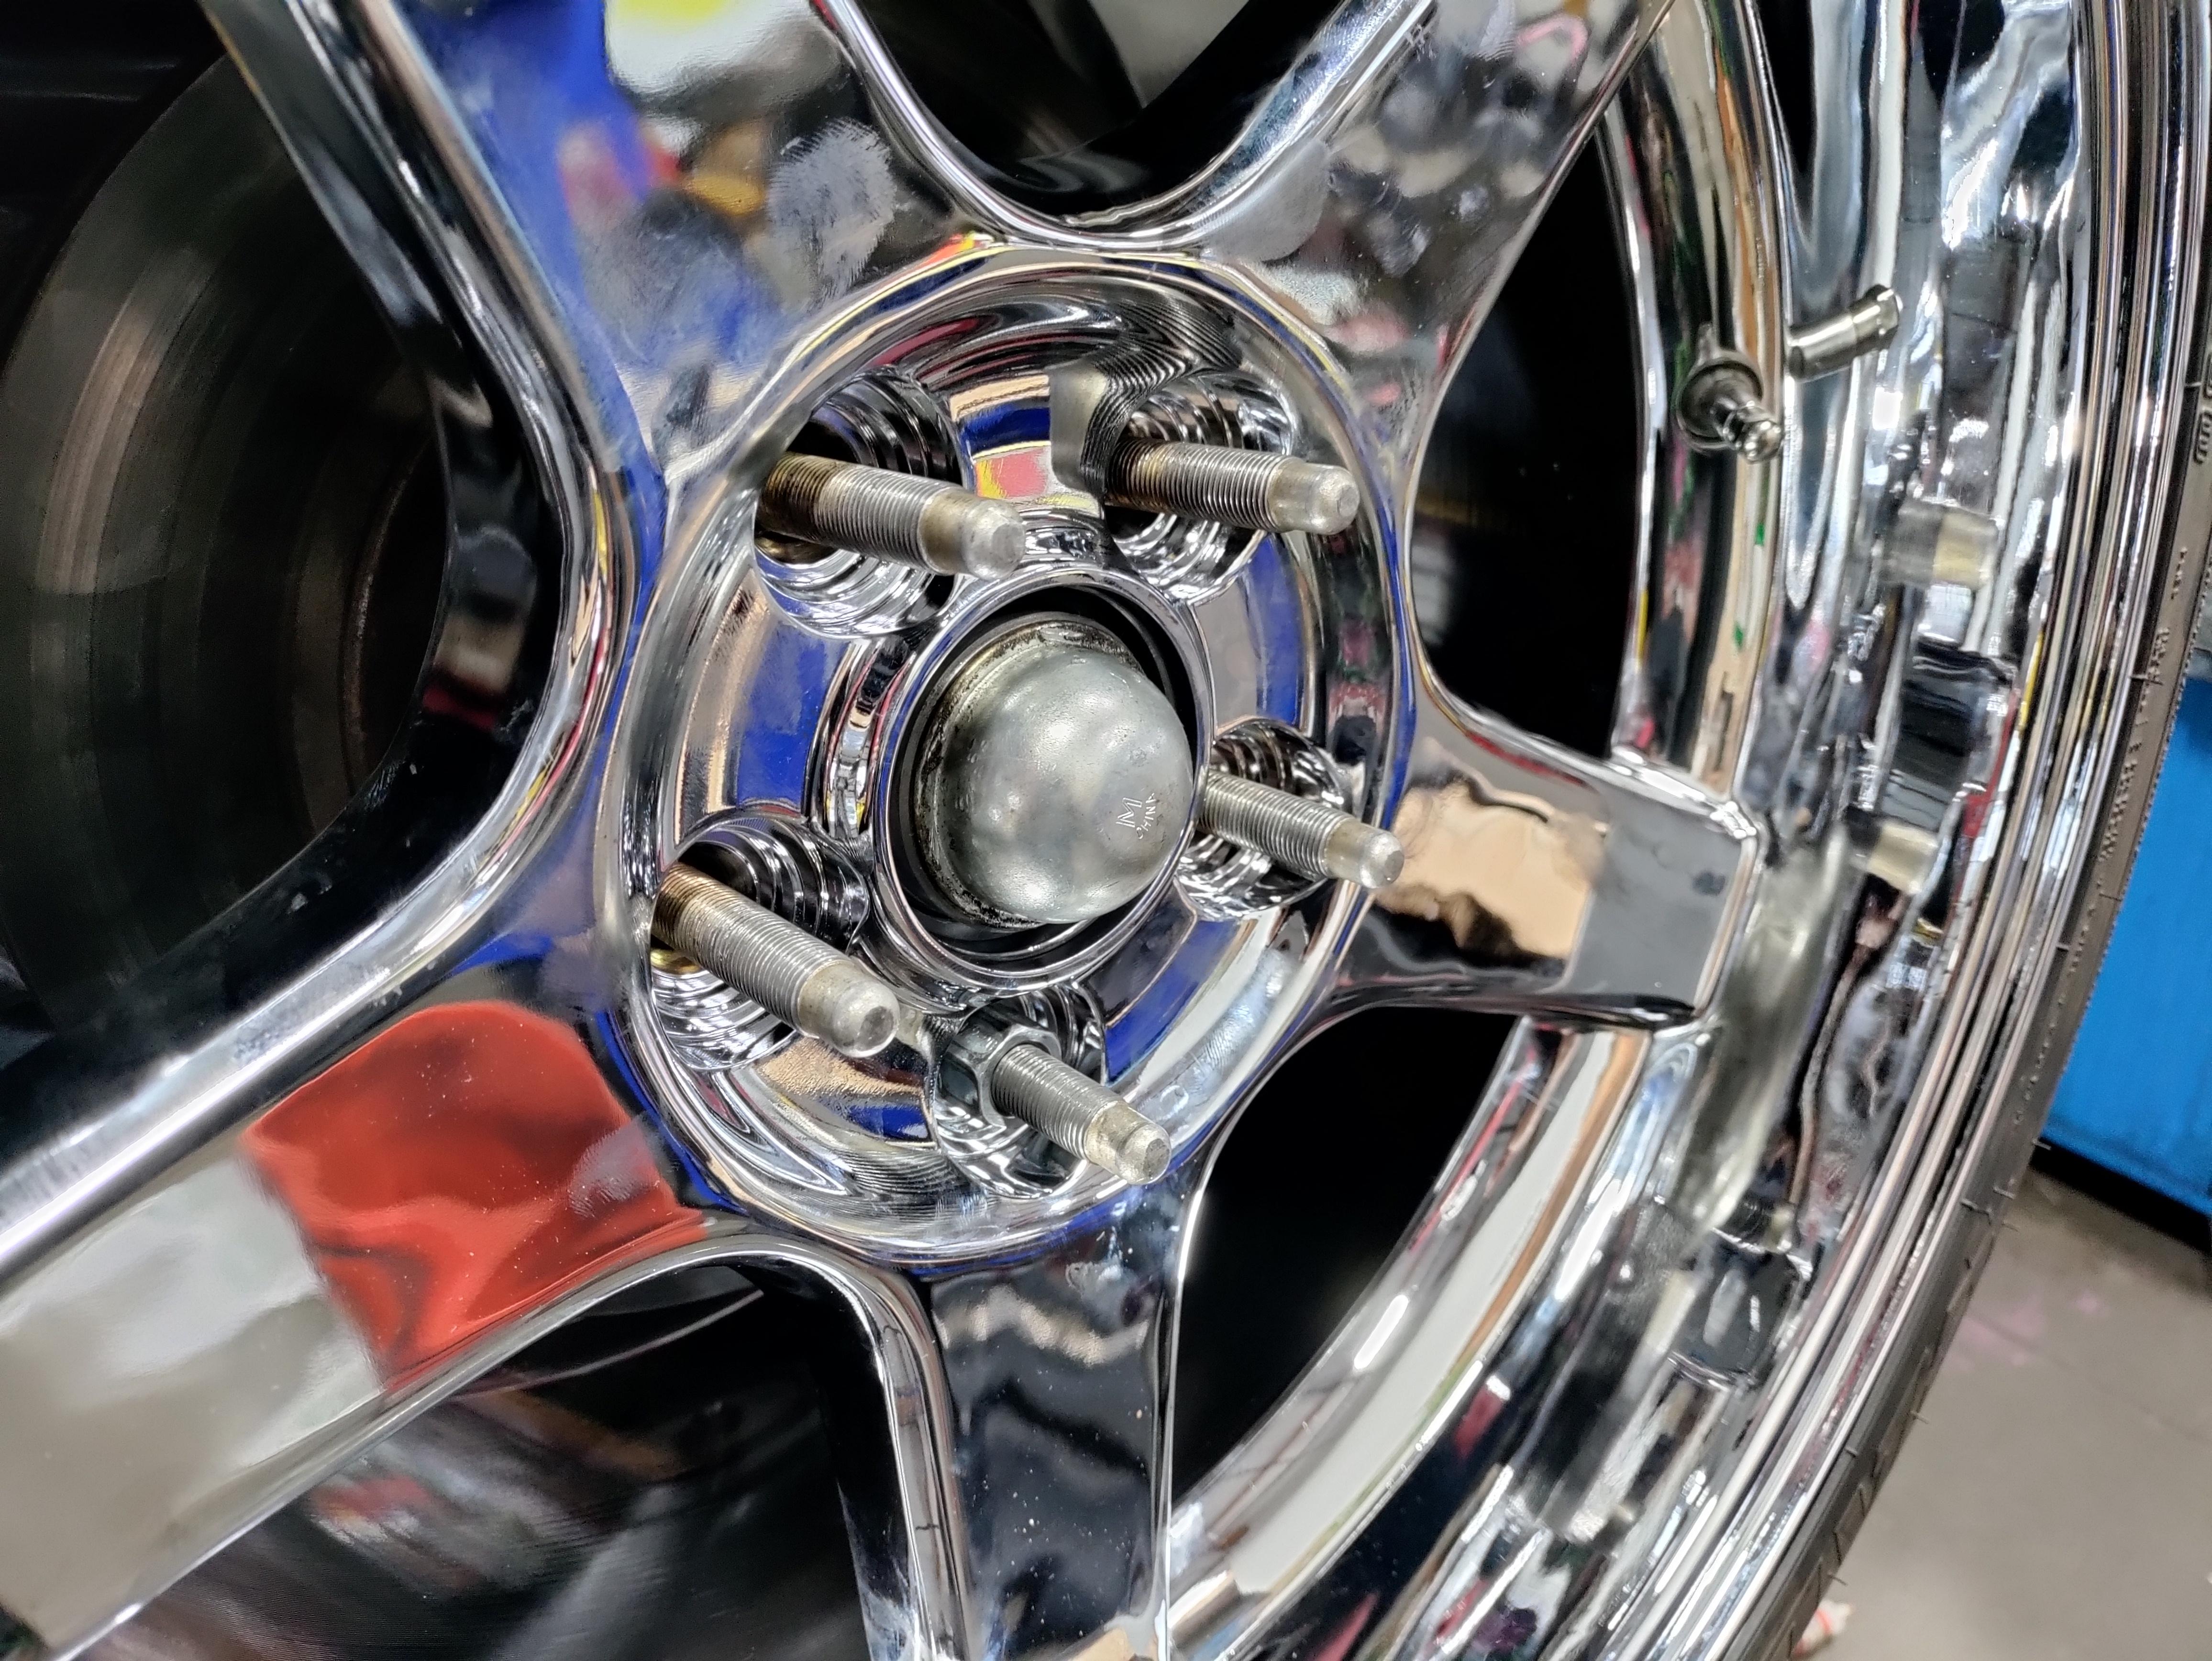
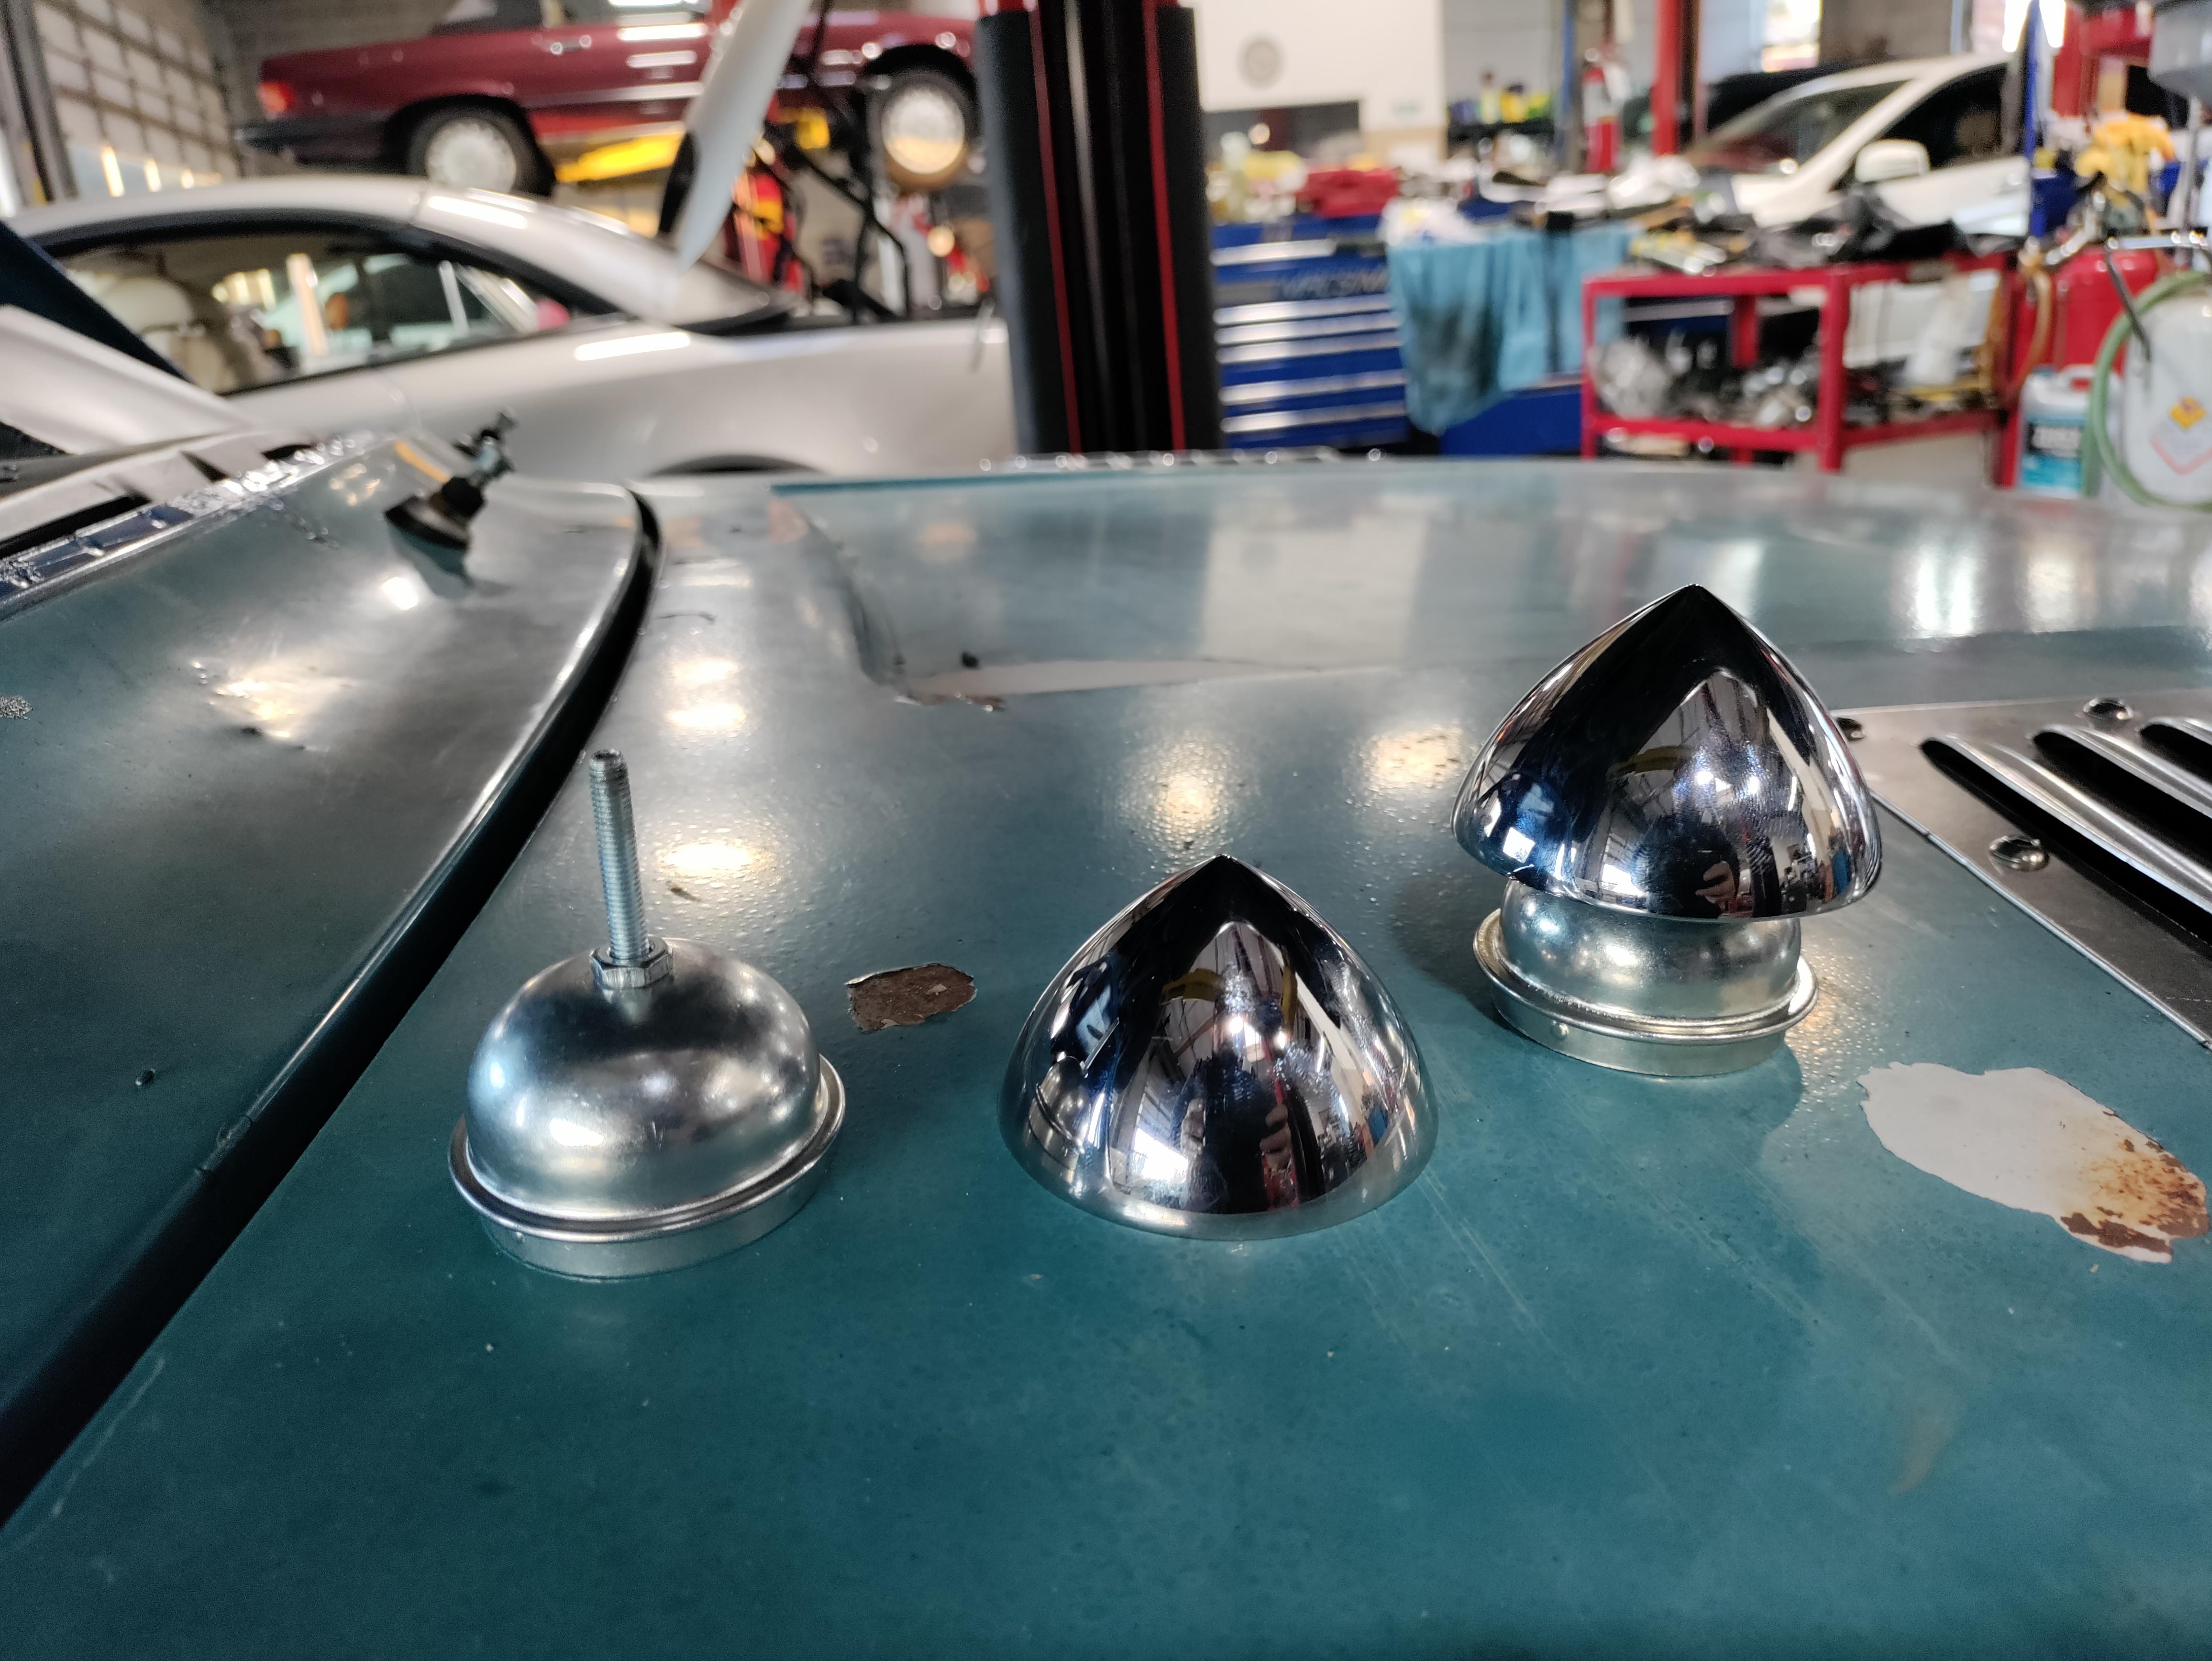
I also got my new bullet center caps
I also got my new bullet center caps
Reply
0
0
01-12-2022, 11:04 AM
#217
Senior Member
Thread Starter
Join Date: Jan 2011
Location: sacramento ,ca
Posts: 568
Total Cats: 162
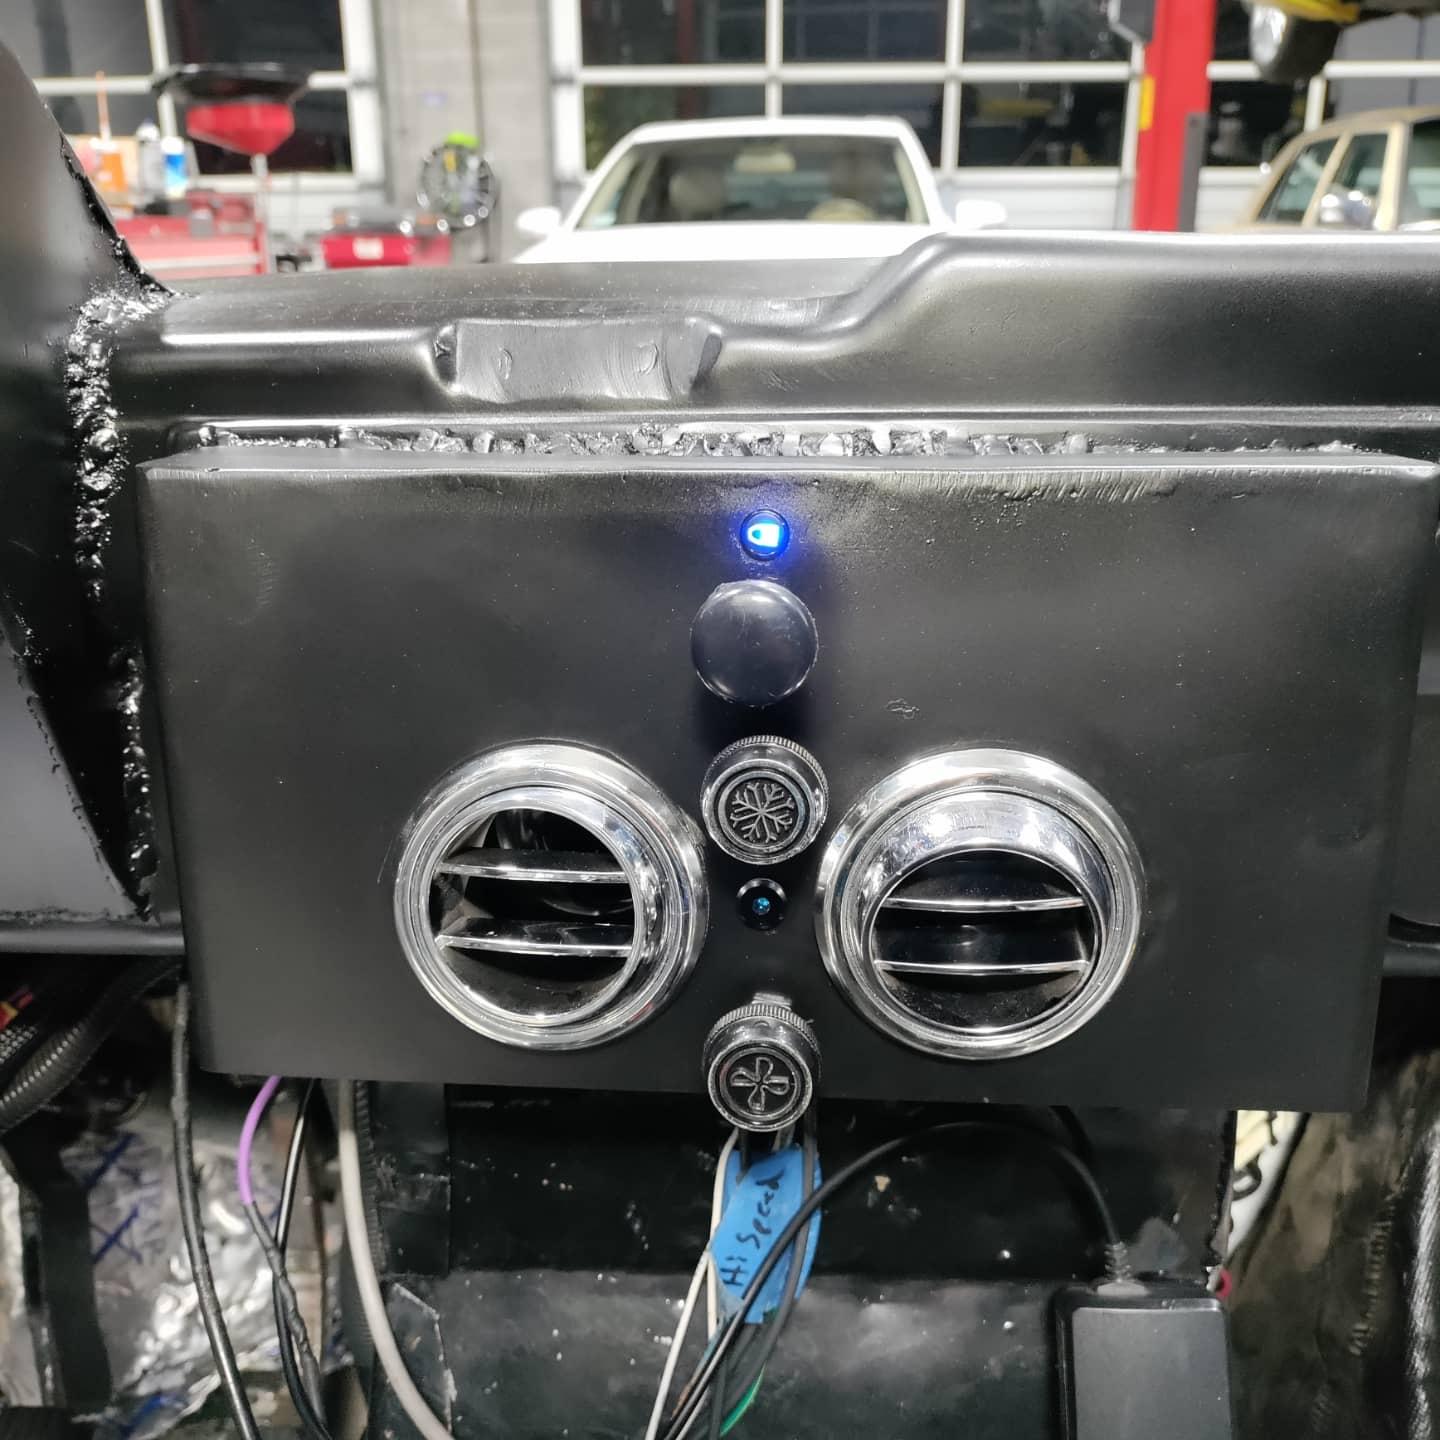
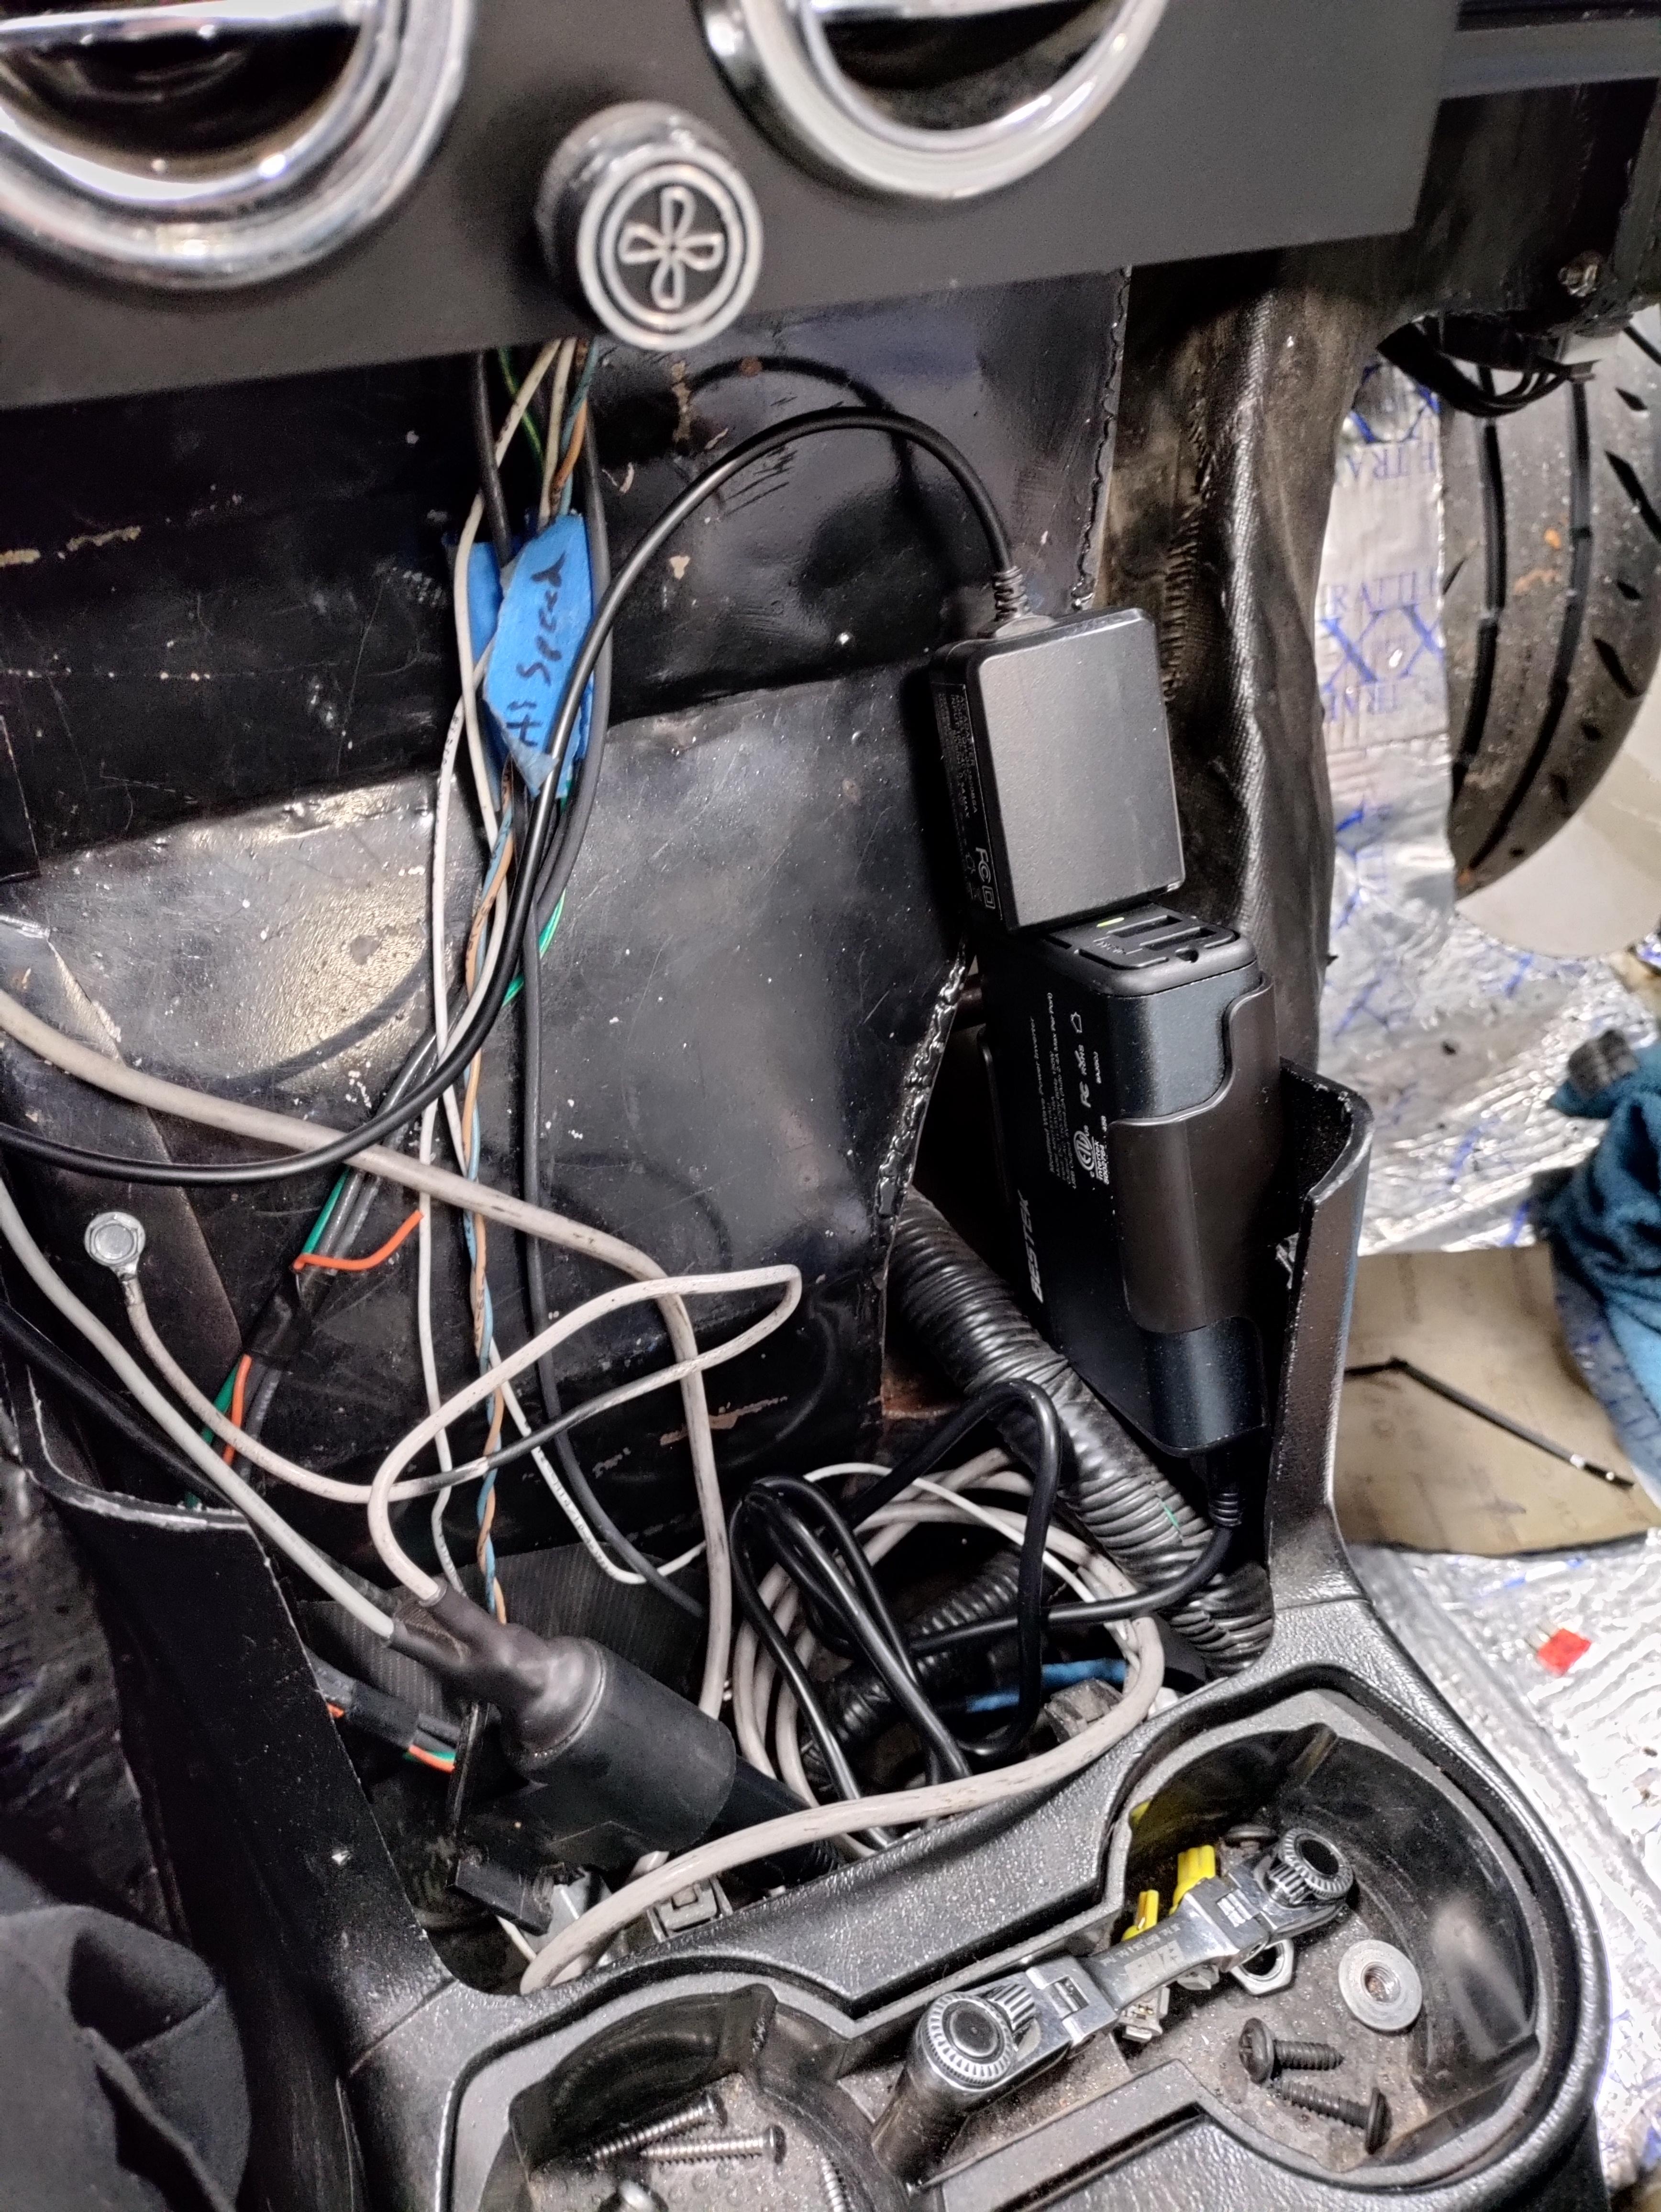
dash is painted, headlight switch and indicator is moved to center vents, all I have left is to install turn signal indicators and figure out what I'm gonna do to connect the center vent to the center console.
Reply
0
0
01-31-2022, 12:29 AM
#218
Senior Member
Thread Starter
Join Date: Jan 2011
Location: sacramento ,ca
Posts: 568
Total Cats: 162
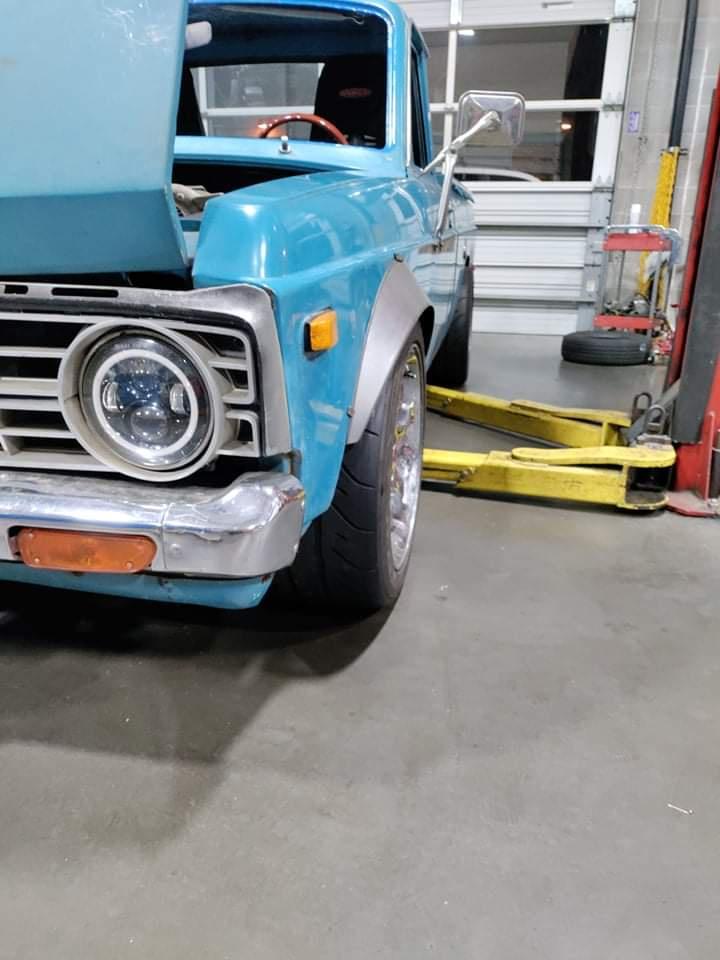
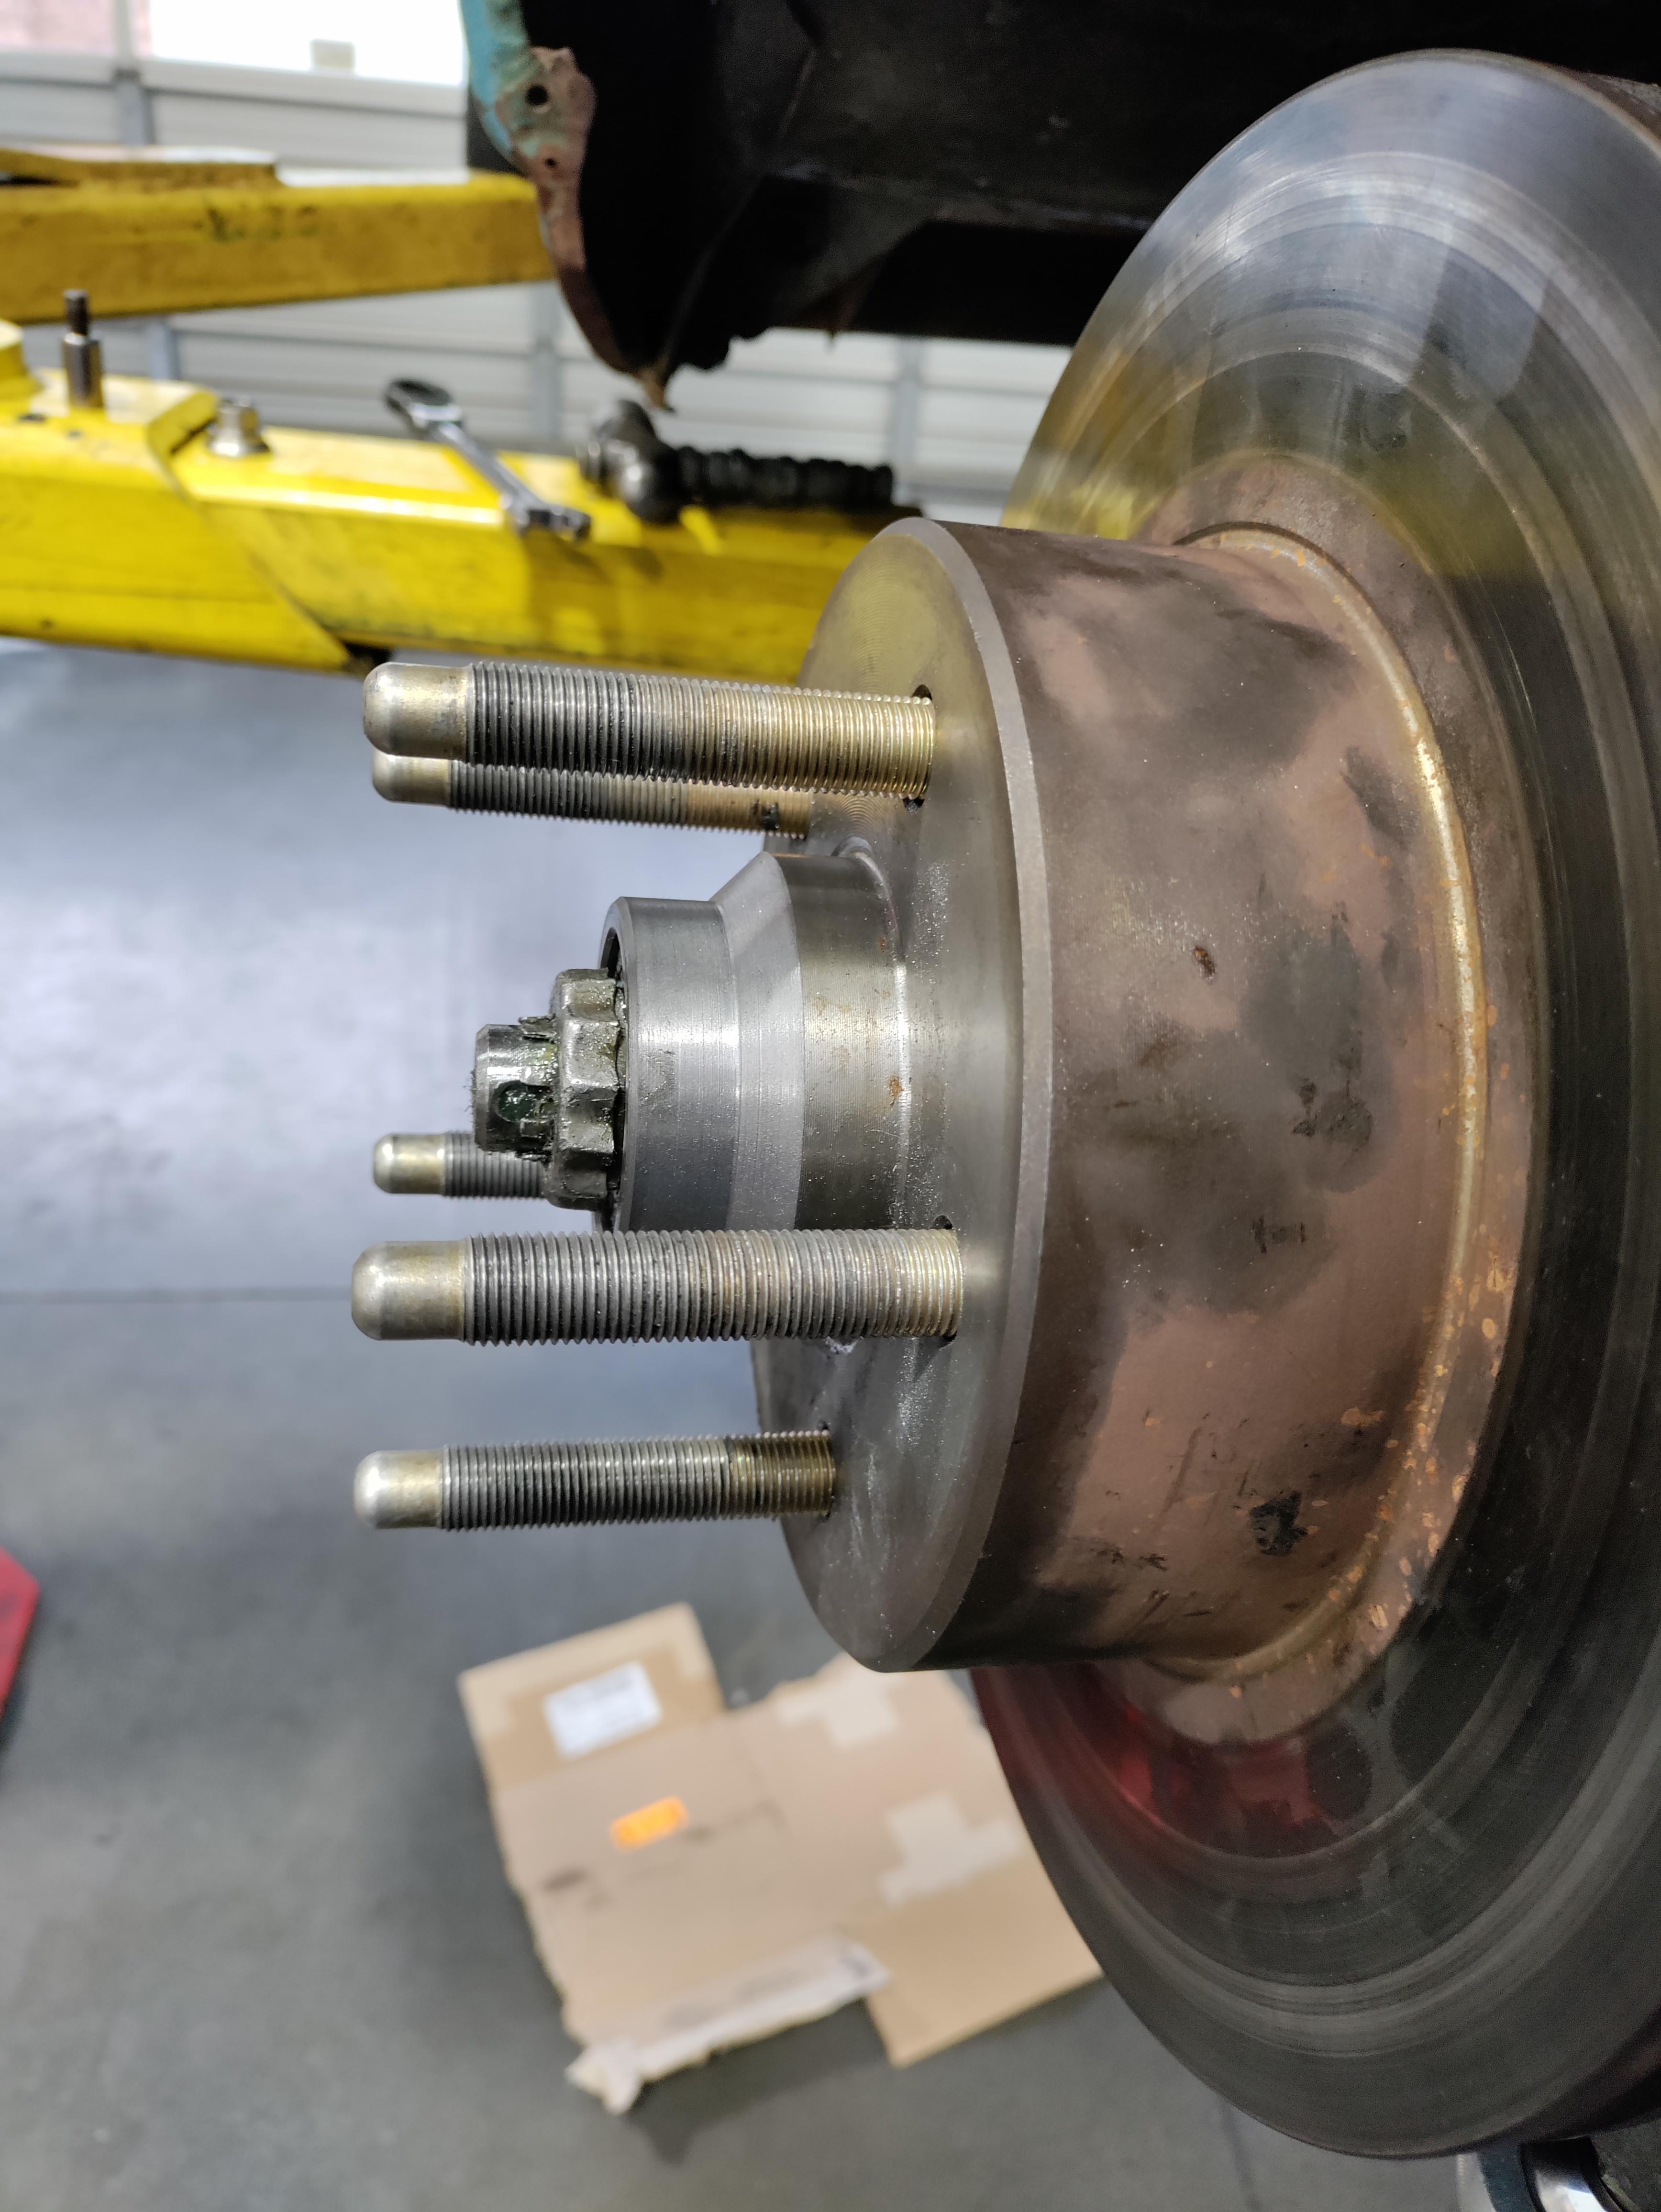
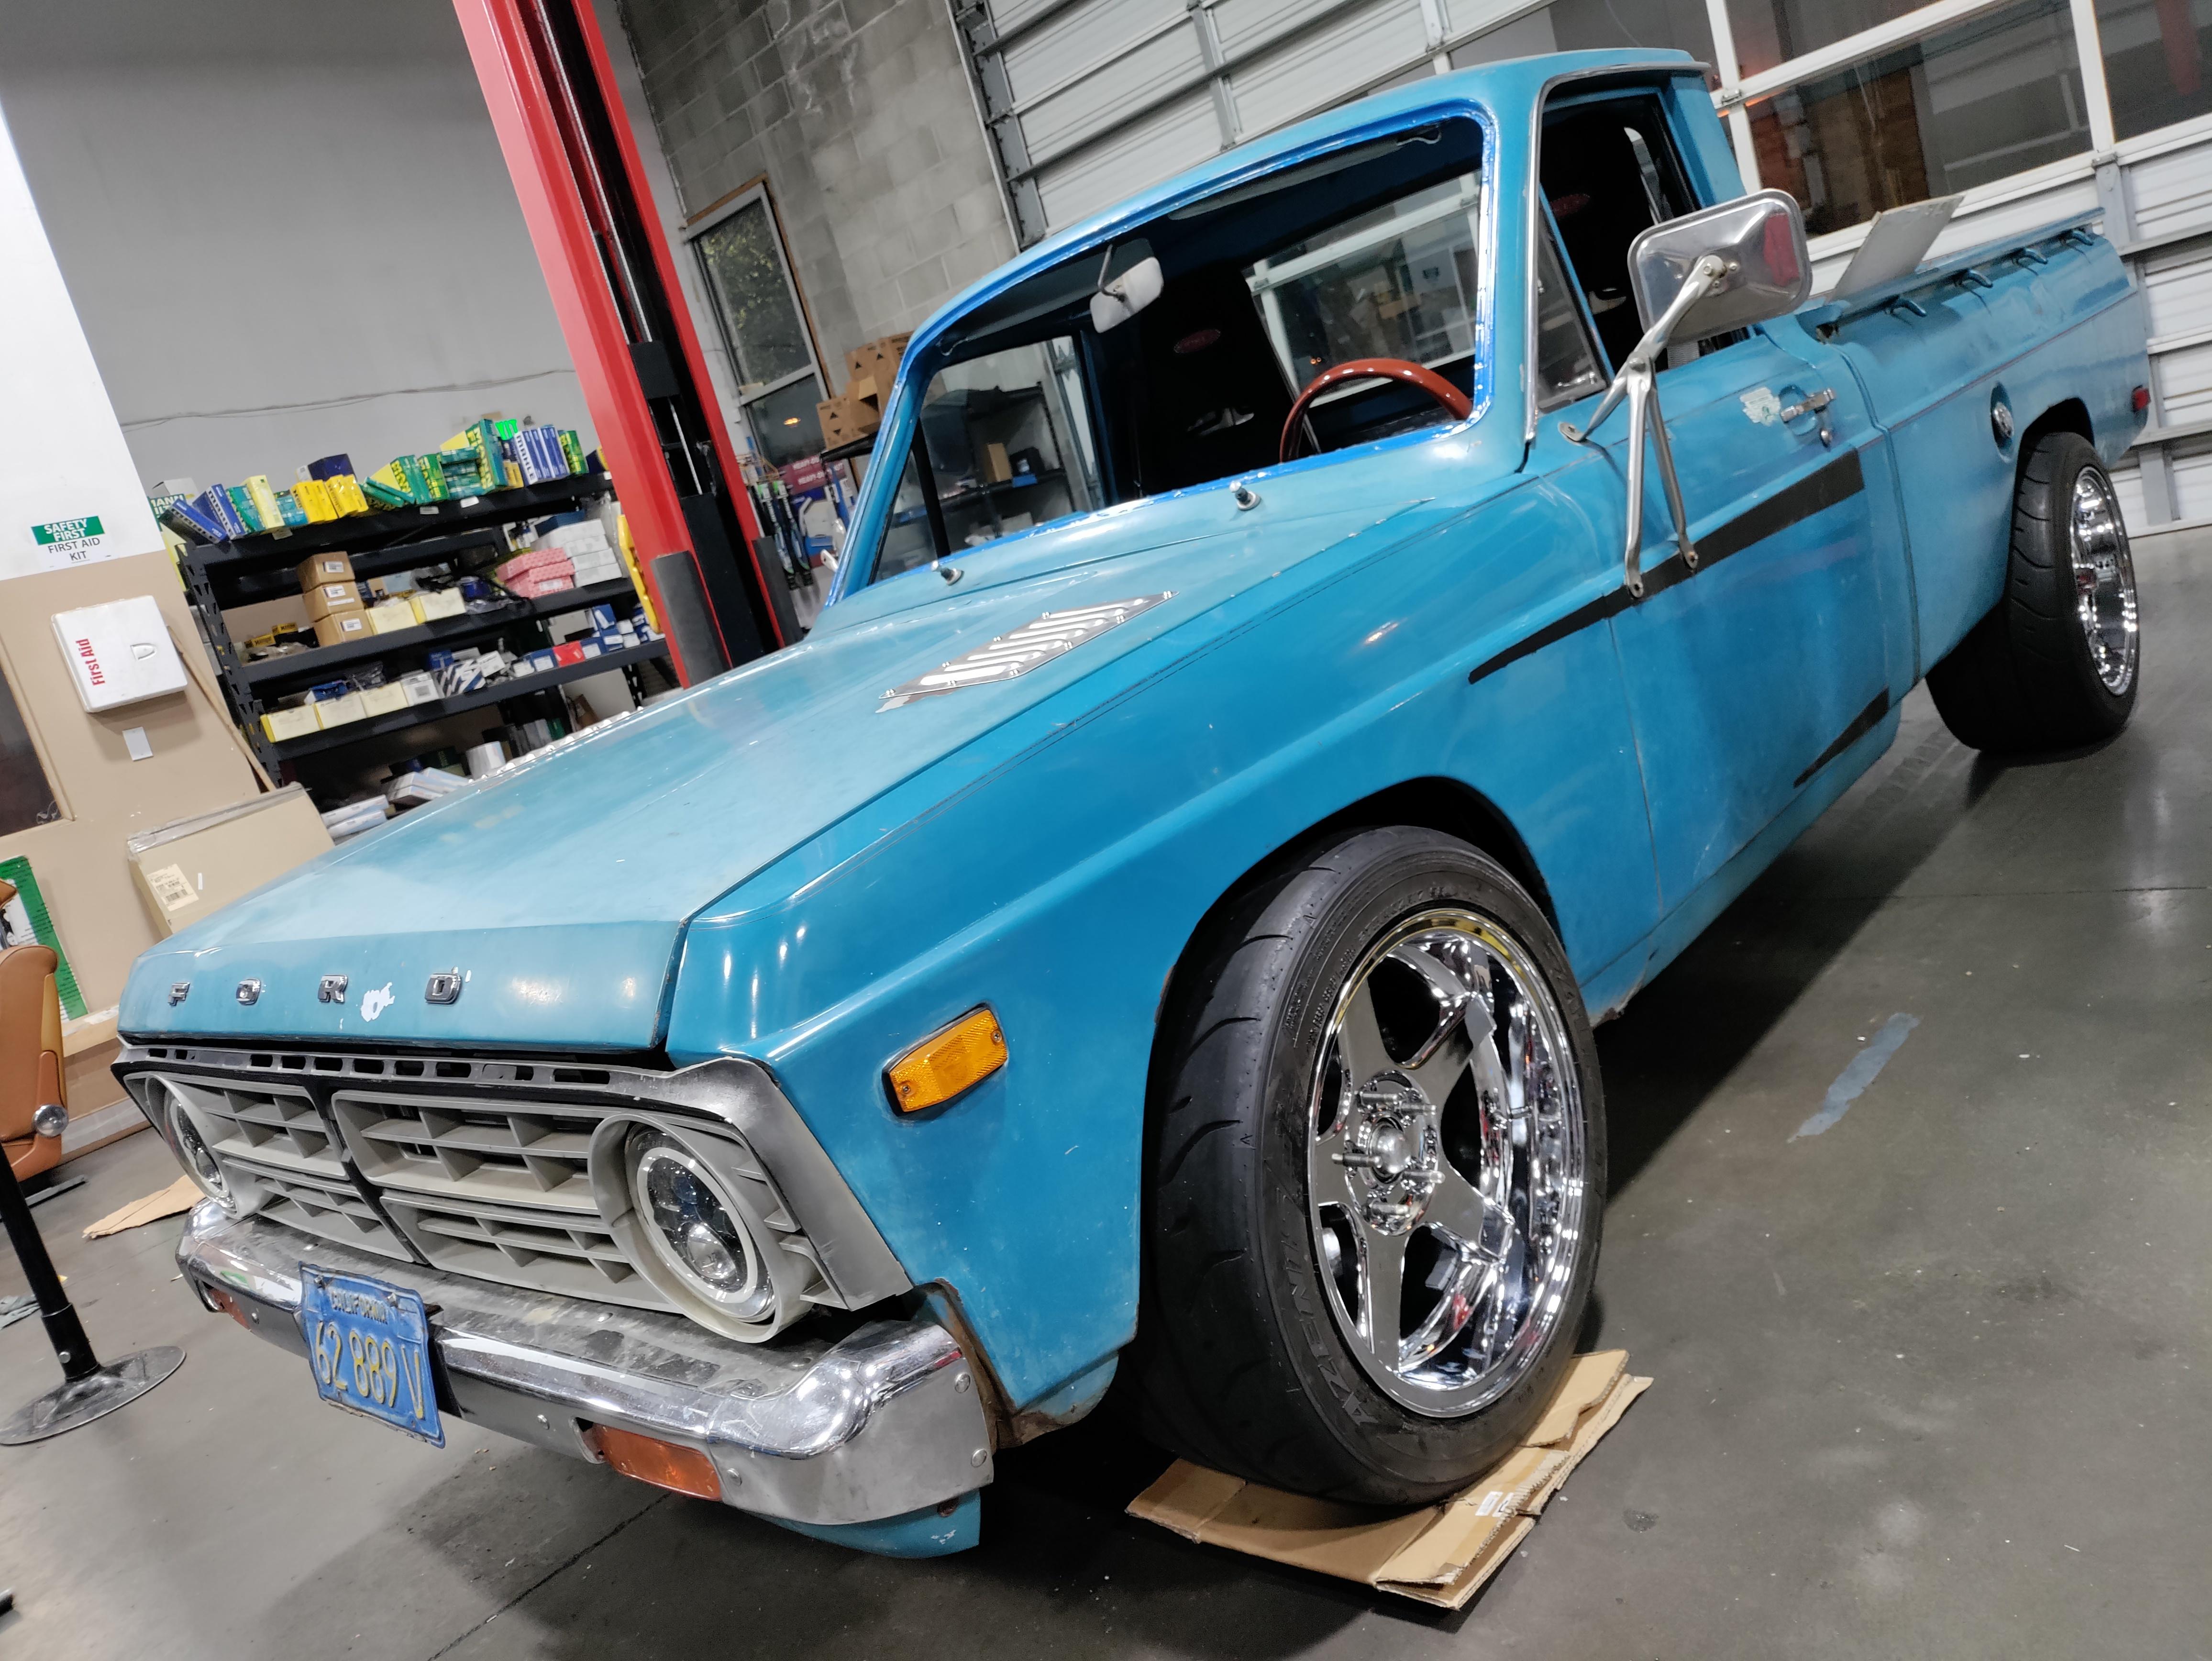
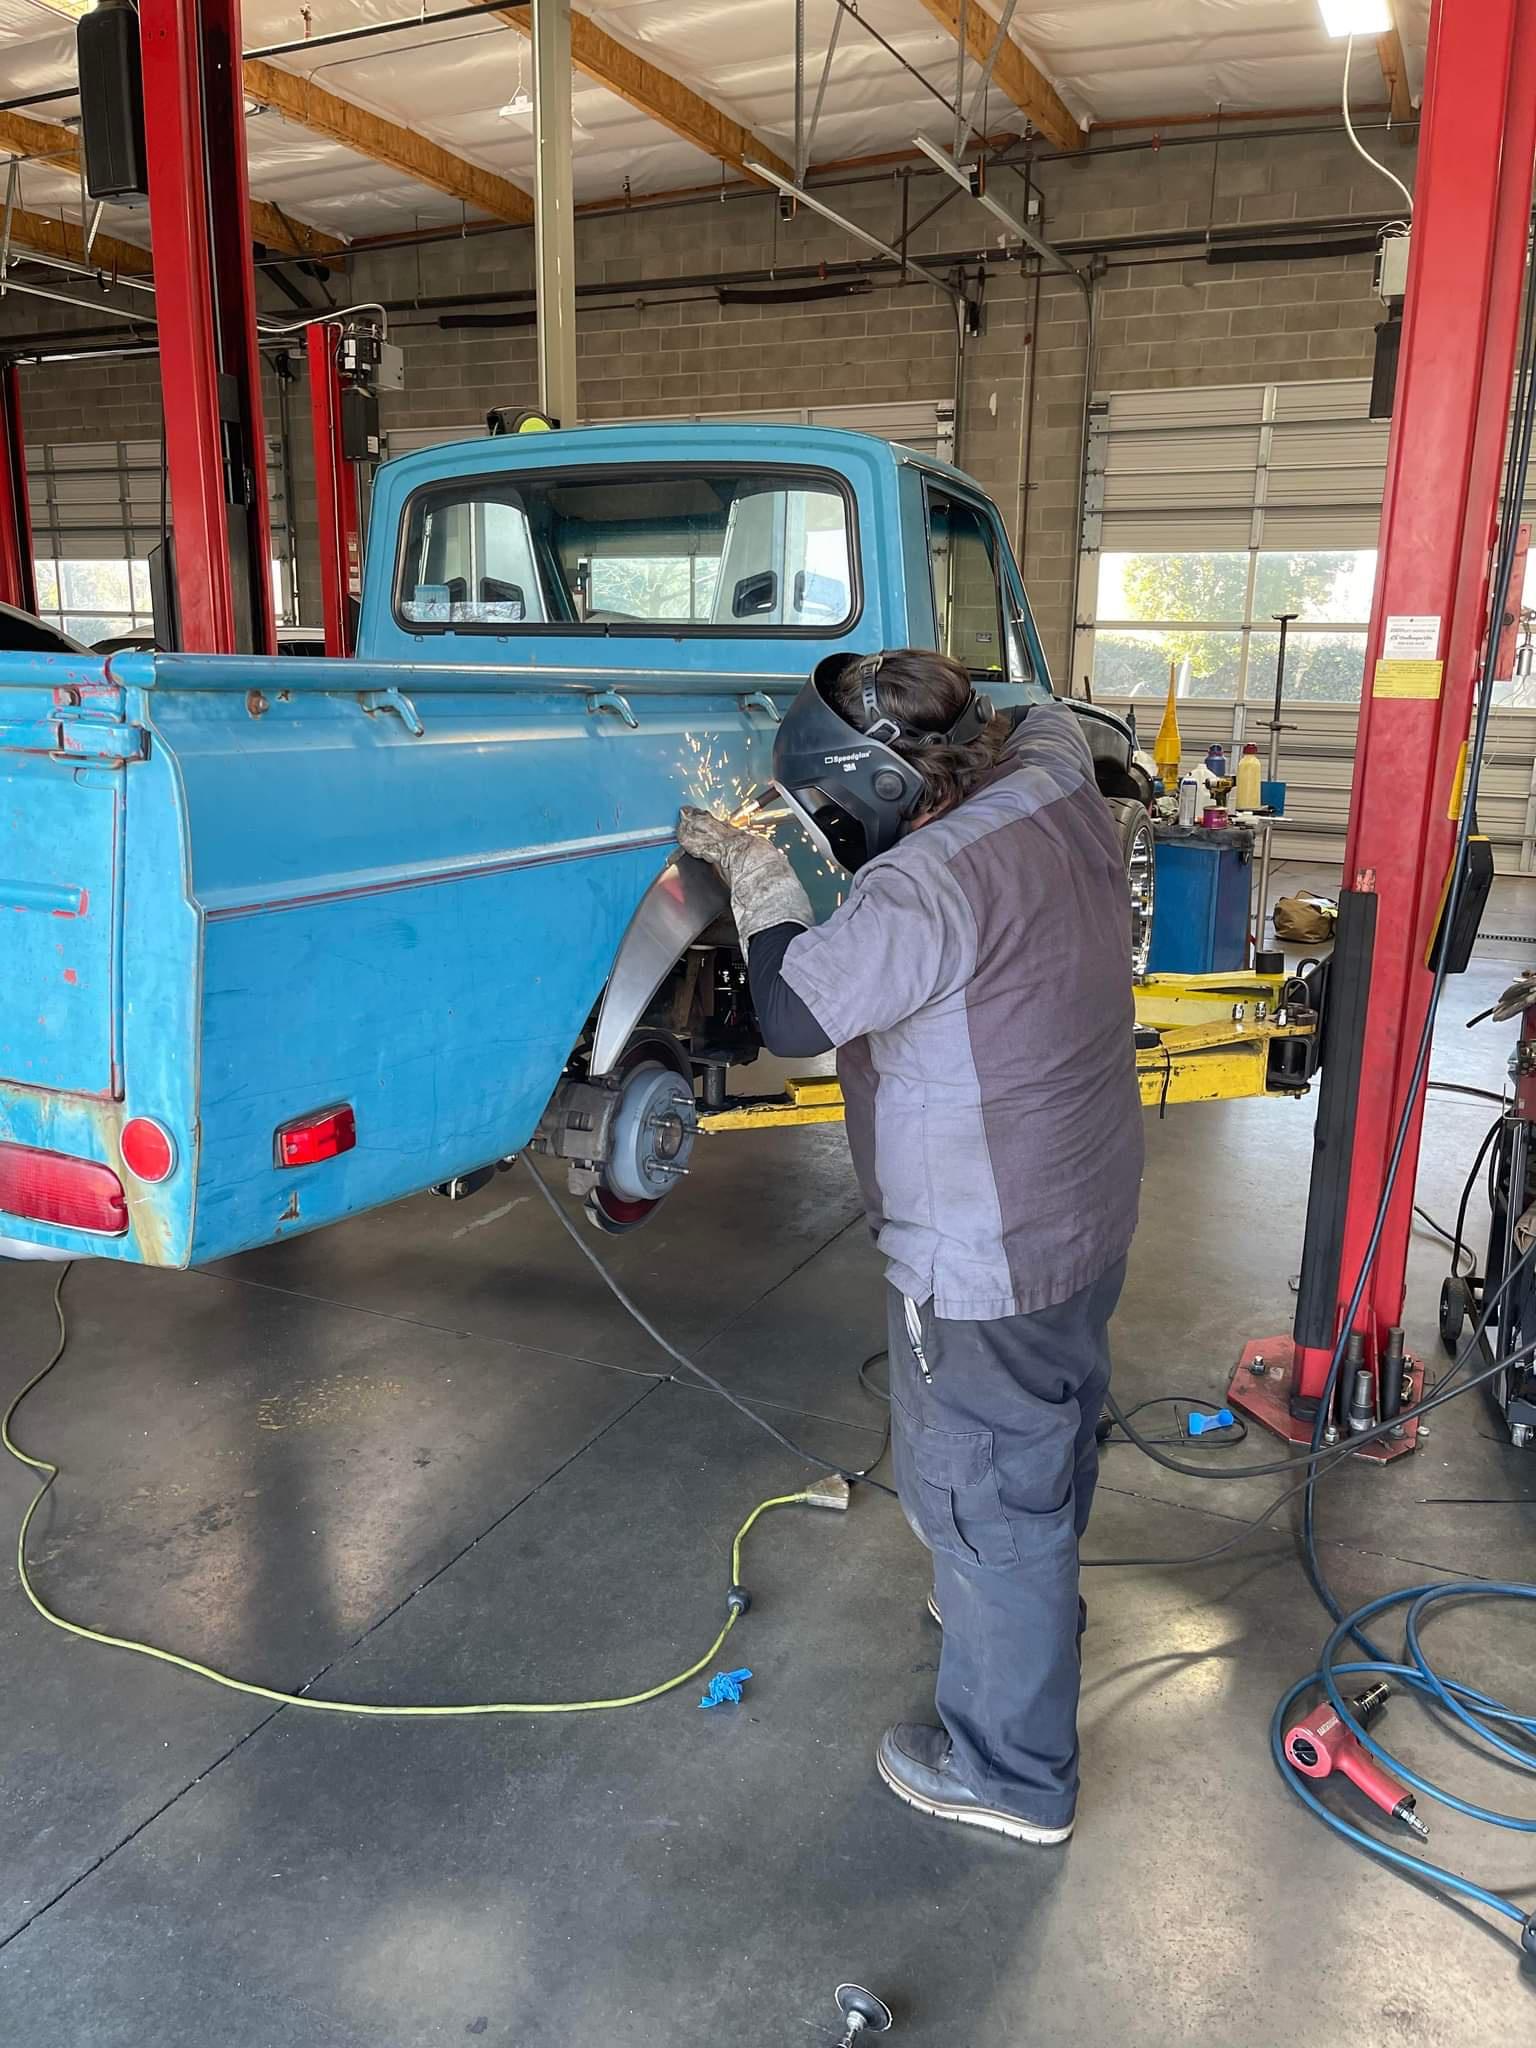
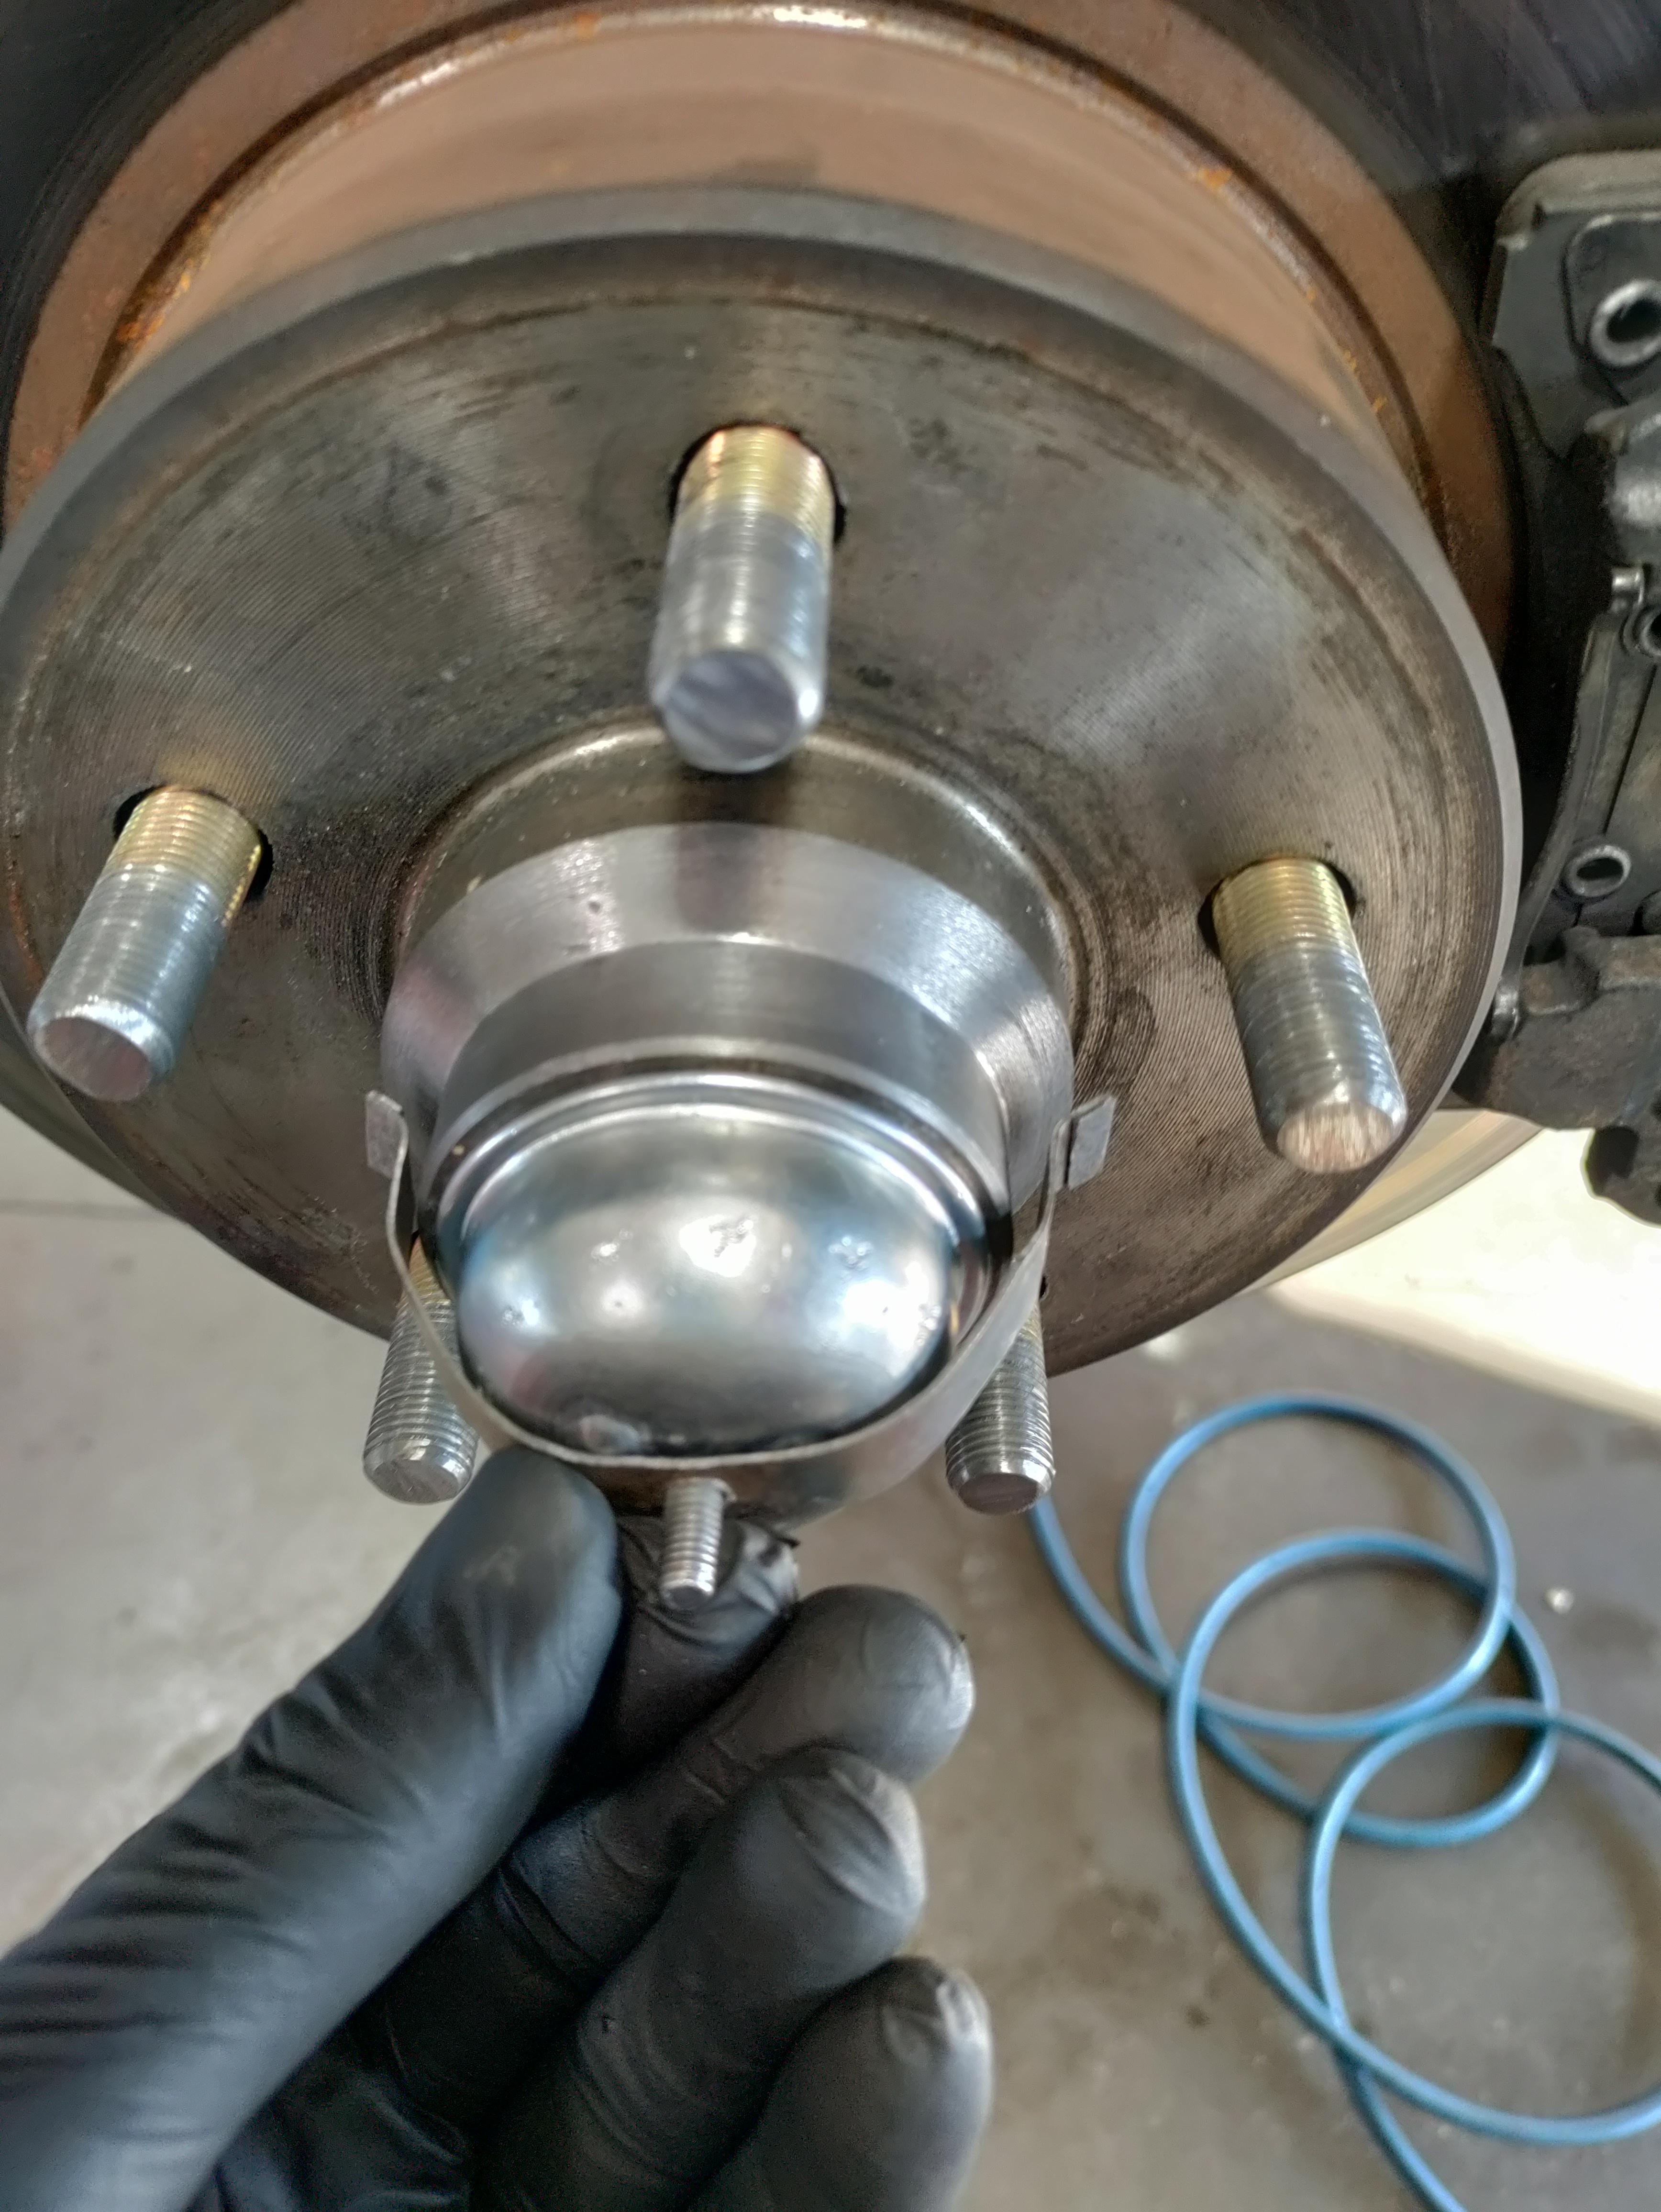
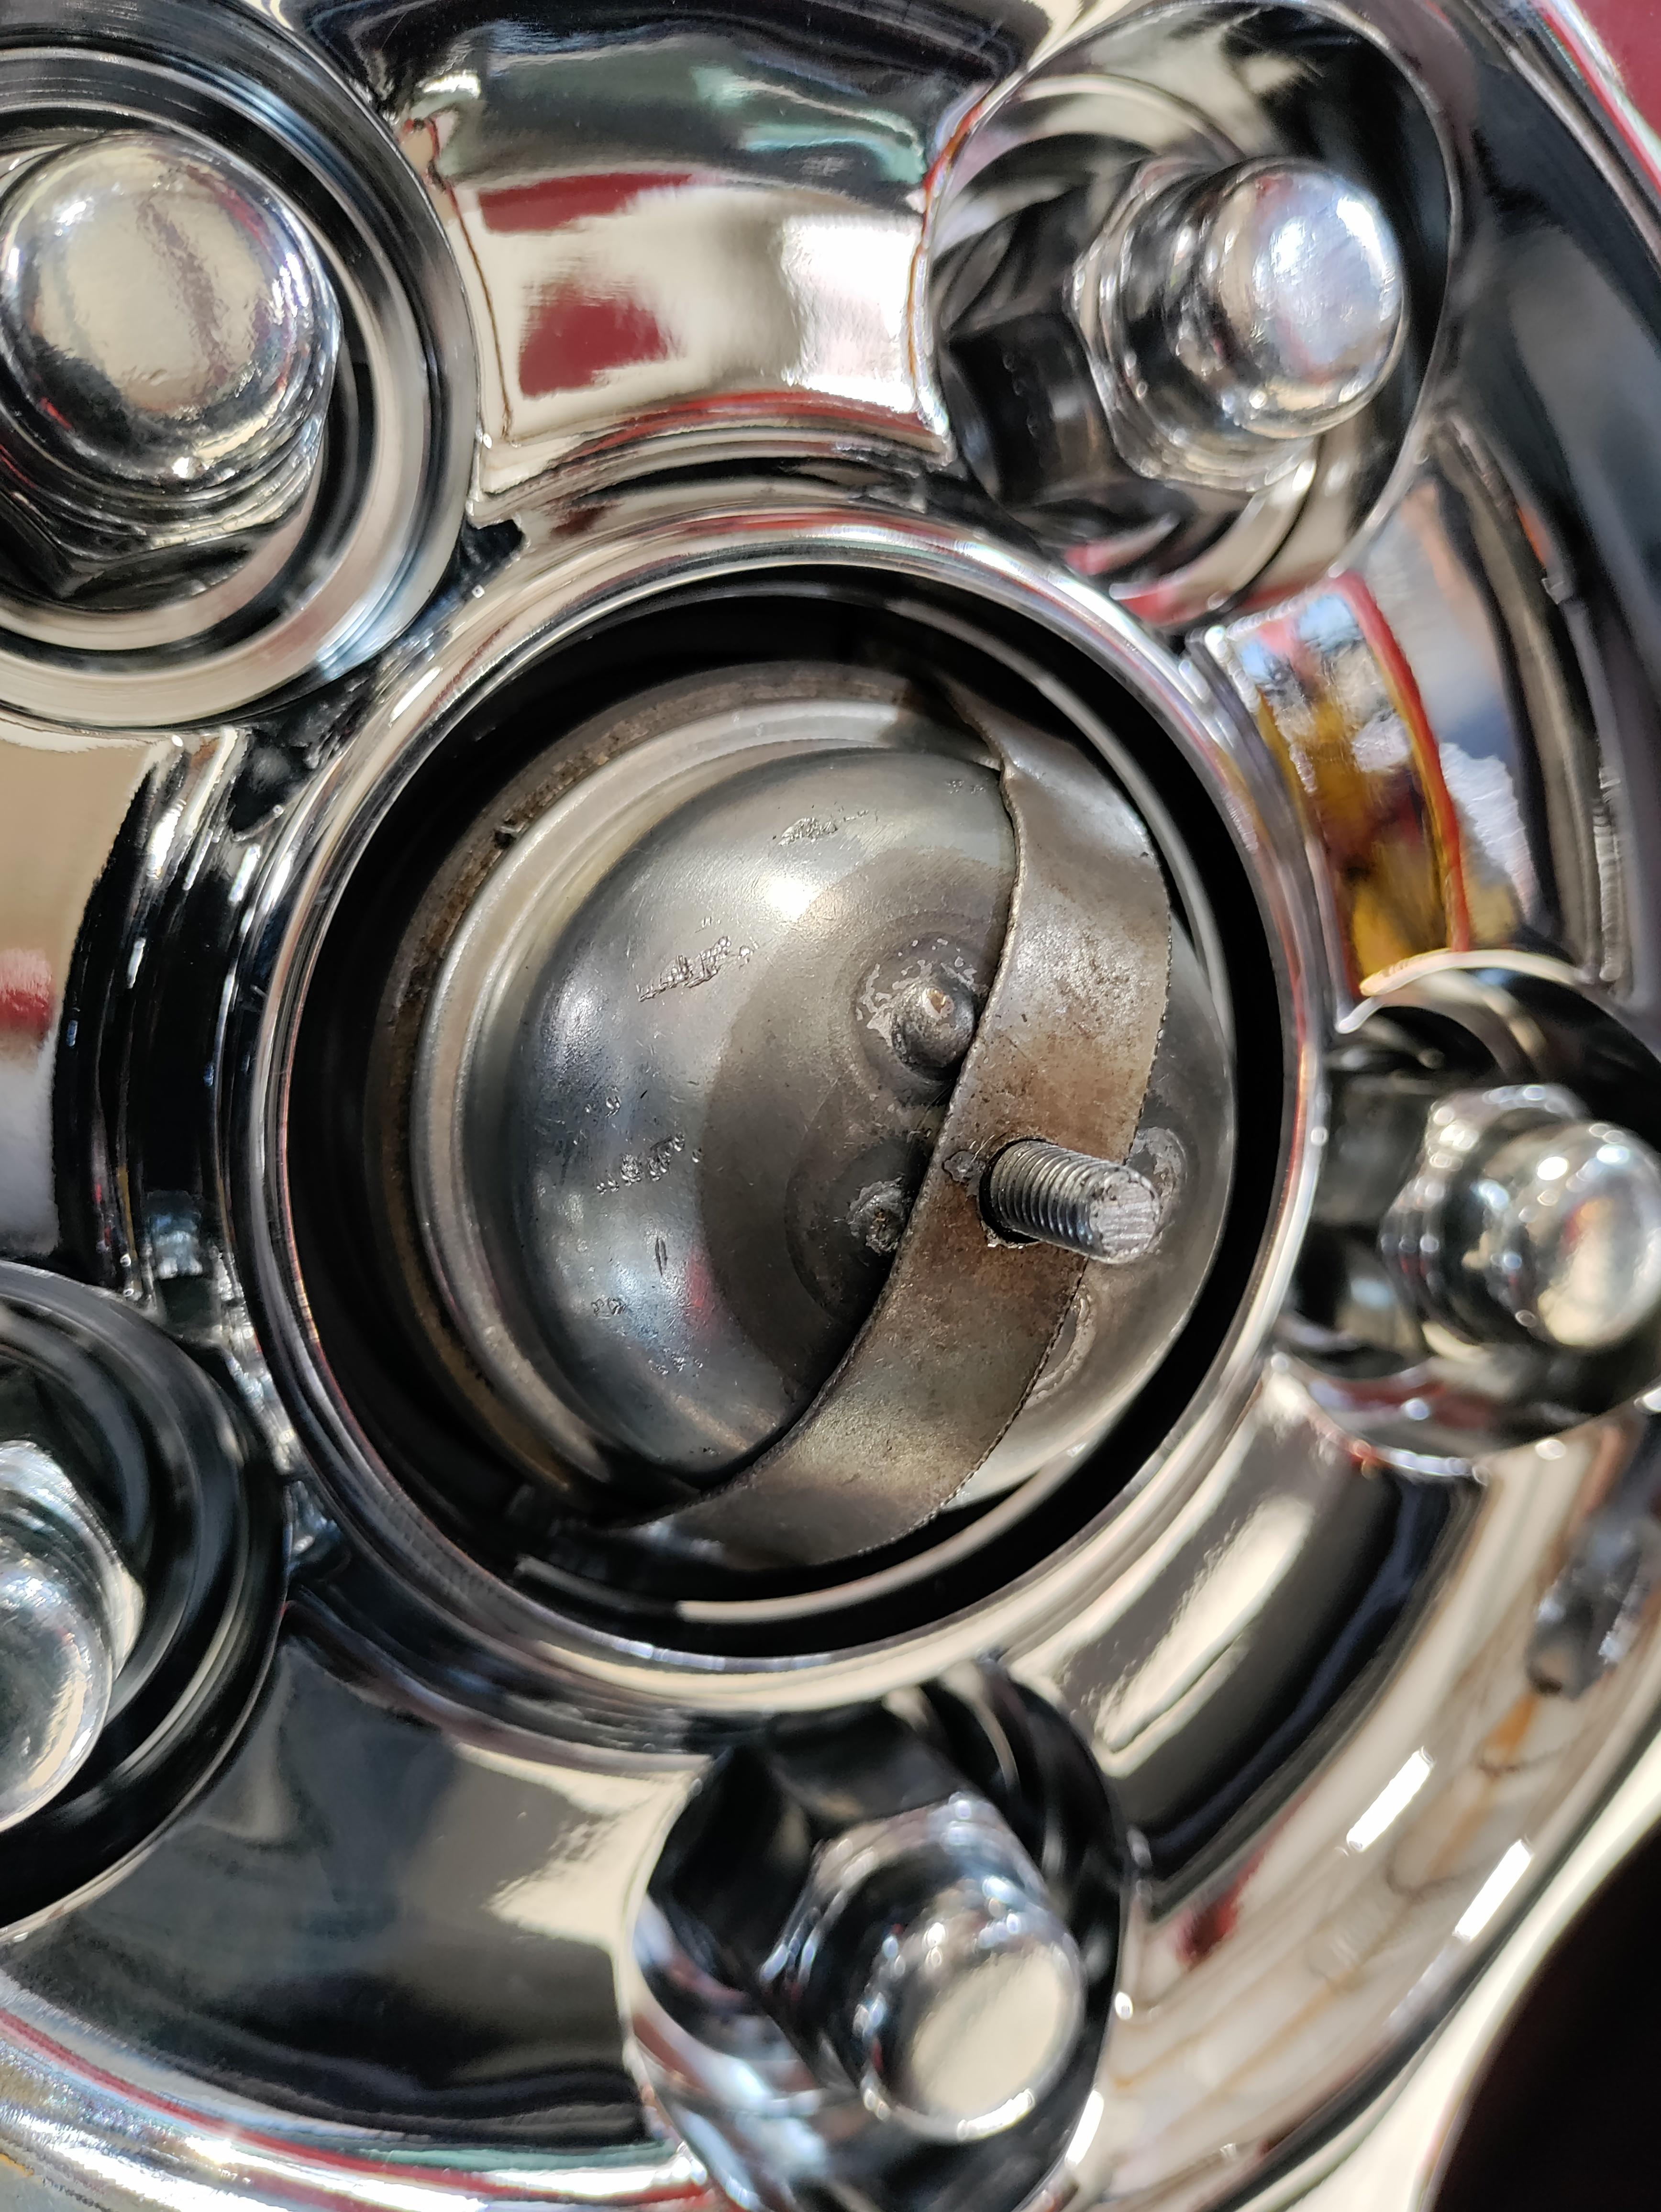
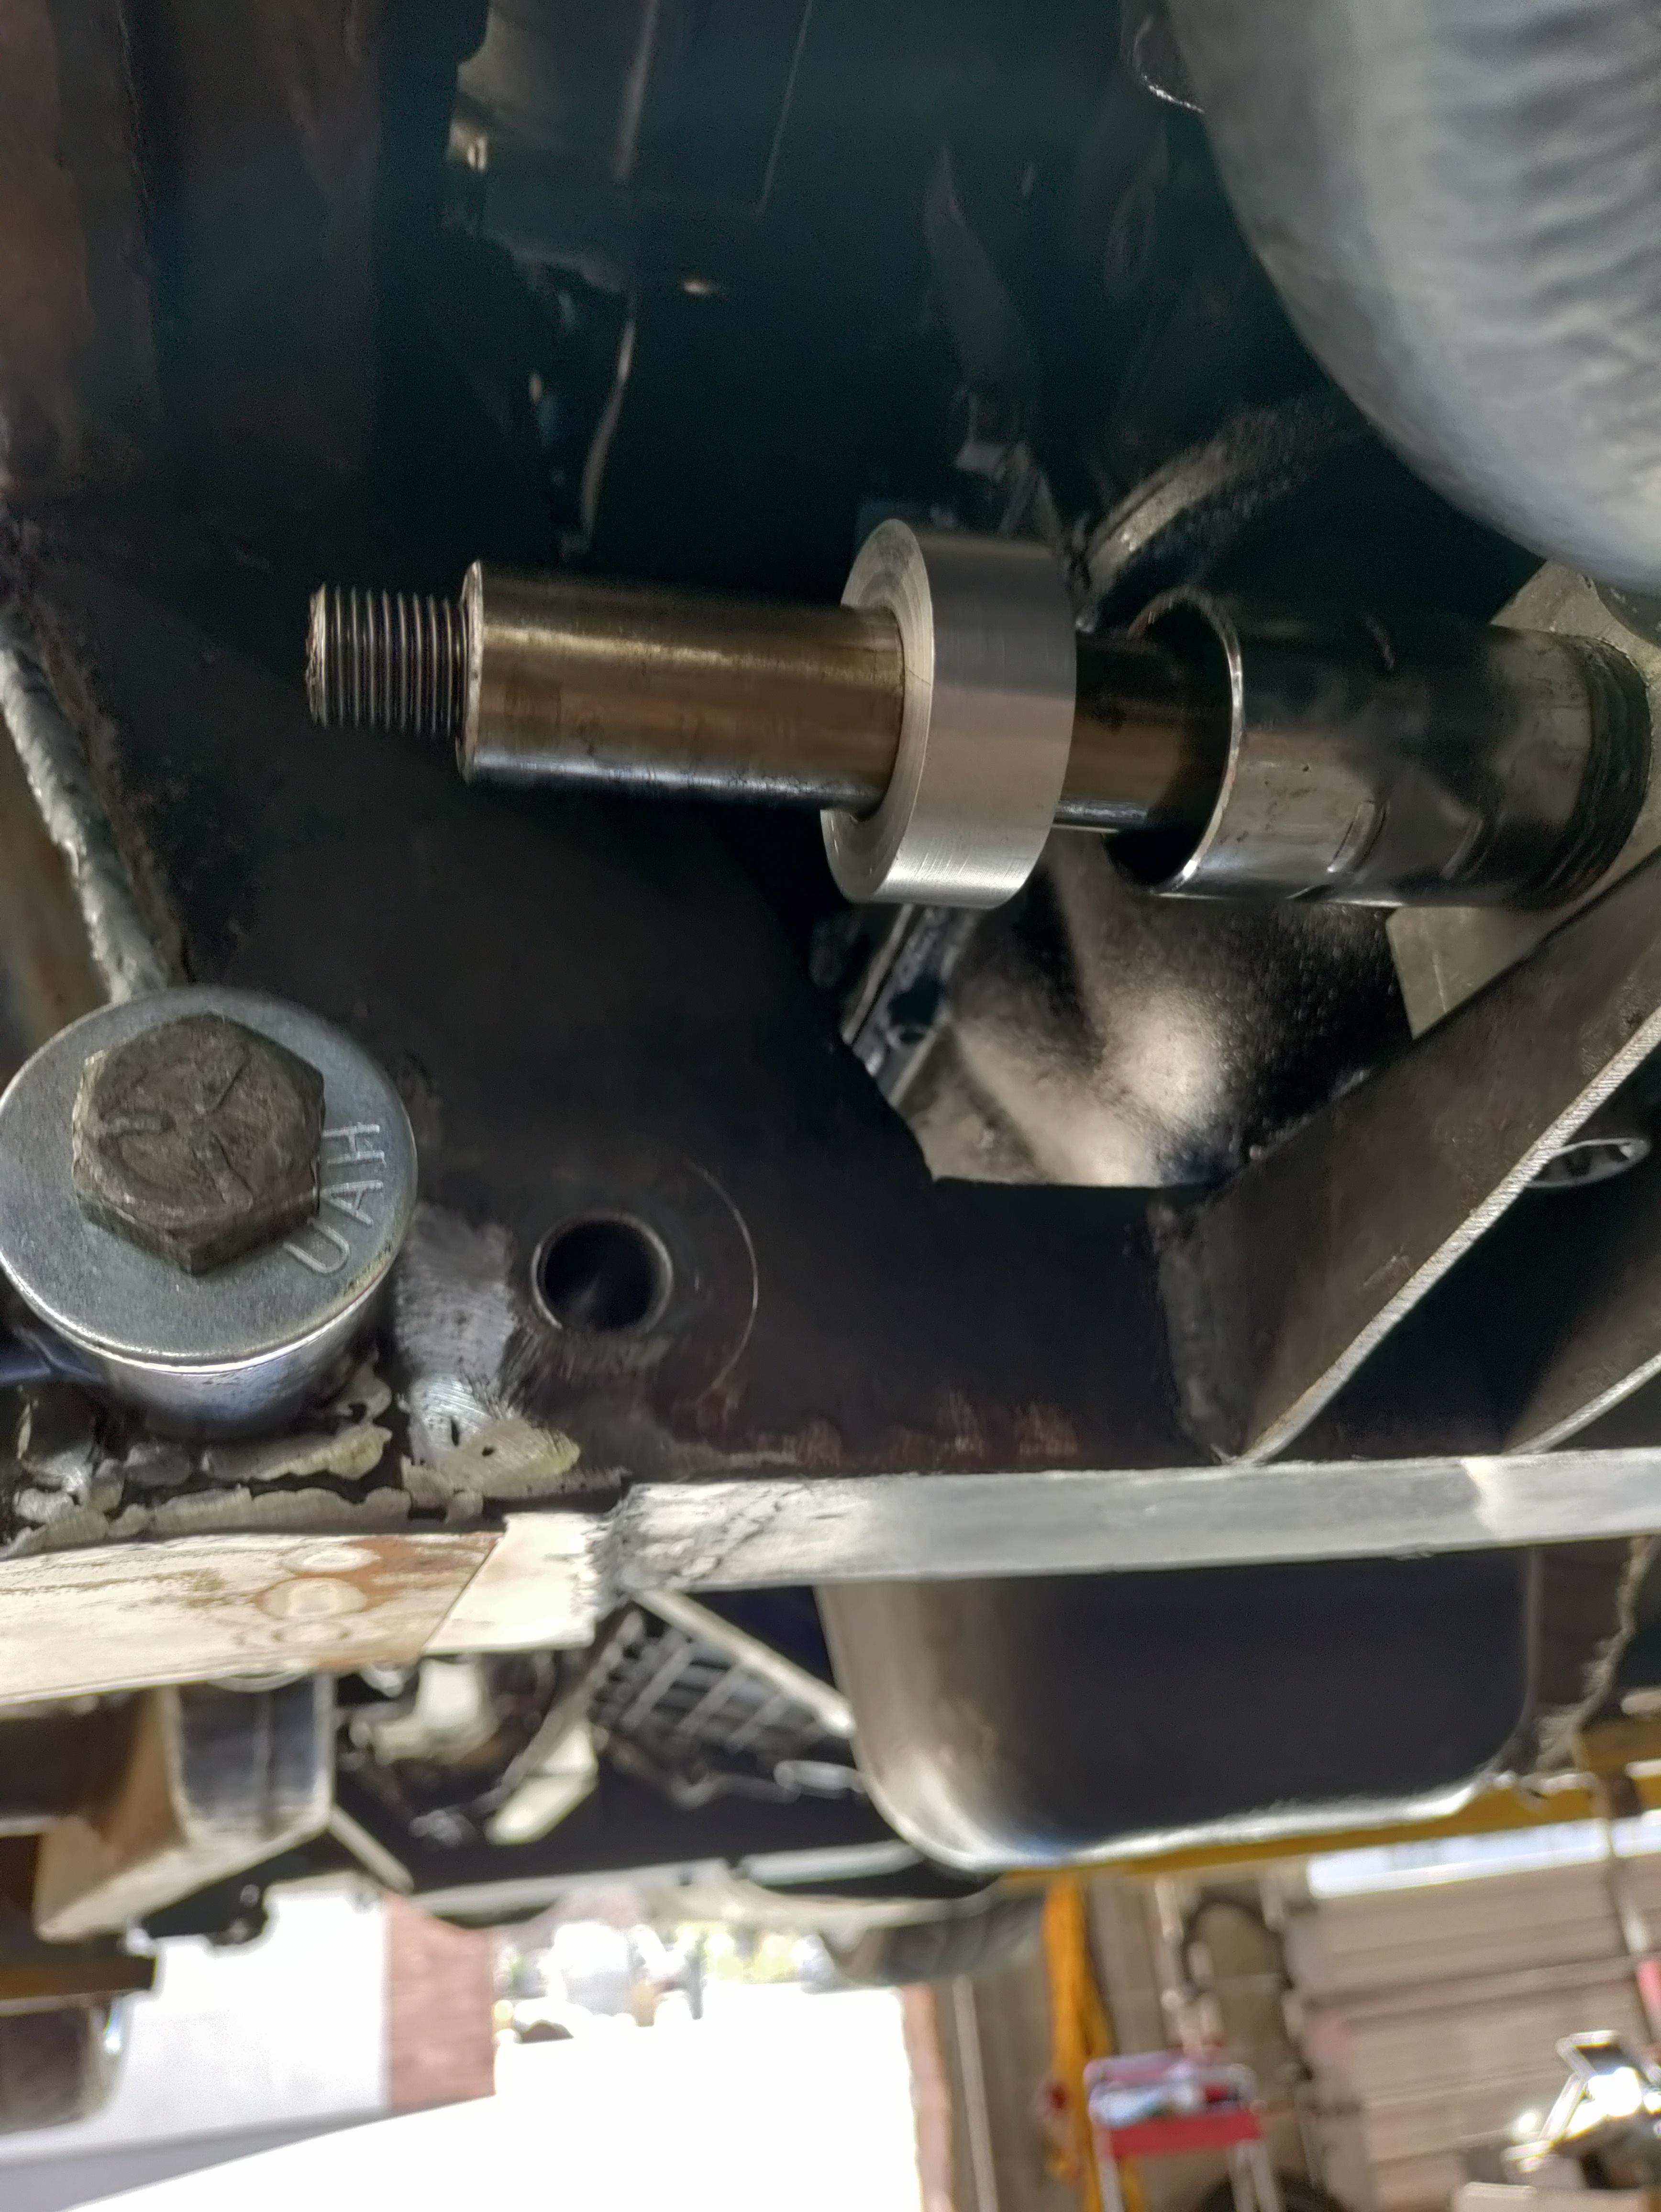
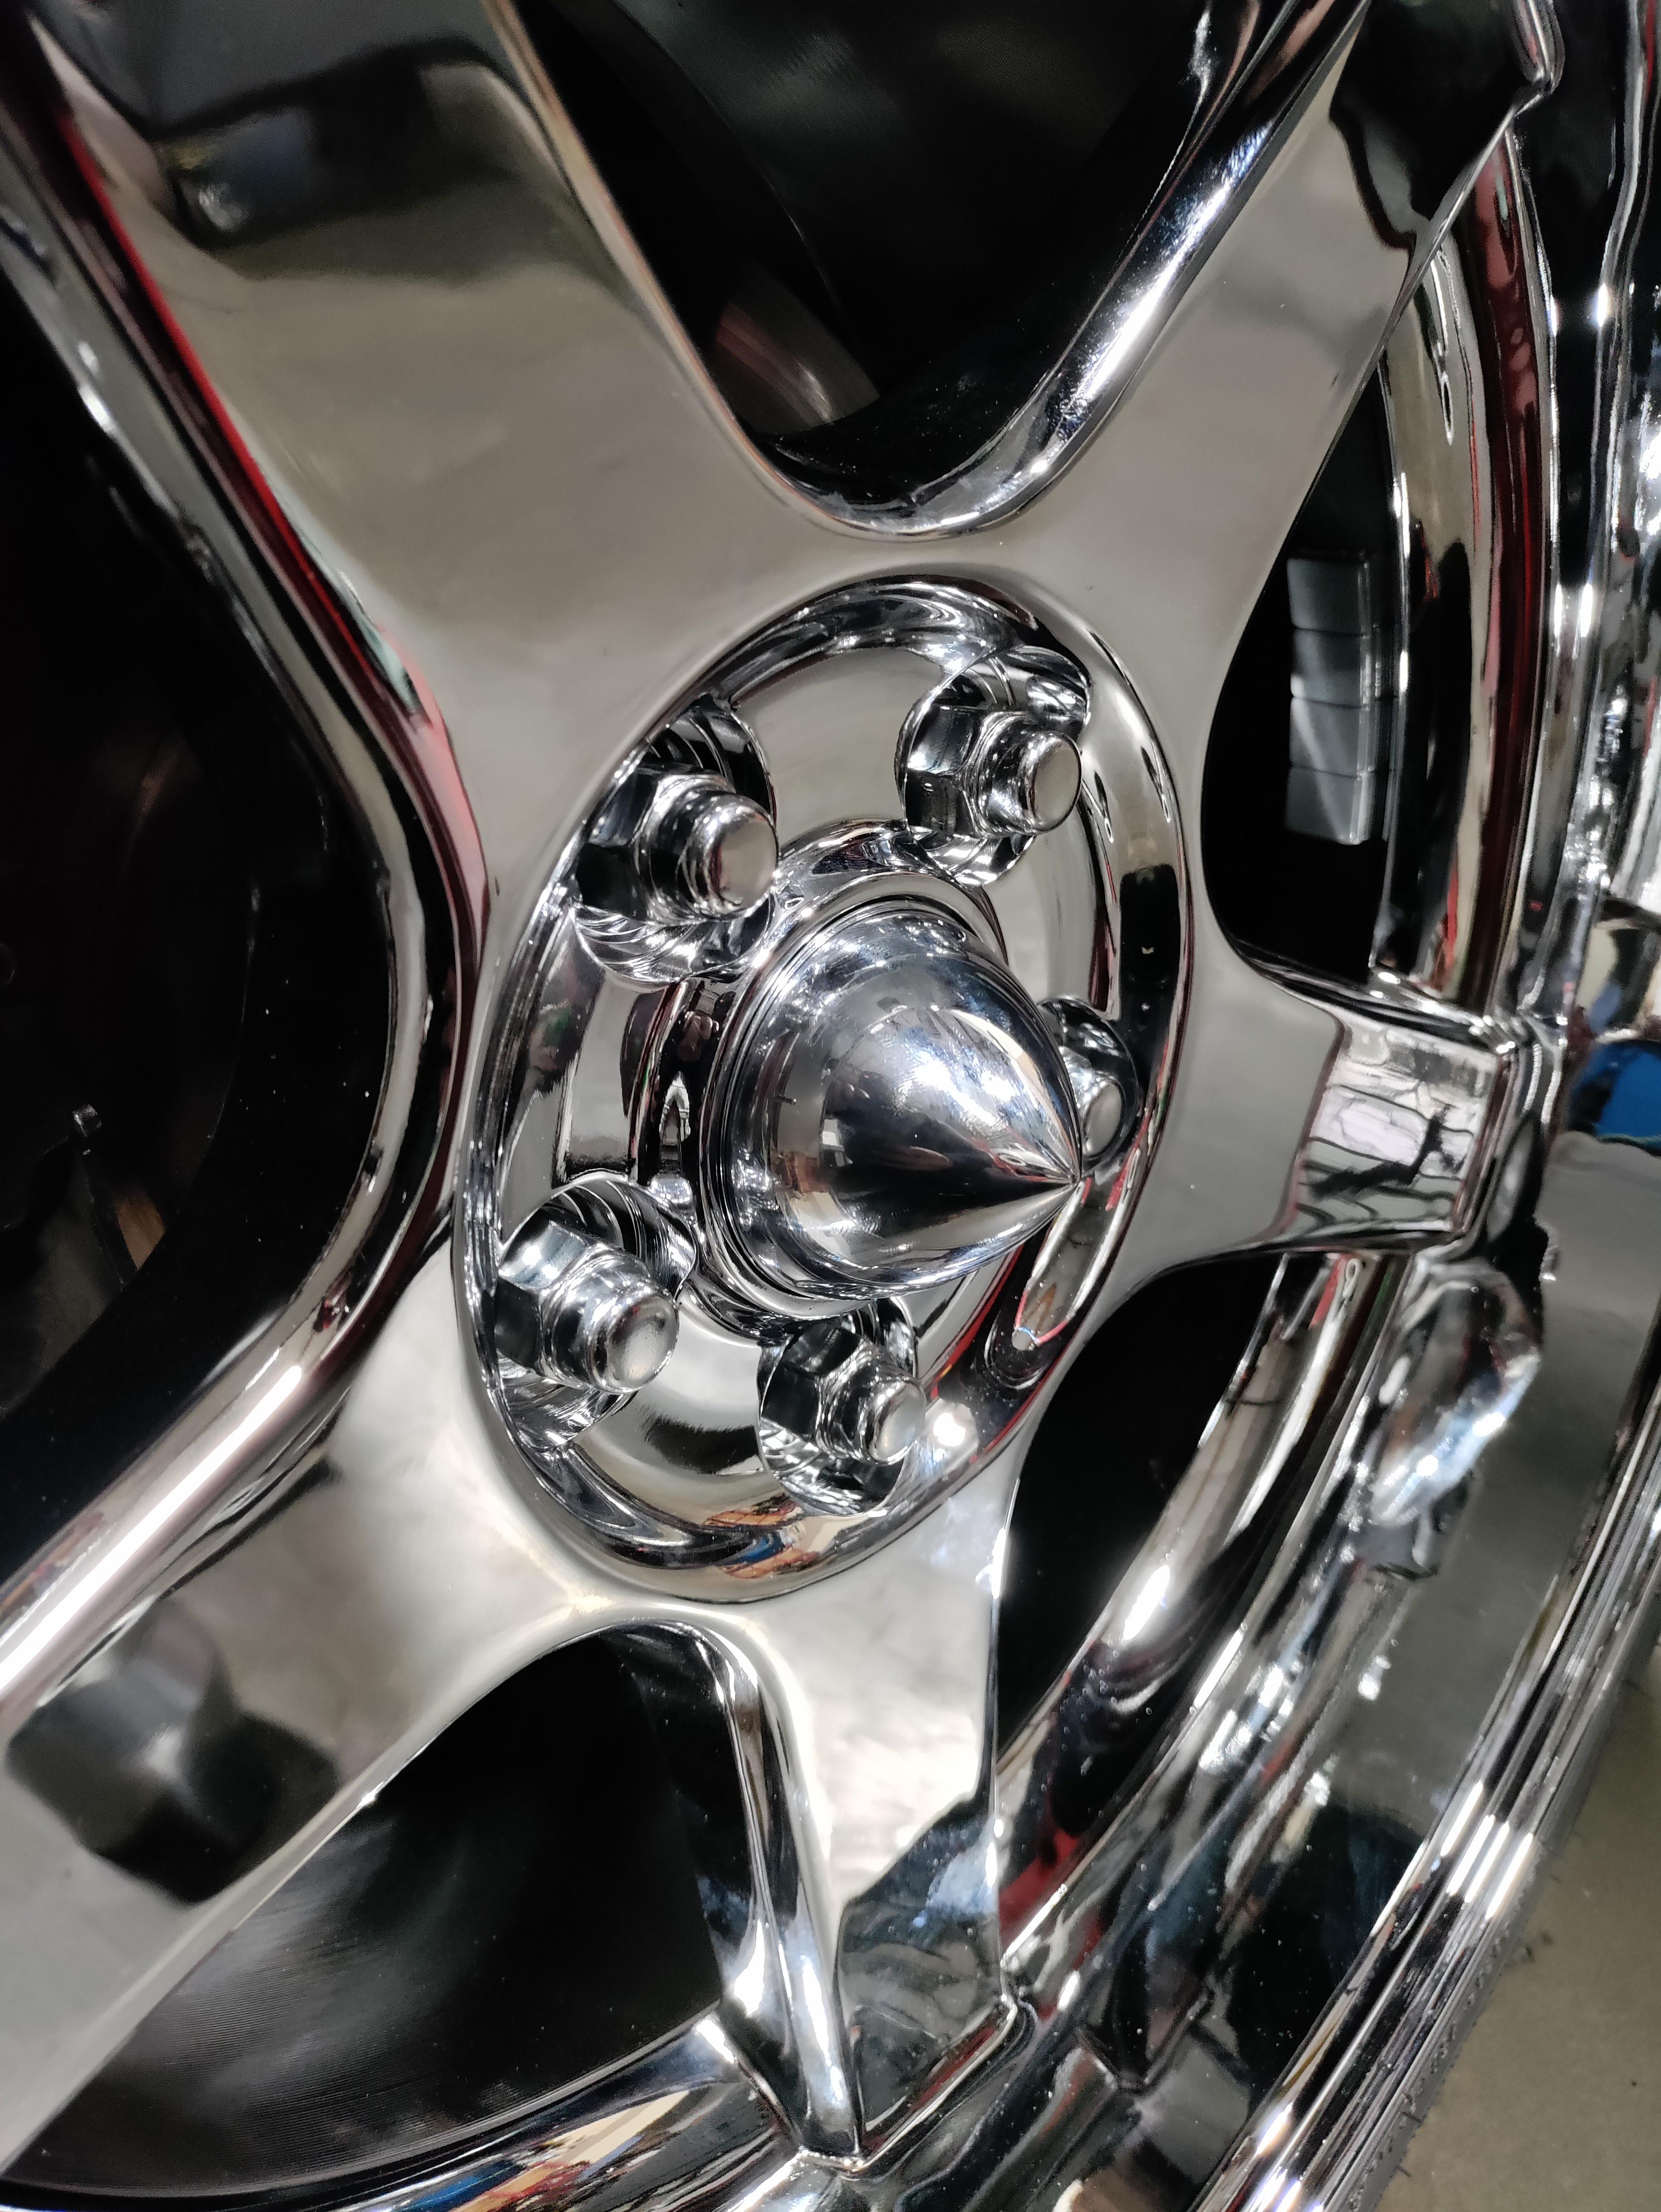
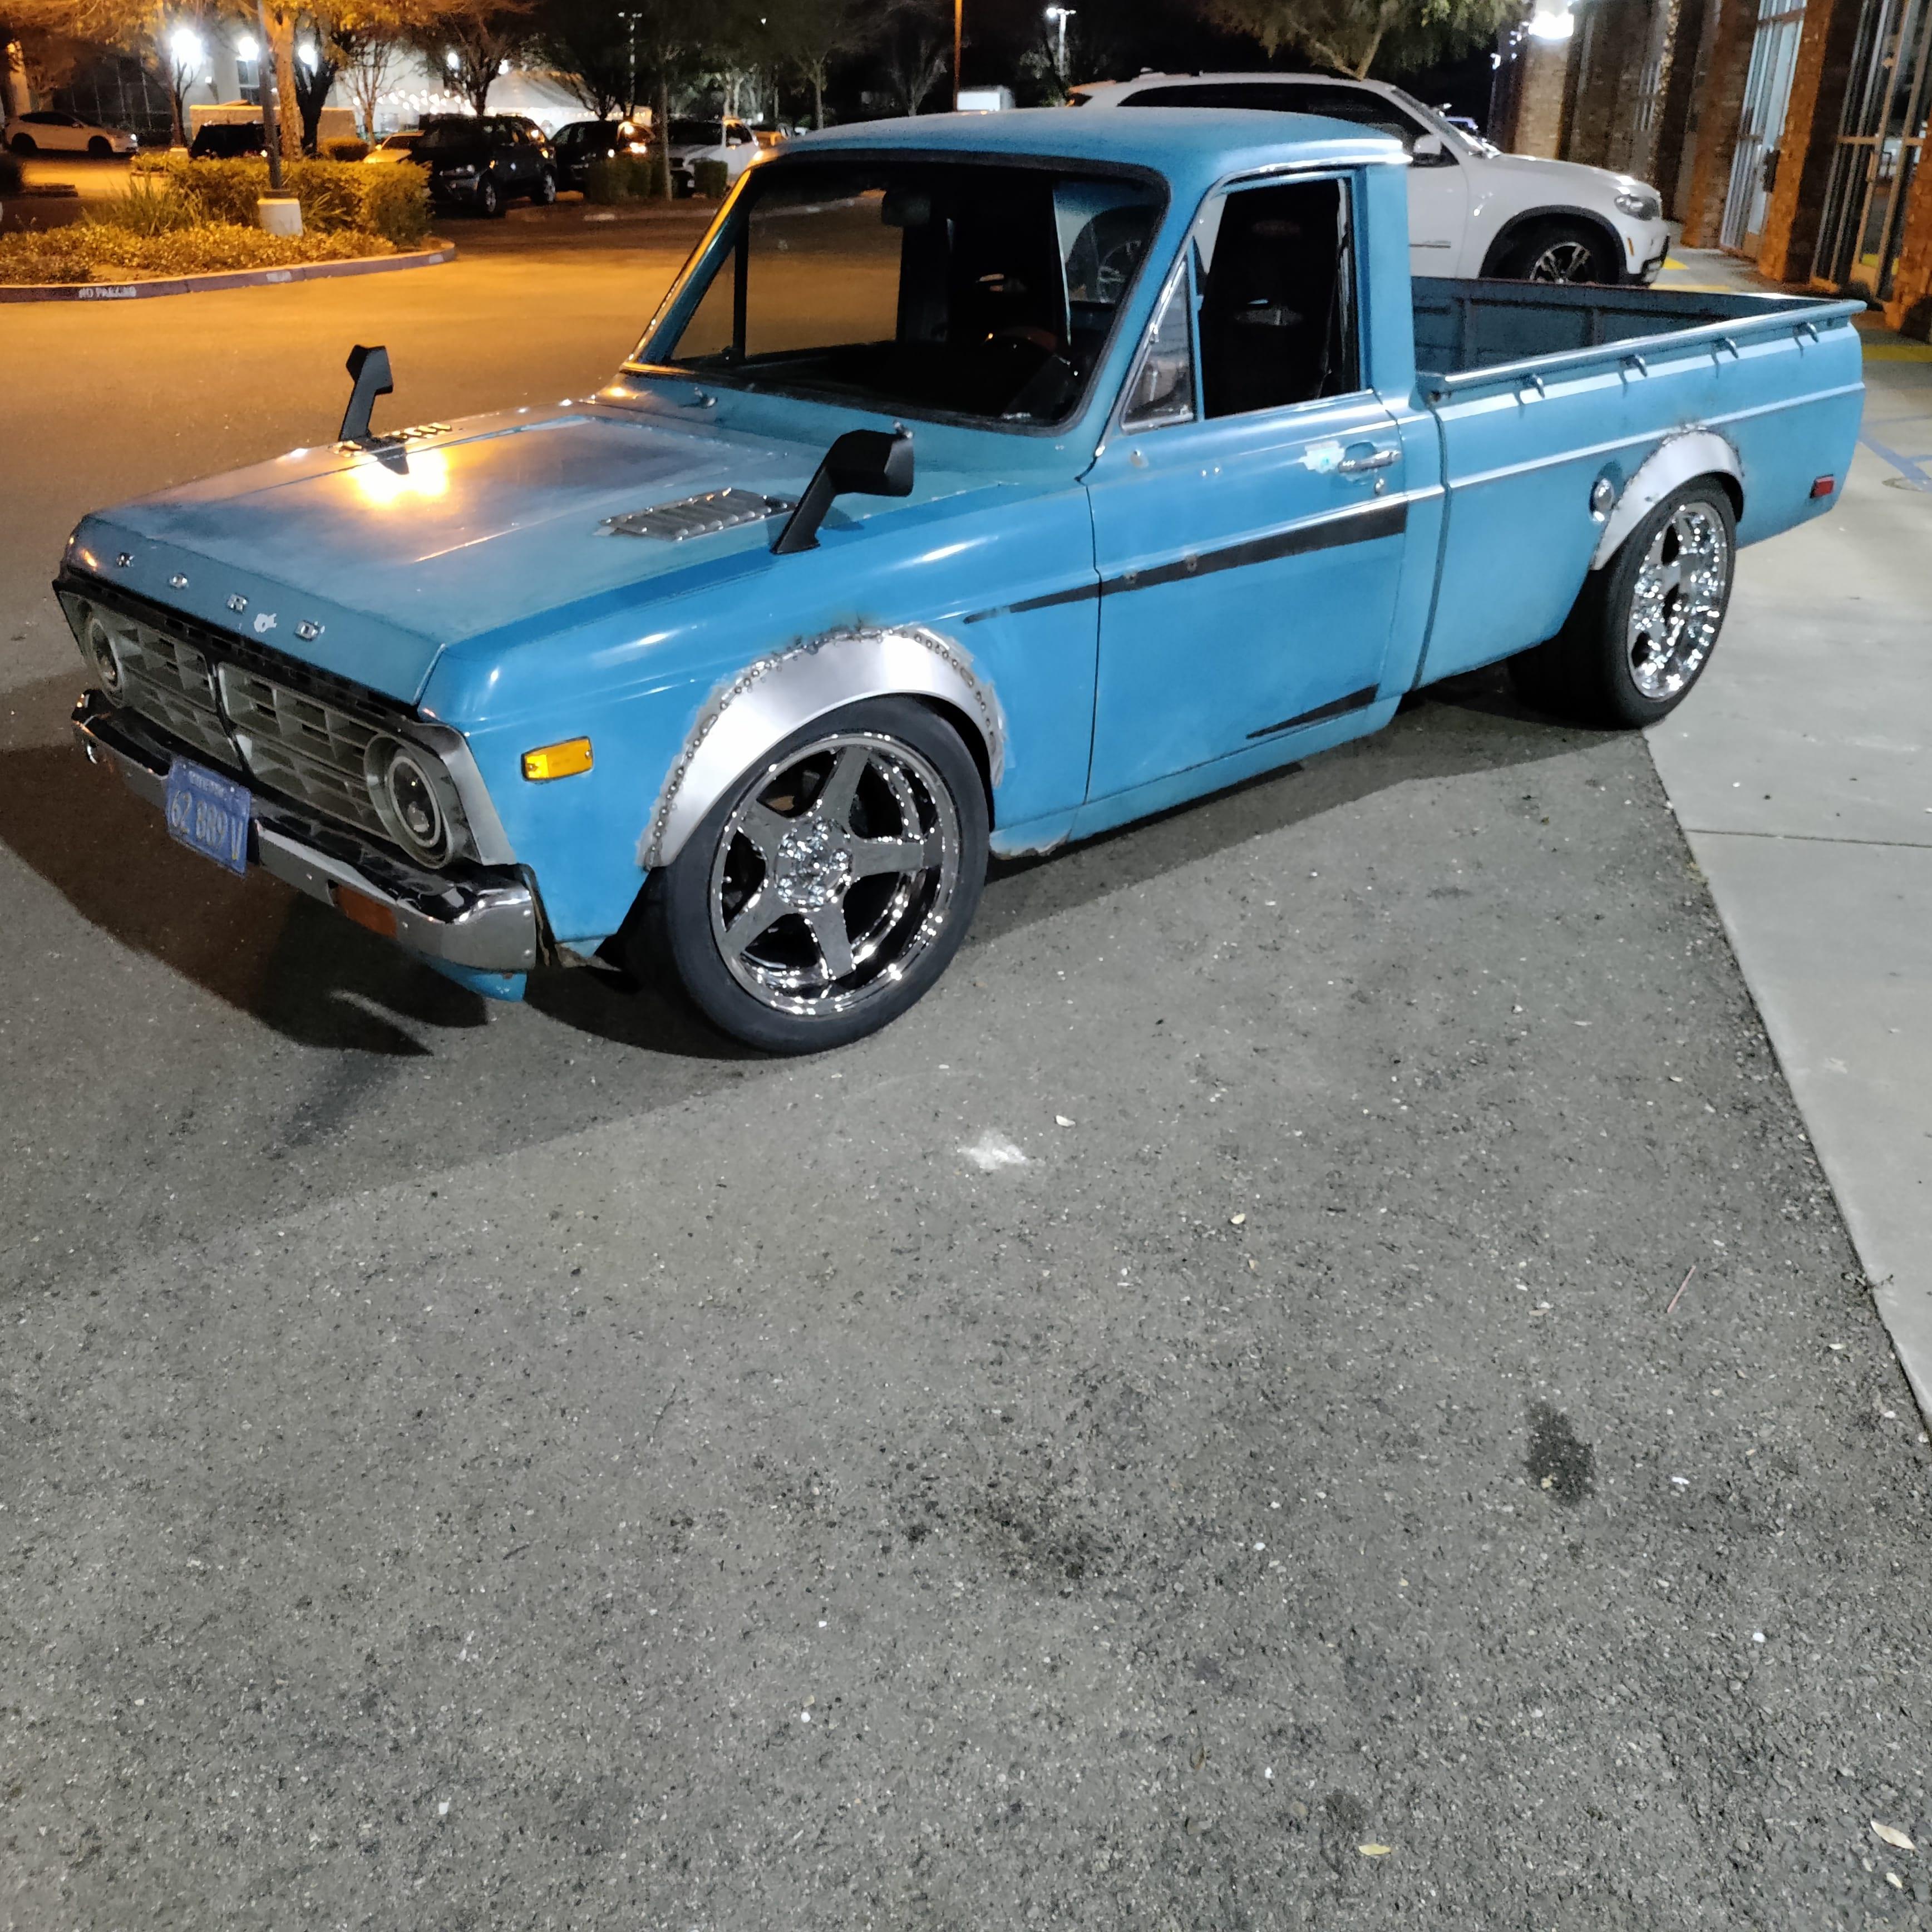
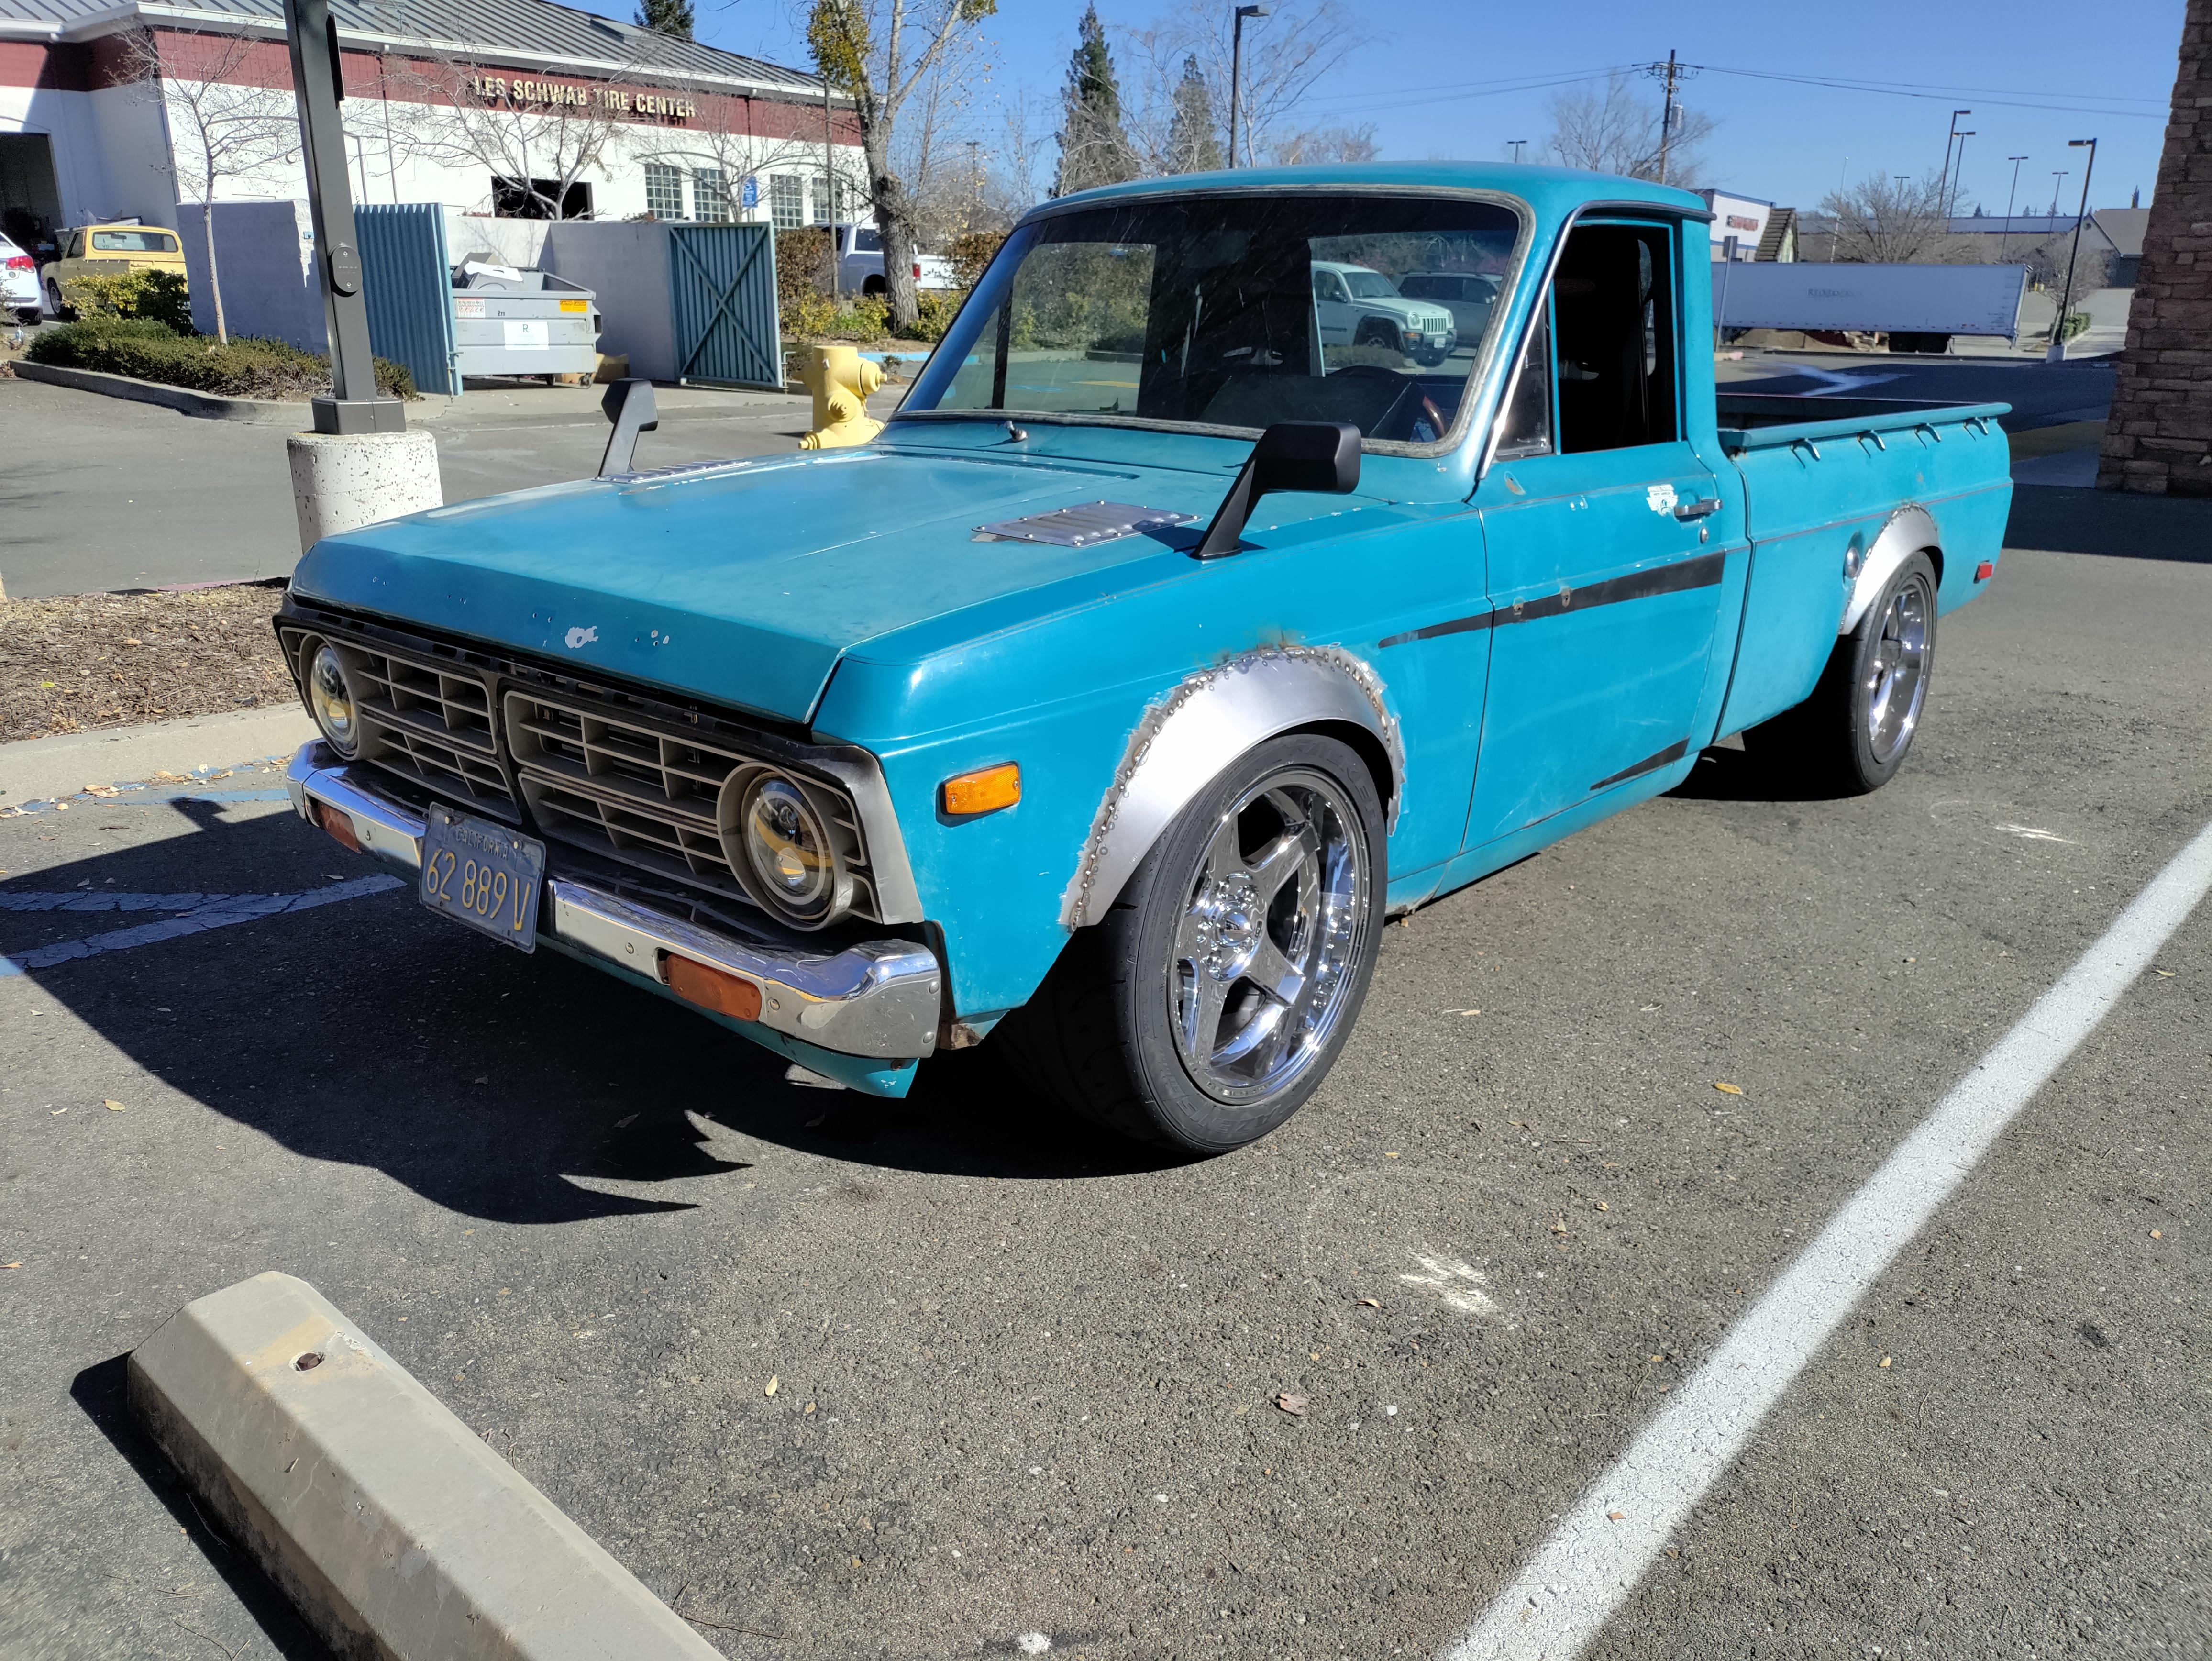
Getting closer to being finished, floors welded back in, flares tacked on, alignment done. fender mirrors going on tomorrow. gonna finish welding the flares on and blending them in over the next week. still need some adjustments cause the front rubs a little at full lock over bumps. either gonna roll the flares a little or raise the front up 1/8"- 1/4". welded studs into the dust cap to fit the center cap spikes and made some straps that go around the front dust caps in case the spikes work them loose. i also had to make spacers for the steering rack to keep the 17x10.5s from rubbing the control arm at full lock.

[img]https://i.imgur.com/sWJtV2B.jpg[img]
[img]https://i.imgur.com/sWJtV2B.jpg[img]
Reply
3
3
02-11-2022, 06:44 PM
#219
Senior Member
Thread Starter
Join Date: Jan 2011
Location: sacramento ,ca
Posts: 568
Total Cats: 162
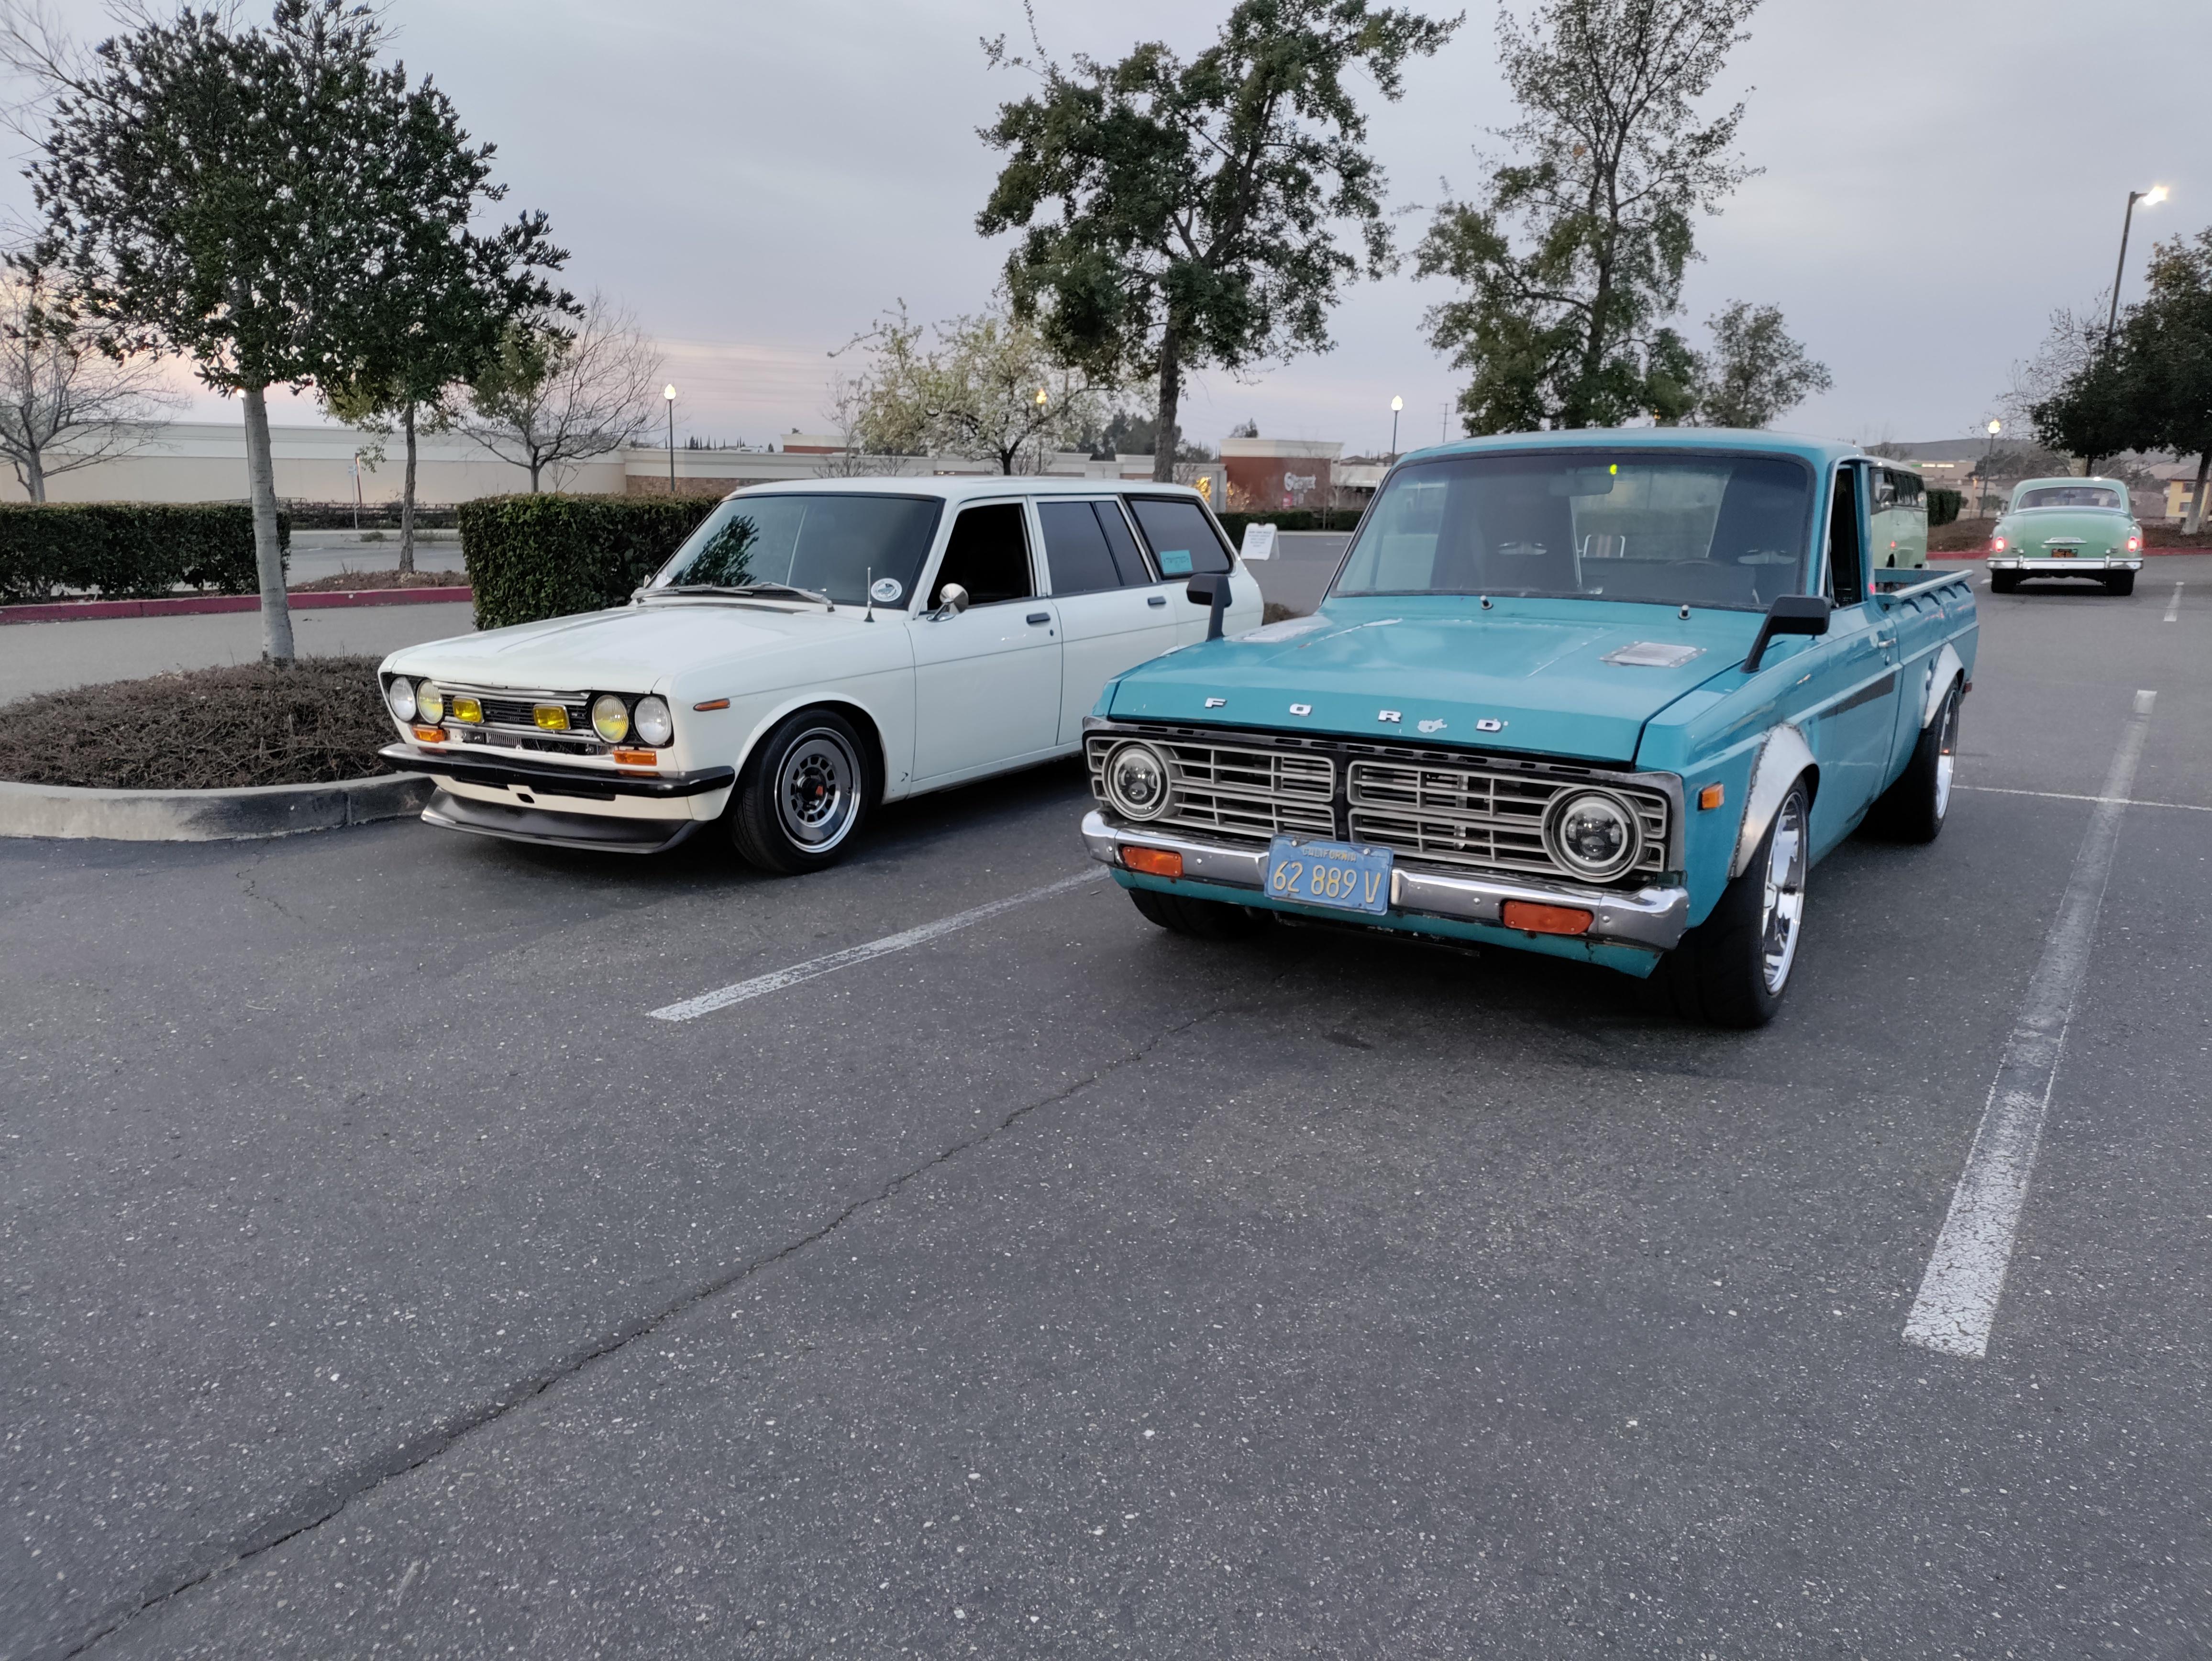
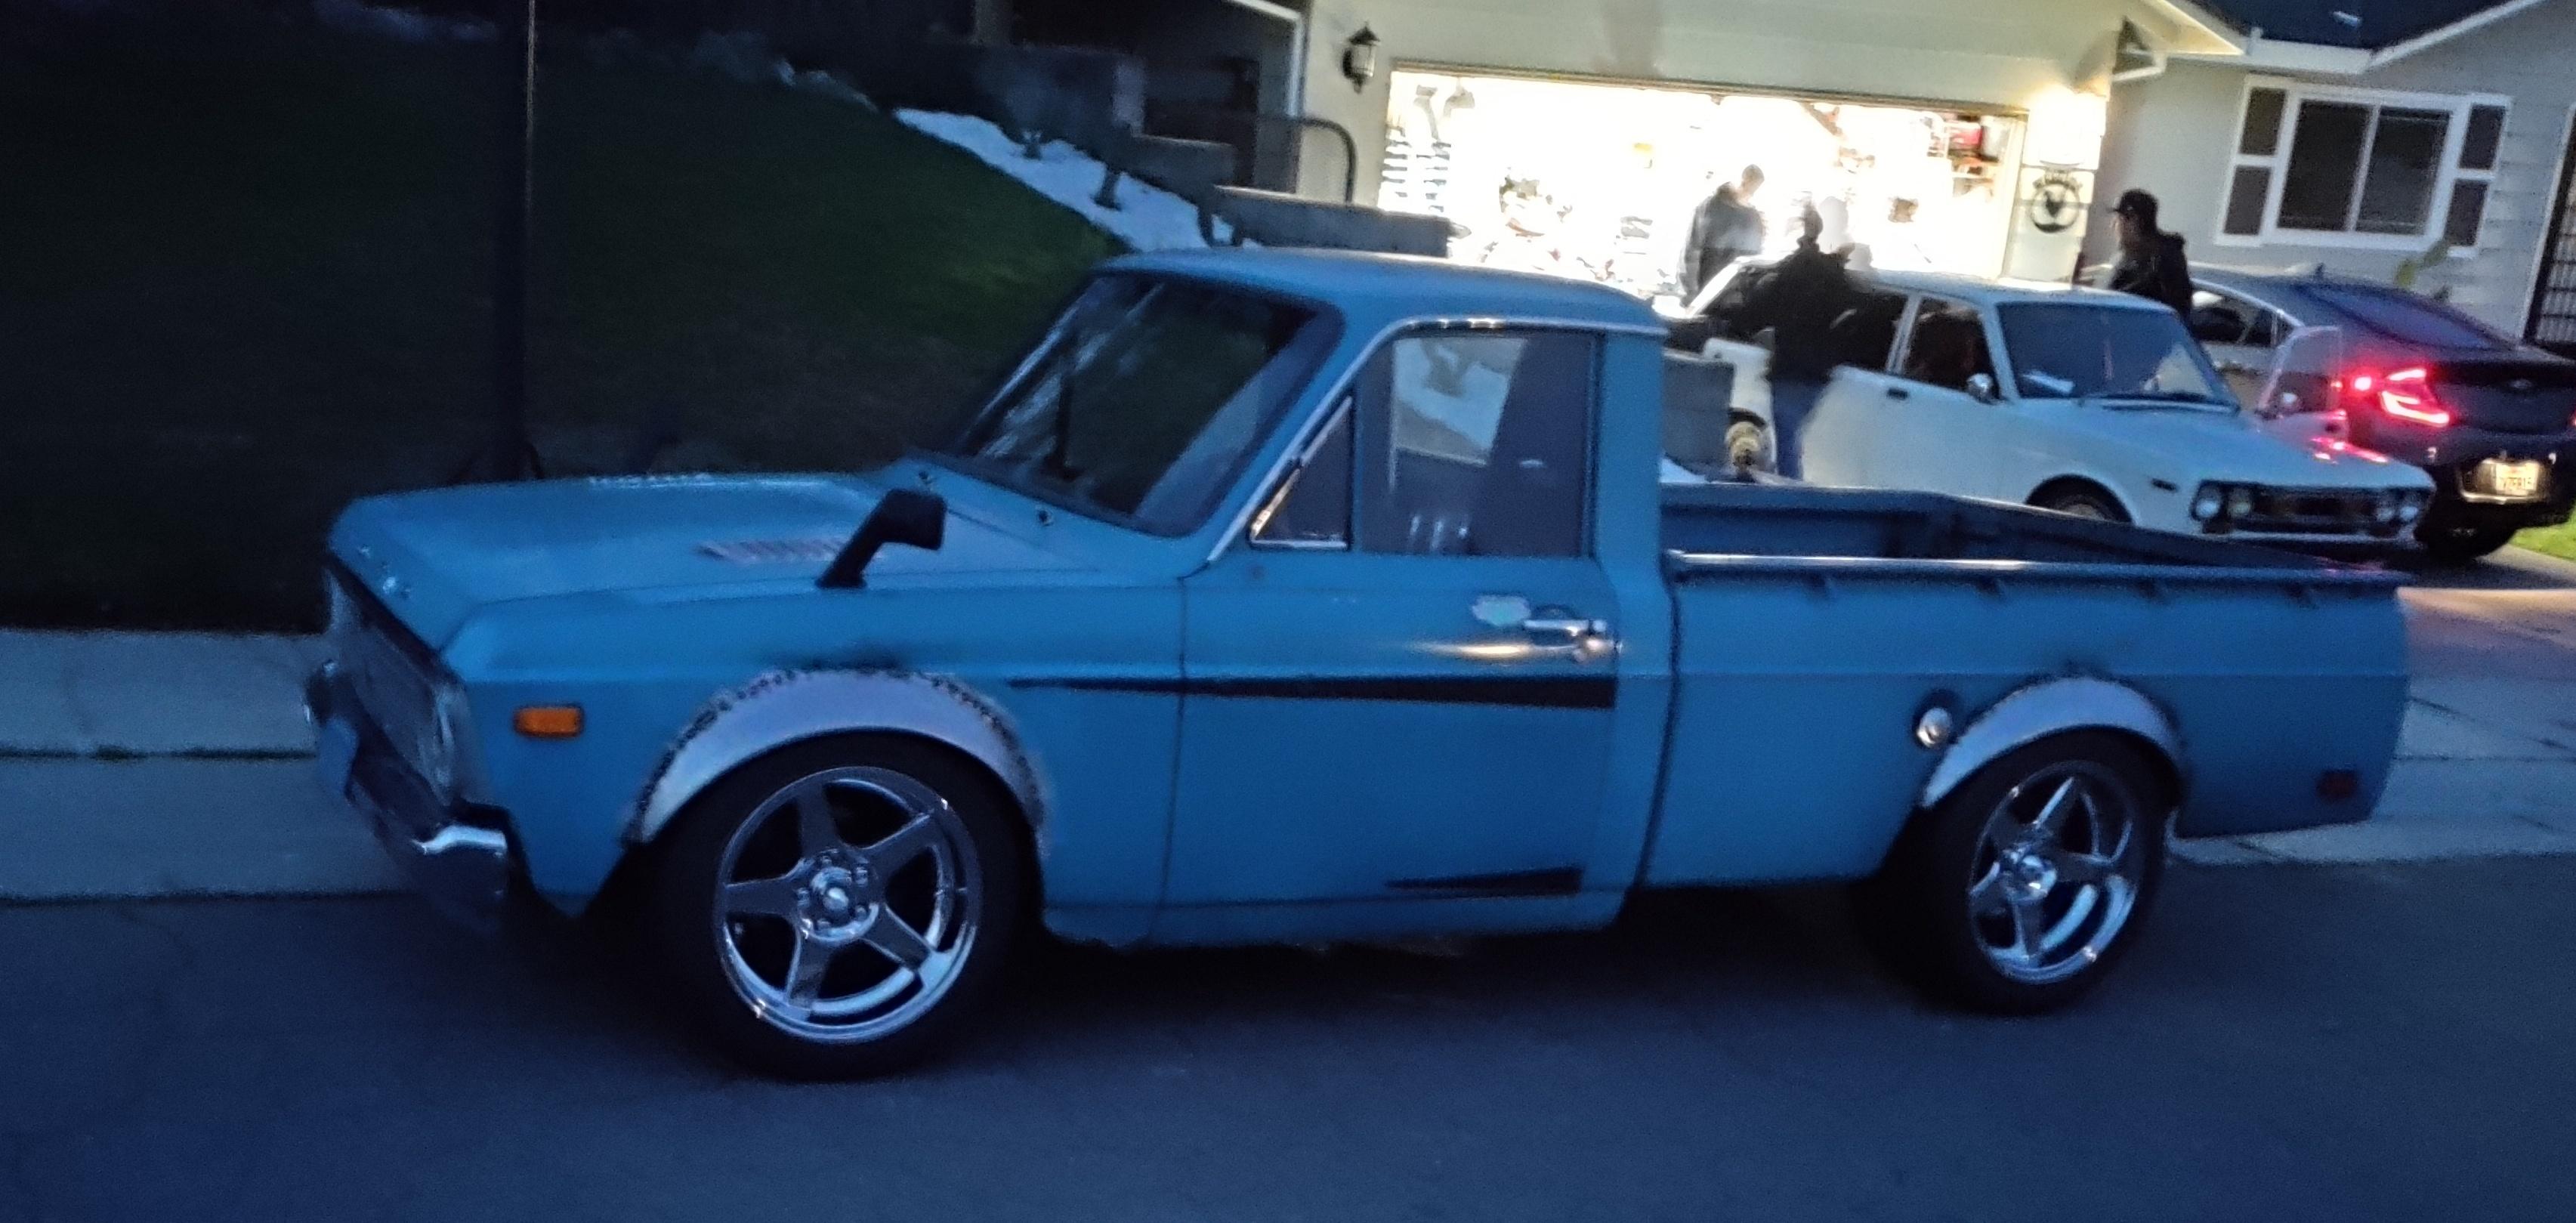
Fender mirrors are on. Took it out to cars and coffee in Folsom to show it off with my buddy's 68 Datsun wagon. I forgot how to drive lowered cars and mashed my wheel into my fender turning into a driveway. Luckily my buddy's dad is an amazing body man and hammered it back straight in less than an hour. Watching him take out that dent and making everything smooth was mind blowing.
Reply
0
0
02-11-2022, 07:02 PM
#220
Elite Member
iTrader: (37)

Join Date: Apr 2010
Location: Very NorCal
Posts: 10,441
Total Cats: 1,899
I saw a puke green post 76 Courier in the junkyard last weekend with a factory camper shell on it and a bed liner made of orange **** carpet. For some reason, it reminded me of this thread 
Keep up the good work dude. You just don't see to many of these things anymore, still very much digging this project!
Keep up the good work dude. You just don't see to many of these things anymore, still very much digging this project!
Reply
0
0


