
My SR20T25 Artech/homemade build
 10-10-2014 | 01:34 PM
#1

Thread Starter
Senior Member
iTrader: (3)
Joined: Oct 2008
Posts: 610
Total Cats: 12
From: Indianapolis
Well, it is raining and I got everything I wanted to get done in the Miata. Time to post my build thread.
It all started with a 1990 JRSC Miata that Hhammerly (my uncle) built. I bought it from him in August. We used to race it at the autocrosses locally and the supercharger was lots of fun, but I wanted a little more power.
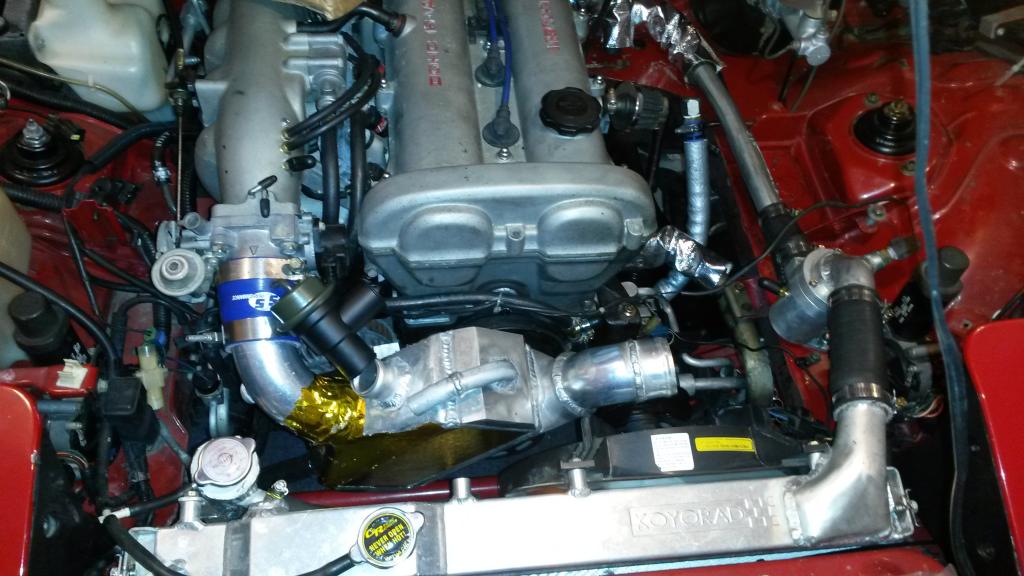
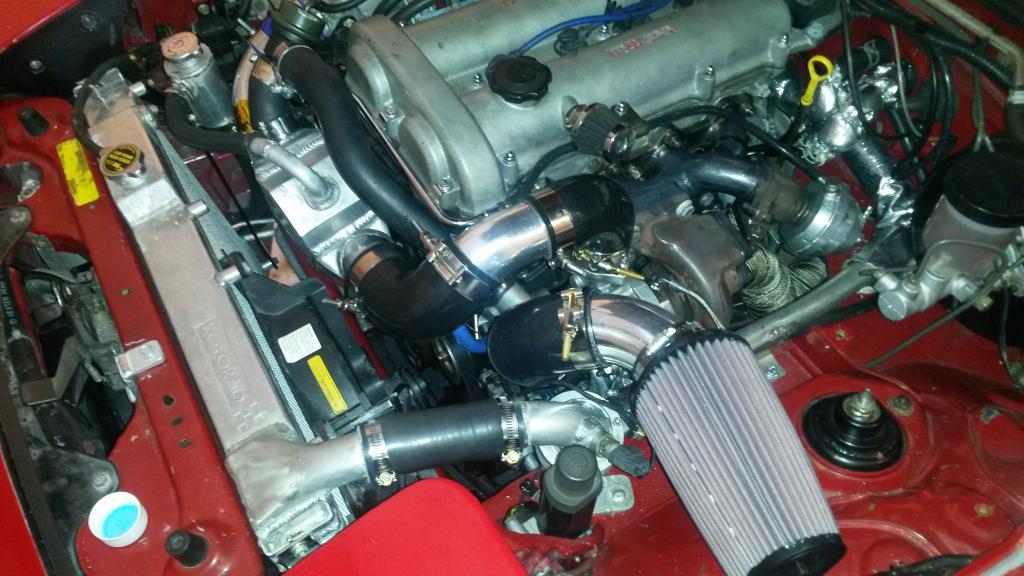
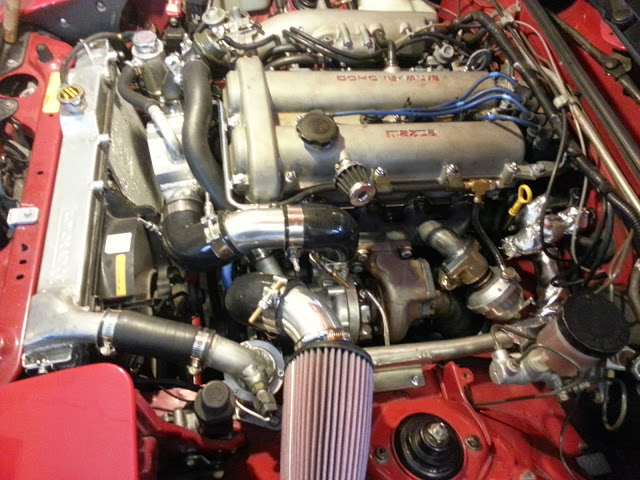
Here are the pictures of the engine bay the way I bought it from Hhammerly.
Water to air intercooler and running MSPNP1


I know you guys do not prefer superchargers but this setup was fun. I posted the whole setup for sale here and clubroadster.com ...and of course, not one hit here but I manage to sell it for $1000 at the other forum in less than 1 week.
Now I had $1000 to play with and get the turbo installed. I got this t25 turbo and Tial wastegate from the zilvia.net forum for only $130 shipped for both. The turbo did not have much play but I still bought a g-pop rebuild kit and rebuilt it myself for under $100
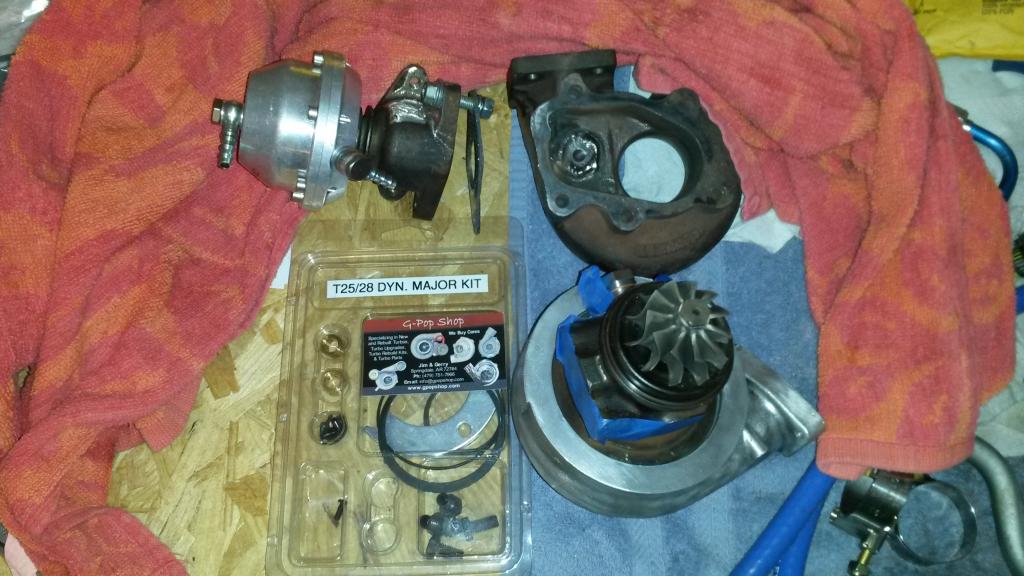
I decided to stay with the 1.6L because of my budget and the fact that the engine was rebuilt about 10000 miles ago, it had been running with the SC with no problems.
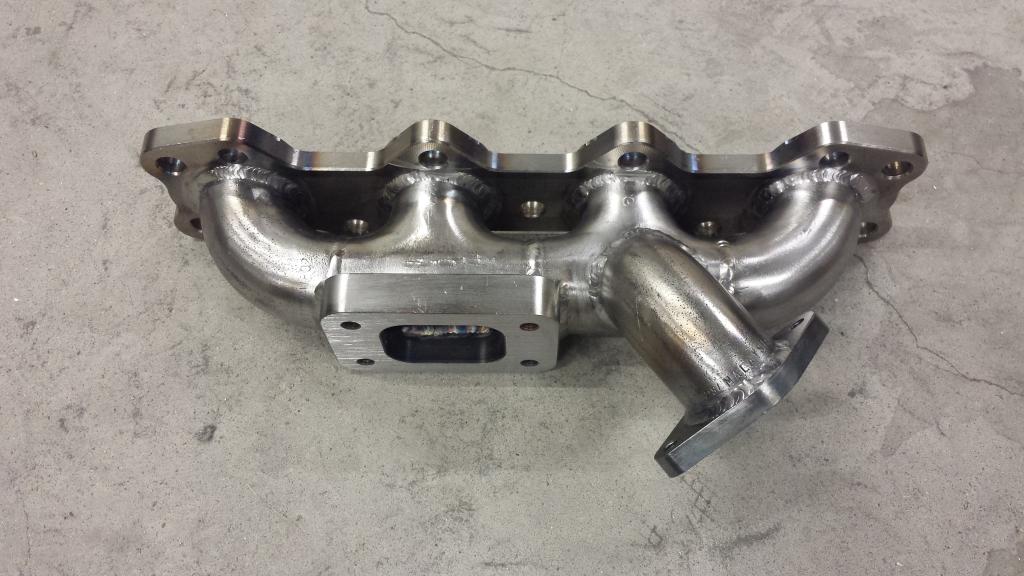
I tried to source a used exhaust manifold but could not find one so I had Abe made me this one, he is shipping it tomorrow. He alredy had a t25 and a Tial f38 EWG in his shop so I didnt even need to send them mine for mock up. All he needed was me to provide the EWG flange, which I got at atpturbo
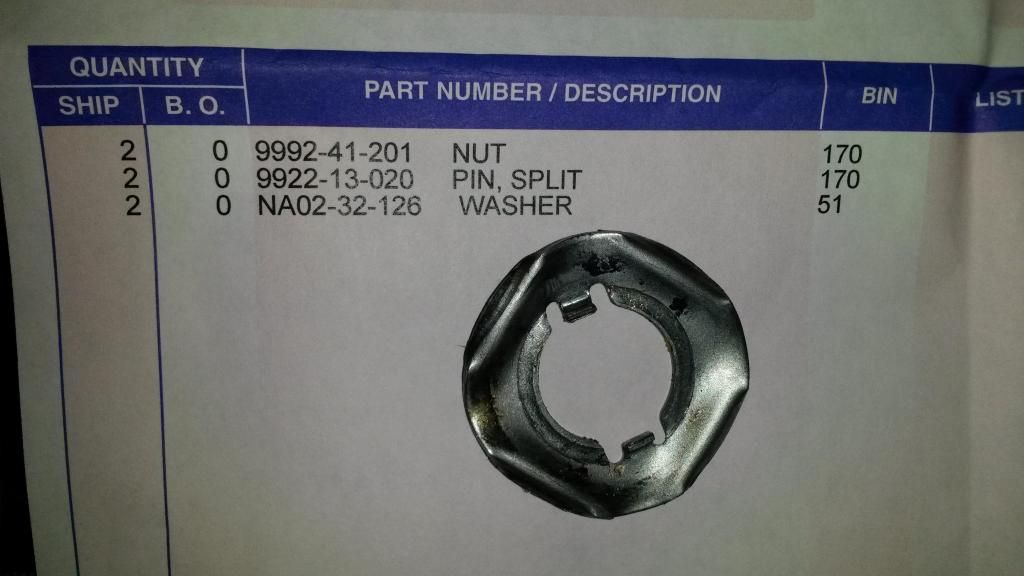
Next on the list was the power steering, I was going to keep the PS but decided to depower mine the proper way. I did it per flyin miata instructions, and also welded the steering shaft (sorry no pictures of that) for less flex. Flyin Miata fails to mention you should change these washers when you remove the inner tie rods, you also need a 30mm combination wrench, which I got from Amazon for $10 and grinded the end so it would fit on the inner tie rod (the space for the wrench is 8mm wide, the wrench was 12mm wide).
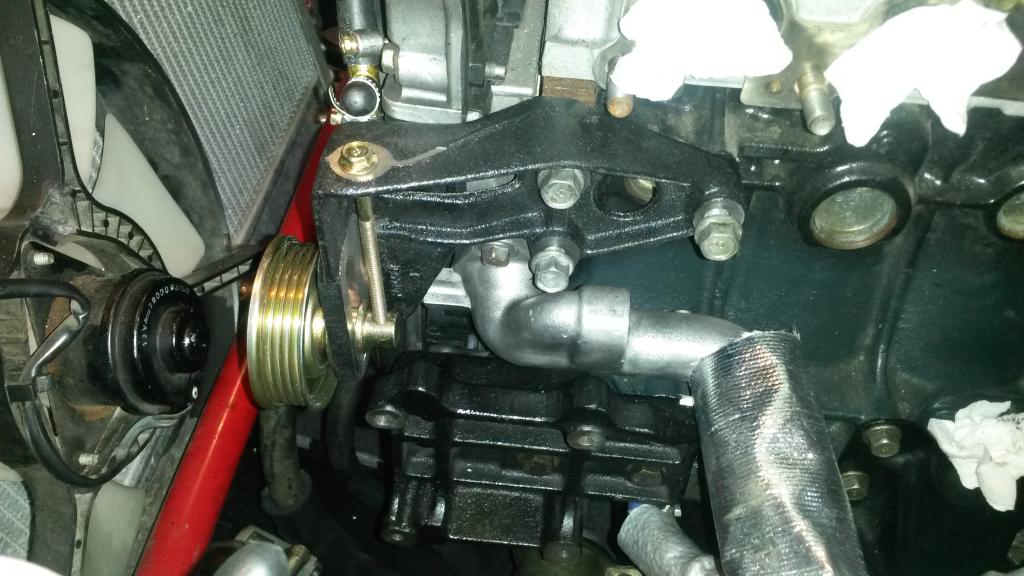
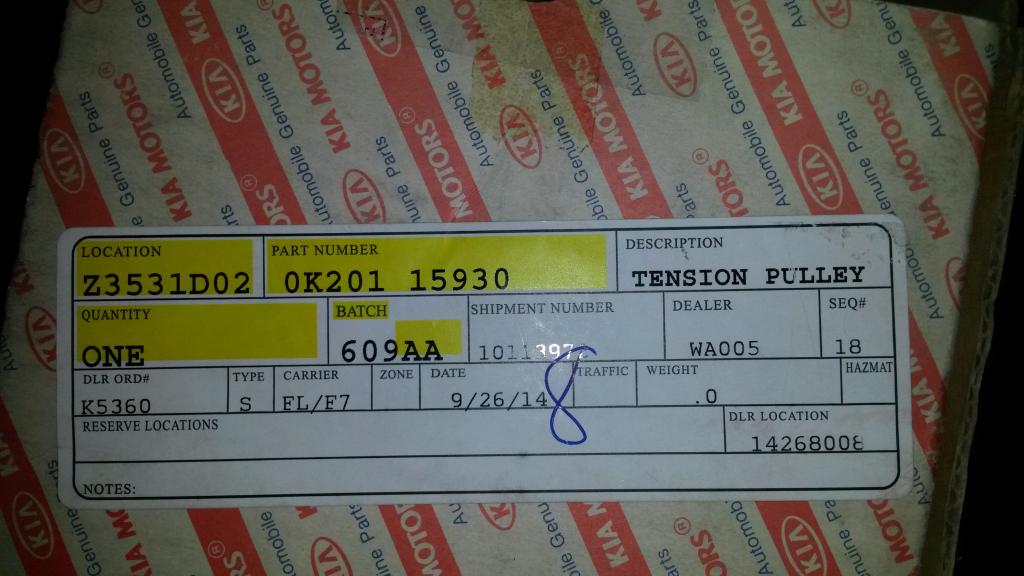
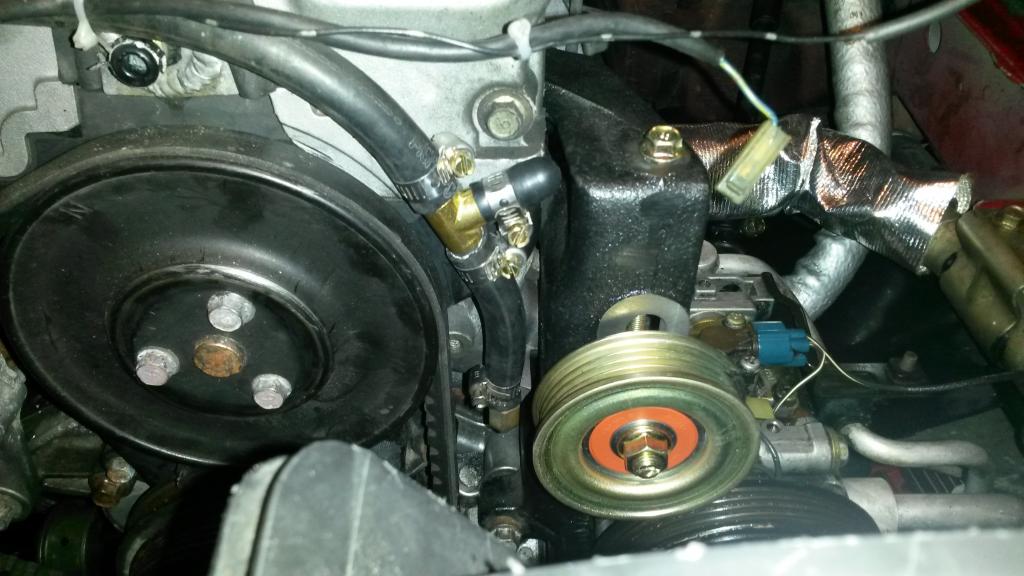
I decided to keep the AC and I did not like the idea of putting tension on the belt by sliding washers under the compressor so I got the Kia tensioner and it fits perfectly.
Part number
In the mean time, I bought the Mazda RX7 10mm studs for the turbo to manifold and stage 8 10 x 1.5mm nuts. I had to put the turbo in a lathe and enlarge the holes because it comes drilled for 8mm studs. The stage 8 10mm nuts fit perfectly.
I will have to drill Artechs manifold because it is drilled for 8mm studs
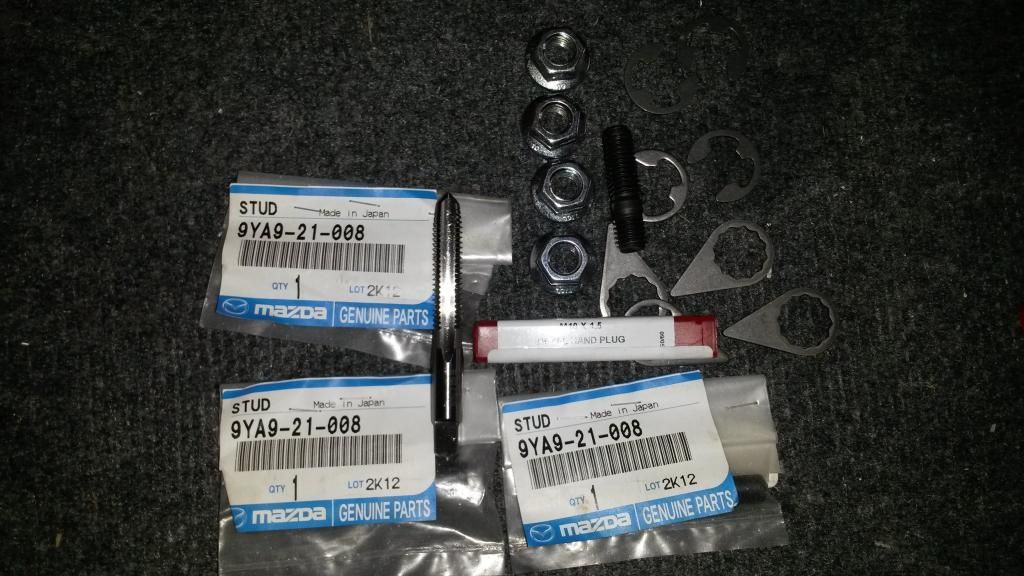
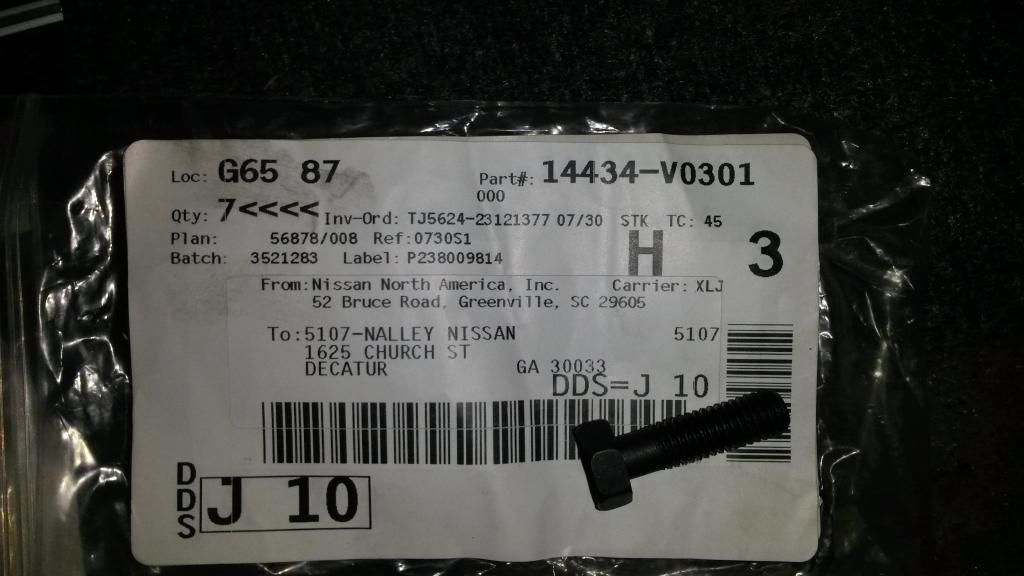
I also got brand new studs for the exhaust side of the turbo, tried to install them but the threads are quite rusty, so I ordered a m8x 1.25 tap to chase the threads and try again. I also got Resbond from Mcmaster, (it was not cheap ~$40) Here are the Nissan studs, they are supposed to be inconel too
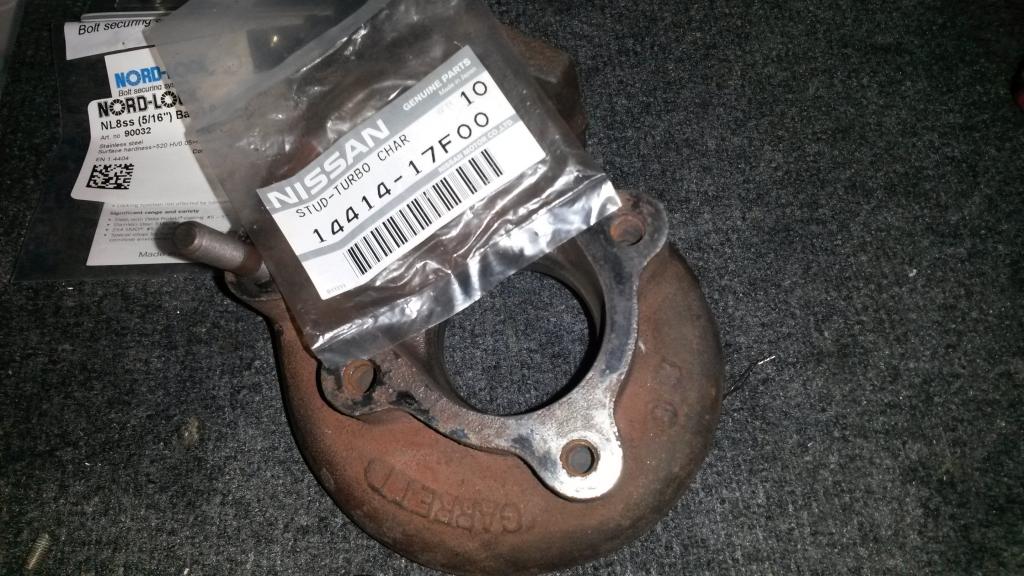
I also got these "inconel" bolts from Nissan. I will use them for the EWG
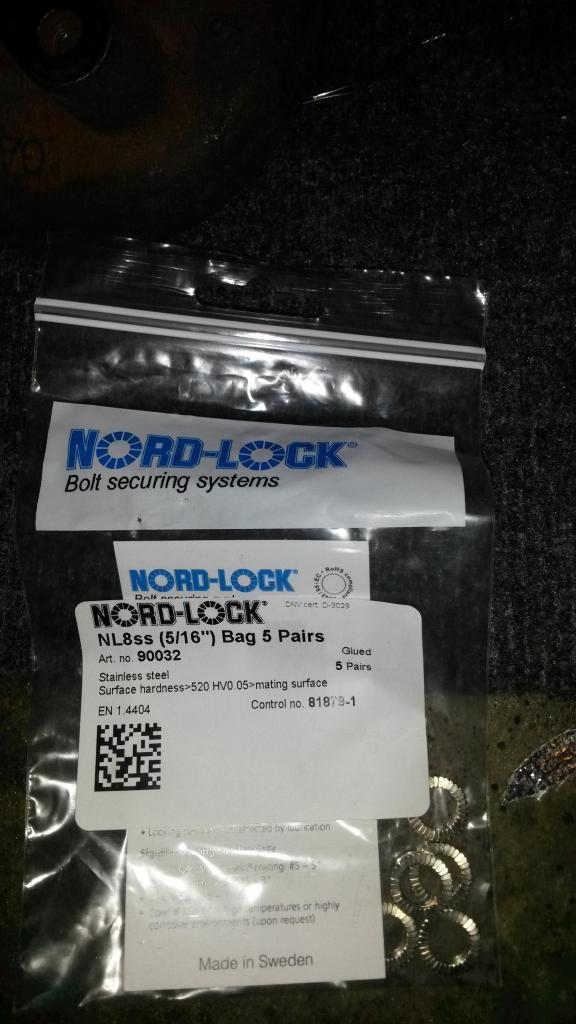
Nordlock washers from Mcmaster the keep everything tight
20141010_122048_zps3cb78d80.jpg?t=1412959579
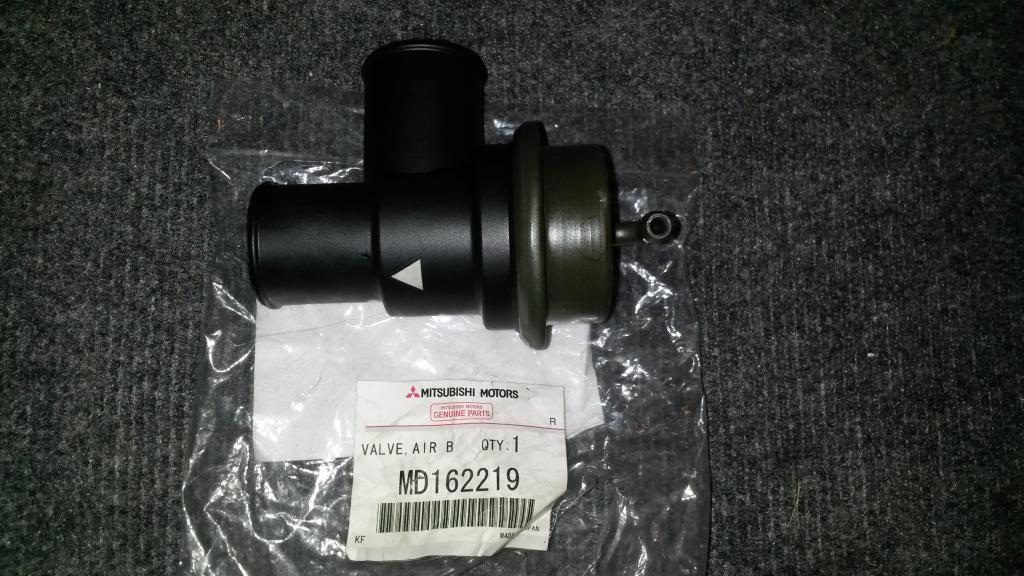
I had hhammerly weld the BOV outlet (weird 1 3/8 od) to the intercooler and got a Mitsubishi BOV, the one Begi sells. Buy it from the dealer and its only $56. I tapped the back of the cold side of the intercooler and added a 90 degree barb for the EWG boost source.
Here is the BOV and part number
20141010_121526_zps20c65987.jpg?t=1412959658
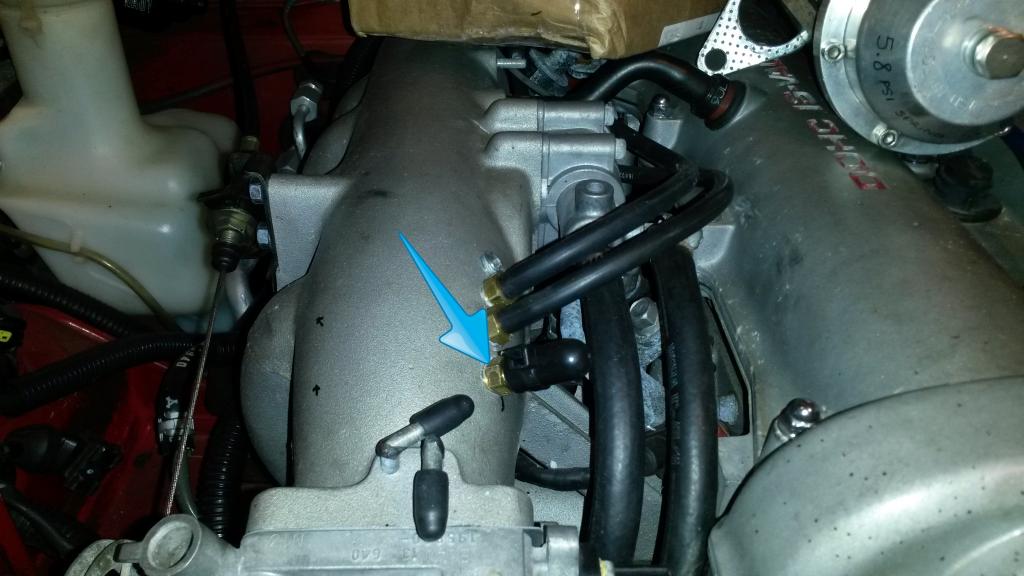
I also tapped to intake manifold and added some barb fittings for vacuum and BOV source
20141010_120529_zps7e88361c.jpg?t=1412959809
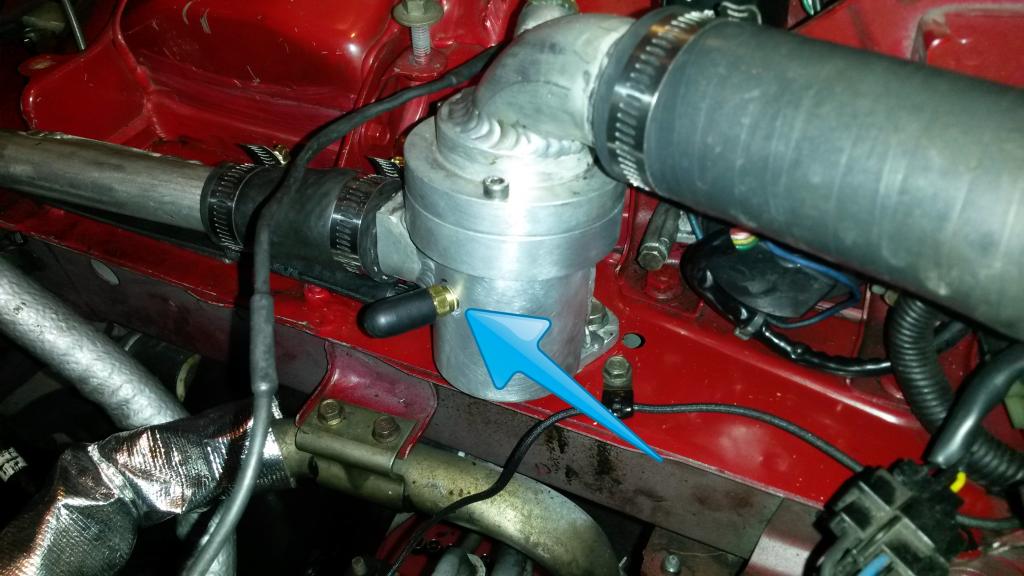
Here is the turbo water supply
And the water return, on the Honda thermostat housing that Hhammerly had made for the coolant reroute.
20141010_120504_zps94a39899.jpg?t=1412873457
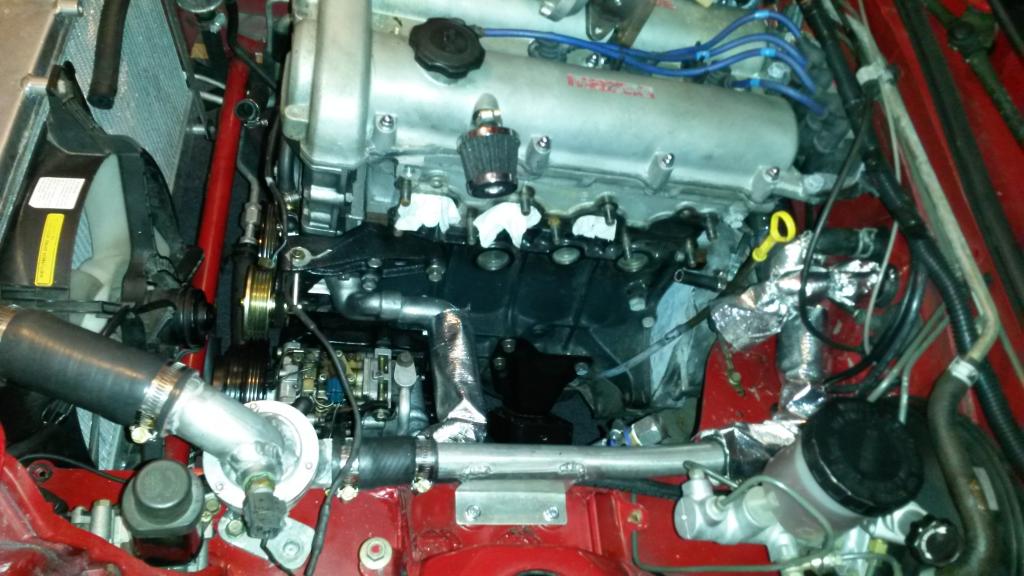
I bought the artech oil/water lines from a member here. Mock up placement
20141010_121010_zpsaad3b854.jpg?t=1412959696
Modified and painted the heater core tube so its far far away from the turbo. The reason why it has another nipple on it is because that is necessary to supply a constant flow of water for the Honda thermostat.
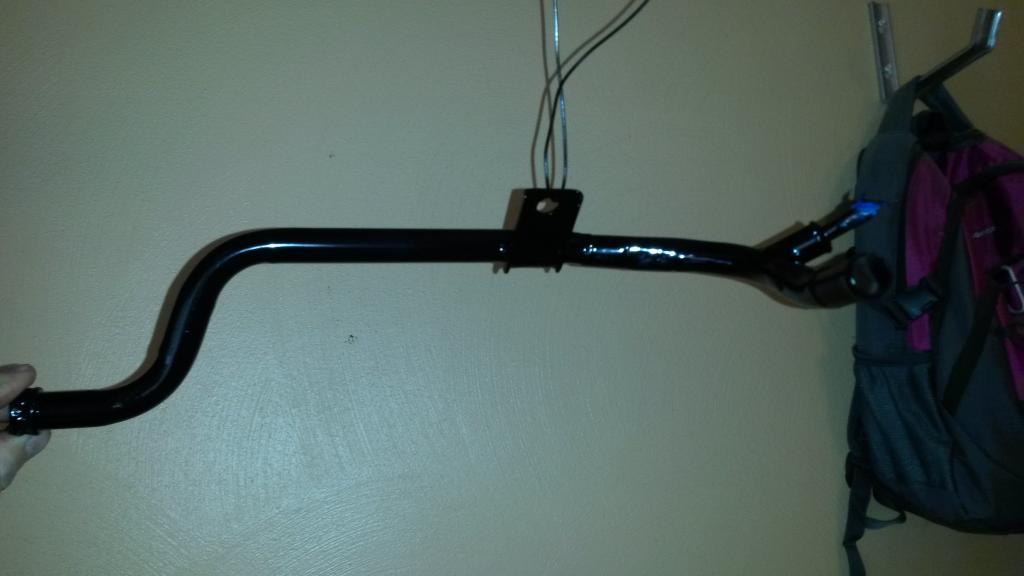
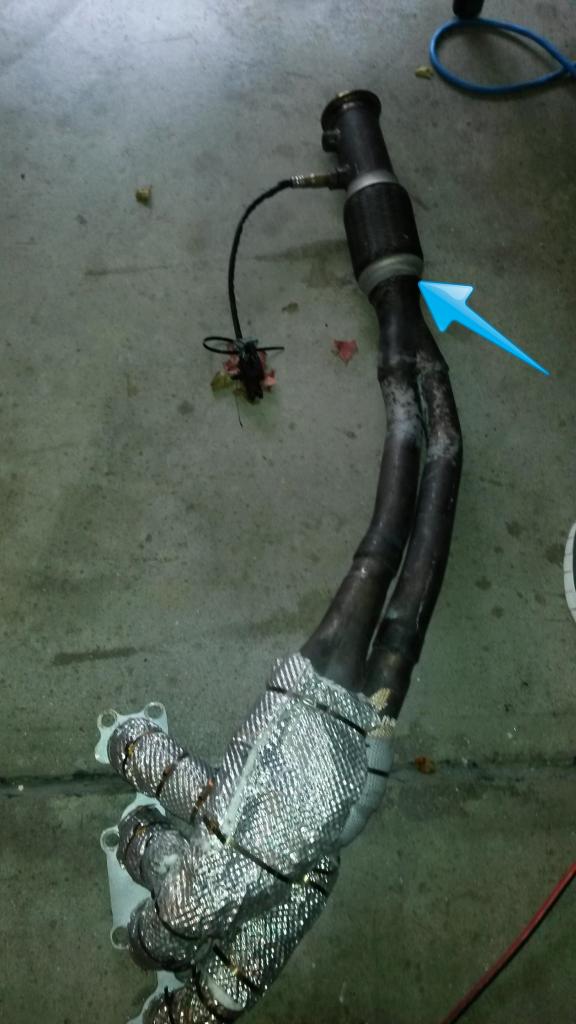
Hhammerly had modified a OBX header and added a 2.5" collector and flex pipe to it. I plan on chopping it where the arrow is and weld my future downpipe there.
20141010_120550_zpsa320004d.jpg?t=1412959757
And finally, I added insulation to all the heater/radiator hoses.
My goal is to use this 1.6l until it gives up then build a 1.8l. I hope I can get it to run close to 180hp at 10-12 psi. We shall see.
Things to do will be to finish the intercooler piping and made a downpipe and dump tube. Hopefully I will get the exhuast manifold from Abe early next week. My MSPNP was dyno tuned for the JRSC so it should not be too far away to run decent with the turbo.
Any comments and suggestions are appreciated. Keep in mind I am trying to stay close to $1000
It all started with a 1990 JRSC Miata that Hhammerly (my uncle) built. I bought it from him in August. We used to race it at the autocrosses locally and the supercharger was lots of fun, but I wanted a little more power.
Here are the pictures of the engine bay the way I bought it from Hhammerly.
Water to air intercooler and running MSPNP1
I know you guys do not prefer superchargers but this setup was fun. I posted the whole setup for sale here and clubroadster.com ...and of course, not one hit here but I manage to sell it for $1000 at the other forum in less than 1 week.
Now I had $1000 to play with and get the turbo installed. I got this t25 turbo and Tial wastegate from the zilvia.net forum for only $130 shipped for both. The turbo did not have much play but I still bought a g-pop rebuild kit and rebuilt it myself for under $100
I decided to stay with the 1.6L because of my budget and the fact that the engine was rebuilt about 10000 miles ago, it had been running with the SC with no problems.
I tried to source a used exhaust manifold but could not find one so I had Abe made me this one, he is shipping it tomorrow. He alredy had a t25 and a Tial f38 EWG in his shop so I didnt even need to send them mine for mock up. All he needed was me to provide the EWG flange, which I got at atpturbo
Next on the list was the power steering, I was going to keep the PS but decided to depower mine the proper way. I did it per flyin miata instructions, and also welded the steering shaft (sorry no pictures of that) for less flex. Flyin Miata fails to mention you should change these washers when you remove the inner tie rods, you also need a 30mm combination wrench, which I got from Amazon for $10 and grinded the end so it would fit on the inner tie rod (the space for the wrench is 8mm wide, the wrench was 12mm wide).
I decided to keep the AC and I did not like the idea of putting tension on the belt by sliding washers under the compressor so I got the Kia tensioner and it fits perfectly.
Part number
In the mean time, I bought the Mazda RX7 10mm studs for the turbo to manifold and stage 8 10 x 1.5mm nuts. I had to put the turbo in a lathe and enlarge the holes because it comes drilled for 8mm studs. The stage 8 10mm nuts fit perfectly.
I will have to drill Artechs manifold because it is drilled for 8mm studs
I also got brand new studs for the exhaust side of the turbo, tried to install them but the threads are quite rusty, so I ordered a m8x 1.25 tap to chase the threads and try again. I also got Resbond from Mcmaster, (it was not cheap ~$40) Here are the Nissan studs, they are supposed to be inconel too
I also got these "inconel" bolts from Nissan. I will use them for the EWG
Nordlock washers from Mcmaster the keep everything tight
20141010_122048_zps3cb78d80.jpg?t=1412959579
I had hhammerly weld the BOV outlet (weird 1 3/8 od) to the intercooler and got a Mitsubishi BOV, the one Begi sells. Buy it from the dealer and its only $56. I tapped the back of the cold side of the intercooler and added a 90 degree barb for the EWG boost source.
Here is the BOV and part number
20141010_121526_zps20c65987.jpg?t=1412959658
I also tapped to intake manifold and added some barb fittings for vacuum and BOV source
20141010_120529_zps7e88361c.jpg?t=1412959809
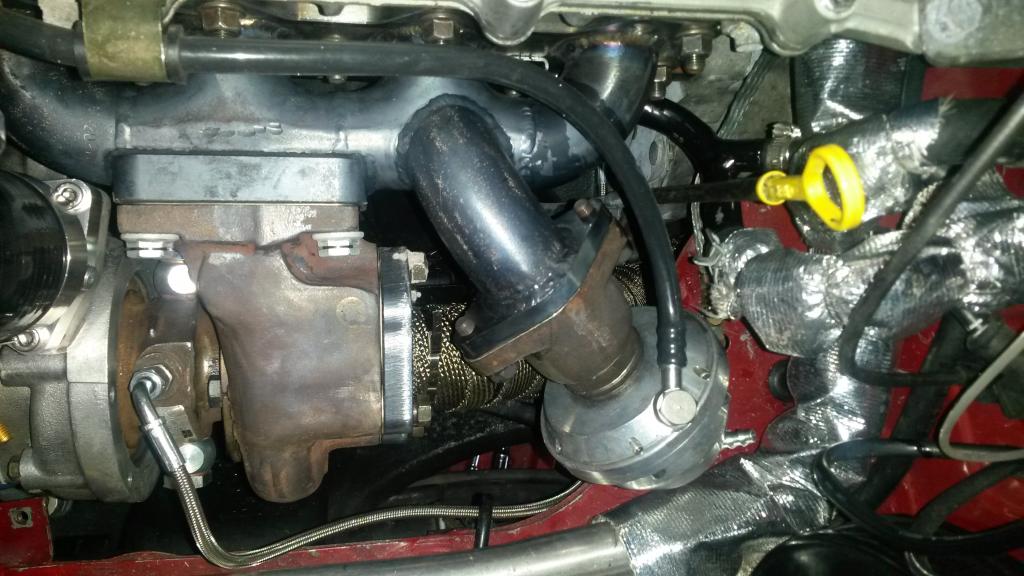
Here is the turbo water supply
And the water return, on the Honda thermostat housing that Hhammerly had made for the coolant reroute.
20141010_120504_zps94a39899.jpg?t=1412873457
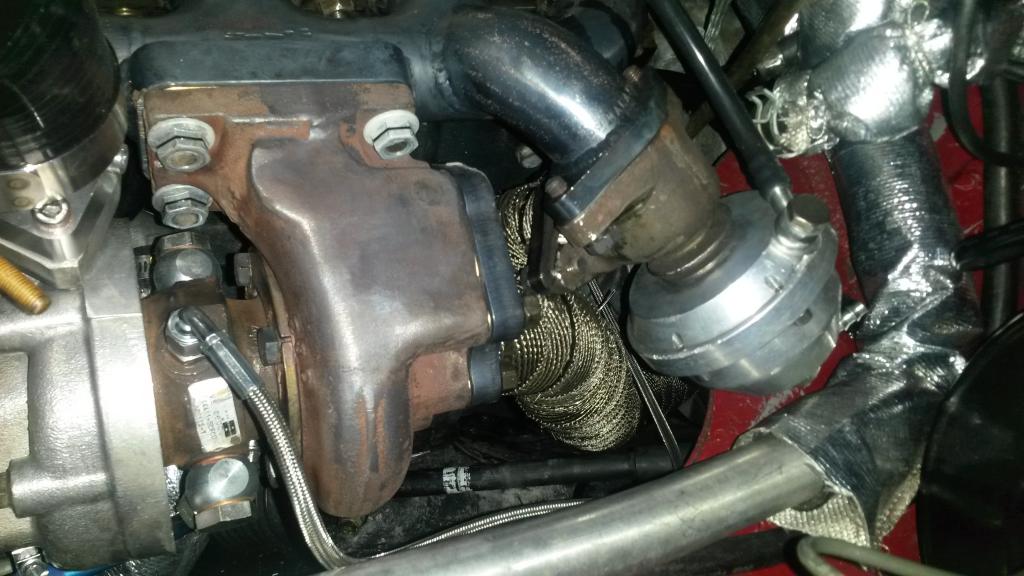
I bought the artech oil/water lines from a member here. Mock up placement
20141010_121010_zpsaad3b854.jpg?t=1412959696
Modified and painted the heater core tube so its far far away from the turbo. The reason why it has another nipple on it is because that is necessary to supply a constant flow of water for the Honda thermostat.
Hhammerly had modified a OBX header and added a 2.5" collector and flex pipe to it. I plan on chopping it where the arrow is and weld my future downpipe there.
20141010_120550_zpsa320004d.jpg?t=1412959757
And finally, I added insulation to all the heater/radiator hoses.
My goal is to use this 1.6l until it gives up then build a 1.8l. I hope I can get it to run close to 180hp at 10-12 psi. We shall see.
Things to do will be to finish the intercooler piping and made a downpipe and dump tube. Hopefully I will get the exhuast manifold from Abe early next week. My MSPNP was dyno tuned for the JRSC so it should not be too far away to run decent with the turbo.
Any comments and suggestions are appreciated. Keep in mind I am trying to stay close to $1000
Reply
 1
1

1
 10-10-2014 | 03:49 PM
#4

Junior Member
Joined: Sep 2012
Posts: 283
Total Cats: 12
From: Cranston, RI
This is looking promising. Car looks clean! Got any exterior shots?
I also did an SR20 setup on my car. My thread is in my signature. On my 1.8, I am at 202 whp around 11 psi. Running MSPNP2 and a MBC.
I also did an SR20 setup on my car. My thread is in my signature. On my 1.8, I am at 202 whp around 11 psi. Running MSPNP2 and a MBC.
Reply
0
0
 10-10-2014 | 05:11 PM
#6
Thread Starter
Senior Member
iTrader: (3)
Joined: Oct 2008
Posts: 610
Total Cats: 12
From: Indianapolis
Never mind. I just looked at the greddy ebc looks like it's a standalone unit? But it's $450 new. At that price I rather get an ms2 and use the MS ebc
Reply
0
0


 10-28-2014 | 10:07 AM
#11
Thread Starter
Senior Member
iTrader: (3)
Joined: Oct 2008
Posts: 610
Total Cats: 12
From: Indianapolis
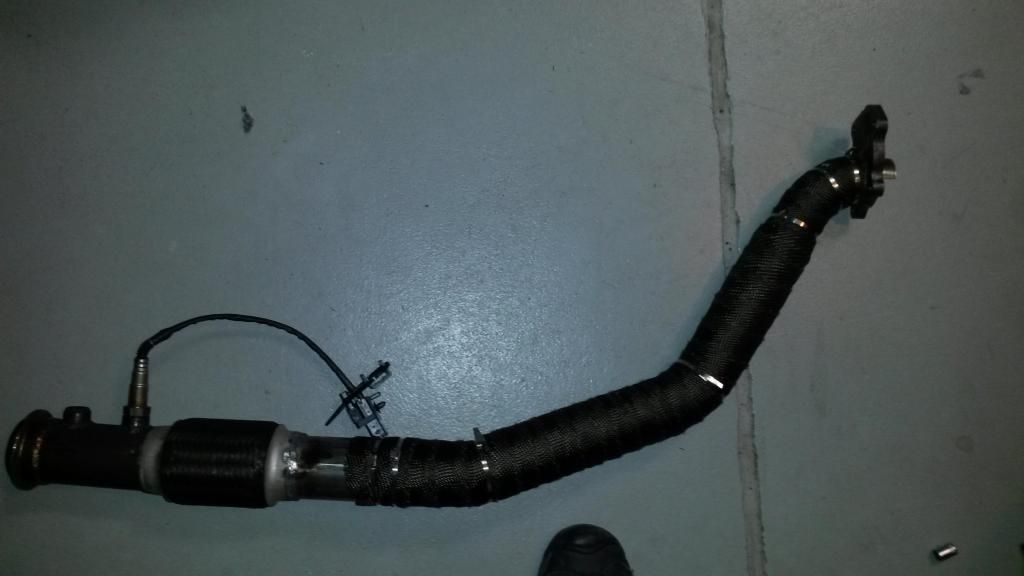
I made the downpipe this weekend out of 409 stainless, well...tack welded it and HHammerly tig welded it (thanks!), total cost was $50 (2 180degree dynomax bends from Summit) plus the Vibrant flange $30. One of the holes in the flange was a little off so it had to be enlarged. Thankfully Hhammerly as a lathe that took care of it.
Also, we machined a blank piece of metal to cover the internal wastegate hole.
The downpipe is 2" for the first bend to 2.5". The rest of the exhaust was recently made out of 304 stainless + nice metal core cat so I will leave it the way it is.
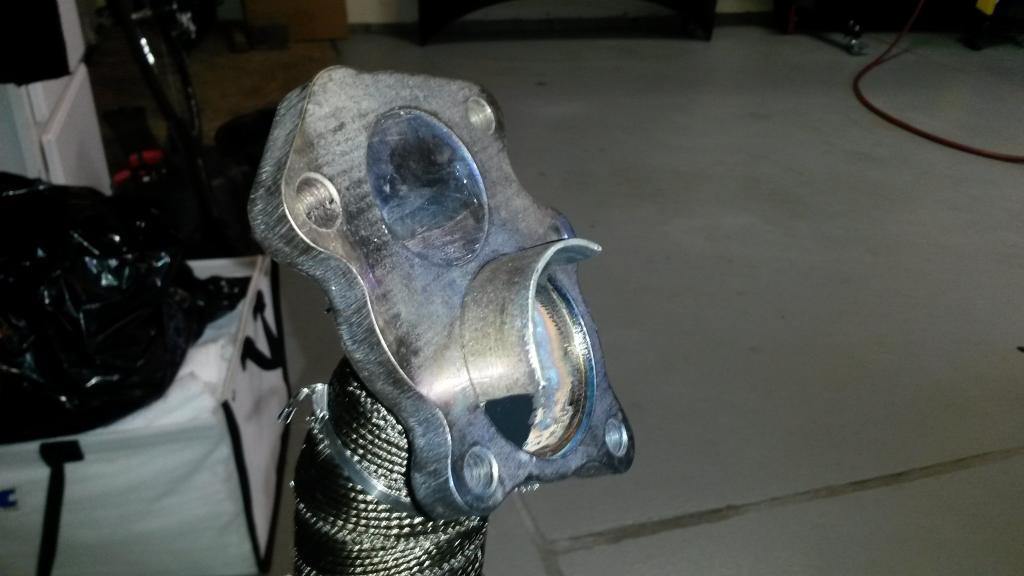
I reused the flexpipe that came with the car
Also, we machined a blank piece of metal to cover the internal wastegate hole.
The downpipe is 2" for the first bend to 2.5". The rest of the exhaust was recently made out of 304 stainless + nice metal core cat so I will leave it the way it is.
I reused the flexpipe that came with the car
Reply
0
0
10-28-2014 | 10:15 AM
#12
Thread Starter
Senior Member
iTrader: (3)
Joined: Oct 2008
Posts: 610
Total Cats: 12
From: Indianapolis
Downpipe has a good 1" clearance on both sides. I also made the dumptube and made a bracket to attach it to the transmission. The middle section of the dumptube was made with this http://www.sfxperformance.com/parts/VIB84027.htm , hopefully it lasts.
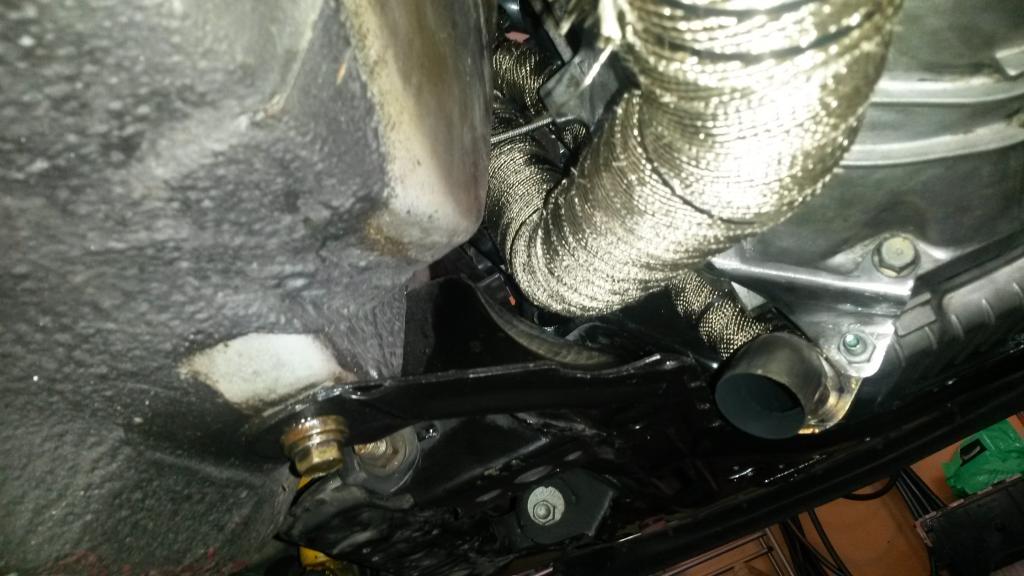
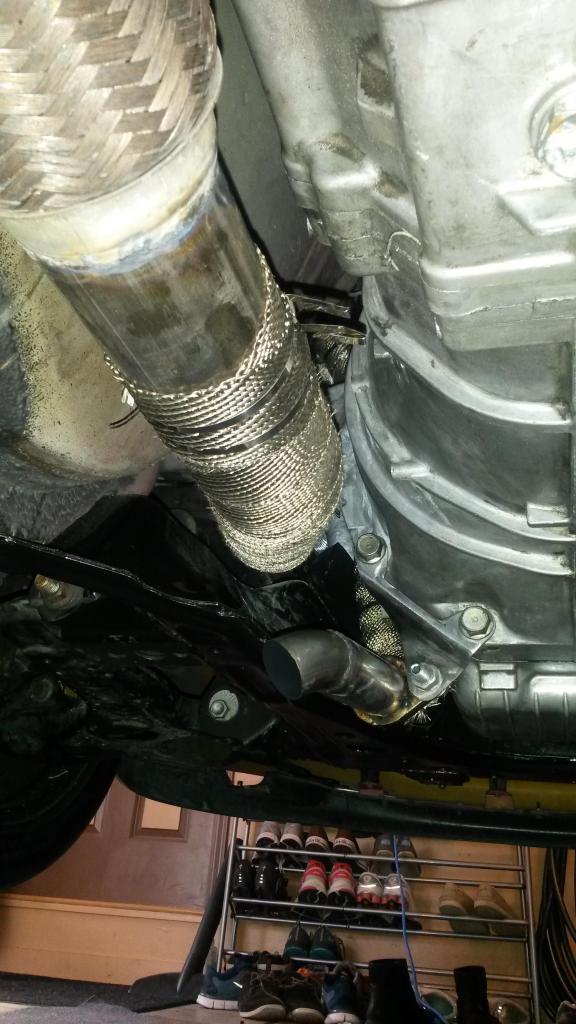
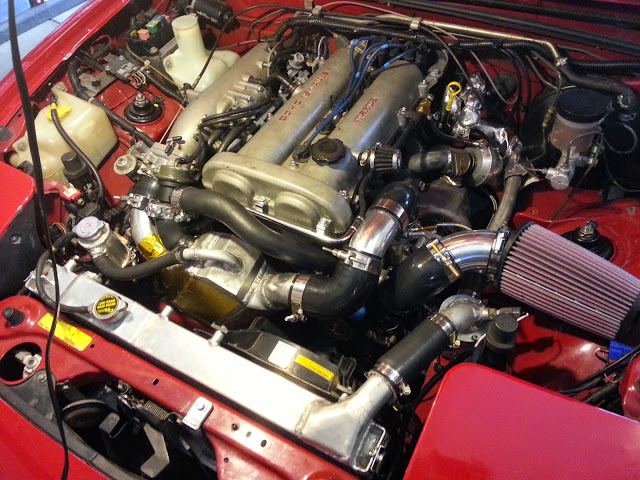
Finished the intercooler piping. Straight shot!!!!
And here is a close up pic of how everything fits snugly. Thanks Abe for the awesome manifold. The last turbo setup I had was from Begi, making your own stuff actually makes everything easier and fits better.
I have to install the stage 8 retaining clips, I was too lazy at the time.
Reply
0
0

 11-10-2014 | 10:56 AM
#14
Thread Starter
Senior Member
iTrader: (3)
Joined: Oct 2008
Posts: 610
Total Cats: 12
From: Indianapolis
Thanks man, I wish I would have started this thread under "Builds". But I guess its also a DIY, except the artech manifold.
Thanks for tuning my enrichments, the car drives better. I got it to idle better this morning too. Get ready for some autocrosses next spring!
Thanks for tuning my enrichments, the car drives better. I got it to idle better this morning too. Get ready for some autocrosses next spring!
Reply
0
0
 11-11-2014 | 09:48 PM
#20
Thread Starter
Senior Member
iTrader: (3)
Joined: Oct 2008
Posts: 610
Total Cats: 12
From: Indianapolis
Yea I can do it next week. I'm using the stock diyautotune spark map...timing needs work. Curly was nice enough to give me his but I don't want to test it until I get in the dyno with a det-can. I also think it will spool up faster with a ebc. I have a mbc now, I wanted to go step by step. Cops are next
Reply
0
0


