Let's make a Miata that shoots rainbows
#1
Thread Starter
Junior Member
iTrader: (2)
Joined: Jan 2013
Posts: 48
Total Cats: 5
From: San Marcos, TX/ Houston,TX
Decided to make a thread to chronicle the adventures of my Miata build.
A few years ago I went to an event at Harris Hill Road in my (mostly stock at the time) Evo X SE. Here we basically did a few follow sessions where we chased an instructor around the track. After being hossed by an instructor driving a yellow NC, I decided I wanted a see what this little queer car was all about. I bought a 90 1.6L which I quickly flipped. Then got a 95 1.8L but wasn't happy with the condition of the car and finally bought a 94 M-Edition which I decided to keep. After a few months I decided I wanted to make the Miata fast, but 250 hp wasn't going to be enough; my goal is to make this little bugger shoot rainbows.
Here is a pic of the 94 when I picked it up at a shop next to Motorsports Ranch in Cresson.

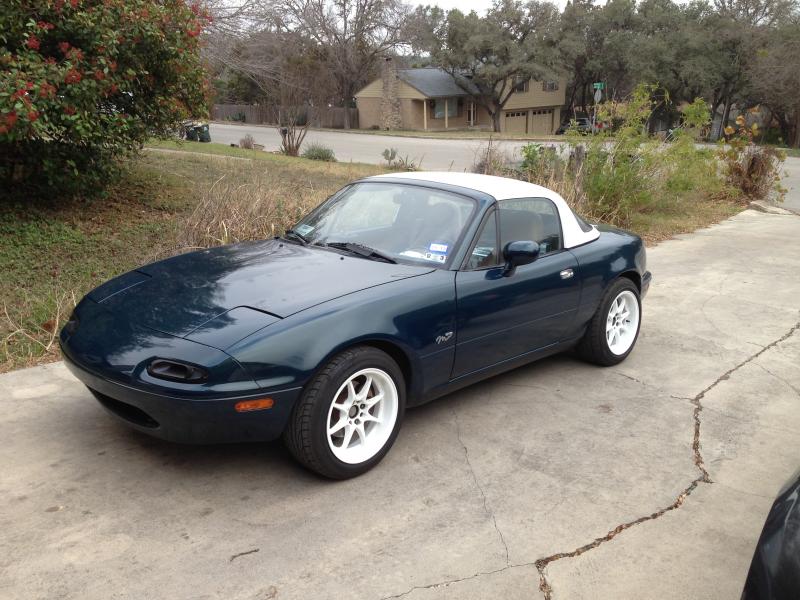
Here it is after I transplanted the rims and hardtop that I used to have the 95. The color combo isn't too bad, but I hate the motigo blue color. Dam thing can't decided if it's blue or green.
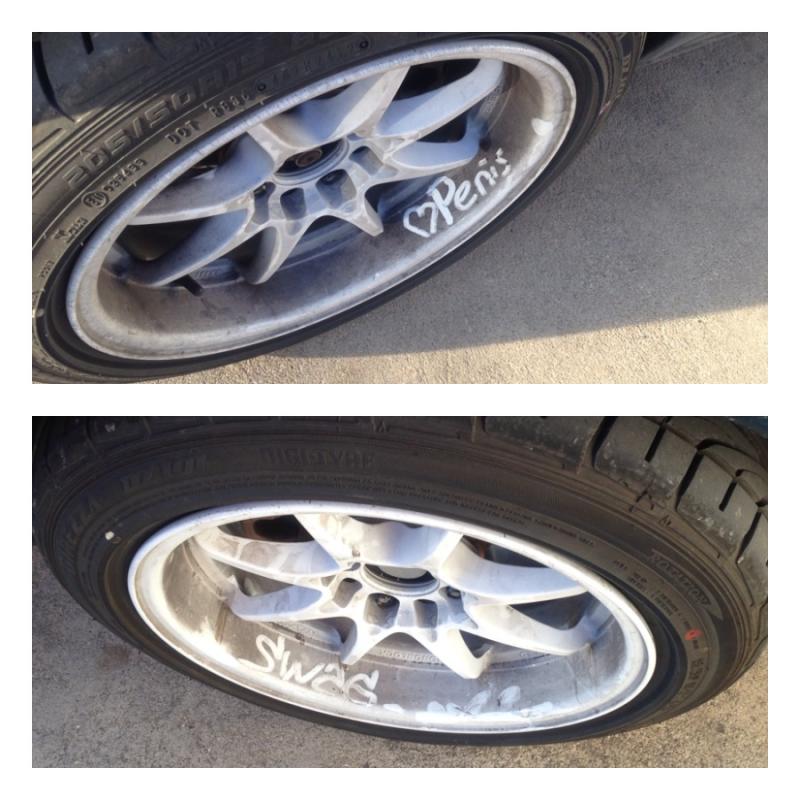
The white rims are cool but are a pain to keep clean. If you got friends like mine, you better keep them clean or else...
Throughout the build, I've had 2 good friends helping me along the way. Both BlackHornet and ScottyP3821 have been helping me make progress on this PITA as well as give me advice. They have also added their own ideas and twists into the plot.
BlackHornet wanted to build a start button setup, but didn't like how most of the ones online where done. We picked up a cubby from a Protoge, some plugs for the ignition harness, a few relays and buttons and he got to working. This setup doesn't require any splicing into the car and the stock ignition setup can be hooked back up in seconds. This is the end result.
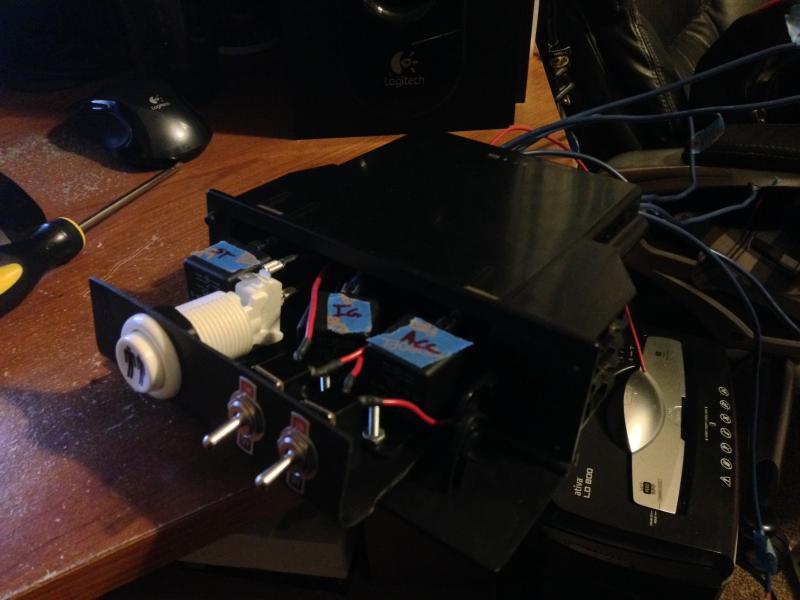
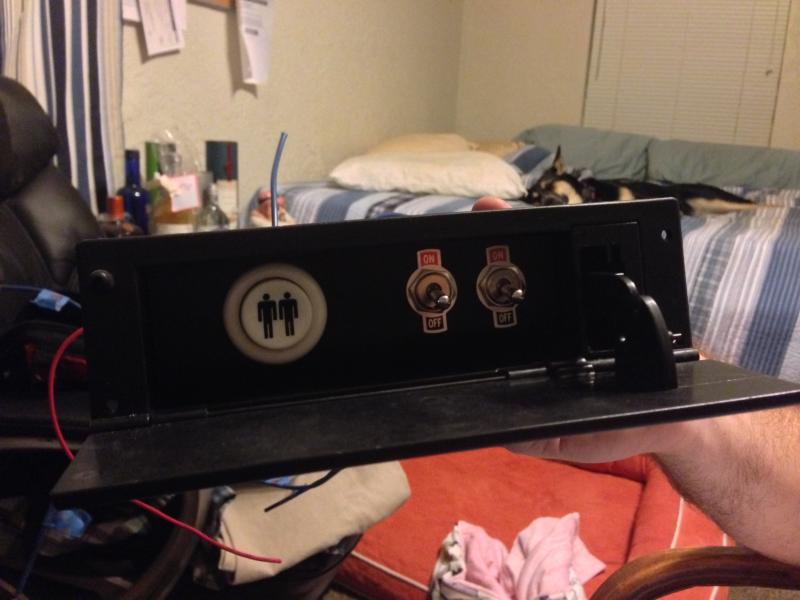
The switch on the far right is the accessories. The middle one is the fuel pump. The 2 player button cranks the car. You can't own a Miata and not have some fun with it, so the 2 player button just seamed appropriate as hell.
Somewhere around this time I installed a set of Frog Arms as well as the Harddog M2 roll bar from my 95. I also picked up a cheap strut bar from GoMiata. In with the roll bar went a set of Schroth PROFI ASM 2 harnesses and picked up a set of Corbeau A4s. These seats are super comfortable and fit my fat *** (42 inch waist) but don't quite fit in the car using the Corbeau seat rail. My head is just above the roll bar and that is a no no; still trying to figure out a fix for this without having to hack the floor of the car or loosing weight.
Next up I installed a full kit of Prothane Bushings on all four corners, diff and sway bars. As most of yall know, if you don't have a press this job might as well be considered torture. I used a rod of all-thread and some washers bigger than the holes for the bushings and some smaller than the holes so I could back them out of the control arms. Never doing it this way again. Ever. I also picked up a set of "Moose Knuckles" from Danny George. Honestly I dono why I did. I had the cash, he had them for sale, I said "oh wells rainbows and driftzors for me". I kept the dust shields so the epicness is quite limited.
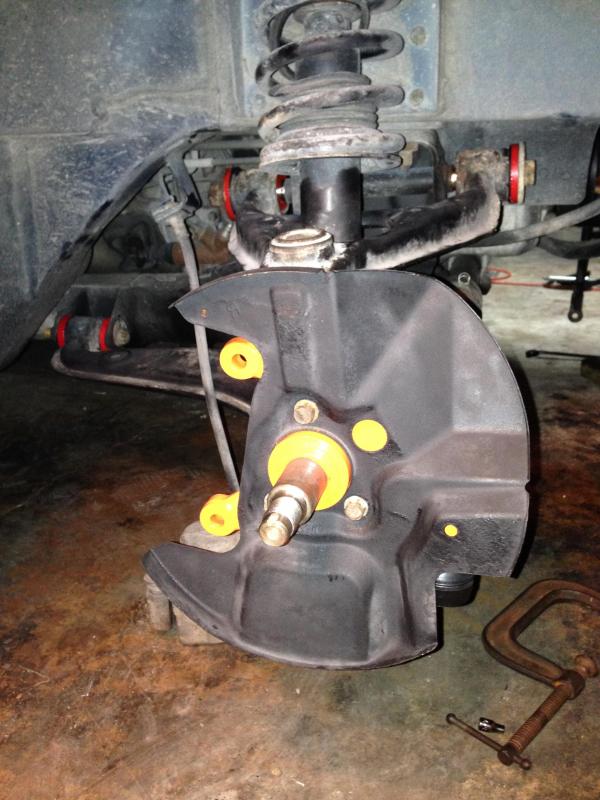
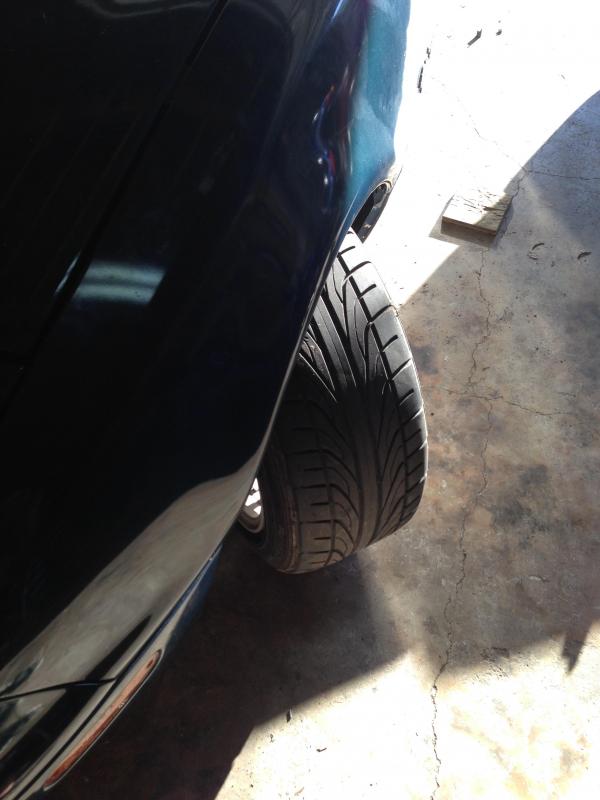
Car now has something like 45* of turn-in. Miata's have good turning radius, but my car is now a U-turn champ lol.
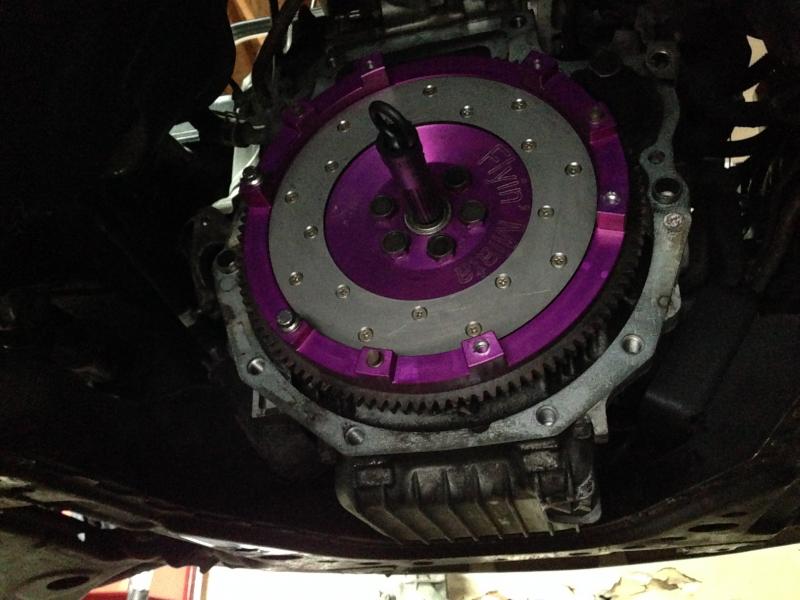
I picked up the complete drive train from an NB from a guy in the Houston Miata Club. Guy was prety cool and threw in a MiataRoadster short shifter kit and a Fidanza 2piece flywheel that needed a new plate. The plan is to brake in the clutch and install the rear end before putting in the new motor. We installed the flywheel and found out the hard way that the oem pressure plate bolts just don't fit...
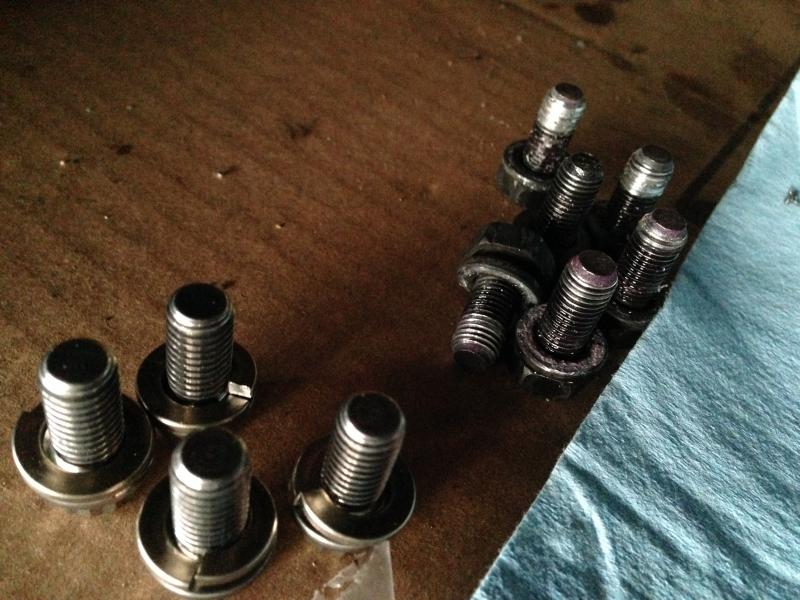
The guy gave me a set of pressure plate bolts from ARP but those also didn't quite fit. We ended up tapping the flywheel to fit the larger ARP hardware and everything went well. Here is a pic of the carnage, on the right is the oem and the left is the fresh ARP stuff.
For the clutch I decided to go with a Clutch Masters FX300. So far it feels awesome, granted I've only driven it for 14 miles lol. This is going to be the longest 500 miles of my life. I also picked up one of the "straight shot" clutch cables from Bill at MiataRoadster.
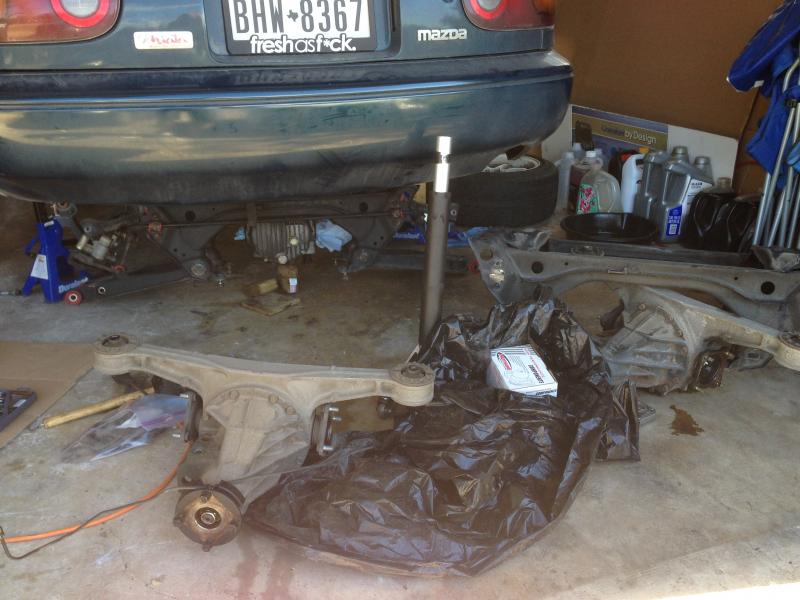
We ran into some problems when the original nuts for the main studs on the subframe that hold the diff didn't want to go back in. After being fed some incorrect information about the size of the oem nuts, we re-threaded the studs. I know... dumb idea. As I was installing the 3.90 torsen into the car I stripped the stud on the subframe... I raged with the fury of 10,000 suns and cursed the universe for my noobness. I was incredibly lucky and managed to find a mint condition subframe in the junk yard. It also didn't hurt that it had a 4.10 torsen attached to it. I ended up paying $300 for the subframe, control arms, torsen, half shafts, drive shaft and some random M45 superchargers parts that where on the car. We cleaned the new subframe and coated it with rustoleum and put the new rear end back in the car.
I now has Torsens for days. (2 4.10 torsens in the front and the 3.9 on the old subframe).
A few years ago I went to an event at Harris Hill Road in my (mostly stock at the time) Evo X SE. Here we basically did a few follow sessions where we chased an instructor around the track. After being hossed by an instructor driving a yellow NC, I decided I wanted a see what this little queer car was all about. I bought a 90 1.6L which I quickly flipped. Then got a 95 1.8L but wasn't happy with the condition of the car and finally bought a 94 M-Edition which I decided to keep. After a few months I decided I wanted to make the Miata fast, but 250 hp wasn't going to be enough; my goal is to make this little bugger shoot rainbows.
Here is a pic of the 94 when I picked it up at a shop next to Motorsports Ranch in Cresson.

Here it is after I transplanted the rims and hardtop that I used to have the 95. The color combo isn't too bad, but I hate the motigo blue color. Dam thing can't decided if it's blue or green.

The white rims are cool but are a pain to keep clean. If you got friends like mine, you better keep them clean or else...

Throughout the build, I've had 2 good friends helping me along the way. Both BlackHornet and ScottyP3821 have been helping me make progress on this PITA as well as give me advice. They have also added their own ideas and twists into the plot.
BlackHornet wanted to build a start button setup, but didn't like how most of the ones online where done. We picked up a cubby from a Protoge, some plugs for the ignition harness, a few relays and buttons and he got to working. This setup doesn't require any splicing into the car and the stock ignition setup can be hooked back up in seconds. This is the end result.

The switch on the far right is the accessories. The middle one is the fuel pump. The 2 player button cranks the car. You can't own a Miata and not have some fun with it, so the 2 player button just seamed appropriate as hell.

Somewhere around this time I installed a set of Frog Arms as well as the Harddog M2 roll bar from my 95. I also picked up a cheap strut bar from GoMiata. In with the roll bar went a set of Schroth PROFI ASM 2 harnesses and picked up a set of Corbeau A4s. These seats are super comfortable and fit my fat *** (42 inch waist) but don't quite fit in the car using the Corbeau seat rail. My head is just above the roll bar and that is a no no; still trying to figure out a fix for this without having to hack the floor of the car or loosing weight.
Next up I installed a full kit of Prothane Bushings on all four corners, diff and sway bars. As most of yall know, if you don't have a press this job might as well be considered torture. I used a rod of all-thread and some washers bigger than the holes for the bushings and some smaller than the holes so I could back them out of the control arms. Never doing it this way again. Ever. I also picked up a set of "Moose Knuckles" from Danny George. Honestly I dono why I did. I had the cash, he had them for sale, I said "oh wells rainbows and driftzors for me". I kept the dust shields so the epicness is quite limited.

Car now has something like 45* of turn-in. Miata's have good turning radius, but my car is now a U-turn champ lol.

I picked up the complete drive train from an NB from a guy in the Houston Miata Club. Guy was prety cool and threw in a MiataRoadster short shifter kit and a Fidanza 2piece flywheel that needed a new plate. The plan is to brake in the clutch and install the rear end before putting in the new motor. We installed the flywheel and found out the hard way that the oem pressure plate bolts just don't fit...

The guy gave me a set of pressure plate bolts from ARP but those also didn't quite fit. We ended up tapping the flywheel to fit the larger ARP hardware and everything went well. Here is a pic of the carnage, on the right is the oem and the left is the fresh ARP stuff.

For the clutch I decided to go with a Clutch Masters FX300. So far it feels awesome, granted I've only driven it for 14 miles lol. This is going to be the longest 500 miles of my life. I also picked up one of the "straight shot" clutch cables from Bill at MiataRoadster.
We ran into some problems when the original nuts for the main studs on the subframe that hold the diff didn't want to go back in. After being fed some incorrect information about the size of the oem nuts, we re-threaded the studs. I know... dumb idea. As I was installing the 3.90 torsen into the car I stripped the stud on the subframe... I raged with the fury of 10,000 suns and cursed the universe for my noobness. I was incredibly lucky and managed to find a mint condition subframe in the junk yard. It also didn't hurt that it had a 4.10 torsen attached to it. I ended up paying $300 for the subframe, control arms, torsen, half shafts, drive shaft and some random M45 superchargers parts that where on the car. We cleaned the new subframe and coated it with rustoleum and put the new rear end back in the car.
I now has Torsens for days. (2 4.10 torsens in the front and the 3.9 on the old subframe).

#2
Thread Starter
Junior Member
iTrader: (2)
Joined: Jan 2013
Posts: 48
Total Cats: 5
From: San Marcos, TX/ Houston,TX
As of now everything from the flywheel back is installed. The 6speed install wasn't bad at all. Now I just have to put miles on the new clutch.
As far as the go fast bits go...
I picked up a built short block from yellowihss. It's bored to a 1.9L and has Wiseco 8.5:1 pistons, Scat rods, IJ crank scraper, ACL bearings and ARP hardware. Attached is a Boundary Engineering street/strip oil pump and new water pump. He had the oil pan coated in baller lime green powder just like the frog arms (already tapped for the return line).
For the head, I'm using a 99 head and intake manifold. I stripped the manifold and had all the EGR stuff removed, living in a non-emmisions county rocks lol. I got +1mm nitrated intake valves and +1mm inconel exhaust valves from SuperTech, 56 lbs single spring kit with shims, retainers and Ti keepers and a MSM intake cam. I'm throwing in some Fidanza adjustable cam gears in there too. Also got new seals and guides then took the head to Kozmic Motorsports (they have done all the work on my Evo) to machine and assemble the head for me.
When it came to installing the head on the block, I read a ton of info about not using copper spray on an MLS gasket. I talked to the guys from the shop for a while about what to do and they recommended using the spray. I figure they did the machine work on the head and have built a crap ton of high boost motors including the one in my evo so I followed their recommendation.
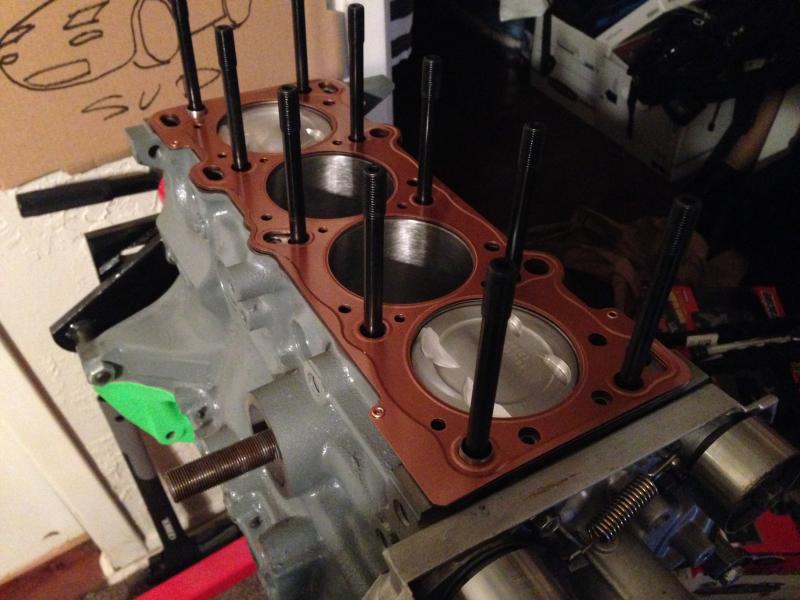
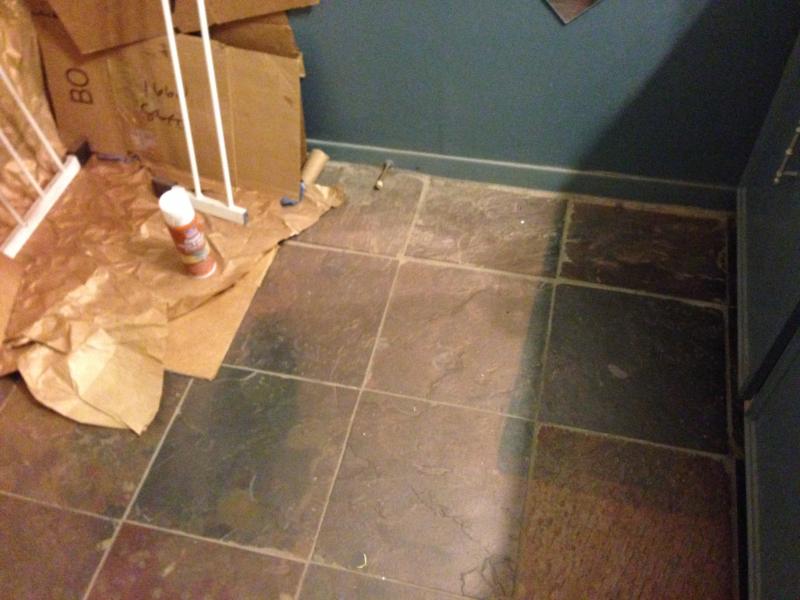
We have been having some cold weather down here in Texas and I needed to get the motor sealed up. I figured I'd lay down some cardboard and paper in my bathroom and spray the gasket in there with the fan on. Well I ended up coating the gasket and half the floor as well as my bathroom mats. All that **** is sticky now lmao. I'll have to figure out a way to clean it up before I move out from this place (if yall have any recommendations let me know).
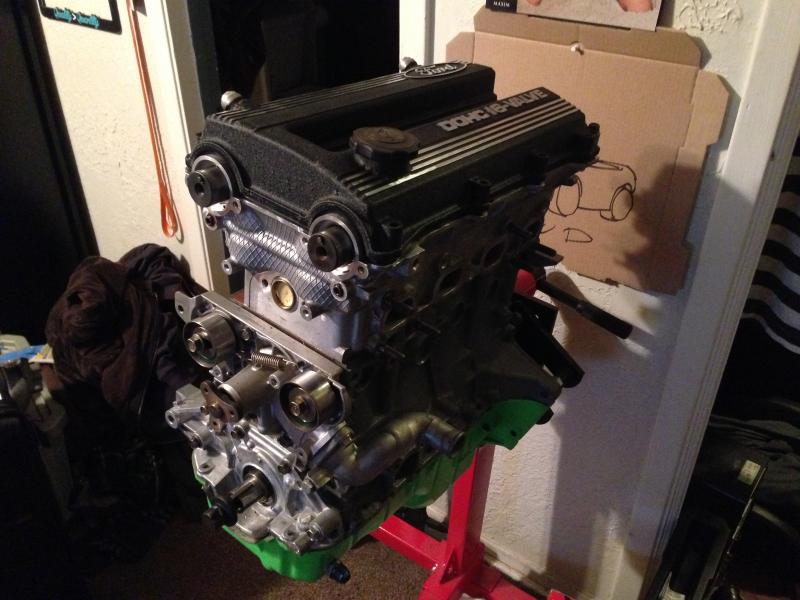
I'm rocking a valve cover from an Escort GT. I know, I know it says Ford. But our blocks are technically duratecs. Besides, I'll enjoy all the "WTFs ?" from everyone that sees it. I had -10AN fitting installed into it and the back sealed up.
I picked up a SuperMiata damper with a 12+1 tooth wheel,TrackSpeed COP setup and M-Tuned coolant reroute to go along with the motor. I also have a Flyin Miata Oil cooler and filter relocator kit that I'm going to install once I put the new motor in. Yup, I'm going ***** deep. As far as engine management I'm going to go with a ProEFI standalone. I know MegaSquirt can do everything I need it to, but the ProEFI is bullet proof. The other big reason is I'm gettting a big hook up on the ecu so it's actually going to be cheaper for me to run this than a MegaSquirt
FYI I'm going on 93 pump gas, E85 isn't very common in my area.
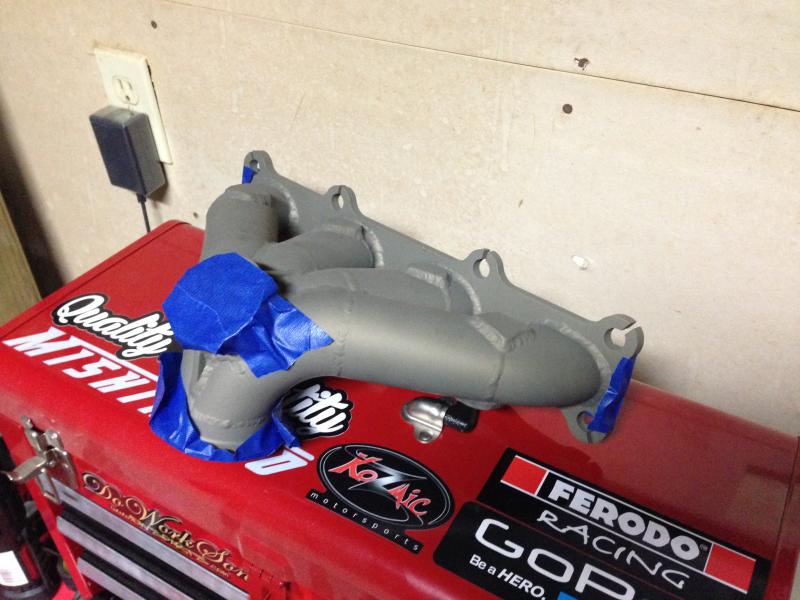
For the turbo setup I'm running the kit I bought from rigidbigelsworth on here. It's an Absurdflow EWG bottom mount manifold with a 2871 and 3" exhaust from ArtTech. The whole setup is Vband so it's going to be a breeze to install. I had the manifold ceramic coated by Carlos at TCC. He does amazing work and recommend him if anyone need anything powder coated or ceramic coated. The manifold is super sexy in gold ceramic although in this lighting it doesn't look too gold.
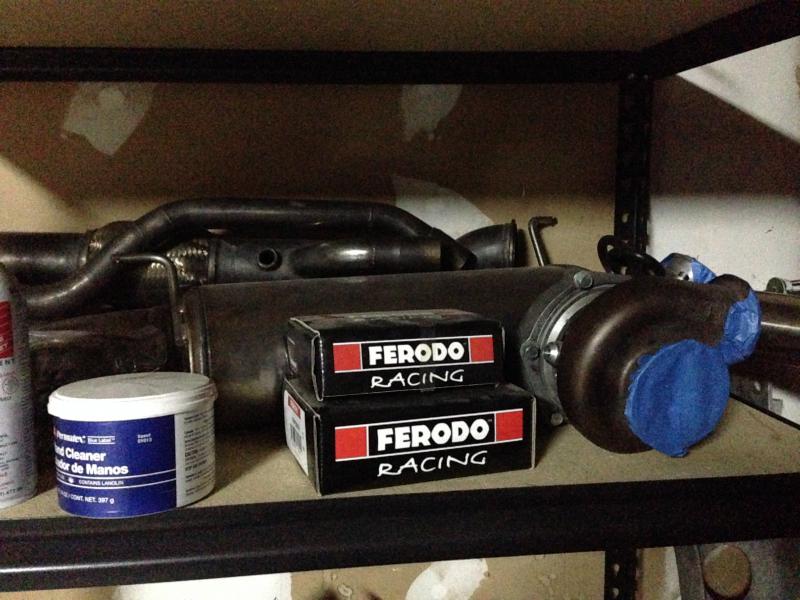
As for now I'm thinking of sticking with the 2871 just so I can get the car running soonish. I still have quite a few things I need to buy and figure down the road I can spend $$ on a bigger turbo. Also doesn't hurt that it has a nice Tial hotside. In the back you can see the downpipe and muffler. (Disregard the Ferodo pads, they are for the evo)
For cooling the car already has a Mishimoto 3row radiator and slim fans with a shroud. The coolant overflow tank on the car was messed up and had a nasty patch on it so I replaced it with a Moroso tank.
As of now that's it. I still need to buy an intercooler, I am stuck debating between a Precision 350hp or a Treadstone Performance TR6. As far as injectors I'll most likely go with my old faithful FIC1100s. I ran into a ton of issues with ID injectors after installing the cams on the evo and once I switched to FICs (Fuel Injector Clinic) everything was butter. I also need to figure out the rest of the fuel system and was thinking of getting the Flyin Miata big fuel kit, but I know there has to be a way to make the kit for a whole lot less. I'll probably end up making something and using their fuel rail. The piping will be fabricated by Kozmic who is also going to do all the tuning.
Down the road I want to install some fender flares and maybe get some 6ULs.
As the story of my build continues to unfold I will update this thread. Any information and/or advice is welcomed.
As far as the go fast bits go...
I picked up a built short block from yellowihss. It's bored to a 1.9L and has Wiseco 8.5:1 pistons, Scat rods, IJ crank scraper, ACL bearings and ARP hardware. Attached is a Boundary Engineering street/strip oil pump and new water pump. He had the oil pan coated in baller lime green powder just like the frog arms (already tapped for the return line).
For the head, I'm using a 99 head and intake manifold. I stripped the manifold and had all the EGR stuff removed, living in a non-emmisions county rocks lol. I got +1mm nitrated intake valves and +1mm inconel exhaust valves from SuperTech, 56 lbs single spring kit with shims, retainers and Ti keepers and a MSM intake cam. I'm throwing in some Fidanza adjustable cam gears in there too. Also got new seals and guides then took the head to Kozmic Motorsports (they have done all the work on my Evo) to machine and assemble the head for me.
When it came to installing the head on the block, I read a ton of info about not using copper spray on an MLS gasket. I talked to the guys from the shop for a while about what to do and they recommended using the spray. I figure they did the machine work on the head and have built a crap ton of high boost motors including the one in my evo so I followed their recommendation.

We have been having some cold weather down here in Texas and I needed to get the motor sealed up. I figured I'd lay down some cardboard and paper in my bathroom and spray the gasket in there with the fan on. Well I ended up coating the gasket and half the floor as well as my bathroom mats. All that **** is sticky now lmao. I'll have to figure out a way to clean it up before I move out from this place (if yall have any recommendations let me know).

I'm rocking a valve cover from an Escort GT. I know, I know it says Ford. But our blocks are technically duratecs. Besides, I'll enjoy all the "WTFs ?" from everyone that sees it. I had -10AN fitting installed into it and the back sealed up.

I picked up a SuperMiata damper with a 12+1 tooth wheel,TrackSpeed COP setup and M-Tuned coolant reroute to go along with the motor. I also have a Flyin Miata Oil cooler and filter relocator kit that I'm going to install once I put the new motor in. Yup, I'm going ***** deep. As far as engine management I'm going to go with a ProEFI standalone. I know MegaSquirt can do everything I need it to, but the ProEFI is bullet proof. The other big reason is I'm gettting a big hook up on the ecu so it's actually going to be cheaper for me to run this than a MegaSquirt

FYI I'm going on 93 pump gas, E85 isn't very common in my area.
For the turbo setup I'm running the kit I bought from rigidbigelsworth on here. It's an Absurdflow EWG bottom mount manifold with a 2871 and 3" exhaust from ArtTech. The whole setup is Vband so it's going to be a breeze to install. I had the manifold ceramic coated by Carlos at TCC. He does amazing work and recommend him if anyone need anything powder coated or ceramic coated. The manifold is super sexy in gold ceramic although in this lighting it doesn't look too gold.

As for now I'm thinking of sticking with the 2871 just so I can get the car running soonish. I still have quite a few things I need to buy and figure down the road I can spend $$ on a bigger turbo. Also doesn't hurt that it has a nice Tial hotside. In the back you can see the downpipe and muffler. (Disregard the Ferodo pads, they are for the evo)

For cooling the car already has a Mishimoto 3row radiator and slim fans with a shroud. The coolant overflow tank on the car was messed up and had a nasty patch on it so I replaced it with a Moroso tank.
As of now that's it. I still need to buy an intercooler, I am stuck debating between a Precision 350hp or a Treadstone Performance TR6. As far as injectors I'll most likely go with my old faithful FIC1100s. I ran into a ton of issues with ID injectors after installing the cams on the evo and once I switched to FICs (Fuel Injector Clinic) everything was butter. I also need to figure out the rest of the fuel system and was thinking of getting the Flyin Miata big fuel kit, but I know there has to be a way to make the kit for a whole lot less. I'll probably end up making something and using their fuel rail. The piping will be fabricated by Kozmic who is also going to do all the tuning.
Down the road I want to install some fender flares and maybe get some 6ULs.
As the story of my build continues to unfold I will update this thread. Any information and/or advice is welcomed.
#11
Thread Starter
Junior Member
iTrader: (2)
Joined: Jan 2013
Posts: 48
Total Cats: 5
From: San Marcos, TX/ Houston,TX
When I got the head it had 2 exhaust manifold studs that where removed, of these 2 the guy that removed them had stripped the threads of one of the holes. Figured I'd replaced them with some from MiataRoadster. We began removing the rest and ended up getting all of them out except for 1. We'll come back and either grind the edges so we can grab it better or weld a nut to it. We also stripped the threads in 1 of the holes, gawd are these a pain in the *** to remove. I couldn't find a helicoil kit locally that was the right dimensions so I ordered one, should arrive Monday.
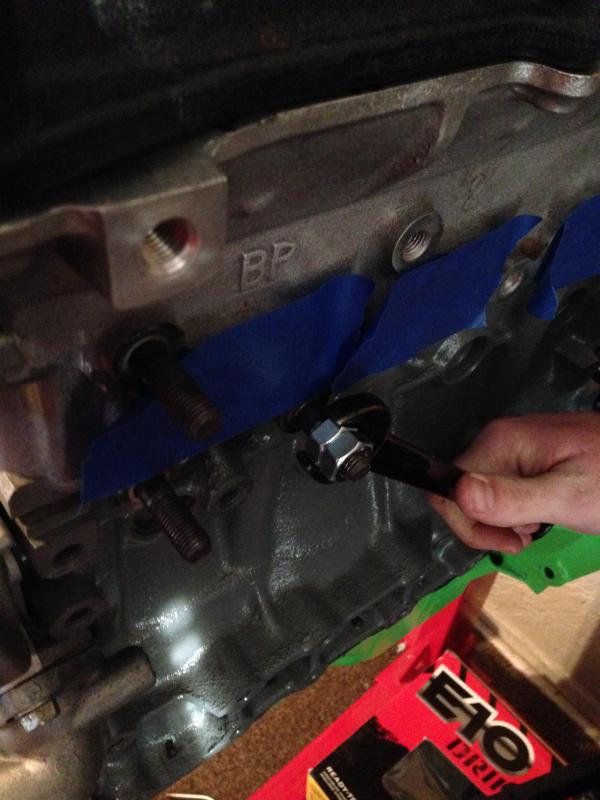
We also installed the adjustable cam gears. I got an extra front plate with the E and I marks from the junk yard and cut it so I can set them and then remove the plate.
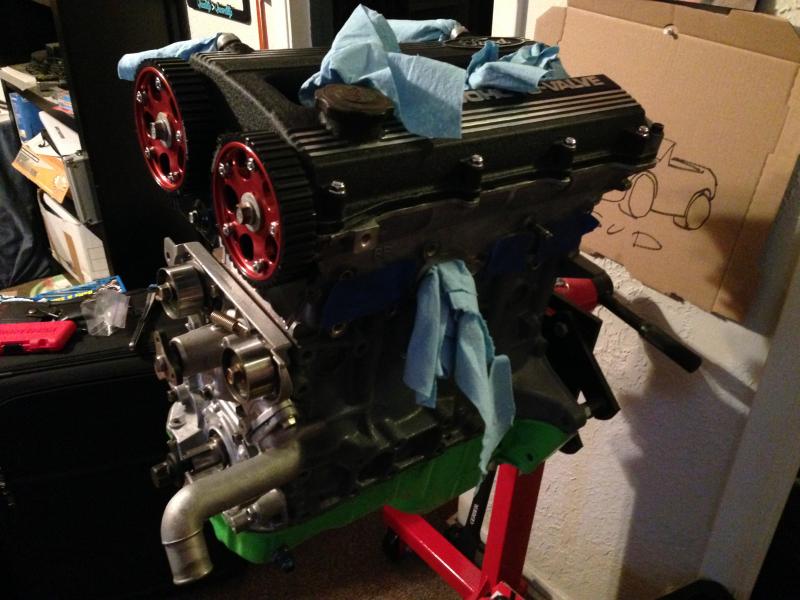
I also want to change the bottom neck so it faces forward and reroute all that crap away from the turbo. The big mishimoto radiator and fan combo is too big and the neck won't fit. Plan is to cut the 90* bend and then weld it closer to the base. Gona get an extra one from the junk yard just incase lol.

We also installed the adjustable cam gears. I got an extra front plate with the E and I marks from the junk yard and cut it so I can set them and then remove the plate.

I also want to change the bottom neck so it faces forward and reroute all that crap away from the turbo. The big mishimoto radiator and fan combo is too big and the neck won't fit. Plan is to cut the 90* bend and then weld it closer to the base. Gona get an extra one from the junk yard just incase lol.
#13
Thread Starter
Junior Member
iTrader: (2)
Joined: Jan 2013
Posts: 48
Total Cats: 5
From: San Marcos, TX/ Houston,TX
Thanks! I've had the chance to drive a M45 miata making ~170whp as well as ride in ScottyP3821's 2560 miata, I have my mind set in making at least 300whp on Kozmic's mustang dyno (the same one my evo was tuned on). I feel this is attainable on my current setup as well as making it fun as hell to drive.
My plan is to have room to grow down the road though
My plan is to have room to grow down the road though

#14
Thread Starter
Junior Member
iTrader: (2)
Joined: Jan 2013
Posts: 48
Total Cats: 5
From: San Marcos, TX/ Houston,TX
Went to the junkyard today with ScottyP3821 and another buddy looking for an assortment of parts for our miatas.
When I tried installing the adapters for my oil relocator and cooler, I noticed there was quite a gap left. I did some research and noticed I was missing a part from my motor.
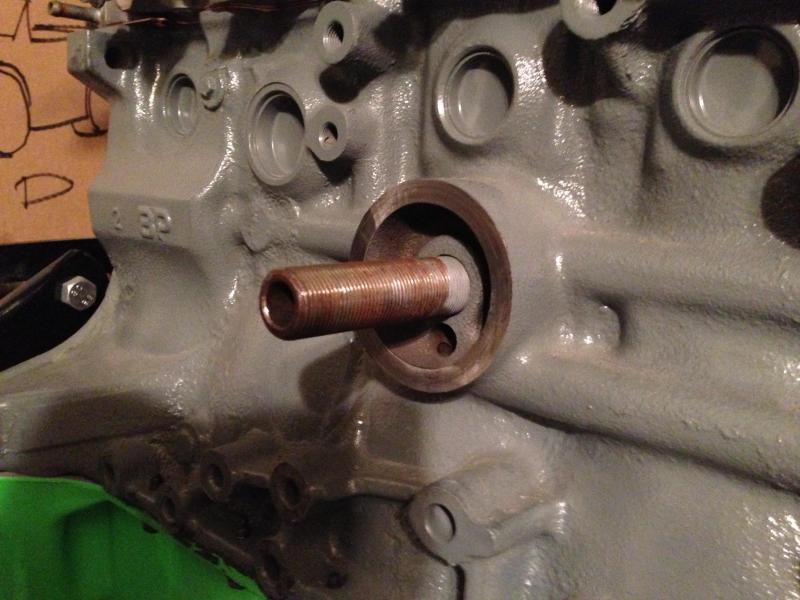
Here is what the oilfilter thread part looked like, ignore the rusty looking threads on there lol.
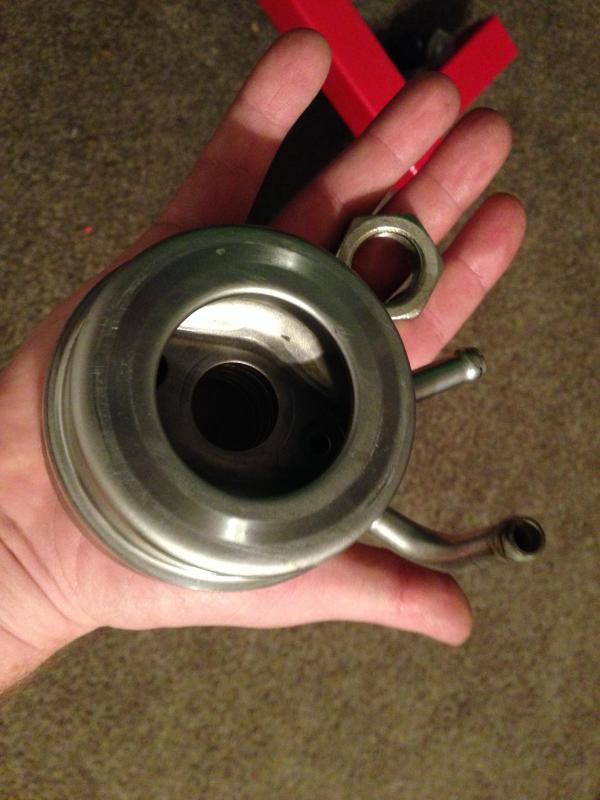
What I was missing was this part. After doing some research I found out its an oem "oil cooler", if you could even call it that lol. From what I read, coolant flows thru it and helps warm the oil up and then cools it once it's at operating temp... I lol'd all over this info, no way in hell this actually works . What it does work for is act as a spacer so all my adapters will fit. I'll put plugs on the oem "cooler" so nothing can get in there.
Went ahead and setup the sandwich plate for the oil cooler and then put the extra threaded piece at the end for the oil relocator.
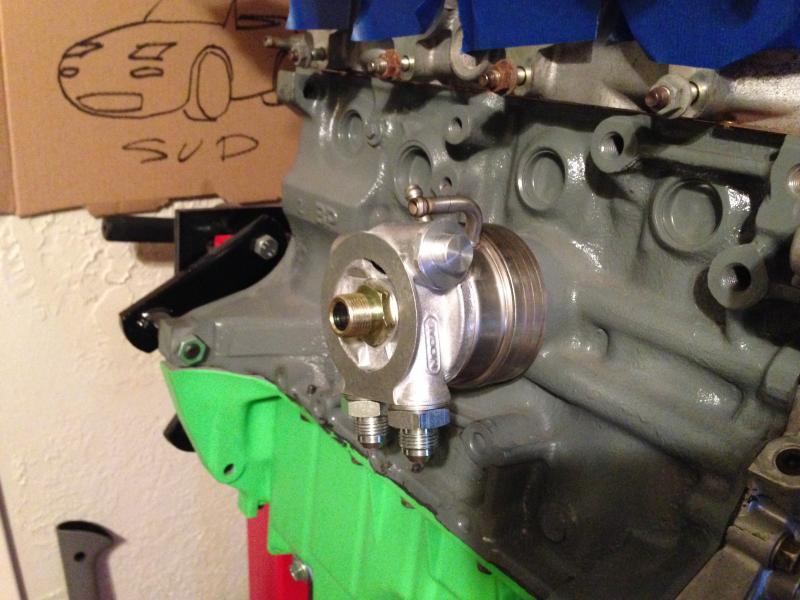
Here it is with everything setup.
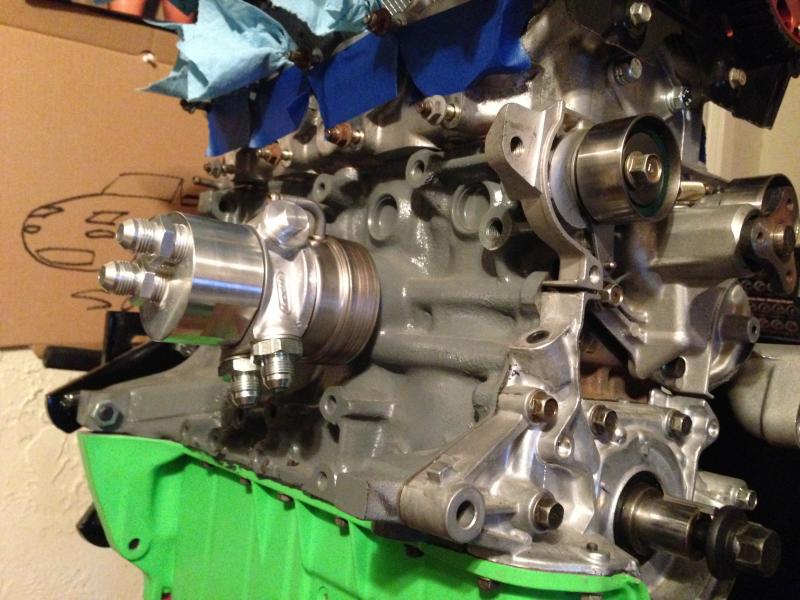
We mocked up how the lines would run to the filter relocator and the oil cooler. The adapters are cool and all but the lines FM sent with the kit suck. They are braided SS lines with FPS fittings. These fittings don't rotate at all and with the lines being the braided SS kind, I'm afraid they are going to rub against stuff and damage things. I'll be replacing the lines with some braided nylon lines and fittings from Earl's. Kinda worried since I have introduced a ton of fail points, but if I take it slow and make sure everything is tight and sealed everything should be fine.
When I tried installing the adapters for my oil relocator and cooler, I noticed there was quite a gap left. I did some research and noticed I was missing a part from my motor.
Here is what the oilfilter thread part looked like, ignore the rusty looking threads on there lol.

What I was missing was this part. After doing some research I found out its an oem "oil cooler", if you could even call it that lol. From what I read, coolant flows thru it and helps warm the oil up and then cools it once it's at operating temp... I lol'd all over this info, no way in hell this actually works
 . What it does work for is act as a spacer so all my adapters will fit. I'll put plugs on the oem "cooler" so nothing can get in there.
Went ahead and setup the sandwich plate for the oil cooler and then put the extra threaded piece at the end for the oil relocator.

Here it is with everything setup.

We mocked up how the lines would run to the filter relocator and the oil cooler. The adapters are cool and all but the lines FM sent with the kit suck. They are braided SS lines with FPS fittings. These fittings don't rotate at all and with the lines being the braided SS kind, I'm afraid they are going to rub against stuff and damage things. I'll be replacing the lines with some braided nylon lines and fittings from Earl's. Kinda worried since I have introduced a ton of fail points, but if I take it slow and make sure everything is tight and sealed everything should be fine.
#17
Thread Starter
Junior Member
iTrader: (2)
Joined: Jan 2013
Posts: 48
Total Cats: 5
From: San Marcos, TX/ Houston,TX

I checked around and it looked like this would have been a fix for my situation, I just wasn't sure. It ended up being cheaper to get the cooler piece from the junk yard in the end though.
#20
Well Duh of course we have just been having a bitch of a time getting out the older header studs that Id imagine this would be a bitch as well. We would have to track down another nut when there is only one 1.8 miata at our junkyards right now. Putting the spacer on was much easier even though it adds another point of fail. I guess we could have put the nut on followed by that golden colored nut that comes with FM kit but idk its done and its more than sufficient.


