
LeBoeuf's build...

 02-21-2016, 11:24 PM
#82
Junior Member
Thread Starter
iTrader: (1)

Join Date: May 2013
Location: Sandia Park, NM
Posts: 455
Total Cats: 54
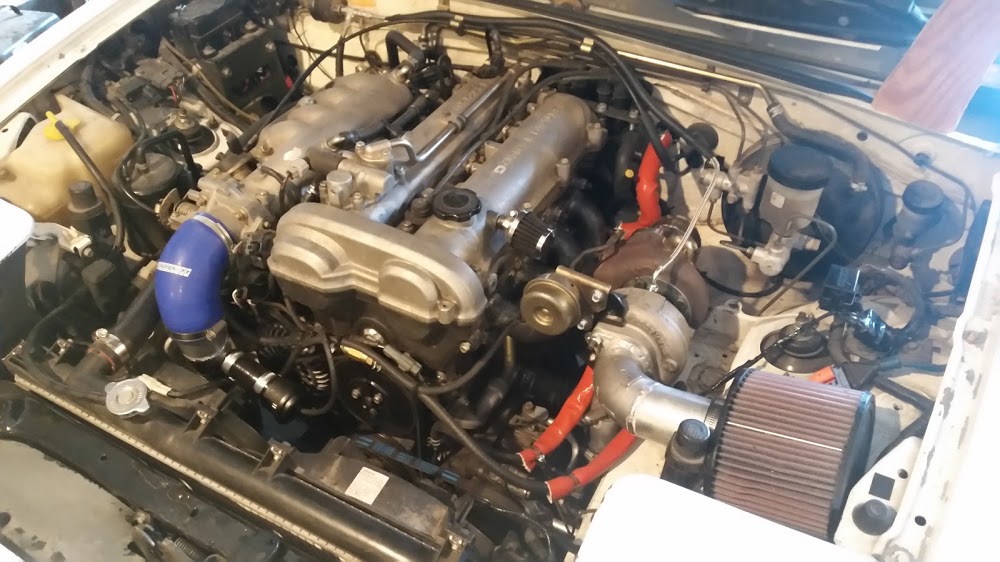
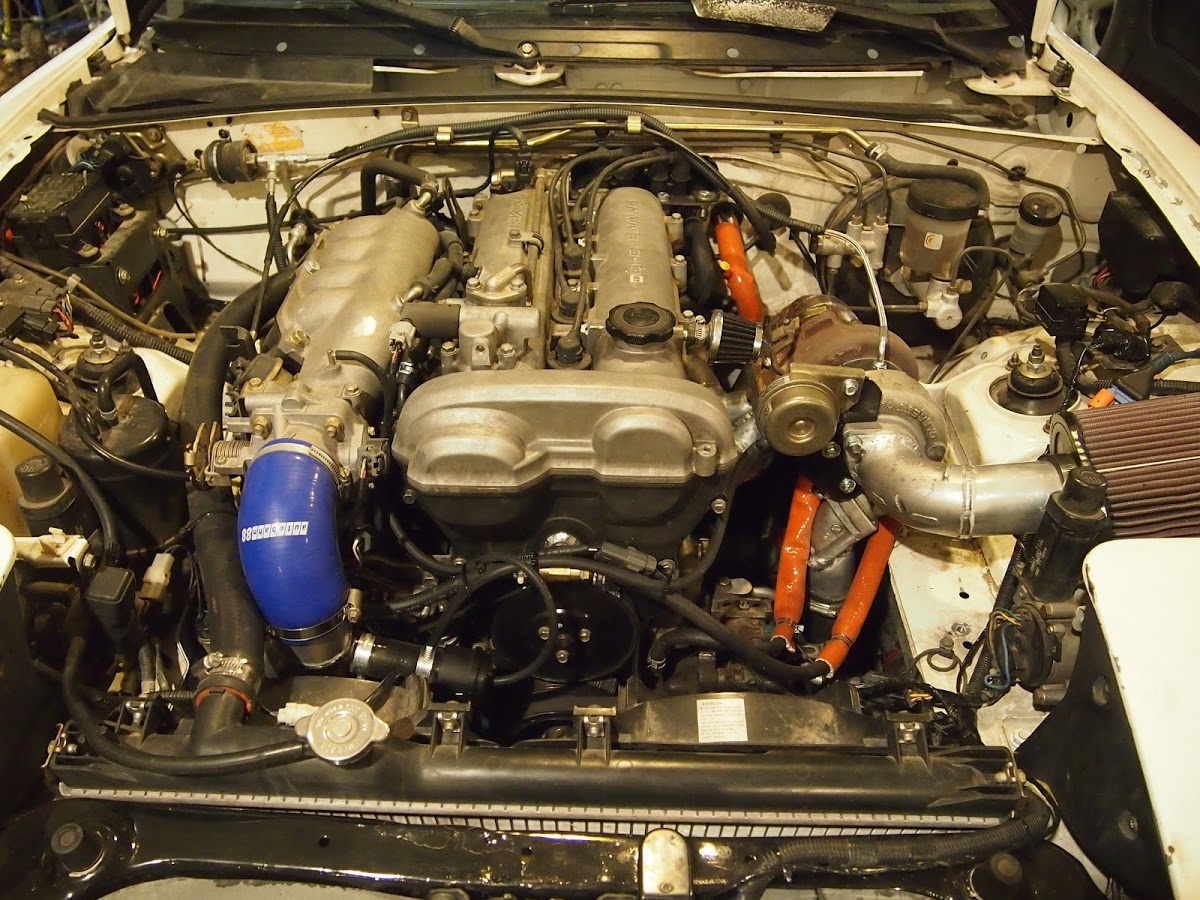
Well I officially have a turbo miata!
My overall thanks to the miataturbo community. This really would not have happened without this site.
I've never owned anything fast so I don't really have much to compare this thing to. To me it feels and sounds like a rocketship. It's on a 7psi wastegate with no boost control...
There are still some projects to get some heat shielding and my airbox back in there; but at least I got the thing off the jack stands.
It will certainly be interesting on the track.
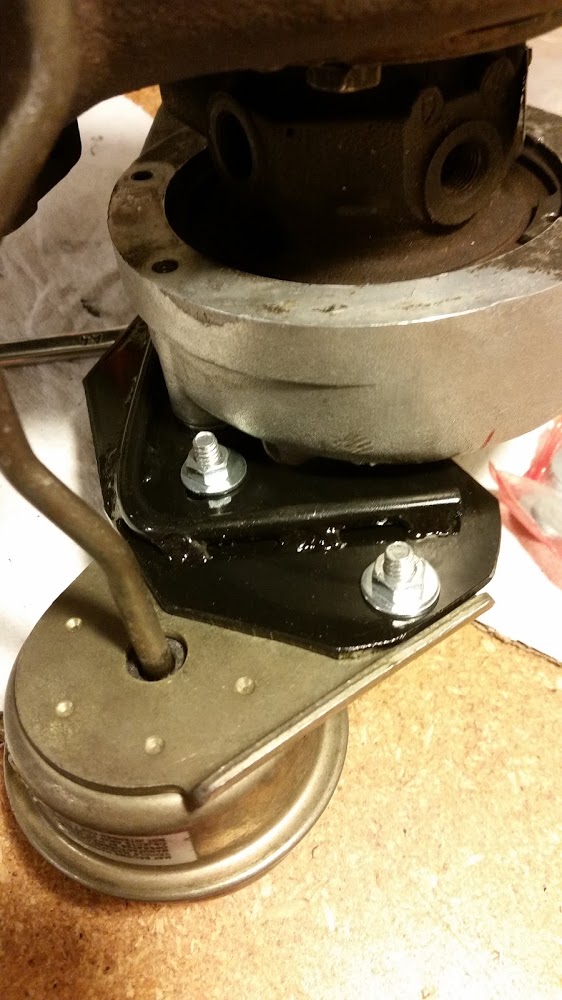
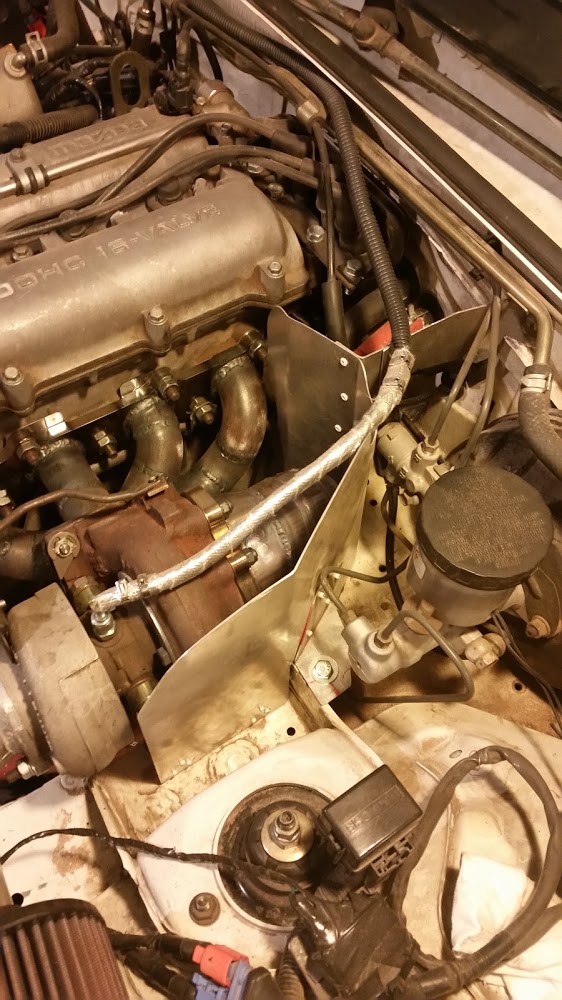
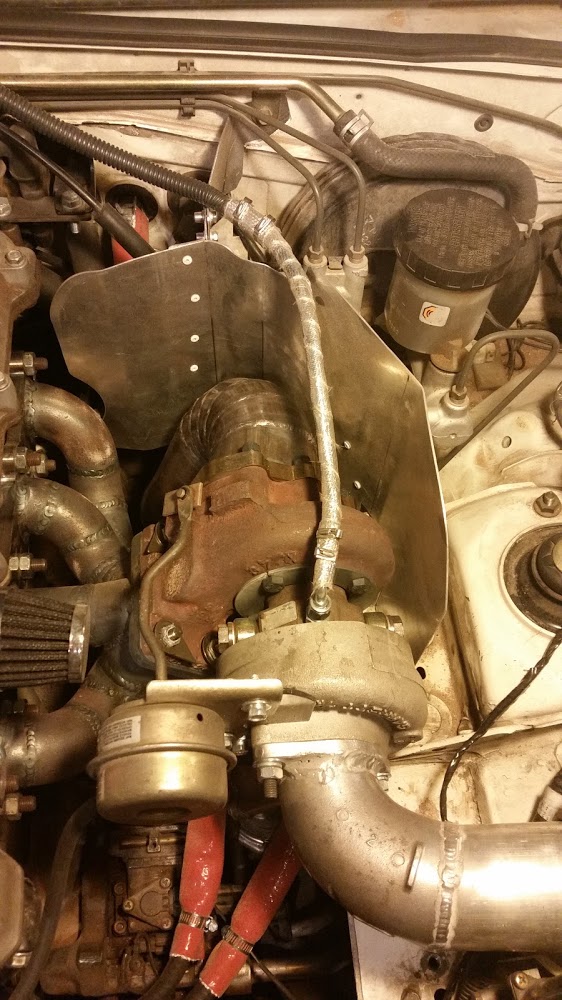
I lied about not fabricating anything else. I needed a wastegate mount.
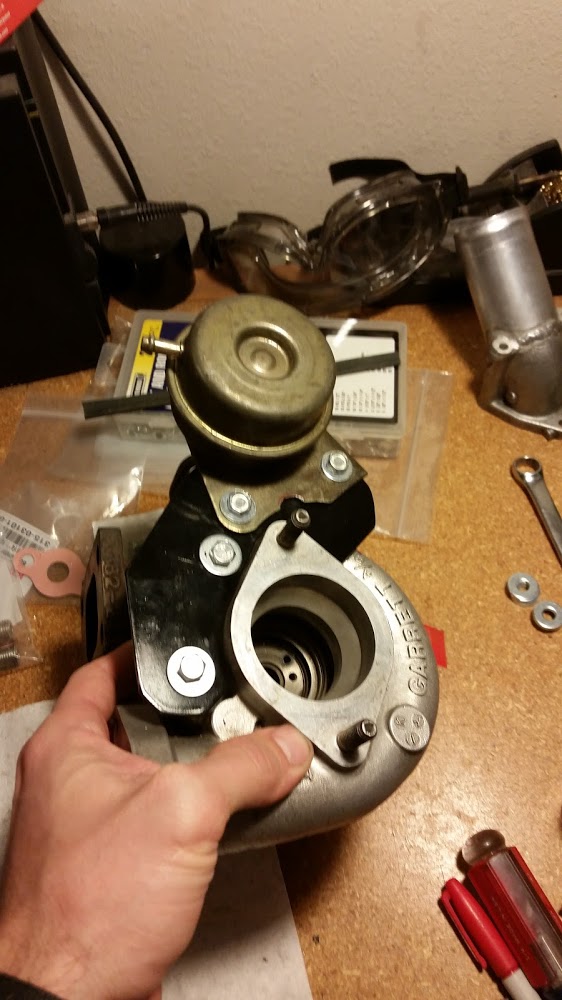
Braced:
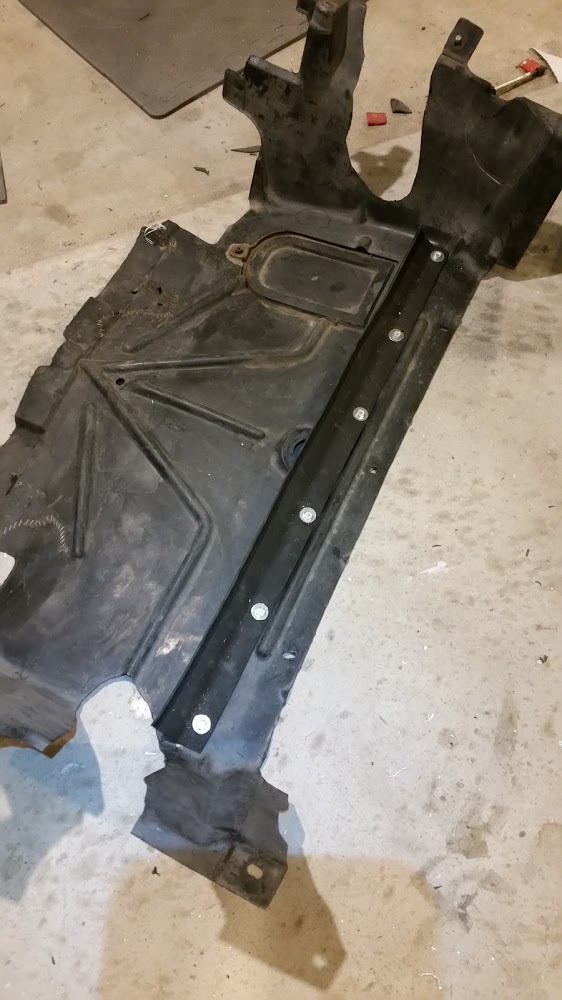
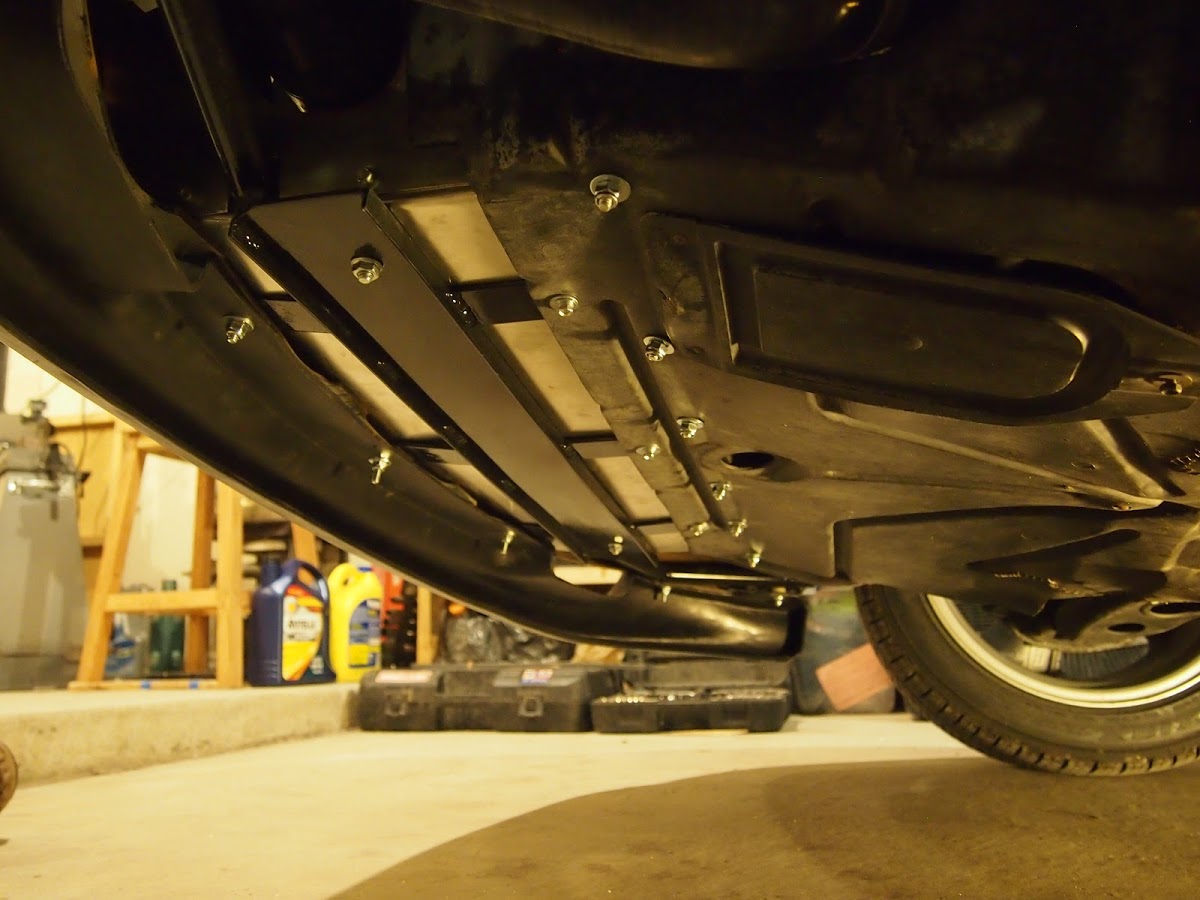
I added this gasket to the undertray to close off the gap beneath the radiator (its a garage door gasket):
Aaannndd somehow this is the best picture I have? I'll get my better camera out tomorrow and take some nice pictures
Edit: Note the one blue coupler just for brain
My overall thanks to the miataturbo community. This really would not have happened without this site.
I've never owned anything fast so I don't really have much to compare this thing to. To me it feels and sounds like a rocketship. It's on a 7psi wastegate with no boost control...
There are still some projects to get some heat shielding and my airbox back in there; but at least I got the thing off the jack stands.
It will certainly be interesting on the track.
I lied about not fabricating anything else. I needed a wastegate mount.
Braced:
I added this gasket to the undertray to close off the gap beneath the radiator (its a garage door gasket):
Aaannndd somehow this is the best picture I have? I'll get my better camera out tomorrow and take some nice pictures
Edit: Note the one blue coupler just for brain

Reply
 0
0

0
02-22-2016, 02:11 AM
#83
Junior Member
Thread Starter
iTrader: (1)
Join Date: May 2013
Location: Sandia Park, NM
Posts: 455
Total Cats: 54
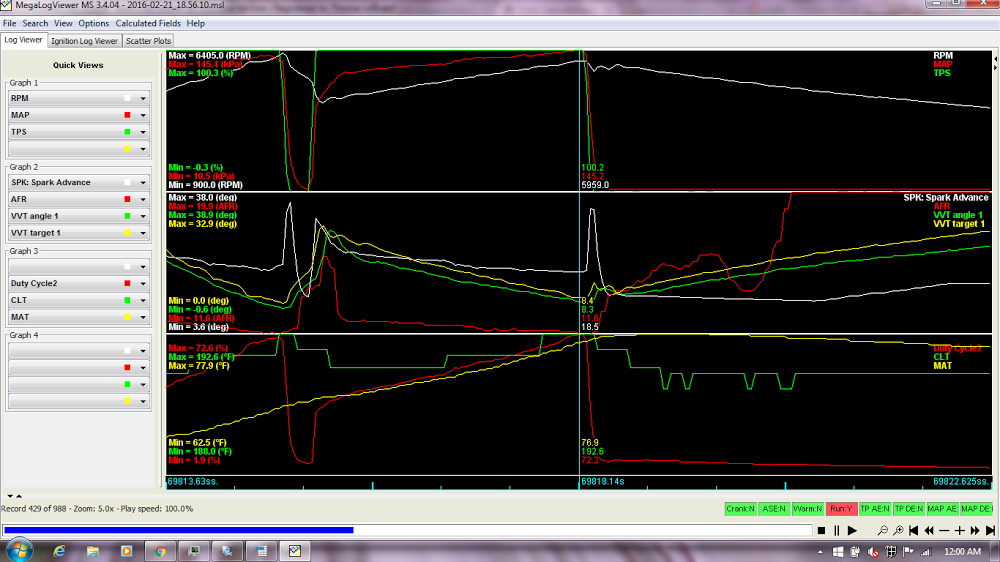
Got a chance to take a look at the log. 145kpa with a base pressure of 80kpa is a real amount of positive pressure. I believe the section shown is in 3rd gear.
I need to look around and see if 18.5 degrees of advance is acceptable at 145kpa on a stock piston vvt motor. Otherwise looks pretty rich and safe. Also it looks as though there's a lot to be gained with some EBC.
I need to look around and see if 18.5 degrees of advance is acceptable at 145kpa on a stock piston vvt motor. Otherwise looks pretty rich and safe. Also it looks as though there's a lot to be gained with some EBC.
Reply
0
0

 02-23-2016, 11:16 AM
#86
Junior Member
Thread Starter
iTrader: (1)
Join Date: May 2013
Location: Sandia Park, NM
Posts: 455
Total Cats: 54
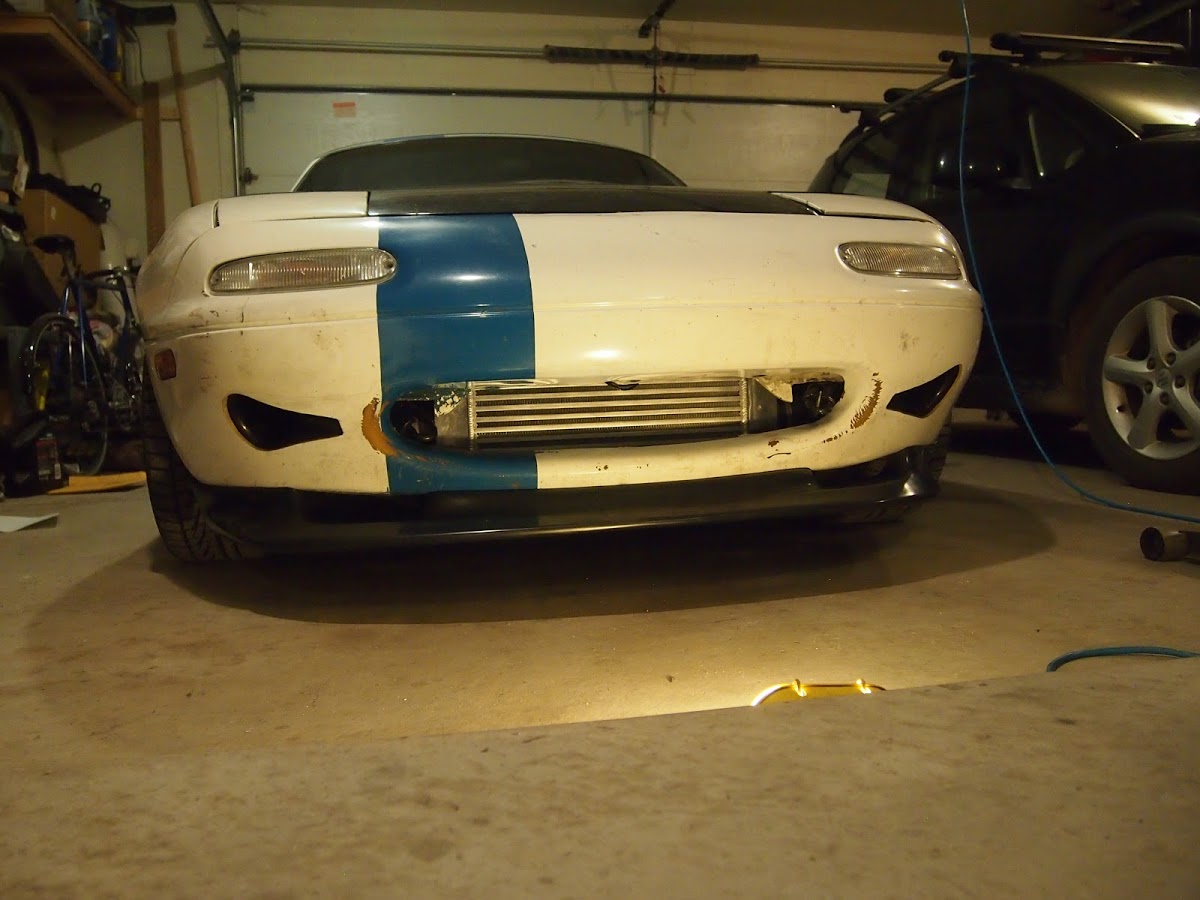
The duct is not completely shrouded and its not shrouded at all in the sense of that one dude with the crazy 3d printed setup.
It does seal off on the body on 3 sides. I will likely make something to close off the bottom when I make the splash guard.
There are some trains of thought here. I'm not that kind of engineer, but as I understand the wheel well isn't the lowest pressure exit point for the thing, so all of the air flow comes from the naca duct forcing the air through the exchanger (basically just blasts the thing). In that sweet 3d printed setup, he's exiting out the side of the bumper and relying on that suction to draw the air through the exchanger, so he needs it to be air tight.
Aaand its rather effective as is so that project has been moved down in priority...
Reply
0
0
02-23-2016, 11:24 AM
#87
The duct is not completely shrouded and its not shrouded at all in the sense of that one dude with the crazy 3d printed setup.
It does seal off on the body on 3 sides. I will likely make something to close off the bottom when I make the splash guard.
There are some trains of thought here. I'm not that kind of engineer, but as I understand the wheel well isn't the lowest pressure exit point for the thing, so all of the air flow comes from the naca duct forcing the air through the exchanger (basically just blasts the thing). In that sweet 3d printed setup, he's exiting out the side of the bumper and relying on that suction to draw the air through the exchanger, so he needs it to be air tight.
Aaand its rather effective as is so that project has been moved down in priority...
It does seal off on the body on 3 sides. I will likely make something to close off the bottom when I make the splash guard.
There are some trains of thought here. I'm not that kind of engineer, but as I understand the wheel well isn't the lowest pressure exit point for the thing, so all of the air flow comes from the naca duct forcing the air through the exchanger (basically just blasts the thing). In that sweet 3d printed setup, he's exiting out the side of the bumper and relying on that suction to draw the air through the exchanger, so he needs it to be air tight.
Aaand its rather effective as is so that project has been moved down in priority...
I really need to search for a cooling setup. My oil is HOT.
Reply
0
0
02-23-2016, 12:08 PM
#88
Junior Member
Thread Starter
iTrader: (1)
Join Date: May 2013
Location: Sandia Park, NM
Posts: 455
Total Cats: 54
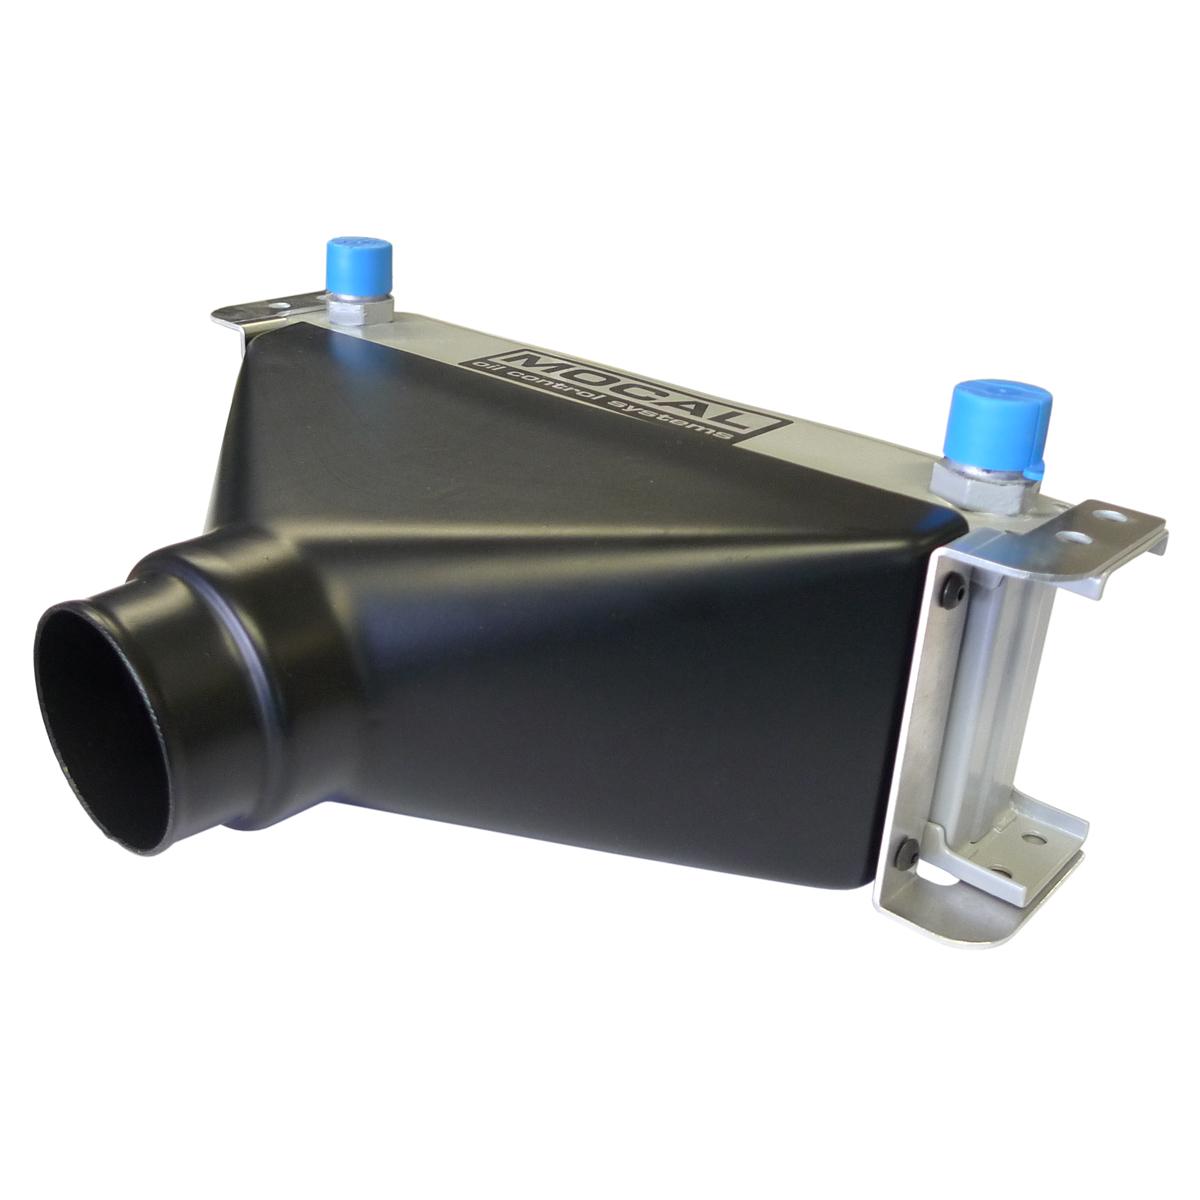
Yeah there's no way something off the shelf like that would fit without modification.
The inner lip of the naca duct is 5mm or so from the oil cooler. You could absolutely fabricate your own, it would just have to enter at a steep angle.
ANY oil cooler is better than no oil cooler. I wouldn't track or turbo without one. I saw a 20 psi increase in oil pressure at the track once I put that one on.
Reply
0
0
02-23-2016, 12:52 PM
#89
Yeah there's no way something off the shelf like that would fit without modification.
The inner lip of the naca duct is 5mm or so from the oil cooler. You could absolutely fabricate your own, it would just have to enter at a steep angle.
ANY oil cooler is better than no oil cooler. I wouldn't track or turbo without one. I saw a 20 psi increase in oil pressure at the track once I put that one on.
The inner lip of the naca duct is 5mm or so from the oil cooler. You could absolutely fabricate your own, it would just have to enter at a steep angle.
ANY oil cooler is better than no oil cooler. I wouldn't track or turbo without one. I saw a 20 psi increase in oil pressure at the track once I put that one on.
Yea my oil gets hot just driving on the highway with a 6spd/4.10.
Im wondering if I should stick it behind the bumper like you or remove the fan by the a/C compressor and mount it behind the radiator. Whenever the fans kick on in the supermarket cross flow, the driver side always blows cold anyway.
Still, clever setup here.
Reply
0
0
02-23-2016, 04:10 PM
#90
Junior Member
Thread Starter
iTrader: (1)
Join Date: May 2013
Location: Sandia Park, NM
Posts: 455
Total Cats: 54
Thanks man!
TBH if I didn't have a/c (lol), I would probably put the exchanger in the radiator path. Its easier and better protected.
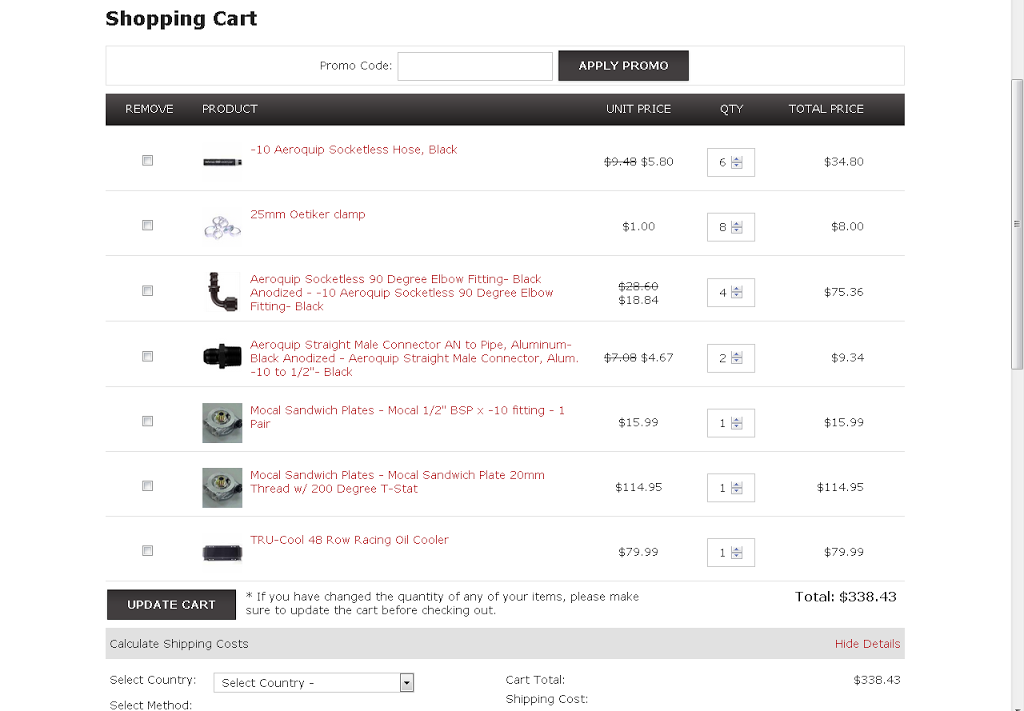
Here's your shopping list from racer parts wholesale:
TBH if I didn't have a/c (lol), I would probably put the exchanger in the radiator path. Its easier and better protected.
Here's your shopping list from racer parts wholesale:
Reply
0
0
02-25-2016, 12:47 AM
#91
Junior Member
Thread Starter
iTrader: (1)
Join Date: May 2013
Location: Sandia Park, NM
Posts: 455
Total Cats: 54
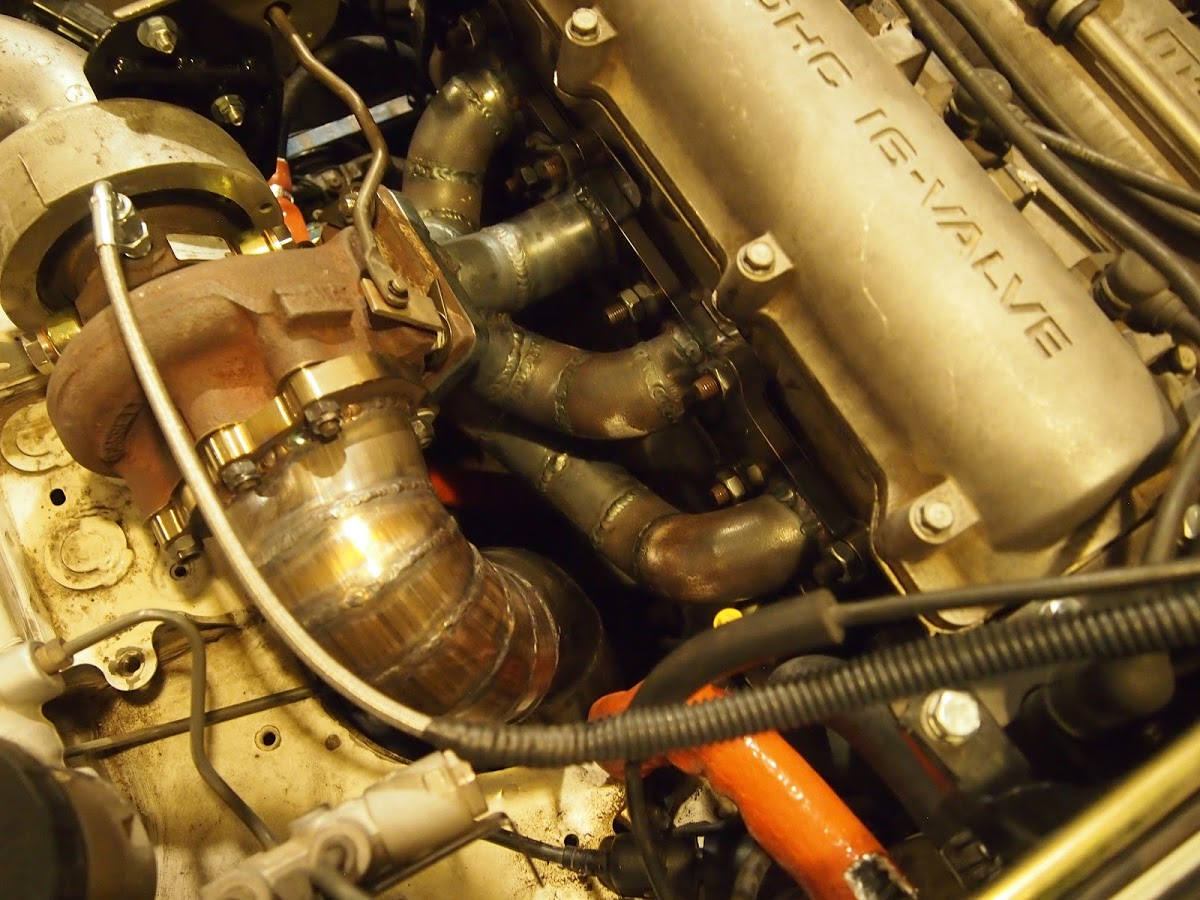
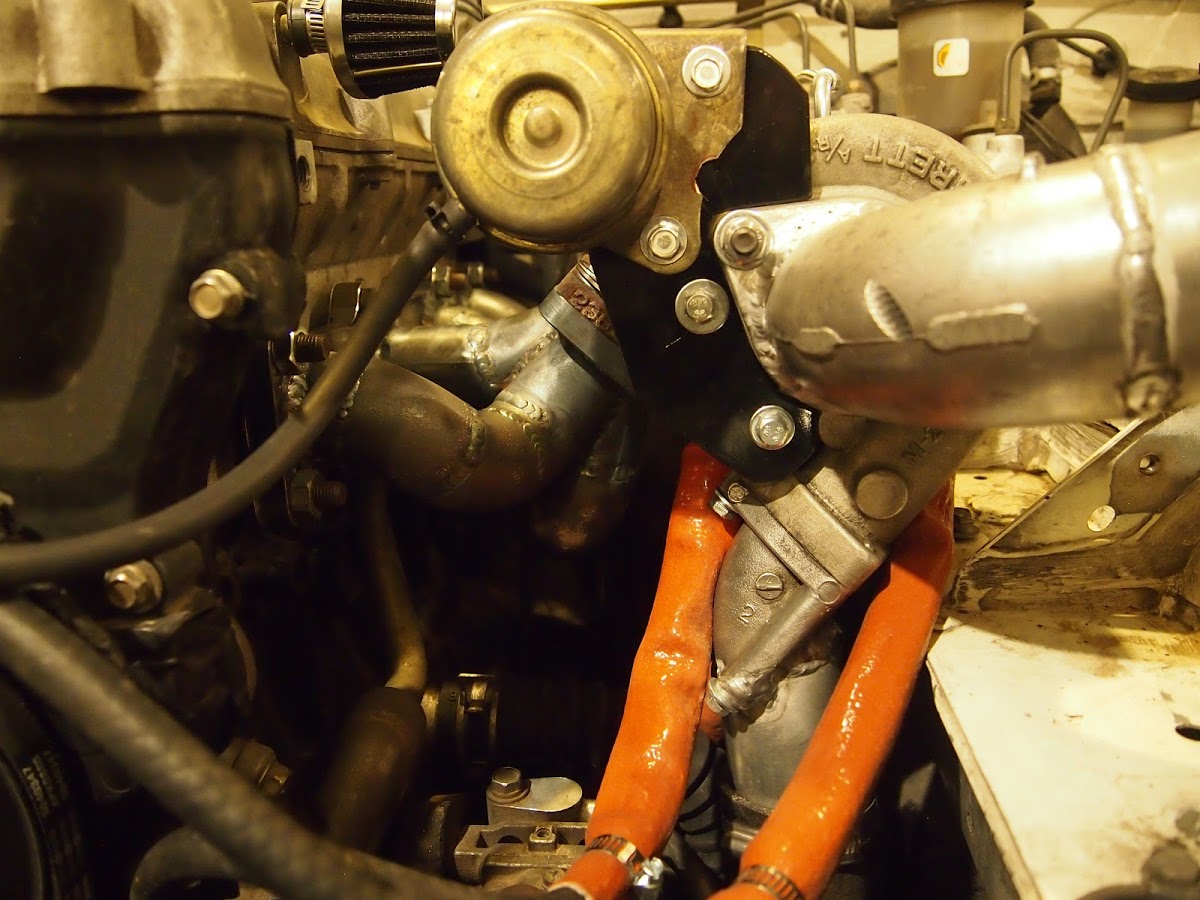
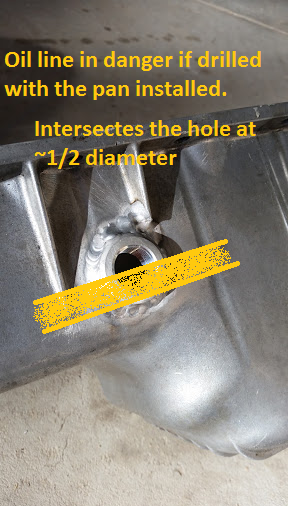
If anyone is curious how my oil drain location worked out here are some pictures that should help describe the situation. Its hard to get a good picture in there...
Turbo to oil pan:
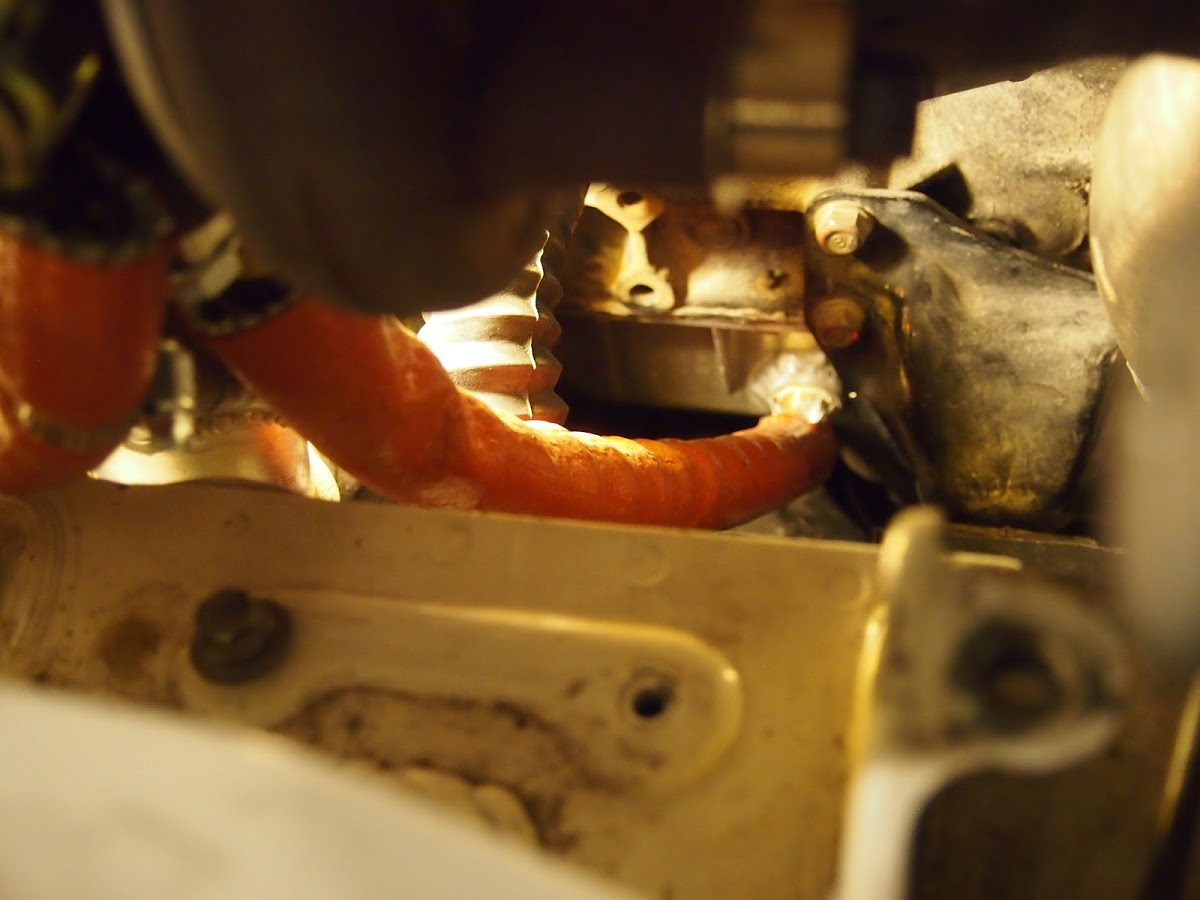
The fire sleeve on the oil line just kisses the lower coolant hose, looking directly down,the engine is to the left
The coolant hose bends down under the a/c compressor and towards the front of the car:
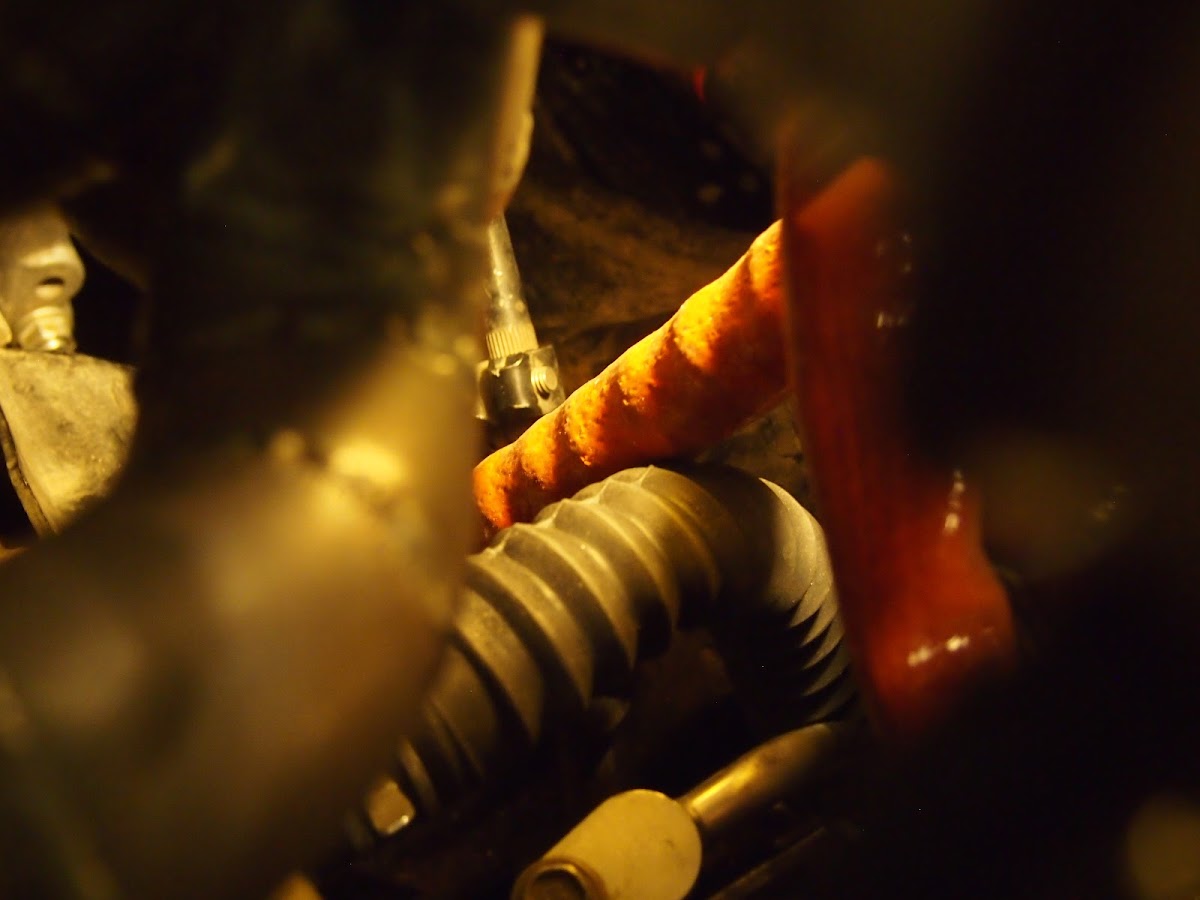
Practice in spatial recognition...
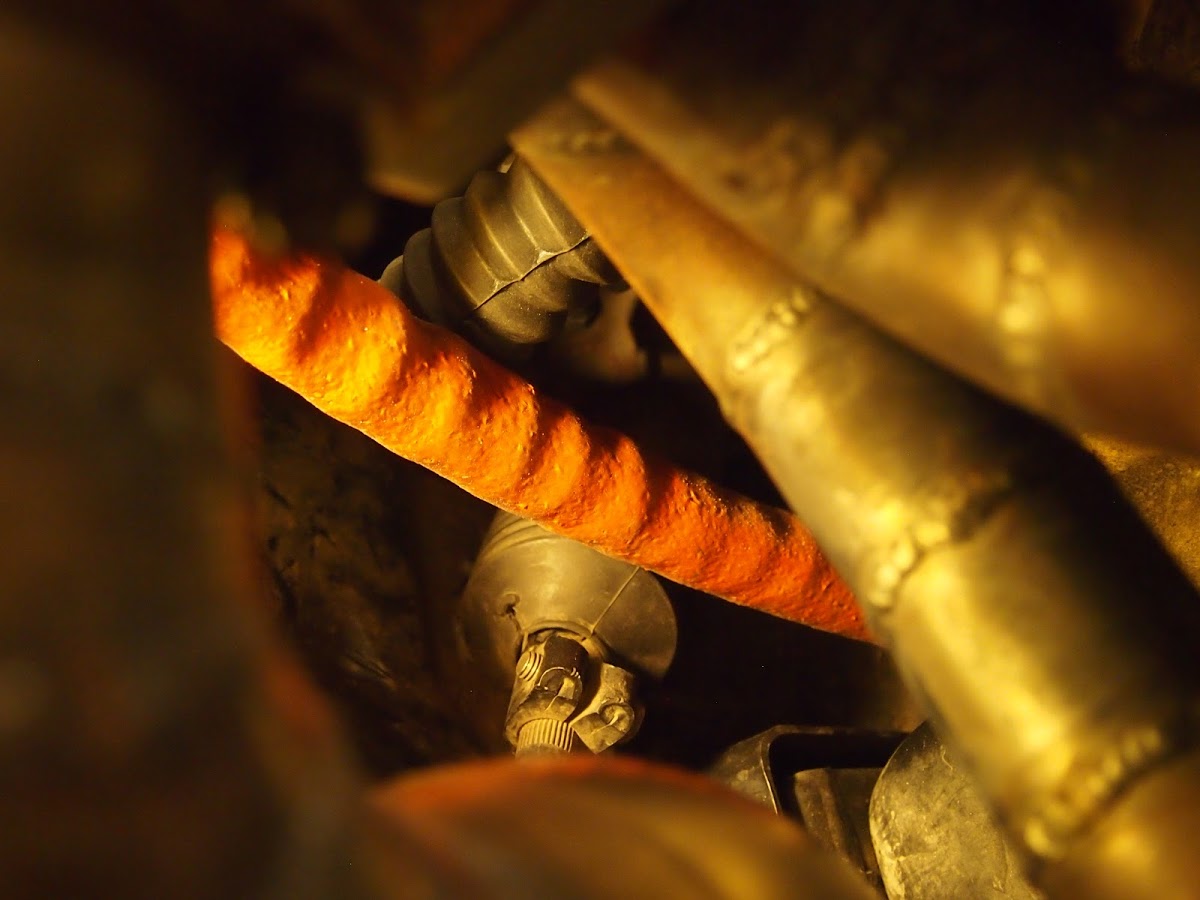
Oil line warning:
Turbo to oil pan:
The fire sleeve on the oil line just kisses the lower coolant hose, looking directly down,the engine is to the left
The coolant hose bends down under the a/c compressor and towards the front of the car:
Practice in spatial recognition...
Oil line warning:
Reply
0
0
03-07-2016, 10:51 AM
#92
Junior Member
Thread Starter
iTrader: (1)
Join Date: May 2013
Location: Sandia Park, NM
Posts: 455
Total Cats: 54
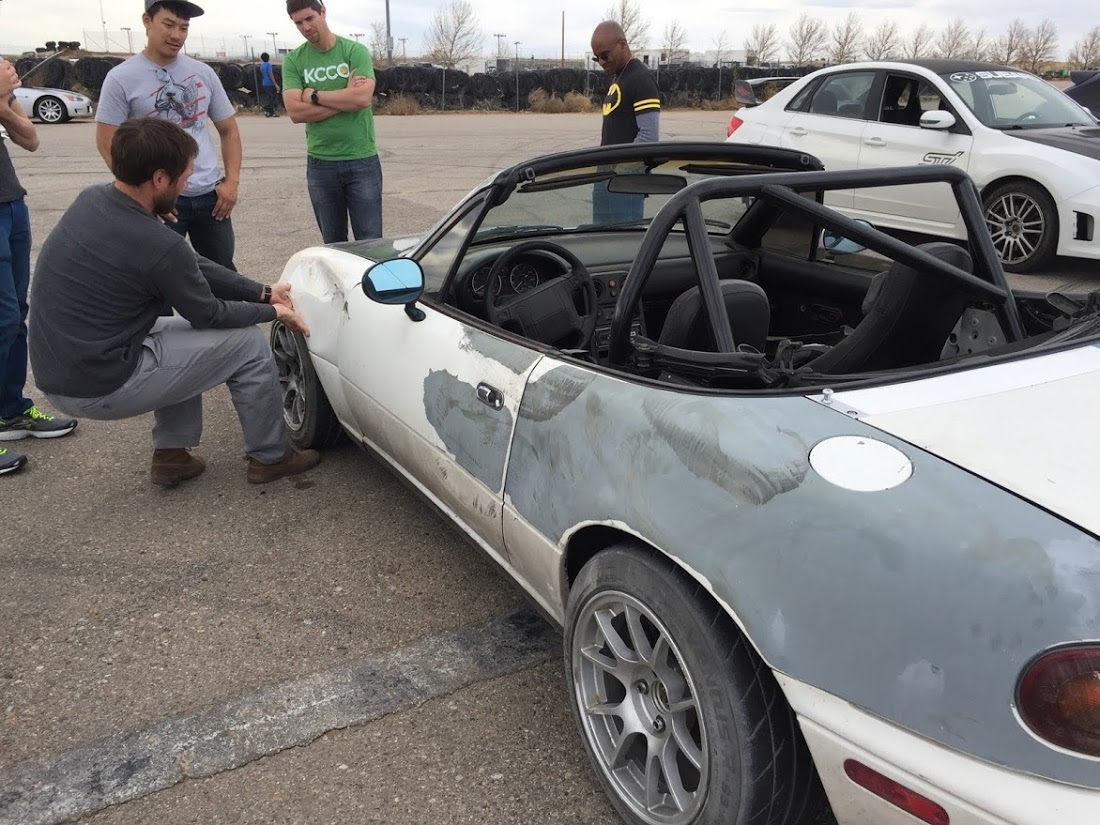
I had my first track event with the turbo car annnnnnd my day ended up in a loose stacked tire wall. I get some catastrophic oversteer when getting on the gas on sweepers... Anyway I have my theories and really I'm only out $50 for another ricer lip. I've hammered out that fender before...
I think the kaaz 1.5 way that I have in there is partially to blame, I have no idea what kind of clutches are in it and need to read about setting the thing up correctly.
Also finished a heat shield that's working rather well:
 tire prints everywhere
I think the kaaz 1.5 way that I have in there is partially to blame, I have no idea what kind of clutches are in it and need to read about setting the thing up correctly.
Also finished a heat shield that's working rather well:
tire prints everywhere
Reply
0
0
 03-07-2016, 12:36 PM
#94
Junior Member
Thread Starter
iTrader: (1)
Join Date: May 2013
Location: Sandia Park, NM
Posts: 455
Total Cats: 54
Yeah unfortunately its not the first time I've touched a tire wall either...
No pics of the event, was trying to get my crap picked up and off the track to not delay too much. No real damage either, I could have kept racing if I wanted to.
I generally only push things in low consequence sections of our track (which there are few), so I hit a loose stacked wall in the middle of the desert. So it looks like I pitched tires 20 yards or so into the dirt.
My buddy said it looked pretty wild with tires flying everywhere.
And people keep asking me when I'm going to paint the car :P
I'm going to rehab the kaaz this week and set the clutches for much less engagement. I have a torsen as well that I might try out for the next event.
Reply
0
0
03-26-2016, 03:49 PM
#96
Junior Member
Thread Starter
iTrader: (1)
Join Date: May 2013
Location: Sandia Park, NM
Posts: 455
Total Cats: 54
The car is back on the road.
I got some pretty solid advice in this thread https://www.miataturbo.net/race-prep...ersteer-88071/
And decided to apply the recommendations.
The end result certainly feels much nicer on the road. I'm no longer getting kidney punched when I hit potholes.
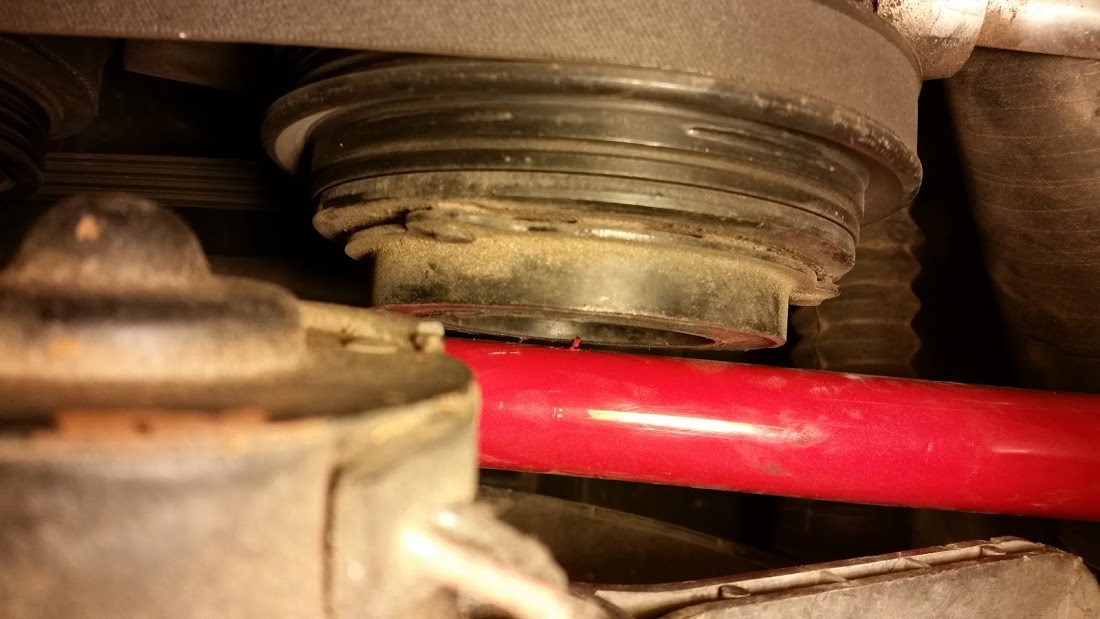
I also pulled my diff and did the axle seals and reset the backlash. It was at 24 thousandths! Spec is 3.4-4.8 or so... Magically the rear end is much quieter now
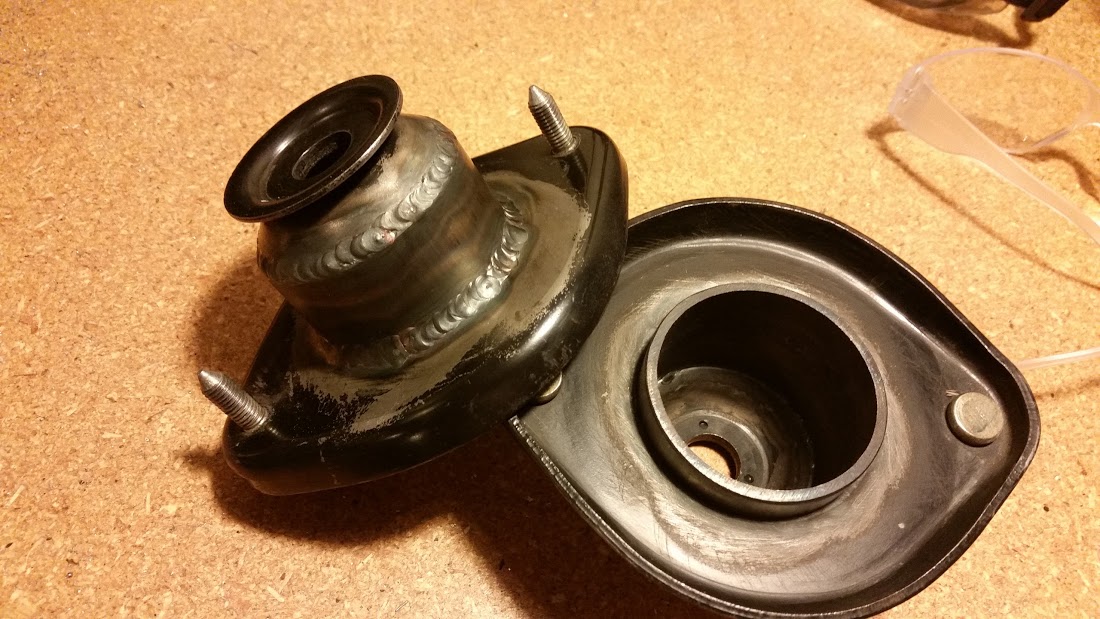
With my new found rear travel I decided to extend my rear tophats by 1"
Hmmm 300 in/lbs vs 450 in/lbs...
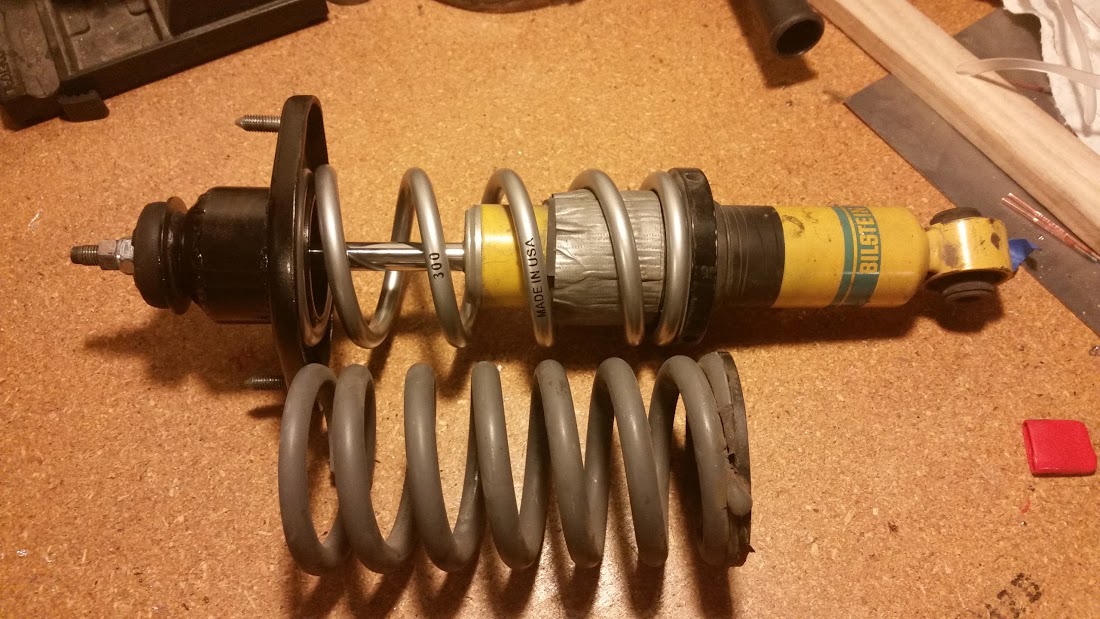
This is really close... not sure if that scratch happened during installation...
I decided to just throw down the money and just buy nice install-able parts. It was kind of nice to not fabricate anything here

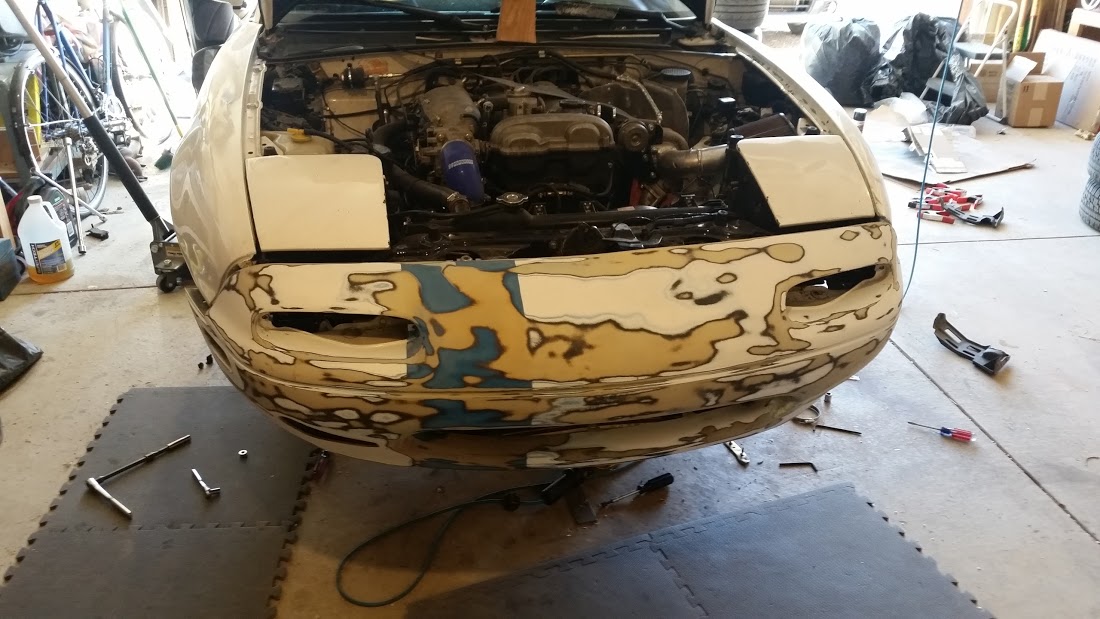
Also decided to paint the car.... sometime soon hah
I got some pretty solid advice in this thread https://www.miataturbo.net/race-prep...ersteer-88071/
And decided to apply the recommendations.
The end result certainly feels much nicer on the road. I'm no longer getting kidney punched when I hit potholes.
I also pulled my diff and did the axle seals and reset the backlash. It was at 24 thousandths! Spec is 3.4-4.8 or so... Magically the rear end is much quieter now
With my new found rear travel I decided to extend my rear tophats by 1"
Hmmm 300 in/lbs vs 450 in/lbs...
This is really close... not sure if that scratch happened during installation...
I decided to just throw down the money and just buy nice install-able parts. It was kind of nice to not fabricate anything here
Also decided to paint the car.... sometime soon hah
Reply
0
0
03-26-2016, 11:19 PM
#97

The coil density is huge on that 450 ft/lb spring, are you sure those were 450s? They looks much stiffer.
Also, what kind of steel did you use on the tophats? I was thinking about doing something very similar to that with some left over NA hats I have around and my MIG.
Also, what kind of steel did you use on the tophats? I was thinking about doing something very similar to that with some left over NA hats I have around and my MIG.
Reply
0
0
 03-27-2016, 01:41 AM
#99
Junior Member
Thread Starter
iTrader: (1)
Join Date: May 2013
Location: Sandia Park, NM
Posts: 455
Total Cats: 54
The coil density is huge on that 450 ft/lb spring, are you sure those were 450s? They looks much stiffer.
Also, what kind of steel did you use on the tophats? I was thinking about doing something very similar to that with some left over NA hats I have around and my MIG.
Also, what kind of steel did you use on the tophats? I was thinking about doing something very similar to that with some left over NA hats I have around and my MIG.
My metal supplier had some 2.5" .120" wall DOM tubing. So its actually the nicest stuff you can get for this purpose. I actually asked for just basic hot rolled crap and he hooked it up.
Edit: I meant to ask how much you were able to extend with what length bump stop?
Last edited by leboeuf; 03-27-2016 at 02:39 AM.
Reply
0
0


