
LeBoeuf's build...
 03-22-2015, 09:15 PM
#21
Junior Member
Thread Starter
iTrader: (1)

Join Date: May 2013
Location: Sandia Park, NM
Posts: 455
Total Cats: 54
Basically I just used the front neck to link the throttle body coolant to the mixing manifold. I live in the mountains and drive the car in sub-freezing temps so the TB needs to be warmed. Also it serves to keep some coolant flow through the front of the head.
Once the turbo comes into the picture the port will be linked to the snail.
I really like having just simple npt bungs in my systems to keep my options open. May I ask why the -AN fitting? I suppose they do make removal a lot easier.
Once the turbo comes into the picture the port will be linked to the snail.
I really like having just simple npt bungs in my systems to keep my options open. May I ask why the -AN fitting? I suppose they do make removal a lot easier.

Reply
 0
0

0
03-23-2015, 06:25 AM
#23
Retired Mech Design Engr

iTrader: (3)
Join Date: Jan 2013
Location: Seneca, SC
Posts: 5,012
Total Cats: 859
Basically I just used the front neck to link the throttle body coolant to the mixing manifold. I live in the mountains and drive the car in sub-freezing temps so the TB needs to be warmed. Also it serves to keep some coolant flow through the front of the head.
Once the turbo comes into the picture the port will be linked to the snail.
I really like having just simple npt bungs in my systems to keep my options open. May I ask why the -AN fitting? I suppose they do make removal a lot easier.
Once the turbo comes into the picture the port will be linked to the snail.
I really like having just simple npt bungs in my systems to keep my options open. May I ask why the -AN fitting? I suppose they do make removal a lot easier.
Aidandj: "NPT fitting to AN10/8." Is this for potential repair purposes? I had considered it vs an -AN bung, but that is an extra fitting.
Reply
0
0
03-23-2015, 11:06 AM
#24
Junior Member
Thread Starter
iTrader: (1)
Join Date: May 2013
Location: Sandia Park, NM
Posts: 455
Total Cats: 54
Ahh hard lines; that makes sense.
I finished off a quick bracket to mount my coils last night. This will likely be temporary until I get my ls2 coils installed. I'm trying to change as little as possible for the initial phase of the engine swap.
Clearance is tight (1/8"-1/4")... Will probably pull things apart and grind down some spots.
Reply
0
0
03-30-2015, 11:04 AM
#26
Junior Member
Thread Starter
iTrader: (1)
Join Date: May 2013
Location: Sandia Park, NM
Posts: 455
Total Cats: 54
More progress!:
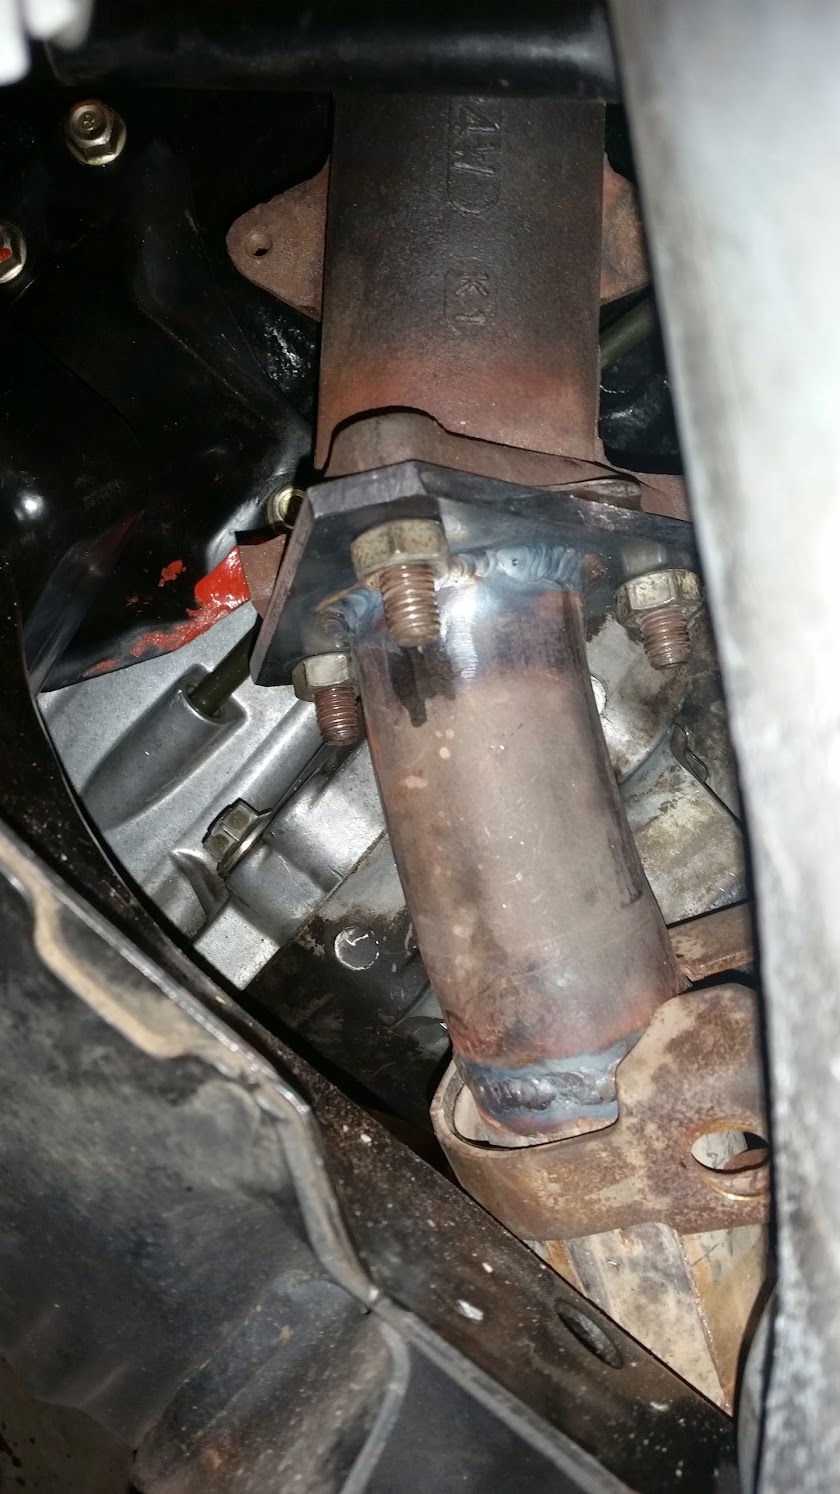
I need a temporary exhaust to hold me over until I get the turbo stuff fabbed. Naturally I went to the lowes exhaust flange department and glued some metal together.
After that was wrapped up I spent the rest of the weekend rewiring large sections of my engine harness and lengthening/shortening things as needed. All of the connectors came from ballenger motor sports; highly recommend these guys!


Cut ~1" off the existing NA exhaust.
Snipped the existing CAS connector and added a weatherpack in its place:

First start will hopefully be tonight or tomorrow. My clutch slave graciously decided to die sometime over the weekend as well, so I'm waiting on a new one for the time being.

The fuel line on the brake vacuum hardline is for mockup. I have an oem one on the way.

I need a temporary exhaust to hold me over until I get the turbo stuff fabbed. Naturally I went to the lowes exhaust flange department and glued some metal together.
After that was wrapped up I spent the rest of the weekend rewiring large sections of my engine harness and lengthening/shortening things as needed. All of the connectors came from ballenger motor sports; highly recommend these guys!
Cut ~1" off the existing NA exhaust.
Snipped the existing CAS connector and added a weatherpack in its place:
First start will hopefully be tonight or tomorrow. My clutch slave graciously decided to die sometime over the weekend as well, so I'm waiting on a new one for the time being.
The fuel line on the brake vacuum hardline is for mockup. I have an oem one on the way.
Reply
0
0
03-30-2015, 11:29 AM
#28
Junior Member
Thread Starter
iTrader: (1)
Join Date: May 2013
Location: Sandia Park, NM
Posts: 455
Total Cats: 54
Haha I have no idea about the header. It at least doesn't have the cat incorporated into it. I can say that it is not light... Its funny I daily drive a b2600i and it almost has the exact same cast manifold.
Hopefully it doesn't get used for too long... I hope to start on the turbo manifold as soon as the engine is broken in.
Hopefully it doesn't get used for too long... I hope to start on the turbo manifold as soon as the engine is broken in.
Reply
0
0
04-06-2015, 10:47 AM
#29
Junior Member
Thread Starter
iTrader: (1)
Join Date: May 2013
Location: Sandia Park, NM
Posts: 455
Total Cats: 54
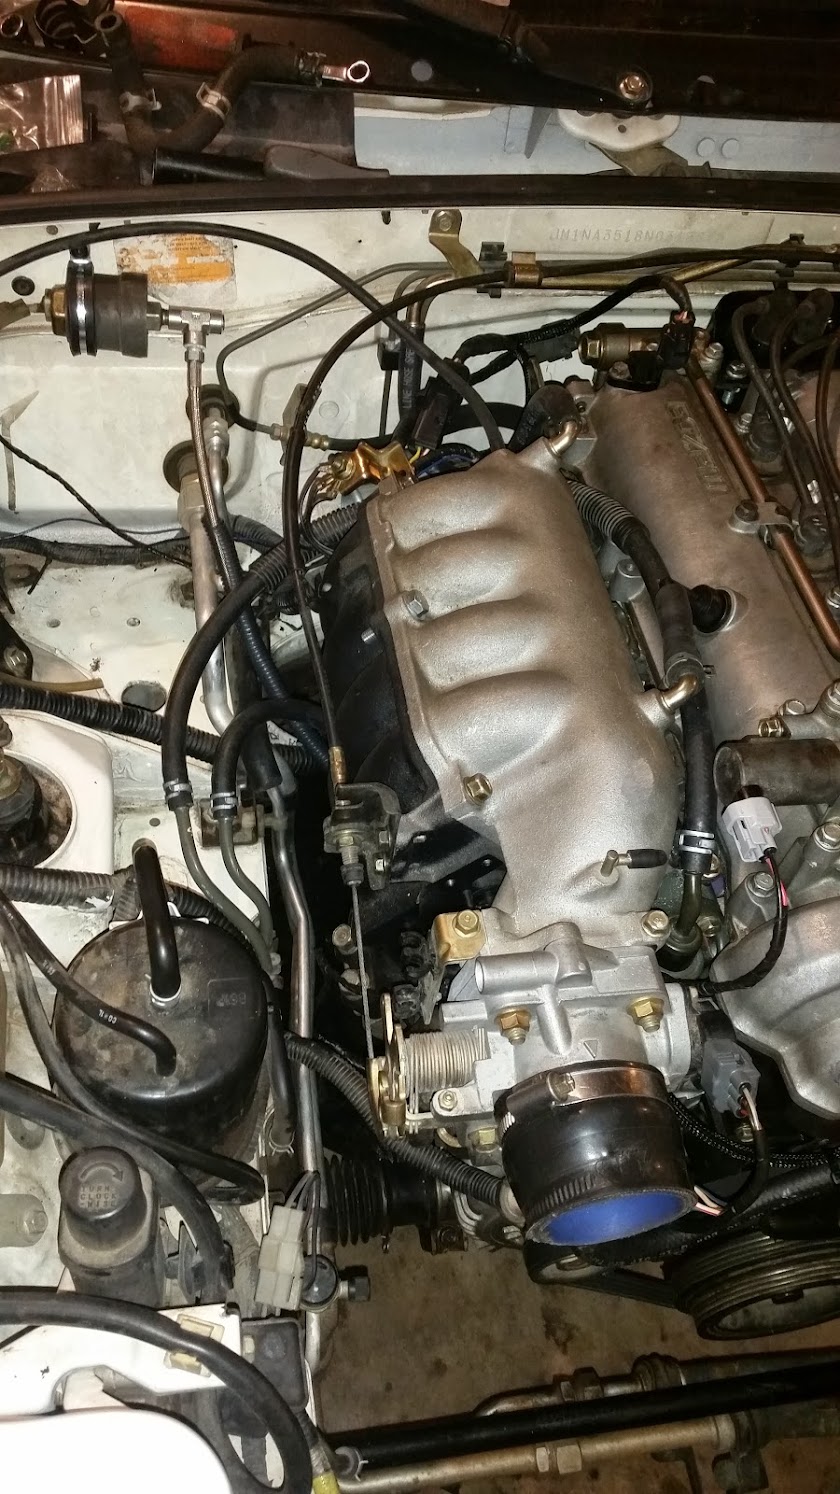
Well she's up and running. Sounds pretty smooth to my ears. We shall see how the break in period goes, but for now the engine is not smoking/leaking/burning stuff other than gas.
The intake is for mockup while I wait on some silicone 90deg pieces to finish it off.

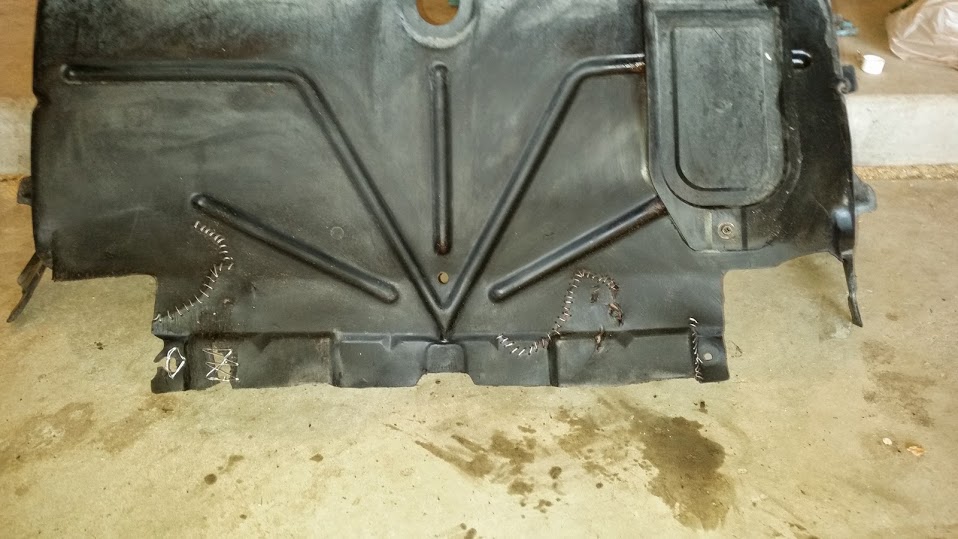
Ummm just keep patching it?
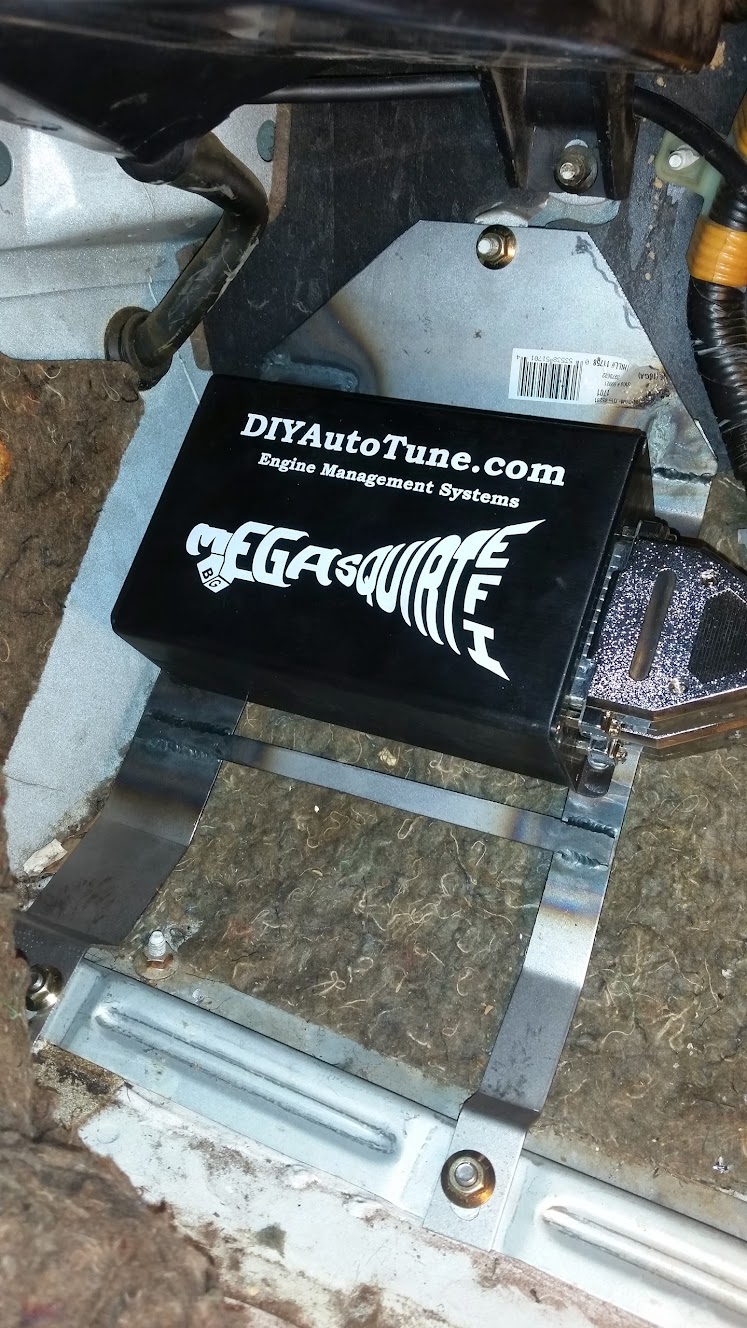
I also decided to make my MS3 installation a little more permanent with a bracket

Boom
Next project will be wheels and a 6 point half cage thing.
The intake is for mockup while I wait on some silicone 90deg pieces to finish it off.
Ummm just keep patching it?
I also decided to make my MS3 installation a little more permanent with a bracket
Boom
Next project will be wheels and a 6 point half cage thing.
Reply
0
0
04-19-2015, 11:14 PM
#30
Junior Member
Thread Starter
iTrader: (1)
Join Date: May 2013
Location: Sandia Park, NM
Posts: 455
Total Cats: 54
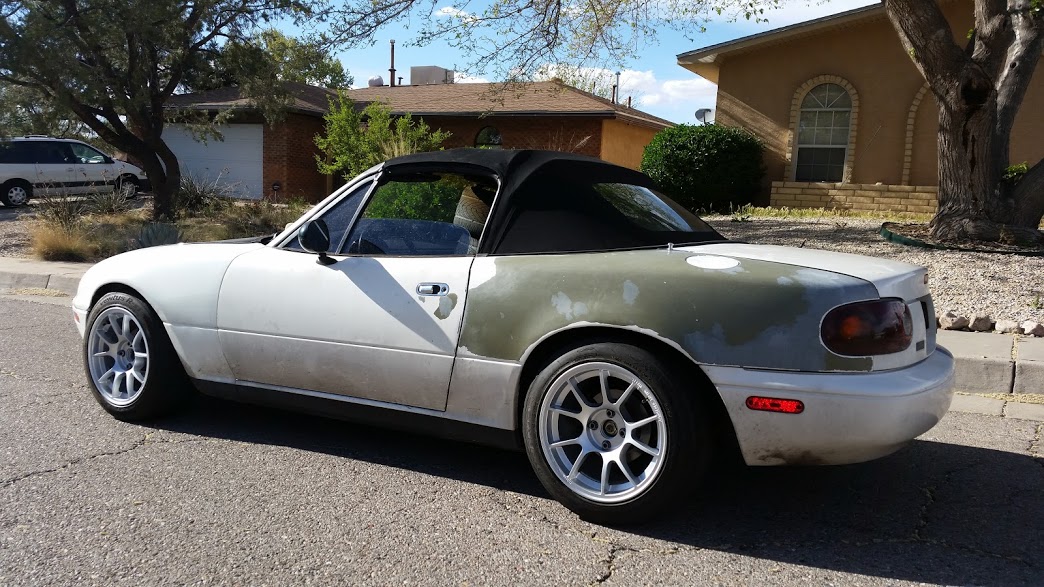
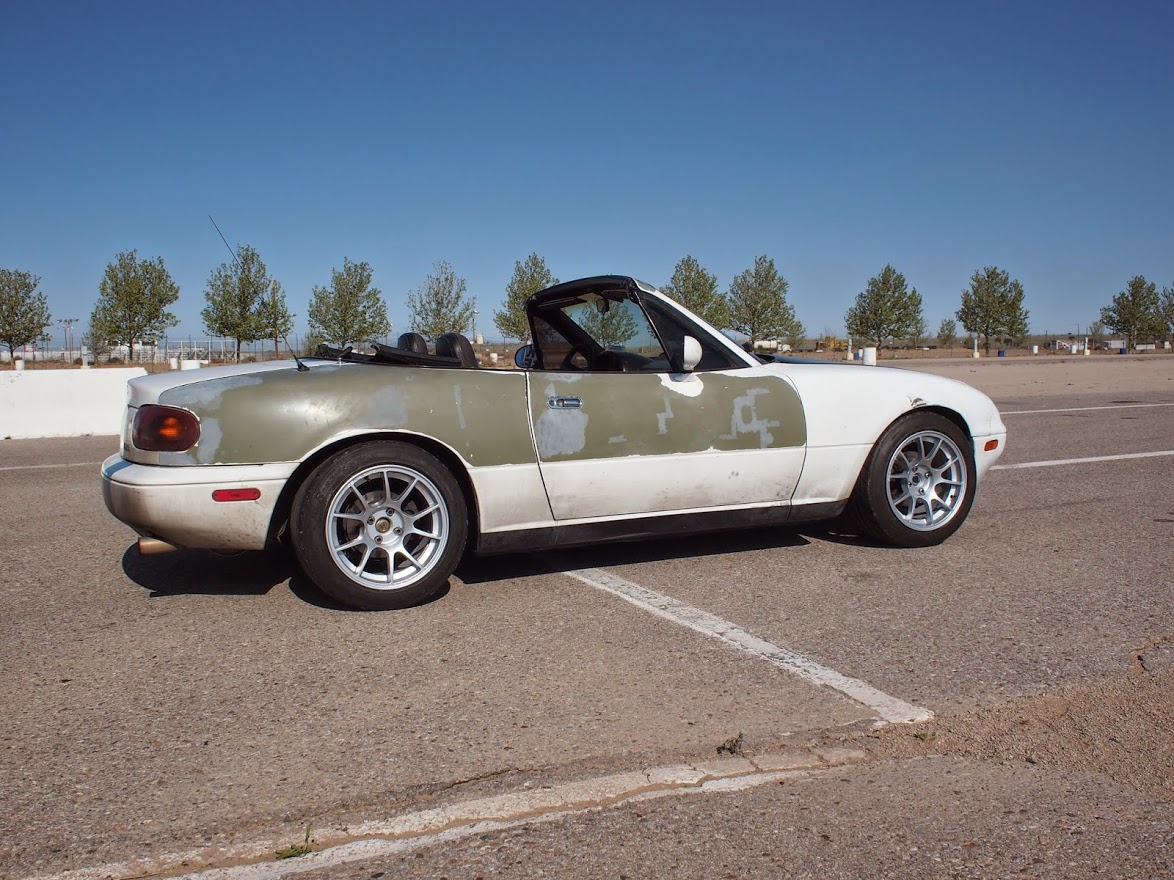
A friend generously sold me some lightly used rs3's for a really good price. Luckily just in time for our time attack this weekend.
My transmission is on its last legs and the engine is barely broken in so I decided to just short shift at 6krpm and see how it did.
Wellll I dropped 5 seconds/lap Down from a 1:42.0x to a l:37.01 on my first session. Pretty sure this setup (with me driving) can get well into the 1:34's. I think the SM record is 1:32 or 1:33. Fastest lap of the day was an exige at 1:31.4.
These things are big hah

My transmission is on its last legs and the engine is barely broken in so I decided to just short shift at 6krpm and see how it did.
Wellll I dropped 5 seconds/lap
Down from a 1:42.0x to a l:37.01 on my first session. Pretty sure this setup (with me driving) can get well into the 1:34's. I think the SM record is 1:32 or 1:33. Fastest lap of the day was an exige at 1:31.4.These things are big hah
Reply
0
0
 06-07-2015, 12:13 PM
#33
Junior Member
Thread Starter
iTrader: (1)
Join Date: May 2013
Location: Sandia Park, NM
Posts: 455
Total Cats: 54
Still waiting on my tubing bender purchase to go through so I started on numerous other projects.
This whole project is being done to increase my fabrication skills so I decided to tackle the manifold design.
This started with making a jig to get the collector cuts done. It took a lot of cuts to get my head around how to compensate for the saw blade correctly. Good thing I started with pvc

After many attempts I drew a mockup on my morning coffee cup and got things figured out

Then proceeded to just make the entire thing out of PVC. Obviously these bends will be a lot different with the longer radius bends so this was just for placement and practice.


I'm in the process of swapping transmissions so my exhaust was already out; may as well put it on there.


Turbo placement looks ok. There's over an inch of clearance everywhere and the downpipe route looks pretty wide open. I don't like how cantilevered the turbo is, but with this FAB9 inspired sidemount, that's just where it ends up. I'll try and get the turbo closer to the block on the metal version.

This whole project is being done to increase my fabrication skills so I decided to tackle the manifold design.
This started with making a jig to get the collector cuts done. It took a lot of cuts to get my head around how to compensate for the saw blade correctly. Good thing I started with pvc
After many attempts I drew a mockup on my morning coffee cup and got things figured out
Then proceeded to just make the entire thing out of PVC. Obviously these bends will be a lot different with the longer radius bends so this was just for placement and practice.
I'm in the process of swapping transmissions so my exhaust was already out; may as well put it on there.
Turbo placement looks ok. There's over an inch of clearance everywhere and the downpipe route looks pretty wide open. I don't like how cantilevered the turbo is, but with this FAB9 inspired sidemount, that's just where it ends up. I'll try and get the turbo closer to the block on the metal version.
Reply
0
0
06-17-2015, 10:42 AM
#34
Junior Member
Thread Starter
iTrader: (1)
Join Date: May 2013
Location: Sandia Park, NM
Posts: 455
Total Cats: 54
The collector is done and the turbo placement has been finalized.
Welding the valley of the merge is really not that easy. Kudos to those of you that can make that area look good... I just put 1/3 of a rod's worth of metal in there.


Location looks like it should be just right.


Welding the valley of the merge is really not that easy. Kudos to those of you that can make that area look good... I just put 1/3 of a rod's worth of metal in there.
Location looks like it should be just right.
Reply
1
1
06-19-2015, 11:55 AM
#35
Junior Member
Thread Starter
iTrader: (1)
Join Date: May 2013
Location: Sandia Park, NM
Posts: 455
Total Cats: 54
Manifold progress!
This is kind of fun. I've just been free handing the cuts on the bandsaw which has worked out really great. Also the harborF... 6 inch belt/disk sander thing has been awesome (other than the fact that I have to give it a little push to get going hah)
The runners all maintain the radius of weld elbows.
Reply
2
2
06-23-2015, 01:56 AM
#37
Junior Member
Thread Starter
iTrader: (1)
Join Date: May 2013
Location: Sandia Park, NM
Posts: 455
Total Cats: 54
Thanks! I've enjoyed watching the total rescue going on in your build thread.
I've got the manifold pretty much wrapped up. I'm going to wait to weld the head flange until I have a good heat sink. My plan is to use the big cast iron manifold currently on the car, but I won't get around to pulling that off for a bit.


I also got a newly balanced rotating assembly with a new large trim turbine wheel for my t28.
I had the work done at gpopshop. Can't say enough good things about these guys. There was a minor issue with my order and they immediately owned up to it and went out of their way to correct the situation. I wouldn't go anywhere else to have work done on a turbo.
Shown next to a t25 assembly:

I've got the manifold pretty much wrapped up. I'm going to wait to weld the head flange until I have a good heat sink. My plan is to use the big cast iron manifold currently on the car, but I won't get around to pulling that off for a bit.
I also got a newly balanced rotating assembly with a new large trim turbine wheel for my t28.
I had the work done at gpopshop. Can't say enough good things about these guys. There was a minor issue with my order and they immediately owned up to it and went out of their way to correct the situation. I wouldn't go anywhere else to have work done on a turbo.
Shown next to a t25 assembly:
Reply
0
0
06-25-2015, 09:13 AM
#38
Cpt. Slow
iTrader: (25)
Join Date: Oct 2005
Location: Oregon City, OR
Posts: 14,429
Total Cats: 1,207
Very nice manifold. While it's out, you seem to have the fabrication skills to make either a lower brace or crane. I'd highly suggest it.
Personally, I'd weld something like what the factory uses on 1.6 headers for the heat shield. I'd put 1-2 (but bigger than m6) on that #4 runner, and brace it down to an engine mount bolt or something.
Personally, I'd weld something like what the factory uses on 1.6 headers for the heat shield. I'd put 1-2 (but bigger than m6) on that #4 runner, and brace it down to an engine mount bolt or something.
Reply
0
0
06-25-2015, 09:37 AM
#39
SADFab Destructive Testing Engineer

iTrader: (5)
Join Date: Apr 2014
Location: Beaverton, USA
Posts: 18,642
Total Cats: 1,866
<p>I know <span>@bbundy uses a "diving board" brace. Which I assume means that it supports the weight of the turbo without directly tying it to the block, giving it room to flex. I would worry that triangulating the manifold to the engine mount could cause stress when heating up the manifold. Unless you have run FEA on your designs or whatever you MEs use.</span></p>
Reply
0
0


