
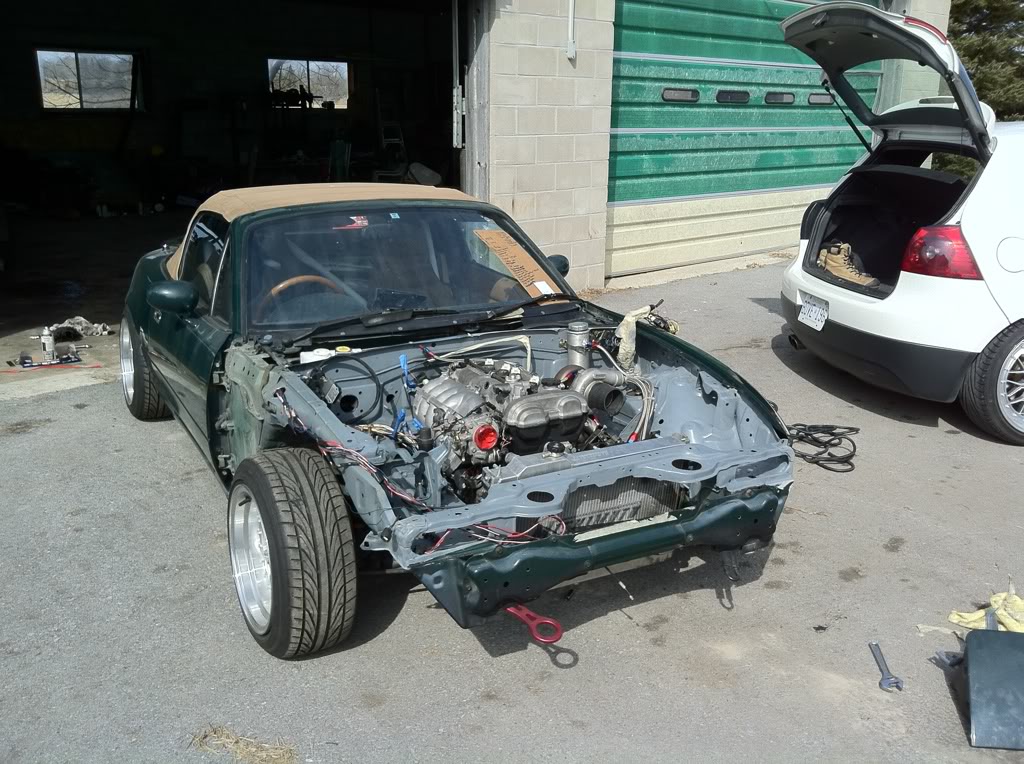
Half Bottle of JD and a 12mm wrench


.JPG)
.JPG)
 03-17-2011, 01:48 PM
#143
Elite Member
Thread Starter
iTrader: (8)

Join Date: Dec 2008
Location: Kingston, Ontario
Posts: 2,910
Total Cats: 51
Can anyone confirm that an intake manifold flange for a 1999 is the same as a 2002?
i know somewhere down the line they change... but im not sure when.
i know somewhere down the line they change... but im not sure when.

Reply
 0
0

0
03-17-2011, 02:38 PM
#144
Elite Member
iTrader: (2)

Join Date: Jan 2007
Location: Los Angeles, CA
Posts: 8,682
Total Cats: 130
What a nice manifold you have made!
I can confirm intake flange is the same on the 99 as the 01. I just put a gutted 99 intake on my vvt head.
Also see herrr:
http://finishlineperformance.com/sto...3&cat=0&page=1
I can confirm intake flange is the same on the 99 as the 01. I just put a gutted 99 intake on my vvt head.
Also see herrr:
http://finishlineperformance.com/sto...3&cat=0&page=1
Reply
0
0
03-17-2011, 02:52 PM
#145
Elite Member
Thread Starter
iTrader: (8)
Join Date: Dec 2008
Location: Kingston, Ontario
Posts: 2,910
Total Cats: 51
Thanks dude!
I am starting up a side buisness building manifolds and custom parts for people.
The week after next I hope to do my downpipe, charge piping as well as a midpipe for a 1jz-gte toyota soarer.
I am starting up a side buisness building manifolds and custom parts for people.
The week after next I hope to do my downpipe, charge piping as well as a midpipe for a 1jz-gte toyota soarer.
Reply
0
0
03-20-2011, 10:56 PM
#146
Elite Member
Thread Starter
iTrader: (8)
Join Date: Dec 2008
Location: Kingston, Ontario
Posts: 2,910
Total Cats: 51
Pushed it into the light for the first time since snow.
Managed to weld on the wastegate port and plumb the turbo for oil on top of finishing another manifold.
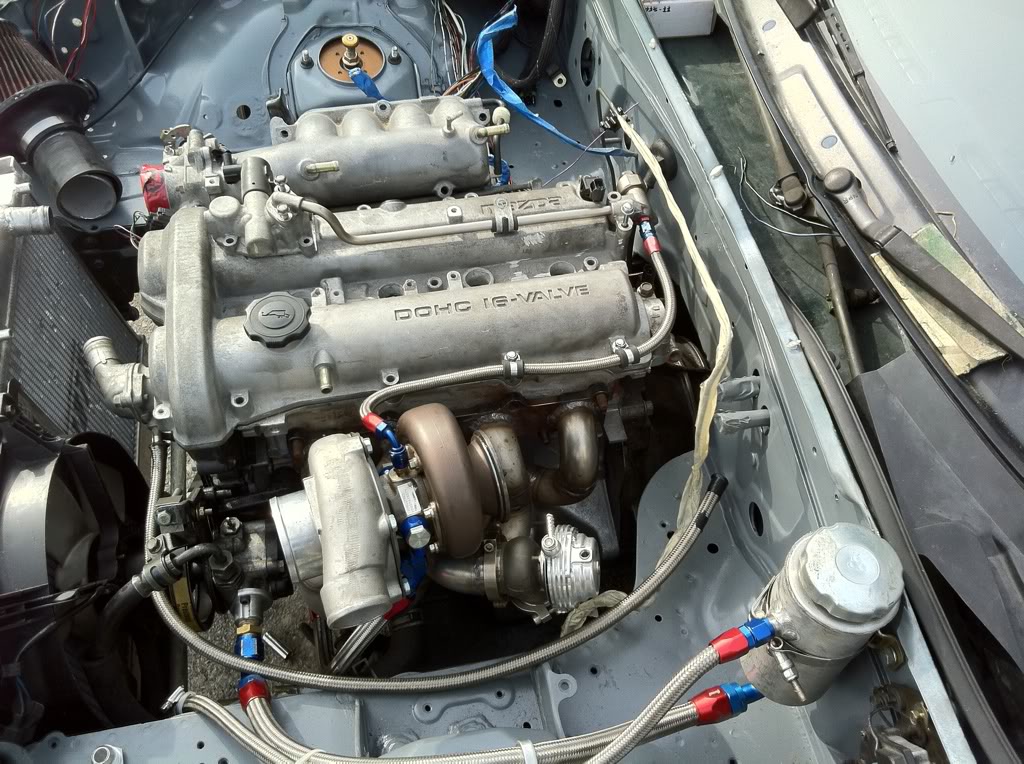
Best oil feed ever
Managed to weld on the wastegate port and plumb the turbo for oil on top of finishing another manifold.
Best oil feed ever
Reply
1
1
 03-21-2011, 09:23 AM
#151
Elite Member
Thread Starter
iTrader: (8)
Join Date: Dec 2008
Location: Kingston, Ontario
Posts: 2,910
Total Cats: 51
There was minor mods to the location needed to allow the fitting to fit properly.
It was steel though so grinding the surface flat is no big deal. And from there its just a drill and tap with 1/8 NPT.
Edit: The idea is also to keep things that can leak in plain sight, so if they do leak, i can see it and quickly fix it as opposed to last year where it was all hidden and i had to try to determine the "Leak-zone"
Reply
0
0

 03-21-2011, 01:18 PM
#156
Elite Member
Thread Starter
iTrader: (8)
Join Date: Dec 2008
Location: Kingston, Ontario
Posts: 2,910
Total Cats: 51
Want some right now.
Dropped the valve cover for sandblasting and machining to fit the new toyota cops at lunch.
Color suggestions for the valve cover? I am going to get it powdered!
I am thinking candy red to keep it matching the AN fittings.
on the inverse of that candy blue could be dope too.
Dropped the valve cover for sandblasting and machining to fit the new toyota cops at lunch.
Color suggestions for the valve cover? I am going to get it powdered!
I am thinking candy red to keep it matching the AN fittings.
on the inverse of that candy blue could be dope too.
Reply
0
0
 03-21-2011, 02:18 PM
#158
Elite Member
Thread Starter
iTrader: (8)
Join Date: Dec 2008
Location: Kingston, Ontario
Posts: 2,910
Total Cats: 51
Yeah, that seems to be the concensus.
My powder guy just got back to me too and he said he has the stuff to do it.
I just need to get the cover back, and weld on my fittings as well as the bridge between cylinder 1 and 2 which is going to be milled out to fit my COPS
My powder guy just got back to me too and he said he has the stuff to do it.
I just need to get the cover back, and weld on my fittings as well as the bridge between cylinder 1 and 2 which is going to be milled out to fit my COPS
Reply
0
0
03-21-2011, 03:13 PM
#160
Elite Member
Thread Starter
iTrader: (8)
Join Date: Dec 2008
Location: Kingston, Ontario
Posts: 2,910
Total Cats: 51
The valve cover needs to be modded after machining being that the center section between cyl 1 and 2 need to be filled with new metal due to the milling.
Do you think -10 or -12 would be best on the valve cover?
Reply
0
0


