
electroCrunch's 99 NB - streetable track toy
 08-03-2021, 02:21 PM
#41
Junior Member
Thread Starter

Join Date: Mar 2016
Location: Phoenix AZ
Posts: 113
Total Cats: 55
It's literally this basemap for 99-00 MS3, and I just exported/imported the ignition table: https://trubokitty.com/#/tune
I just bumped the 6k-7k @WOT (for my n/a MAP) down to 35 degrees to feel better about things, might bump the entire higher RPM WOT row to ~32 degrees to feel even more betterer (because knock isn't registering yet and I don't fully trust the sensor).
Last edited by electroCrunch; 08-04-2021 at 11:01 AM.

Reply
 0
0

0
08-10-2021, 11:34 AM
#42
Junior Member
Thread Starter
Join Date: Mar 2016
Location: Phoenix AZ
Posts: 113
Total Cats: 55
Fixed a small CLT wiring issue. This probably isn't worth a post but I had a good LOL at the wiring "repair" job from previous owner or mechanic, and wanted to share. Also wanted to share my new source for connectors.... first time using Ballenger Motorsports for a new pigtail connector. I'll be using them moving forward, good quality and I appreciate the few extra inches of wiring now present for the connector.
Another weird previous-owner repair job fixed. 3 butt connectors, and the wire snapped at the connector lol. This should hold now.

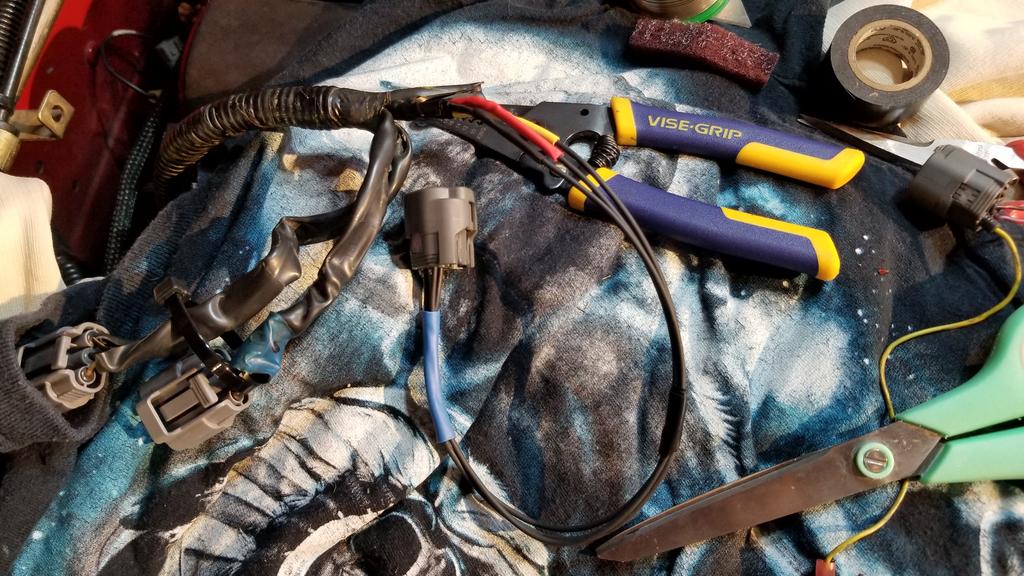
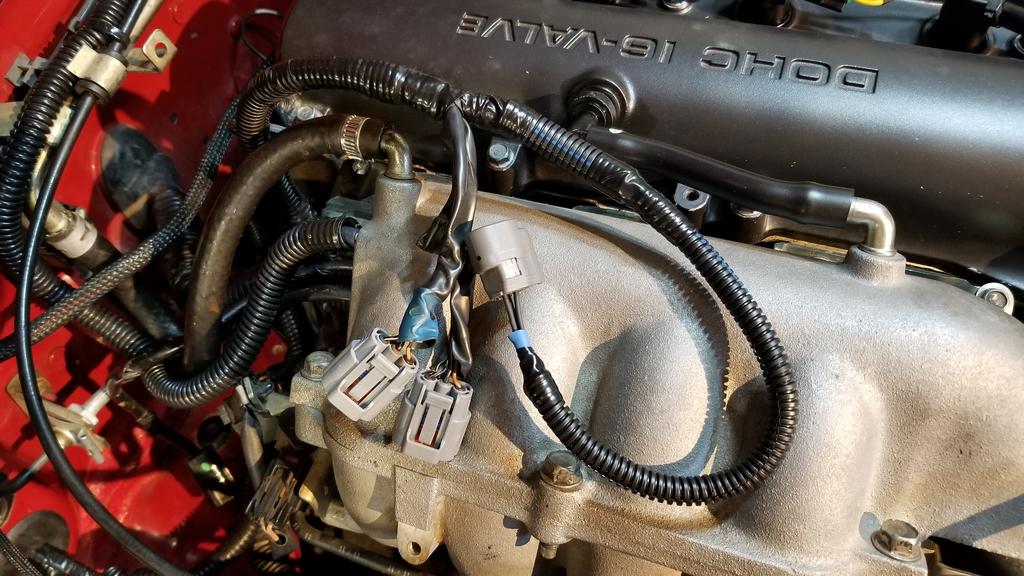
It works!
Another weird previous-owner repair job fixed. 3 butt connectors, and the wire snapped at the connector lol. This should hold now.
It works!
Reply
0
0
09-15-2021, 01:57 PM
#43
Junior Member
Thread Starter
Join Date: Mar 2016
Location: Phoenix AZ
Posts: 113
Total Cats: 55
I decided it was time to upgrade to a MS3Pro Plug and Play unit from DIYautoTune, for various reasons. The swap from MSpnp2 was pretty straight forward and I got it done in a few hours, including software setup/config. Miata started on the first try, success.
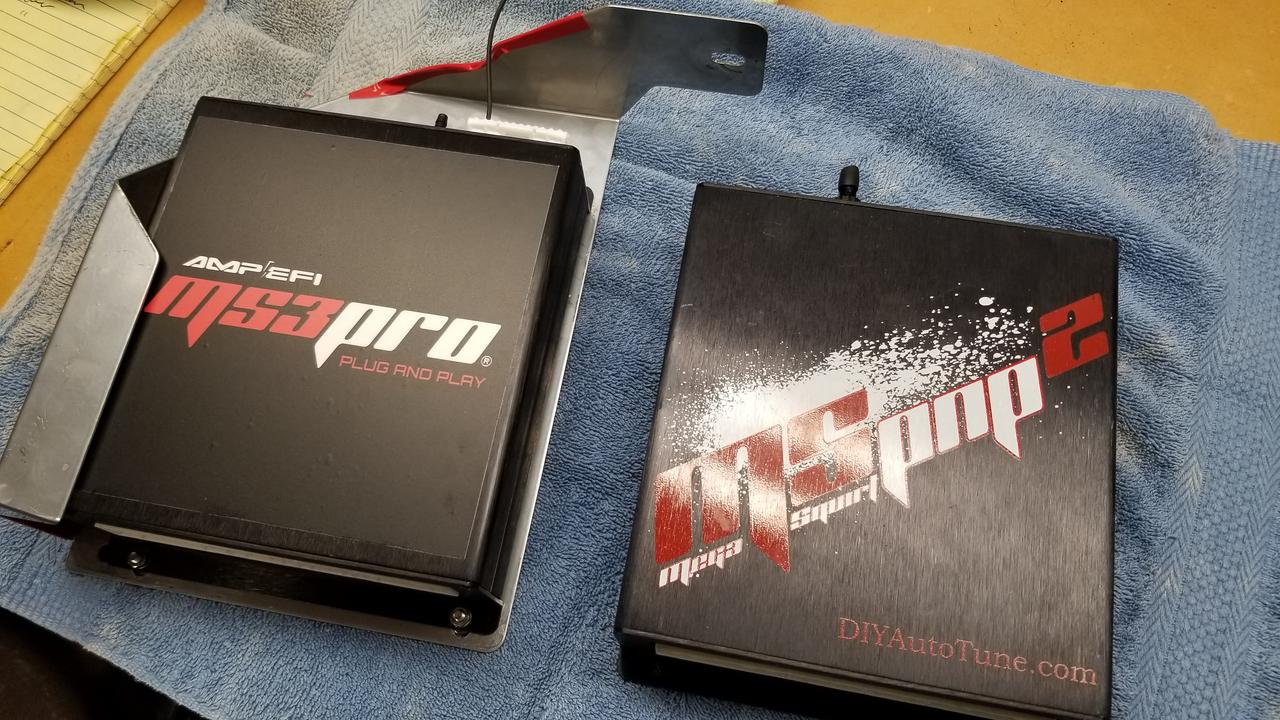
Aside from lifting the vehicle off the ground a bit to get access to under the dash, the most difficult part was re-soldering the Wideband (mtx-l) analog input wire for the new optional connector. Not too bad at all. I'm glad I didn't go any deeper into the MSpnp2 setup, otherwise it would have been added soldering work and electrical considerations.
Aside from lifting the vehicle off the ground a bit to get access to under the dash, the most difficult part was re-soldering the Wideband (mtx-l) analog input wire for the new optional connector. Not too bad at all. I'm glad I didn't go any deeper into the MSpnp2 setup, otherwise it would have been added soldering work and electrical considerations.
Last edited by electroCrunch; 11-24-2021 at 11:48 AM.
Reply
0
0
09-29-2021, 12:48 PM
#44
Junior Member
Thread Starter
Join Date: Mar 2016
Location: Phoenix AZ
Posts: 113
Total Cats: 55
Bad luck, good luck, bad luck, good luck, etc...
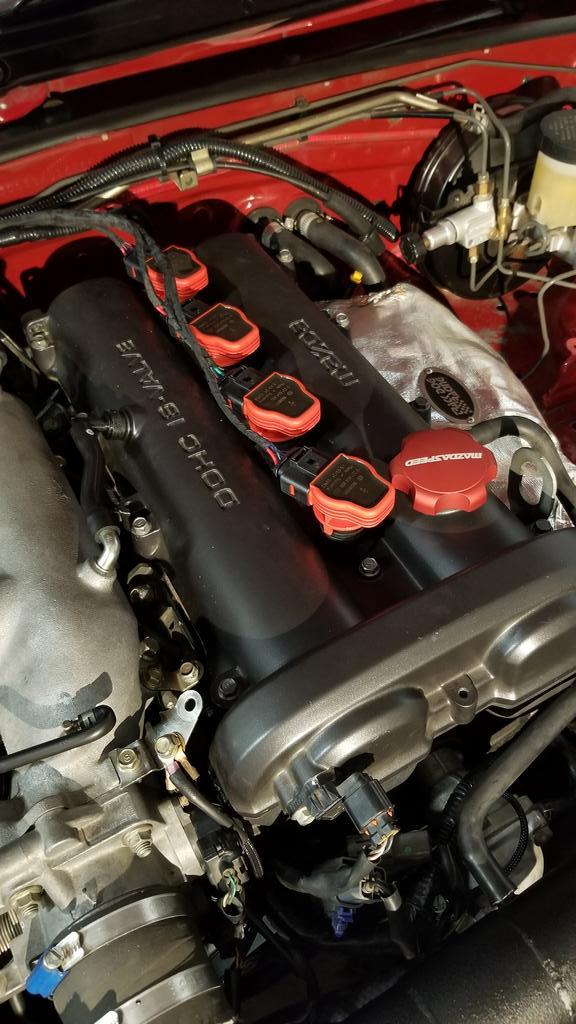
First, shout out to Matt Cramer and the awesome support I received from DIYautoTune/AMP-EFI, when troubleshooting continued issues with the Bosch COPs. Only cylinders 1&2 were igniting still. Matt helped me to narrow the issue down to the FlowForce harness. I validated this with a multimeter that the grounds were bad. FlowForce sent me a new harness and the R8/VAG/Bosch coils are now working very well! Wasted spark configuration. So glad to get these off the parts shelf and running. Fingers crossed this is bye bye forever with the Fab9 COPs.
I found this article on m.net where this FlowForce customer was having the exact same symptoms I was having. Here's a link in case it's helpful to anyone.
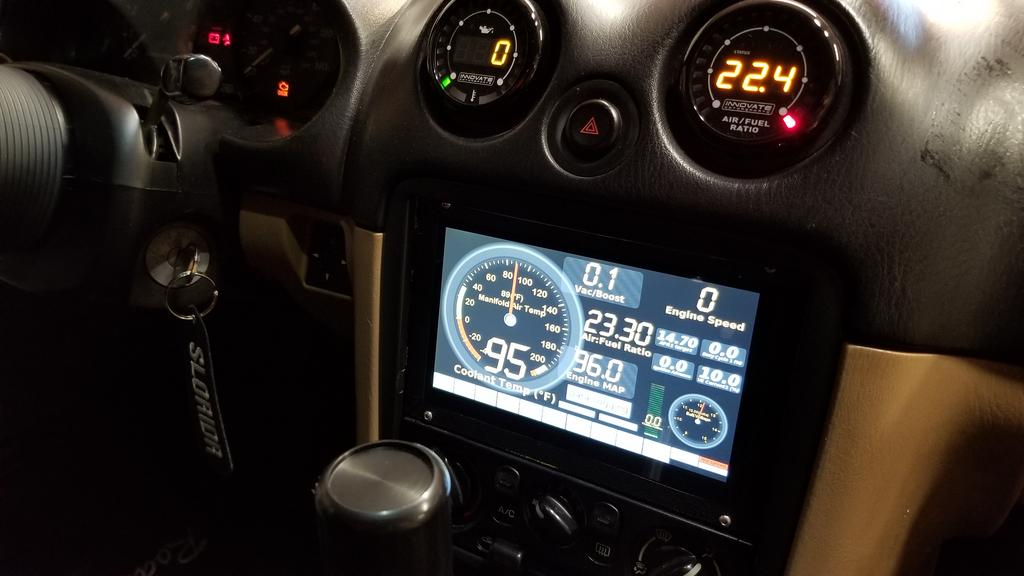
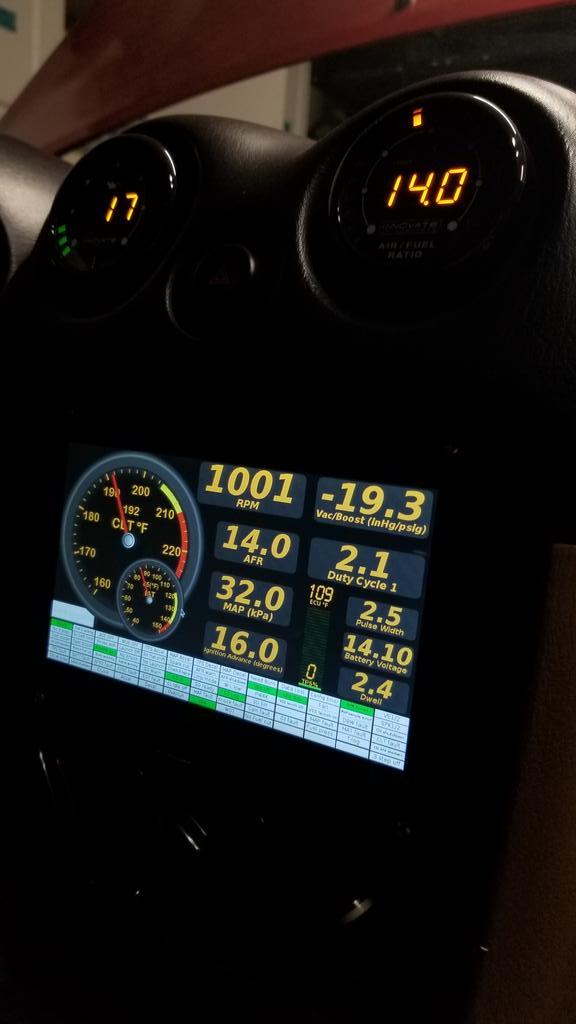
Here's the bad luck part. I installed the new harness, all cylinders igniting well. However, my MTX-L Wideband was pegged at 22.4 AFR. I decided to not believe it was related to the coils, so I did some research and found that these controllers/sensors can be finicky. I suspect that when the engine was running poorly with the bad harness and not igniting half the cylinders, I doused the sensor with fuel causing it to fail. I'm also aware that sometimes the MTX-L controller/firmware can be an issue. Luckily my controller didn't display any erratic or odd behavior. Just a sensor pegged at 22.4. I tried to recalibrate the sensor but that resulted in an E8 error code. All signs point to a bad sensor. I ordered a new sensor on amazon, branded Innovate Motorsports, and had it installed the next day (yesterday). Success, new Wideband sensor works great.
Interesting article I came across in my research, in regards to how/why sensors fail prematurely with non-OEM ECUs: https://www.nzefi.com/bosch-lsu-wide...-applications/
The new MS3Pro_PNP is working well. No issues whatsoever. Last night, with the new COPs, I verified base timing as well as tuned the Spark Hardware Latency. I'm finally at a baseline I can build off of!
First, shout out to Matt Cramer and the awesome support I received from DIYautoTune/AMP-EFI, when troubleshooting continued issues with the Bosch COPs. Only cylinders 1&2 were igniting still. Matt helped me to narrow the issue down to the FlowForce harness. I validated this with a multimeter that the grounds were bad. FlowForce sent me a new harness and the R8/VAG/Bosch coils are now working very well! Wasted spark configuration. So glad to get these off the parts shelf and running. Fingers crossed this is bye bye forever with the Fab9 COPs.
I found this article on m.net where this FlowForce customer was having the exact same symptoms I was having. Here's a link in case it's helpful to anyone.
Here's the bad luck part. I installed the new harness, all cylinders igniting well. However, my MTX-L Wideband was pegged at 22.4 AFR. I decided to not believe it was related to the coils, so I did some research and found that these controllers/sensors can be finicky. I suspect that when the engine was running poorly with the bad harness and not igniting half the cylinders, I doused the sensor with fuel causing it to fail. I'm also aware that sometimes the MTX-L controller/firmware can be an issue. Luckily my controller didn't display any erratic or odd behavior. Just a sensor pegged at 22.4. I tried to recalibrate the sensor but that resulted in an E8 error code. All signs point to a bad sensor. I ordered a new sensor on amazon, branded Innovate Motorsports, and had it installed the next day (yesterday). Success, new Wideband sensor works great.
Interesting article I came across in my research, in regards to how/why sensors fail prematurely with non-OEM ECUs: https://www.nzefi.com/bosch-lsu-wide...-applications/
The new MS3Pro_PNP is working well. No issues whatsoever. Last night, with the new COPs, I verified base timing as well as tuned the Spark Hardware Latency. I'm finally at a baseline I can build off of!
Last edited by electroCrunch; 10-07-2021 at 01:38 PM.
Reply
2
2
10-14-2021, 01:45 PM
#45
Junior Member
Thread Starter
Join Date: Mar 2016
Location: Phoenix AZ
Posts: 113
Total Cats: 55
I ordered the RB midpipe and muffler in April 2021 (thanks for the recommendation @Arca_ex ). Muffler arrived in June. Midpipe finally got delivered yesterday. 6 months from order to fulfillment.
I got the new exhaust bits installed same day yesterday, I was really excited to hear and feel the new exhaust. This is my first vehicle with full header back exhaust. I love the way it sounds. It's not at all loud, and no drone. I can barely hear the exhaust over my intake and general NVH in cruise/idle, but when I open it up I can definitely hear the exhaust come to life. I love it. It was worth the wait I think.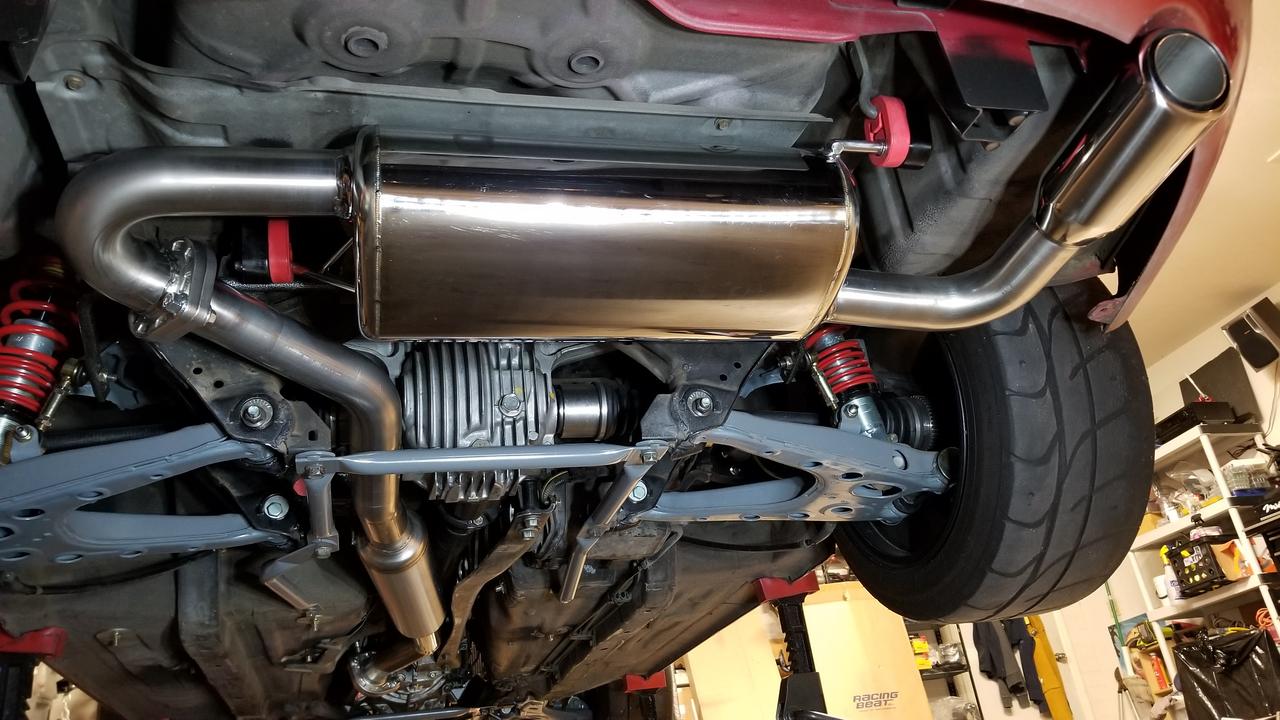
I'm experimenting with the exhaust hangers. I'm using a combination of generic rubber hangers I got off of Amazon, as well as poly hangers I got from FM. I hope the combination holds up over time.
I got the new exhaust bits installed same day yesterday, I was really excited to hear and feel the new exhaust. This is my first vehicle with full header back exhaust. I love the way it sounds. It's not at all loud, and no drone. I can barely hear the exhaust over my intake and general NVH in cruise/idle, but when I open it up I can definitely hear the exhaust come to life. I love it. It was worth the wait I think.
- Miata Race Connecting Pipe
- Racing Beat Single Tip Miata Exhaust
I'm experimenting with the exhaust hangers. I'm using a combination of generic rubber hangers I got off of Amazon, as well as poly hangers I got from FM. I hope the combination holds up over time.
Reply
1
1
 11-03-2021, 01:08 PM
#47
Junior Member
Thread Starter
Join Date: Mar 2016
Location: Phoenix AZ
Posts: 113
Total Cats: 55
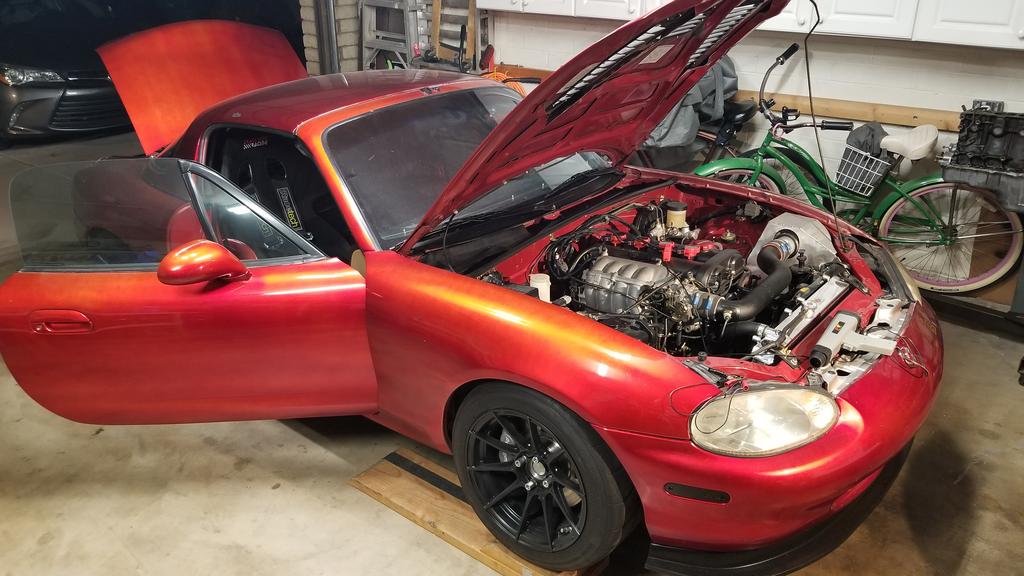
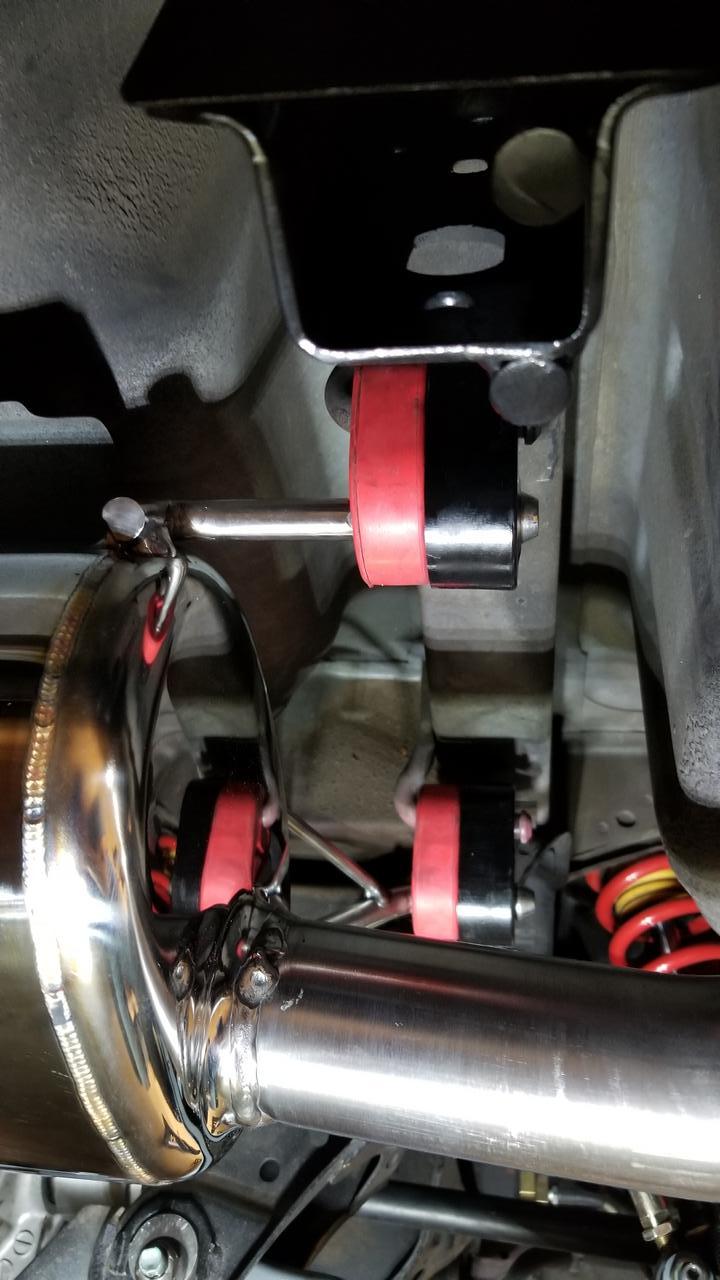
Putting things back together after tearing down a lot of stuff in the front of the engine bay. TB/WP job and a Supermiata Coolant Reroute is almost done. I decided while I had the front of the engine bay cleared out, I would tackle the power steering depower as well. I thought over this for a long time because I wasn't sure if I was going to like the depowered rack for a track/street car. So I did it the "proper" method for depowering, plus I'll be sure to get my caster dialed in to 3.5-4 when getting aligned.
With all of the parts/hardware/brackets that were removed from the power steering system, I measured approximately 16 pounds was removed from the vehicle as an added bonus.
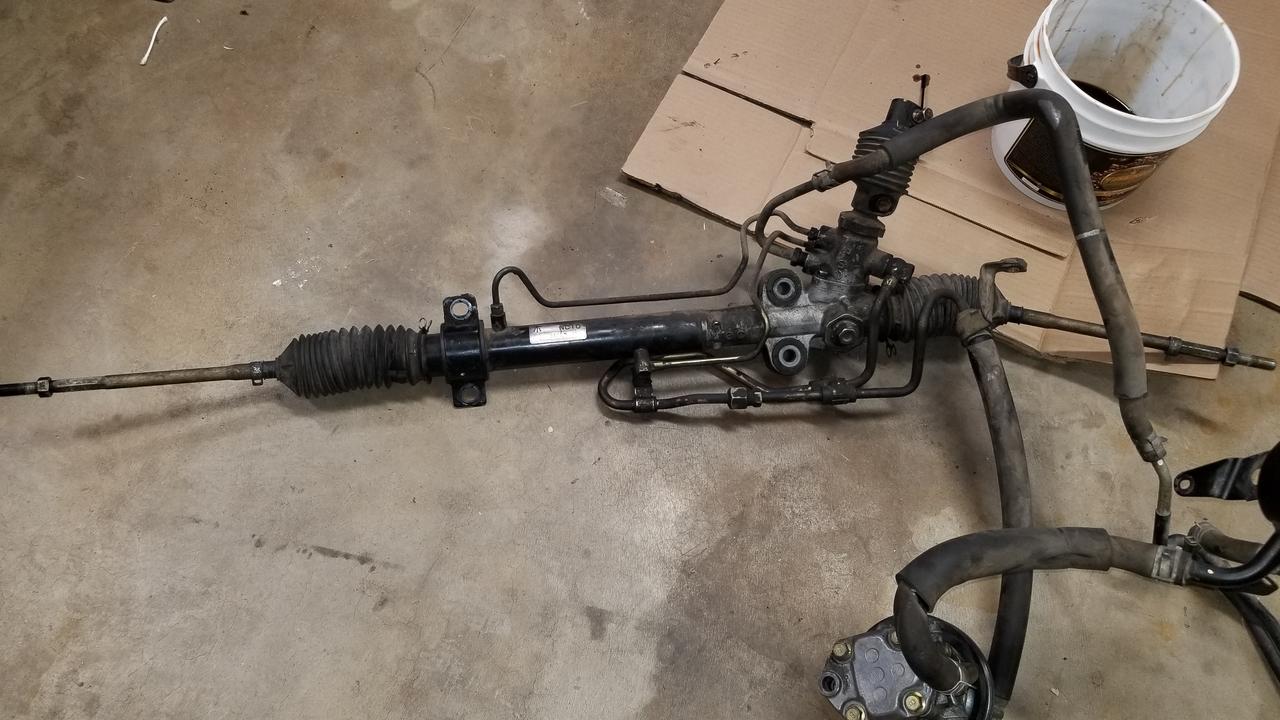
Before:
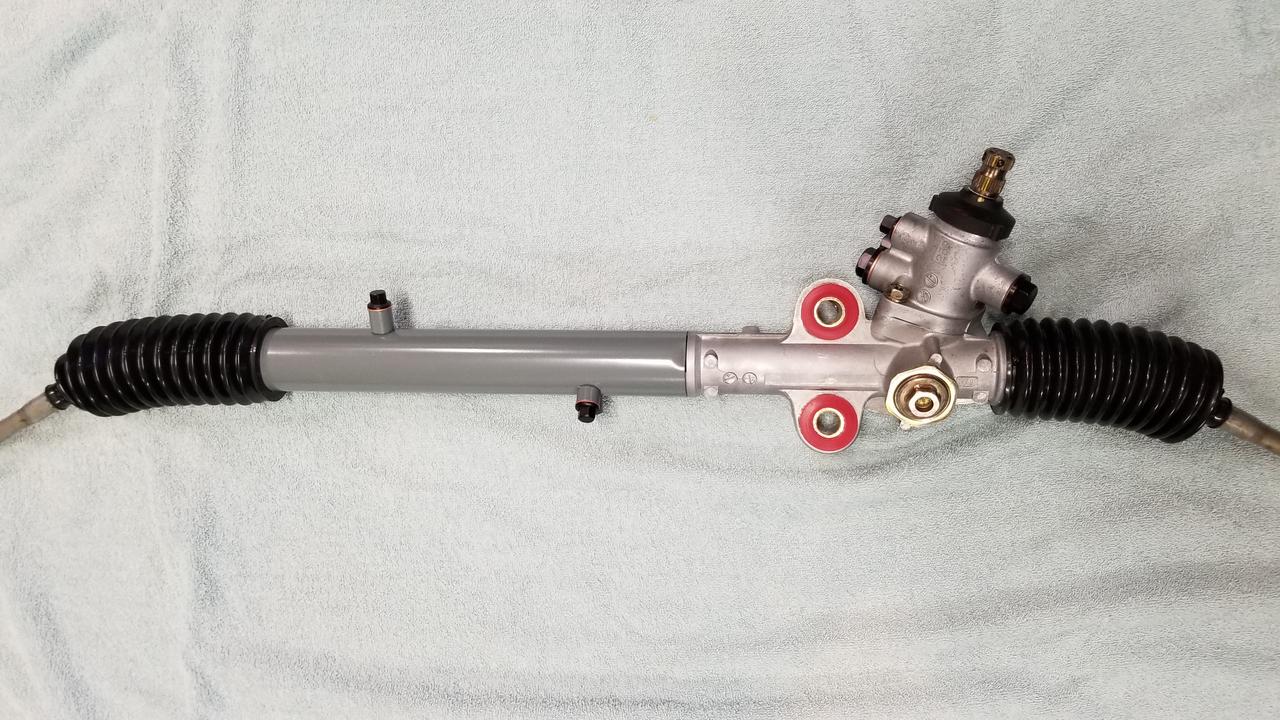
After:
Close up of the welded input shaft just to share another example to the internets:

Parts used for the depower and rebuild:
With all of the parts/hardware/brackets that were removed from the power steering system, I measured approximately 16 pounds was removed from the vehicle as an added bonus.
Before:
After:
Close up of the welded input shaft just to share another example to the internets:
Parts used for the depower and rebuild:
- MiataRoadster steering rack depowering kit plugs (NB Miata)
- Prothane steering rack mounts kit urethane RED (NB Miata)
- Mevotech MK80156 bellows kit
- Beavis Motorsports had a really good video to demonstrate the overall process:
- FlyinMiata depower guide (not exactly a fully complete guide, but really great): https://flyinmiata.com/tech/depower.php
- MotoIQ had a decent guide as well. My fabricator pal used the guide to figure out he needed "880 filler rod" (Ni/Cr filler material made for repairing giant forged stamping dies) for the weld: https://motoiq.com/project-miatabusa...steering-rack/
- There's a lot of discussion on m.net about the procedure as well, but I won't link to that other miata forum directly

Last edited by electroCrunch; 11-03-2021 at 04:07 PM.
Reply
0
0
 11-04-2021, 12:45 PM
#49
Junior Member
Thread Starter
Join Date: Mar 2016
Location: Phoenix AZ
Posts: 113
Total Cats: 55
I already had the poly bushings sitting on the shelf for years, so I may just run them and see how they perform regardless. I bought them back when I was a much bigger noob and unaware of delrin.
The poly has got to be better than the dried out rubber OEMs I replaced them with. Now that there's no power steering system, it's much easier to remove the rack if I do change my mind. It would just cost me an alignment.
Last edited by electroCrunch; 11-04-2021 at 01:20 PM.
Reply
0
0

 11-04-2021, 04:53 PM
#52
Junior Member
Thread Starter
Join Date: Mar 2016
Location: Phoenix AZ
Posts: 113
Total Cats: 55
I'm just gonna send it with the Prothane bushings, after doing some digging. I wasn't able to actually find a durometer spec from Prothane, aside from a blurb at their site: https://www.prothanesuspensionparts.com/12701
The only place I could find durometer mentioned for the Prothane 12-701 bushing set is "95" durometer from MiataRoadster: Prothane steering rack mount kits MAZDA - MiataRoadster - Stay Tuned With MiataRoadster!
Given I've already spent the money on them, and installed, I'm just going to run these since they are seemingly close enough-ish to OEM give or take-ish. If they turn out to be a noticeable issue, I'll replace with OEM per Emilio's recommendation (thank you again).
These polyurethane bushings are much sturdier than the OE rubber. Resistant to both physical wear and contamination the 12-701 will once again tighten your steering and keep it that way. Not only does the 12-701 restore your steering, but since the polyurethane is stiffer than the OE rubber your roadster will actually be more responsive than before.
Made of 95 durometer Urethane
Reply
0
0
11-22-2021, 11:45 AM
#53
Junior Member
Thread Starter
Join Date: Mar 2016
Location: Phoenix AZ
Posts: 113
Total Cats: 55
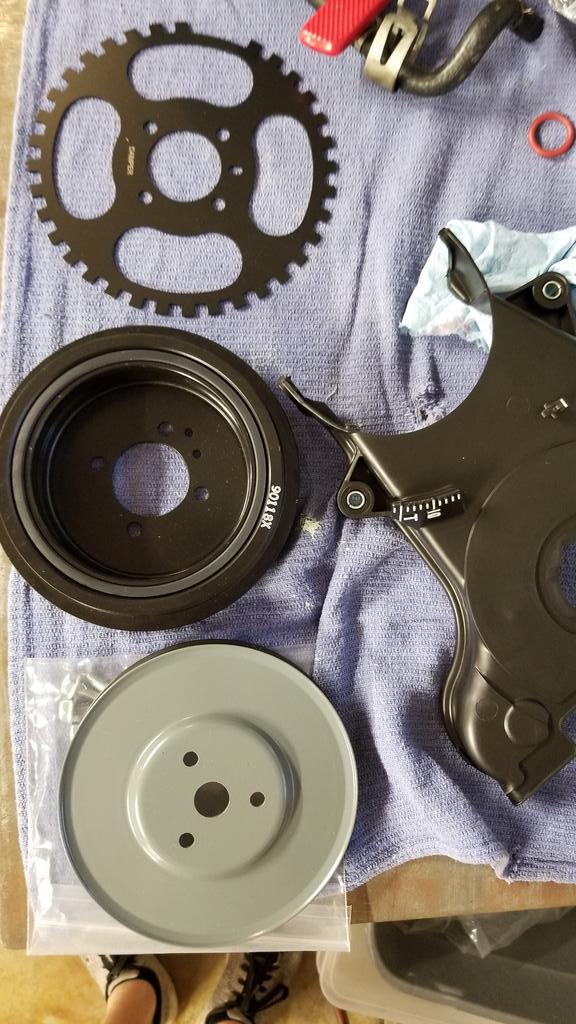
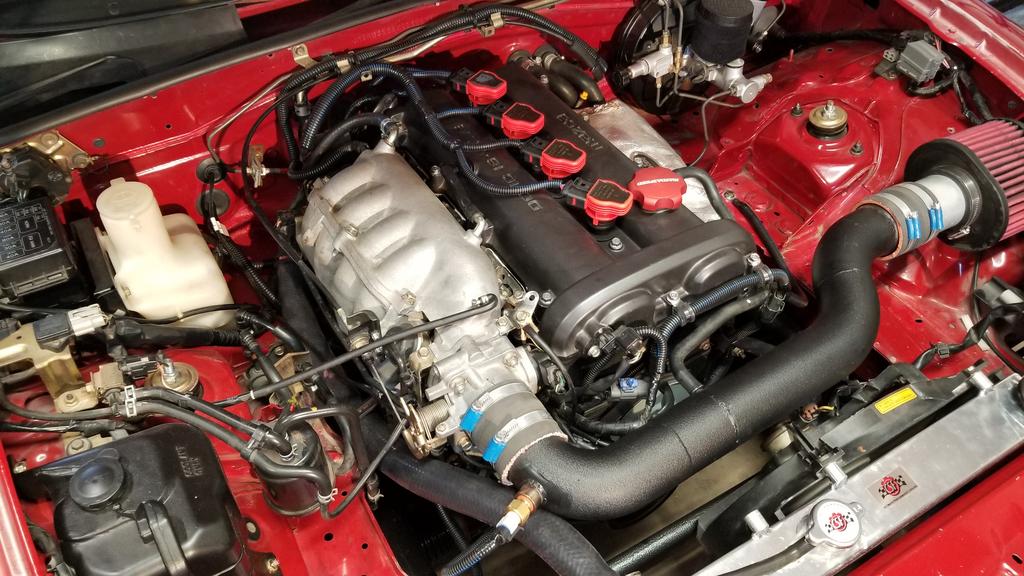
Big update. I started the tear down for a Timing Belt, Water Pump, SuperMiata Qmax reroute (thanks yet again @Arca_ex for another great suggestion) , BP5A camshaft swap, plus a bunch of other work a few weeks ago. A sore back delayed me from finishing it up quickly but I was able to wrap it up over this last weekend. I was relieved when it started the first try!
The easy part was getting it all torn down. After the tear down, I spent many hours cleaning up years and years worth of oil leaking from both camshaft and crankshaft seals. It was a mess everywhere. The tear down...

The goal
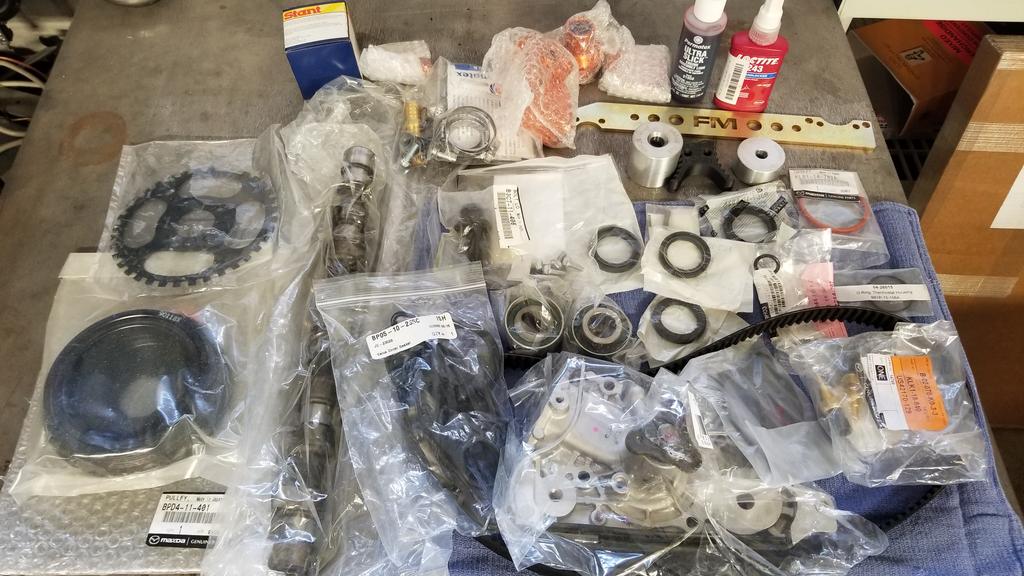
Some of the newness and freshness. I decided to go with OEM damper to save some money. If/when I do an engine build, I'll go with Fluidampr. But for now this'll work. Had downtime so I painted the WP pulley too.
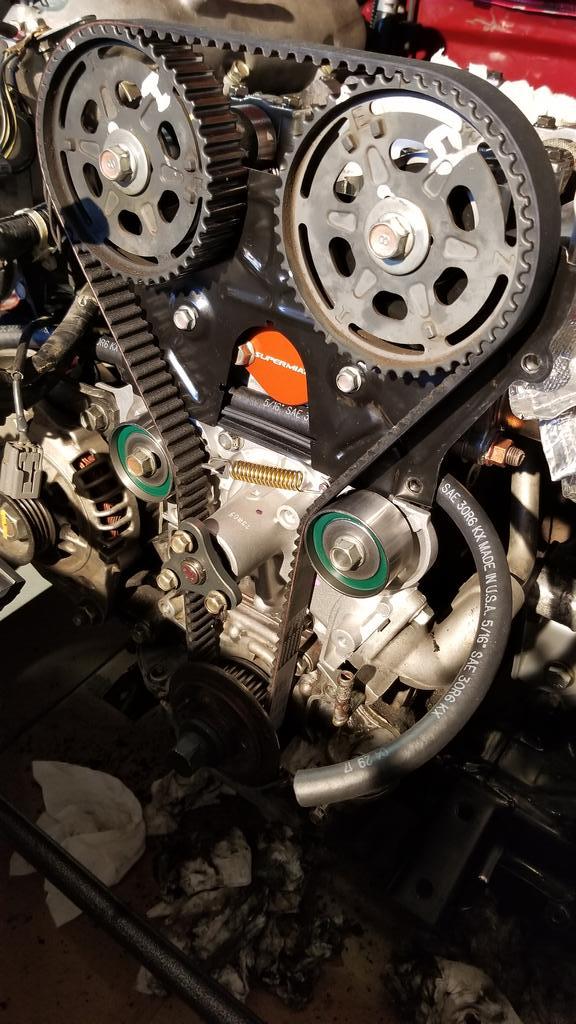
Timed
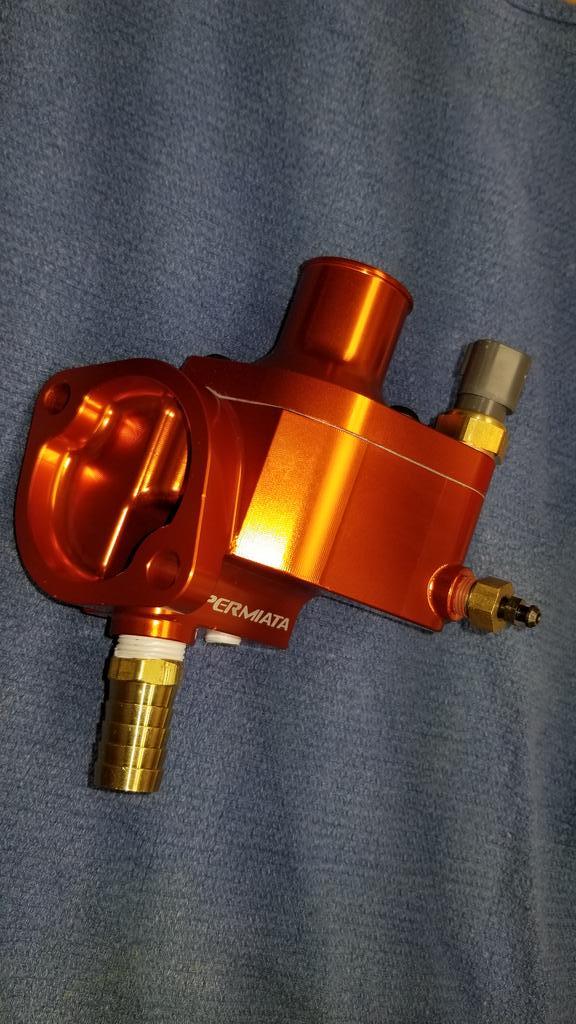
Bling
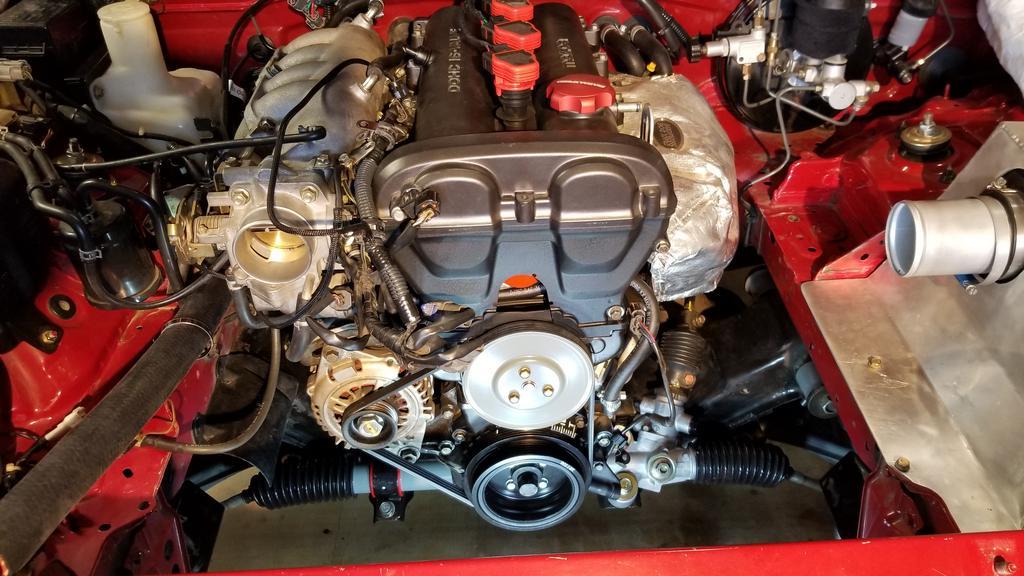
Mostly assembled
She runs again!

The only leak I found was from the new CLT sensor, just had to tighten it a bit more on the housing. Other than that, it was mostly a drama free project. The engine runs well and smoother than before I believe. It's nice to get my parts shelf mostly cleared out. I've had some of these parts for 5 year sitting there collecting dust.
SHOUTOUT to SuperMiata for some quick and excellent support as always!!
I took it for a test drive because I was itching to try the depowered steering rack. The effort is not as bad as I thought. It's definitely more effort everywhere, but most of the effort is needed at lower speeds (which is no surprise). I think it's time to get it aligned with proper caster and I'll give my final review of steering effort then. At the very least, I am telling myself the depower was worth it, and the increased road-feel is noticeably positive.
Next up... After an alignment and some idle tuning, I would like to get this professionally tuned. If UMS Tuning near me will tune my MS3pro, that's where I'll take it (I think they're an AEM shop mostly). My goal is to be tuned and Dyno'd before next season's UMS Tuning Time Attack season (plus HPDE track days).
I do have a bit more hardware on the parts shelf. I'm debating on installing a duckbill/tail spoiler I got, or just saving up for a read deal rear wing. I also have most of an oil cooler system assembled. Just need to get a few more parts to complete the system.
Cheers
- Water Pump
- Timing Belt + pulleys
- SuperMiata Qmax coolant reroute
- Power Steering delete (FM method for manual conversion) & rebuild
- SuperMiata 36-2 trigger wheel
- BP5A camshaft
- AWR HD Sway Bar mounts
- Additional ground wire
- DEI silicone fire sleeve (where small coolant line meets/touches head via deleted OEM thermostat housing/neck)
- REPLACED/New:
- OEM Harmonic damper & new bolts
- OEM Lower timing cover (suspect damper was bad and wobbled, destroying lower timing cover)
- OEM Crankshaft seal
- OEM Camshaft seals
- OEM Heater o-ring
- OEM Crank bolt
- OEM Key
- OEM Mazda CLT sensor
The easy part was getting it all torn down. After the tear down, I spent many hours cleaning up years and years worth of oil leaking from both camshaft and crankshaft seals. It was a mess everywhere. The tear down...
The goal
Some of the newness and freshness. I decided to go with OEM damper to save some money. If/when I do an engine build, I'll go with Fluidampr. But for now this'll work. Had downtime so I painted the WP pulley too.
Timed
Bling
Mostly assembled
She runs again!
The only leak I found was from the new CLT sensor, just had to tighten it a bit more on the housing. Other than that, it was mostly a drama free project. The engine runs well and smoother than before I believe. It's nice to get my parts shelf mostly cleared out. I've had some of these parts for 5 year sitting there collecting dust.
SHOUTOUT to SuperMiata for some quick and excellent support as always!!
I took it for a test drive because I was itching to try the depowered steering rack. The effort is not as bad as I thought. It's definitely more effort everywhere, but most of the effort is needed at lower speeds (which is no surprise). I think it's time to get it aligned with proper caster and I'll give my final review of steering effort then. At the very least, I am telling myself the depower was worth it, and the increased road-feel is noticeably positive.
Next up... After an alignment and some idle tuning, I would like to get this professionally tuned. If UMS Tuning near me will tune my MS3pro, that's where I'll take it (I think they're an AEM shop mostly). My goal is to be tuned and Dyno'd before next season's UMS Tuning Time Attack season (plus HPDE track days).
I do have a bit more hardware on the parts shelf. I'm debating on installing a duckbill/tail spoiler I got, or just saving up for a read deal rear wing. I also have most of an oil cooler system assembled. Just need to get a few more parts to complete the system.
Cheers
Last edited by electroCrunch; 11-22-2021 at 12:29 PM.
Reply
0
0
11-22-2021, 11:54 AM
#54
Senior Member

Join Date: Sep 2011
Location: Sierra Vista, AZ
Posts: 1,305
Total Cats: 332
I replied in the other thread as well... UMS tuned my car on MS3. I don't think it's his favorite ECU, but he did a great job.
IMHO, skip the duckbill and go straight to the wing. I went from stock to BBFW lexan spoiler to NLR wing. The back end of my car is much more planted with the NLR wing.
IMHO, skip the duckbill and go straight to the wing. I went from stock to BBFW lexan spoiler to NLR wing. The back end of my car is much more planted with the NLR wing.
Reply
1
1
11-22-2021, 12:23 PM
#55
Junior Member
Thread Starter
Join Date: Mar 2016
Location: Phoenix AZ
Posts: 113
Total Cats: 55
@Roda Ah, thanks for the pro tips man. Greatly appreciated. I'll see about getting on UMS's calendar ASAP. And yeah, two threads going (trying to share the knowledge and my fails with as many miata folks as possible). I find at this point I am getting most of my information and learning from this site though.
The best long term plan for me is the NLR wing. I know this lol. The only thing holding me back at this stage (well, besides cost I supposed) is I'm mostly weirded out about having a street/track vehicle with a massive wing on the back. One reason is due to the cop-magnetness of it. I suppose theft is another concern but likely easily solved with some security bolts. Black Friday is coming up also, so I'll think hard on it in case a NLR deal shows up this Friday.
I'm not familiar with your setup (would love to take a look at a build thread or a pic). Do you have front downforce also to balance out the rear wing? I could see myself getting a front splitter setup to balance it, ideally removable for street duty, as well.
Reply
0
0
11-22-2021, 12:56 PM
#56
Senior Member
Join Date: Sep 2011
Location: Sierra Vista, AZ
Posts: 1,305
Total Cats: 332
"Supermiata" air dam/ birch ply splitter up front, NLR wing out back. Mine gets driven to the gas station, and occasional C&C, but I don't drive it regularly on the street. It does make you feel a little silly driving on the street. Recent pic:

I have a thread on GRM that has most of the NA's build documented: GRM Miata thread
We're planning to be out at AMP with ProAuto on 12/11. You're welcome to stop by and chat.
I have a thread on GRM that has most of the NA's build documented: GRM Miata thread
We're planning to be out at AMP with ProAuto on 12/11. You're welcome to stop by and chat.
Reply
1
1
11-23-2021, 03:29 PM
#58
A lot of solid maintenance and upgrades in that last round of mods.
The only thing I would consider doing is maybe trying to get back in there and take that spring off of the timing tensioner, or bend the ends of it with a needle nose so it is completely captured. Once the bolt on the tensioner pulley is cranked all the way down it becomes pretty much useless and I've seen it fall off before then it drops down with the potential to damage the timing belt. That being said I didn't know that when I did mine either and it never had an issue with it popping off for years and years.
The only thing I would consider doing is maybe trying to get back in there and take that spring off of the timing tensioner, or bend the ends of it with a needle nose so it is completely captured. Once the bolt on the tensioner pulley is cranked all the way down it becomes pretty much useless and I've seen it fall off before then it drops down with the potential to damage the timing belt. That being said I didn't know that when I did mine either and it never had an issue with it popping off for years and years.
Reply
1
1
11-23-2021, 06:08 PM
#59
Senior Member

Join Date: Jul 2014
Location: Milwaukee, WI
Posts: 1,188
Total Cats: 599
I'd also mimic Roda's comments and go straight to the NLR airfoil. With any worthwhile splitter on the car, you're going to likely find that the BBFW lexan wing will not get you the performance you are likely looking for. You get used to street driving a "big ****" car after a while, and I've driven across the country without any hiccup with a cop (unless your local ones are specifically annoying, I wouldn't worry about it). I've got some decent photos of my setup in my build thread if you scroll back a bit...
Reply
0
0


