DJWade's (Hopefully) California Legal LFXocet Swap Build
 05-24-2017, 11:55 PM
#41
Junior Member
Thread Starter

Join Date: Sep 2016
Location: Concord, CA
Posts: 122
Total Cats: 12
Also, if someone has the power and feels gracious enough to do so, I would appreciate a title change of this thread to something more fitting given that I'm absolutely making the LFXocet now. 
(unless there's a way besides double-clicking in the time window that I missed and discover in the interim)
(unless there's a way besides double-clicking in the time window that I missed and discover in the interim)

Reply
 0
0

0
05-27-2017, 12:43 AM
#42
Junior Member
Thread Starter
Join Date: Sep 2016
Location: Concord, CA
Posts: 122
Total Cats: 12
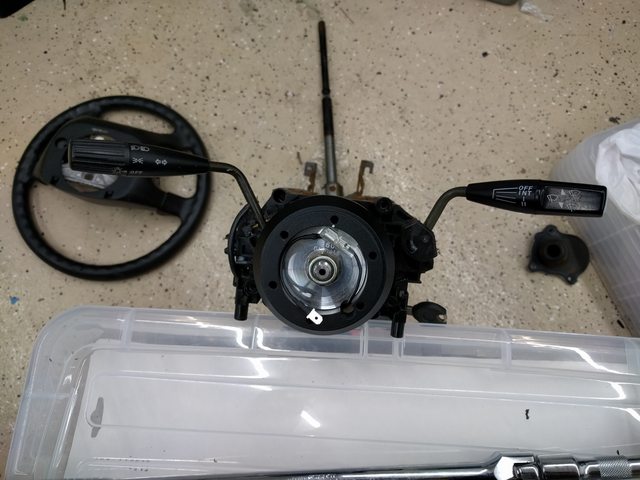
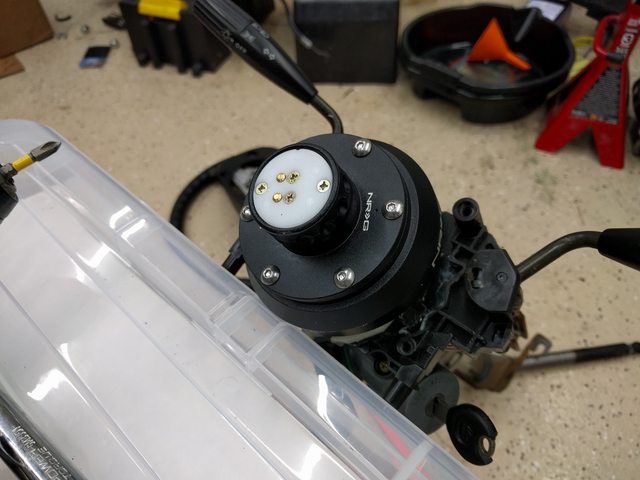
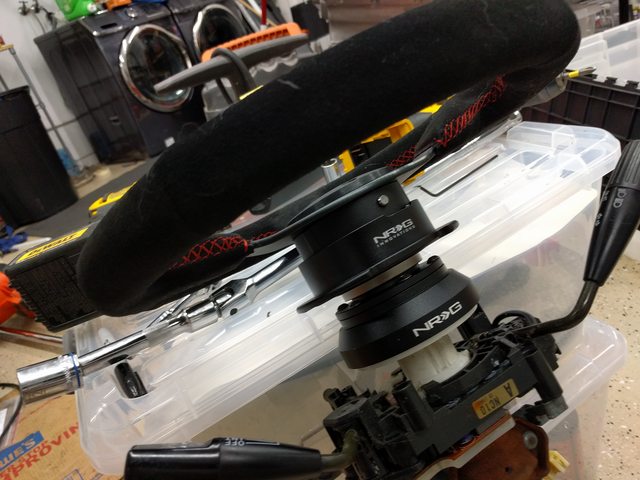
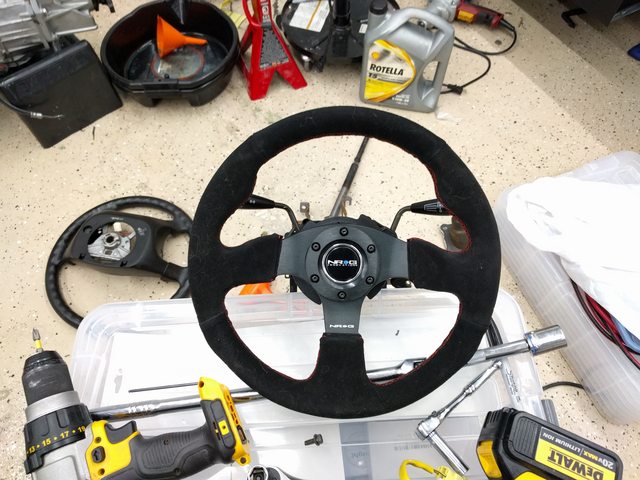
As the clock keeps ticking down to all the parts arriving, I've been focusing on doing little things when I can. I've primarily been cleaning and organizing my garage, but I also received the new rear seal for the transmission and installed that, as well as the NRG short hub, quick release, and 320mm steering wheel. I wasn't blown away by the quality of the steering wheel itself, especially the suede, but I wanted to get something to start with to know if I wanted to change to different one further on down the line.
Reply
0
0
05-27-2017, 12:53 AM
#43
Junior Member
Thread Starter
Join Date: Sep 2016
Location: Concord, CA
Posts: 122
Total Cats: 12
In other news, I may have just scored a Haltech branded MXL Track Dash for a grand total of....wait for it... $59.75.
I honestly was expecting an email saying there had been an error in their system and they wouldn't be honoring the price, but it was just marked as shipped...
I suppose theres still a chance that their website description is wrong, but I'm crossing my fingers really damn hard right now.
For the curious, link to the page below, along with my checkout total:
https://autoplicity.com/5227956-halt...60201-dash-mxl

Edit: Don't go off ordering it just yet. Just looked at the shipping information and it's way too light. Definitely too good to be true. It was worth a $50 gamble thought.
I honestly was expecting an email saying there had been an error in their system and they wouldn't be honoring the price, but it was just marked as shipped...
I suppose theres still a chance that their website description is wrong, but I'm crossing my fingers really damn hard right now.
For the curious, link to the page below, along with my checkout total:
https://autoplicity.com/5227956-halt...60201-dash-mxl
Edit: Don't go off ordering it just yet. Just looked at the shipping information and it's way too light. Definitely too good to be true. It was worth a $50 gamble thought.
Reply
0
0
05-28-2017, 12:18 AM
#45
Junior Member
Thread Starter
Join Date: Sep 2016
Location: Concord, CA
Posts: 122
Total Cats: 12
Maybe this? HT-060201 - Haltech
Reply
0
0
06-03-2017, 01:32 AM
#46
Junior Member
Thread Starter
Join Date: Sep 2016
Location: Concord, CA
Posts: 122
Total Cats: 12
T-minus 2 days to delivery. Pretty excited to finally have it here.
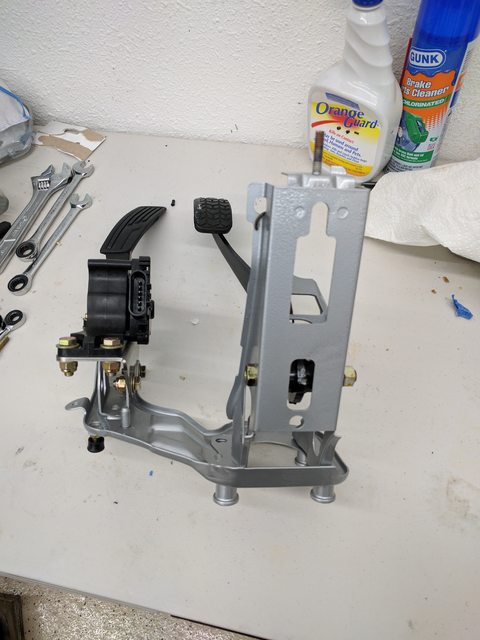
In the meantime, I've been working on some more little things, primarily making sure I have a nice space cleared out in the garage for delivery. Now that I've gotten that taken care of, I switched into getting the throttle pedal mounted. I have precisely zero skill at welding, nor do I have a welder (though that will all change fairly soon), so I ended up purchasing the stainless steel GM pedal bracket from Bauer Ltd.
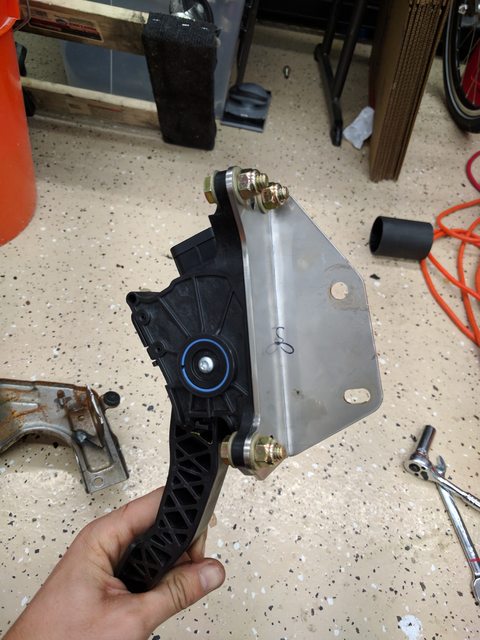
While welding a custom bracket is probably better, I actually like the options for mounting using the bracket. If you don't modify the pedal, there's only one mounting position, which is on the left side of the original throttle pedal pivot bracket. However, if you cut off the ear on the right side and salvage the nut as a spacer, you now have 2 more positions to choose from.
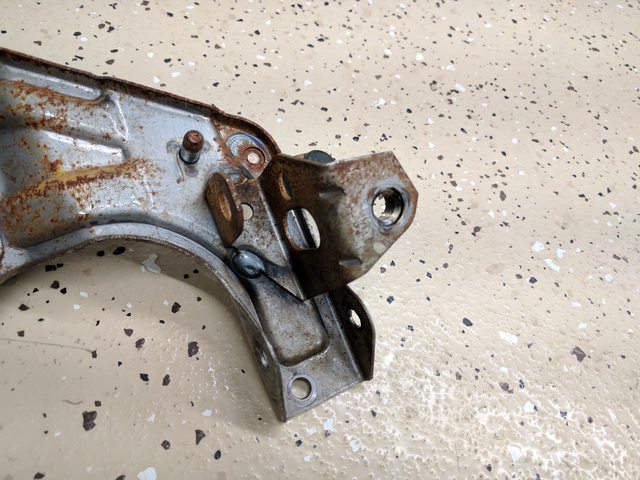
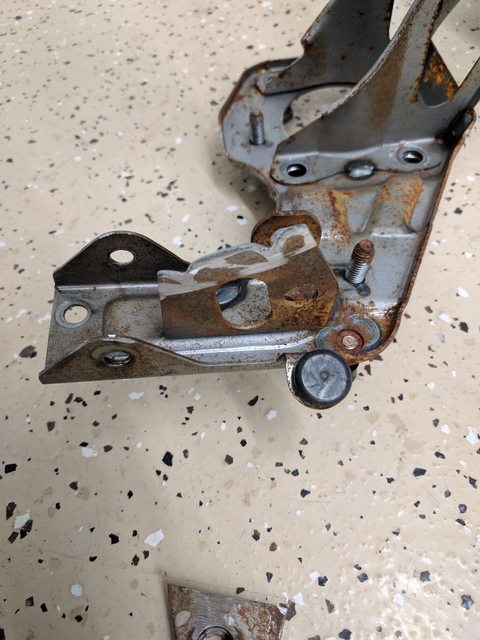
I opted to use the furthest position to the right, which I think will retain the most stock-like position, however if I prefer it closer to the brake pedal for heel-toe, I can easily adjust it later, which is rather convenient.
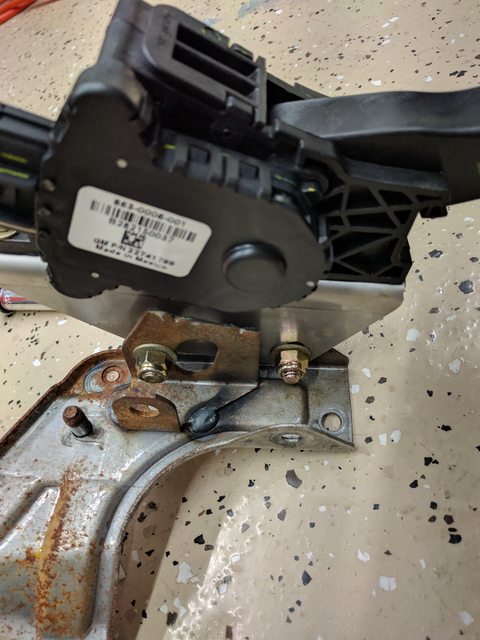
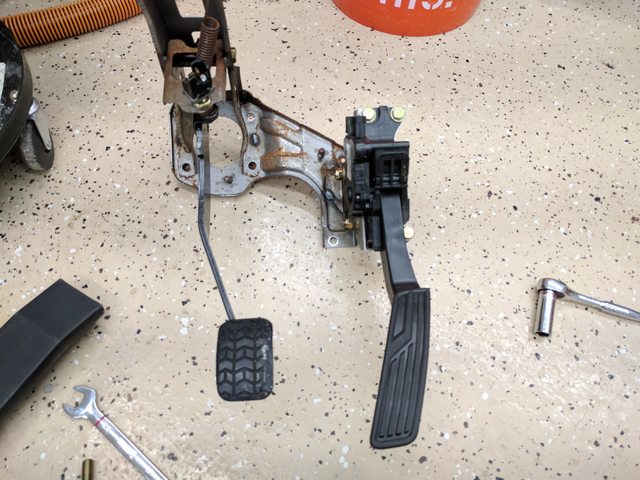
Overall I'm pretty happy with the bracket, given the flexibility it offers. It's also quite sturdy. You're going to break the pedal itself before you get any noticeable deflection of the bracket. Now I just need to disassemble the pedal assembly again so I can clean things up and paint it before it goes onto the Exocet.
In the meantime, I've been working on some more little things, primarily making sure I have a nice space cleared out in the garage for delivery. Now that I've gotten that taken care of, I switched into getting the throttle pedal mounted. I have precisely zero skill at welding, nor do I have a welder (though that will all change fairly soon), so I ended up purchasing the stainless steel GM pedal bracket from Bauer Ltd.
While welding a custom bracket is probably better, I actually like the options for mounting using the bracket. If you don't modify the pedal, there's only one mounting position, which is on the left side of the original throttle pedal pivot bracket. However, if you cut off the ear on the right side and salvage the nut as a spacer, you now have 2 more positions to choose from.
I opted to use the furthest position to the right, which I think will retain the most stock-like position, however if I prefer it closer to the brake pedal for heel-toe, I can easily adjust it later, which is rather convenient.
Overall I'm pretty happy with the bracket, given the flexibility it offers. It's also quite sturdy. You're going to break the pedal itself before you get any noticeable deflection of the bracket. Now I just need to disassemble the pedal assembly again so I can clean things up and paint it before it goes onto the Exocet.
Reply
0
0
06-04-2017, 03:27 AM
#47
Junior Member
Thread Starter
Join Date: Sep 2016
Location: Concord, CA
Posts: 122
Total Cats: 12
What's this?
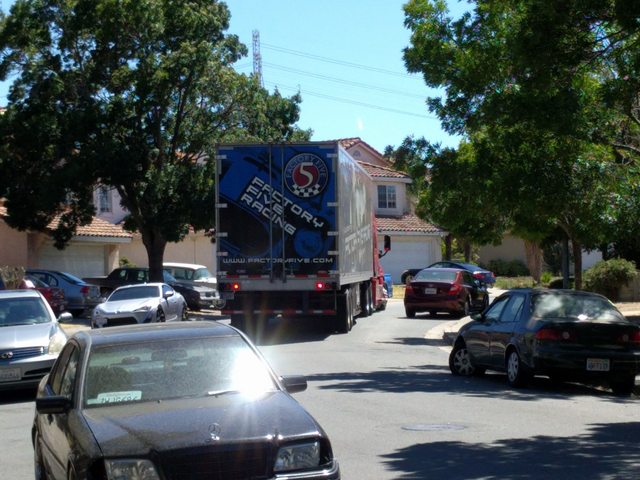
Why, hello there! [Insert Witty/Punny "pick-up" line here]

I got a very pleasant call that the driver was ahead of schedule and was able to deliver a day early, meaning that I now have essentially all of tomorrow to unwrap everything and do some inventory and planning for the next steps forward. It feels great to have it in my garage. Tomorrow is going to be a very exciting day. Something tells me the wire wheeling and painting of the pedal assembly got delayed...

Why, hello there! [Insert Witty/Punny "pick-up" line here]
I got a very pleasant call that the driver was ahead of schedule and was able to deliver a day early, meaning that I now have essentially all of tomorrow to unwrap everything and do some inventory and planning for the next steps forward. It feels great to have it in my garage. Tomorrow is going to be a very exciting day. Something tells me the wire wheeling and painting of the pedal assembly got delayed...
Reply
1
1
06-05-2017, 01:14 AM
#50
Junior Member
Thread Starter
Join Date: Sep 2016
Location: Concord, CA
Posts: 122
Total Cats: 12
Today, I was able to really pull things apart and start putting some of the larger pieces on the body to start clearing up space in my terribly disorganized garage. The first order of business really should have been clearing up more space given that I have more parts arriving soon, but my excitement got the better of me, so I spent much of today working on the chassis itself.
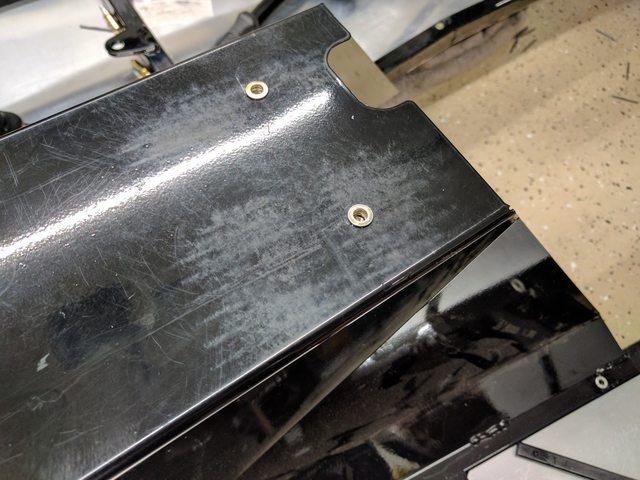
Overall, I'm happy with the fit and finish of everything so far. I have some gripes with the aluminum transmission tunnel not mating up well with the firewall or the rear trans tunnel, but it's definitely something I can solve in the future. More on that later.
The first thing I did after pulling all the parts off and making sure everything was present was to flip the chassis over. I'm basically stuck doing everything solo with this project, so I was slightly concerned about the process of flipping the chassis over a few times during the build. Patience and strategic use of towels, however, made the process pretty straight forward.
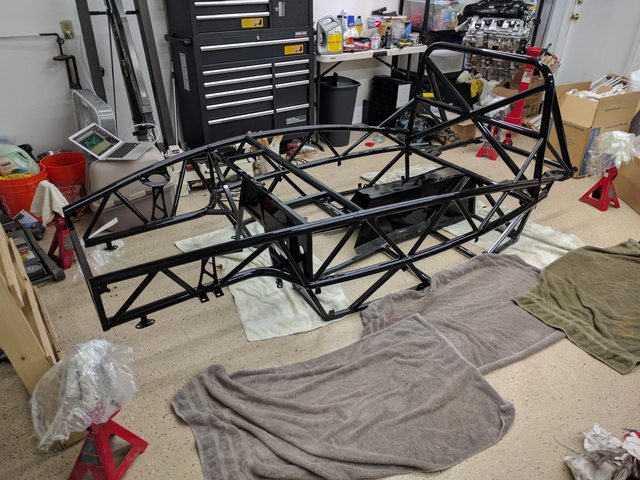
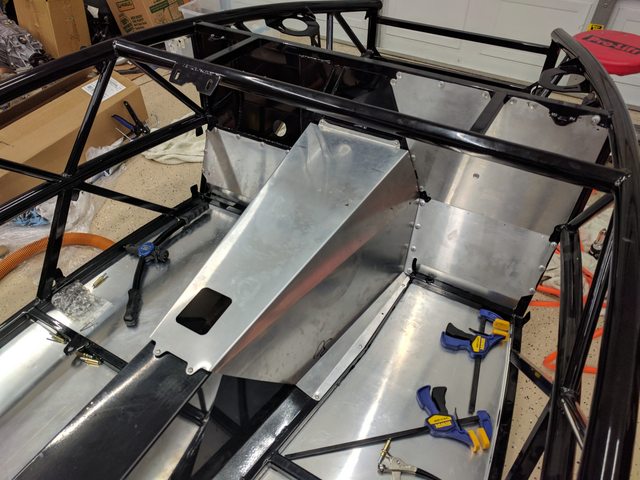
Once it was upside down, I got to clamping the aluminum floors into place and drilling the holes for the rivets. This was much less painful than I thought it would be, primarily because of the laser cut pilot holes in the aluminum. Before riveting, I opted apply a generous amount of RTV between the frame and the floor in order to prevent rattling.
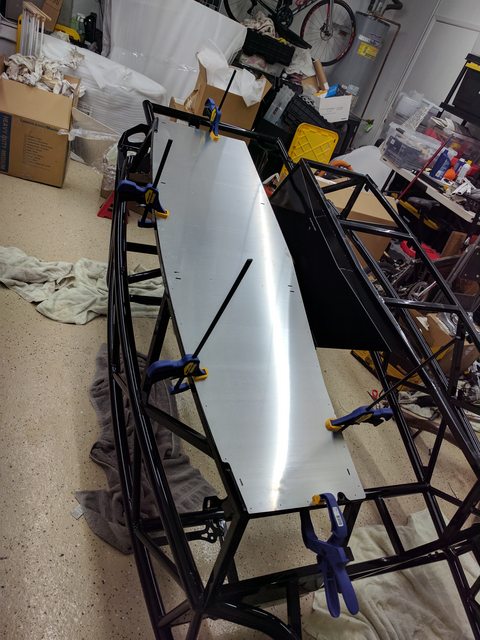
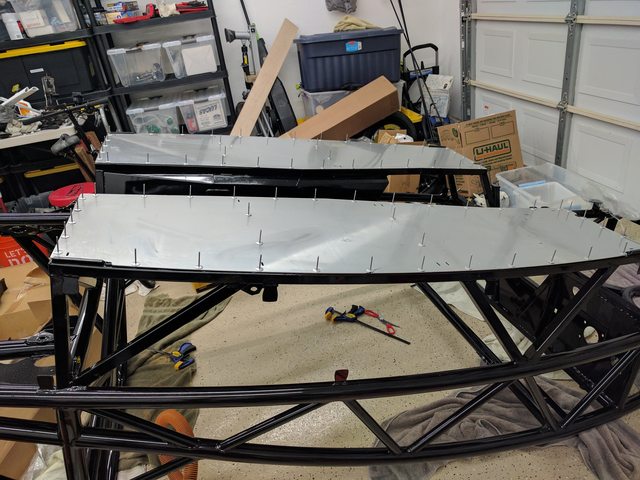
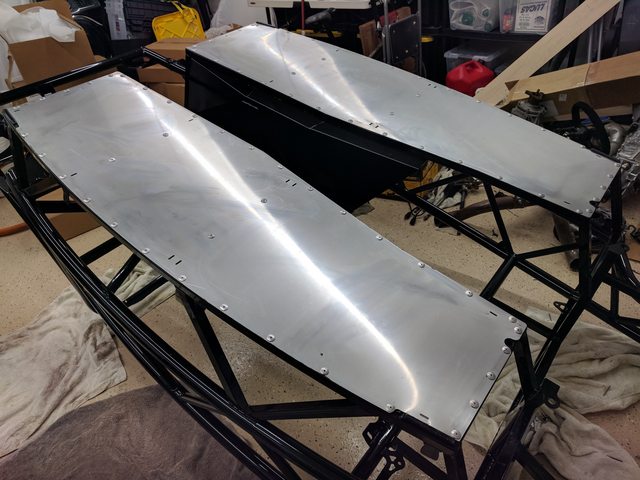
I opted to purchase a pneumatic riveter for this, and it was absolutely worth every penny. Once I had finished up the floor pans, I returned the chassis to the right-side-up, and began assembling the firewall using the same method of drilling, cleaning, RTV and riveting.
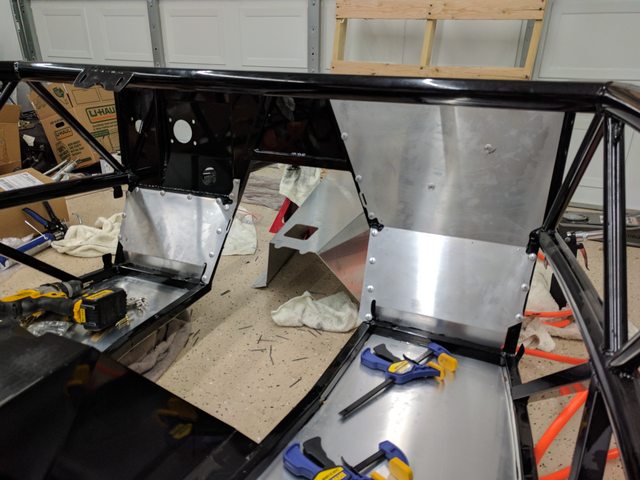
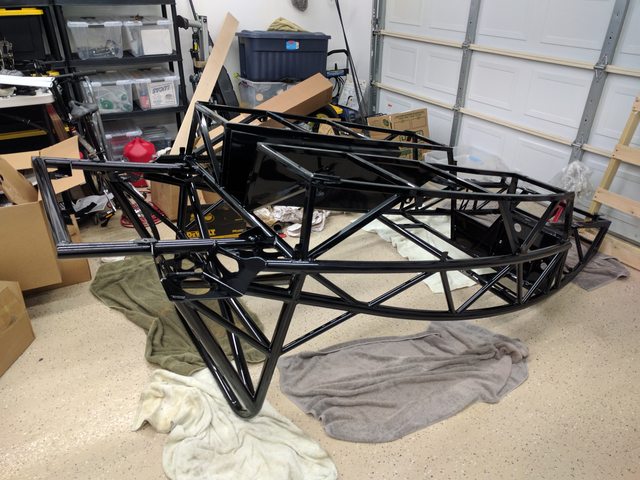
The transmission tunnel is my first gripe, as I mentioned above. No matter how hard I tried, I couldn't get it to mate up nicely with the pre-installed rear tunnel and the front firewall. Because of this, I wanted to have the option of switching it out for something more custom in the future, so rivnuts were used in place of rivets.
And that about wraps up todays progress. I'm pretty happy with everything I got done today, but I definitely need to dedicate some time to clearing more space for the other parts arriving shortly.
Overall impressions now that it's physically in front of me are overall very good. The chassis feels very rigid, and fit and finish (with the exception of the transmission tunnel) have been very good so far. And holy cow, this thing feels small. The reduction of overhang, no matter how slight, really makes this feel much smaller than a miata.
Overall, I'm happy with the fit and finish of everything so far. I have some gripes with the aluminum transmission tunnel not mating up well with the firewall or the rear trans tunnel, but it's definitely something I can solve in the future. More on that later.
The first thing I did after pulling all the parts off and making sure everything was present was to flip the chassis over. I'm basically stuck doing everything solo with this project, so I was slightly concerned about the process of flipping the chassis over a few times during the build. Patience and strategic use of towels, however, made the process pretty straight forward.
Once it was upside down, I got to clamping the aluminum floors into place and drilling the holes for the rivets. This was much less painful than I thought it would be, primarily because of the laser cut pilot holes in the aluminum. Before riveting, I opted apply a generous amount of RTV between the frame and the floor in order to prevent rattling.
I opted to purchase a pneumatic riveter for this, and it was absolutely worth every penny. Once I had finished up the floor pans, I returned the chassis to the right-side-up, and began assembling the firewall using the same method of drilling, cleaning, RTV and riveting.
The transmission tunnel is my first gripe, as I mentioned above. No matter how hard I tried, I couldn't get it to mate up nicely with the pre-installed rear tunnel and the front firewall. Because of this, I wanted to have the option of switching it out for something more custom in the future, so rivnuts were used in place of rivets.
And that about wraps up todays progress. I'm pretty happy with everything I got done today, but I definitely need to dedicate some time to clearing more space for the other parts arriving shortly.
Overall impressions now that it's physically in front of me are overall very good. The chassis feels very rigid, and fit and finish (with the exception of the transmission tunnel) have been very good so far. And holy cow, this thing feels small. The reduction of overhang, no matter how slight, really makes this feel much smaller than a miata.
Reply
1
1
 06-05-2017, 09:20 AM
#52
Junior Member
Thread Starter
Join Date: Sep 2016
Location: Concord, CA
Posts: 122
Total Cats: 12
Thanks! It's fun so far, and I'm hoping the end sum of the experience yields significant more fun than frustration. This is my first kit car, so I know there will likely be numerous occasions where I'm tearing my hair out (probably over wiring), but I expect it will be an enjoyable experience with a very enjoyable car at the end of it all.
Last edited by Djwade; 06-05-2017 at 09:50 AM. Reason: grammar
Reply
0
0
 06-06-2017, 11:58 PM
#54
Junior Member
Thread Starter
Join Date: Sep 2016
Location: Concord, CA
Posts: 122
Total Cats: 12
Progress one the chassis is taking a tiny break right now. The next major step is running the fuel and brake line through the transmission tunnel, but I'm waiting on the fuel line to come with the V8 roadsters components, which shouldn't be too far off. A call on Monday informed me that the subframe and rear differential mount were at the powder coater, and will hopefully be shipped out by the start of next week, which I'm hoping will put it in my garage by that weekend, though I suspect that's a bit optimistic.
In the mean time, I'm tackling a few of the smaller details that got side-tracked when the chassis got here. I added another wire rack to the garage which now holds nearly all of the Exocet parts.
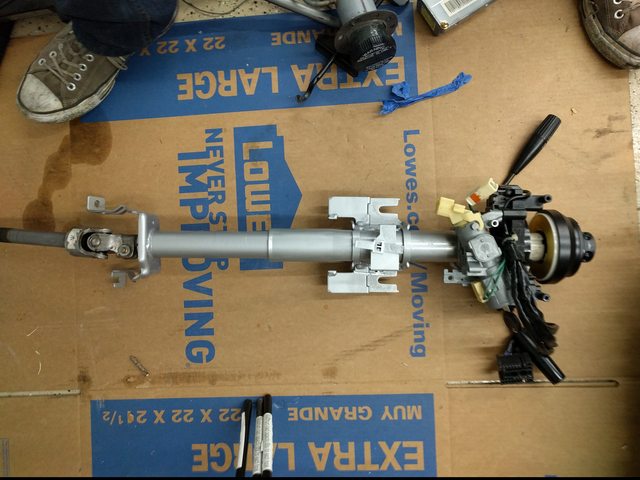
I had some rust on the pedal assembly and the steering column, so I decided to tackle that over the past few days. Some sanding, naval jelly, and hammered silver paint yielded some satisfactory results. Odds are, no one but myself will ever really see most of these components, but there's something about this build that's making me make sure every piece going on is clean and finished to a certain minimum level. I'm sure I could have put both the steering column and pedal assembly on as they were, and the rust never would have caused an issue, but I just simply couldn't have that.

Overall, I'm happy with the results. I did some test fitting of the pedal assembly before I stripped it apart in the chassis and the pedal location ended up being much tighter to the transmission tunnel than I liked, so I opted to return the bracket to the leftmost position on reassembly. While it's now closer than it was at stock, my foot will no longer rub the transmission tunnel when centered on the gas pedal. Very glad I have the mounting flexibility for the bracket now.
In the mean time, I'm tackling a few of the smaller details that got side-tracked when the chassis got here. I added another wire rack to the garage which now holds nearly all of the Exocet parts.
I had some rust on the pedal assembly and the steering column, so I decided to tackle that over the past few days. Some sanding, naval jelly, and hammered silver paint yielded some satisfactory results. Odds are, no one but myself will ever really see most of these components, but there's something about this build that's making me make sure every piece going on is clean and finished to a certain minimum level. I'm sure I could have put both the steering column and pedal assembly on as they were, and the rust never would have caused an issue, but I just simply couldn't have that.
Overall, I'm happy with the results. I did some test fitting of the pedal assembly before I stripped it apart in the chassis and the pedal location ended up being much tighter to the transmission tunnel than I liked, so I opted to return the bracket to the leftmost position on reassembly. While it's now closer than it was at stock, my foot will no longer rub the transmission tunnel when centered on the gas pedal. Very glad I have the mounting flexibility for the bracket now.
Last edited by Djwade; 06-07-2017 at 12:26 PM.
Reply
0
0
06-20-2017, 12:34 AM
#55
Junior Member
Thread Starter
Join Date: Sep 2016
Location: Concord, CA
Posts: 122
Total Cats: 12
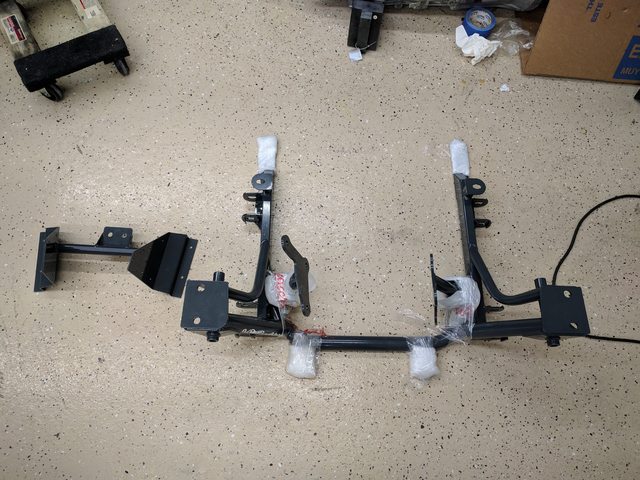
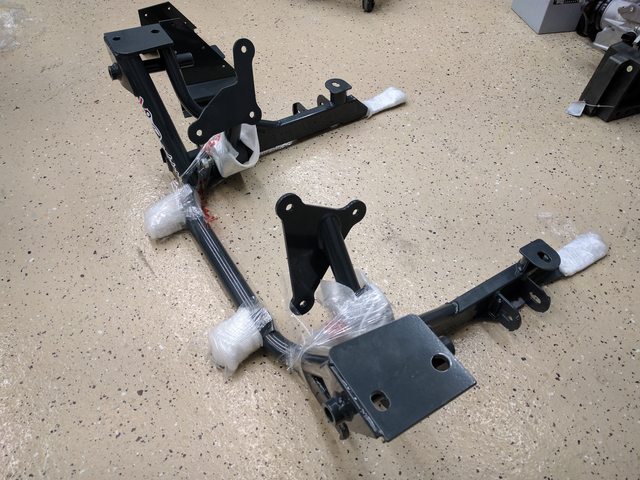
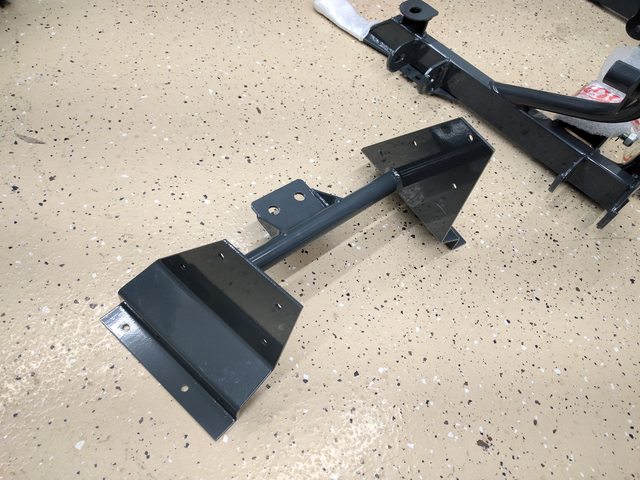
The first V8 Roadster parts have started to arrive. Thus far I've received the differential mount, transmission mount, subframe, and radiator.
I'm still waiting on a few little things, namely the fuel lines/pump so I can take care of that while the chassis is still light enough to flip upside down, but then it will be full steam ahead.
The big debate I'm having with myself right now is the welding. I've done very very little welding, and don't currently have a welder, but I'm debating picking up a basic MIG setup to do the necessary welding rather than pay a local shop, but I'm not exactly brimming with confidence about doing it right the first time, even with some practice beforehand.
Reply
0
0

 06-20-2017, 10:47 AM
#58
Elite Member

Join Date: Sep 2015
Location: Seattle, WA
Posts: 1,651
Total Cats: 884
Yes, been welding for almost six years now. Learned everything online and just from experimenting. If it were me I'd buy a tig if possible, mig is way easier but with tig you understand more of the fundamentals of welding and what's going on. You also have access to the ability to weld aluminum/stainless/ti.
You'll realize how much more you can do with a welder once you have one, just the other day I got a stubborn pilot bearing out by welding a tube to it and then welding a nut onto that tube so the slide hammer would stop slipping off.Also, you gain a bunch of new friends! Just make sure to make it apparent you're going to charge for welding time otherwise people will take advantage of it. I learned that one the hard way.
If I were to do it again, I may start with tig, but either way, buy the welder!
Reply
0
0
06-20-2017, 01:31 PM
#60
Supporting Vendor

iTrader: (3)

Join Date: Jul 2006
Location: San Diego
Posts: 3,303
Total Cats: 1,216
I would start with a TIG class because that process helps you understand what's going on much better than the "pull the trigger and stick stuff together" MIG. Then buy a MIG for home/garage use. After taking the TIG course you'll understand MIG very quickly.

Reply
0
0


