
Dieselmiata's car is not a diesel or a Miata. Discuss.
 05-01-2013, 11:40 PM
#21
Cpt. Slow

iTrader: (25)
Join Date: Oct 2005
Location: Oregon City, OR
Posts: 14,429
Total Cats: 1,207
It is indeed clean, I'd definitely be careful though, painting brackets only draws attention to them, like the fuel rail and power steering tensioner bracket, and they're not very attractive pieces, no matter the paint quality.

Reply
 0
0

0
05-01-2013, 11:54 PM
#22
Senior Member
Thread Starter
iTrader: (3)

Join Date: Apr 2011
Location: Volo, IL
Posts: 1,356
Total Cats: 154
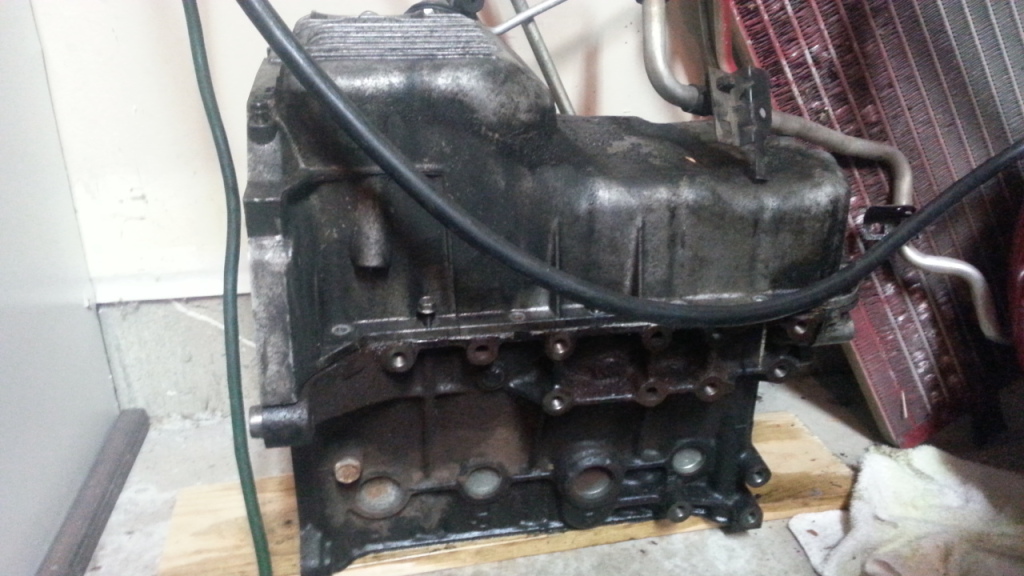
Absolutely. At present, the power steering brackets (among many others)are a nice shiny polished color. They are also in a cardboard box. I removed the power steering and A/C in preparation for the turbo system. I have a very bad habit of acting upon "cosmetic" mods just to see if I like the way they look. You'll notice that in the first picture the wheels are gunmetal. Then they were bronze for about a day, the gold for about a week, now they're silver again.
As she sits now.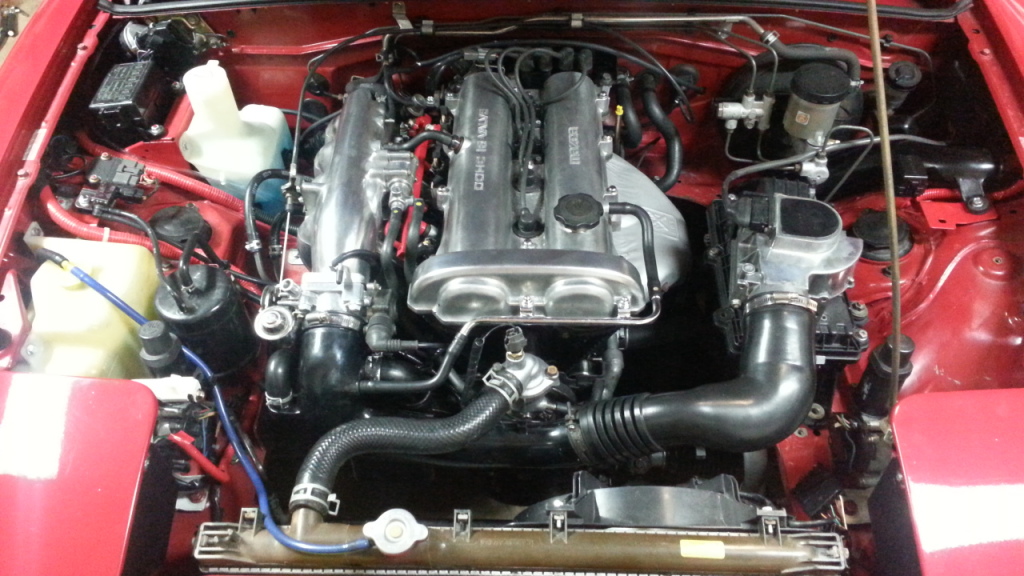
I actually hate things that stand out. I want everything to blend in, and look like it could have very well come from the manufacturer in that condition, but every now and then I get a wild hare and decide to paint something. Luckily I have a big eraser (sand blaster). Notice the blue hose on the radiator? It makes my skin crawl everytime I see it. I've just been too busy to get a replacement. The green radiator has to go as well.
As she sits now.

I actually hate things that stand out. I want everything to blend in, and look like it could have very well come from the manufacturer in that condition, but every now and then I get a wild hare and decide to paint something. Luckily I have a big eraser (sand blaster). Notice the blue hose on the radiator? It makes my skin crawl everytime I see it. I've just been too busy to get a replacement. The green radiator has to go as well.
Reply
0
0
 05-02-2013, 09:35 AM
#25
Senior Member
Thread Starter
iTrader: (3)
Join Date: Apr 2011
Location: Volo, IL
Posts: 1,356
Total Cats: 154
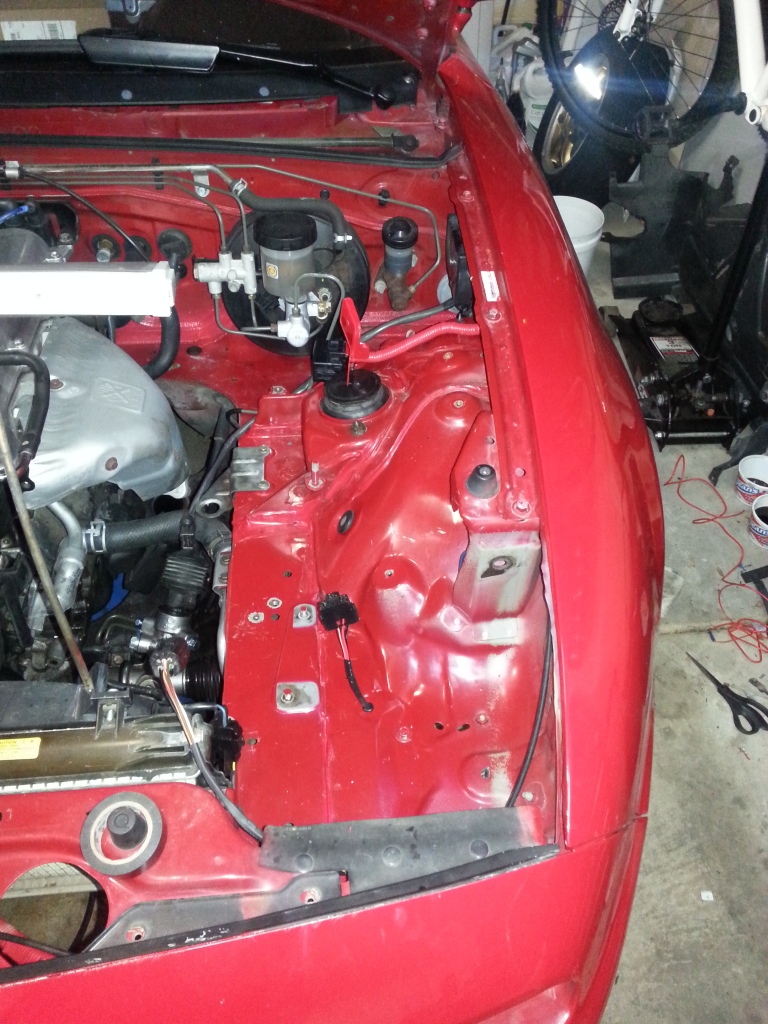
Many of the wires under the hood were old, hardened, and brittle, so I decided to splice in new wires. In the process, I decided to go ahead and do a slight wire tuck. Nothing too drastic, just moving stuff around for ease of cleaning.

Reply
0
0
05-02-2013, 10:05 AM
#26

Great job so far.
Always nice to see a car go from dirty/ugly to nice and shiny.
So I've a question I ask just about everyone: to polish or "brush" the vc and im, all you used was the dremel, drill, and those two wire wheels? Or what?
Break it down for me. I want to do mine similar to that (though a little less shiny/blingy) and then clear coat em.
What was your exact process?
Reply
0
0
05-02-2013, 10:30 AM
#27
Senior Member
Thread Starter
iTrader: (3)
Join Date: Apr 2011
Location: Volo, IL
Posts: 1,356
Total Cats: 154
If you go to Harbor freight or similar places, you can find nylon wheels of varying grades. Coarse, Medium, and fine. Usually the orange ones are coarse, and the bule are fine and those are the two you will need. (you can see them in the picture I posted of my "weapons of mass de-rust-ion). Get an electric drill that you can adjust the speed on, a die grinder and most air drills are too fast for the nylon wheels and they will fall apart. Those two alone will get you the brushed aluminum look. Just follow up with a good aluminum polish and sealer and you're golden.
If you want to go even further, such as I did with the throttle body,start with a 400 grit sandpaper to reach the spots untouched by the nylon wheels. Bust out the dremel and the cloth drums that come in the usual assortment of bits. Most hardware stores will have the polishing compounds used, and they vary in grades like everything else. Start with a course grade and slowly work your way up to the finer stuff.
The real hat trick though, is to be patient. It is VERY time consuming to get it done. The valve cover took about 2 hours of course brushing, and another 2 of fine. The throttle body took about 3 hours all together. I usually just start a movie, put in the headphones, and go to town. The longer you spend, the better it looks.
Here is the wheel I speak of. Get the orange one too.
http://www.harborfreight.com/4-inch-...ush-91372.html
This is the polishing compound I use. It comes in grades 1-5. Just get them all, they're cheap and last forever.
http://www.lowes.com/pd_329452-70-PC...ductId=3364032
Reply
1
1
05-02-2013, 10:34 AM
#29
Senior Member
Thread Starter
iTrader: (3)
Join Date: Apr 2011
Location: Volo, IL
Posts: 1,356
Total Cats: 154
Also, notice that in the picture I have the nylon wheels in a die grinder. Don't do that. They will fly apart when you over speed them. I found out the hard way, and luckily managed to avoid injury. You also get a better finish with a constant speed.
Reply
0
0
05-02-2013, 11:10 AM
#30
cool beans. I have a variable speed drill, and HF is a couple minutes away, I'll def give it a shot.
I got my current parts bead blasted already, so they're clean and purdy, but have a few imperfections here and there. this will hopefully eliminate that. I'm not going for mirror finish, but yours does look good in pictures and looks "natural" more or less. I'm not painting anything in my bay. Just cleaning and clearing/sealing.
Did you take apart your tb to do it up?
Reply
0
0
05-02-2013, 11:12 AM
#31
Senior Member
Thread Starter
iTrader: (3)
Join Date: Apr 2011
Location: Volo, IL
Posts: 1,356
Total Cats: 154
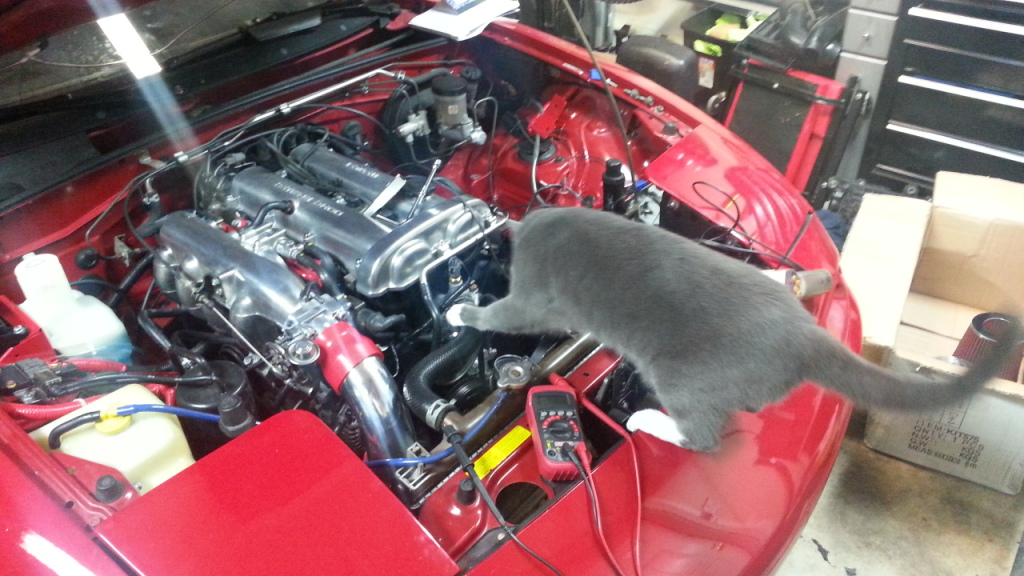
I decided to remove the A/C and PS because
1. Make room for the turbo and piping
2. Declutter the engine bay.
3. I never use the A/C anyway.
4. PS is for little girly men.
I hate half-assing things, so I used brake line tubing with fittings and fabricated some real nice, bent tubes to use as the loops instead of the traditional hose and clamp method for depowering the rack. Plus I like to keep my mods easily reversible. You can see the one of the loops I made in the latest picture of the engine bay.
As it turns out however, I am a little girly man. After a week of driving with the depowered rack, I hate it. I want my PS back, so I will be doing that project soon. As a side, I will soon have an awesome set of depowering lines and plus for anyone who is more of a man than I am. I'll get pictures of them up soon.
And since I forgot to take pictures, here is a cat helping with the work.

Reply
0
0
05-02-2013, 11:15 AM
#32

I find it amusing that all the tough guys act hard on the internet with statements like " PS is for wussies " and " A/C is for women " then 99% of them end up re-installing ps and ac into their daily because no one in their right mind enjoys sweating their ***** off on a daily basis and man handling/wrestling with the steering wheel in parking lots and on slow turns.
I just acknowledged my little girly man side and never ditched either in the 1st place

Reply
0
0

 05-02-2013, 11:26 AM
#35
Senior Member
Thread Starter
iTrader: (3)
Join Date: Apr 2011
Location: Volo, IL
Posts: 1,356
Total Cats: 154
I did remove the dashpot, TPS, IAC and the throttle wheel, but left the plate inside. All of those things are help on with just a few screws, so they are easy to remove/install in a matter of seconds.
Dremel bits have all sorts of shapes for polishing wheels, so you can get into the nooks and crannies pretty easily.
Dremel bits have all sorts of shapes for polishing wheels, so you can get into the nooks and crannies pretty easily.
Reply
0
0
05-02-2013, 09:02 PM
#36
Senior Member
Thread Starter
iTrader: (3)
Join Date: Apr 2011
Location: Volo, IL
Posts: 1,356
Total Cats: 154
Got a differential and carrier from a 1.8L
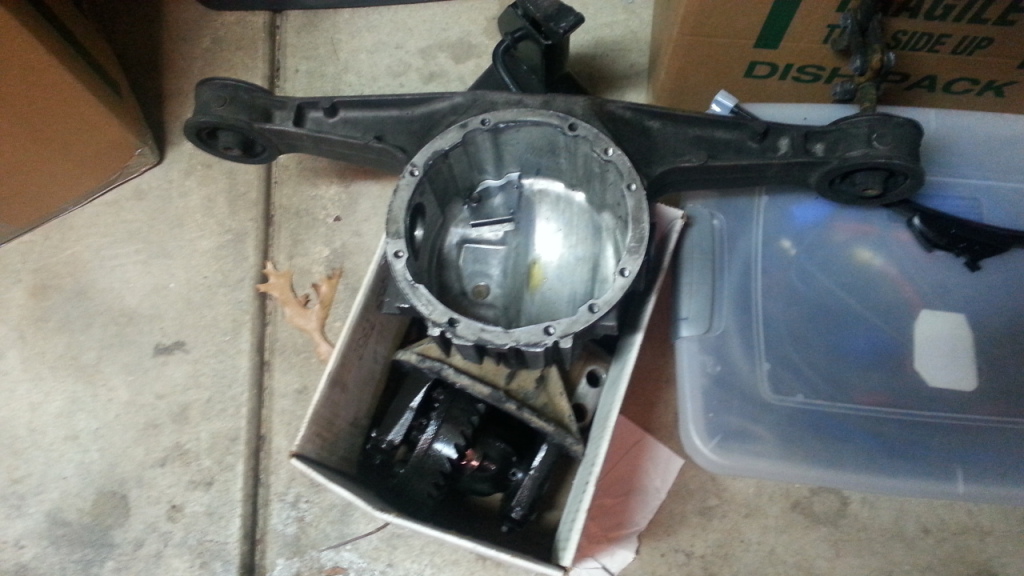
Spare block, came with all the goodies (alternator, PS pump, blah blah blah)
Spare head
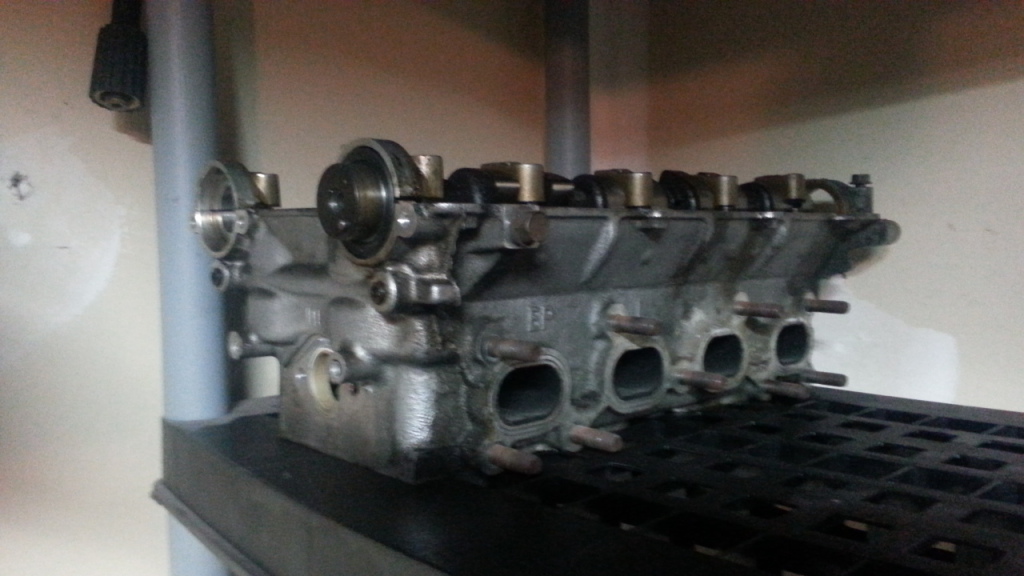
And my big box o' rice!
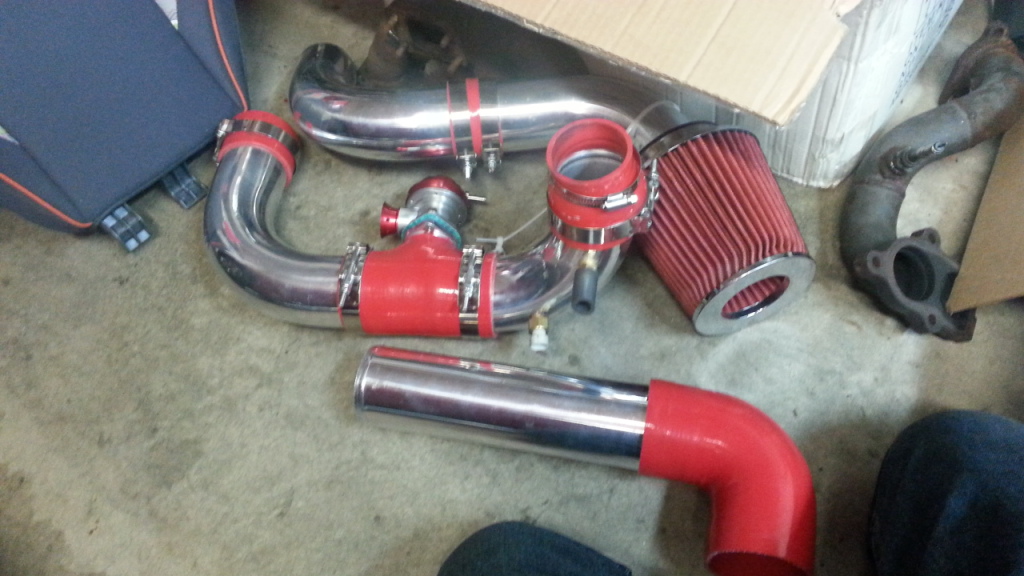
But here's the rub. The ebay vendor I bought it from sent me the wrong kit. So I sent it back, and this time they sent me the right kit, only in 3" pipe size. I seriously doubt I'll manage to fit it in, so I think rather than dealing with the douchbag ebay vendor, i'll just try for a sell/trade for 2 or 2.5" pipe.

Spare block, came with all the goodies (alternator, PS pump, blah blah blah)

Spare head

And my big box o' rice!

But here's the rub. The ebay vendor I bought it from sent me the wrong kit. So I sent it back, and this time they sent me the right kit, only in 3" pipe size. I seriously doubt I'll manage to fit it in, so I think rather than dealing with the douchbag ebay vendor, i'll just try for a sell/trade for 2 or 2.5" pipe.
Reply
0
0

 05-04-2013, 12:46 PM
#39
Senior Member
Thread Starter
iTrader: (3)
Join Date: Apr 2011
Location: Volo, IL
Posts: 1,356
Total Cats: 154
Running on a DIYPNP MS2extra. Been running it off an on for about 2 years now. I've got the hang of it for the most part, but I still have some learning to do as far as dialing in enrichments, and creating the perfect idle. All the rain is putting a huge damper in my plans, and I'm moving to Volo at the end of the month so progress will not be as fast as i'd like it to be for a bit. But the summer is still young, I have time.
Reply
0
0


