Conquering the Catfish in So Cal: Tales of a Newbie Nothing
#41
The primary floor panels are mounted to the bottom of the tube frame to create a smooth underbelly. There are also floor panels in front of each seat that mount on top of the tube frame (sandwiching the frame).
In this pic you can see the large panel under the frame and the driver side floor panel over the frame. I will be placing some dense foam insulation between the two panels to help disperse weight when you step into the car just to make sure it doesn't sag over the years.

In this pic you can see the large panel under the frame and the driver side floor panel over the frame. I will be placing some dense foam insulation between the two panels to help disperse weight when you step into the car just to make sure it doesn't sag over the years.

#43
Wheels and Tires:
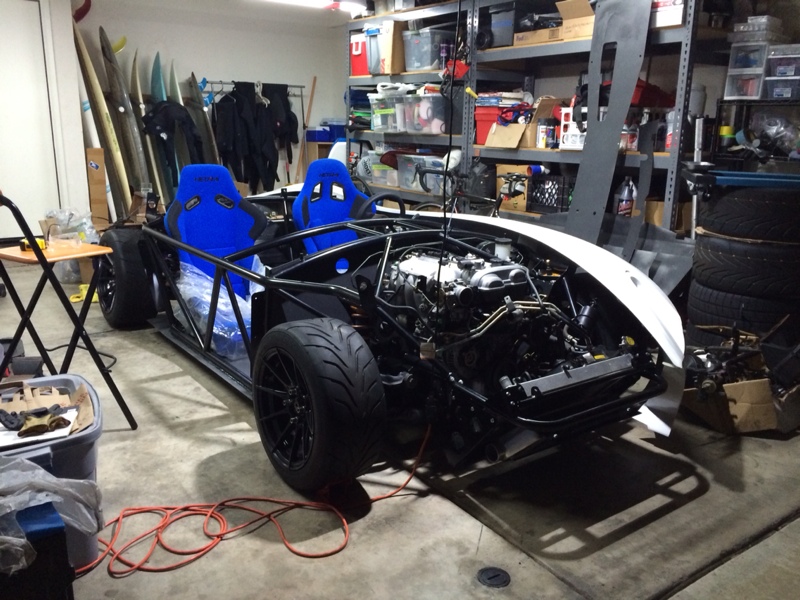
You may have noticed in the previous pictures but I ended up selling the 2 sets of Rota wheels that came with my NA donor and purchased some new Avanti Storm S1 15x9's. These wheels are flow formed with a 500kg load rating and they weigh 12 pounds! I kept the almost new Toyo R888 225/45/15's and mounted them on the Avanti's.
Seats:
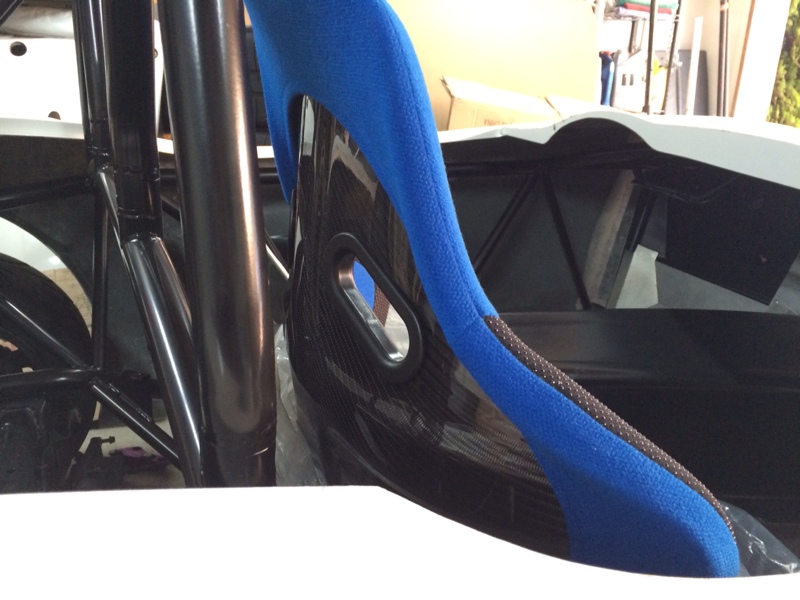
I ended up finding a great deal on some full carbon fiber seats from a guy on craigslist. The seats are about 6 years old but they are brand new and have just been sitting in a garage unused. They appear to be very high quality and they only weigh about 12 pounds including all the fabric and padding. I'm not sure about the bright blue but I couldn't pass up the deal so I jumped on them.


You may have noticed in the previous pictures but I ended up selling the 2 sets of Rota wheels that came with my NA donor and purchased some new Avanti Storm S1 15x9's. These wheels are flow formed with a 500kg load rating and they weigh 12 pounds! I kept the almost new Toyo R888 225/45/15's and mounted them on the Avanti's.

Seats:
I ended up finding a great deal on some full carbon fiber seats from a guy on craigslist. The seats are about 6 years old but they are brand new and have just been sitting in a garage unused. They appear to be very high quality and they only weigh about 12 pounds including all the fabric and padding. I'm not sure about the bright blue but I couldn't pass up the deal so I jumped on them.


#44
I figured I would share my list of upgrades that came off the second donor car along with my list of "necessary" purchases so that anyone doing a similar build in the future can see everything I ended up needing to get during the build. I’m sure there will be plenty more once I get to the details and start on the interior but for this portion of the build hopefully this will save them a few extra trips to the auto parts store:
List of performance parts I retained from the NA donor:
Flyin Miata FMii Turbo Kit and Hydra kit
Flyin Miata Cooling Kit / race radiator
2 Toyo R1 225/45/15 tires
4 R888 225/45/15 Tires (new)
Ohlins Adjustable Coilovers with Swift Springs
Front and Rear Flyin Miata sway bars
Willwood Big Brake Kit
Rear FM big brake kit (11' rotors, extension and race pads)
Flyin Miata Clutch (happy meal)
NKG quick release
FM Reverse guage cluster
AF ratio gauge
Battery
Additional Parts purchased:
Avanti 15x9 Storm S1 Wheels
Carbon Fiber Race Seats
1.8 Turbo Manifold
Misc turbo stuff from Flyin Miata (Hydra harness for the 1.8, longer coolant lines and oil lines, inconel studs...)
Lizard skin carbon ceramic insulation and sprayer kit
Misc tools and drill bits from Harbor Freight
Carpet and interior Upholstry
New belts
New fuel filter and oil filter
New upper and lower radiator hoses (non-miata)
Heater core bypass hose (non-miata)
Seem Sealer and insulation foam board
Power steering cooler
Radiator and intercooler mount (custom fabricated)
Battery bracket (custom fabricated)
Battery cable
#47
He definitely is a cool dude. Incredibly knowledgeable and great to work with. He has bough and sold hundreds of miata and he was super helpful in helping me figure out which setup to go with. I'm planning to head out to a track day with him in the next few weeks, I hear he's a great driver/instructor as well. Is that a recent pic in his Exocet? How was it?
#49
It's been a couple months and I've made a lot of progress on the catfish. Below is my recent progress, (I will try and keep it in chronological order and post all the progress over the next couple days):
Drilled and tapped the oil return line for the FM turbo and got the turbo kit installed. This took a good amount of time but FM had great instructions:


Ran the brake, clutch and fuel lines. I was able to use the stock fuel lines (replaced the fuel filter) and I used new brake line from the local auto parts store. I ran both the brake and fuel lines along the PPF and put some 3/16th hose around them in certain sections for protection. I also put a Willwood brake proportioning valve in-line next to the shifter so I could access it easily from the driver seat if needed. I put it low enough that it will be under the shift boot and out of the way so it doesn't get unintentionally adjusted:

I also cut the fiberglass tranmission tunnel for the shifter. In order to line it up properly I put a piece of tape on top of the shift **** while in neutral than dropped the tunnel straight down until the tape stuck to the inside of the tunnel. I then drilled a hole through the tape as a starting point then cut a square around the shifter (which will eventually have to be cut a bit more):

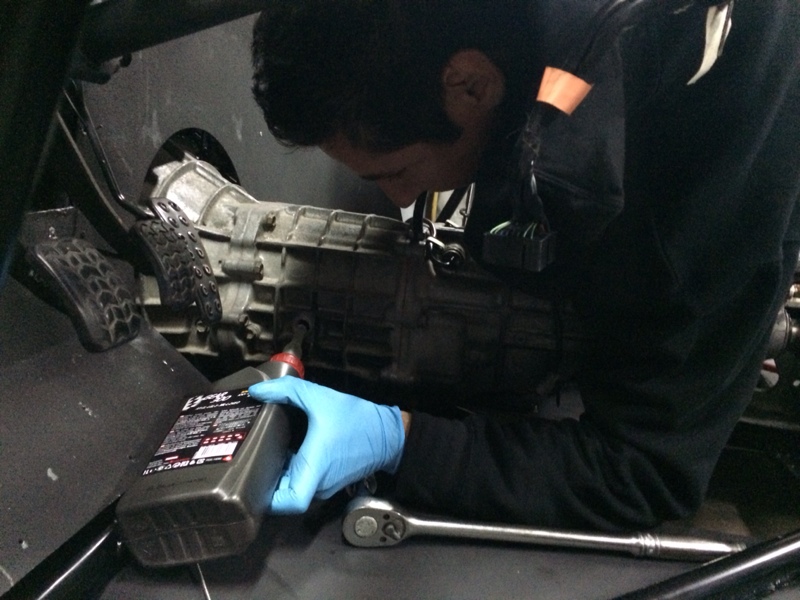
I then replaced all fluids and in the process found a leak in the clutch master cylinder which I was luckily able to easily replace with the master cylinder from the second donor car. At this point I also changed out the speed sensor since I switched to a Torson 4.1:
I had a bracket made by Bent Motorsports in San Diego in order to hold the battery. I mounted the battery behind the gas tank which will work well with the harness (in terms of length) and has the added benefit of putting a bit of weight low and in the back:

Next up: Fabrication of a custom downpipe, tackling the wiring harness and installing the Hydra.
Drilled and tapped the oil return line for the FM turbo and got the turbo kit installed. This took a good amount of time but FM had great instructions:


Ran the brake, clutch and fuel lines. I was able to use the stock fuel lines (replaced the fuel filter) and I used new brake line from the local auto parts store. I ran both the brake and fuel lines along the PPF and put some 3/16th hose around them in certain sections for protection. I also put a Willwood brake proportioning valve in-line next to the shifter so I could access it easily from the driver seat if needed. I put it low enough that it will be under the shift boot and out of the way so it doesn't get unintentionally adjusted:

I also cut the fiberglass tranmission tunnel for the shifter. In order to line it up properly I put a piece of tape on top of the shift **** while in neutral than dropped the tunnel straight down until the tape stuck to the inside of the tunnel. I then drilled a hole through the tape as a starting point then cut a square around the shifter (which will eventually have to be cut a bit more):

I then replaced all fluids and in the process found a leak in the clutch master cylinder which I was luckily able to easily replace with the master cylinder from the second donor car. At this point I also changed out the speed sensor since I switched to a Torson 4.1:

I had a bracket made by Bent Motorsports in San Diego in order to hold the battery. I mounted the battery behind the gas tank which will work well with the harness (in terms of length) and has the added benefit of putting a bit of weight low and in the back:

Next up: Fabrication of a custom downpipe, tackling the wiring harness and installing the Hydra.
#52
You guys need to read this
https://www.miataturbo.net/insert-bs...glasses-82616/
https://www.miataturbo.net/insert-bs...glasses-82616/
#58
Yes tons of updates, not sure were to start... Thanks for the reminder and sorry I've been so MIA!
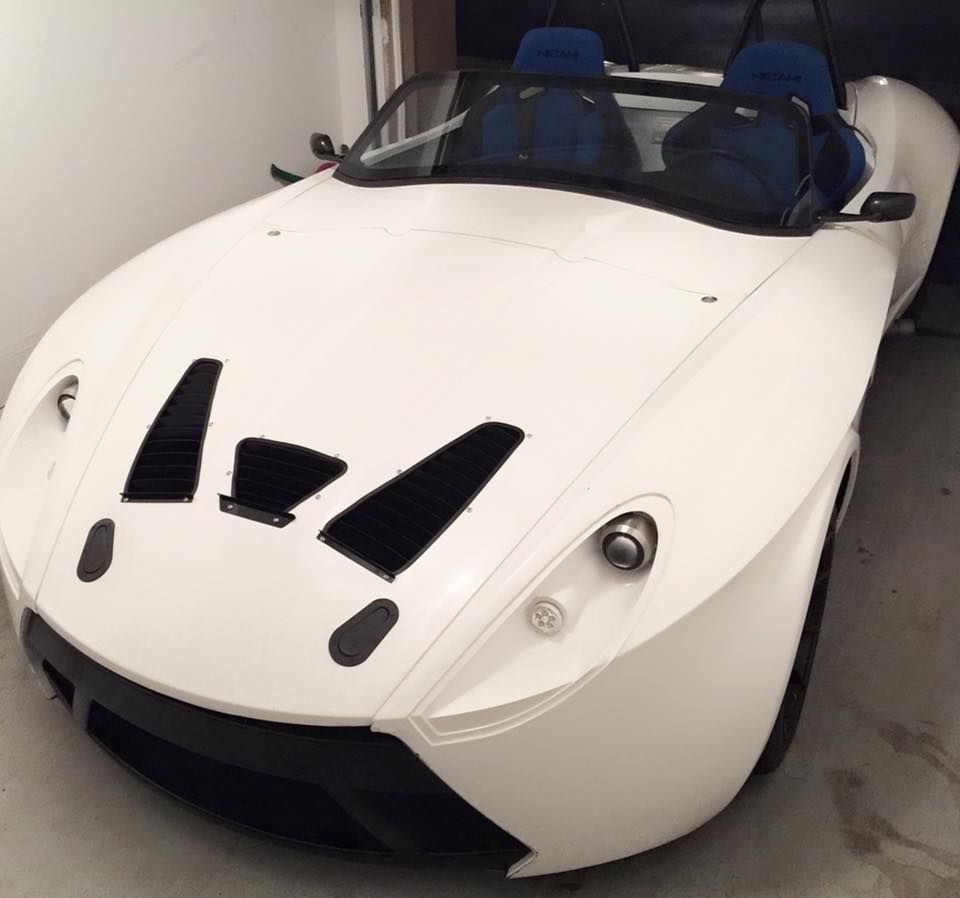
The car is now California street legal and smog exempt!
It still needs to be painted etc but I've run a couple autocross events and I am starting to get the tune and the suspension dialed in. After this post I will figure out were I left off and share some progress pictures and important milestones.
In the meantime here is a current pic and a video from autocross if you want to see into the future


The car is now California street legal and smog exempt!

It still needs to be painted etc but I've run a couple autocross events and I am starting to get the tune and the suspension dialed in. After this post I will figure out were I left off and share some progress pictures and important milestones.
In the meantime here is a current pic and a video from autocross if you want to see into the future


