Building a blonde young beefcake wearing nothing but skimpy shorts named Rocky
#1241
I don't think it is going to be a kit that's for sale from the sounds of it. There's a lot of custom work that goes into the swap. A lot of modifying of the actual bellhousing. If you look in my thread you can see just what I'm talking about. Other than the adaptor plate and mounts to the chassis I'm not sure what else you could get that would make it a "kit".
#1243
I don't think it is going to be a kit that's for sale from the sounds of it. There's a lot of custom work that goes into the swap. A lot of modifying of the actual bellhousing. If you look in my thread you can see just what I'm talking about. Other than the adaptor plate and mounts to the chassis I'm not sure what else you could get that would make it a "kit".
I just want an FD trans mount kit.
#1253
Pulled the turbo out for removal of the compressor side, it's going out to be coated to match the FPR and EWG.

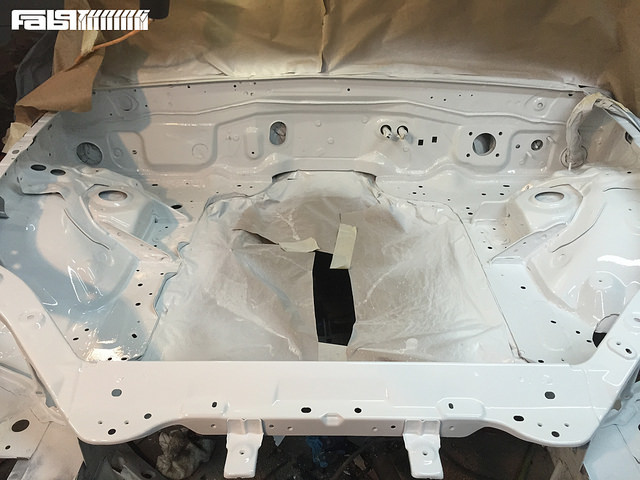
Engine is removed, bay is stripped and etching primer has been applied anywhere necessary.
I've decided to do a brake booster delete setup (after speaking with my Wilwood rep I'll likely not take this master route) but and completely tuck the brake lines:


Engine is removed, bay is stripped and etching primer has been applied anywhere necessary.
I've decided to do a brake booster delete setup (after speaking with my Wilwood rep I'll likely not take this master route) but and completely tuck the brake lines:


#1254
Small update while I wait for Epoxy Primer to set up. Pulled the engine, pulled the dash, pulled the wiring and blasted everything out from the cracks. Went through and ground down areas of chipping paint, in most places this resulted in bare metal.
Bare metal should always be hit with some etching primer, usually it's this ugly green color:

The Epoxy primer went on - I decided to use this specific primer for a solid chemical adhesion because of the harsh nature of an engine bay. Most of the bay was prepped with 220 grit sandpaper and this primer should do a great job filling that with a coat thickness of 1.3-1.6mm.

Cleaned the gun out and I'll give this an hour to set up and hit it with a light scuff - being a 2 part primer it should set up nicely by then but it's been years since I've painted anything.
Bare metal should always be hit with some etching primer, usually it's this ugly green color:

The Epoxy primer went on - I decided to use this specific primer for a solid chemical adhesion because of the harsh nature of an engine bay. Most of the bay was prepped with 220 grit sandpaper and this primer should do a great job filling that with a coat thickness of 1.3-1.6mm.

Cleaned the gun out and I'll give this an hour to set up and hit it with a light scuff - being a 2 part primer it should set up nicely by then but it's been years since I've painted anything.
#1256
Bare steel is fine with no etching primer, its aluminum that needs it most, SS and other self oxidizing metals can go either way. I mean its not going to hurt, and you could always just give it a wipe down with muriatic acid before painting as well if you didnt want green but wanted it etched.
#1258
I was able to get a thing or two done this weekend. Finally finished prep on the bay and shot some paint and clear coat. The basecoat showed some signs of contamination and it turned out to be some water in the compressor... Drained it and ran an inline filter and it went on like glass.


Now it's time to route the brake lines.. I picked up stainless hardline which is just a pretty version of your standard brake line. All of the fittings will be black 3an fittings. Should come together really nicely if I can find time.
#1259
This is bit of a jump in progress but as Fab9 continues to grow I have less and less time to work on it and update build threads, unfortunately. Now we're in a bit of a rush to finish the car before Miatas at the Gap/Tail of the Dragon. Here is a link to the blog post, if any of you will be attending we'd like to meet you: Fab9Tuning Blog

A couple of recent changes - we decided to go with the TEIN Monosport because we kept selling out of the TEIN Flex Systems and I think we will take better advantage of the Monosport configuration. (I ended up shipping my personal set of Street Flex to a customer).
Swaybar setup changed, went with the reinforced swaybar mounts and Whiteline sealed end links (both listed on the site).
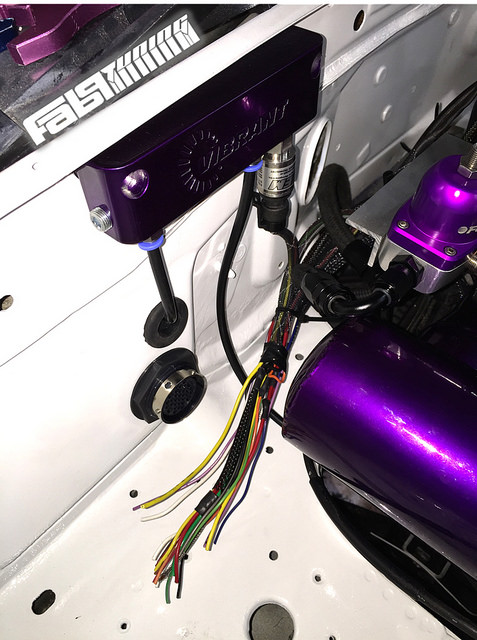
New ish fuel configuration to acomodate the fuelab 515 regulator.

Got rid of the GM 3 Bar Map sensor and installed the AEM 5 bar to support the higher boost levels we expect to tune the EFR on. Also finished most of the engine side wiring..

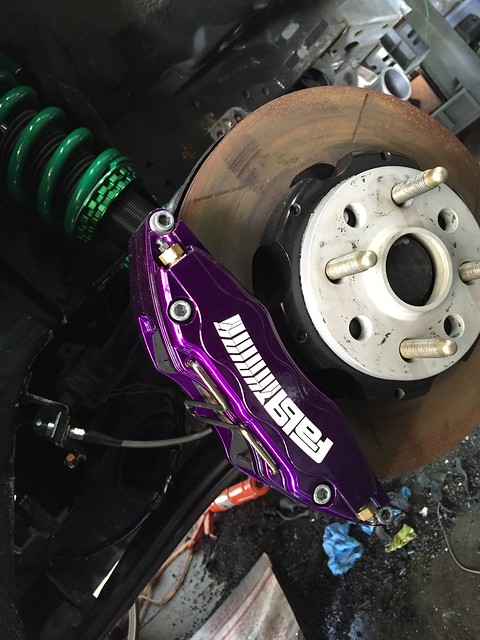
This was just to fill a curiosity I had, I'll likely end up with Wilwood stickers back on here. Looks a bit busy for my taste.

A couple of recent changes - we decided to go with the TEIN Monosport because we kept selling out of the TEIN Flex Systems and I think we will take better advantage of the Monosport configuration. (I ended up shipping my personal set of Street Flex to a customer).
Swaybar setup changed, went with the reinforced swaybar mounts and Whiteline sealed end links (both listed on the site).
New ish fuel configuration to acomodate the fuelab 515 regulator.

Got rid of the GM 3 Bar Map sensor and installed the AEM 5 bar to support the higher boost levels we expect to tune the EFR on. Also finished most of the engine side wiring..

This was just to fill a curiosity I had, I'll likely end up with Wilwood stickers back on here. Looks a bit busy for my taste.

Thread
Thread Starter
Forum
Replies
Last Post
Grifbatenhorst
Build Threads
10
01-19-2016 10:06 PM


