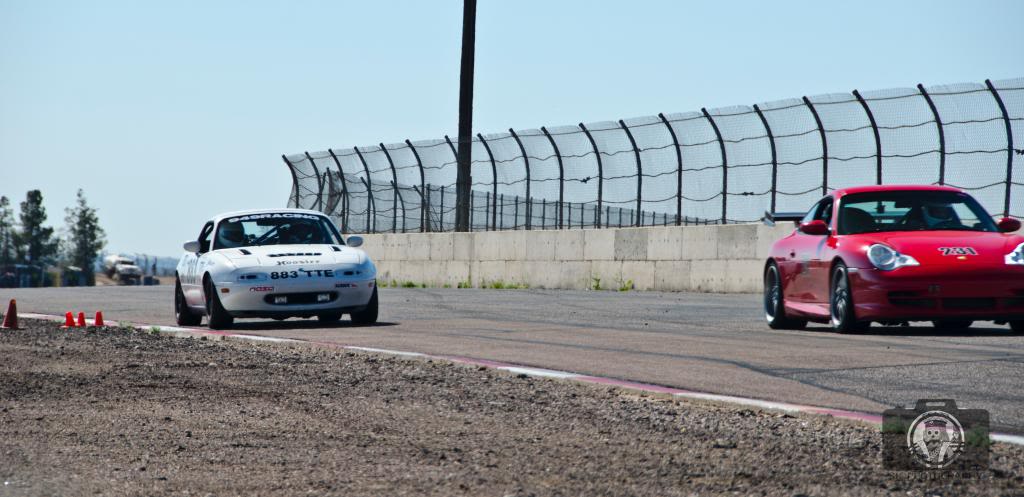
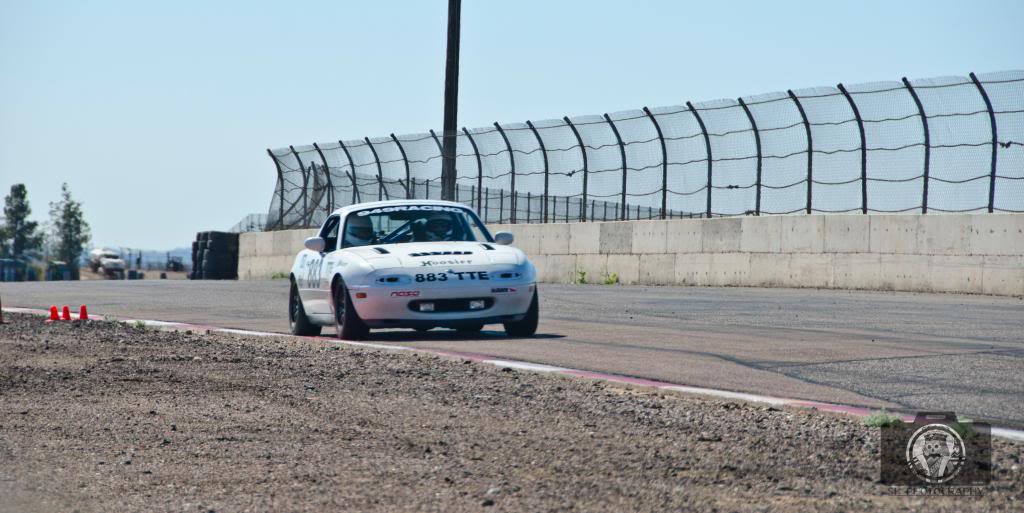
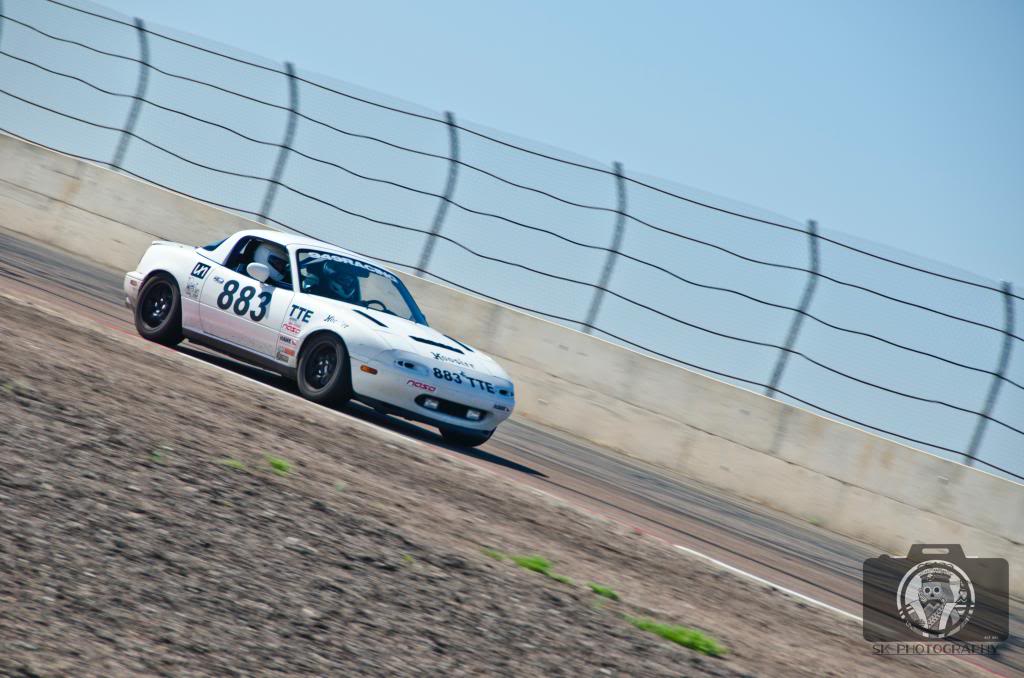
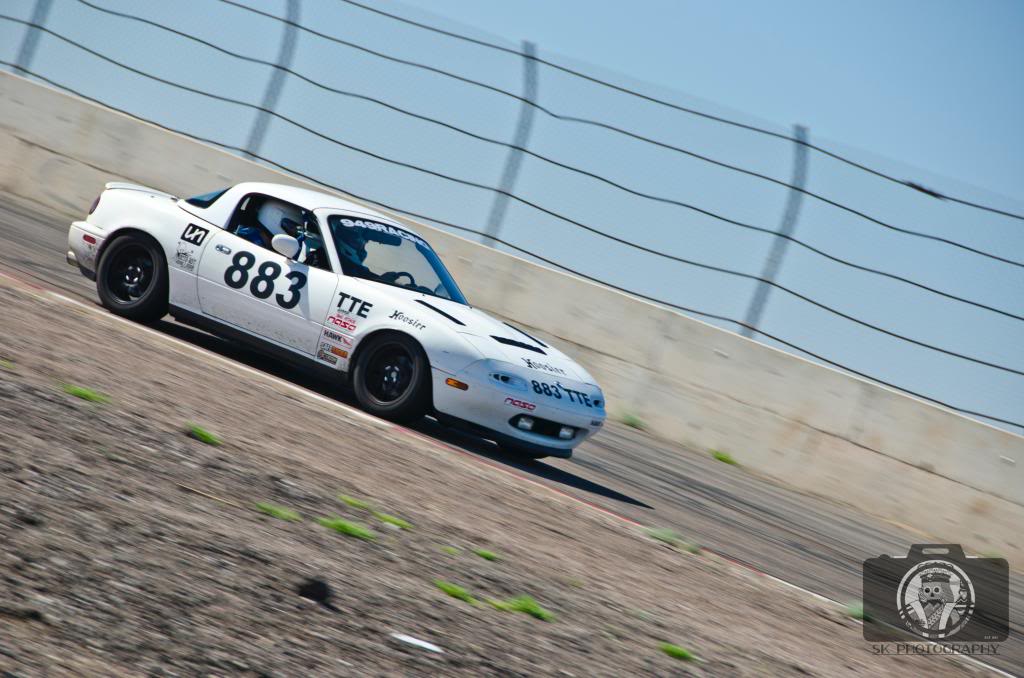
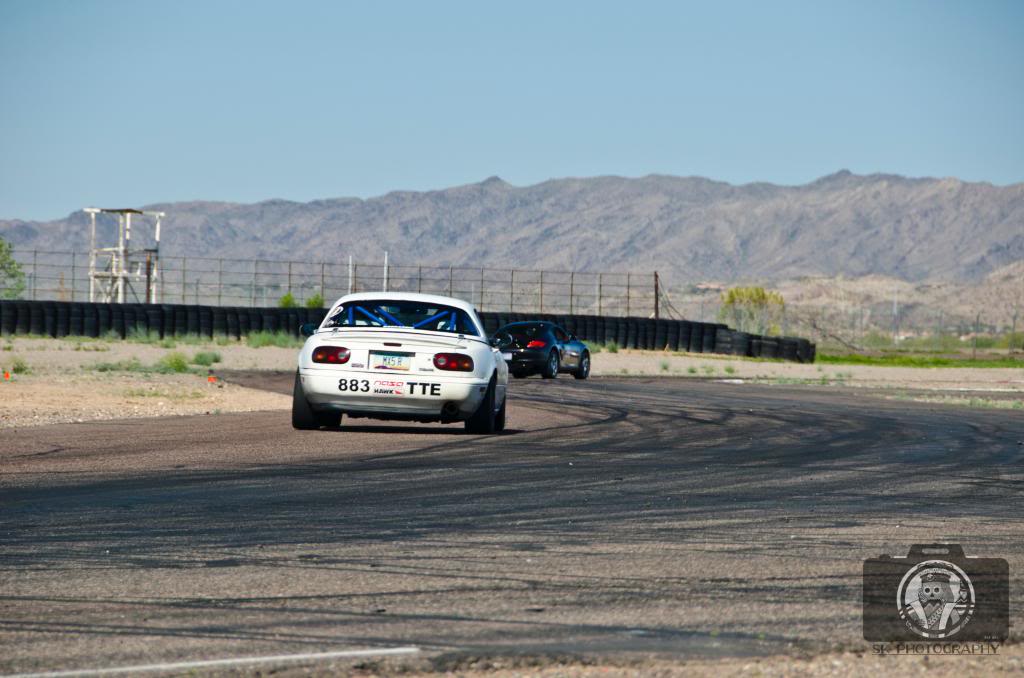
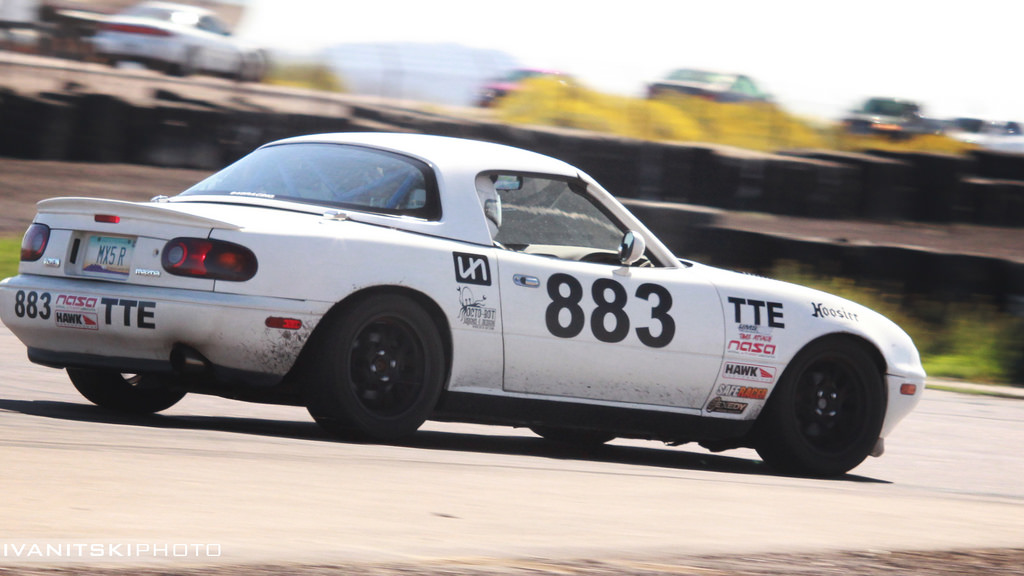
Arca's R Package Racecar Build - K24 Swap
#1
Thread Starter
Elite Member
iTrader: (2)
Joined: Jan 2013
Posts: 1,632
Total Cats: 430
From: Chandler, AZ
If you've landed here, I hope you enjoy the reading and here are a couple more places to follow along:
Instagram Link: @hmrfactory
YouTube Link: www.youtube.com/HMRfactory
I've been cruising around these forums for a bit and figured I'd post my build thread over here as well. It's just a naturally aspirated TTE car but still plenty of fun at the track. Here goes nothing.
Update: The car has evolved into a K24Z3 swapped wheel to wheel full rotisserie build racecar with the goal of competing in NASA Super Touring 4 (ST4), GridLife Touring Cup (GLTC), and ProAutoSports Production Sedan 2 (PS2).
Last edited by Arca_ex; 07-05-2021 at 01:21 PM.
#2
Thread Starter
Elite Member
iTrader: (2)
Joined: Jan 2013
Posts: 1,632
Total Cats: 430
From: Chandler, AZ
So, the background story for this car and build starts about August 2012. I'll cover what's been done up to this point then go from there. I have a build thread on my other car and thought it would be nice to have one for the Miata as well.
Anyways, I had been tracking my then daily driver 2005 RX-8 for about a year, and my Dad came out to the track a couple times to hang out. Miatas are of course very popular out here at NASA AZ and he got a ride along in the same car I got my very first ride along in as well, my friends 1994 Miata. After talking to some other people about cars and costs and other questions, he found that the answer was always Miata, so the search began to find a Miata project that we could both work on and drive. This is my "Plan B" car for when I'm unable to drive my RX-8 and is my dad's dedicated track car. The RX-8 is undergoing a massive rebuild right now and has its own build thread which can be found at the link below if anyone is interested.
https://www.miataturbo.net/build-thr...care-me-89524/
So our search for a suitable car started. Our budget was about $3000 and the important things on our list was 1994 or 1995 so we had OBD1 with a 1.8L, and it had to have an LSD in it already. We had a couple cars sold out from under us before we could even show up to look at it.
The first car we actually got to see was a '95 M edition, and the guy swore up and down that it just needed a battery and it would work fine... we hooked it up to jumper cables from our F150 and it would crank and crank and not fire, pulled the plugs and did a compression test right there (guy wasn't expecting that), cylinder 1 had a ton of oil, 140PSI, then the rest of the cylinders were less than 50PSI. 150 mile round trip that was a total waste of time and even with a blown motor and trashed interior he still wouldn't budge from $2500 asking price so we told him to kick rocks. Then I reported that it had a blown motor on the Carfax because **** that guy.
After browsing Craigslist for awhile and not seeing anything we liked, my buddy (the one that gave my dad a ride along in his Miata) sent me a link at about 8:30PM. A 1994 that was perfect for what we needed... $3500 asking price, figured maybe we could talk him down a bit. The ad had only been up for about 45 minutes so far, and I was sick of people beating us to cars, so I called the guy anyways at 8:45PM on a Monday. He said he already had two people coming over to look at it the next morning, so I asked him what his crossroads were, and he was only 3 miles from my place. I asked if I could look at it tonight and he said that was cool. Grabbed my dad and jetted over there to check it out, and it was better than we could have ever thought.
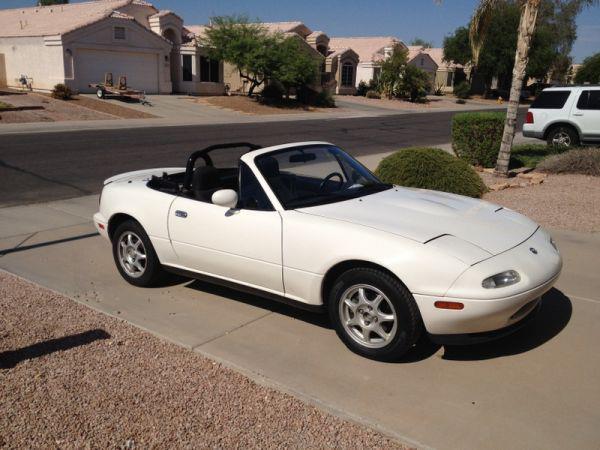
It was a 1994 R-Package with 103k miles on the clock, kept mostly in Colorado driven by the guys mom, only during summers (no rust) and it was even serviced by Flyin' Miata regularly. Not even a hint of lifter tick, no accidents and it drove awesome on the test drive. The only thing not stock were the shocks (no "R" bilsteins) but they were getting replaced anyways. While we were there, his phone was ringing off the hook with people offering almost $1000 over asking price, but we were lucky he was a stand up guy and fellow car enthusiast and he said if we wanted it for the $3500 full asking price, it was ours. We agreed and we were back the next day with cash and took it home. That's where the fun starts.
June 25, 2012:

Last edited by Arca_ex; 10-12-2020 at 05:11 AM.
#3
Thread Starter
Elite Member
iTrader: (2)
Joined: Jan 2013
Posts: 1,632
Total Cats: 430
From: Chandler, AZ
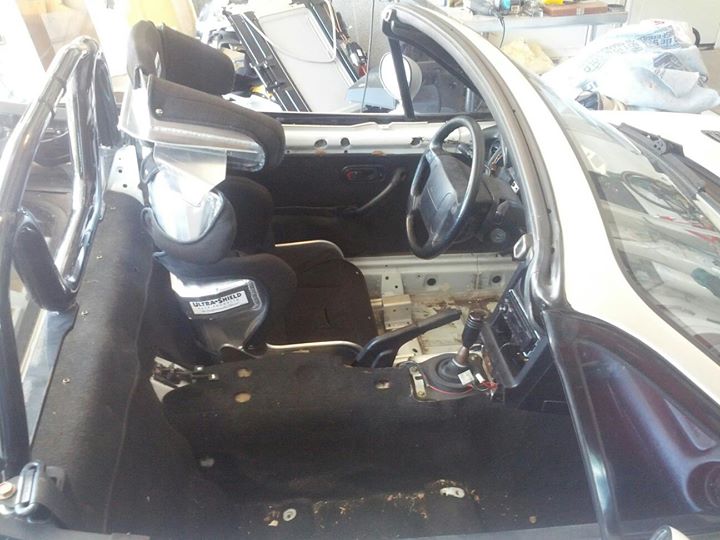
So first thing's first... I'm 6'5" and my Dad is 6'2"... the first and biggest challenge is making it so we can fit in the damn car. We came to the conclusion that a bolt in roll bar was not going to work for what we need (the seats can't go far enough back) and that we need to have an aluminum seat bolted straight to the floor.
After doing some research we purchased two seats from Ultrashield. All the Kirkey seats I have sat in I hated, so we kind of took a gamble. On the website, they say you only need one measurement to buy a seat... you sit on a bench, put two boards down the sides of your hips, stand up, and measure the distance between the two boards. Luckily for both my dad and I, the measurement was 17", so that was the size seats we ordered, and we lucked out because they fit awesome and are super comfortable on track.
Drivers Seat: Ultrashield VS Halo 17"
Passenger Seat: Ultrashield Spec Miata 17"
The drivers seat I like a lot, holds you in very well. Also since it is technically a circle track seat, they made the driver side Halo piece shorter than the other side, which works out well because it doesn't hinder entry/exit at all.
The passenger seat we were just looking for the lightest solution possible.
My buddy Stenos ("Noz") sitting in what would essentially be the seating position. This is the same guy that I mentioned earlier that gave a ride along to my dad and played a large role in us choosing a Miata. He helped out a TON with working on the car and it is definitely nice to have someone who knows what does and doesn't work on a track car. It's nice to avoid wasting time with trial and error type modifications and car setups and be able to just go with stuff that works well right off the bat.
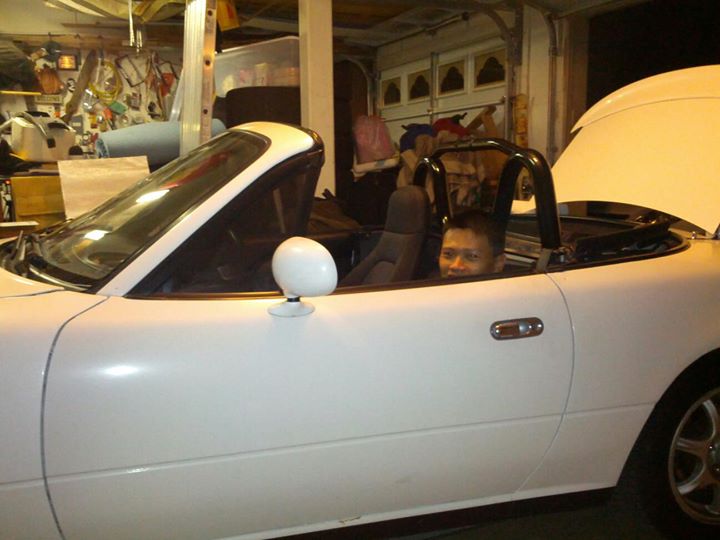
Testing the position for the drivers seat.
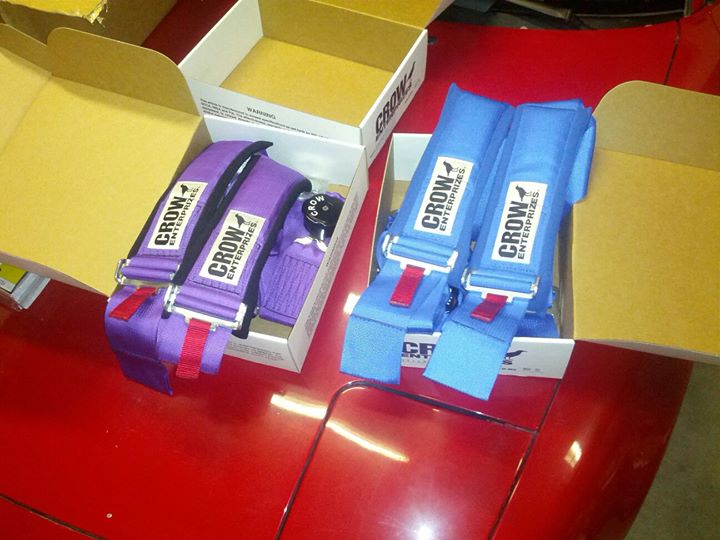
Got some harnesses from Crow Enterprizes. The purple ones are for the RX-8, blue is for the Miata. They are 6 point camlock with pull up lap belts, all 3" with sewn in shoulder pads. If you don't have a head and neck restraint, the shoulder pads are awesome. Great price on these as well, and they offer a recertification service that you can use when they expire, it's only like 60 bucks to send them in and they replace all the webbing so you're good to go for tech inspection.
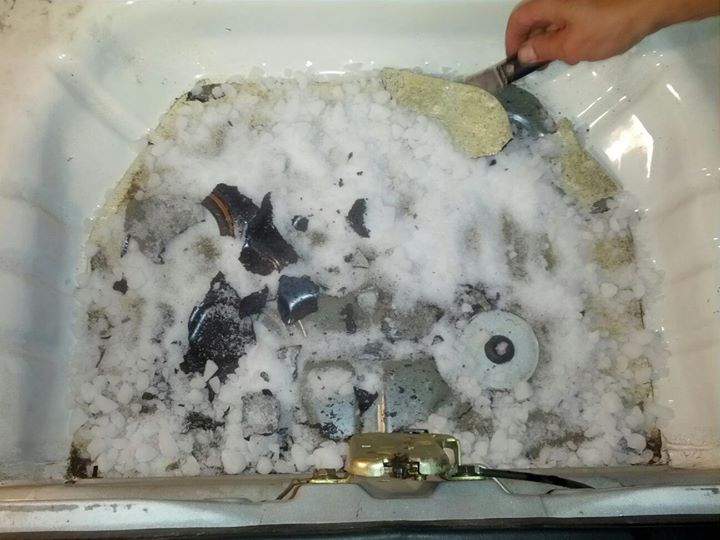
While we were stripping out the interior we also removed the sound deadening with dry ice. It took about 10 minutes total... just crush up dry ice into powder/tiny pieces, spread evenly, wait until you start to hear it cracking then it just lifts off with a putty knife.
After doing some research we purchased two seats from Ultrashield. All the Kirkey seats I have sat in I hated, so we kind of took a gamble. On the website, they say you only need one measurement to buy a seat... you sit on a bench, put two boards down the sides of your hips, stand up, and measure the distance between the two boards. Luckily for both my dad and I, the measurement was 17", so that was the size seats we ordered, and we lucked out because they fit awesome and are super comfortable on track.
Drivers Seat: Ultrashield VS Halo 17"
Passenger Seat: Ultrashield Spec Miata 17"
The drivers seat I like a lot, holds you in very well. Also since it is technically a circle track seat, they made the driver side Halo piece shorter than the other side, which works out well because it doesn't hinder entry/exit at all.
The passenger seat we were just looking for the lightest solution possible.
My buddy Stenos ("Noz") sitting in what would essentially be the seating position. This is the same guy that I mentioned earlier that gave a ride along to my dad and played a large role in us choosing a Miata. He helped out a TON with working on the car and it is definitely nice to have someone who knows what does and doesn't work on a track car. It's nice to avoid wasting time with trial and error type modifications and car setups and be able to just go with stuff that works well right off the bat.

Testing the position for the drivers seat.

Got some harnesses from Crow Enterprizes. The purple ones are for the RX-8, blue is for the Miata. They are 6 point camlock with pull up lap belts, all 3" with sewn in shoulder pads. If you don't have a head and neck restraint, the shoulder pads are awesome. Great price on these as well, and they offer a recertification service that you can use when they expire, it's only like 60 bucks to send them in and they replace all the webbing so you're good to go for tech inspection.

While we were stripping out the interior we also removed the sound deadening with dry ice. It took about 10 minutes total... just crush up dry ice into powder/tiny pieces, spread evenly, wait until you start to hear it cracking then it just lifts off with a putty knife.

#4
Thread Starter
Elite Member
iTrader: (2)
Joined: Jan 2013
Posts: 1,632
Total Cats: 430
From: Chandler, AZ
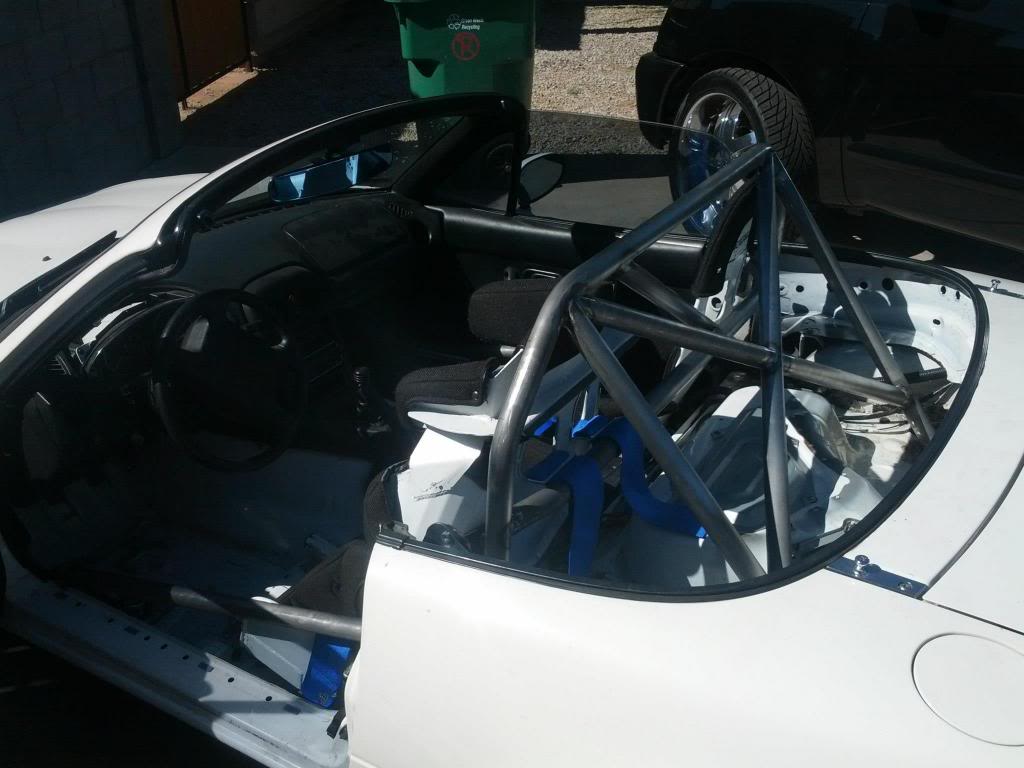
So after the seats went in, it was time for the rollbar. The seats are just bolted to the floor, took a little encouragement with a BFH for the trans tunnel to move over a little so the drivers side would sit flat. Also shot them with some gloss white Rustoleum.
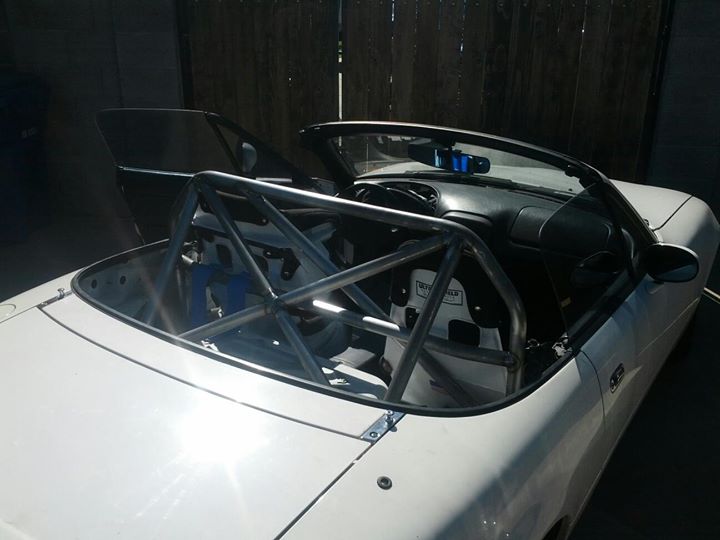
The car got dropped off at Fathead Fabrications and I told him exactly what I wanted. It is a 6 point that is legal for NASA Time Trials. The two door bars attach near the base of the main hoop and land where a normal full cage would. We were considering a full cage but given how tight on space it is in there, this was a good option.
All done:
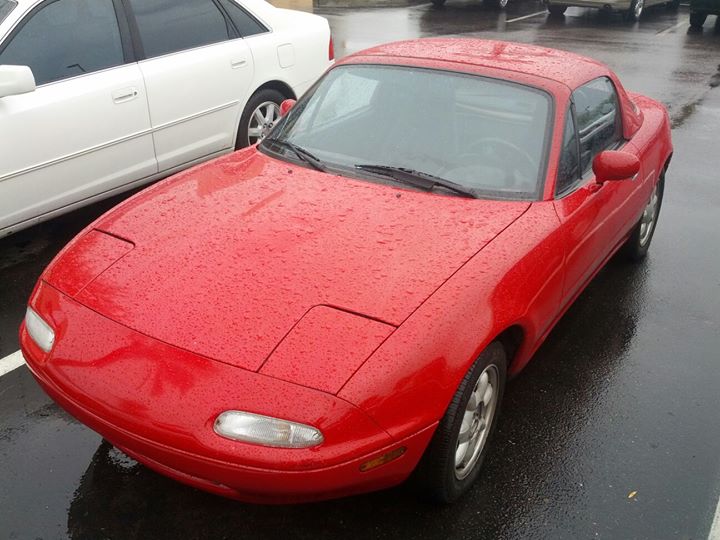
Another thing we were in search of is a hard top. They are stupid expensive on Craigslist most of the time around here. Like $1000. My dad was on Craigslist one day and spotted a Red '91 Miata for $1500 and it happened to have a non-defrost OEM hard top on it. We went to go check it out immediately to see why it was so cheap. It was an automatic and the owners said that they thought the transmission was blown and that's why it was so cheap. They said it would seem to slip and not want to shift and all sorts of stuff. While my dad was talking to them I pulled the dipstick for the trans fluid while it was running, and it was bone dry... I walked over and handed them $1500 and said we'll take it.
Took it home, filled up the trans fluid and it worked perfectly. So we took the hard top off, painted it white, put it on our car, and then sold the '91 Automatic for the same price we bought it for 3 days later, and let the new owner know to watch the trans fluid level. Free hard top, **** yeah.
The '91 Automatic:
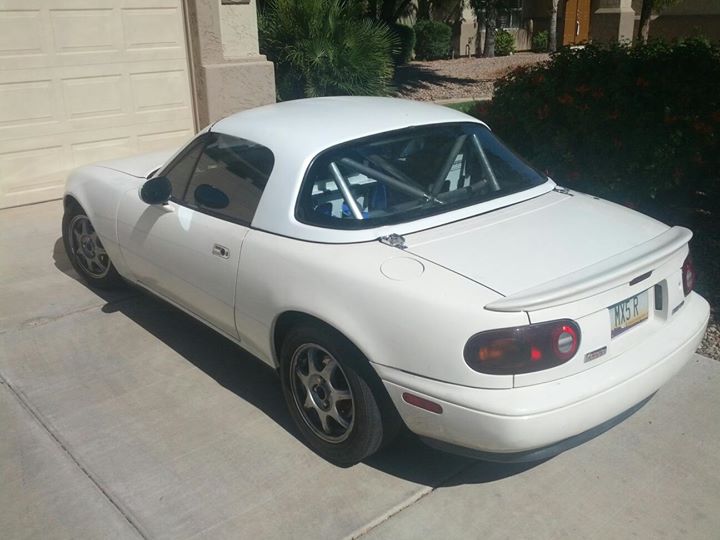
Hard top rattle canned and put on, also got new license plate in the mail.
The car got dropped off at Fathead Fabrications and I told him exactly what I wanted. It is a 6 point that is legal for NASA Time Trials. The two door bars attach near the base of the main hoop and land where a normal full cage would. We were considering a full cage but given how tight on space it is in there, this was a good option.
All done:


Another thing we were in search of is a hard top. They are stupid expensive on Craigslist most of the time around here. Like $1000. My dad was on Craigslist one day and spotted a Red '91 Miata for $1500 and it happened to have a non-defrost OEM hard top on it. We went to go check it out immediately to see why it was so cheap. It was an automatic and the owners said that they thought the transmission was blown and that's why it was so cheap. They said it would seem to slip and not want to shift and all sorts of stuff. While my dad was talking to them I pulled the dipstick for the trans fluid while it was running, and it was bone dry... I walked over and handed them $1500 and said we'll take it.
Took it home, filled up the trans fluid and it worked perfectly. So we took the hard top off, painted it white, put it on our car, and then sold the '91 Automatic for the same price we bought it for 3 days later, and let the new owner know to watch the trans fluid level. Free hard top, **** yeah.
The '91 Automatic:

Hard top rattle canned and put on, also got new license plate in the mail.

#5
Thread Starter
Elite Member
iTrader: (2)
Joined: Jan 2013
Posts: 1,632
Total Cats: 430
From: Chandler, AZ
Next step of the equation, weight reduction and some creature comforts.
So list of weight reduction as of today:
Removed interior
Removed A/C
Removed side windows
Removed Charcoal Canister and EGR System
Removed Headlight assemblies
Removed airbags, sensors, module
Gutted Doors
Gutted Rear Deck
Sound Deadening removed
Cut out some brackets from trunk
Removed brackets under the hood for fuse boxes etc.
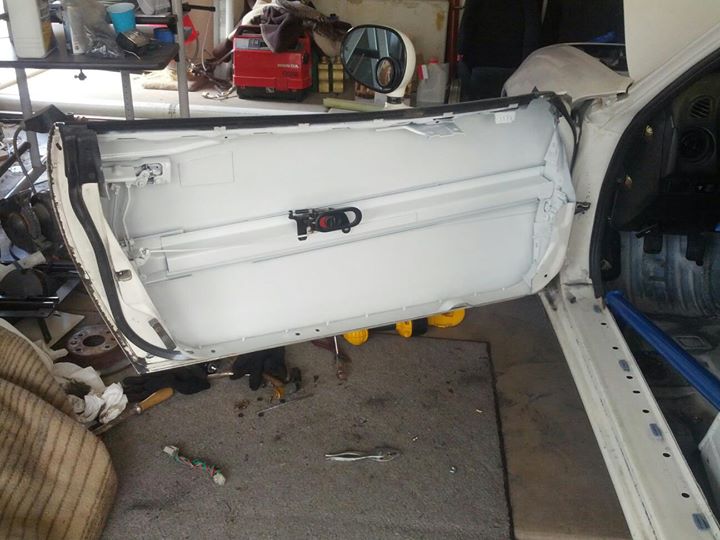
Here's the gutted doors, left the door bars in for extra side impact protection. You can also see here that we rattle canned the cage blue, you'll be able to see it in future pictures.
We were able to take out nearly 80lbs of weight between all the metal and glass in the doors... one of the best things we ever did for weight reduction. You can even go a step further than we did and get 1.6L door skins, they are lighter than the 1.8L. My buddy did this but we didn't bother.
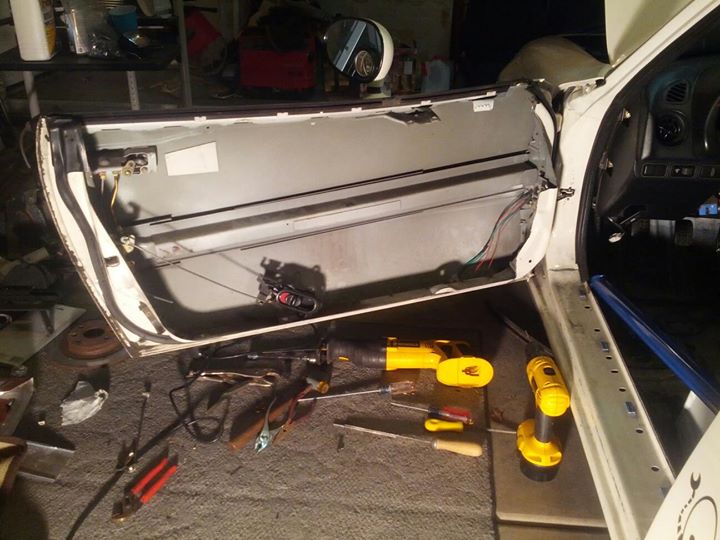
Then painted them white and covered sharp edges with some trim (trim not pictured).
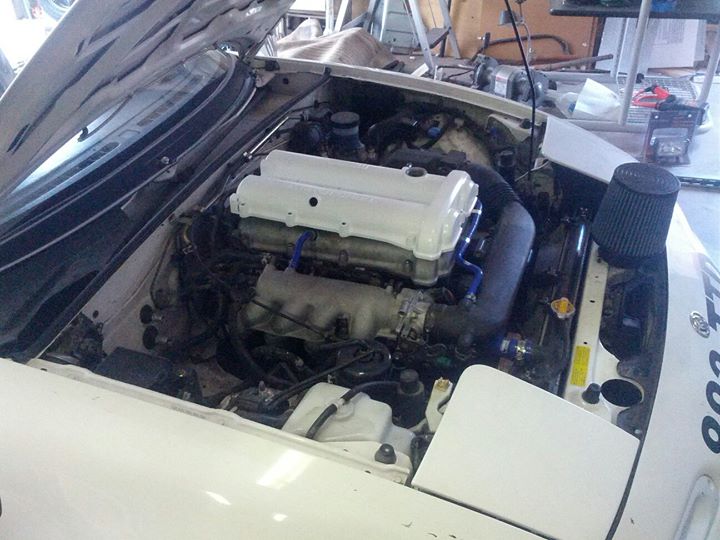
One other thing is that when we bought it there was an extra valve cover in the trunk. We painted it white to put on later. Also installed a Samco Silicone Hose kit and the Ancillary line kit in blue.
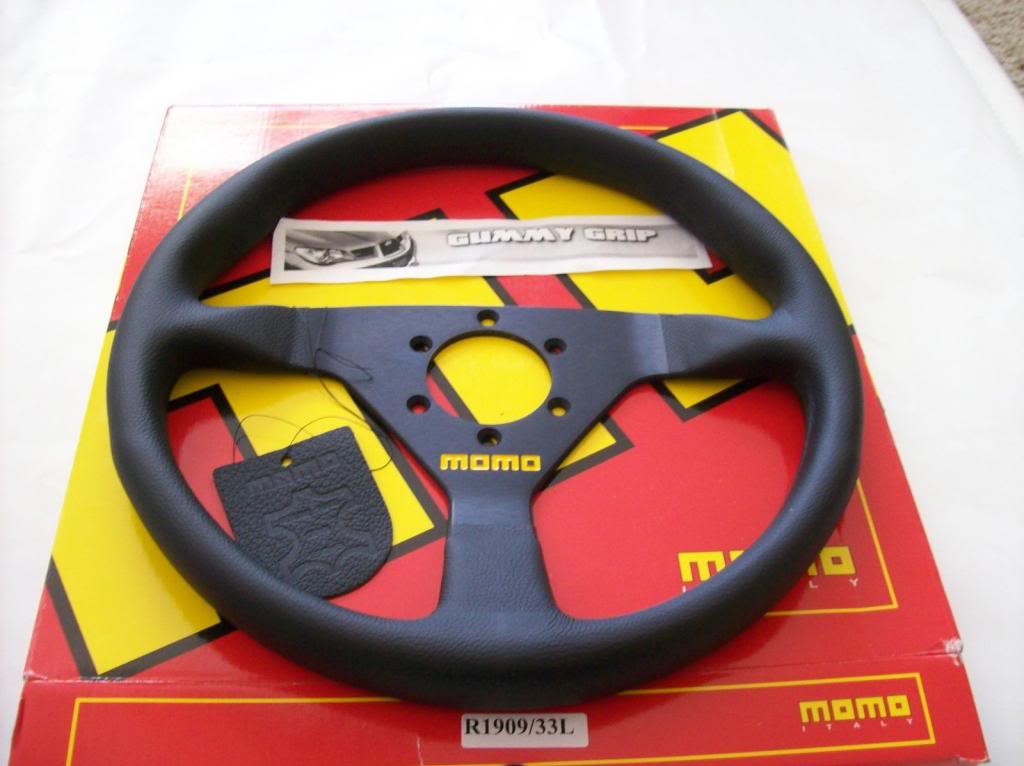
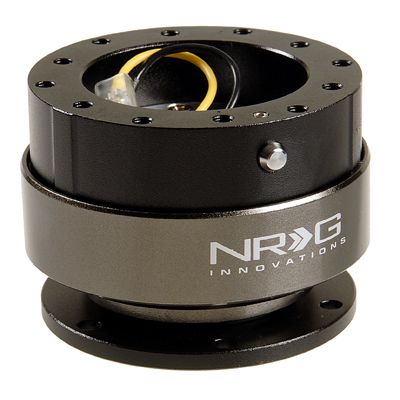
Also had to do something about the steering wheel because it was too large and in a bad spot. Also I needed a quick release to be able to get in and out quickly, my dad didn't seem to mind a fixed steering wheel though.
Ordered up:
Momo Hub Adapter #5702
Momo Mod.78 Steering Wheel (330mm Leather)
NRG Gen 2.0 Quick Release (Black/Charcoal)
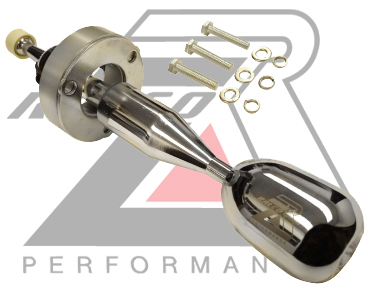
Now, out of all the parts that I've gotten for this car I've only REALLY regretted one part. And that is the Ralco RZ short shifter. What a nightmare. It seemed like a good deal, but once we got it (it includes no instructions whatsoever by the way), it really seemed like someone drafted this on a computer without ever actually trying to install it on the car. I won't really get into it that much but holy hell, it took an entire day of grinding, test fitting, grinding some more, and custom making a few parts in order to even get it to drop in the turret. After that it worked great for awhile but now it is getting shitty. The shifter shaft can rotate about 20 degrees either way because it only uses one locating pin and it must be reaming out the plastic slot on the shifter ball.
I did, however, like the cheapo Sickspeed 2.5" shifter extender and the VooDoo Piano Black weighted shift ****. Those are nice pieces.
DO NOT BUY THIS:
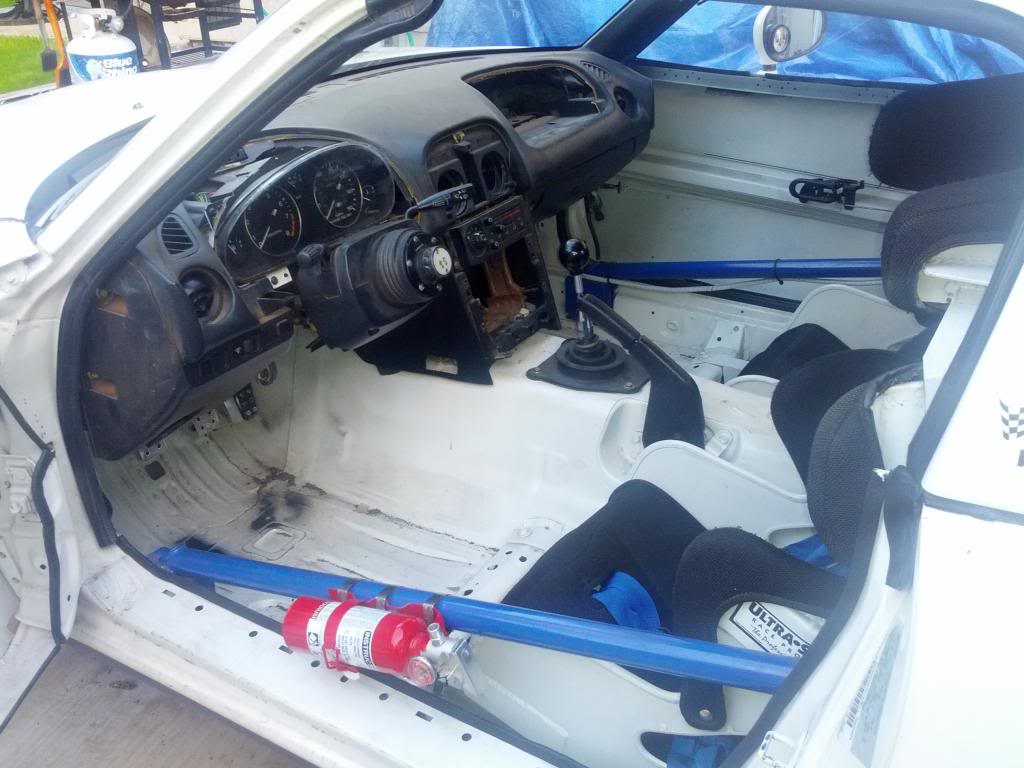
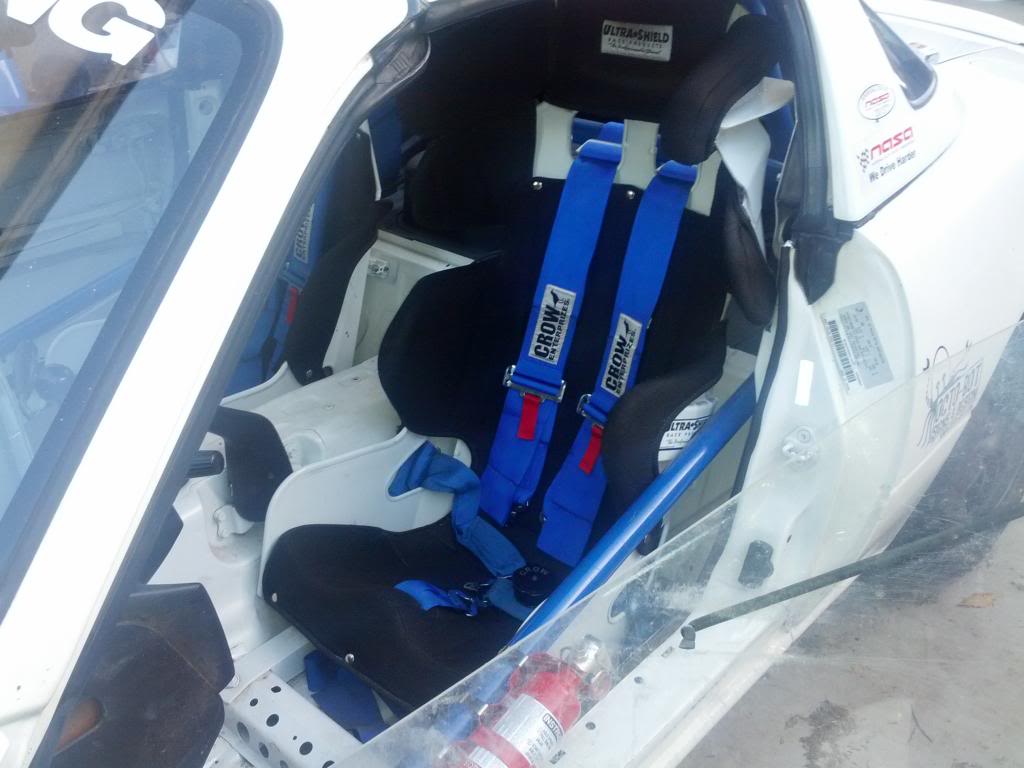
Also the rest of the interior tub was painted gloss white, and the rear deck and trunk was painted matte black with the hope that it would reduce glare in the back window. Worked out pretty well.
Here are some interior shots from about Feb. 2014.
So list of weight reduction as of today:
Removed interior
Removed A/C
Removed side windows
Removed Charcoal Canister and EGR System
Removed Headlight assemblies
Removed airbags, sensors, module
Gutted Doors
Gutted Rear Deck
Sound Deadening removed
Cut out some brackets from trunk
Removed brackets under the hood for fuse boxes etc.
Here's the gutted doors, left the door bars in for extra side impact protection. You can also see here that we rattle canned the cage blue, you'll be able to see it in future pictures.
We were able to take out nearly 80lbs of weight between all the metal and glass in the doors... one of the best things we ever did for weight reduction. You can even go a step further than we did and get 1.6L door skins, they are lighter than the 1.8L. My buddy did this but we didn't bother.

Then painted them white and covered sharp edges with some trim (trim not pictured).

One other thing is that when we bought it there was an extra valve cover in the trunk. We painted it white to put on later. Also installed a Samco Silicone Hose kit and the Ancillary line kit in blue.

Also had to do something about the steering wheel because it was too large and in a bad spot. Also I needed a quick release to be able to get in and out quickly, my dad didn't seem to mind a fixed steering wheel though.
Ordered up:
Momo Hub Adapter #5702
Momo Mod.78 Steering Wheel (330mm Leather)
NRG Gen 2.0 Quick Release (Black/Charcoal)


Now, out of all the parts that I've gotten for this car I've only REALLY regretted one part. And that is the Ralco RZ short shifter. What a nightmare. It seemed like a good deal, but once we got it (it includes no instructions whatsoever by the way), it really seemed like someone drafted this on a computer without ever actually trying to install it on the car. I won't really get into it that much but holy hell, it took an entire day of grinding, test fitting, grinding some more, and custom making a few parts in order to even get it to drop in the turret. After that it worked great for awhile but now it is getting shitty. The shifter shaft can rotate about 20 degrees either way because it only uses one locating pin and it must be reaming out the plastic slot on the shifter ball.
I did, however, like the cheapo Sickspeed 2.5" shifter extender and the VooDoo Piano Black weighted shift ****. Those are nice pieces.
DO NOT BUY THIS:

Also the rest of the interior tub was painted gloss white, and the rear deck and trunk was painted matte black with the hope that it would reduce glare in the back window. Worked out pretty well.
Here are some interior shots from about Feb. 2014.


#6
Thread Starter
Elite Member
iTrader: (2)
Joined: Jan 2013
Posts: 1,632
Total Cats: 430
From: Chandler, AZ
Alright, so, prep for the cars first track event. The event was October 27/28 of 2012, so we had been working on the car for about 4 months. This was right after I decided to put the RX-8 aside for a rebuild, so I would be driving the car in NASA Time Trials and my Dad would be doing his first event ever in HPDE1.
So we had ordered the Flyin' Miata Track Package which includes their Vmaxx Track Pack Adjustable coilovers and their front and rear sway bars.
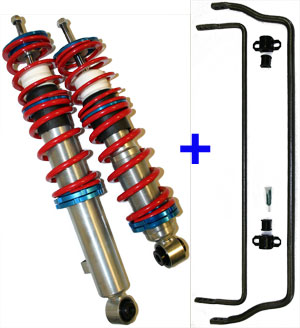
The coilovers were on backorder, we thought they would arrive in time but they got delayed. We got the sway bars in before the event along with some 949 Racing Endlinks, but our shocks were blown.
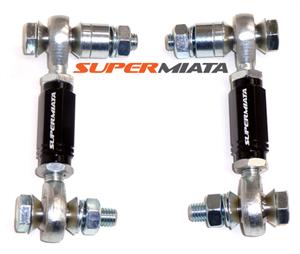
My buddy Noz came to the rescue and let us borrow his old suspension setup which was the Flyin' Miata Stage 1 with Tokico adjustables and lowering springs.
Being that my Dad was just getting into doing track days I decided to start with some good street tires.
225/45R15 Hankook RS-3's. These things are awesome for a street tire, but they like a LOT of camber. Unfortunately we were maxed on camber so outer edge wear was a problem and we had to flip them a couple times throughout their life.
Just in case anyone is wondering, those are 275/40R17 NT01's for my RX-8 in the background.
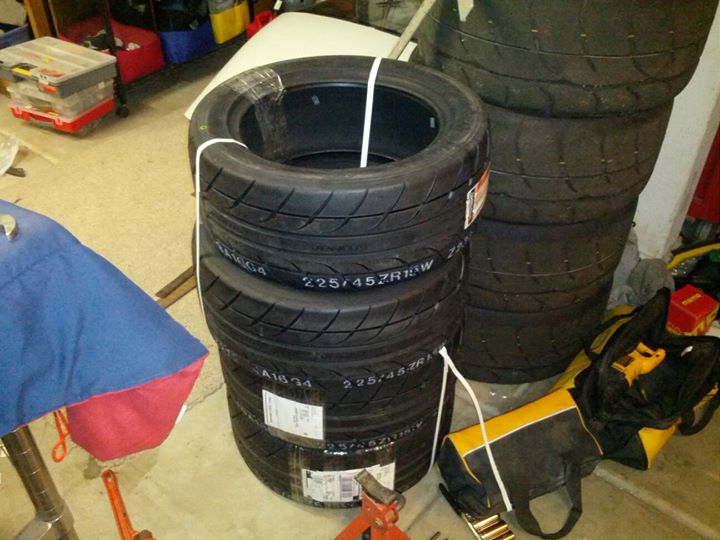
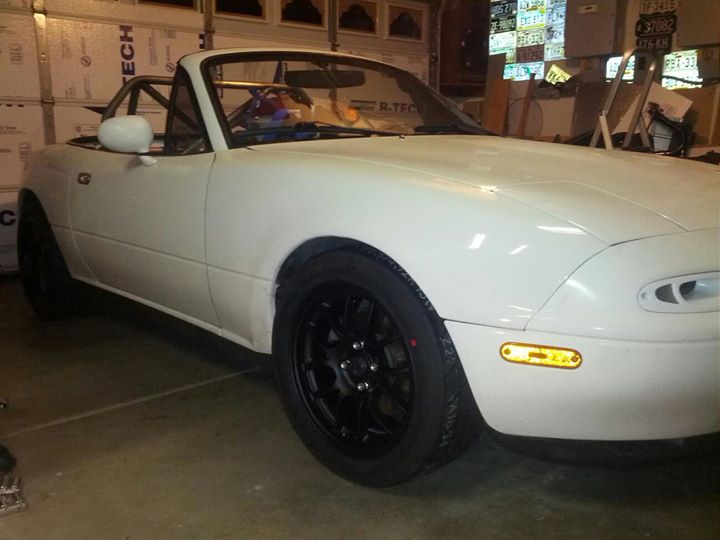
And of course some 15x8 6UL Gen 3's in black. I know the tread is backwards I just threw some on for a picture.
We also threw on some Hawk HP+ Brake Pads for starters and some cheapo blank rotors from O'Reilly's and bled the brakes with some ATE Super Blue.
Other tune up items we did before the event were:
NGK OE Spec Copper Plugs
NGK Spark Plug Wires
Amsoil 75w-90 GL4 Trans Fluid
Amsoil 75w-90 GL5 Rear Diff Fluid
Rotella T6 5w-40 Oil
Wix Oil Filter
The first event at Firebird Main Course went awesome. HOLY HELL was this car fun to drive. The suspension was too soft but it was still awesome, I couldn't wait to get some coilovers on it. It felt like driving a go kart and I loved the feel of not having power steering. The car ran flawlessly the whole time and I was pumped to do a few more mods then just drive the crap out of it for awhile and really work on that driver mod.
My Dad was hooked after his very first session on track. He did really well and advanced quickly. By the end of the weekend he was already all the way to HPDE3... I think his previous experience racing pro BMX when he was younger helped him out here.
Good times.
Here is a picture with my buddy after the first day of track goodness at a gas station. His car is on the right. You can see where we were going with the stickers and would soon be confusing almost everyone at the track... this was the start of the twin Miaters. :icon_cheers:
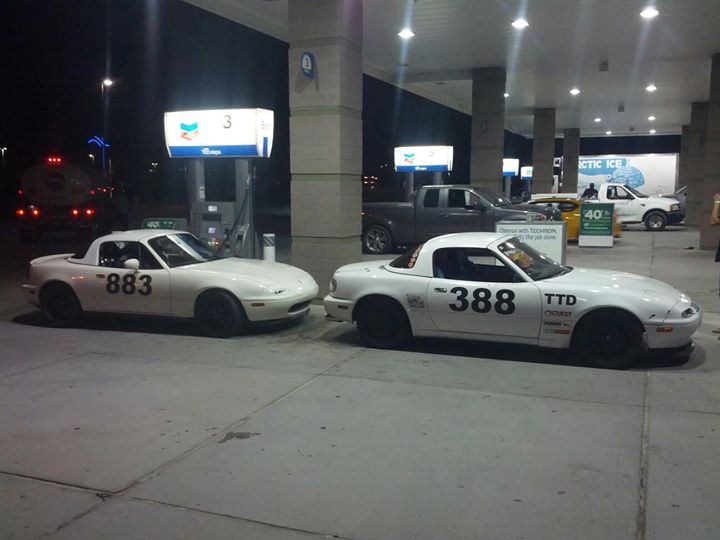
Some more stickers went on and here are some photos from the second day.
My dad getting some seat time in HPDE3:
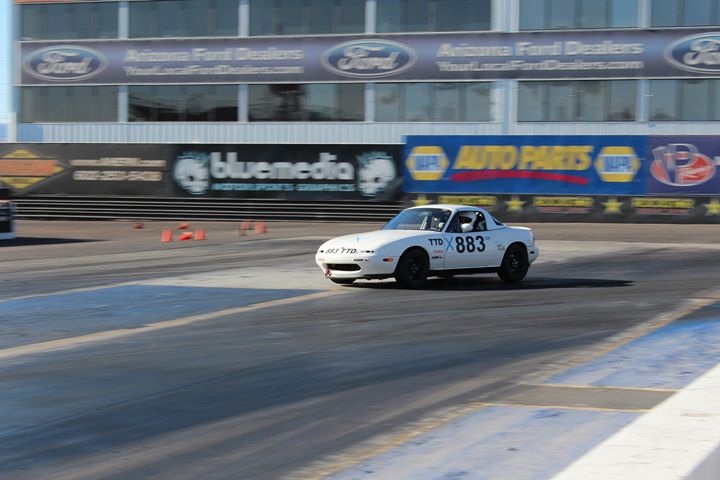
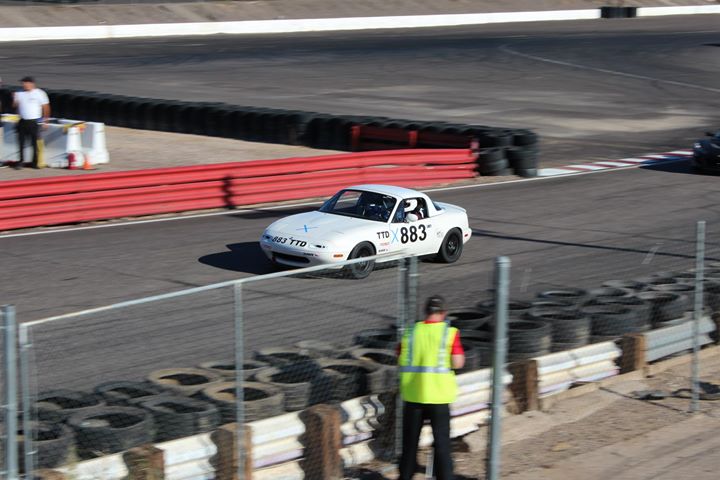
Me, just decided to throw the car in TT-D for that day:
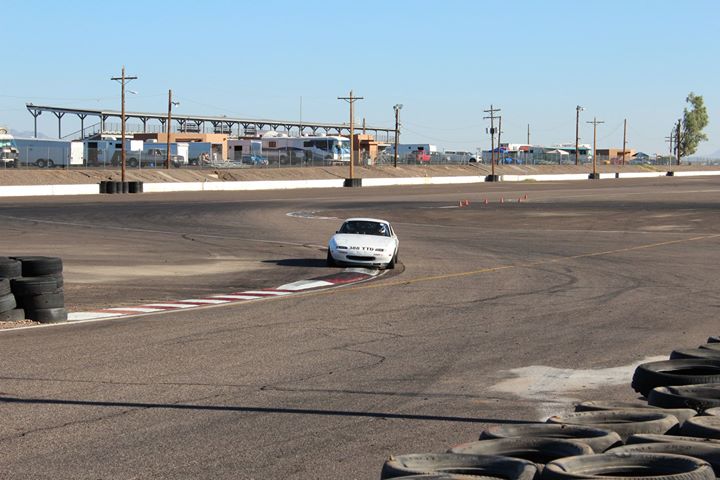
My buddy Noz two wheeling:
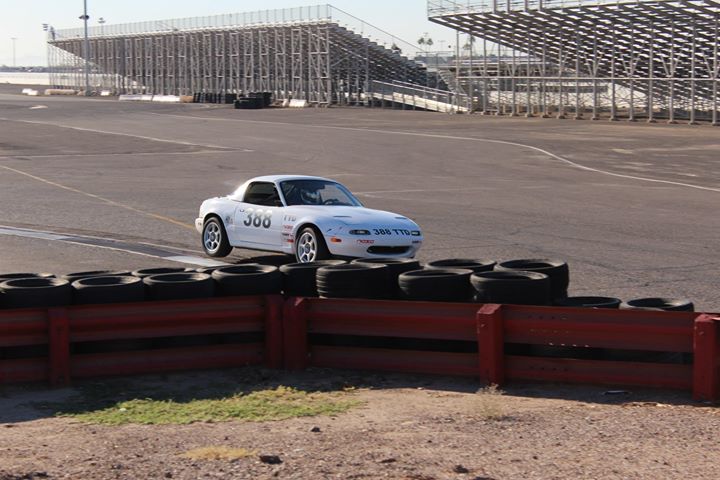
Me two wheeling:
Twin Miaters!
So we had ordered the Flyin' Miata Track Package which includes their Vmaxx Track Pack Adjustable coilovers and their front and rear sway bars.

The coilovers were on backorder, we thought they would arrive in time but they got delayed. We got the sway bars in before the event along with some 949 Racing Endlinks, but our shocks were blown.

My buddy Noz came to the rescue and let us borrow his old suspension setup which was the Flyin' Miata Stage 1 with Tokico adjustables and lowering springs.
Being that my Dad was just getting into doing track days I decided to start with some good street tires.
225/45R15 Hankook RS-3's. These things are awesome for a street tire, but they like a LOT of camber. Unfortunately we were maxed on camber so outer edge wear was a problem and we had to flip them a couple times throughout their life.
Just in case anyone is wondering, those are 275/40R17 NT01's for my RX-8 in the background.

And of course some 15x8 6UL Gen 3's in black. I know the tread is backwards I just threw some on for a picture.

We also threw on some Hawk HP+ Brake Pads for starters and some cheapo blank rotors from O'Reilly's and bled the brakes with some ATE Super Blue.
Other tune up items we did before the event were:
NGK OE Spec Copper Plugs
NGK Spark Plug Wires
Amsoil 75w-90 GL4 Trans Fluid
Amsoil 75w-90 GL5 Rear Diff Fluid
Rotella T6 5w-40 Oil
Wix Oil Filter
The first event at Firebird Main Course went awesome. HOLY HELL was this car fun to drive. The suspension was too soft but it was still awesome, I couldn't wait to get some coilovers on it. It felt like driving a go kart and I loved the feel of not having power steering. The car ran flawlessly the whole time and I was pumped to do a few more mods then just drive the crap out of it for awhile and really work on that driver mod.
My Dad was hooked after his very first session on track. He did really well and advanced quickly. By the end of the weekend he was already all the way to HPDE3... I think his previous experience racing pro BMX when he was younger helped him out here.
Good times.
Here is a picture with my buddy after the first day of track goodness at a gas station. His car is on the right. You can see where we were going with the stickers and would soon be confusing almost everyone at the track... this was the start of the twin Miaters. :icon_cheers:

Some more stickers went on and here are some photos from the second day.
My dad getting some seat time in HPDE3:


Me, just decided to throw the car in TT-D for that day:

My buddy Noz two wheeling:

Me two wheeling:

Twin Miaters!

#7
Thread Starter
Elite Member
iTrader: (2)
Joined: Jan 2013
Posts: 1,632
Total Cats: 430
From: Chandler, AZ
Alright, so we made it through the first track weekend and everything was working awesome. The timeline is now at December 2012.
Time for some more mods and to start adding a little power.
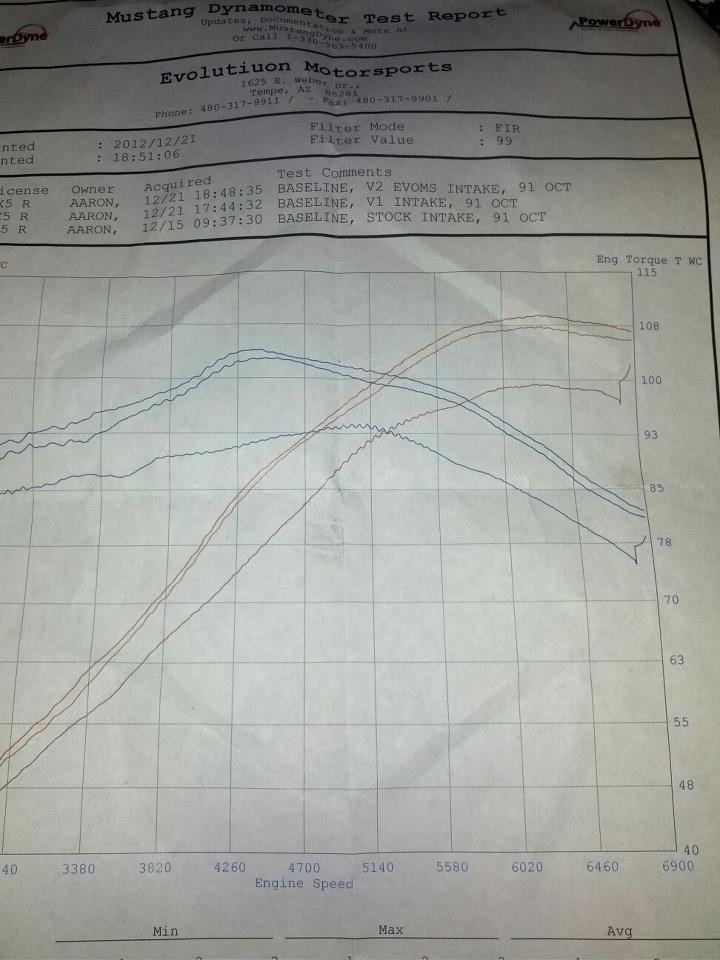
We did a baseline dyno run at Evolution Motorsports, I was working there at the time so was fortunate enough to use the dyno for free for a couple different nights spent testing stuff.
All the car had was a Roadstersport 2.5" test pipe and was at 14* timing and that's it.
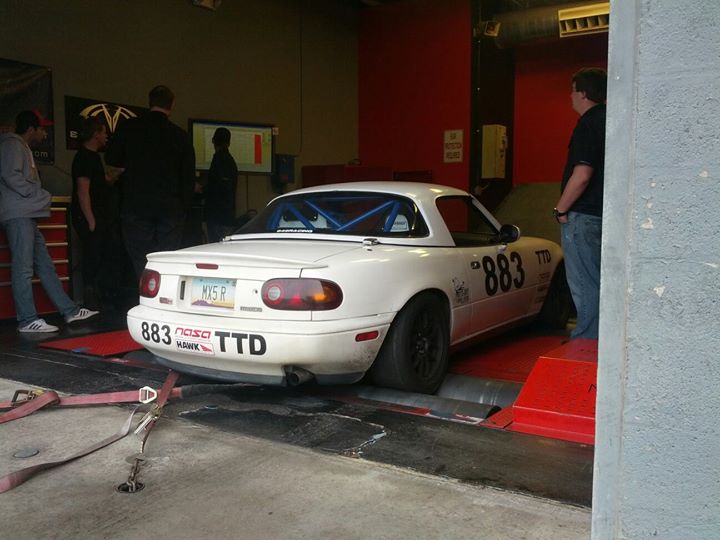
It made 100RWHP and 94RWTQ.
Using some parts laying around at work, I pieced together some stuff to make an intake that was housed where the left headlight used to be, and my dad built a plexiglass airbox to seal it off from the engine bay. It draws air in through the turn signal duct. Dat ram air yo.
Trying to figure out placement.
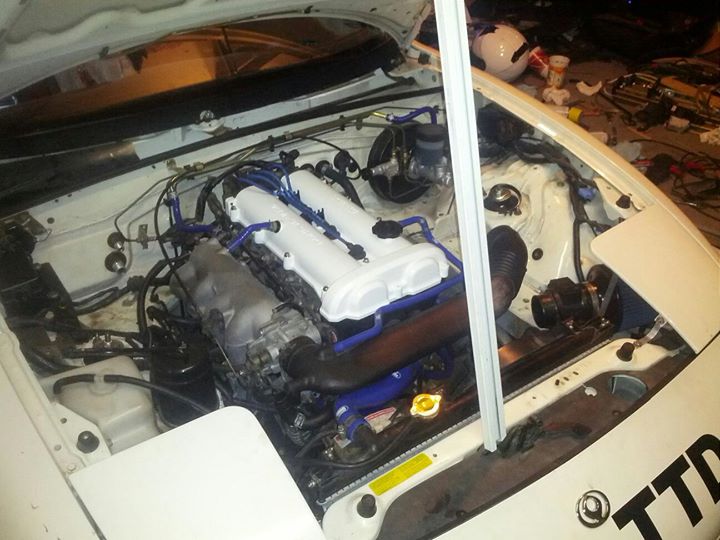
I cut the little accordion looking section, rotated it 180 degrees and use a small piece of exhaust pipe the same size as the tubing and this is how it turned out. Not bad.
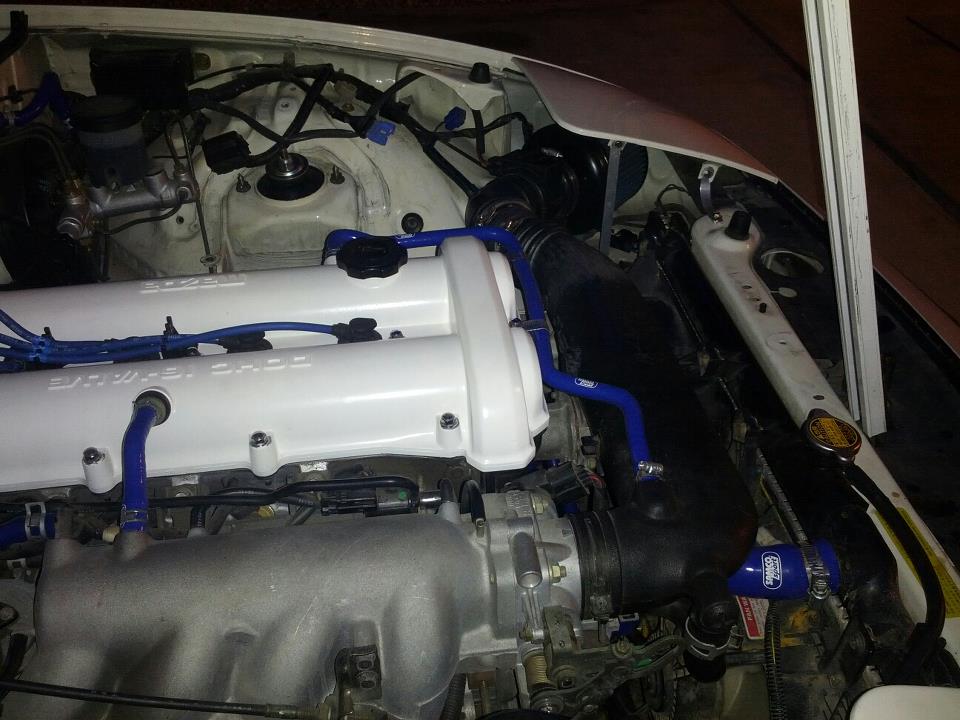
Building plexi glass box.
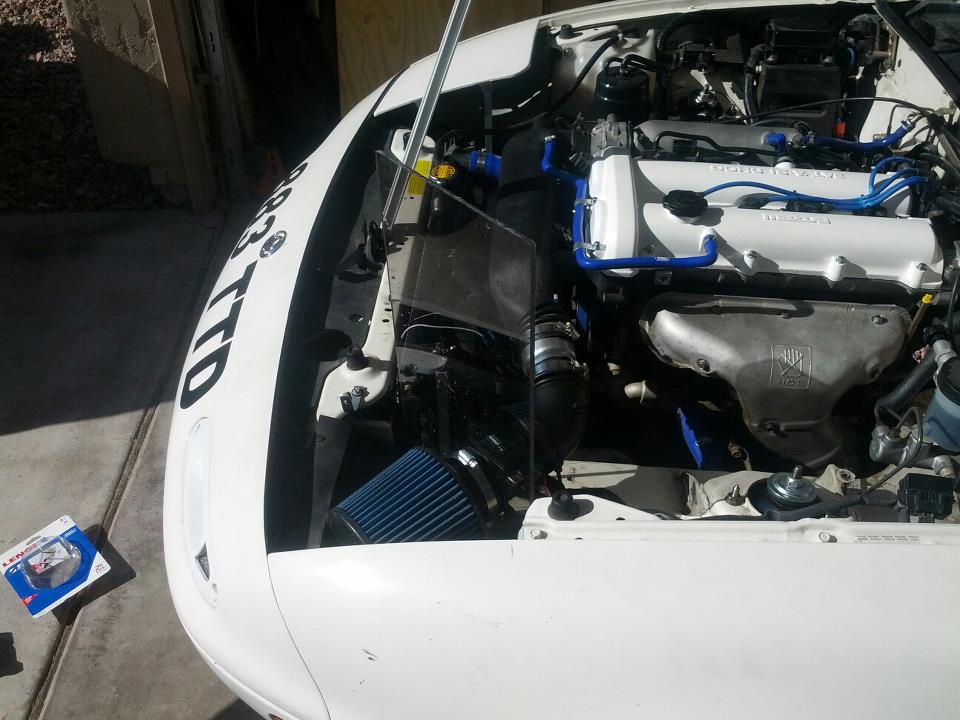
And then this is the final version. You can see that at the shop my friend Dan helped me out a bit with a 90 degree silicone coupler and a different filter setup. I'll explain why we did this for the next picture.
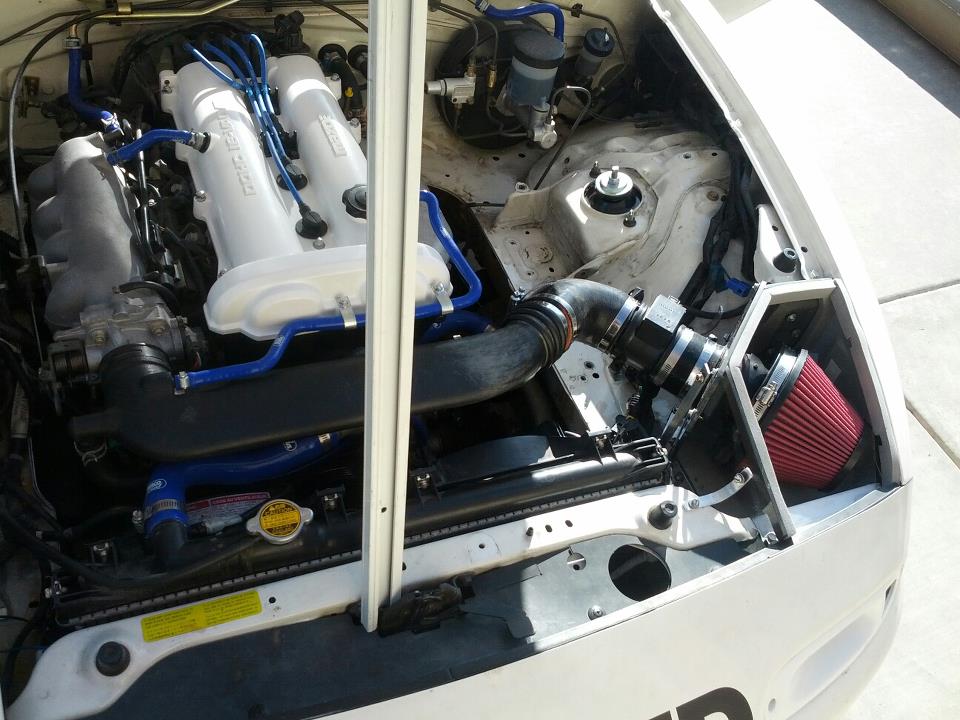
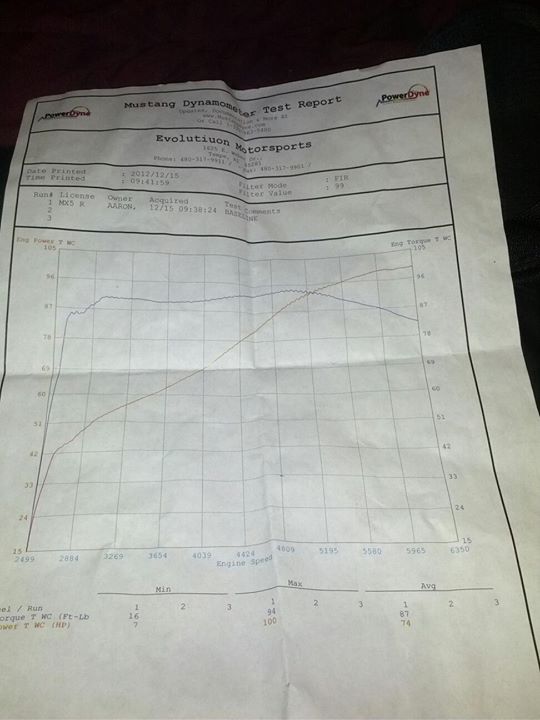
So. I tested two different intake variations. One with the normal blue filter just put straight onto the MAF, and the other is a velocity stack from one of the Evolution Motorsports intake kits and one of their filters. On the graph you can see the baseline of 100WHP, then the blue regular filter was 107WHP, and then changing to the velocity stack and red filter gained 2WHP almost everywhere on the curve for a total of 109WHP with just the intake, 2.5" test pipe, and 14* timing.
The peak torque shifted down a bit on the RPM's but I was very happy with solid gains everywhere, and it only cost me about 40 bucks in supplies.
Another thing to mention is that I tried two different crossover tubes, one with the helmholtz resonator and one without, all it did was make the 2000-4000RPM range more wavy with the resonator, and without it the line split through the wavy section meaning there was no difference in torque or power at all. Did three pulls each on each tube to verify. All within 1WHP of each other for the entire graph.
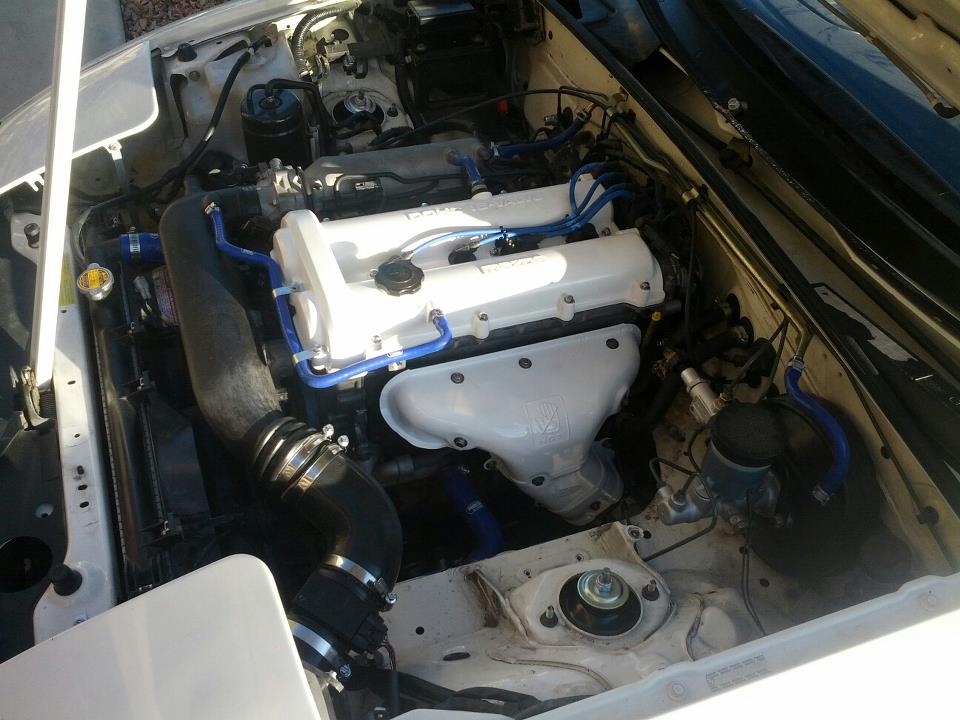
Also I painted the heatshield white with some super high temp paint... it lasted two events before it started to get yellow then did matte black header paint later...
Time for some more mods and to start adding a little power.
We did a baseline dyno run at Evolution Motorsports, I was working there at the time so was fortunate enough to use the dyno for free for a couple different nights spent testing stuff.
All the car had was a Roadstersport 2.5" test pipe and was at 14* timing and that's it.

It made 100RWHP and 94RWTQ.

Using some parts laying around at work, I pieced together some stuff to make an intake that was housed where the left headlight used to be, and my dad built a plexiglass airbox to seal it off from the engine bay. It draws air in through the turn signal duct. Dat ram air yo.
Trying to figure out placement.

I cut the little accordion looking section, rotated it 180 degrees and use a small piece of exhaust pipe the same size as the tubing and this is how it turned out. Not bad.

Building plexi glass box.

And then this is the final version. You can see that at the shop my friend Dan helped me out a bit with a 90 degree silicone coupler and a different filter setup. I'll explain why we did this for the next picture.

So. I tested two different intake variations. One with the normal blue filter just put straight onto the MAF, and the other is a velocity stack from one of the Evolution Motorsports intake kits and one of their filters. On the graph you can see the baseline of 100WHP, then the blue regular filter was 107WHP, and then changing to the velocity stack and red filter gained 2WHP almost everywhere on the curve for a total of 109WHP with just the intake, 2.5" test pipe, and 14* timing.
The peak torque shifted down a bit on the RPM's but I was very happy with solid gains everywhere, and it only cost me about 40 bucks in supplies.
Another thing to mention is that I tried two different crossover tubes, one with the helmholtz resonator and one without, all it did was make the 2000-4000RPM range more wavy with the resonator, and without it the line split through the wavy section meaning there was no difference in torque or power at all. Did three pulls each on each tube to verify. All within 1WHP of each other for the entire graph.

Also I painted the heatshield white with some super high temp paint... it lasted two events before it started to get yellow then did matte black header paint later...

#8
Thread Starter
Elite Member
iTrader: (2)
Joined: Jan 2013
Posts: 1,632
Total Cats: 430
From: Chandler, AZ
One thing I noticed at the track day is that I was forced to shuffle steer in one of the very tight corners. I hate shuffle steering, I don't ever like to let go of the wheel when I'm on track.
The problem is that the manual rack in the R Package is much slower than a normal power steering rack. So we picked up a power steering rack for 40 bucks, looped the lines and stuck it in. Good to go. I thought about doing the full FM depower but it's already easy enough to steer that I'm not going to bother. The only time it is excessively heavy is when the car is moving less than 5MPH.
Then, got the coilovers in.
FM Vmaxx Xxtreme Track Pack (9k/6k springs).
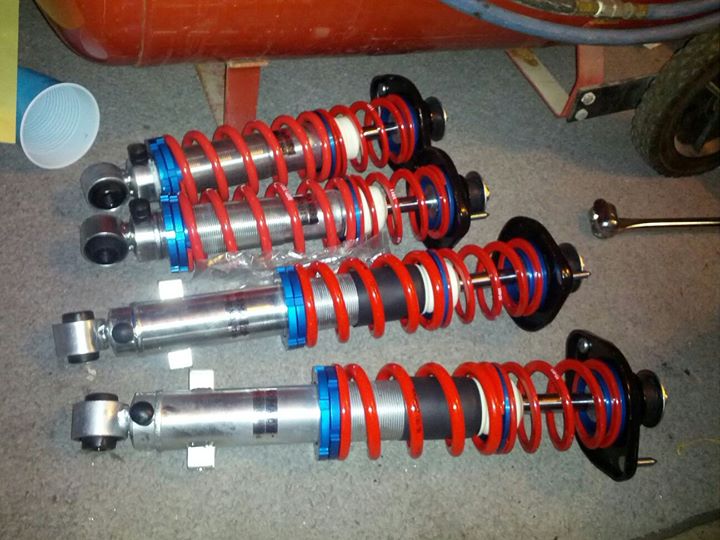
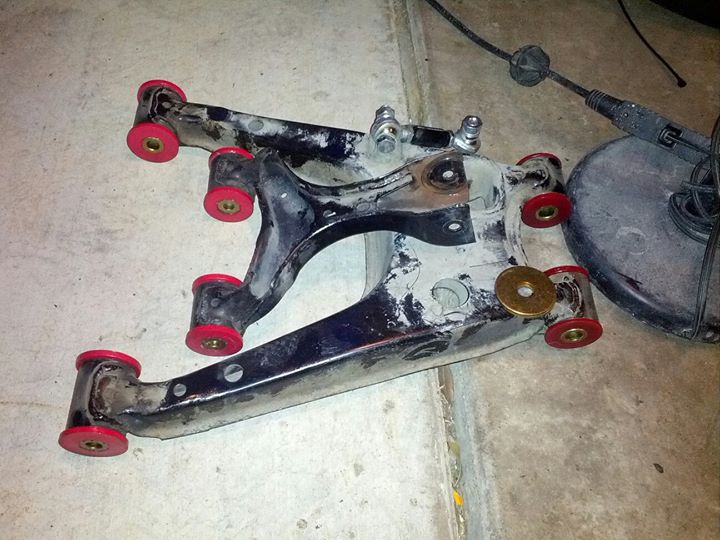
Also shortly after the coilovers we did Energy Suspension Poly suspension bushings all around, as well as poly diff bushings. Really liked this mod, everything just feels tighter and more precise. Can feel the road a lot better.
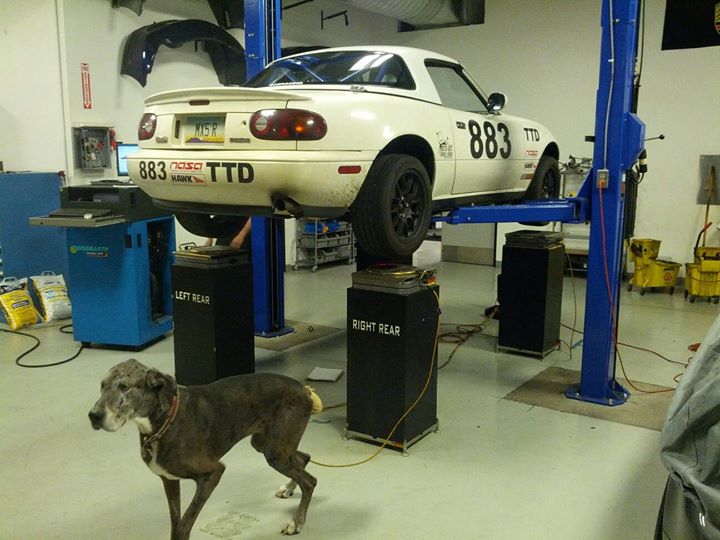
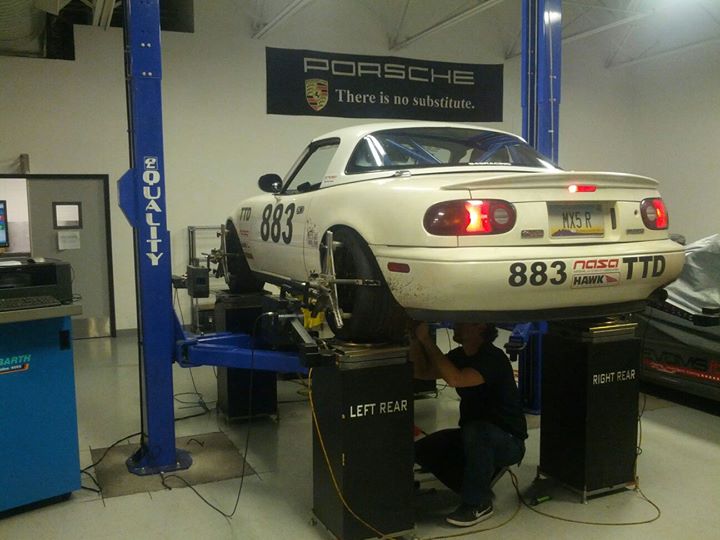
Getting the car corner balanced and aligned by my friend Robert. At the time he was the service department manager at Evolution Motorsports, where I worked. He used to do setup and data acquisition for many race teams including Indy car and different road course series, he knows his ****. Turned out awesome. 50/50 crossweights with me in it, and 50/50 front to rear... also I went with the 949 Racing track alignment.
Car weighed in at 2150 without me in it and at a half a tank of gas, we were still working on weight reduction, like I said about our "weight reduction list" earlier, it happened over time. Weren't quite finished yet.
The problem is that the manual rack in the R Package is much slower than a normal power steering rack. So we picked up a power steering rack for 40 bucks, looped the lines and stuck it in. Good to go. I thought about doing the full FM depower but it's already easy enough to steer that I'm not going to bother. The only time it is excessively heavy is when the car is moving less than 5MPH.
Then, got the coilovers in.
FM Vmaxx Xxtreme Track Pack (9k/6k springs).

Also shortly after the coilovers we did Energy Suspension Poly suspension bushings all around, as well as poly diff bushings. Really liked this mod, everything just feels tighter and more precise. Can feel the road a lot better.

Getting the car corner balanced and aligned by my friend Robert. At the time he was the service department manager at Evolution Motorsports, where I worked. He used to do setup and data acquisition for many race teams including Indy car and different road course series, he knows his ****. Turned out awesome. 50/50 crossweights with me in it, and 50/50 front to rear... also I went with the 949 Racing track alignment.
Car weighed in at 2150 without me in it and at a half a tank of gas, we were still working on weight reduction, like I said about our "weight reduction list" earlier, it happened over time. Weren't quite finished yet.


#9
Thread Starter
Elite Member
iTrader: (2)
Joined: Jan 2013
Posts: 1,632
Total Cats: 430
From: Chandler, AZ
So after the alignment and corner balance and getting everything sorted, we decided to just drive the crap out of it for awhile and learn the car before doing much else.
Also if I hadn't mentioned it before, I found a killer deal from a local guy selling a brand new set of Goodridge stainless braided brake lines. Awesome upgrade for any track car.
Here's the list of mods up to this point, which is late January 2013.
Weight Reduction:
Removed interior
Removed A/C
Removed side windows
Removed Headlight assemblies
Removed airbags, sensors, module.
Gutted Doors
Gutted Rear Deck
Sound Deadening removed
Other misc. stuff removed.
Engine/Intake/Exhaust:
Custom made cold air intake with velocity stack
Roadstersport 2.5" test pipe
NGK Copper Plugs
NGK Blue Plug Wires
Rotella T6 5w-40 Synthetic Diesel Oil
Drivetrain:
Ralco RZ Short Shifter (Do not buy this... took a lot of fab work to get it to work and it's starting to get sloppy.)
Sickspeed 2" Shifter Extender
VooDoo Piano Black 2" Weighted Shift ****
AmsOil 75w-90 GL4 Trans Fluid
AmsOil 75w-90 GL5 Rear Diff Fluid
Cooling:
Samco Blue Silicone Radiator and Ancillary Hose Kit
Secondary Radiator Fan Removed
Suspension/Brakes/Wheels/Chassis:
Replaced stock manual steering rack with de-powered power steering rack (quicker ratio)
Flyin Miata VMaxx Track Pack Coilovers
Flyin Miata Front and Rear Sway Bars
949 Racing SuperMiata Adjustable Endlinks
Energy Suspension Poly Control Arm Bushings Front and Rear
Energy Suspension Poly Diff Bushings
Hawk HP+ Pads
Cheapo O'Reilly's Rotors
949 Racing 6UL Wheels 15x8"
6 Point Custom Roll Bar by Fathead Fabrications
GoodRidge Stainless Braided Brake Lines
Interior/Exterior/Electronics:
OEM Mazda Non-Defroster Hard Top
Ultrashield VS Halo Aluminum Seat 17" (Driver)
Ultrashield Spec Miata Aluminum Seat 17" (Passenger)
Crow Enterprizes 6 Point Harnesses (Blue)
Small Fire Extinguisher
Painted Interior White
Painted Seats White
Painted Rear Deck Area/Trunk Matte Black
Painted Roll Bar Blue
Momo Hub Adapter
NRG Gen 2.0 Quick Release (Black)
Momo Mod.78 Leather Steering Wheel (Flat, 330mm)
Radiator Protective Mesh Mounted Inside Bumper
Driving Lights Mounted In Bumper Opening
The only thing on here that I didn't mention was the radiator protective grille and the driving lights. The lights are just some cheapo square lights from O'Reilly that I mounted in the bumper opening for driving on the street at night. They are technically too low I think but I haven't gotten pulled over yet. You can see them in various track pictures of the car, usually turned sideways to avoid rock damage on the track.
The radiator grill is mounted where the A/C condenser would normally go to guard against rock damage.
So we hit the track!
Here are some different photos from around that time. Might not quite line up with the timeline in the thread but oh well.
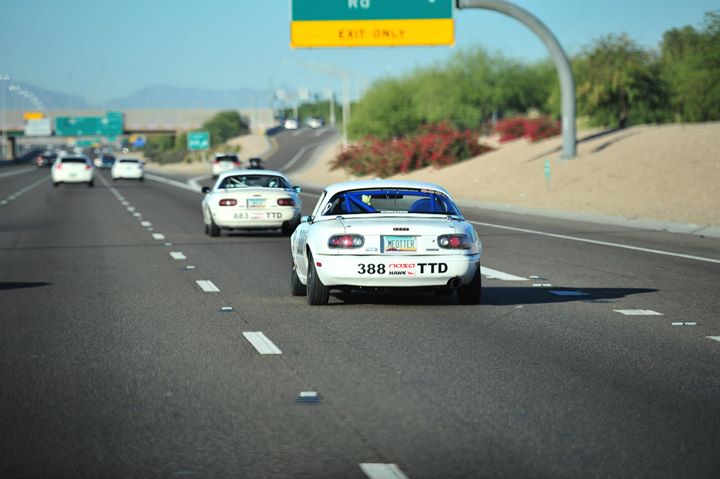
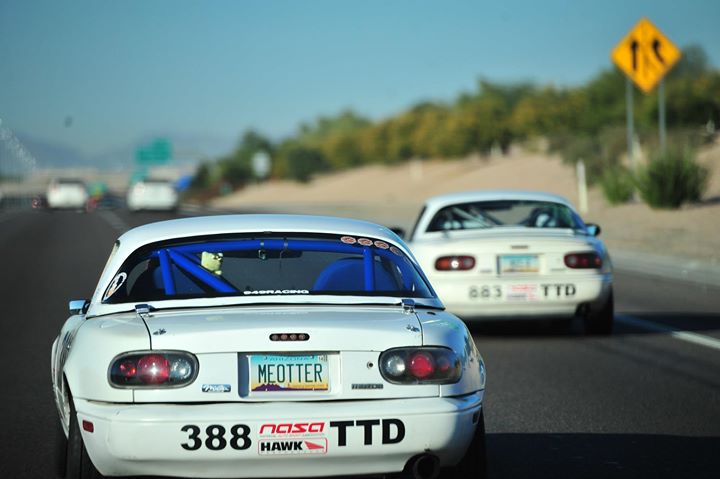
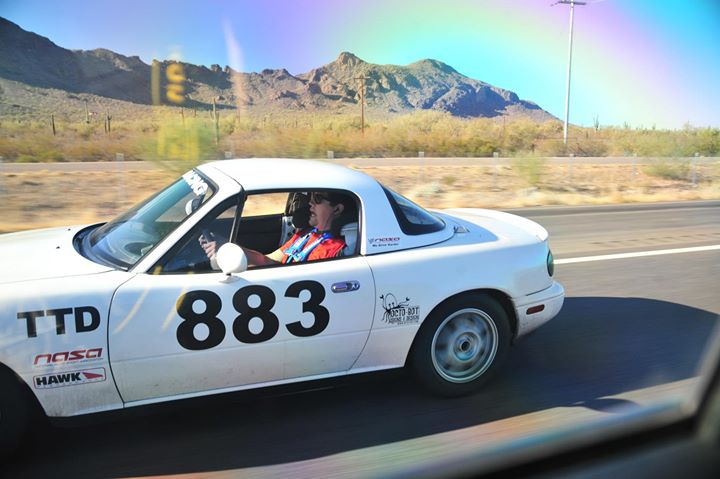
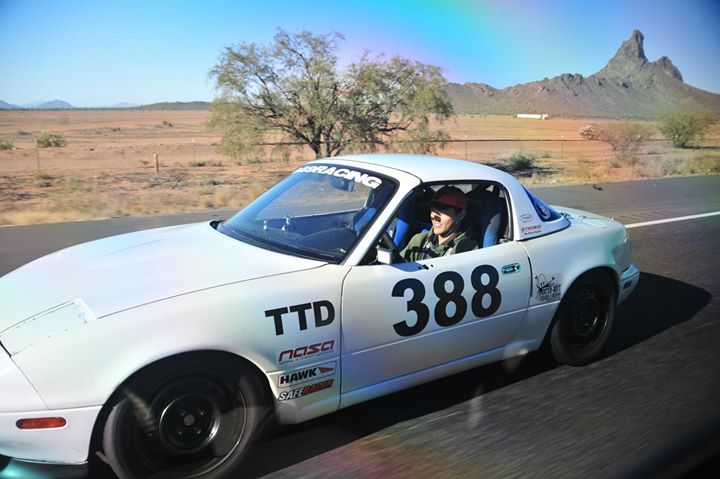
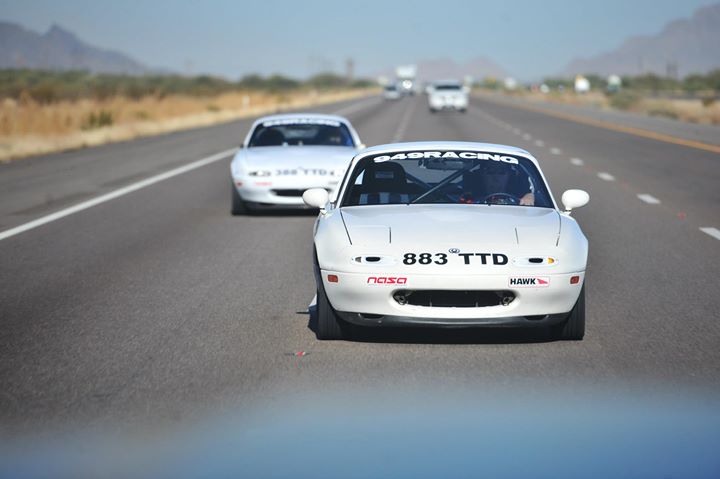
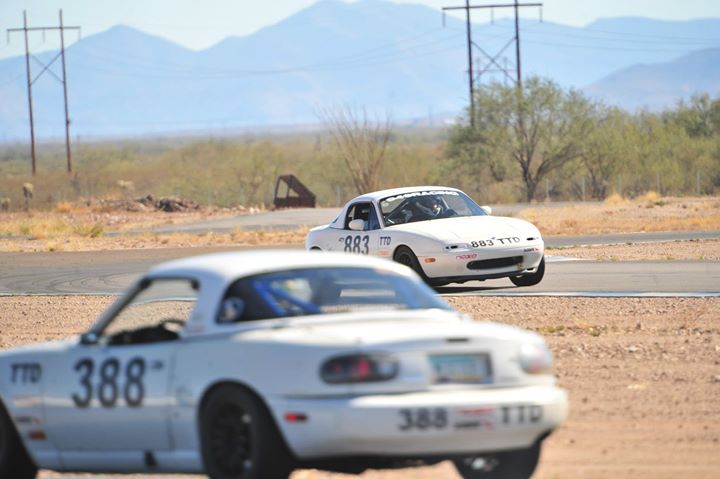
Cruising to P1 Kart Circuit a.k.a. Musselman Honda Circuit on the southern outskirts of Tucson. They have fun little open track days on a super small and technical course. It's like autocross speed on a road course type track, kind of like a stepping stone if I had to compare it to autox and road course driving.
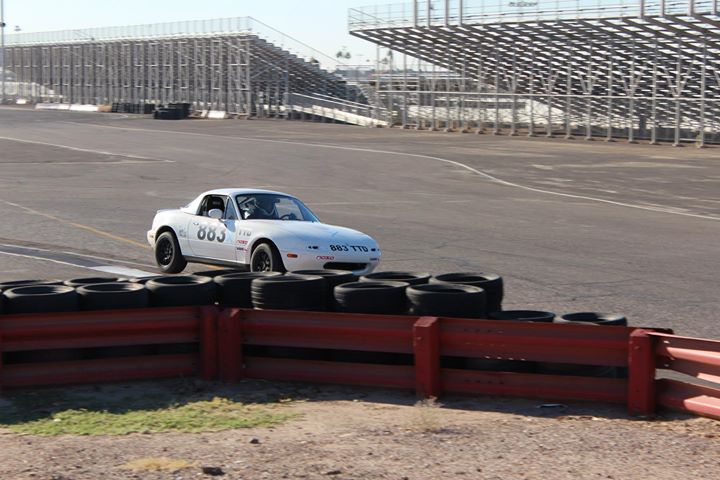
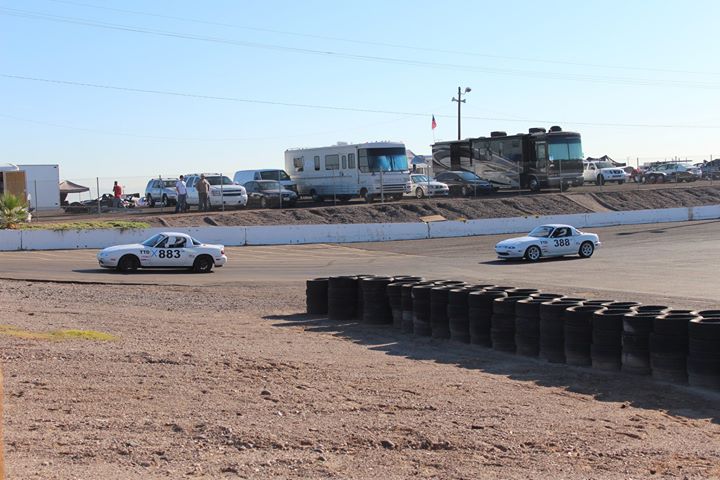
Remember mine is 883 haha.
Light speed flyby:
Getting some seat time at P1/Musselman:
My dad:
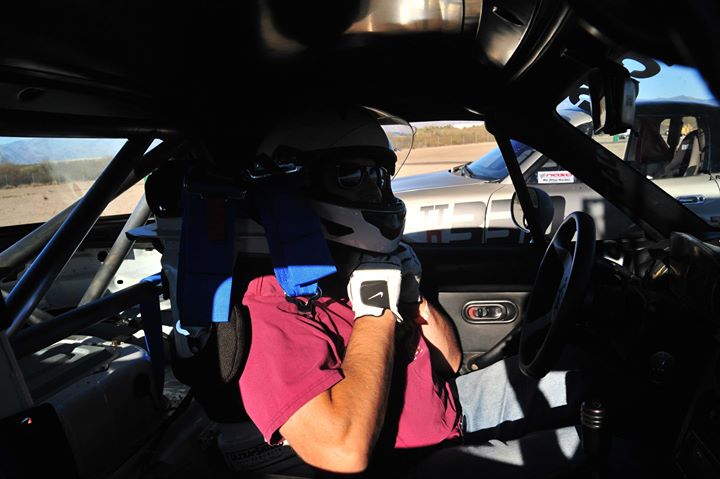
This is at Chuckwalla Valley Raceway in Desert Center, CA near Blythe. My dad is driving in all of these.
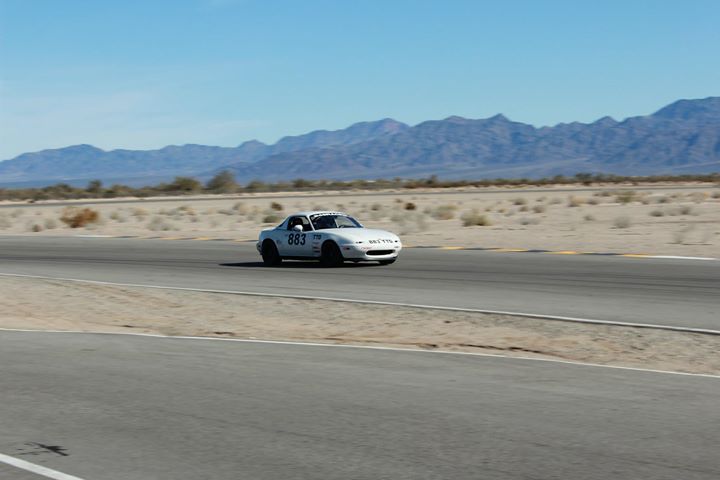
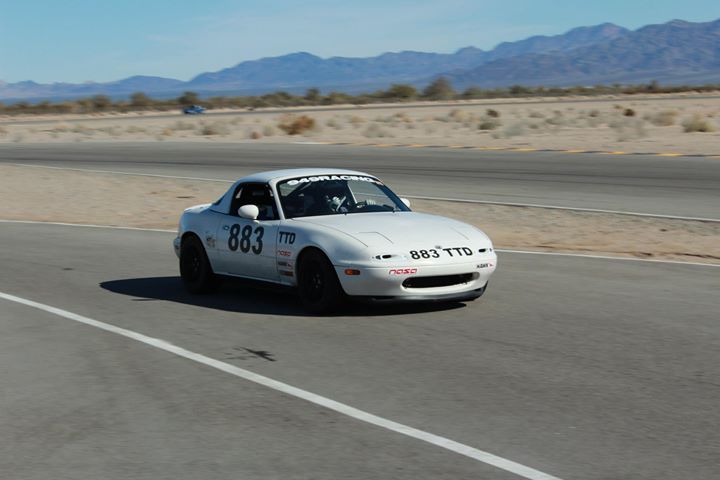
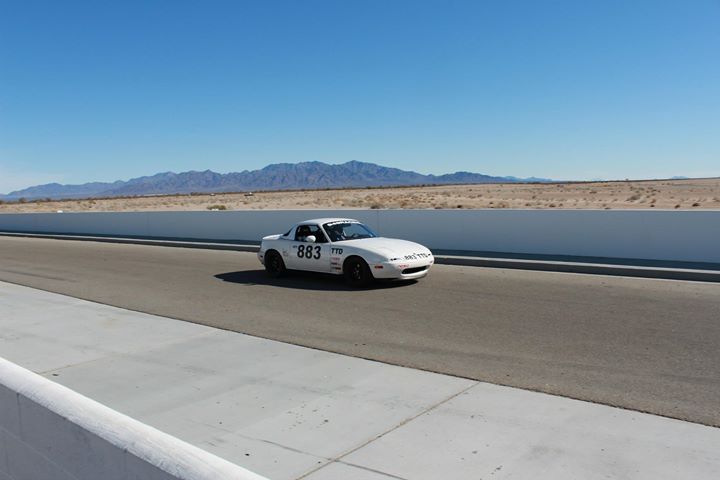
Also if I hadn't mentioned it before, I found a killer deal from a local guy selling a brand new set of Goodridge stainless braided brake lines. Awesome upgrade for any track car.
Here's the list of mods up to this point, which is late January 2013.
Weight Reduction:
Removed interior
Removed A/C
Removed side windows
Removed Headlight assemblies
Removed airbags, sensors, module.
Gutted Doors
Gutted Rear Deck
Sound Deadening removed
Other misc. stuff removed.
Engine/Intake/Exhaust:
Custom made cold air intake with velocity stack
Roadstersport 2.5" test pipe
NGK Copper Plugs
NGK Blue Plug Wires
Rotella T6 5w-40 Synthetic Diesel Oil
Drivetrain:
Ralco RZ Short Shifter (Do not buy this... took a lot of fab work to get it to work and it's starting to get sloppy.)
Sickspeed 2" Shifter Extender
VooDoo Piano Black 2" Weighted Shift ****
AmsOil 75w-90 GL4 Trans Fluid
AmsOil 75w-90 GL5 Rear Diff Fluid
Cooling:
Samco Blue Silicone Radiator and Ancillary Hose Kit
Secondary Radiator Fan Removed
Suspension/Brakes/Wheels/Chassis:
Replaced stock manual steering rack with de-powered power steering rack (quicker ratio)
Flyin Miata VMaxx Track Pack Coilovers
Flyin Miata Front and Rear Sway Bars
949 Racing SuperMiata Adjustable Endlinks
Energy Suspension Poly Control Arm Bushings Front and Rear
Energy Suspension Poly Diff Bushings
Hawk HP+ Pads
Cheapo O'Reilly's Rotors
949 Racing 6UL Wheels 15x8"
6 Point Custom Roll Bar by Fathead Fabrications
GoodRidge Stainless Braided Brake Lines
Interior/Exterior/Electronics:
OEM Mazda Non-Defroster Hard Top
Ultrashield VS Halo Aluminum Seat 17" (Driver)
Ultrashield Spec Miata Aluminum Seat 17" (Passenger)
Crow Enterprizes 6 Point Harnesses (Blue)
Small Fire Extinguisher
Painted Interior White
Painted Seats White
Painted Rear Deck Area/Trunk Matte Black
Painted Roll Bar Blue
Momo Hub Adapter
NRG Gen 2.0 Quick Release (Black)
Momo Mod.78 Leather Steering Wheel (Flat, 330mm)
Radiator Protective Mesh Mounted Inside Bumper
Driving Lights Mounted In Bumper Opening
The only thing on here that I didn't mention was the radiator protective grille and the driving lights. The lights are just some cheapo square lights from O'Reilly that I mounted in the bumper opening for driving on the street at night. They are technically too low I think but I haven't gotten pulled over yet. You can see them in various track pictures of the car, usually turned sideways to avoid rock damage on the track.
The radiator grill is mounted where the A/C condenser would normally go to guard against rock damage.
So we hit the track!
Here are some different photos from around that time. Might not quite line up with the timeline in the thread but oh well.
Cruising to P1 Kart Circuit a.k.a. Musselman Honda Circuit on the southern outskirts of Tucson. They have fun little open track days on a super small and technical course. It's like autocross speed on a road course type track, kind of like a stepping stone if I had to compare it to autox and road course driving.
Remember mine is 883 haha.


Light speed flyby:


Getting some seat time at P1/Musselman:

My dad:

This is at Chuckwalla Valley Raceway in Desert Center, CA near Blythe. My dad is driving in all of these.


#10
Thread Starter
Elite Member
iTrader: (2)
Joined: Jan 2013
Posts: 1,632
Total Cats: 430
From: Chandler, AZ
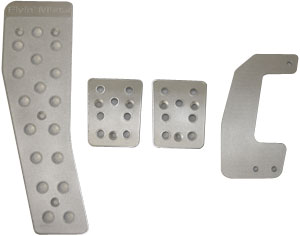
My dad was having trouble with heel toe downshifting. We thought of making a simple pedal extension, but after seeing another competitor eat a tire wall (cosmetic damage, driver was fine) when his foot slipped off the brake (stock rubber covers) we decided to just bite the bullet and get the FM pedal kit. I like this kit a lot, feels great and makes heel toe shifting easier as well.
So, everything was going great and then we had a problem with the car. Front right wheel bearing started to go out. Did some research and saw the horror stories of bearing and/or hub failure. Replaced all four of them with Dorman Hub Assemblies and Precision Wheel Bearings all purchased at O'Reilly's.
Also at Chuckwalla I accidentally shifted from 3rd to 2nd while coming out of a corner... I figured out later that both of our stock motor mounts were pretty much torn in half. What happened is that when I pulled down on the shifter to go to 4th, while letting off the gas, the driveline leaned over since it wasn't under load and lined up 2nd gear for me. I wrapped the tach, the needle went past 8... probably hit about 9000RPM while shitting my pants at the same time. Luckily the car was totally fine, no damage, still made the same power on the dyno, disaster avoided.
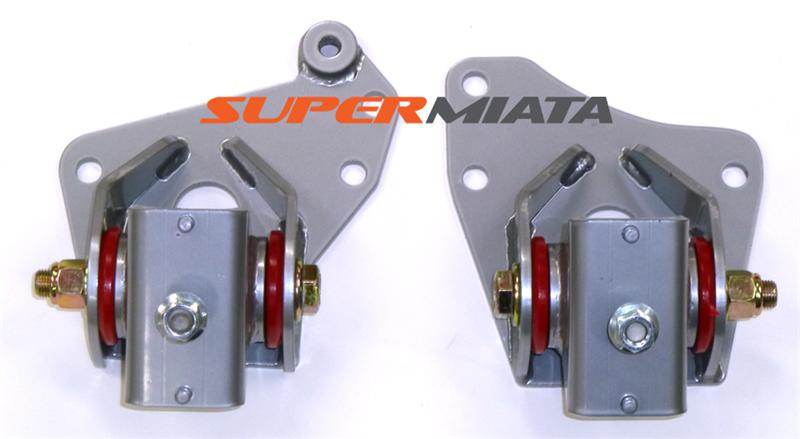
Shelled out for some 949 Racing Poly Motor Mounts. We got the middle stiffness durometer, do yourself a favor and get the softest one... it is still MUCH stiffer than even the Mazdaspeed mounts. With the middle duro the whole car vibrates like a mother between 1000 and 1500RPM but feels awesome on track. Highly suggest these things.
Right after this, the clutch started slipping at approximately 106k miles. It was only slightly and during very quick shifts, instead of grabbing the next gear right away, it would slip down to meet the RPM's like a slipper clutch you see on drag cars even after you let the pedal all the way out. Decided to just take care of it instead of letting it develop into a bigger problem.
Ordered up:
1.6L Exedy Stage 2 Thick Disk Clutch Kit
1.6L Fidanza 7.0lbs Aluminum Flywheel
TechnaFit Stainless Braided Clutch Line (If I did it again I would get the 949 Racing line that deletes the pigtail.)
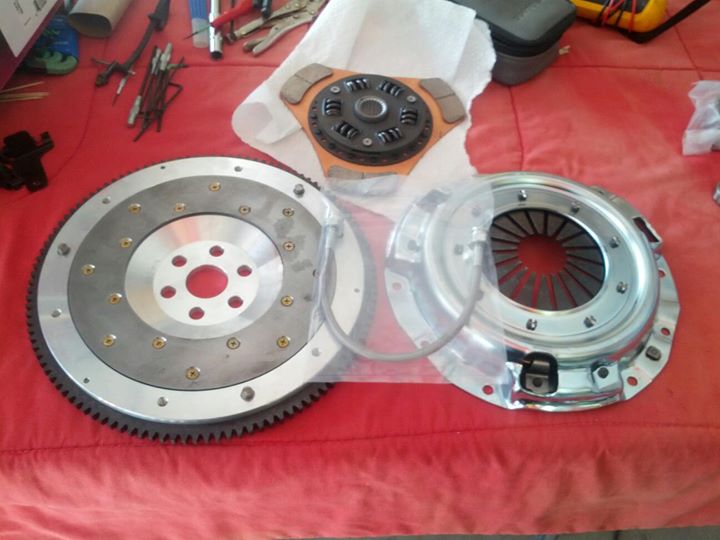
I figured this combo would be good on the track, and with the decreased clutch size in addition to the lightweight parts, would make for a considerable decrease in moment of inertia.
If money were more... abundant... for this build, I would have went with the 949 Racing 7.25" Twin Disk setup.
So I managed to put about 350 city street miles on the new clutch before hitting the track, I was a bit afraid that it wasn't broken in yet but it worked flawlessly. This is definitely the best setup that I can think of without going to something crazy like a tiny twin disk. One of the best upgrades to the car by far. Rev matching got a lot easier, engine was more responsive to throttle input, and the clutch felt great. I was able to shift a bit quicker too because of the decreased mass and moment of inertia of the tiny three puck clutch disk.
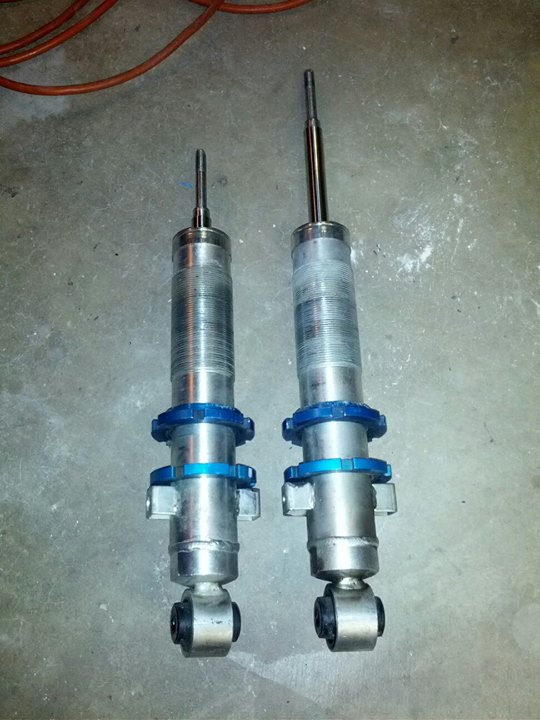
So fast forward a little, I'm working on the car, and I decide to change the shock stiffness... I turn the ****, it feels a little gritty like sand or dirt got in the **** (even though the rubber **** protector was properly fitted the entire time) and then oil starts dripping out of it at an alarming rate... awesome...
If you bounced the car up and down you could hear air traveling through the valving... ON BOTH FRONTS. EFF.
Luckily, they have a 2 year warranty and Flyin' Miata is awesome and sent me some replacements ASAP. I wouldn't hesitate to buy them again since they are backed by a good warranty and the stand up people over at FM. The warranty was process was painless.
I think it was just a singular bad run because the rears and the replacements they sent for the fronts have different batch codes on them and are still doing awesome.
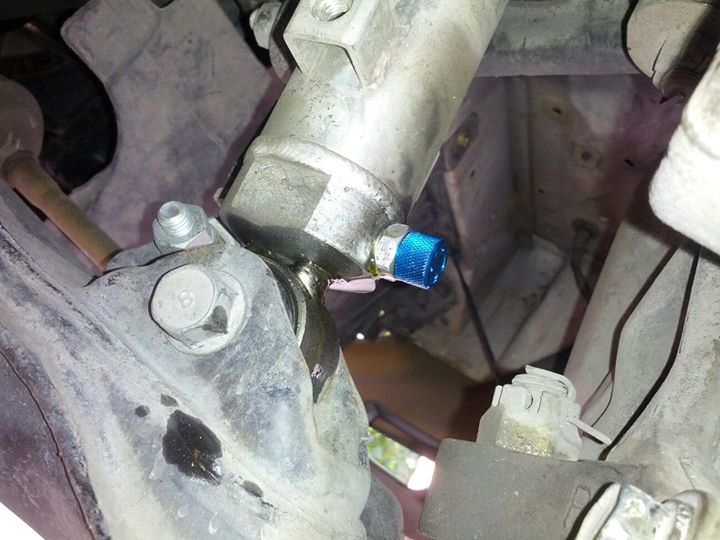
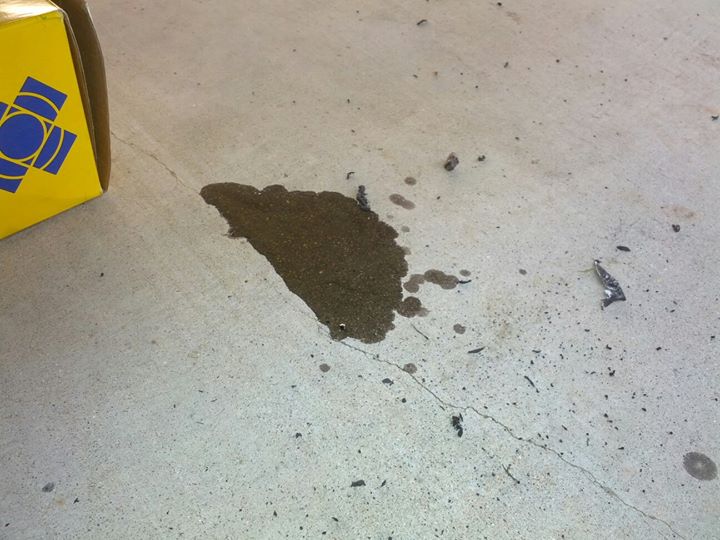
Pulled them off and the shock that wasn't leaking was nearly seized. I could move the shaft at all, even in a vice.

So, everything was going great and then we had a problem with the car. Front right wheel bearing started to go out. Did some research and saw the horror stories of bearing and/or hub failure. Replaced all four of them with Dorman Hub Assemblies and Precision Wheel Bearings all purchased at O'Reilly's.
Also at Chuckwalla I accidentally shifted from 3rd to 2nd while coming out of a corner... I figured out later that both of our stock motor mounts were pretty much torn in half. What happened is that when I pulled down on the shifter to go to 4th, while letting off the gas, the driveline leaned over since it wasn't under load and lined up 2nd gear for me. I wrapped the tach, the needle went past 8... probably hit about 9000RPM while shitting my pants at the same time. Luckily the car was totally fine, no damage, still made the same power on the dyno, disaster avoided.
Shelled out for some 949 Racing Poly Motor Mounts. We got the middle stiffness durometer, do yourself a favor and get the softest one... it is still MUCH stiffer than even the Mazdaspeed mounts. With the middle duro the whole car vibrates like a mother between 1000 and 1500RPM but feels awesome on track. Highly suggest these things.

Right after this, the clutch started slipping at approximately 106k miles. It was only slightly and during very quick shifts, instead of grabbing the next gear right away, it would slip down to meet the RPM's like a slipper clutch you see on drag cars even after you let the pedal all the way out. Decided to just take care of it instead of letting it develop into a bigger problem.
Ordered up:
1.6L Exedy Stage 2 Thick Disk Clutch Kit
1.6L Fidanza 7.0lbs Aluminum Flywheel
TechnaFit Stainless Braided Clutch Line (If I did it again I would get the 949 Racing line that deletes the pigtail.)

I figured this combo would be good on the track, and with the decreased clutch size in addition to the lightweight parts, would make for a considerable decrease in moment of inertia.
If money were more... abundant... for this build, I would have went with the 949 Racing 7.25" Twin Disk setup.
So I managed to put about 350 city street miles on the new clutch before hitting the track, I was a bit afraid that it wasn't broken in yet but it worked flawlessly. This is definitely the best setup that I can think of without going to something crazy like a tiny twin disk. One of the best upgrades to the car by far. Rev matching got a lot easier, engine was more responsive to throttle input, and the clutch felt great. I was able to shift a bit quicker too because of the decreased mass and moment of inertia of the tiny three puck clutch disk.
So fast forward a little, I'm working on the car, and I decide to change the shock stiffness... I turn the ****, it feels a little gritty like sand or dirt got in the **** (even though the rubber **** protector was properly fitted the entire time) and then oil starts dripping out of it at an alarming rate... awesome...
If you bounced the car up and down you could hear air traveling through the valving... ON BOTH FRONTS. EFF.
Luckily, they have a 2 year warranty and Flyin' Miata is awesome and sent me some replacements ASAP. I wouldn't hesitate to buy them again since they are backed by a good warranty and the stand up people over at FM. The warranty was process was painless.
I think it was just a singular bad run because the rears and the replacements they sent for the fronts have different batch codes on them and are still doing awesome.


Pulled them off and the shock that wasn't leaking was nearly seized. I could move the shaft at all, even in a vice.

#11
Thread Starter
Elite Member
iTrader: (2)
Joined: Jan 2013
Posts: 1,632
Total Cats: 430
From: Chandler, AZ
So. The time finally came that my dad was getting ready to get his Time Trials license. We figured we would slot the car into TTE with a dyno reclass, so it was time for the biggest round of mods yet.
First: Throw the cat on and get emissions and reg done for the next 2 years now that I'm about to make it even harder to pass visual inspection... The charcoal canister was still in at this point. Passed with flying colors and the guy didn't stall it even with the 7lbs flywheel and tiny grabby clutch.
Now for the parts that are going on in this round of mods...
Engine/Intake/Exhaust:
Exhintake Cam Mod (Use another exhaust cam on the intake side)
New NB Purple Injectors (265cc @ 3bar)
5xRacing Adjustable Fuel Pressure Regulator
5xRacing In-Line Fuel Pressure Gauge
Racing Beat 4-1 Header (Ceramic Coated Black Inside and Out)
Fel-Pro Exhaust Manifold Gasket
Racing Beat 2.25" ID Test Pipe (Ceramic Coated Black Inside and Out)
Roadstersport 3 2.25" ID Exhaust System (Connecting Pipe Ceramic Coated Black Inside and Out)
Gates Racing Timing Belt
Gates T-Belt Idler/Tensioner
Gates Racing Water Pump/Alternator Belt
Nissan Pump Co. Water Pump (made in Japan) with 3D Cast Impeller
Fel-Pro Front Main Seal, Cam Seals, and Valve Cover Gasket
Fresh NGK OE Spec Copper Plugs
Cooling:
Mishimoto 55mm Radiator
NRG Air Diversion Panel
Secondary Radiator Fan Removed
Stant 16PSI Radiator Cap (Mishimoto cap is known to fail)
Stant SuperStat 180* Thermostat with jiggle pin drilled out
Suspension/Brakes/Wheels/Chassis:
Hawk HT-10 Pads
More Cheapo O'Reilly's Rotors
Bleed with ATE Super Blue
So before I broke down and ordered the RB 4-1 header, I came across a craigslist find. Unknown brand header with a JASMA tag that came over on a JDM 1.8L. Runners had cracking at the flange. 20 bucks. ****.
I took it to my buddy Al (he is the fabricator at Evolution Motorsports where I worked at the time) and he welded it up really nice in exchange for some Guinness. Score.
I did some research and I think it is the HKS header for 1.8L, but I tried to put it in and of course it hits the steering shaft... bad...
Right hand drive only. Womp womp. So it still sits in the garage, I don't even know what to do with it.
Also in this picture, Roadstersport 3 catback, and we switched to the RB test pipe so it was 2.25" and matched the header and catback pipe size.
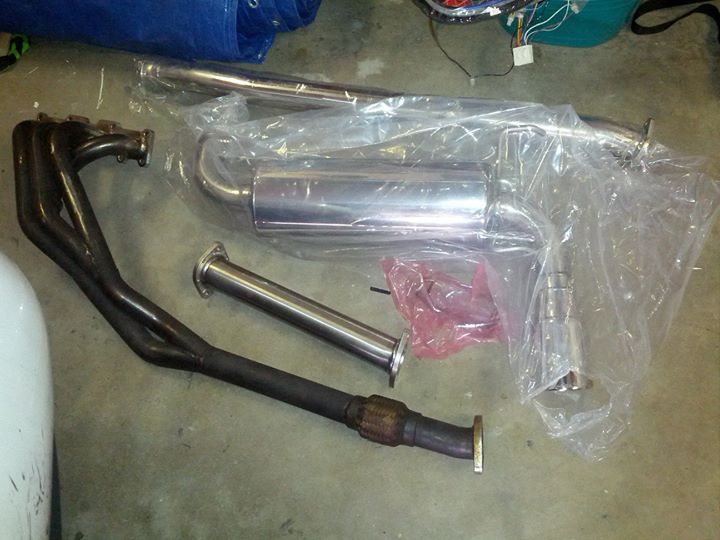
Partz:
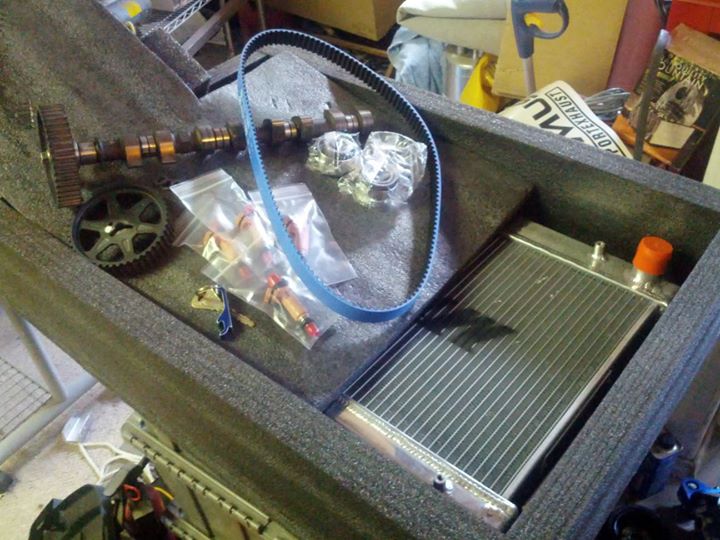
Installing with help from Noz, he helped out a shitload with getting all these mods on the car.
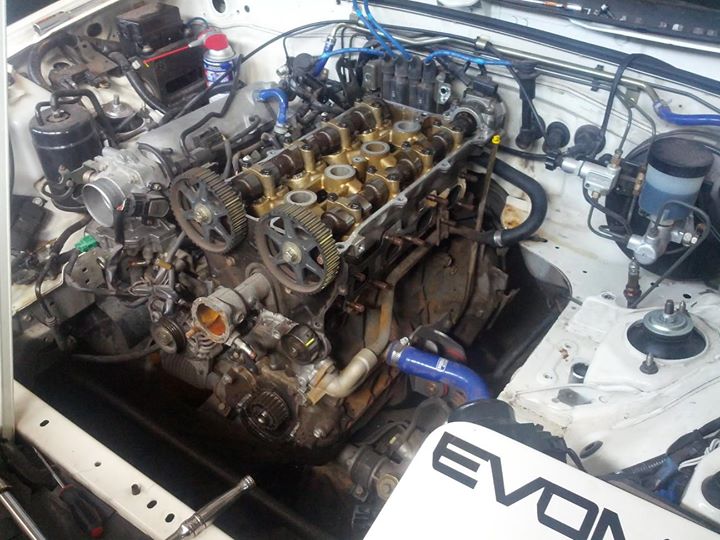
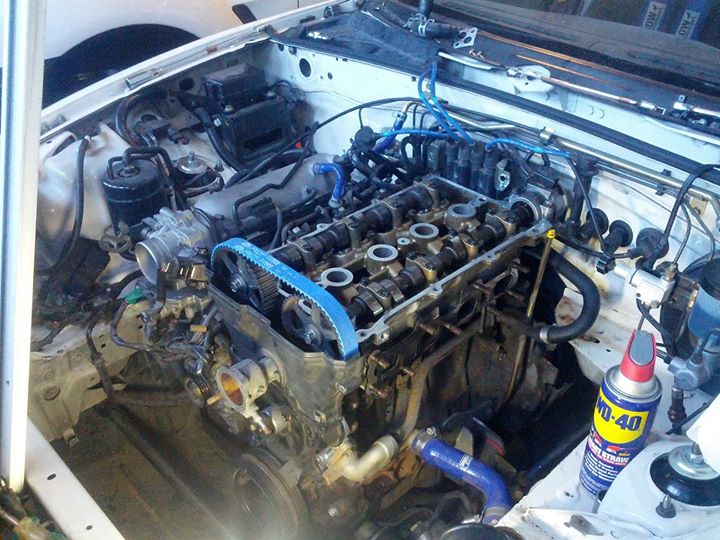
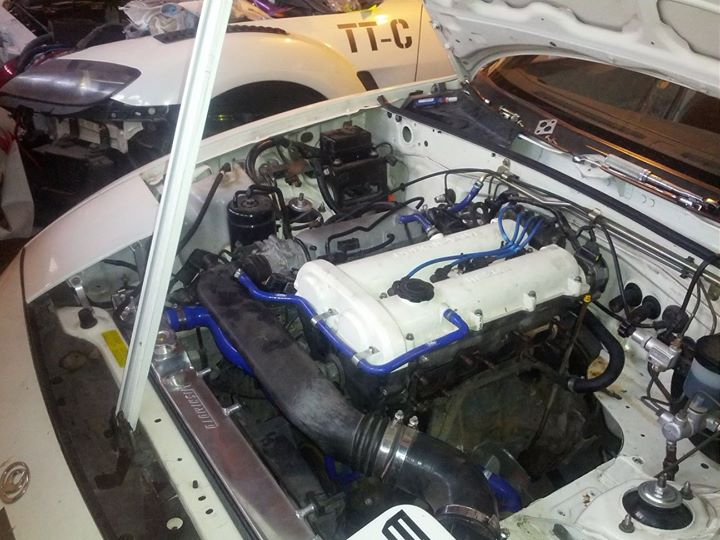
Shinyyyyyyyyyyy
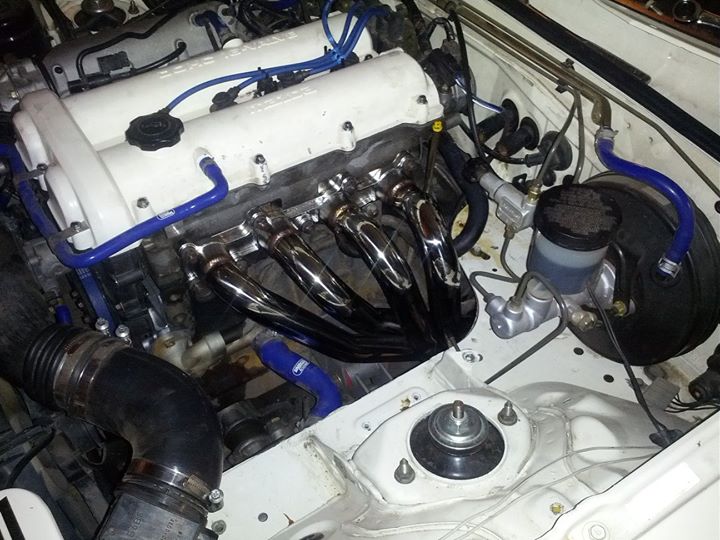
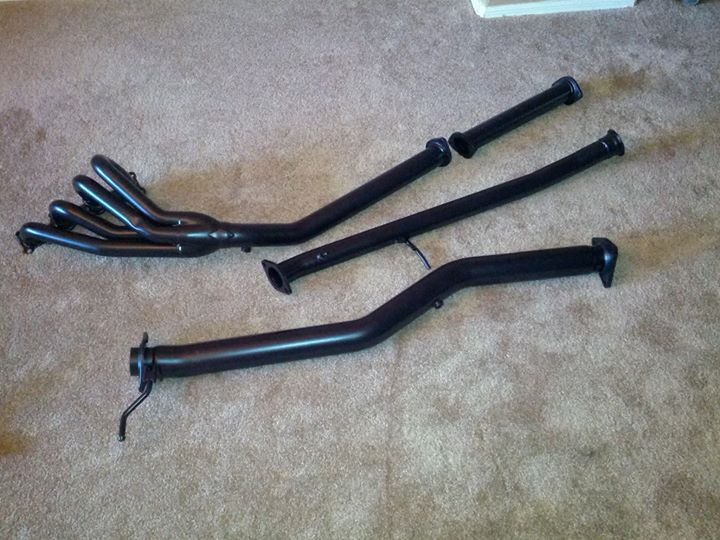
Also later I got the header, test pipe, and midpipe all ceramic coated on the outside and inside. Helped cut down on heat in the engine bay a lot. Ignore the bottom pipe, that's a 3" ID midpipe for my RX-8.
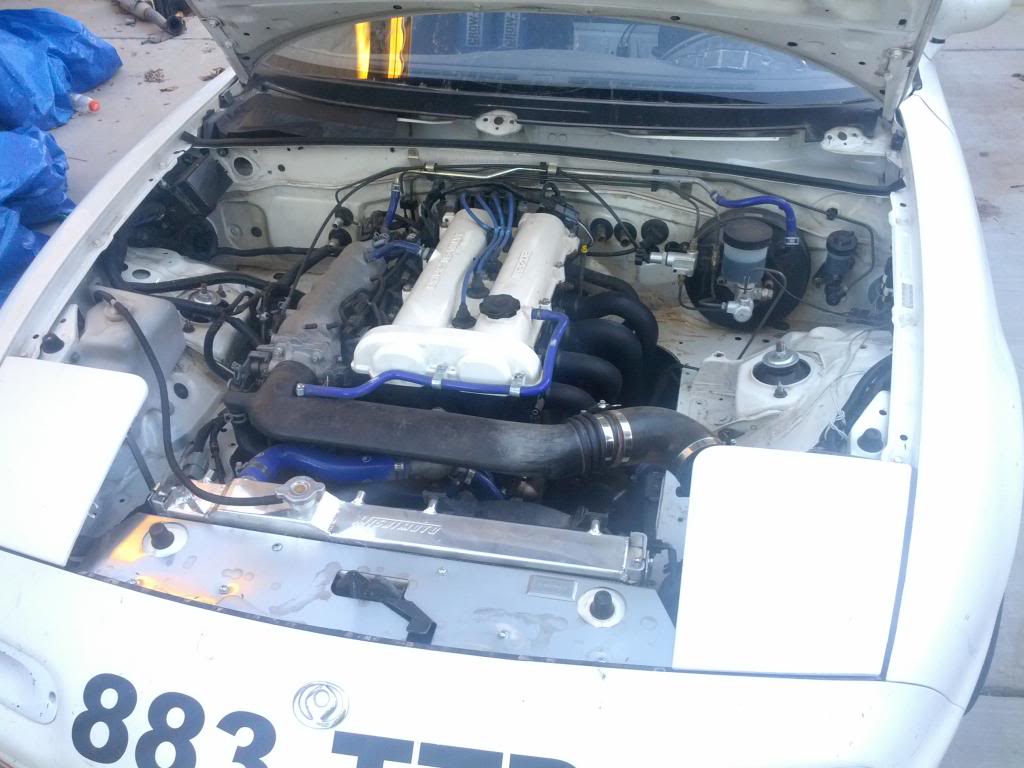
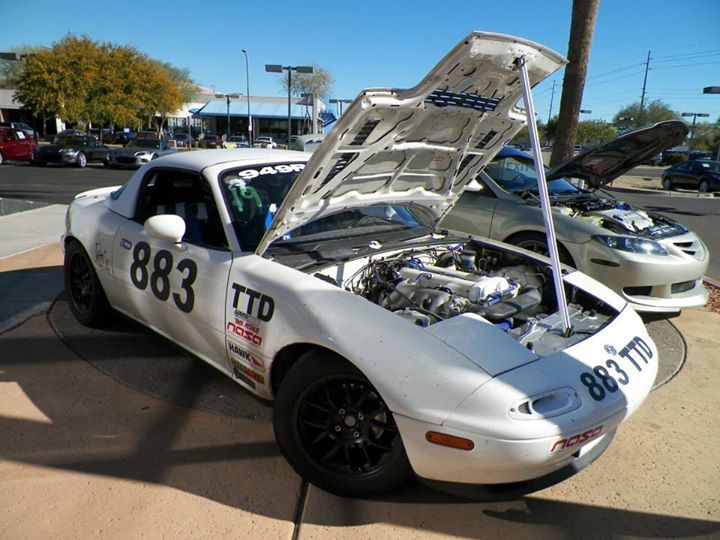
Recent engine bay shot, this is what it looks like at the moment:
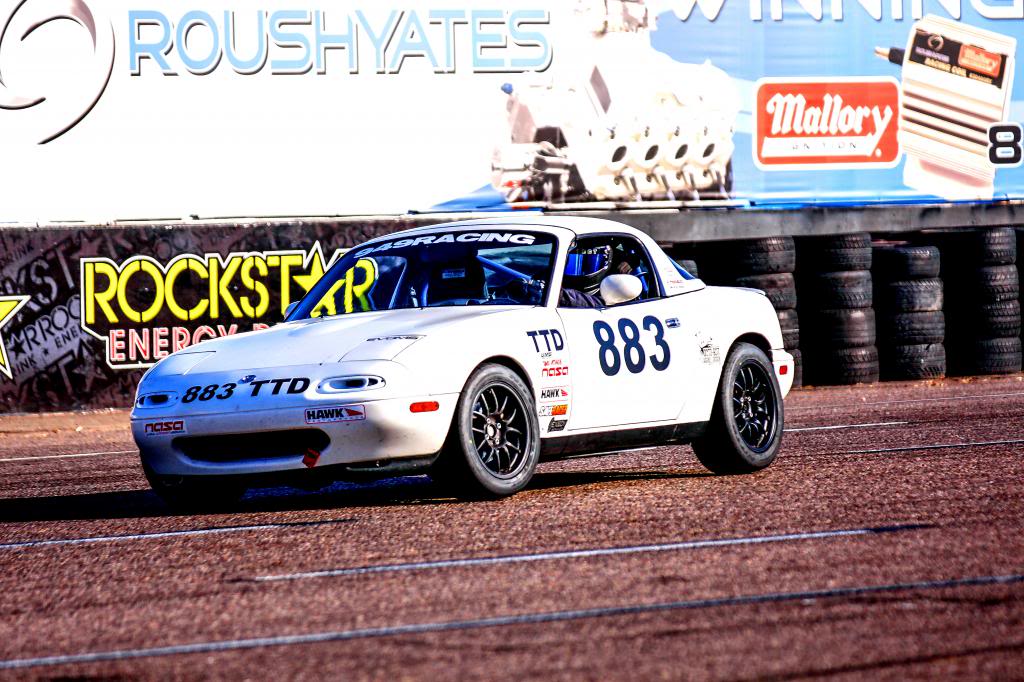
To the track! Everything was awesome during the shakedown.
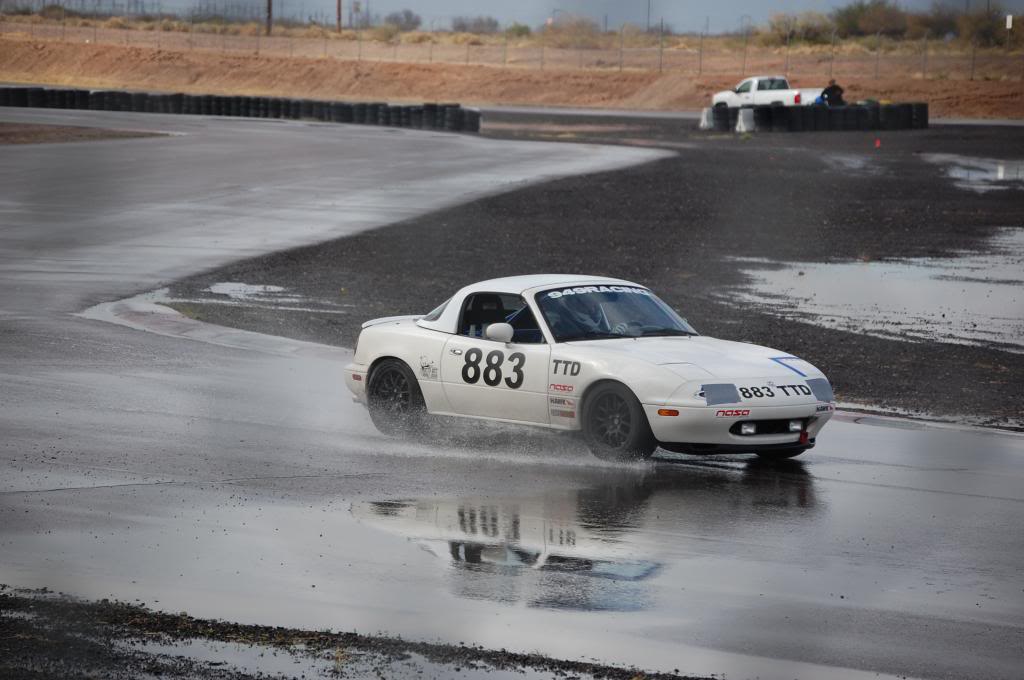
Getting sideways in the tower turn at Firebird Main, tire walls and k rails on both sides lol.
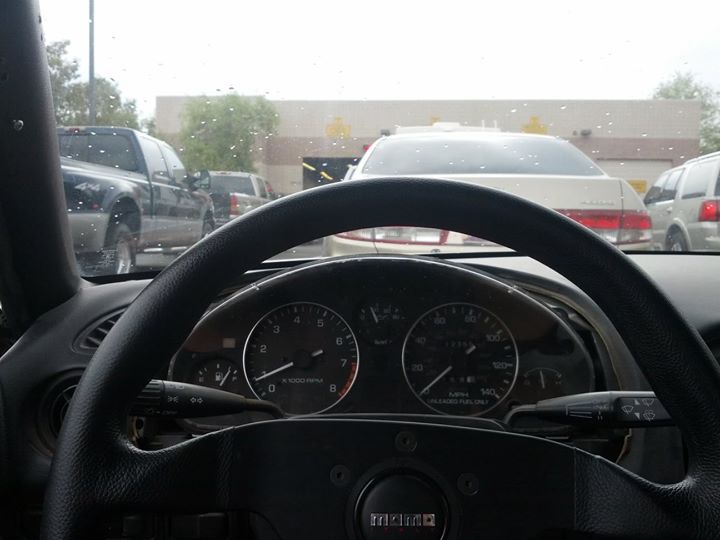
This event was a good learning experience (we never get rain trackdays here in AZ), except for the fact that our intake is not... optimal... when it is raining. Sucked down enough water to **** off the MAF and had to dry that out then tape everything up. We ended up losing the O2 sensor a week later, probably related. Threw a Denso unit in, good to go. But ever since then our gauge cluster is kinda... twitchy. Thoroughly cleaned and re-did all of the grounds and still no change. It doesn't really affect performance but maybe I'll address it later.
Also we decided that for better cooling we were going to copy something I did on my RX-8. This company called GenRight OffRoad sells louver panels that are made for jeeps, they rivet on to almost anything.
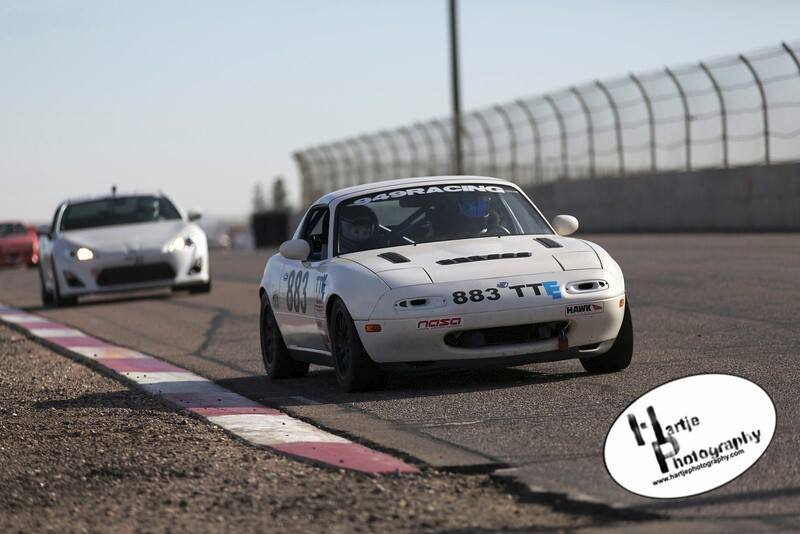
Cut some holes, rivet them on, bam, better cooling and improved aerodynamics.
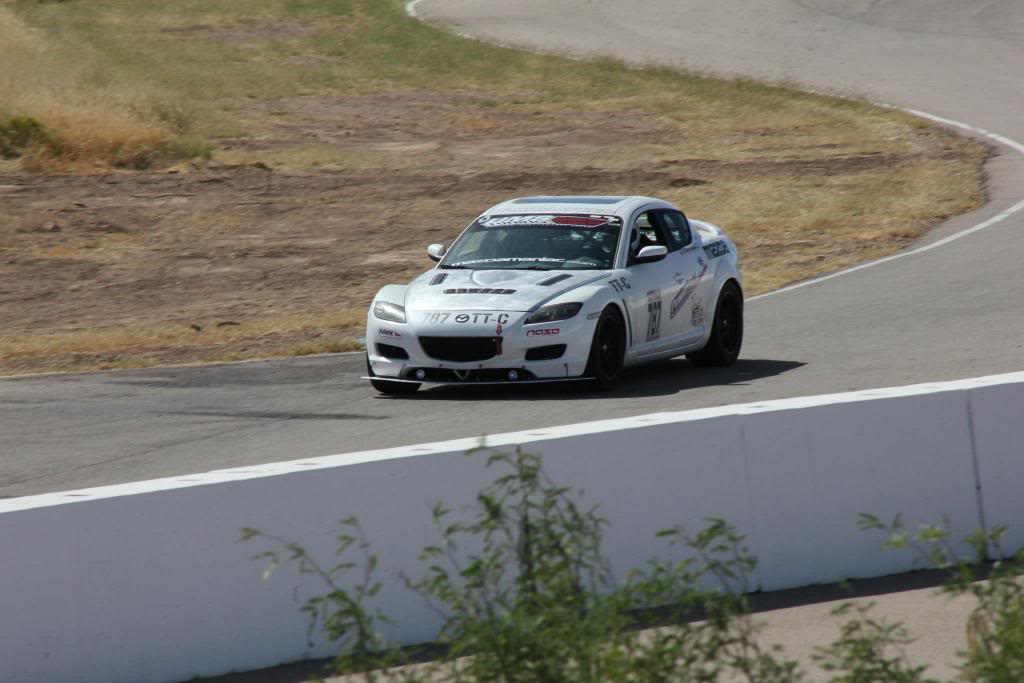
I can't find a picture of them on the Miata... here is what they look like on the RX-8, I'll throw in a picture of them on the Miata later.
EDIT: Here are some pictures of them on the Miata.
First: Throw the cat on and get emissions and reg done for the next 2 years now that I'm about to make it even harder to pass visual inspection... The charcoal canister was still in at this point. Passed with flying colors and the guy didn't stall it even with the 7lbs flywheel and tiny grabby clutch.

Now for the parts that are going on in this round of mods...
Engine/Intake/Exhaust:
Exhintake Cam Mod (Use another exhaust cam on the intake side)
New NB Purple Injectors (265cc @ 3bar)
5xRacing Adjustable Fuel Pressure Regulator
5xRacing In-Line Fuel Pressure Gauge
Racing Beat 4-1 Header (Ceramic Coated Black Inside and Out)
Fel-Pro Exhaust Manifold Gasket
Racing Beat 2.25" ID Test Pipe (Ceramic Coated Black Inside and Out)
Roadstersport 3 2.25" ID Exhaust System (Connecting Pipe Ceramic Coated Black Inside and Out)
Gates Racing Timing Belt
Gates T-Belt Idler/Tensioner
Gates Racing Water Pump/Alternator Belt
Nissan Pump Co. Water Pump (made in Japan) with 3D Cast Impeller
Fel-Pro Front Main Seal, Cam Seals, and Valve Cover Gasket
Fresh NGK OE Spec Copper Plugs
Cooling:
Mishimoto 55mm Radiator
NRG Air Diversion Panel
Secondary Radiator Fan Removed
Stant 16PSI Radiator Cap (Mishimoto cap is known to fail)
Stant SuperStat 180* Thermostat with jiggle pin drilled out
Suspension/Brakes/Wheels/Chassis:
Hawk HT-10 Pads
More Cheapo O'Reilly's Rotors
Bleed with ATE Super Blue
So before I broke down and ordered the RB 4-1 header, I came across a craigslist find. Unknown brand header with a JASMA tag that came over on a JDM 1.8L. Runners had cracking at the flange. 20 bucks. ****.
I took it to my buddy Al (he is the fabricator at Evolution Motorsports where I worked at the time) and he welded it up really nice in exchange for some Guinness. Score.
I did some research and I think it is the HKS header for 1.8L, but I tried to put it in and of course it hits the steering shaft... bad...
Right hand drive only. Womp womp. So it still sits in the garage, I don't even know what to do with it.
Also in this picture, Roadstersport 3 catback, and we switched to the RB test pipe so it was 2.25" and matched the header and catback pipe size.

Partz:

Installing with help from Noz, he helped out a shitload with getting all these mods on the car.


Shinyyyyyyyyyyy

Also later I got the header, test pipe, and midpipe all ceramic coated on the outside and inside. Helped cut down on heat in the engine bay a lot. Ignore the bottom pipe, that's a 3" ID midpipe for my RX-8.

Recent engine bay shot, this is what it looks like at the moment:

To the track! Everything was awesome during the shakedown.
Getting sideways in the tower turn at Firebird Main, tire walls and k rails on both sides lol.

This event was a good learning experience (we never get rain trackdays here in AZ), except for the fact that our intake is not... optimal... when it is raining. Sucked down enough water to **** off the MAF and had to dry that out then tape everything up. We ended up losing the O2 sensor a week later, probably related. Threw a Denso unit in, good to go. But ever since then our gauge cluster is kinda... twitchy. Thoroughly cleaned and re-did all of the grounds and still no change. It doesn't really affect performance but maybe I'll address it later.

Also we decided that for better cooling we were going to copy something I did on my RX-8. This company called GenRight OffRoad sells louver panels that are made for jeeps, they rivet on to almost anything.
Cut some holes, rivet them on, bam, better cooling and improved aerodynamics.
I can't find a picture of them on the Miata... here is what they look like on the RX-8, I'll throw in a picture of them on the Miata later.

EDIT: Here are some pictures of them on the Miata.


#12
Thread Starter
Elite Member
iTrader: (2)
Joined: Jan 2013
Posts: 1,632
Total Cats: 430
From: Chandler, AZ
So, to the Dyno.
We had to use a DynoJet because that is the only legal Dyno for doing 2WD cars for NASA classing purposes. We were going to use a Dyno Reclass to fit into TT-E, meaning that we no longer had to take points for engine modifications or for weight reduction, but instead were given a minimum competition weight and a maximum wheel horsepower that we have to follow.
First pull on the dyno it belts out 130.8 RWHP. Sick, more than I thought it would make.
After running some numbers we figure that 128RWHP would be a good horsepower limit (you also have to give yourself some room for error in case you get put on the Dyno for a compliance check). I dumped a little fuel on it with the 5xRacing adjustable FPR and backed the timing off to 10* and got a repeatable 125 RWHP. Perfect.
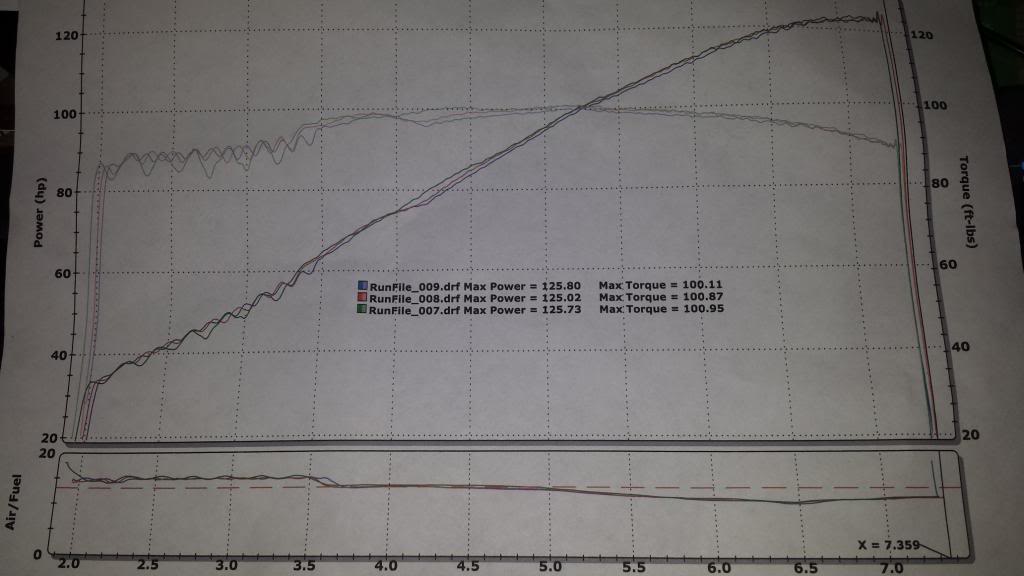
So the dyno reclass that we got back was base class TT-E, Maximum RWHP of 128, and Minimum Competition Weight of 2355. I weighed the car again, and with half a tank of gas and me in it, was 2370. Wicked.
The mods taking up our 19 points to stay in class:
+10 Hoosier R6 Compound
-1 225mm Tire Width
+3 Limited Slip Diff
+2 Sway Bars
+3 Adjustable Shocks
+2 Springs
At this point I'm thinking, time to go rape and pillage TT-E with this completely dialed car, and we go out and do some events and it's awesome. It felt a bit faster but... not really that much for some reason, but hey I dyno'd it and that thing doesn't lie so I was happy.
The only thing I didn't like is that on the stock ECU I can only move the fuel line up or down... and for some reason once it got to closed loop, it would run at 13.0:1, dip WAY the hell down to 10.8:1 and then go back up to about 12.0:1 by the time it redlined.
WTB engine management...
So we submit all our info, register the car as a Team Car with my dad being the owner and myself the secondary driver, so that I can jump out for a session to set a good time. I'm still about 1.5 seconds faster than him on local tracks and anywhere from 3 to 7 seconds faster on tracks he hasn't had a lot of seat time on.
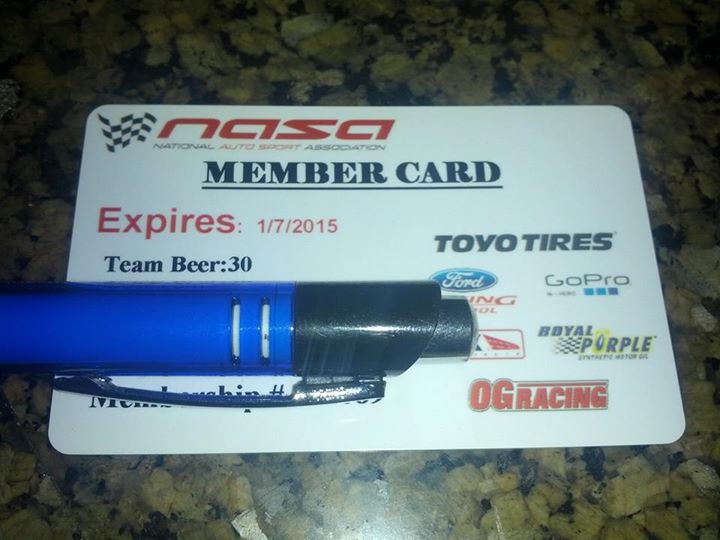
We had to think of a name, so we thought of the time when the track goes cold, and when the track goes cold it is always Beer:30. We are more of a drinking team with a racing problem anyways. :icon_cheers:
They let the name through LOL:
You can have any brew you want... as long as it's a Corona.
/F&F
Here's the bad news...
I just recently had the car on a Dynapack at UMS Tuning for the UMS Tuning Time Attack Series compliance checks, and it only pulled 113RWHP, and usually Keith's Dynojet (the one I used earlier) and Tony's (UMS Tuning) Dynapack read almost identical. WTF.
I noticed another thing while it was on Tony's dyno, it redlined at 6,900RPM's instead of 7,200RPM like it did on the Dynojet. Here's where I fucked up. I did some research only to find out the tach is off and really the '94 1.8L redlines at 6,900RPM. Tony set the RPM on his dyno using a digital timing light, so that the RPM's were correct on the dyno. On the Dynojet, I held the car at 4,000RPM while looking at the tach to set the RPM... you can see how this shifted the entire torque curve up on my Dynojet graph by almost 350RPM's. If you do the math and shift the line over to the right spot, I really only made about 115WHP on the Dynojet since horsepower is a function of torque.
Right now I took a little fuel out and bumped the timing back to about 15* BTDC and it feels a lot better. I need to hit the dynojet again, do it properly this time, and adjust my dyno reclass to be more competitive.
Anyways, after that wall of text, here's a recent video at Inde Motorsports Ranch. In an earlier session that day I was only 0.9 seconds off of the TT-E track record. ON A SET OF 225 NT01! Seriously wish I would have had some Hoosiers that day, I would have had a fighting chance at setting a track record that day.
I had just grown enough ***** to throw the car into the turn after the main straight without even touching the brakes. Just a little lift, and throw it in. For my super fast lap I almost didn't even let off... nearly flat out and I dipped 2 wheels off on the exit pretty good, that's the kind of stuff on track that I live for, it was pretty terrifying to say the least. Data says the fastest I got through there that weekend was 96MPH.
We had to use a DynoJet because that is the only legal Dyno for doing 2WD cars for NASA classing purposes. We were going to use a Dyno Reclass to fit into TT-E, meaning that we no longer had to take points for engine modifications or for weight reduction, but instead were given a minimum competition weight and a maximum wheel horsepower that we have to follow.
First pull on the dyno it belts out 130.8 RWHP. Sick, more than I thought it would make.
After running some numbers we figure that 128RWHP would be a good horsepower limit (you also have to give yourself some room for error in case you get put on the Dyno for a compliance check). I dumped a little fuel on it with the 5xRacing adjustable FPR and backed the timing off to 10* and got a repeatable 125 RWHP. Perfect.

So the dyno reclass that we got back was base class TT-E, Maximum RWHP of 128, and Minimum Competition Weight of 2355. I weighed the car again, and with half a tank of gas and me in it, was 2370. Wicked.
The mods taking up our 19 points to stay in class:
+10 Hoosier R6 Compound
-1 225mm Tire Width
+3 Limited Slip Diff
+2 Sway Bars
+3 Adjustable Shocks
+2 Springs
At this point I'm thinking, time to go rape and pillage TT-E with this completely dialed car, and we go out and do some events and it's awesome. It felt a bit faster but... not really that much for some reason, but hey I dyno'd it and that thing doesn't lie so I was happy.
The only thing I didn't like is that on the stock ECU I can only move the fuel line up or down... and for some reason once it got to closed loop, it would run at 13.0:1, dip WAY the hell down to 10.8:1 and then go back up to about 12.0:1 by the time it redlined.
WTB engine management...
So we submit all our info, register the car as a Team Car with my dad being the owner and myself the secondary driver, so that I can jump out for a session to set a good time. I'm still about 1.5 seconds faster than him on local tracks and anywhere from 3 to 7 seconds faster on tracks he hasn't had a lot of seat time on.
We had to think of a name, so we thought of the time when the track goes cold, and when the track goes cold it is always Beer:30. We are more of a drinking team with a racing problem anyways. :icon_cheers:
They let the name through LOL:

You can have any brew you want... as long as it's a Corona.
/F&F

Here's the bad news...
I just recently had the car on a Dynapack at UMS Tuning for the UMS Tuning Time Attack Series compliance checks, and it only pulled 113RWHP, and usually Keith's Dynojet (the one I used earlier) and Tony's (UMS Tuning) Dynapack read almost identical. WTF.
I noticed another thing while it was on Tony's dyno, it redlined at 6,900RPM's instead of 7,200RPM like it did on the Dynojet. Here's where I fucked up. I did some research only to find out the tach is off and really the '94 1.8L redlines at 6,900RPM. Tony set the RPM on his dyno using a digital timing light, so that the RPM's were correct on the dyno. On the Dynojet, I held the car at 4,000RPM while looking at the tach to set the RPM... you can see how this shifted the entire torque curve up on my Dynojet graph by almost 350RPM's. If you do the math and shift the line over to the right spot, I really only made about 115WHP on the Dynojet since horsepower is a function of torque.
Right now I took a little fuel out and bumped the timing back to about 15* BTDC and it feels a lot better. I need to hit the dynojet again, do it properly this time, and adjust my dyno reclass to be more competitive.
Anyways, after that wall of text, here's a recent video at Inde Motorsports Ranch. In an earlier session that day I was only 0.9 seconds off of the TT-E track record. ON A SET OF 225 NT01! Seriously wish I would have had some Hoosiers that day, I would have had a fighting chance at setting a track record that day.
I had just grown enough ***** to throw the car into the turn after the main straight without even touching the brakes. Just a little lift, and throw it in. For my super fast lap I almost didn't even let off... nearly flat out and I dipped 2 wheels off on the exit pretty good, that's the kind of stuff on track that I live for, it was pretty terrifying to say the least. Data says the fastest I got through there that weekend was 96MPH.
#13
Thread Starter
Elite Member
iTrader: (2)
Joined: Jan 2013
Posts: 1,632
Total Cats: 430
From: Chandler, AZ
Current date for reference at this point is about March 2014.
One mod that I really liked that I forgot to mention was in this little video. This is the guy that I bought my cam from to do the exhintake mod lol.
Other stuff that is happening:
Just got some TRMotorsports C3M's in 15x9 and put some 225/45R15 Hoosier R6's on them. Will take pics soon. Barely fit with roll and slight pull. Paint on the fenders was not a happy camper...
Just got the master cylinder brake brace and a nylon shift **** from Garage Star. Installing soon.
Have most of the components to do an oil cooler setup, that is on deck as well.
Remote oil filter setup as well.
Miataroadster Short Shifter from this last group buy should be shipping next week. Hopefully it gets here before next weekend because I'll be out at the track. I will be sure to get some footage with my new GoPro Hero 3+ Black Edition. It is ballin'.
Stuff I want to do in the future:
COP Conversion and Standalone ECU. Probably Adaptronic PnP.
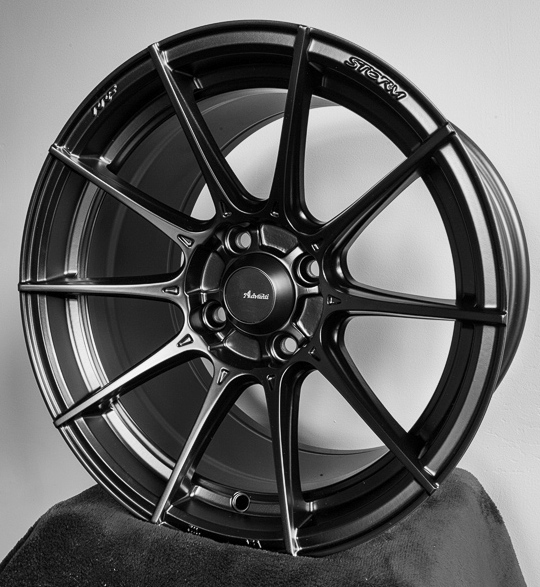
Also just ordered some of these... 15x9 with 550kg load rating and 12.2lbs.
To recap, here is where the car stands in terms of parts I've thrown at it etc.
Weight Reduction:
Removed interior
Removed A/C
Removed side windows
Removed Charcoal Canister and EGR System
Removed Headlight assemblies
Removed airbags, sensors, module.
Gutted Doors
Gutted Rear Deck
Sound Deadening removed
Engine/Intake/Exhaust:
Exhintake Cam Mod (Use another exhaust cam on the intake side)
New NB Purple Injectors (265cc @ 3bar)
5xRacing Adjustable Fuel Pressure Regulator
5xRacing In-Line Fuel Pressure Gauge
Custom made cold air intake with velocity stack sealed off from engine bay
Racing Beat 4-1 Header (Ceramic Coated Black Inside and Out)
Racing Beat 2.25" ID Test Pipe (Ceramic Coated Black Inside and Out)
Roadstersport 3 2.25" ID Exhaust System (Connecting Pipe Ceramic Coated Black Inside and Out)
Gates Racing Timing Belt
Gates T-Belt Idler/Tensioner
Gates Racing Serpentine Belt for water pump/alternator
Nissan Pump Co. Water Pump (made in Japan) with 3D Cast Impeller
New Front/Rear Main, Cam and Valve Cover Seals
NGK Copper Plugs
NGK Blue Plug Wires
Rotella T6 5w-40 Synthetic Diesel Oil (No HLA tick at all)
Drivetrain:
Fidanza 7.0lbs Flywheel for 1.6L (Converted to 1.6L Clutch/Flywheel. Smaller and lighter)
Exedy Stage 2 Clutch (3 Puck Thick Disk NON-HD) for 1.6L
TechnaFit Stainless Braided Clutch Line
Ralco RZ Short Shifter (Do not buy this... took a lot of fab work to get it to work and it's starting to get sloppy.)
Sickspeed 2" Shifter Extender
VooDoo Piano Black 2" Weighted Shift ****
AmsOil 75w-90 GL4 Trans Fluid
AmsOil 75w-90 GL5 Rear Diff Fluid
Cooling:
Mishimoto 55mm Radiator
NRG Air Diversion Panel
Samco Blue Silicone Radiator and Ancillary Hose Kit
Secondary Radiator Fan Removed
Stant 16PSI Radiator Cap
Stant SuperStat 180* Thermostat with jiggle pin drilled out
Suspension/Brakes/Wheels/Chassis:
Replaced stock manual steering rack with de-powered power steering rack (quicker ratio)
Flyin Miata VMaxx Track Pack Coilovers (9k/6k)
Flyin Miata Front and Rear Sway Bars
949 Racing SuperMiata Adjustable Endlinks
Energy Suspension Poly Control Arm Bushings Front and Rear
Energy Suspension Poly Diff Bushings
949 Racing Poly Motor Mounts (Get the softest ones, we did medium and it's too harsh even for a track car)
Hawk HT-10 Pads
Cheapo O'Reilly's Rotors
949 Racing 6UL Wheels 15x8"
TRMotorsports C3M 15x9"
Stock 14" Hollow Spokes for the Street
6 Point Custom Roll Bar by Fathead Fabrications
All New Wheel Hubs and Bearings
GoodRidge Stainless Braided Brake Lines
Interior/Exterior/Electronics:
OEM Mazda Non-Defroster Hard Top
Ultrashield VS Halo Aluminum Seat 17" (Driver)
Ultrashield Spec Miata Aluminum Seat 17" (Passenger)
Crow Enterprizes 6 Point Harnesses (Blue)
Trans Tunnel Heat Shield
Small Fire Extinguisher
Painted Interior White
Painted Seats White
Painted Rear Deck Area/Trunk Matte Black
Painted Roll Bar Blue
Momo Hub Adapter
NRG Gen 2.0 Quick Release (Black)
Momo Mod.78 Leather Steering Wheel (Flat, 330mm)
Radiator Protective Mesh Mounted Inside Bumper
Driving Lights Mounted In Bumper Opening
Mad stickers yo
One mod that I really liked that I forgot to mention was in this little video. This is the guy that I bought my cam from to do the exhintake mod lol.
Other stuff that is happening:
Just got some TRMotorsports C3M's in 15x9 and put some 225/45R15 Hoosier R6's on them. Will take pics soon. Barely fit with roll and slight pull. Paint on the fenders was not a happy camper...
Just got the master cylinder brake brace and a nylon shift **** from Garage Star. Installing soon.
Have most of the components to do an oil cooler setup, that is on deck as well.
Remote oil filter setup as well.
Miataroadster Short Shifter from this last group buy should be shipping next week. Hopefully it gets here before next weekend because I'll be out at the track. I will be sure to get some footage with my new GoPro Hero 3+ Black Edition. It is ballin'.
Stuff I want to do in the future:
COP Conversion and Standalone ECU. Probably Adaptronic PnP.
Also just ordered some of these... 15x9 with 550kg load rating and 12.2lbs.

To recap, here is where the car stands in terms of parts I've thrown at it etc.
Weight Reduction:
Removed interior
Removed A/C
Removed side windows
Removed Charcoal Canister and EGR System
Removed Headlight assemblies
Removed airbags, sensors, module.
Gutted Doors
Gutted Rear Deck
Sound Deadening removed
Engine/Intake/Exhaust:
Exhintake Cam Mod (Use another exhaust cam on the intake side)
New NB Purple Injectors (265cc @ 3bar)
5xRacing Adjustable Fuel Pressure Regulator
5xRacing In-Line Fuel Pressure Gauge
Custom made cold air intake with velocity stack sealed off from engine bay
Racing Beat 4-1 Header (Ceramic Coated Black Inside and Out)
Racing Beat 2.25" ID Test Pipe (Ceramic Coated Black Inside and Out)
Roadstersport 3 2.25" ID Exhaust System (Connecting Pipe Ceramic Coated Black Inside and Out)
Gates Racing Timing Belt
Gates T-Belt Idler/Tensioner
Gates Racing Serpentine Belt for water pump/alternator
Nissan Pump Co. Water Pump (made in Japan) with 3D Cast Impeller
New Front/Rear Main, Cam and Valve Cover Seals
NGK Copper Plugs
NGK Blue Plug Wires
Rotella T6 5w-40 Synthetic Diesel Oil (No HLA tick at all)
Drivetrain:
Fidanza 7.0lbs Flywheel for 1.6L (Converted to 1.6L Clutch/Flywheel. Smaller and lighter)
Exedy Stage 2 Clutch (3 Puck Thick Disk NON-HD) for 1.6L
TechnaFit Stainless Braided Clutch Line
Ralco RZ Short Shifter (Do not buy this... took a lot of fab work to get it to work and it's starting to get sloppy.)
Sickspeed 2" Shifter Extender
VooDoo Piano Black 2" Weighted Shift ****
AmsOil 75w-90 GL4 Trans Fluid
AmsOil 75w-90 GL5 Rear Diff Fluid
Cooling:
Mishimoto 55mm Radiator
NRG Air Diversion Panel
Samco Blue Silicone Radiator and Ancillary Hose Kit
Secondary Radiator Fan Removed
Stant 16PSI Radiator Cap
Stant SuperStat 180* Thermostat with jiggle pin drilled out
Suspension/Brakes/Wheels/Chassis:
Replaced stock manual steering rack with de-powered power steering rack (quicker ratio)
Flyin Miata VMaxx Track Pack Coilovers (9k/6k)
Flyin Miata Front and Rear Sway Bars
949 Racing SuperMiata Adjustable Endlinks
Energy Suspension Poly Control Arm Bushings Front and Rear
Energy Suspension Poly Diff Bushings
949 Racing Poly Motor Mounts (Get the softest ones, we did medium and it's too harsh even for a track car)
Hawk HT-10 Pads
Cheapo O'Reilly's Rotors
949 Racing 6UL Wheels 15x8"
TRMotorsports C3M 15x9"
Stock 14" Hollow Spokes for the Street
6 Point Custom Roll Bar by Fathead Fabrications
All New Wheel Hubs and Bearings
GoodRidge Stainless Braided Brake Lines
Interior/Exterior/Electronics:
OEM Mazda Non-Defroster Hard Top
Ultrashield VS Halo Aluminum Seat 17" (Driver)
Ultrashield Spec Miata Aluminum Seat 17" (Passenger)
Crow Enterprizes 6 Point Harnesses (Blue)
Trans Tunnel Heat Shield
Small Fire Extinguisher
Painted Interior White
Painted Seats White
Painted Rear Deck Area/Trunk Matte Black
Painted Roll Bar Blue
Momo Hub Adapter
NRG Gen 2.0 Quick Release (Black)
Momo Mod.78 Leather Steering Wheel (Flat, 330mm)
Radiator Protective Mesh Mounted Inside Bumper
Driving Lights Mounted In Bumper Opening
Mad stickers yo
#14
Thread Starter
Elite Member
iTrader: (2)
Joined: Jan 2013
Posts: 1,632
Total Cats: 430
From: Chandler, AZ
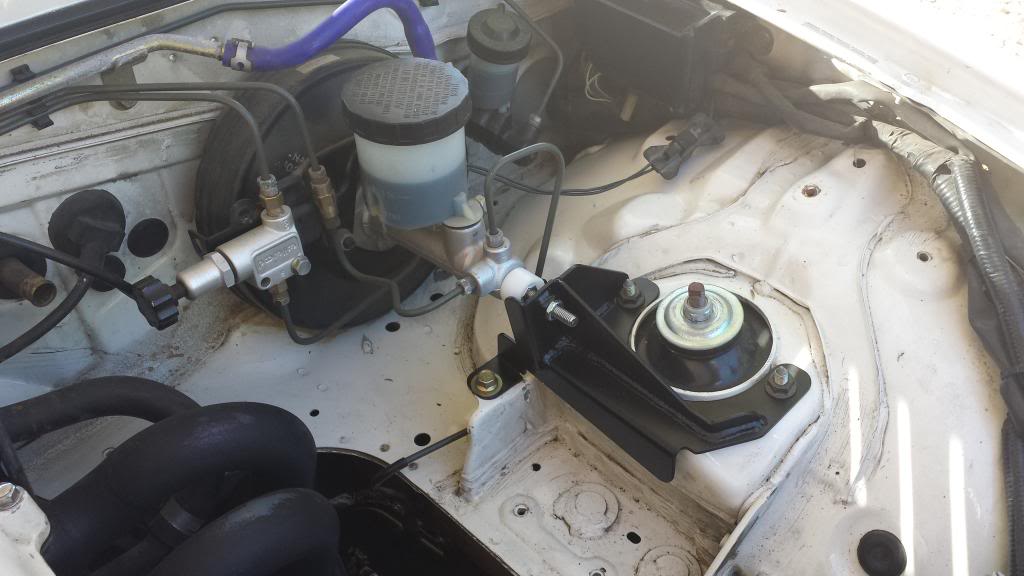
GarageStar brake master cylinder brace installed. I can notice a difference in pedal feel on the street, it feels good. Just more... crisp and precise I guess would be my best description. Can't wait to try it out on track next weekend.
Also switched out to the GarageStar nylon shift ****. It only weighs somewhere around 40 grams, it's super light. It is 1.75" in diameter. I actually like it better than my 2" VooDoo magnum which is considerably heavier. It just feels more raw since all the extra weight isn't there to dampen some of the feedback you get through the shifter. Can't wait till the Miataroadster short shifter gets here so I can try it out with that. They were supposed to ship out last Monday the 3rd, but I emailed them and they still haven't shipped... waiting on the delrin shifter bushings to be machined apparently. Hopefully it makes it here in time to drop in for the event next weekend.
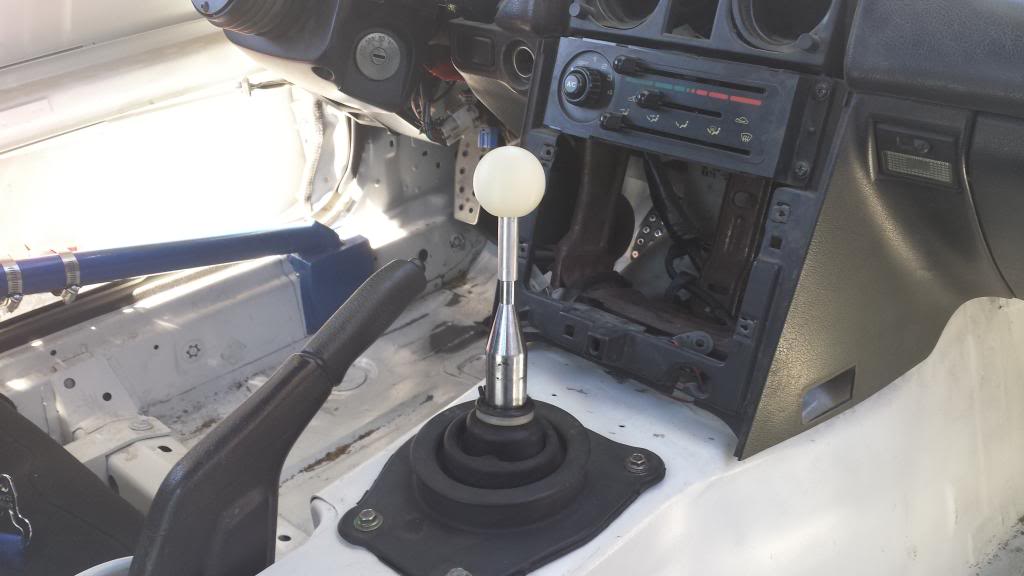

Also switched out to the GarageStar nylon shift ****. It only weighs somewhere around 40 grams, it's super light. It is 1.75" in diameter. I actually like it better than my 2" VooDoo magnum which is considerably heavier. It just feels more raw since all the extra weight isn't there to dampen some of the feedback you get through the shifter. Can't wait till the Miataroadster short shifter gets here so I can try it out with that. They were supposed to ship out last Monday the 3rd, but I emailed them and they still haven't shipped... waiting on the delrin shifter bushings to be machined apparently. Hopefully it makes it here in time to drop in for the event next weekend.

#15
Thread Starter
Elite Member
iTrader: (2)
Joined: Jan 2013
Posts: 1,632
Total Cats: 430
From: Chandler, AZ
Middle of March 2014:
Shifter came in today (**** yeah) in time for the track weekend! USPS 2 day flat rate ftw.
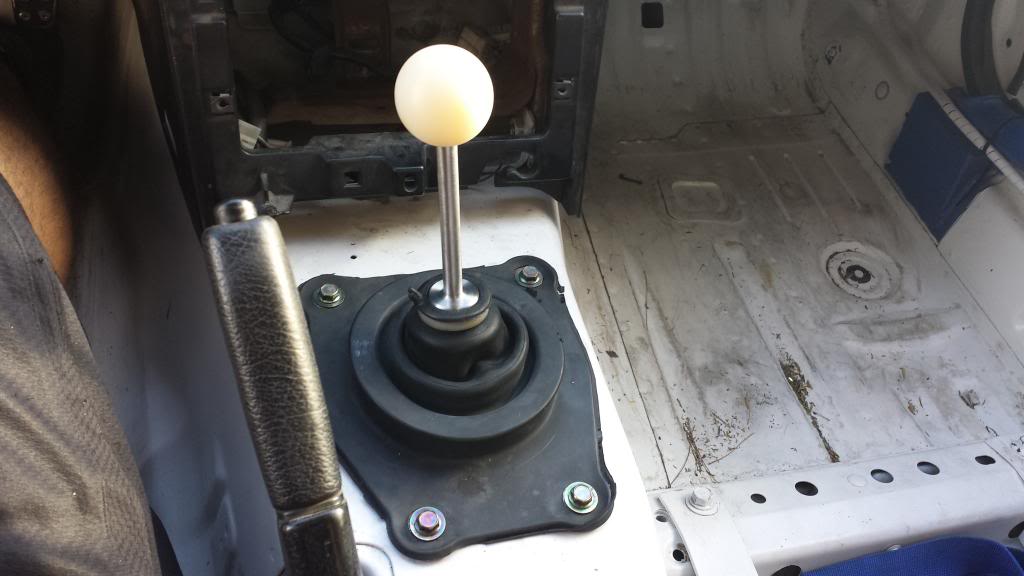
Miataroadster Shifter Tall, Straight, and Bootless is what I went with. Looks great in a race car that doesn't have a center console. It's about the same height as the old Ralco RZ shifter with 2" extension on it. Maybe a tiny bit shorter.
Pros:
-Super solid
-High quality
-Everything lines right up and drops right in
-Feels awesome, no more shifter slop or shifter rotating in the turret.
-Shifts are nice and short and crisp even with the taller **** location.
Cons:
-According to the group buy thread on M.net, it was supposed to be $330 shipped, with a $25 dollar discount for omitting the upper rubber boot. My invoice was $325 minus $25 but there is a $20 shipping charge? What gives? Shipping was supposed to be included AND it came in a flat rate box that I know for a fact costs $12.35 to ship anywhere in the country lol.
-Did I mention already that this thing cost me $320 bucks... it's awesome but it's expensive. There is literally no other decent competition, they pretty much have the market cornered since nothing else comes close in terms of quality and function. You can tell there's no direct competitors because these used to be less than $200 not that long ago...
-Estimated ship date was 3/3/14. It didn't ship until 3/12/14. I sent an email 5 days after the expected ship date wondering where it was and was told that they were being delayed because they were still making the delrin shifter bushings. Would have been nice to at least get an email notifying me of this instead of having to ask what the heck was going on.
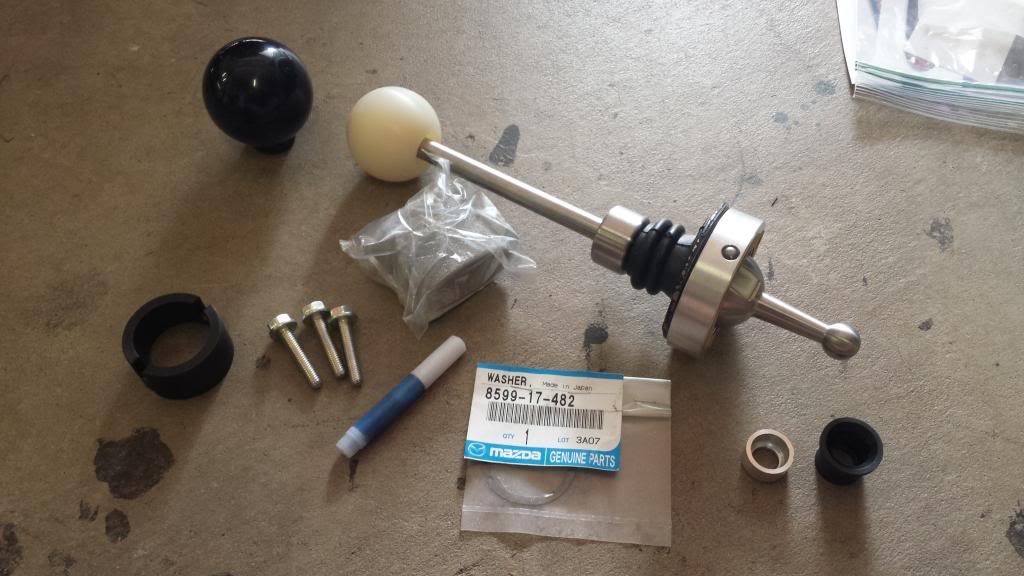
Here's the kit. Also I have sitting there an aluminum Mazdaspeed shifter bushing that I used instead of the delrin one supplied with the kit. It fit a lot tighter, but still not tight enough to "snap" onto the shifter tip. Good stuff though I like this bushing, super mechanical feeling which I love. Also pictured: GarageStar 1.75" Nylon shift **** and VooDoo 2" Magnum shift **** in Piano Black. I went with the GarageStar shifter I like the lighter feel better, it's barely 40 grams compared to the 175 gram VooDoo.
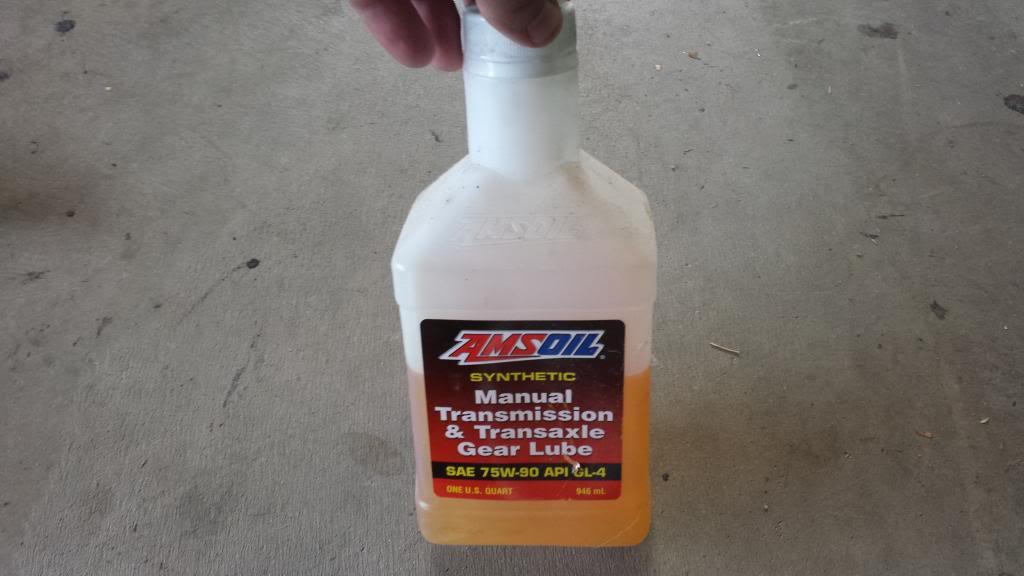
Sucked out and replaced turret fluid with my favorite stuff ever. I used this last time as well but figured some fresh fluid couldn't hurt.
Installed:
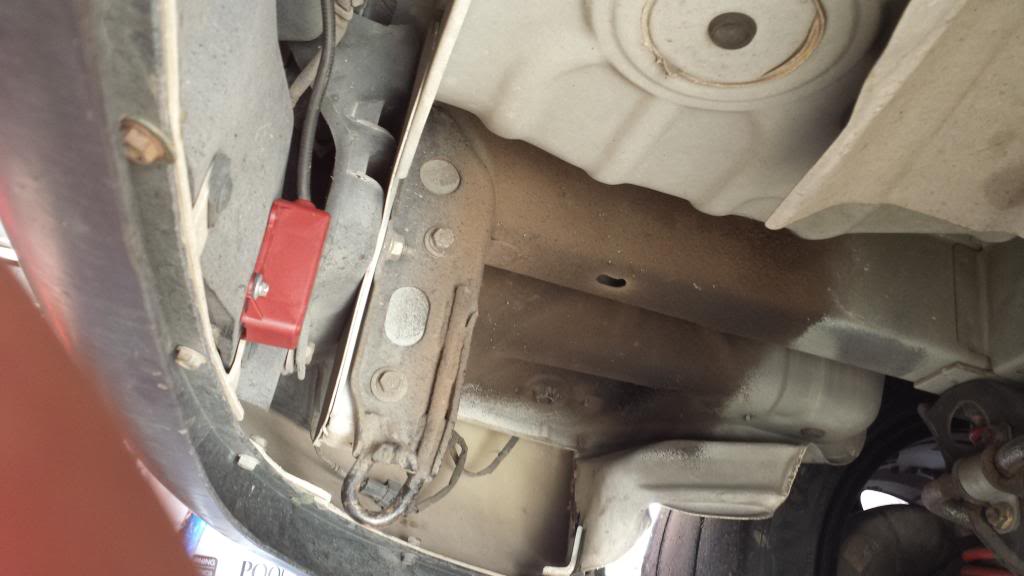
Also I got a used hard wired transponder so I don't have to pay for rentals anymore.
Mounted behind the rear bumper with a clear shot at the ground. (I know there is only one screw, I was finalizing the positioning so it was level.)
Guy that owned this before me put in a fuse that you can pull to shut it off, but used crimp connectors and electrical tape. I hate crimp connectors so I will redo this later. Have other stuff to prep and load in the truck before I take off for the track weekend.
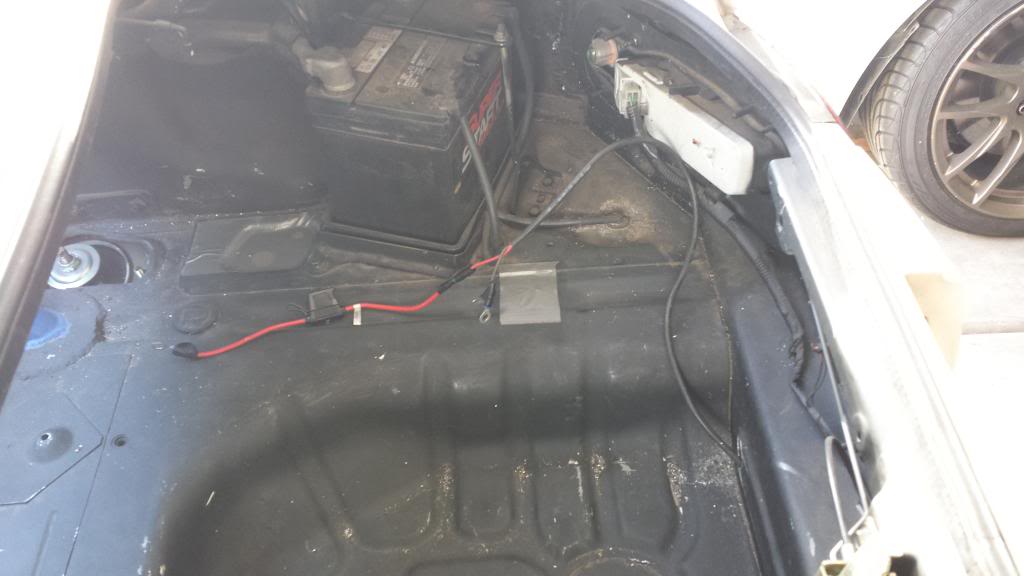
Also got one of these bad boys for the GoPro for this weekend. I'm going to try some twin Miater bumpdraft shenanigans with my buddy Noz, will hopefully have video next week for you guys. Anyways, time to finish loading up and then get some sleep so I can hit the track tomorrow. Woot.
Shifter came in today (**** yeah) in time for the track weekend! USPS 2 day flat rate ftw.
Miataroadster Shifter Tall, Straight, and Bootless is what I went with. Looks great in a race car that doesn't have a center console. It's about the same height as the old Ralco RZ shifter with 2" extension on it. Maybe a tiny bit shorter.
Pros:
-Super solid
-High quality
-Everything lines right up and drops right in
-Feels awesome, no more shifter slop or shifter rotating in the turret.
-Shifts are nice and short and crisp even with the taller **** location.
Cons:
-According to the group buy thread on M.net, it was supposed to be $330 shipped, with a $25 dollar discount for omitting the upper rubber boot. My invoice was $325 minus $25 but there is a $20 shipping charge? What gives? Shipping was supposed to be included AND it came in a flat rate box that I know for a fact costs $12.35 to ship anywhere in the country lol.
-Did I mention already that this thing cost me $320 bucks... it's awesome but it's expensive. There is literally no other decent competition, they pretty much have the market cornered since nothing else comes close in terms of quality and function. You can tell there's no direct competitors because these used to be less than $200 not that long ago...
-Estimated ship date was 3/3/14. It didn't ship until 3/12/14. I sent an email 5 days after the expected ship date wondering where it was and was told that they were being delayed because they were still making the delrin shifter bushings. Would have been nice to at least get an email notifying me of this instead of having to ask what the heck was going on.
Here's the kit. Also I have sitting there an aluminum Mazdaspeed shifter bushing that I used instead of the delrin one supplied with the kit. It fit a lot tighter, but still not tight enough to "snap" onto the shifter tip. Good stuff though I like this bushing, super mechanical feeling which I love. Also pictured: GarageStar 1.75" Nylon shift **** and VooDoo 2" Magnum shift **** in Piano Black. I went with the GarageStar shifter I like the lighter feel better, it's barely 40 grams compared to the 175 gram VooDoo.

Sucked out and replaced turret fluid with my favorite stuff ever. I used this last time as well but figured some fresh fluid couldn't hurt.

Installed:

Also I got a used hard wired transponder so I don't have to pay for rentals anymore.
Mounted behind the rear bumper with a clear shot at the ground. (I know there is only one screw, I was finalizing the positioning so it was level.)

Guy that owned this before me put in a fuse that you can pull to shut it off, but used crimp connectors and electrical tape. I hate crimp connectors so I will redo this later. Have other stuff to prep and load in the truck before I take off for the track weekend.

Also got one of these bad boys for the GoPro for this weekend. I'm going to try some twin Miater bumpdraft shenanigans with my buddy Noz, will hopefully have video next week for you guys. Anyways, time to finish loading up and then get some sleep so I can hit the track tomorrow. Woot.

#16
Thread Starter
Elite Member
iTrader: (2)
Joined: Jan 2013
Posts: 1,632
Total Cats: 430
From: Chandler, AZ
Some last minute shitty cell phone pictures with the TRMotorsports C3M's since I don't have any pics of them yet. 15x9" +36 with 225/45R15 Hoosier R6's. Barely fit with a fender roll and slight pull, and they rub at full lock, not sure where though but I can feel/hear it.
Also better view of the vents.
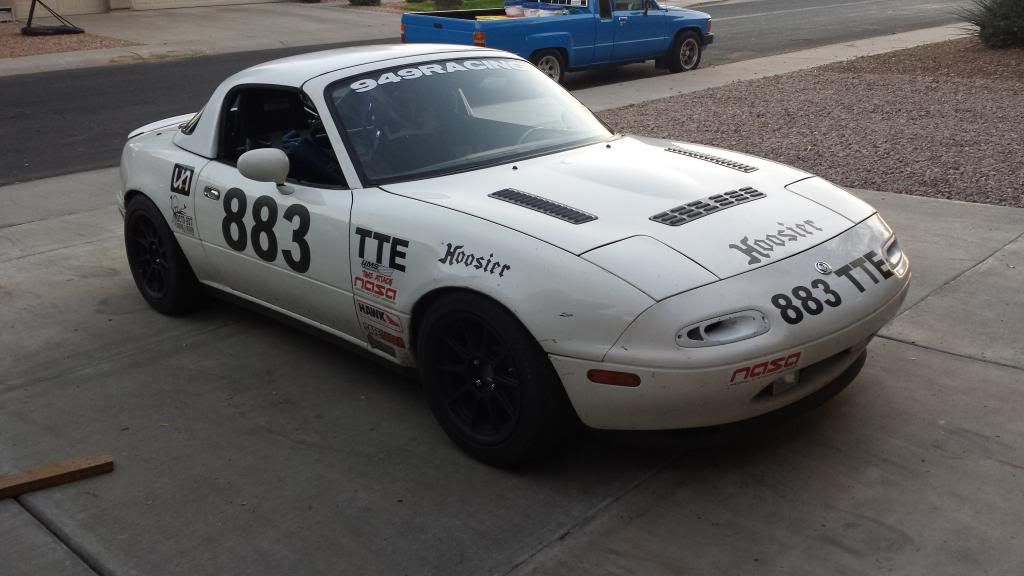
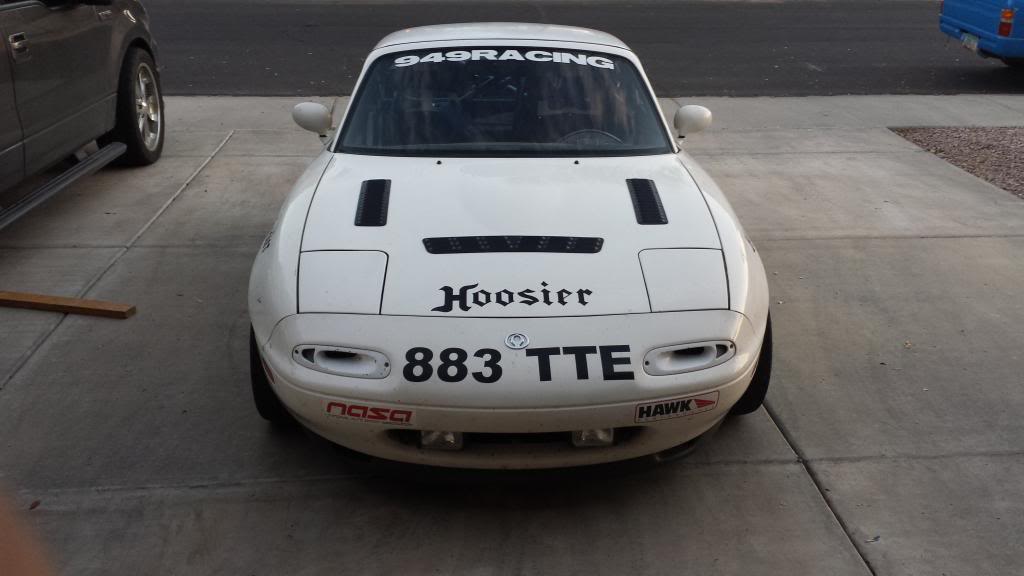
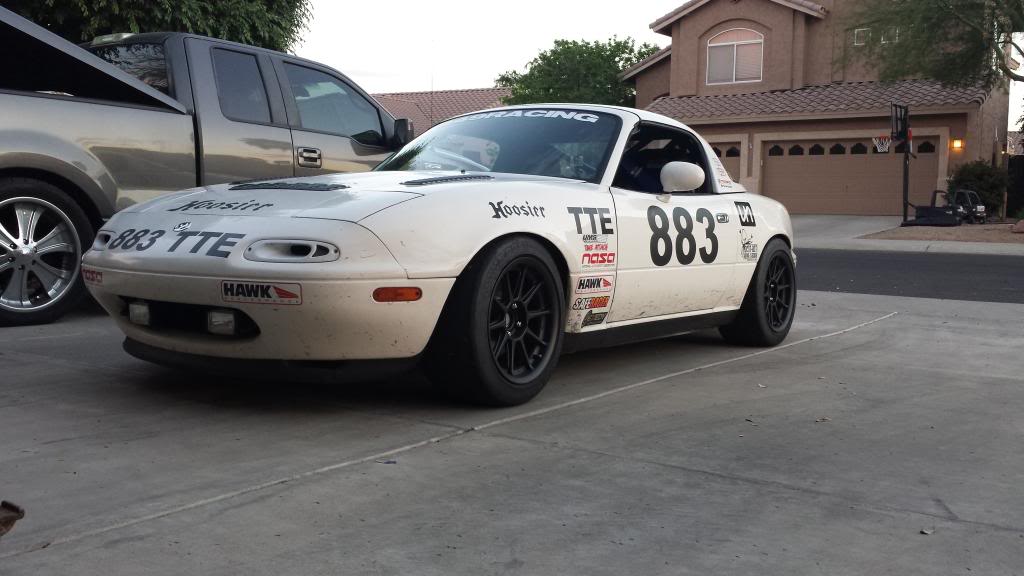
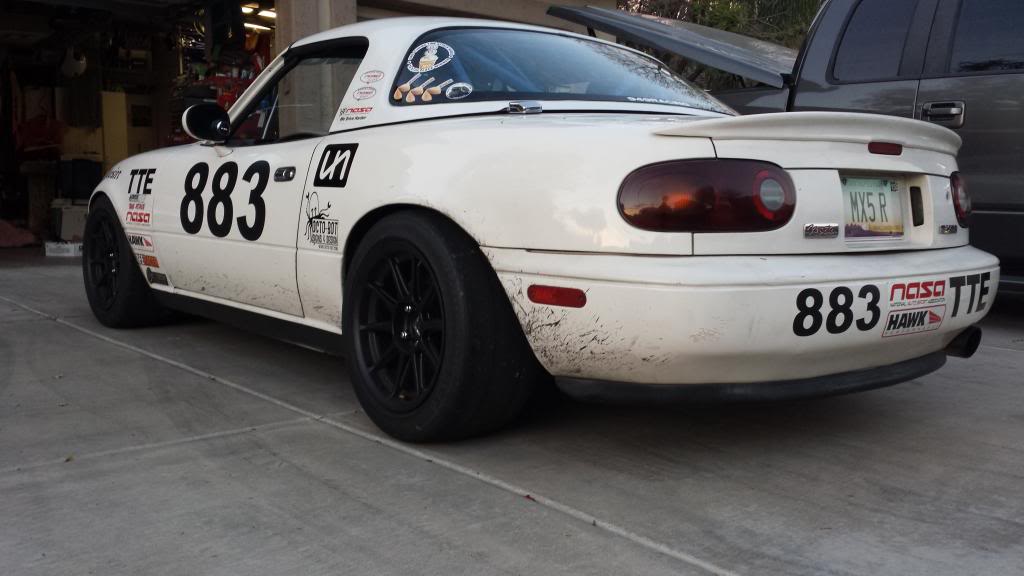
This one came out blurry but screw it. Just wanted to show how stupid huge these tires are on this car.
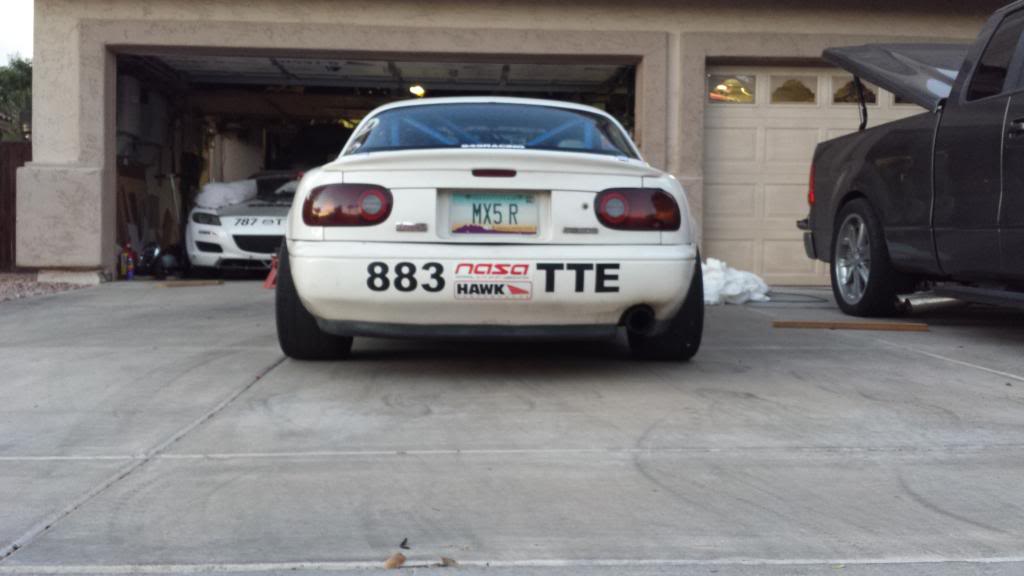
Here is 225/45R15 Nitto NT01's mounted on 15x8" wheels vs. 225/45R15 Hoosier R6's mounted on 15x9" wheels...
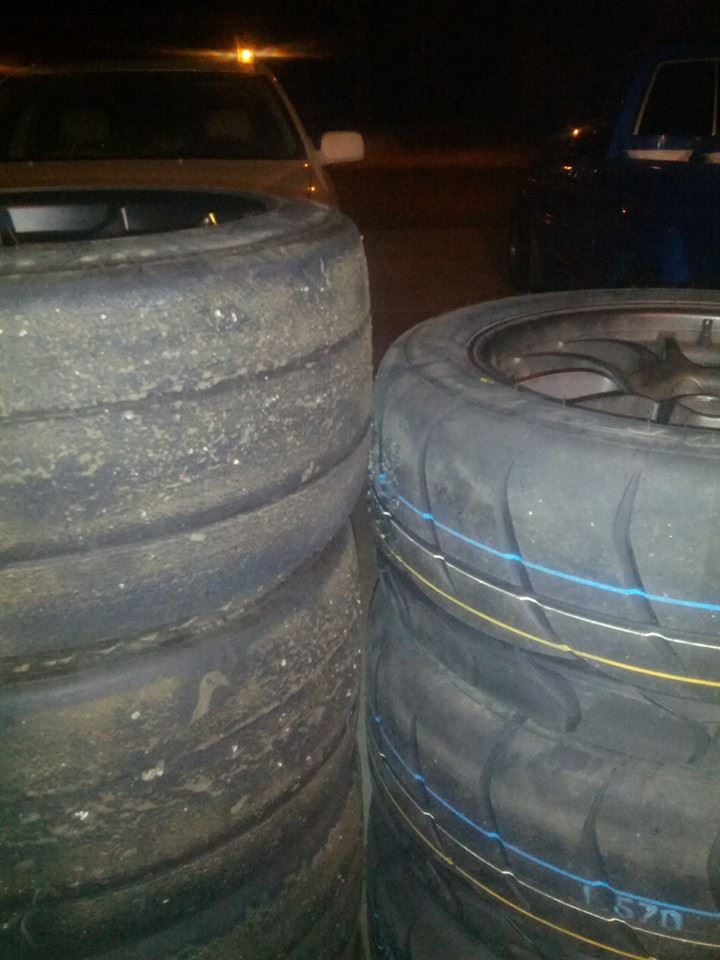
Also better view of the vents.


This one came out blurry but screw it. Just wanted to show how stupid huge these tires are on this car.

Here is 225/45R15 Nitto NT01's mounted on 15x8" wheels vs. 225/45R15 Hoosier R6's mounted on 15x9" wheels...

#17
Thread Starter
Elite Member
iTrader: (2)
Joined: Jan 2013
Posts: 1,632
Total Cats: 430
From: Chandler, AZ
Still March 2014.
So, last weekend went pretty damn well.
1st Place in Time Trials TT-E Class on 3/15/14
1st Place in Time Trials TT-E Class on 3/16/14
1st Place in UMS Tuning Time Attack Series TA-A Class on 3/16/14
New Personal Best Lap of 1:06.322
Time Trials was freaking close... I beat my best friend Noz by only 0.013 seconds. He is co-driving another one of my friends cars, a silver NB with pretty much the same power and weight as me.
Some video.
#19
Thread Starter
Elite Member
iTrader: (2)
Joined: Jan 2013
Posts: 1,632
Total Cats: 430
From: Chandler, AZ
More footage. Bump draft practice with my buddy Noz lol.
Thoughts on the Miataroadster Short Shifter:
It worked awesome, way better than the Ralco RZ piece of garbage. Feels a bit more mechanical, probably due to the aluminum shifter bushing, it's slightly shorter than the previous setup and the throws are a bit shorter as well. It feels good and solid, really helped increase my confidence with shifting, ever since I've missed a gear and spun this engine to 9000RPM, every once in awhile I'll question myself when I make a shift, even though what caused that was ripped motor mounts. But this new shifter helped clear my conscious a bit haha.
Also I figured out why the old shifter got sloppy and rotated in the turret... I finally looked at it and noticed that the plastic guide that the locating pin sits in (you can see them on the ball of the new shifter) was made of shitty plastic and literally disintegrated. It wasn't even there anymore. So it was just a metal pin clicking around in a metal channel that was twice as wide as the pin... I replaced the turret fluid so hopefully there's no chunks floating around. I'll try to get a picture of the failed one in a bit.
#20
Thread Starter
Elite Member
iTrader: (2)
Joined: Jan 2013
Posts: 1,632
Total Cats: 430
From: Chandler, AZ
So some updates.
I managed to get a TT-E class record at Wild Horse Pass West Course. I crushed it by over a second, on 15 heat cycle Hoosier R6's. Had some close competition though, my buddy Noz almost beat me again. Close battles all the time with him, good stuff. Makes up for the lack of people in TT-E lol.
Results, look at Sunday. Team Beer:30. Green = Track Record
NASA Time Trial
I am taking a trip to Minnesota soon to see one of my sponsors for the RX-8 and will be purchasing a new ECU for the Miata so I can try and make up some of that lost power. UMS Tuning here in Mesa will be tuning the car and hopefully with a standalone I will be able to get some of that missing power back and fix my horrific AFR curve. I dyno'd at 115WHP and I want to be at 125WHP. Since I'm making peak power at the rev limiter, bumping the limiter up a little will probably do this. Right now stock is limited at 6900RPM and I'd like to bump it to 7200.
What ECU am I getting? An Adaptronic plug and play from TurboSource.com - Turbochargers | Turbo Components | Heat Management | Performance Parts |.
Adaptronic Select Mazda MX5/Miata ECU
Also on the to do list is getting my oil cooler stuff that I got awhile ago installed.
And the Advanti S1 wheels came in. Yay.


