
240_'s Project Paint

 06-19-2011, 09:20 PM
#22
Elite Member
Thread Starter
iTrader: (2)

Join Date: May 2007
Location: Cromwell, Connecticut
Posts: 2,606
Total Cats: 16
6/16 - 6/19:
I left the Canon XSi at my apartment, so Iphone pics only :(
Took Thursday and Friday off from work to get some stuff done on the car.
Wednesday night:
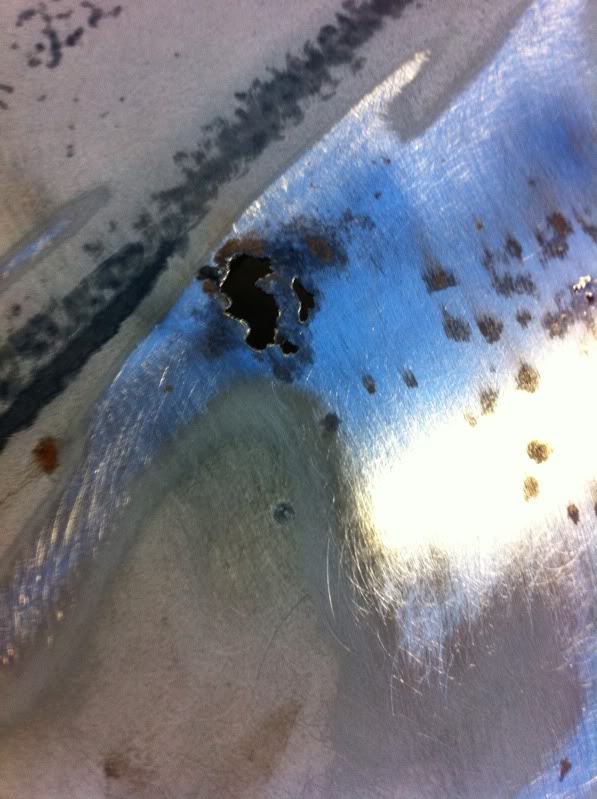
Wire brushed all the surface rust that was behind the fender and ended up POR15ing the entire front frame behind the fenders. (Didnt take pics , sorry). I did find that some of the "surface" rust on the Passenger fender actually went thru. I am not going to attempt to weld this pathetically thin metal, so instead I will adhere metal to the back of it with seam sealer (por15ed of course) and then use some kittyhair bondoglass. Not ideal, but it should never rust if I do it right.
Thursday:
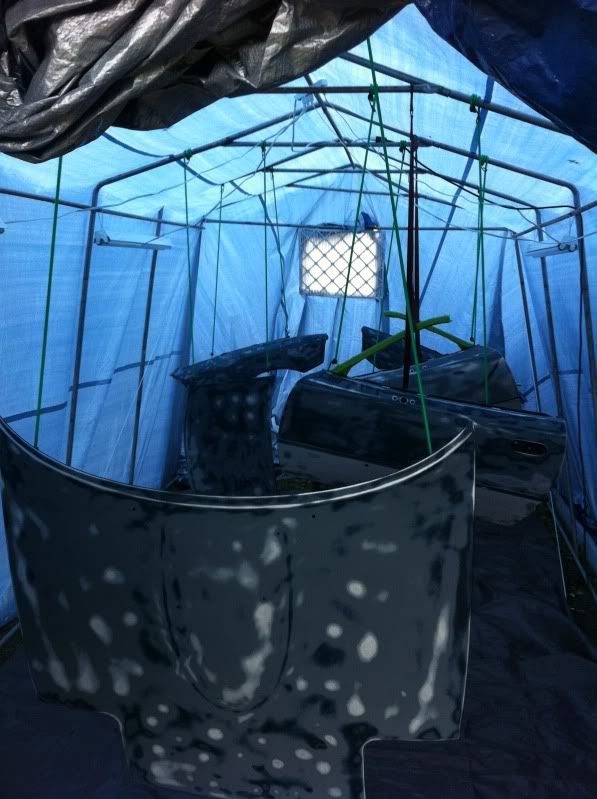
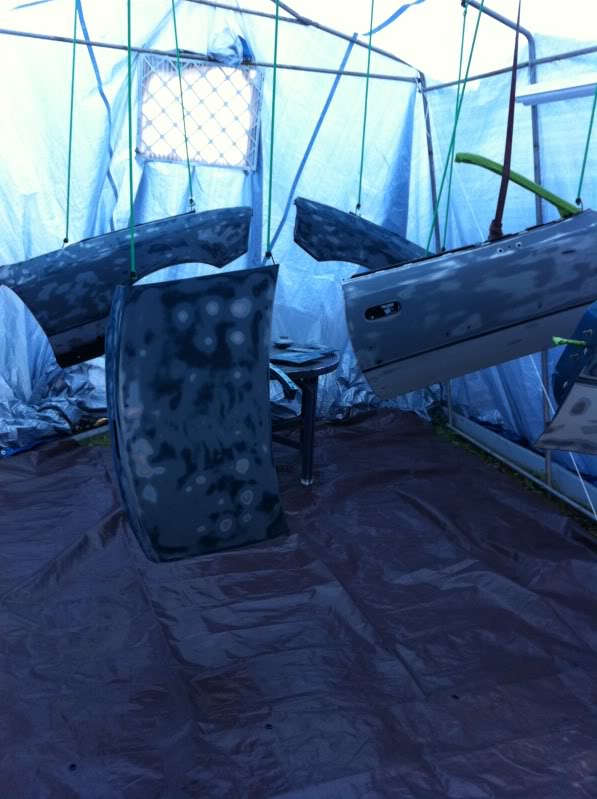
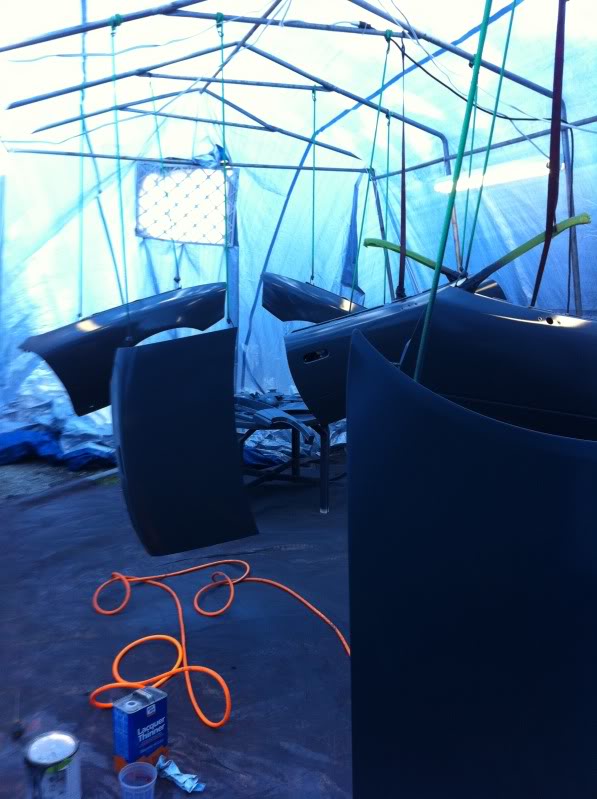
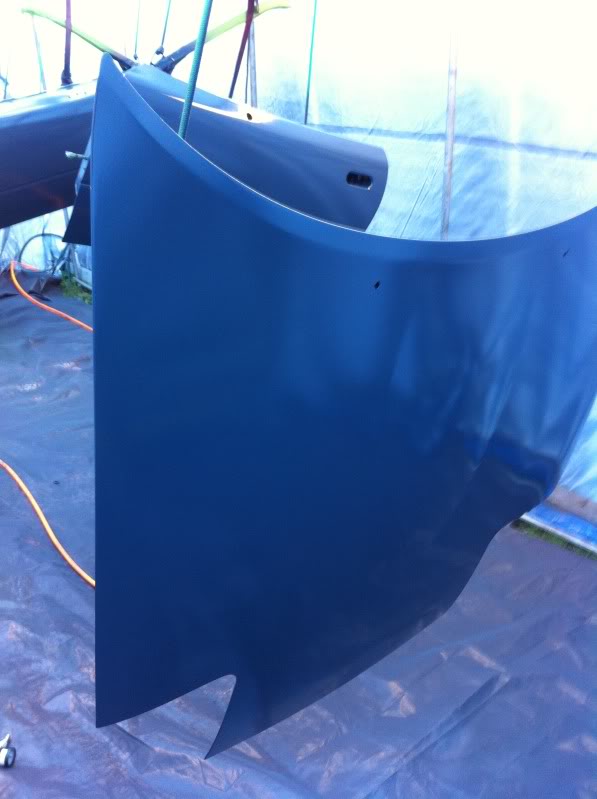
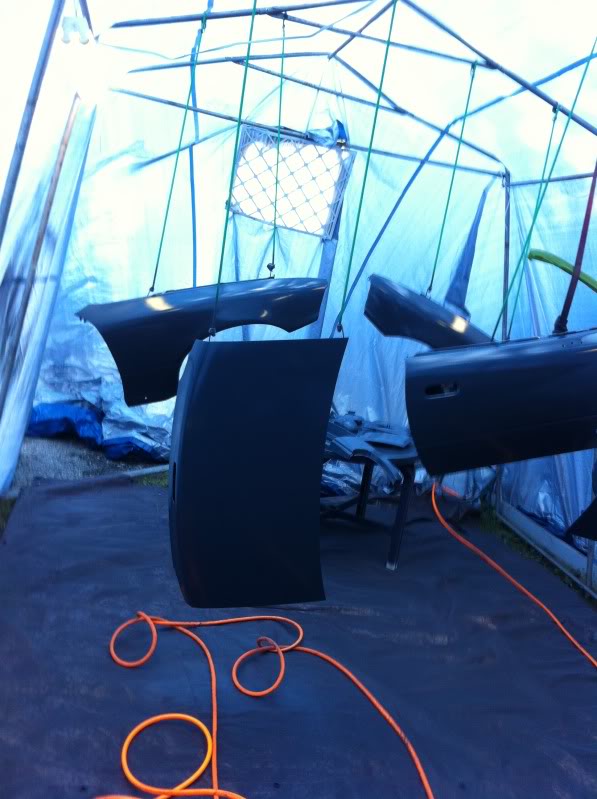
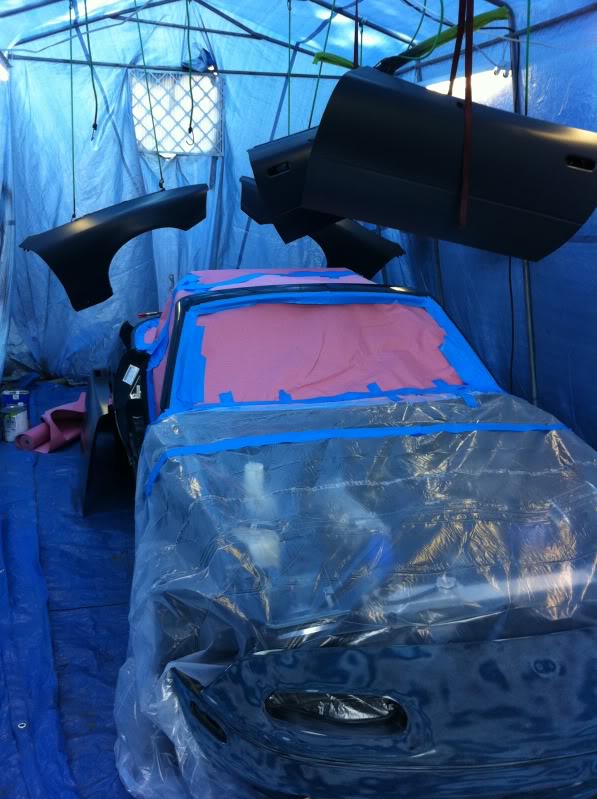
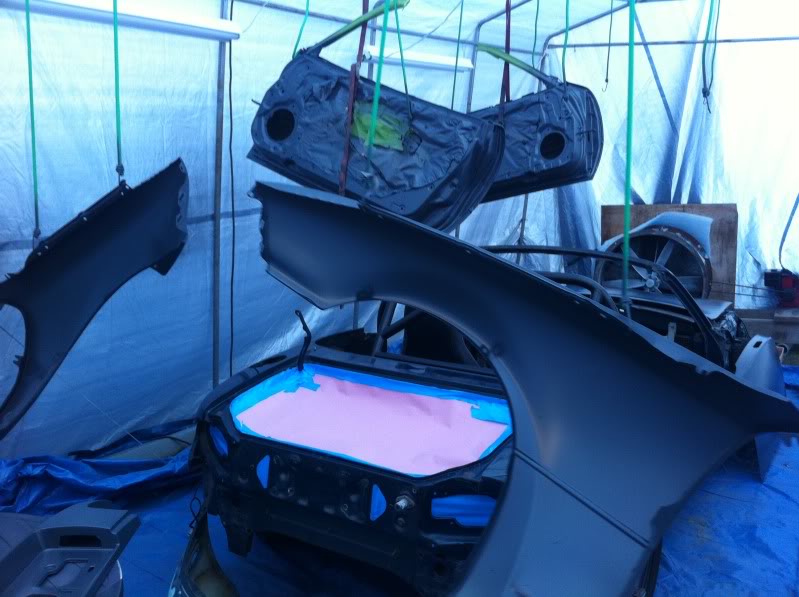
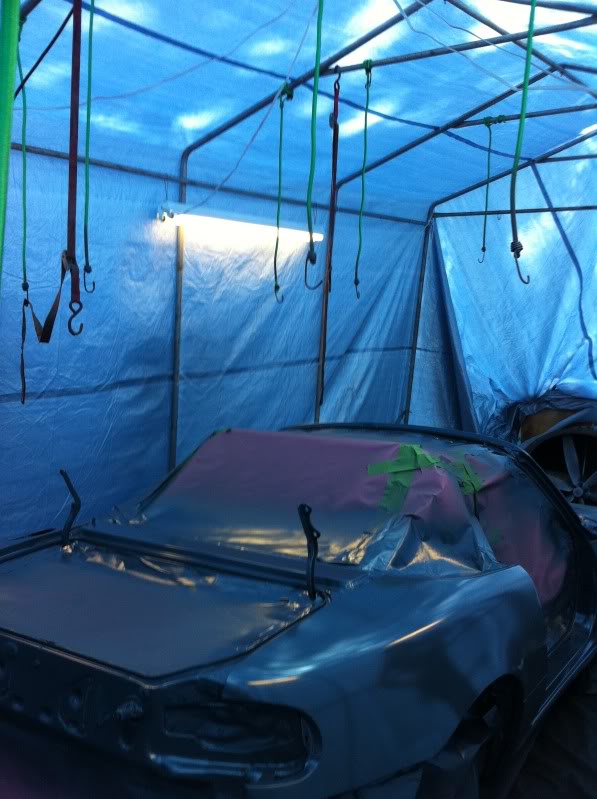
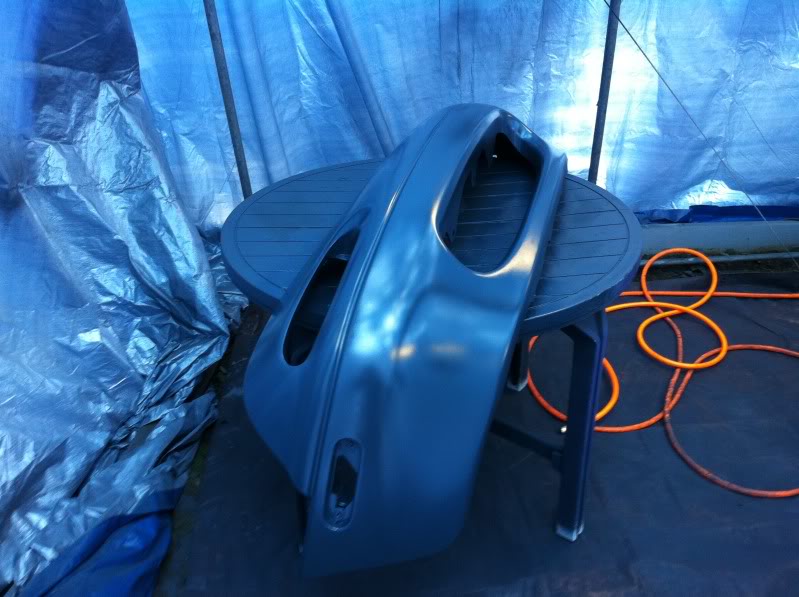
Spent the majority of the day sanding the remaining parts and cleaning up for primer. I took apart my spare door that I will be using, converted it to manual windows, and then sanded everything. I organized everything a bit and got a game plan together for spraying epoxy primer. I decided to hang the doors, fenders, hood, and trunk lid. I layed out the headlight covers, mirrors, and finish panel on a table. There wasnt enough room for the bumpers so they will get sprayed when I do the body.
Here is what I ended up with:
I also mounted the motor to the fan and installed intake and discharge filters:
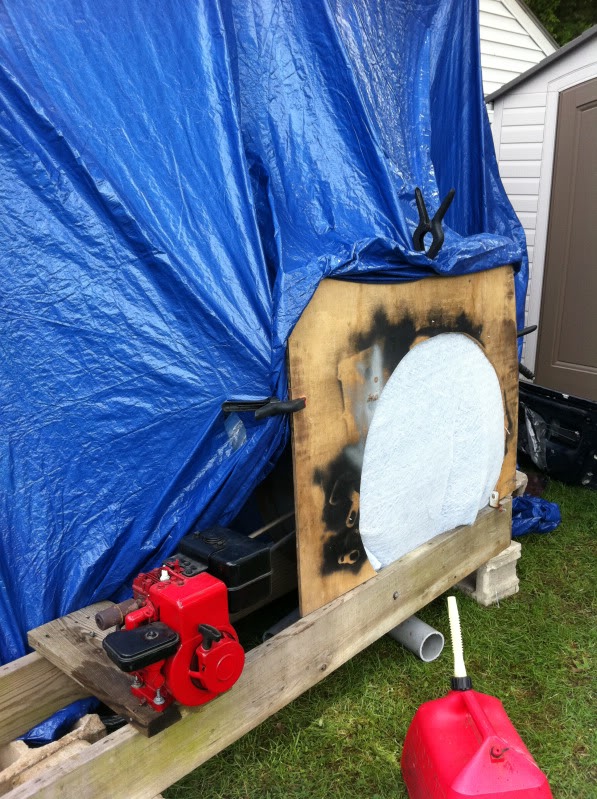
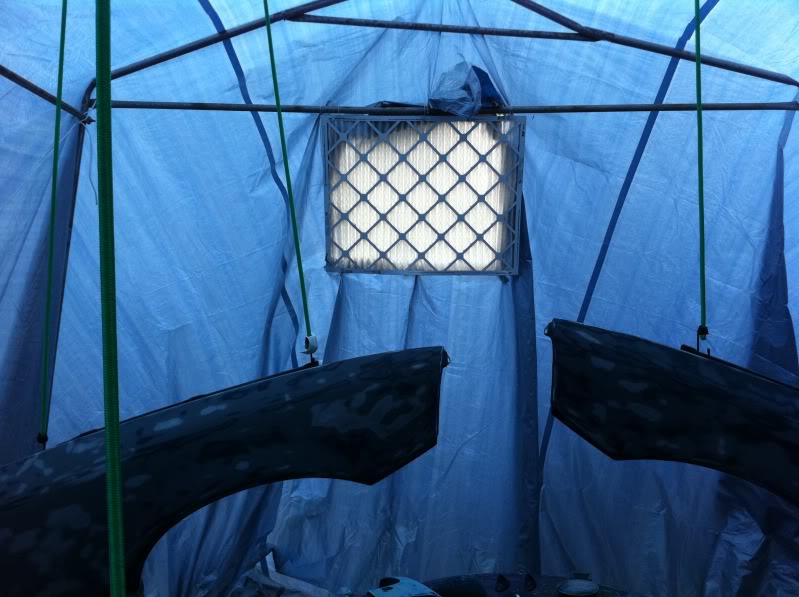
Intake filter isnt big enough. Look at the vacuum!!
Friday: It was raining on and off all day, so I sat on my *** and did nothing. I did go buy a new air hose and filter though. I also picked up more random supplies.
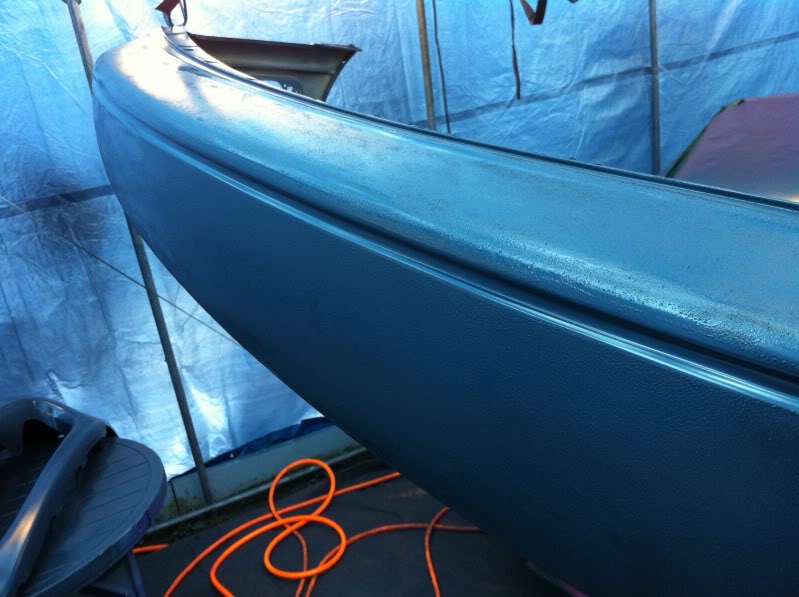
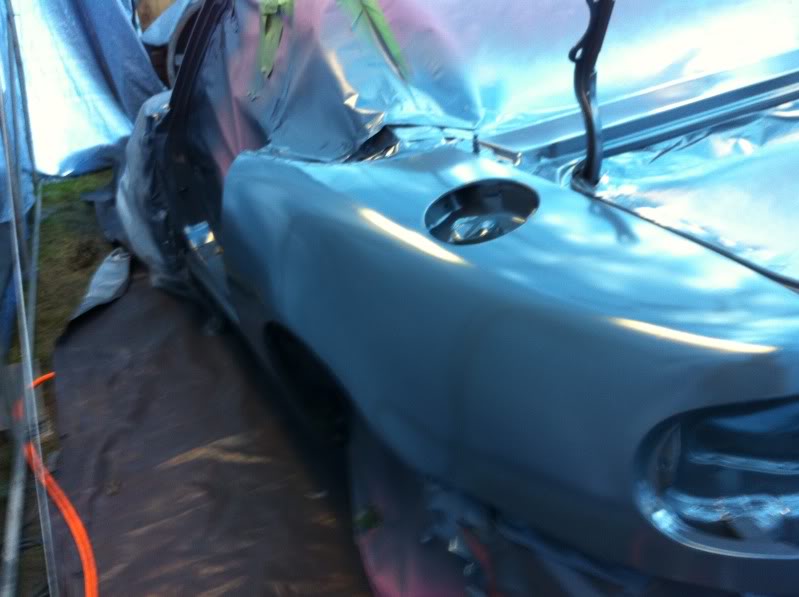
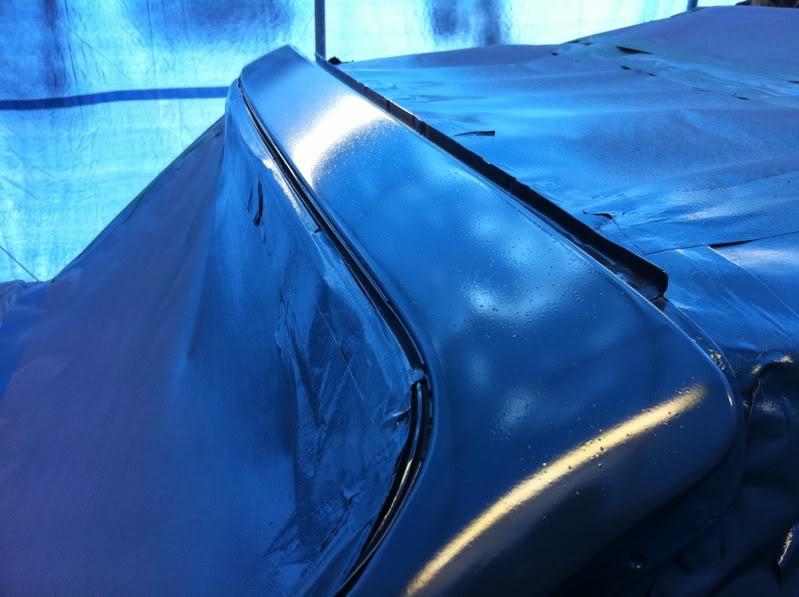
Saturday: SPRAY TIME. I originally bought 1 gallon of Dupont Epoxy Primer/ sealer. It is a 2:1 mix, and I expected it to be enough to do 2 good coats of all components (front and back) and then 1 coat on top of all the body work right before base/clear. Its looking like I need more. I went thru almost a half gallon spraying all this stuff alone.
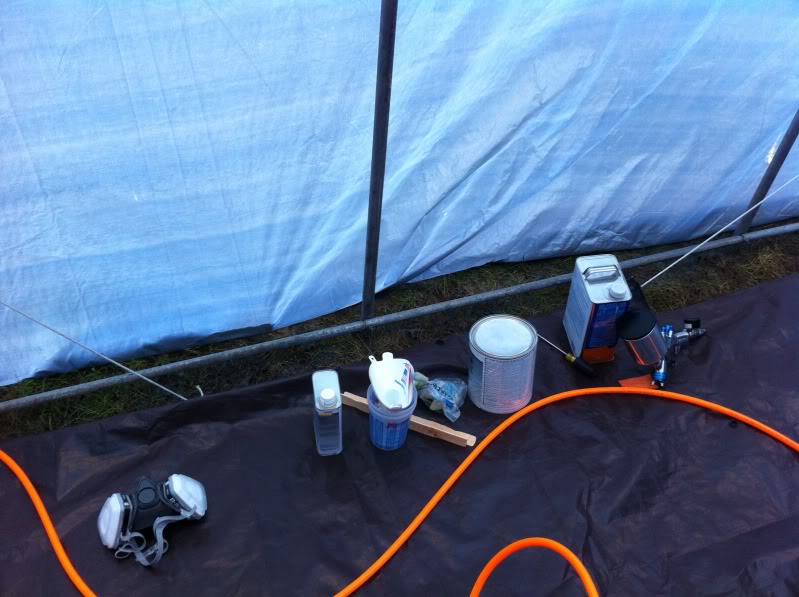
Overall It came out really nice. I layed a lot of paint on, and went over EVERY inch i could. My gun manners need work, It has been a while since I sprayed. By the second coat I was doing much better. I did get one drip in the trunk lid that I have to sand out, and I didnt clean my table well enough so I got some dust particles in the finish panel. Good thing there is A LOT of sanding ahead anyway.
BUGS IN PAINT: almost zero. I guess i got lucky this time around!
Sunday: masking
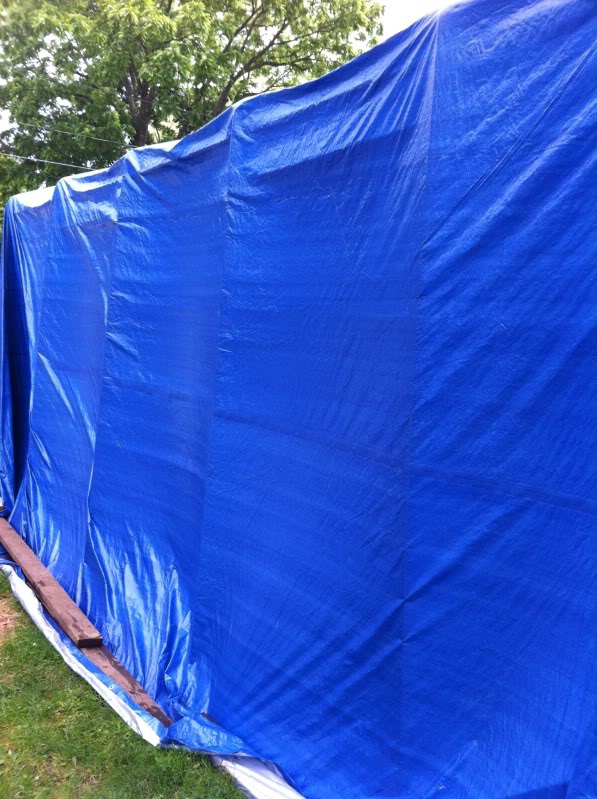
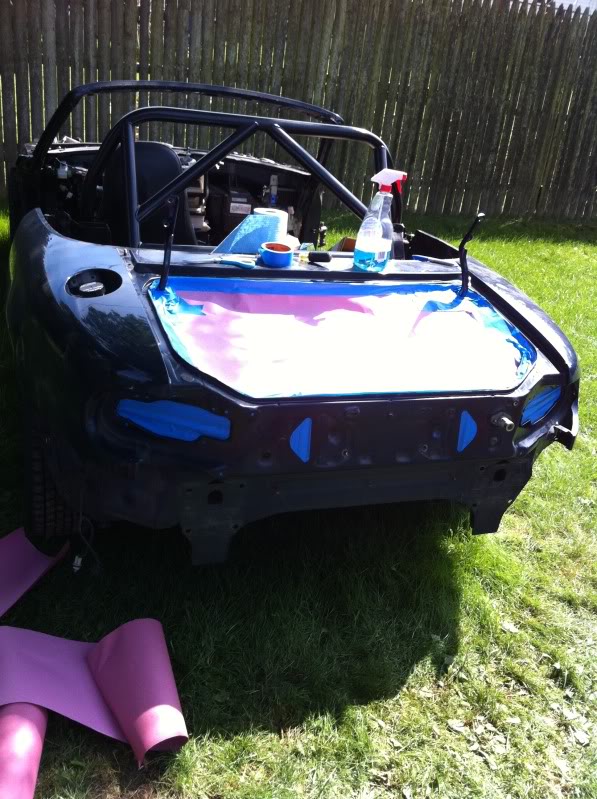
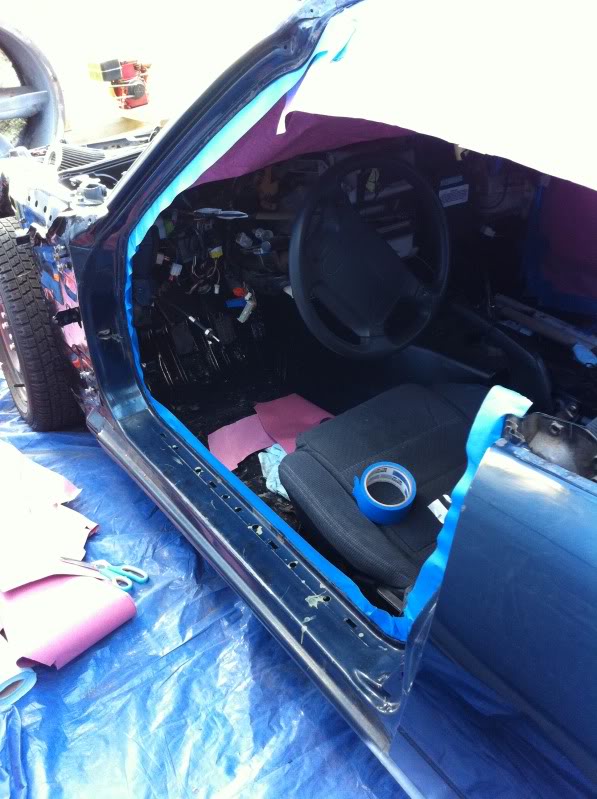
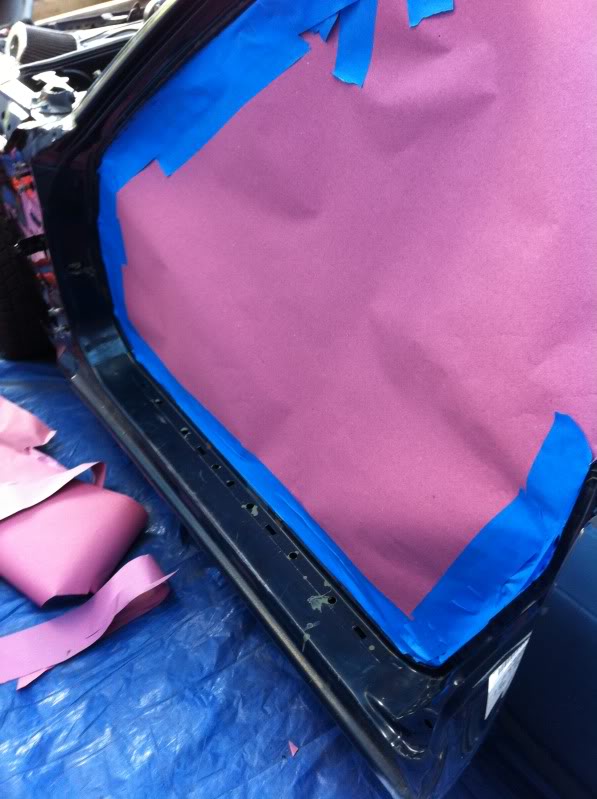
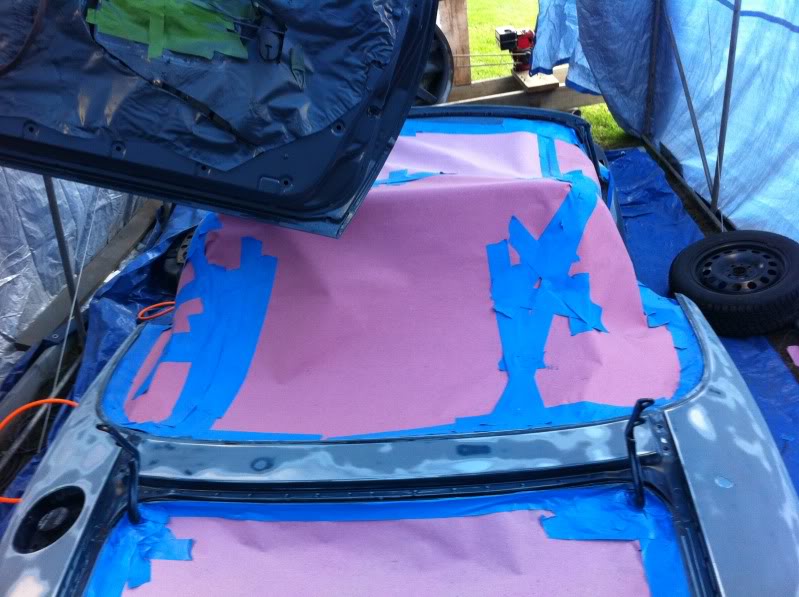
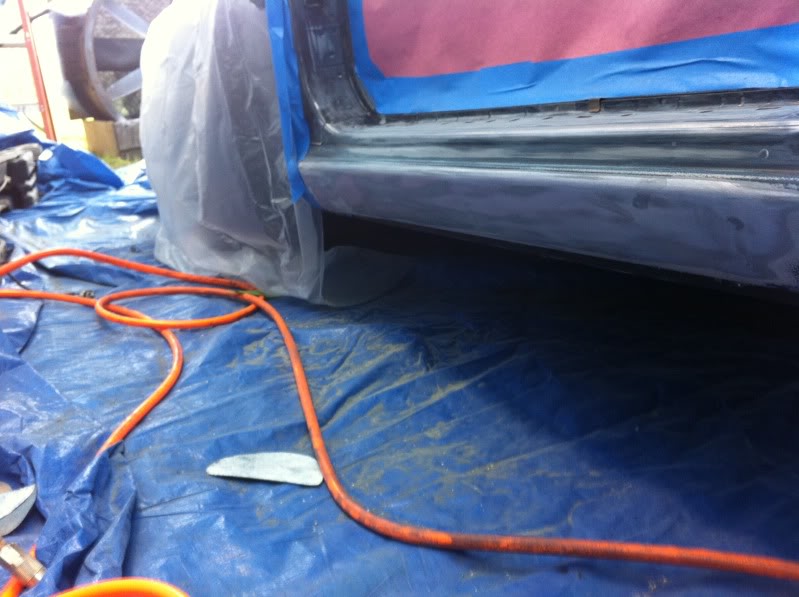
By far my least favorite part about painting. In the past I have always had my friend help me out with this task, but he is in NY for college, so its all me. My plan was to mask off the trunk and interior, and cover the front clip with plastic as well. I will do all the body work with this stuff, and then clean or repace it before I spray. I will also be adding skirting on the bottom of the car to mask for overspray. . . But for just keeping body work dust down, this will do.
The good news is my car is SO COMPLETELY GUTTED that I really dont care too much about dust or masking lines. I just want to keep most of the overspray out of the car and off of my rollbar.
Next I will be sanding down the body with 80 grit, POR15ing the patch panels I have on the quarter to attempt to protect the welds from rusting on me, then i will be spraying epoxy primer. After all that I will FINALLY be laying down bondo.
I left the Canon XSi at my apartment, so Iphone pics only :(
Took Thursday and Friday off from work to get some stuff done on the car.
Wednesday night:
Wire brushed all the surface rust that was behind the fender and ended up POR15ing the entire front frame behind the fenders. (Didnt take pics , sorry). I did find that some of the "surface" rust on the Passenger fender actually went thru. I am not going to attempt to weld this pathetically thin metal, so instead I will adhere metal to the back of it with seam sealer (por15ed of course) and then use some kittyhair bondoglass. Not ideal, but it should never rust if I do it right.
Thursday:
Spent the majority of the day sanding the remaining parts and cleaning up for primer. I took apart my spare door that I will be using, converted it to manual windows, and then sanded everything. I organized everything a bit and got a game plan together for spraying epoxy primer. I decided to hang the doors, fenders, hood, and trunk lid. I layed out the headlight covers, mirrors, and finish panel on a table. There wasnt enough room for the bumpers so they will get sprayed when I do the body.
Here is what I ended up with:
I also mounted the motor to the fan and installed intake and discharge filters:
Intake filter isnt big enough. Look at the vacuum!!
Friday: It was raining on and off all day, so I sat on my *** and did nothing. I did go buy a new air hose and filter though. I also picked up more random supplies.
Saturday: SPRAY TIME. I originally bought 1 gallon of Dupont Epoxy Primer/ sealer. It is a 2:1 mix, and I expected it to be enough to do 2 good coats of all components (front and back) and then 1 coat on top of all the body work right before base/clear. Its looking like I need more. I went thru almost a half gallon spraying all this stuff alone.
Overall It came out really nice. I layed a lot of paint on, and went over EVERY inch i could. My gun manners need work, It has been a while since I sprayed. By the second coat I was doing much better. I did get one drip in the trunk lid that I have to sand out, and I didnt clean my table well enough so I got some dust particles in the finish panel. Good thing there is A LOT of sanding ahead anyway.
BUGS IN PAINT: almost zero. I guess i got lucky this time around!
Sunday: masking
By far my least favorite part about painting. In the past I have always had my friend help me out with this task, but he is in NY for college, so its all me. My plan was to mask off the trunk and interior, and cover the front clip with plastic as well. I will do all the body work with this stuff, and then clean or repace it before I spray. I will also be adding skirting on the bottom of the car to mask for overspray. . . But for just keeping body work dust down, this will do.
The good news is my car is SO COMPLETELY GUTTED that I really dont care too much about dust or masking lines. I just want to keep most of the overspray out of the car and off of my rollbar.
Next I will be sanding down the body with 80 grit, POR15ing the patch panels I have on the quarter to attempt to protect the welds from rusting on me, then i will be spraying epoxy primer. After all that I will FINALLY be laying down bondo.
Last edited by 240_to_miata; 06-19-2011 at 09:31 PM.

Reply
 0
0

0

 06-20-2011, 06:23 AM
#24
Elite Member
Thread Starter
iTrader: (2)
Join Date: May 2007
Location: Cromwell, Connecticut
Posts: 2,606
Total Cats: 16
I only have that 1 spot where the rust went thru. I already POR15ed over the surface before I used epoxy primer. I am going to fit a small piece of sheet metal to cover the hole, POR15 it, and then adhere it to the back with some seam sealer. Ill then use the "kittyhair" fiberglass bondo (a stronger bondo made for things like this) to cover over the patch.
Reply
0
0
06-20-2011, 06:28 AM
#25

Not kittyhair! That stuff sucks! I like to use the metal filler when taking care of dings in metal, I think this is the stuff I used:
http://www.google.com/products/catal...ed=0CGMQ8wIwAQ
http://www.google.com/products/catal...ed=0CGMQ8wIwAQ
Reply
0
0
06-20-2011, 09:52 AM
#28
Following this intently. The pics with the parts hanging looks like something from a horror film, kinda.
In case anyone else was wondering what POR15 is:
http://www.por15.com/whatispor15.asp
In case anyone else was wondering what POR15 is:
http://www.por15.com/whatispor15.asp
Reply
0
0
06-20-2011, 09:57 AM
#29
Elite Member
Thread Starter
iTrader: (2)
Join Date: May 2007
Location: Cromwell, Connecticut
Posts: 2,606
Total Cats: 16
Following this intently. The pics with the parts hanging looks like something from a horror film, kinda.
In case anyone else was wondering what POR15 is:
http://www.por15.com/whatispor15.asp
In case anyone else was wondering what POR15 is:
http://www.por15.com/whatispor15.asp
Reply
0
0
 06-20-2011, 09:41 PM
#31
Elite Member
Thread Starter
iTrader: (2)
Join Date: May 2007
Location: Cromwell, Connecticut
Posts: 2,606
Total Cats: 16
Quick Update:
6/20/11
Went down to my parents house after work today. Sanded down one rear quarter, and then sanded all the patch panels and the fender lips where I rolled and hit a bit of rust. I got all of that in POR15 and called it a night.
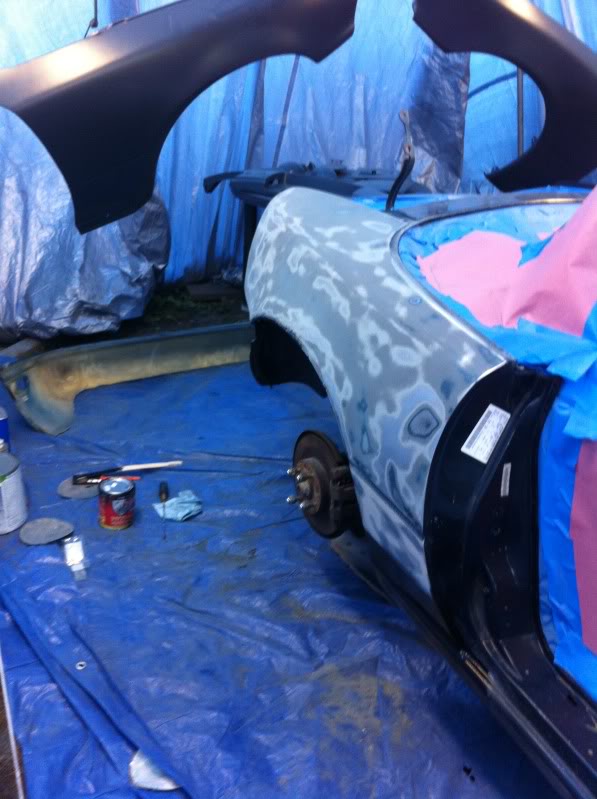


6/20/11
Went down to my parents house after work today. Sanded down one rear quarter, and then sanded all the patch panels and the fender lips where I rolled and hit a bit of rust. I got all of that in POR15 and called it a night.
Reply
0
0
 06-20-2011, 10:21 PM
#33
Elite Member
Thread Starter
iTrader: (2)
Join Date: May 2007
Location: Cromwell, Connecticut
Posts: 2,606
Total Cats: 16
Body work has always been something that I enjoyed doing for some strange and painful reason.
Reply
0
0

 06-21-2011, 09:24 AM
#35
Elite Member
Thread Starter
iTrader: (2)
Join Date: May 2007
Location: Cromwell, Connecticut
Posts: 2,606
Total Cats: 16
Yeah IK lol.
Ordered my body filler last night. Decided to take Martin's advice and got the Evercoat Metal to Metal to use on the patches. Also got Evercoat RAGE Gold for the lightweight filler. Its $$$$ but I have heard really good things, and hell I have gone this far, might as well do it right.

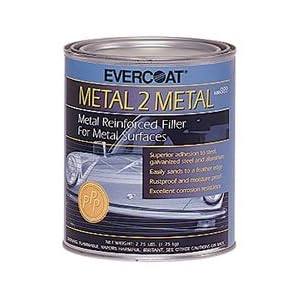
Ordered my body filler last night. Decided to take Martin's advice and got the Evercoat Metal to Metal to use on the patches. Also got Evercoat RAGE Gold for the lightweight filler. Its $$$$ but I have heard really good things, and hell I have gone this far, might as well do it right.
Reply
0
0
06-21-2011, 10:06 PM
#36
Elite Member
Thread Starter
iTrader: (2)
Join Date: May 2007
Location: Cromwell, Connecticut
Posts: 2,606
Total Cats: 16
6/21/2011
Finished stripping the car today.
Why do I put myself thru the torture of sanding my rocker so detailed? I DONT KNOW
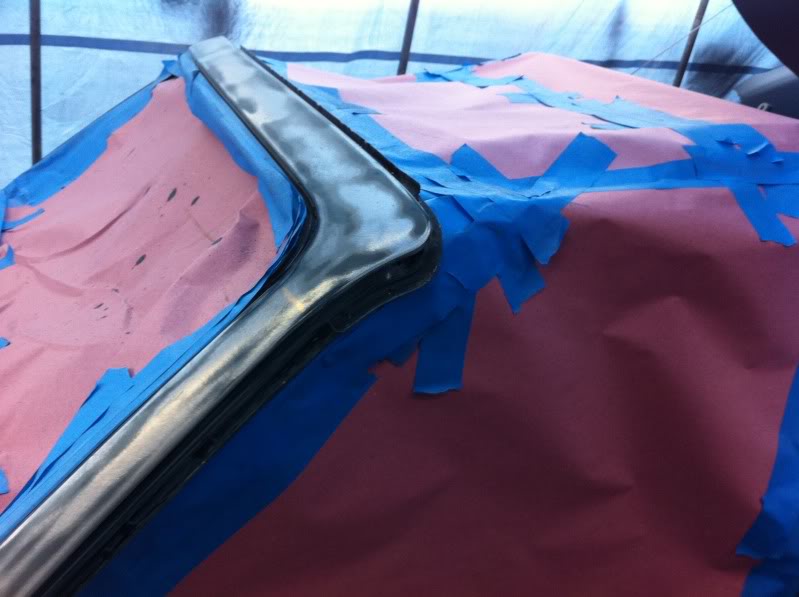
unfortunately that Nice job I did masking. . . Well its getting all re done before I spray primmer. I need to use better tape, plus i want dust free paper when I go to spray.
Too bad its gunna rain the rest of the week... :(
Finished stripping the car today.
Why do I put myself thru the torture of sanding my rocker so detailed? I DONT KNOW
unfortunately that Nice job I did masking. . . Well its getting all re done before I spray primmer. I need to use better tape, plus i want dust free paper when I go to spray.
Too bad its gunna rain the rest of the week... :(
Reply
0
0
06-21-2011, 10:49 PM
#37
Glad to see your going with the metal 2 metal, I love the stuff. What did you mask it off with? I used the super cheap plastic drop cloth[plastic] from home depot, the tape seemed to hold onto it better. Also when I masked off my car I got one of each roll of tape they had at the body shop and tested each one...pretty positive I didn't use the blue tape.
Prep work is coming along well man, and that's the key to a good paint job. Totally lookin forward to seeing this thing back together!
Prep work is coming along well man, and that's the key to a good paint job. Totally lookin forward to seeing this thing back together!
Reply
0
0
06-26-2011, 11:18 PM
#38
Elite Member
Thread Starter
iTrader: (2)
Join Date: May 2007
Location: Cromwell, Connecticut
Posts: 2,606
Total Cats: 16
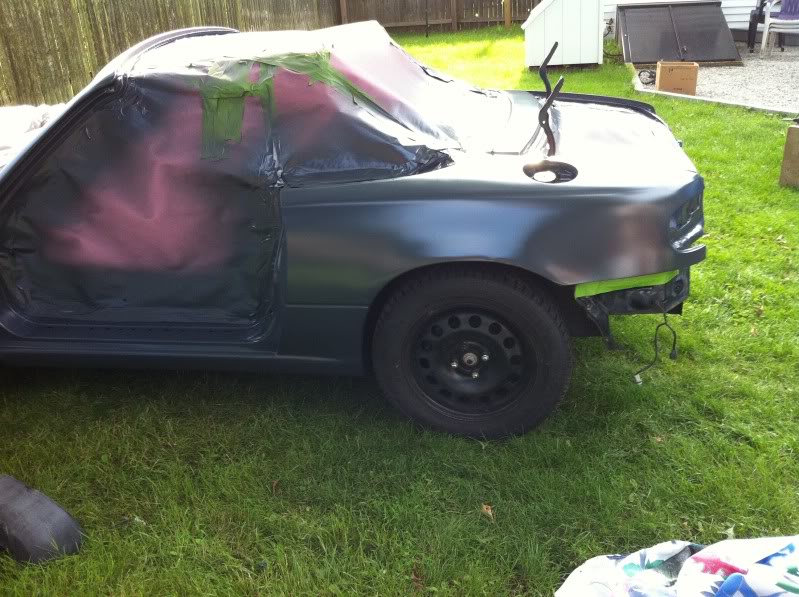
6-26-11
Updates:
shitty weather late in the week so I didnt come down till mid-saturday.
I re-masked the entire car. Used green tape this time (MUCH BETTER)
Then sprayed epoxy primer on the body and bumpers. I ran into a few problems
1) apparently there was quite a bit of dust around the windshield that I missed. it blew all over the roof line and got in the paint :( good thing this wasnt base/clear. Itll sand out
2) a few bugs here and there, one drip cause Im an idiot. No big deal. both will sand out
3) The big issue. The rear bumper is the first thing I stripped. When i did , I went nuts and ended up sanding too aggressively. The bumper started to melt and caused it to be really rough and almost hairy. I sprayed primmer on it anyway, big surprise it looks like ****. I am going to try to see if it'll sand flat. If not the bumper is getting a skim coat of body filler. Live and learn.
This week I will be going down after work to do body filler. Wednesday I am going over Martin's (astroboy) to start up his engine with him.
Pics:
Reply
0
0
06-27-2011, 09:36 PM
#40
Elite Member
Thread Starter
iTrader: (2)
Join Date: May 2007
Location: Cromwell, Connecticut
Posts: 2,606
Total Cats: 16
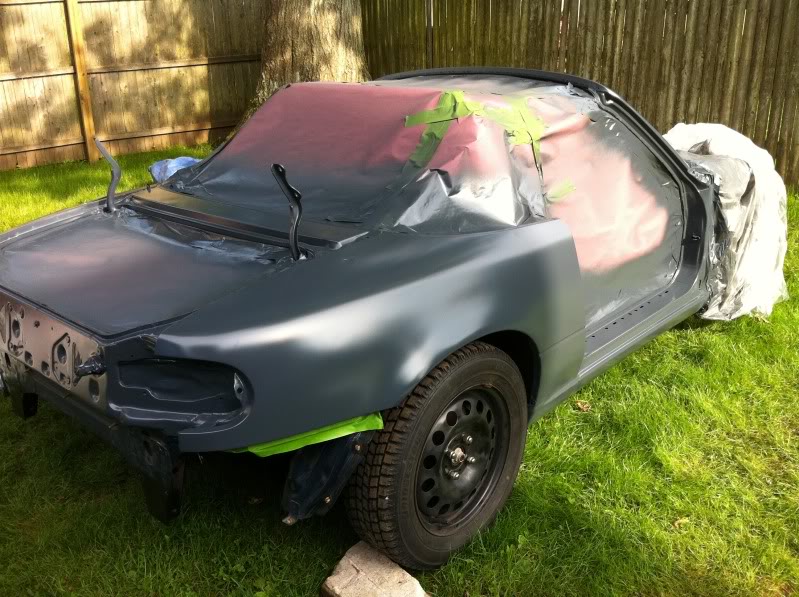
BODY FILLER TIME!
6/27/2011
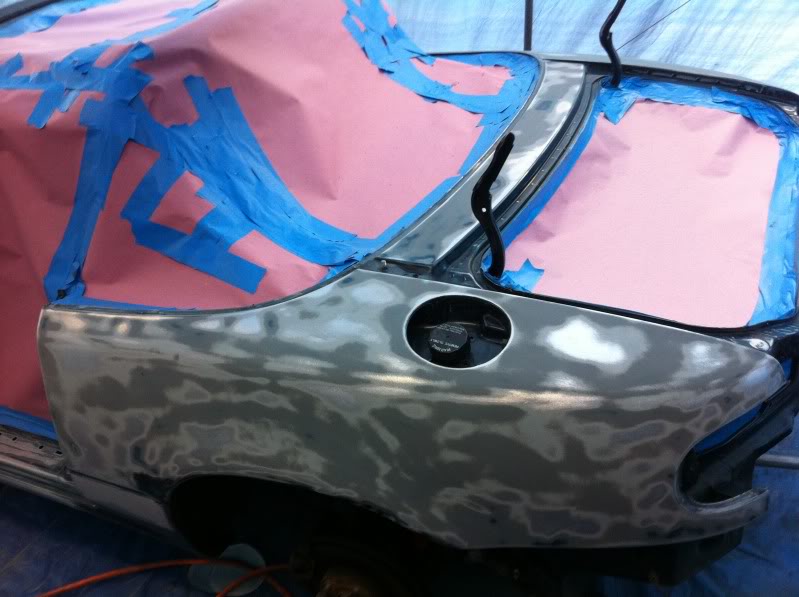
So today I was trying out quite a few new products. I have always used bondo brand crap bondo, now I have this new evercoat stuff I listed earlier. I also have eastwoods 7 pc block set for sanding blocks, and guide coat(both black and tan). I have always used cheap spraypaint for guide coat.
What a difference using the right stuff makes!!! I started on the passenger door and the quarter panels today. It went really well. I sprayed on the guide coat, sanded the panels with 120, and found where I needed the filler. The filler went on great, no pin holes at all, good work time, and sands AMAZING. My blocks were really nice too. The paper stuck really well to them, and with 7 to choose from its always easy.
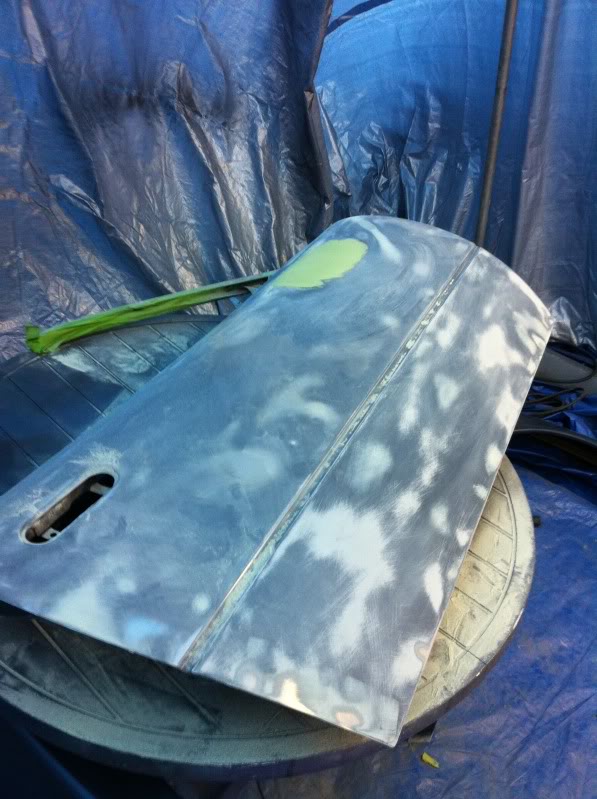
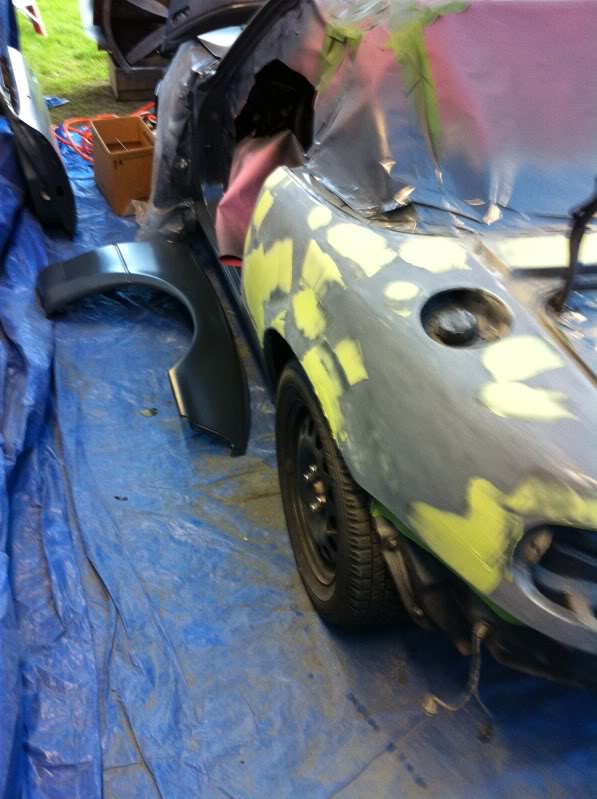
I more or less finished up the door. There was one spot I wasnt happy with so I put on one more skim coat of body filler. The quarter panels have the filler on them and are ready to be sanded.
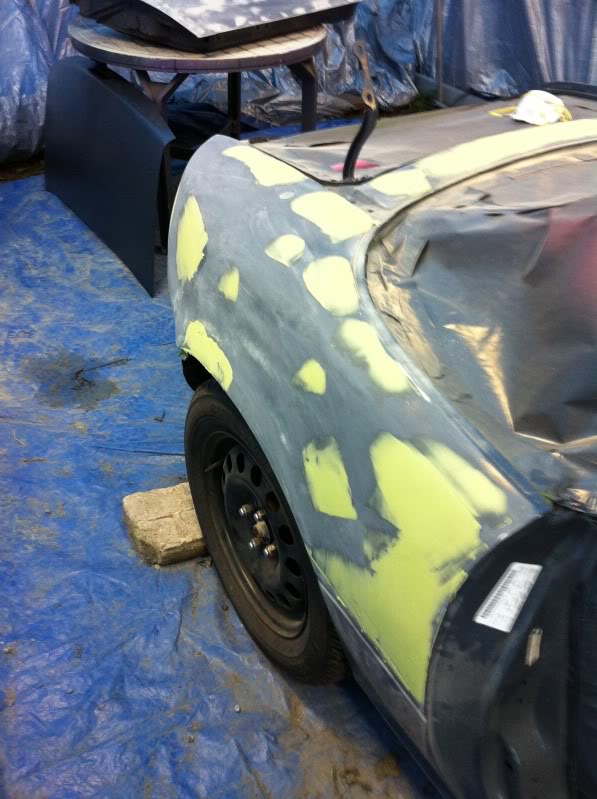
Guide coat:
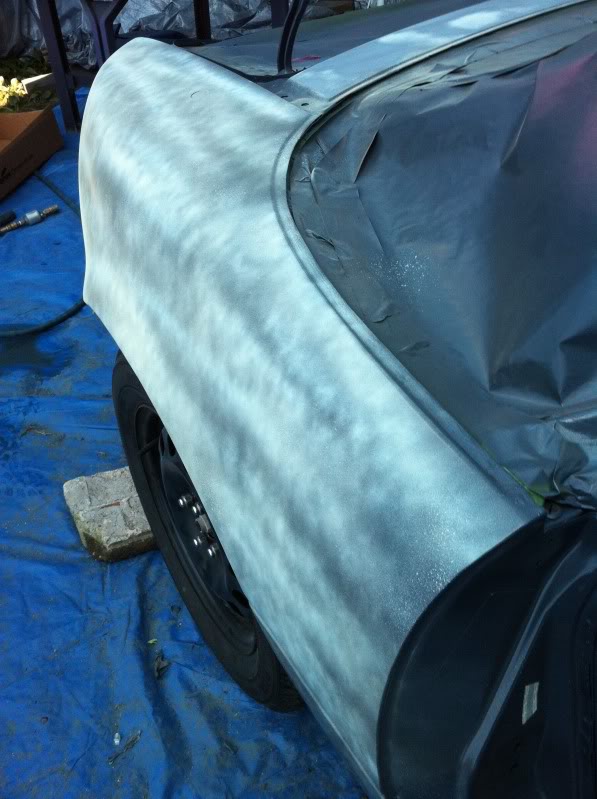
almost complete door:
Quarter panels:
I am going to continue body work most of the rest of the week after work, but I might not post up more pics till this weekend. Its all repetitive from here until I spray high build
6/27/2011
So today I was trying out quite a few new products. I have always used bondo brand crap bondo, now I have this new evercoat stuff I listed earlier. I also have eastwoods 7 pc block set for sanding blocks, and guide coat(both black and tan). I have always used cheap spraypaint for guide coat.
What a difference using the right stuff makes!!! I started on the passenger door and the quarter panels today. It went really well. I sprayed on the guide coat, sanded the panels with 120, and found where I needed the filler. The filler went on great, no pin holes at all, good work time, and sands AMAZING. My blocks were really nice too. The paper stuck really well to them, and with 7 to choose from its always easy.
I more or less finished up the door. There was one spot I wasnt happy with so I put on one more skim coat of body filler. The quarter panels have the filler on them and are ready to be sanded.
Guide coat:
almost complete door:
Quarter panels:
I am going to continue body work most of the rest of the week after work, but I might not post up more pics till this weekend. Its all repetitive from here until I spray high build
Reply
0
0


