[NA] Rescuing a 1990 Miata - This Sparks Joy!
#21
Had some MAJOR boost creep issues with the eBay setup. Currently have a Tial Green spring in the gate for 4.35psi.
Check out this log below, spikes to 9.7psi and leans RIGHT out with the factory injectors (at only 75% throttle). Thankfully I didn't repeat that performance and there doesn't seem to be any damage to the motor.
I've now set up the gauges in tunerstudio to warn me when I'm out of fuel, which is when I lift/shift.

To try and control the situation, I ported the wastegate passage in the turbo exhaust housing. I didn't get fancy with any of the edges; Just went for a straight gasket match.
I haven't had a chance to do more then a couple pulls with this new modification, but so far it seems more controlled. Saw 4.2psi peak at about 75% throttle on the quick log I took today. As a sidenote, Acceleration Enrichment was disabled for the log below.


I've been having fun with the tuning. I've never tuned a boosted car before, and it's a learning experience!
Haven't had a whole lot of time to tune this week, but I have enough in there to make the car very livable under 75% throttle.
Still out of fuel with the factory injectors over ~5500rpm, so that will be the next upgrade.
--------------
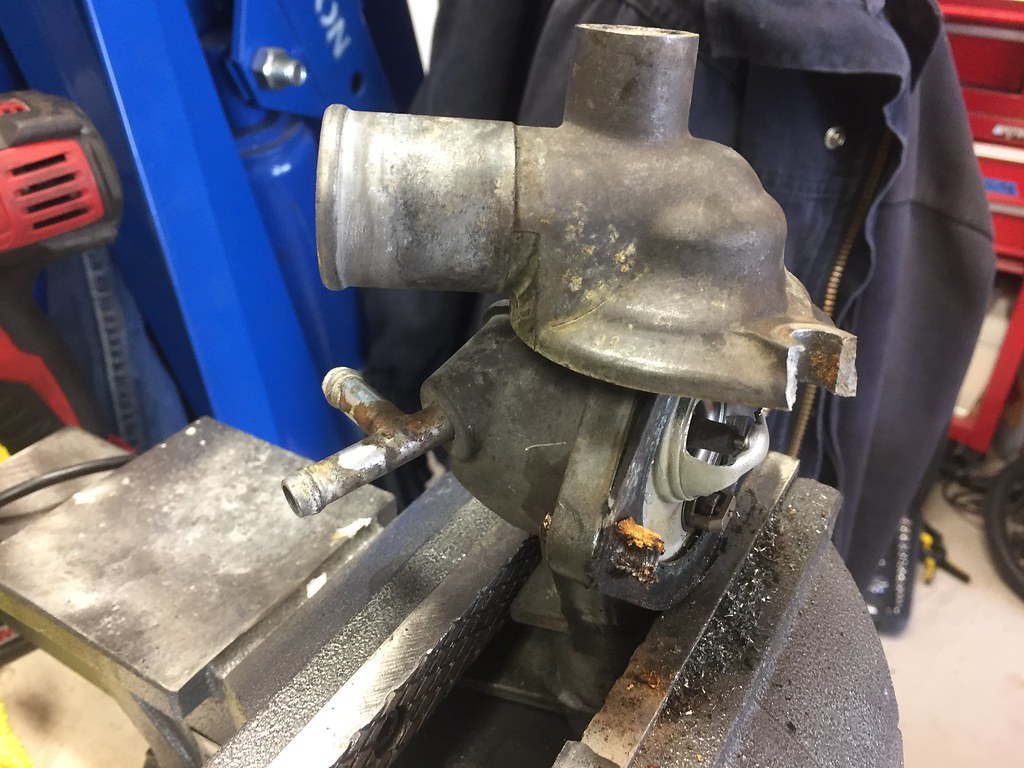
Wanted to swap out my OEM thermostat (Canadian spec cars were 195F afaik) to a 180F unit. Ended up snapping the water neck off the head instead
Thankfully I found that the unit bolts to the head, and one of the local autocross guys (shout out to Brook R!) hooked me up with a replacement that same day. He didn't even charge me anything for the part!
Going to need a new upper thermostat housing piece as mine split along one of the bolt holes while liberating it from the broken bottom half. I tested it up to 210F water temp without issue.
I am dripping a bit of water from where the neck contacts the head. Ordered a new o-ring, which will be in next week.
Not too concerned, seems to either stop leaking or evaporate before it hits the ground when motor is up to temp. Running mostly Water+Water Wetter in the cooling system, so drips on the ground won’t be a hazard.
I’ll just bring some extra on this weekend's driving to top up as needed. At least the new 180F thermostat works mint!


Check out this log below, spikes to 9.7psi and leans RIGHT out with the factory injectors (at only 75% throttle). Thankfully I didn't repeat that performance and there doesn't seem to be any damage to the motor.
I've now set up the gauges in tunerstudio to warn me when I'm out of fuel, which is when I lift/shift.

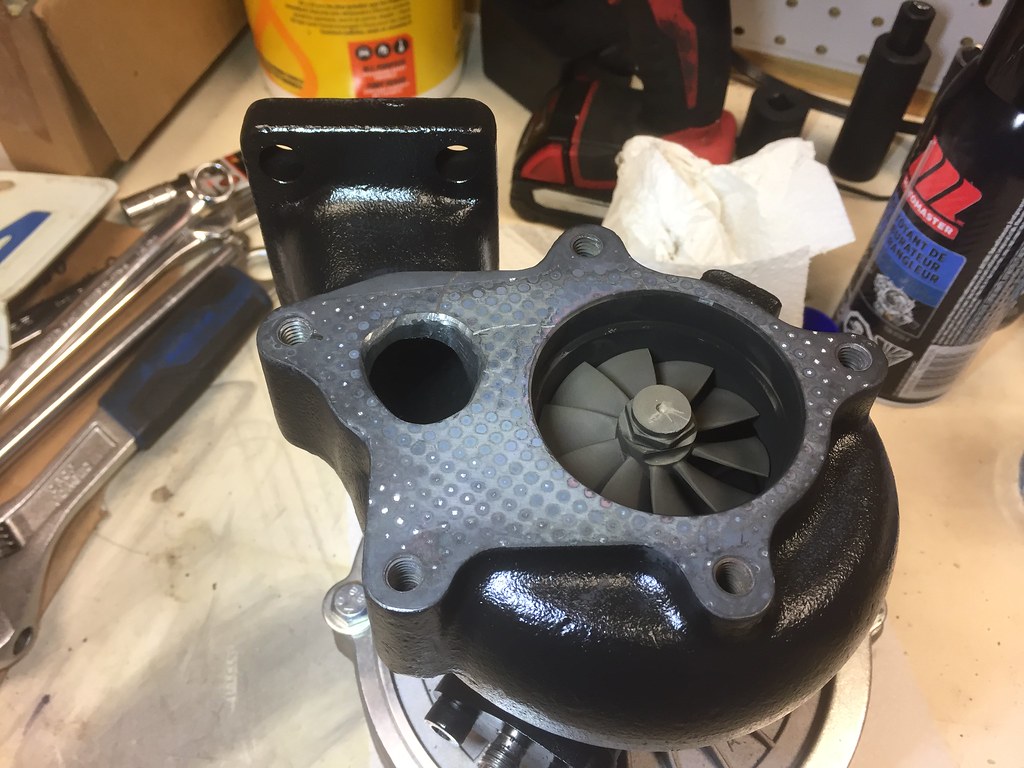
To try and control the situation, I ported the wastegate passage in the turbo exhaust housing. I didn't get fancy with any of the edges; Just went for a straight gasket match.
I haven't had a chance to do more then a couple pulls with this new modification, but so far it seems more controlled. Saw 4.2psi peak at about 75% throttle on the quick log I took today. As a sidenote, Acceleration Enrichment was disabled for the log below.


I've been having fun with the tuning. I've never tuned a boosted car before, and it's a learning experience!
Haven't had a whole lot of time to tune this week, but I have enough in there to make the car very livable under 75% throttle.
Still out of fuel with the factory injectors over ~5500rpm, so that will be the next upgrade.
--------------
Wanted to swap out my OEM thermostat (Canadian spec cars were 195F afaik) to a 180F unit. Ended up snapping the water neck off the head instead

Thankfully I found that the unit bolts to the head, and one of the local autocross guys (shout out to Brook R!) hooked me up with a replacement that same day. He didn't even charge me anything for the part!
Going to need a new upper thermostat housing piece as mine split along one of the bolt holes while liberating it from the broken bottom half. I tested it up to 210F water temp without issue.
I am dripping a bit of water from where the neck contacts the head. Ordered a new o-ring, which will be in next week.
Not too concerned, seems to either stop leaking or evaporate before it hits the ground when motor is up to temp. Running mostly Water+Water Wetter in the cooling system, so drips on the ground won’t be a hazard.
I’ll just bring some extra on this weekend's driving to top up as needed. At least the new 180F thermostat works mint!


#22
Finish welded, cleaned up, painted, and installed an actual rollbar (finally rid of the style bar).
Also added 10.5lbs of sound deadening to the trunk and rear parcel shelf.
Gave the car a much-needed wash today, and then grabbed some pictures and video!
RX-8 Yellow injectors are ordered and in the mail!


Also added 10.5lbs of sound deadening to the trunk and rear parcel shelf.
Gave the car a much-needed wash today, and then grabbed some pictures and video!
RX-8 Yellow injectors are ordered and in the mail!


#23
After only one drive with the additional sound deadening, I realized it was worth the weight penalty and decided to add some to the floors and trans tunnel.
Black material is Hushmat (sound & heat blocking), whereas the silver material is the less expensive Kilmat (sound attenuating only).
The Miata no longer sounds and feels like a tin can, the sound deadening made it feel more substantial if that makes sense.
I cut my eBay short throw shifter in half, and welded on a piece of rod. Throw length and **** position is perfect now, and it feels better then ever banging gears!
Will be switching to a Delrin **** when the weather is no longer temperate. Leather e-brake & shift boots with green stitching match the rollbar nicely. Modified a BMW E39 e-brake handle I had lying around to complete the look.
Got a set of rebuilt RX8 Yellow ~425cc fuel injectors in there as well. Tuned pretty decent after only a few short drives. They don't like to idle nicely at small PW so my idle is pretty rich.
Small sacrifice to make, as the price was right and now I'm not out of fuel anymore at WOT.
As you can see from the screenshots, the car is making just over 6psi at 7000rpm. Since this is a fairly big turbo, I pulled some timing out up top to reduce the power and hopefully save the clutch.
Also brought the motor to a (temporarily reduced) 7000rpm redline for the first time today since the turbo swap. Obviously this area is still untuned so it was pig rich.
I replaced the water neck o-ring with a brand new item and swapped the cooling system to deionized water + water wetter. Hopefully (along with the 180degree thermostat) this will give the stock cooling system a little more headroom.
As a final note, changed the oil to a thicker 10w-40 to help tolerate the heat generated by the turbo.


#24
Went on a driving trip last weekend with some friends. It was one of those "heat warning" days when they recommend staying inside.
Took the black hardtop off the Miata so I wouldn't cook, and dumped plenty of cold water on myself while driving!
The car ran flawlessly, except for a battery terminal becoming detached. Was surprised to find the car wouldn't crank after stopping for fuel; Thankfully was an easy fix with the tools I brought along.
I didn't see coolant temps above 210F or IAT temps above 120F. Ambient air temp was just under 100F for reference.
Before I left for the trip, I strapped a washer fluid pump to an old isopropyl alcohol bottle and crammed it down under the intake manifold.
I installed a sprayer in the center of the windshield cowl, making my hoodless setup legal in my area.
It held on for the whole trip and is still working great!
I logged the entire 8+ hour drive in TunerStudio, and afterwards was able to clean up my fuel map for the larger RX8 injectors.
Found that I was now making 7+ PSI up top, which on this big turbo has to be on the edge of slipping for this poor little 1.6 clutch.
I was able to modify the wastegate lid by removing some material thus allowing the gate to open a little more. This brought my peak boost down from 7.1psi to 5.9psi (on a 4.35psi spring).
Note that only the pink boost lines are scaled evenly in the screenshot, the others have differing min/max and can be ignored.
The lower pink boost line is after the wastegate lid modification.
Obviously the boost creep situation needs more attention, but that will have to wait until the turbo is off the car again.


#26
Rainy Trackday, More Boost, Spare Engine!
Finally got the car to the track for a shakedown run.
Obviously got the turbo hotter then ever before, which contributed to lost turbo nuts and a snapped stud.
I was able to steal an exhaust manifold-to-block nut and cross-thread it onto the turbo stud, which held for the remainder of the track event.
Will need to replace these studs with some non-ebay quality parts!
The stud snapped below flush on the manifold, but I managed to get it out.
Otherwise the car ran great! Used the event more like a test & tune, as I turned up the boost a bit with my newly installed manual boost controller.
I still need to review some data logs & tune a bit; I hit my boost cut at 8psi a few times.
While I've got the turbo off, I took it apart again to give porting the wastegate another crack. This time I paid attention to smoothing out the airflow path which should hopefully help control the boost.
As a final note, I drove 4 hours this past Sunday to pick up a spare 1.6L motor & 5-speed trans for the car. After a thorough degreasing, I built a wood stand and will be fogging/storing the motor properly this week.
Now I can crank up the boost without worry!


#28
In theory, if you add some timing in the column just below your normal idle speed, the idle should "catch" and not stall.
I'm perhaps not the best person to ask, as my RX8 yellow injectors like to idle really rich (11:1 AFR). My idle valve has also gone bad (not using it now) and so my idle is set to ~1000rpm with the idle adjust screw. I have a replacement idle valve on my spare motor, I should probably swap that onto my car!
----------------
Few small updates.
I've completely solved my boost creep issue now. Check out the screenshot below.
Also added two exhaust hangers for stability and reattached my exhaust tip.
Still driving and enjoying the car whenever I can!


#29
Finishing up 2021
Couple more trackdays in 2021, still only able to go for 2-3 hot laps @ 6psi before coolant temps exceed 225F. I set the laptop screen to light up red when this happens so I know to run a cool-down lap. Also made a heatshield for the brake master.
Also went for a BBQ at the local miata shop called Dave's Garage!
Drove the car until late fall. I swapped the water+water wetter to coolant for the winter and on the test drive the car started puking coolant. Parked the car for the season and later determined it was the water pump gasket that failed.
The car sat outside all winter as my BMW E30 restomod project was finally back from paint!


Last edited by Panici; 05-01-2022 at 11:10 AM.
#30
Cooling System Refresh & Upgrades
After pushing the stock cooling system to failure last year, it was time to get serious about keeping this little 1.6L cool.
Spent most of April wrenching after work and finished the following:
Reason for exposing the timing belt was that I snapped the 32 year old rusty mounting bolts off in the block. Going to build an undertray to keep road debris out of the belt.
Took the car out for it's first test drive yesterday first at 4psi and then at 6psi.
Ran flawlessly, but still am going to gap the plugs down from .040 so I don't blow out spark when I turn up the boost!




And a shot of the Miata with my other 2021 project car, a 1998 BMW E36 328i. Build thread @ http://e36.panici.ca

After pushing the stock cooling system to failure last year, it was time to get serious about keeping this little 1.6L cool.
Spent most of April wrenching after work and finished the following:
- Timing belt
- Water pump
- Cam seals
- Did the driver's side twice as I rushed and marred the outer sealing surface the first time.
- Crank seal
- Crank woodruff key
- Flyin' Miata Coolant Reroute
- Flyin' Miata Crossflow Radiator
- Mounted lower to clear charge piping
- Spark plugs
- Relocated (again) coolant overflow bottle
- Valve cover seal
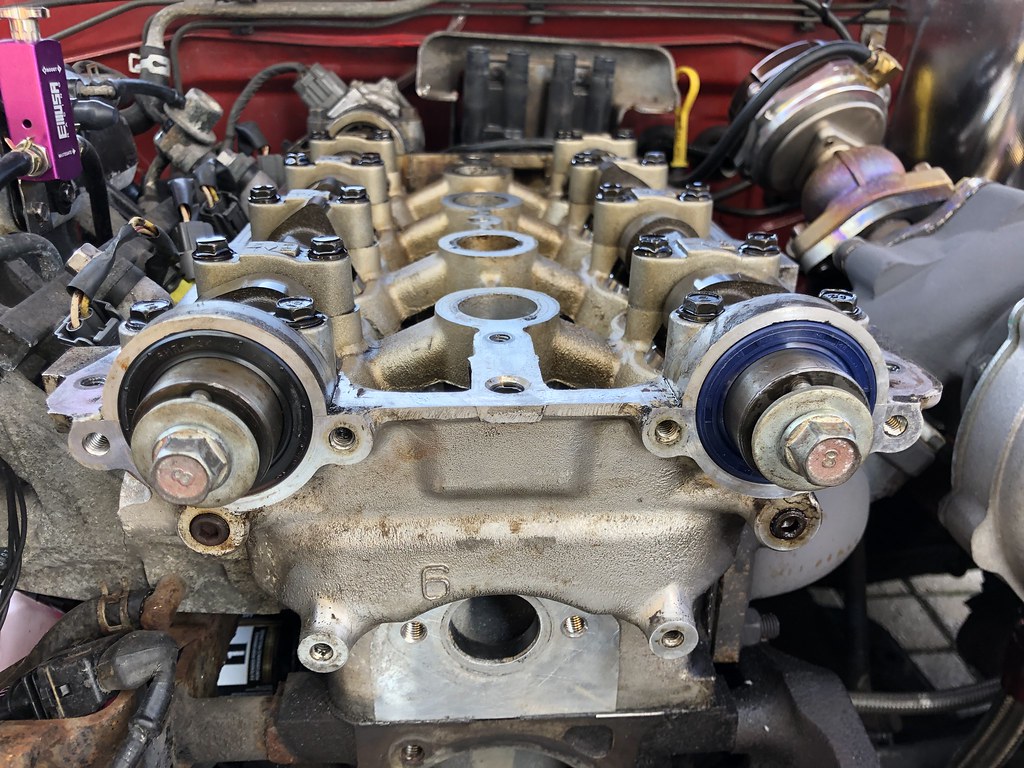
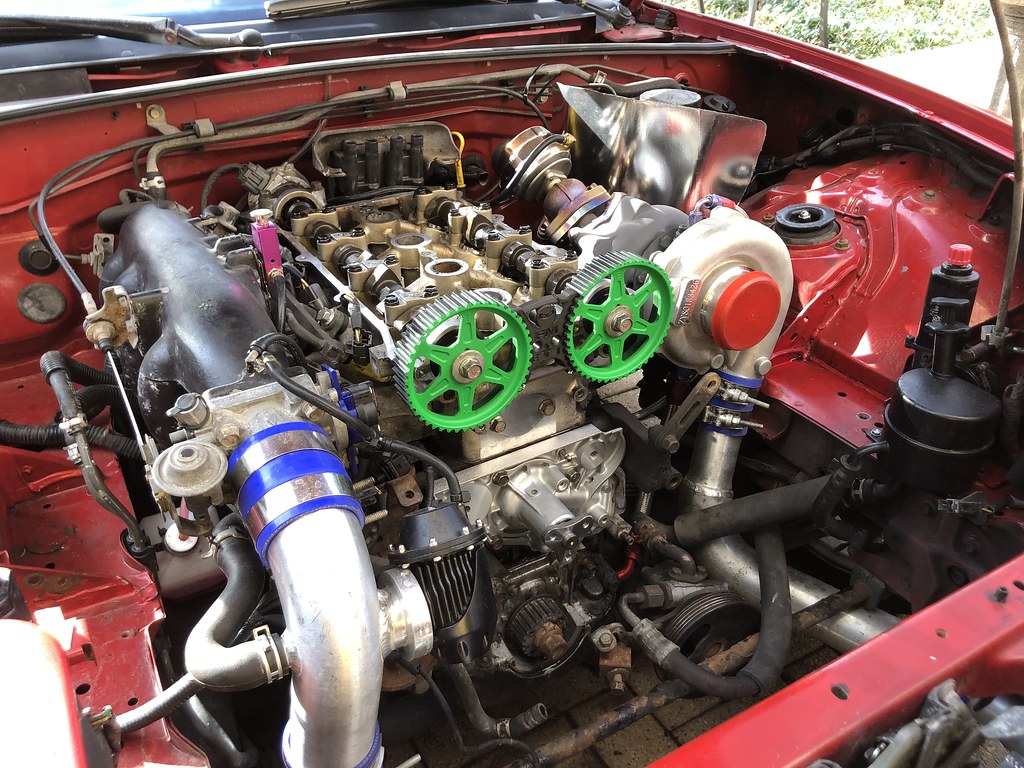
- Exposed timing belt, cut valve cover & painted cam gears.
Reason for exposing the timing belt was that I snapped the 32 year old rusty mounting bolts off in the block. Going to build an undertray to keep road debris out of the belt.
Took the car out for it's first test drive yesterday first at 4psi and then at 6psi.
Ran flawlessly, but still am going to gap the plugs down from .040 so I don't blow out spark when I turn up the boost!


And a shot of the Miata with my other 2021 project car, a 1998 BMW E36 328i. Build thread @ http://e36.panici.ca

Last edited by Panici; 05-01-2022 at 11:52 AM.
#31
Installed a set of Flyin' Miata swaybars (22mm Front, 16mm Rear).
Very noticeable difference in handling. On stock suspension it has changed the body roll from "boat" levels to "modern car equivalent".
Had to take apart all the intercooler piping and clearance my custom overflow tank to fit the bars.
Have been driving the Miata for 2.5 weeks now. Having issues with idle mostly when the hood is on.
It appears that the RX8 yellow injectors heat up and don't want to spray fuel at idle, so the mixture leans out.
As soon as the fuel flow increases the injectors cool off and the AFRs return to normal.
I've been pedaling the revs up at the stoplights and this stops the car from stalling.
If this becomes too annoying I may wire a high-idle switch or pony up for some higher quality aftermarket injectors.
It's too bad because the RX8 yellows are perfect everywhere except idle.


Last edited by Panici; 03-22-2024 at 11:24 AM.
#32
Finally washed & waxed the car for the first time in 2022!
A little bit of TLC goes a long way to make this old & tired paint look good from afar.
Also went for a bit of a road trip up to visit my friend Jeremy to work on his project Nissan 240 with a V8 swap.
On the way back near the lake (closer to sea level) the car saw 8.5-9psi and slipped the factory clutch for the first time under boost.
I turned the MBC back down to ~6psi and now will save up for a better clutch. Thinking about the Flyin' Miata happy meal Level 2 with the 10lb flywheel & full face organic clutch. It should hold whatever power I throw at this thing in the future!
I updated the SpeedyEFI Speeduino ECU to the newest 2022.02 firmware. My main reason for the upgrade was that the TPS has finally been addressed, allowing "0.5% resolution for TPS load". This translates into much better TPSdot readings and therefore Acceleration Enrichment that can actually work when rolling on the throttle.
Going to have to retune my VE table a bit as I was compensating for the lack of AE in my fuel table.
As gas prices are getting pretty wild, I also have started exploring tuning for economy. I don't want to get too crazy as I don't have a knock sensor, but here is my AFR table as it stands. Need to test & tune to see how this fares. On my initial test drive the leaned out low-boost areas have noticeably helped with spool.

Clutch slip (yellow RPM trace, top graph)

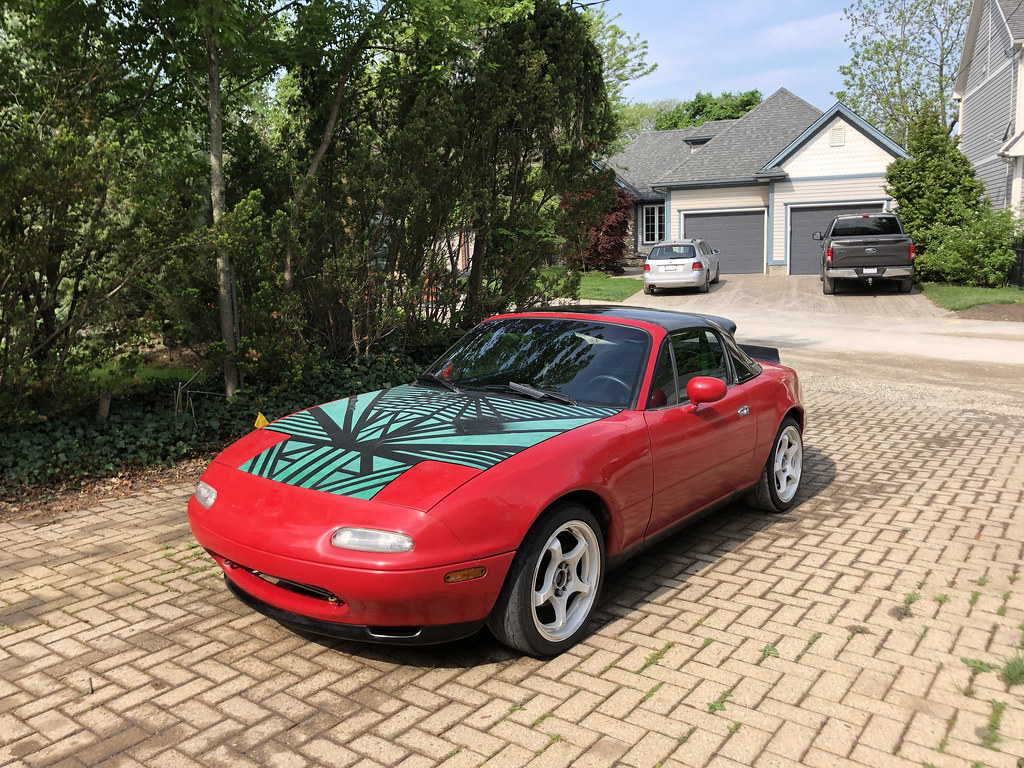


A little bit of TLC goes a long way to make this old & tired paint look good from afar.
Also went for a bit of a road trip up to visit my friend Jeremy to work on his project Nissan 240 with a V8 swap.
On the way back near the lake (closer to sea level) the car saw 8.5-9psi and slipped the factory clutch for the first time under boost.
I turned the MBC back down to ~6psi and now will save up for a better clutch. Thinking about the Flyin' Miata happy meal Level 2 with the 10lb flywheel & full face organic clutch. It should hold whatever power I throw at this thing in the future!
I updated the SpeedyEFI Speeduino ECU to the newest 2022.02 firmware. My main reason for the upgrade was that the TPS has finally been addressed, allowing "0.5% resolution for TPS load". This translates into much better TPSdot readings and therefore Acceleration Enrichment that can actually work when rolling on the throttle.
Going to have to retune my VE table a bit as I was compensating for the lack of AE in my fuel table.
As gas prices are getting pretty wild, I also have started exploring tuning for economy. I don't want to get too crazy as I don't have a knock sensor, but here is my AFR table as it stands. Need to test & tune to see how this fares. On my initial test drive the leaned out low-boost areas have noticeably helped with spool.

Clutch slip (yellow RPM trace, top graph)


#33
Progress update from the last few months of wrenching & driving.




Degrees of timing increase!


- Fixed the passenger side popup headlight. There is a broken wire somewhere in the harness between mid-fender and the motor. Spliced in and ran a new wire along side the harness.
- Installed a knock sensor, extended the harness through a firewall grommet. Trying out TunerNerd Knock Monitor Pro.
- Was able to increase the timing significantly in the lower load range which makes the car feel MUCH faster around town.
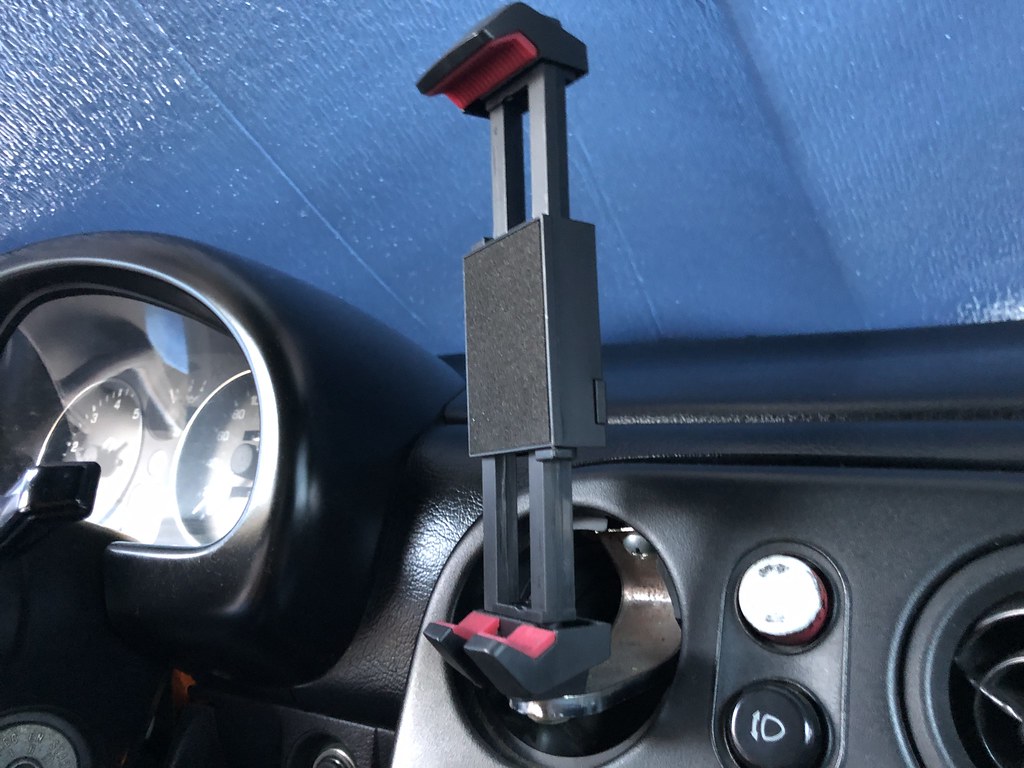
- Installed a $150 tablet in the car to use as a digital dash. Runs a full version of Windows 10 so I have TunerStudio installed.
- Added some Stage 8 locking fasteners to the turbo downpipe bolts. Used a Nordlock washer for the top bolt where a Stage 8 doesn't work.
- Did a trackday with the car turned up to 8psi. New cooling system lets me do full 20 minute sessions instead of just 2-3 laps at a time!


Degrees of timing increase!


Last edited by Panici; 07-10-2024 at 12:46 PM.
#34
Aug 22, 2022 Update
Still driving the miata. Chassis vibration around 4000rpm (110km/h) was getting progressively worse.
Installed new OEM Mazda engine mounts, intake manifold brace, and aftermarket door bushings to solve the problem.
Refinished my set of 16" wheels with a fresh coat of white wheel paint and clear. Brand new set of Continental Extreme Contact Sport tires in 205/45R16 (TW340) mounted up.
Aftermarket TPS that was included with the SpeedyEFI has developed a couple bad spots. This made the car spike lean as Acceleration Enrichment didn't trigger properly.
As luck would have it, it's the same sensor on my 90s BMW engines. I happened to have a spare used OEM sensor in storage, which I installed to correct the TPS reading issue.
Other things of note:
Runs @ 6psi and 9psi


Still driving the miata. Chassis vibration around 4000rpm (110km/h) was getting progressively worse.
Installed new OEM Mazda engine mounts, intake manifold brace, and aftermarket door bushings to solve the problem.
Refinished my set of 16" wheels with a fresh coat of white wheel paint and clear. Brand new set of Continental Extreme Contact Sport tires in 205/45R16 (TW340) mounted up.
Aftermarket TPS that was included with the SpeedyEFI has developed a couple bad spots. This made the car spike lean as Acceleration Enrichment didn't trigger properly.
As luck would have it, it's the same sensor on my 90s BMW engines. I happened to have a spare used OEM sensor in storage, which I installed to correct the TPS reading issue.
Other things of note:
- Wastegate getting some nice blue colouring now that boost is turned up to around 9psi.
- Rear exhaust manifold bolts loosened up, likely due to the excessive vibration.
- OEM exhaust is developing a stress crack right after the rear cat flange. Leak is becoming worse over time.
- Stuffed a moving blanket on either side of the gas tank to try and absorb some of the noise from the rear wheels/trunk.
Runs @ 6psi and 9psi


Last edited by Panici; 03-22-2024 at 11:24 AM.
#35
End of Season 2022
Drove the Miata until mid-october this year. It's parked for the winter now with the battery stored in the basement.
Running a Tial Red spring now (5.8psi) in the wastegate with the MBC turned up to ~10psi.
Somehow the clutch is now holding? I did exchange the clutch fluid with some fresh, but I can't see that making a difference.
As for issues, firstly my charge pipes started popping off. Borrowed my friend's bead roller (thanks Zack!) which was able to roll all the raw edges except for the smallest at the cold side outlet of the turbo. I used some pliars on that as a stopgap.
Second issue will require attention in the springtime; The engine is pushing oil out of every seal.
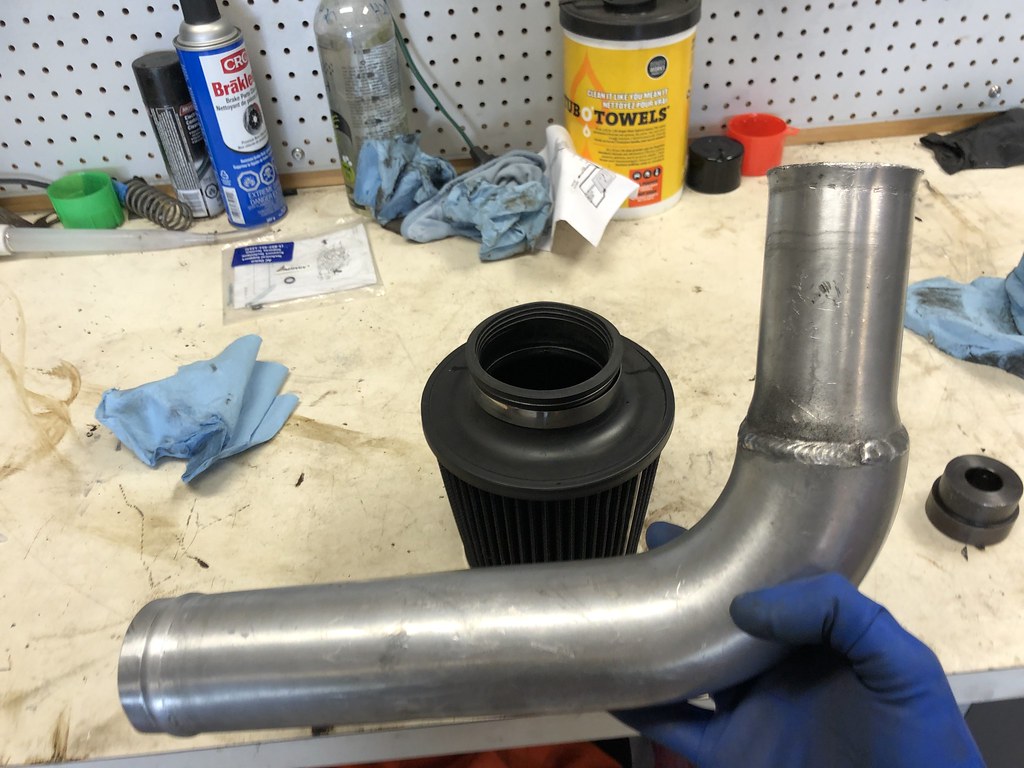
Going to need a catch can setup first thing in 2023. Open to suggestions as to how people with semi-tucked/tidied engine bays go about running catch can setups that aren't just hoses everywhere.
Oh, I also swapped out the broken coil bracket which solved an intermittent sync loss on the speeduino.


Last edited by Panici; 03-22-2024 at 11:23 AM.
#36
Sitrep for 2023
Took the car out at the beginning of April. Heater core is still unhooked so the morning drives to work are a bit chilly.
Five clicks on the MBC makes about 8psi on a cold morning, car still pulls strong.
Added a bit of hose to the engine block vent port on the passenger side. (Thanks @Icedawg for the details).
Engine is no longer breathing through the valve cover vents.
Right now the hose just comes up into the engine bay and shoots oily mist at the underside of the hood. 😅 Going to connect a catch can there.
Exhaust is slowly getting louder under the car. There is a hole near the cat and it's getting worse. I have tubing, cat, muffler, etc to make a full custom downpipe-back exhaust, just need the weather and time to fabricate and install!
Most pressing issue is the new smell of gasoline inside the cabin (and outside on a hot day).
Obviously I've got a small leak somewhere, will need to take a look at all the fuel lines as they are probably due for replacement.
Weather is still quite cold so probably won't get to this for a few weeks, and will park the car meantime.
#37
Installed a couple of catch cans to help with the block venting.
Starter gave out in July 2023, changed it out with a Bosch Reman unit (Thanks Elyse for the help!).
Clutch hydraulics quit in August, put in a complete Exedy kit (master/line/slave cyl).
Update on the fuel smell situation.
Found my gas tank leaking at the rear seam due to rust.
Drove the car for a few months like that with the tank below 1/4 full, and windows down.
Eventually the fumes were too much, and I parked the car a couple months early for the winter season.
I bought a replacement gas tank, so now comes the big job of dropping the subframe to get access.
While I'm in there, the subframe and rear suspension is going to get a refresh.
Managed to JUST squeeze the miata in the 1.5 car garage so I can plug away slowly over the winter months. There is enough room to walk sideways between the two cars.
So far I have the car well-supported, exhaust off, wheels off, driveshaft unbolted, and all relevant bolts soaked in penetrating fluid.
The stretch goal for the off-season is also to fabricate a new downpipe-back exhaust that is properly sized.
I have all the tubing, muffler, cat, v-bands on hand, just need the time.
Hoping to get close to subframe removal next weekend.


Last edited by Panici; 03-10-2024 at 10:03 AM.
#38
Winter 2024 Update
Slowly but surely I worked at the gas tank replacement, took me from January to March working a little every weekend.
Dropped the rear subframe, replaced fuel hoses with quality Gates items, Painted the surface rust on the exposed chassis, replaced the tank with an aftermarket unit.
One of the previous owners didn't reinstall a front PPF bolt, I found two mismatched small bolts in it's place. Purchased a new large bolt and cleaned up the captured nut with a tap.
Since I had the brake system drained, I replaced the hoses with Flyin' Miata Braided DOT approved items, and Super DOT 3 fluid. Topped things off with an oil change.
Wanted to get the car on the road for the spring so bushing replacement and exhaust work will have to wait. Also not really enough room to take apart the subframe.
I can tell you, I'm not doing such a major job right beside my E30 in the future. Nerve wracking having a fresh paintjob in the danger zone.


#40
I still like the green accents on the roll bar and cam gears.
But I want to change the hood out for an OEM gloss black one if I can find it locally. Would match the hardtop nicely.
I've had that brown E30 for 10 years now, it's a long thread but truly a passion project!


